stop start MITSUBISHI ASX 2017 (in English) Workshop Manual
[x] Cancel search | Manufacturer: MITSUBISHI, Model Year: 2017, Model line: ASX, Model: MITSUBISHI ASX 2017Pages: 458, PDF Size: 22.98 MB
Page 235 of 458
CAUTION•The sensors or surroundings have been
wiped by hand, or stickers or accessorieshave been attached.
l The reversing sensor system may not proper-
ly detect the following:
• Objects that are thin, such as wire nets or
ropes.
• Objects that absorb sound waves, such as
snow.
• Objects that are shaped with a sharp an-
gle.
• Objects with a smooth surface, such as
glass.
• Objects that are low, such as kerbstones.NOTEl The buzzer may sound lower than the nor-
mal warning sound when the reversing sen-sor system is receiving ultrasonic noise from
other sources, but this is not a malfunction.
The buzzer will stop sounding and the sys- tem will return to normal operation after thenoise is no longer received.To operate
E00615700738
To operate the system, move the gearshift
lever or selector lever to the “R” position while the ignition switch or the operationmode is in ON. When the reversing sensor
system is operated, the reversing sensor sys-
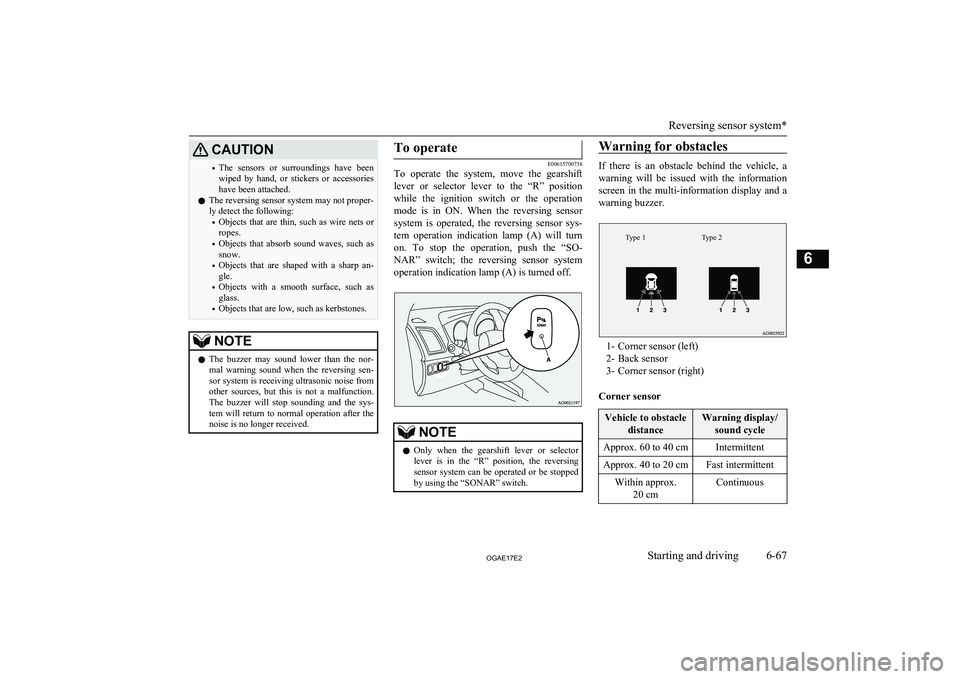
tem operation indication lamp (A) will turn on. To stop the operation, push the “SO-
NAR” switch; the reversing sensor system operation indication lamp (A) is turned off.
NOTEl Only when the gearshift lever or selector
lever is in the “R” position, the reversing
sensor system can be operated or be stopped by using the “SONAR” switch.Warning for obstacles
If there is an obstacle behind the vehicle, a
warning will be issued with the information screen in the multi-information display and a
warning buzzer.
Type 2Type 1
1- Corner sensor (left)
2- Back sensor
3- Corner sensor (right)
Corner sensor
Vehicle to obstacle distanceWarning display/sound cycleApprox. 60 to 40 cmIntermittentApprox. 40 to 20 cmFast intermittentWithin approx. 20 cmContinuous
Reversing sensor system*
6-67OGAE17E2Starting and driving6
Page 236 of 458

Back sensor (vehicles without a towing
bar)Vehicle to obstacle distanceWarning display/sound cycleApprox. 150 to 80 cmIntermittentApprox. 80 to 40 cmFast intermittentWithin approx.40 cmContinuous
Back sensor (vehicles with a towing bar)
Vehicle to obstacle distanceWarning display/sound cycleApprox. 150 to 100 cmIntermittentApprox. 100 to 60 cmFast intermittentWithin approx.60 cmContinuousCAUTIONlThe distances given are to be used for refer-
ence only, as errors may be caused by vari- ous factors, such as temperature, humidity,
or the shape of the obstacles.NOTEl When the sensors detect different obstacles
at the same time, the information screen in the multi-information display indicates the directions of the obstacles each sensor is de-
tecting. However, closer obstacles are given priority over other detected obstacles and the
warning buzzer sounds to inform you of
closer obstacles.Changing the detection areas
E00615800159
The detection areas can be changed as fol-
lows:
Vehicles with a towing bar
While the operation of the system is stopped
at the “SONAR” switch, push the “SONAR”
switch approximately 3 seconds or more, and release it. The buzzer sounds twice to indi-
cate that the detection area has been changed.
Vehicles without a towing bar
While the operation of the system is stopped at the “SONAR” switch, push the “SONAR”
switch approximately 3 seconds or more, and
release it. The buzzer sounds once to indicate that the detection area has been changed.
NOTEl The detection area will not change if you
keep the “SONAR” switch pushed for
10 seconds or more.
l After pushing the “SONAR” switch, revers-
ing sensor system operation differs accord- ing to the detection area setting.
• Setting when towing bar is not equipped
When the gearshift lever or selector lever
is moved to the “R” position, the revers-
ing sensor system will operate even if cor- ner sensor operation was stopped by push-
ing the “SONAR” switch.
• Setting when towing bar is equipped
When reversing sensor system operation was stopped by pushing the “SONAR”
switch, the reversing sensor system will not operate until the engine has been stop- ped even if the gearshift lever or selector
lever is moved to the “R” position.
To resume reversing sensor system opera- tion, push the “SONAR” switch or stop and restart the engine, and then move the
gearshift lever or selector lever to the “R” position.
Reversing sensor system*
6-68OGAE17E2Starting and driving6
Page 237 of 458
Reversing sensor system warn-ing display
E00615900277
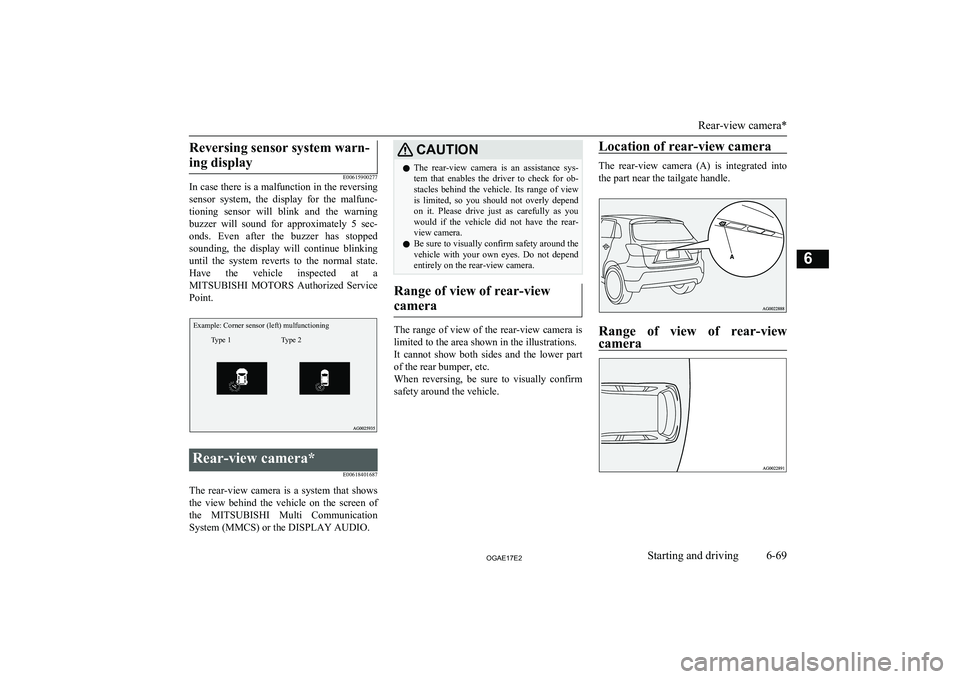
In case there is a malfunction in the reversing
sensor system, the display for the malfunc-
tioning sensor will blink and the warning buzzer will sound for approximately 5 sec-
onds. Even after the buzzer has stopped sounding, the display will continue blinking
until the system reverts to the normal state. Have the vehicle inspected at aMITSUBISHI MOTORS Authorized Service
Point.
Example: Corner sensor (left) mulfunctioningType 2Type 1
Rear-view camera*
E00618401687
The rear-view camera is a system that showsthe view behind the vehicle on the screen of
the MITSUBISHI Multi Communication
System (MMCS) or the DISPLAY AUDIO.
CAUTIONl The rear-view camera is an assistance sys-
tem that enables the driver to check for ob- stacles behind the vehicle. Its range of view
is limited, so you should not overly depend on it. Please drive just as carefully as you
would if the vehicle did not have the rear-
view camera.
l Be sure to visually confirm safety around the
vehicle with your own eyes. Do not depend entirely on the rear-view camera.
Range of view of rear-view
camera
The range of view of the rear-view camera is
limited to the area shown in the illustrations.
It cannot show both sides and the lower part of the rear bumper, etc.
When reversing, be sure to visually confirm
safety around the vehicle.
Location of rear-view camera
The rear-view camera (A) is integrated into
the part near the tailgate handle.
Range of view of rear-viewcamera
Rear-view camera*
6-69OGAE17E2Starting and driving6
Page 242 of 458
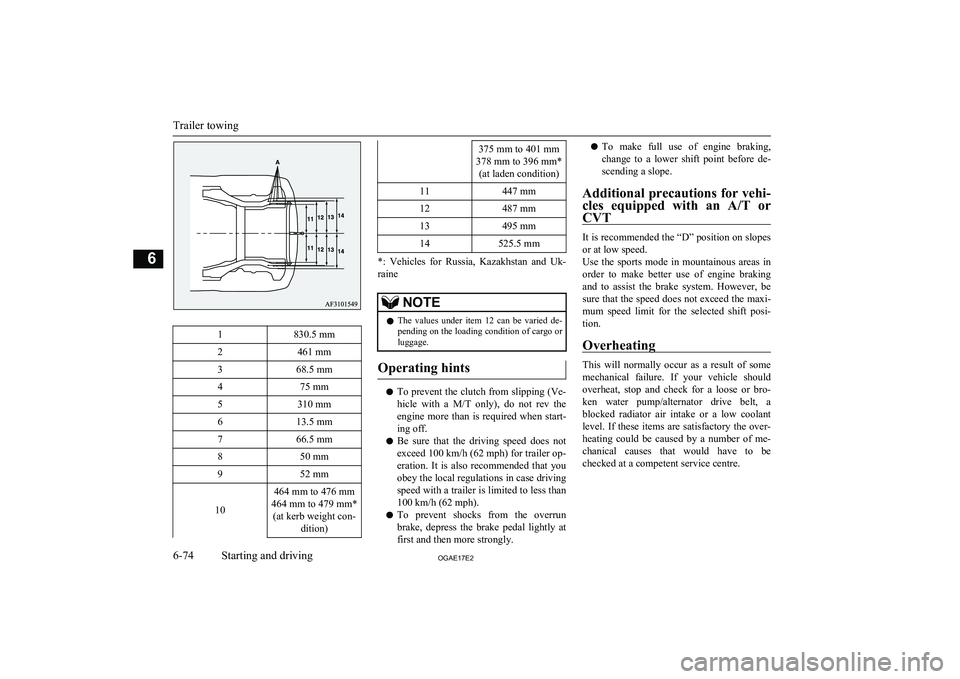
1830.5 mm2461 mm368.5 mm475 mm5310 mm613.5 mm766.5 mm850 mm952 mm
10
464 mm to 476 mm
464 mm to 479 mm* (at kerb weight con- dition)375 mm to 401 mm
378 mm to 396 mm* (at laden condition)11447 mm12487 mm13495 mm14525.5 mm
*: Vehicles for Russia, Kazakhstan and Uk-
raine
NOTEl The values under item 12 can be varied de-
pending on the loading condition of cargo orluggage.
Operating hints
l To prevent the clutch from slipping (Ve-
hicle with a M/T only), do not rev the
engine more than is required when start- ing off.
l Be sure that the driving speed does not
exceed 100 km/h (62 mph) for trailer op-
eration. It is also recommended that you obey the local regulations in case driving
speed with a trailer is limited to less than
100 km/h (62 mph).
l To prevent shocks from the overrun
brake, depress the brake pedal lightly at first and then more strongly.
l To make full use of engine braking,
change to a lower shift point before de- scending a slope.
Additional precautions for vehi- cles equipped with an A/T or
CVT
It is recommended the “D” position on slopes
or at low speed.
Use the sports mode in mountainous areas in order to make better use of engine braking
and to assist the brake system. However, be
sure that the speed does not exceed the maxi- mum speed limit for the selected shift posi- tion.
Overheating
This will normally occur as a result of some
mechanical failure. If your vehicle should
overheat, stop and check for a loose or bro- ken water pump/alternator drive belt, a blocked radiator air intake or a low coolant
level. If these items are satisfactory the over-
heating could be caused by a number of me-
chanical causes that would have to be
checked at a competent service centre.
Trailer towing
6-74OGAE17E2Starting and driving6
Page 266 of 458
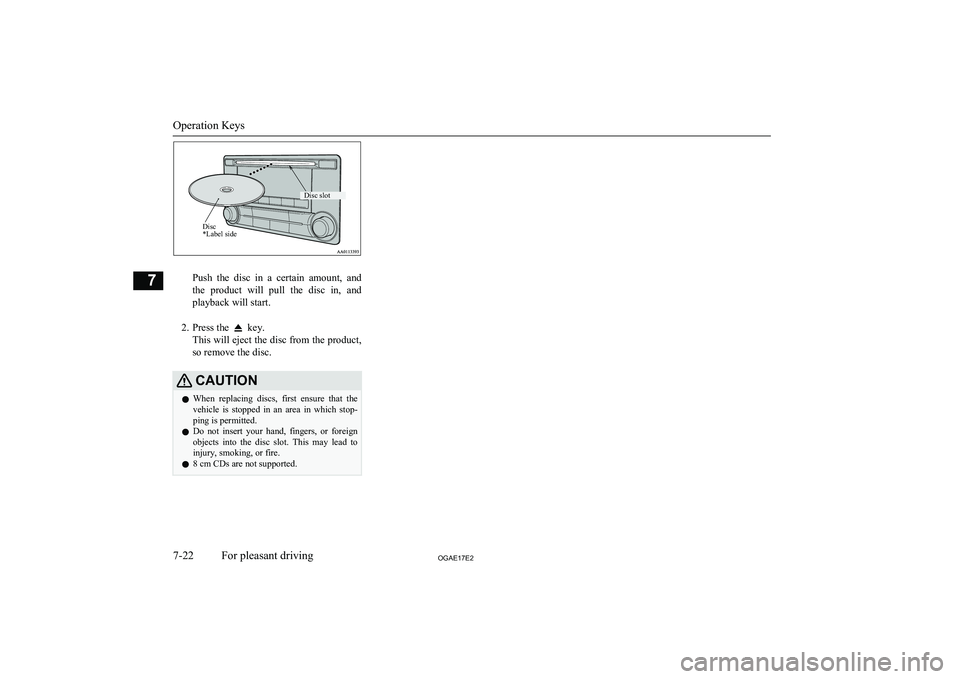
Push the disc in a certain amount, and
the product will pull the disc in, and playback will start.
2. Press the
key.
This will eject the disc from the product,
so remove the disc.
CAUTIONl When replacing discs, first ensure that the
vehicle is stopped in an area in which stop-ping is permitted.
l Do not insert your hand, fingers, or foreign
objects into the disc slot. This may lead to injury, smoking, or fire.
l 8 cm CDs are not supported.
Operation Keys
7-22OGAE17E2For pleasant driving7Disc *Label sideDisc slot
Page 269 of 458

/SEL key
(counter-
clockwise)Reduces the frequency being
received./SEL key
(clockwise)Increases the frequency be-
ing received. key
(hold down)Release the button to start
seek station selection, and
when a station is received,
scanning stops. key
(hold down)
Preset Memory
Register the broadcast station in advance, and select this at a later time.
1. Tune in to the frequency to register.
2. Hold down any of the keys from the
1RPT key to the 6
key.
A “Beep” sounds, and the preset key is registered.
NOTEl The preset memory can register a maximum
of 6 stations for each band (FM1, FM2,
FM3).
l If a preset key that already has a station reg-
istered is selected, then this is overwritten with the new preset.NOTEl Pressing the preset key will select the previ-
ously registered frequency.
Auto Memory (Auto Store)
The top 6 stations with a strong signal can be
automatically registered in order with preset keys.
Hold down the RADIO key.
After completion of auto store operations, the product will receive the station registered in
the preset key [1].
CAUTIONl Please be aware that the formerly-registered
frequency in the memory will be overwrit- ten.NOTEl Using auto store for FM1 and FM2 switches
to FM3.
PTY Search
Select PTY (program content), and automati-
cally scan for stations.
1. During FM reception, press the PTY/
SCAN key.
This switches to the PTY selection mode.
2. Turn the
/SEL key to select PTY.
The PTY (program content) indicator
will flash, and station selection will au- tomatically start. When a station is re-
ceived, the station name is displayed.
NOTEl This receives the station detected first.
l 10 seconds after reception, PTY search
mode will be cancelled.Listen to DAB*
E00739100014
This explains how to listen to DAB.
To listen to DAB
1. Press the RADIO key to switch the
band.
Switch between DAB1, DAB2, and DAB3 bands.
The selected band is indicated on the display.
Listen to DAB*
7-25OGAE17E2For pleasant driving7
Page 274 of 458
CAUTIONlDepending on how the devices are handled,
audio files being damaged or lost, therefore
it is recommended that data be backed up.NOTEl Depending on the generation, model, or soft-
ware version of the iPod/iPhone, playback
on this product may not be possible. (→7-12 ) Additionally, playback as ex-
plained in this document may not be possi- ble.
l For vehicles with a Bluetooth ®
2.0 interface,
the types of devices that can be connected
may vary.
For details, access the MITSUBISHI
MOTORS website.
Please read and agree to the “Warning about
Links to the Web Sites of Other Compa- nies”. The websites mentioned above may
connect you to websites other than the MITSUBISHI MOTORS website.
http://www.mitsubishi-motors.com/en/prod-
ucts/index.html
l Usage of iPod/iPhone hardware with the lat-
est software version is recommended.
l Regarding how to connect the iPod/iPhone,
refer to “How to connect an iPod” on page
7-69.
l When connecting the iPod/iPhone, use a
commerciallyavailable iPod connection ca- ble.NOTEl Set up the device in order that no unsafe ac-
tions, such as plugging in the connection ca-ble are taken while driving.
l When inserting and removing the iPod/
iPhone, for safety’s sake first stop the vehi- cle.
l Depending on the status of the iPod/iPhone,
it may take some time until the device is rec- ognized, or playback starts.
l Buttons on the product will not operate
while iPod/iPhone is connected.
l iPod/iPhone specifications and settings may
mean that connection is not possible, or re-
sult in differences in operation or display.
l Depending on audio data in the iPod/iPhone,
track information may not be displayed cor-
rectly.
l Depending on the status of the vehicle and
device, the iPod/iPhone may not play back after starting the engine.
l Data containing copyright information may
not play back.
l It is recommended that the iPod/iPhone
equaliser settings be set to flat.
l Operate the iPod/iPhone while connected to
this product.
l If the iPod/iPhone is connected via Blue-
tooth as a Bluetooth- capable audio device,
then do not connect the iPod/iPhone using
an iPod cable. Connection using both meth- ods will result in erroneous operation.
l If an iPod/iPhone does not operate correctly,
then remove the iPod/iPhone from the prod-
uct, reset, then reconnect.Play iPod
Press the MEDIA key to set the iPod as the
source.
The selected source is indicated on the dis-
play.
Select the Track (File)
Press the key or key to select the
track.
This enables selection of the next or previous
track.
Fast Forward or Rewind
Hold down the 3 key or the 4 key.
Fast forward/rewind is possible.
Switch Playback Mode
Repeat playback and shuffle playback are
possible.
Repeat Playback (RPT)
Press the 1RPT key.
Repeat playback of the track currently being played.
Listen to an iPod
7-30OGAE17E2For pleasant driving7
Page 276 of 458
NOTElDigital audio players that support the mass
storage class specifications can be connec- ted.
l For details regarding the types of USB devi-
ces that can be connected and the types of files that can be played back in vehicles with
a Bluetooth ®
2.0 interface, refer to “Types
of connectable devices and supported file specifications” on page 7-70.
l Regarding how to connect USB devices, re-
fer to “How to connect a USB memory de-vice” on page 7-68.
l When connecting a USB device, use a con-
nection cable. Failure to use a connection ca-
ble when connecting may place undue load on, or damage the USB connector.
l Set up the device in order that no unsafe ac-
tions, such as plugging in the connection ca-ble are taken while driving.
l When inserting and removing the USB de-
vice, for safety’s sake first stop the vehicle.
l Do not insert other than audio devices into
the USB port. Damage to the device or equipment may result.
l Depending on the status of the USB device,
it may take some time until the device is rec-
ognized, or playback starts.
l Depending on USB devices, buttons on the
product will not operate while the USB de-
vice is connected.
l USB device specifications and settings may
mean that connection is not possible, or re- sult in differences in operation or display.NOTEl Depending on audio data in the USB device,
track information may not be displayed cor-
rectly.
l Depending on the status of the vehicle and
device, the iPod/iPhone may not play back after starting the engine.
l Data containing copyright information may
not play back.
l This product can play back MP3, WMA, and
AAC format audio files.
l Depending on the type of USB device, usage
may not be possible, or functions that can beused may be restricted.
l The recommended file system for USB
memory is FAT32.
l The maximum supported capacity for USB
memory is 32GB.
l Operate the USB device containing recorded
audio files while connected to this product.
Play Back of Audio Files on a
USB Device
Press the MEDIA key to set
USB as the source. The selected source is in- dicated on the display.
Select the Track (File)
Press the key or key to select the
track.
This enables selection of the next or previous
track.
Fast Forward or Rewind
Hold down the 3 key or the 4 key.
Fast forward/rewind is possible.
Switch Playback Mode
Repeat playback, random playback, and scan
playback are possible.
Repeat Playback (RPT)
Press the 1RPT key.
Repeat playback of the track currently being
played.
NOTEl Pressing again will cancel.
l Selecting a file will cancel this.
Folder Repeat Playback
Hold down the 1RPT key.
Repeat playback of the tracks within the fold- er currently being played.
Listen to Audio Files on a USB Device
7-32OGAE17E2For pleasant driving7
Page 281 of 458
Listening to Bluetooth
Audio* E00736701306
This product can play back tracks on com-
mercially-available Bluetooth-capable audio devices.CAUTIONl Never hold these devices in your hand to op-
erate while driving, as this is dangerous.
l Do not leave the Bluetooth audio device un-
attended in the vehicle.
l Depending on how the devices are handled,
audio files being damaged or lost, therefore it is recommended that data be backed up.NOTEl Depending on the type of Bluetooth-capable
audio devices, usage may not be possible, or
functions that can be used may be restricted.
l Confirm together with the user manuals for
the commercially- available Bluetooth-capa-
ble audio devices.
l Depending on the type of Bluetooth-capable
audio devices, volume levels may differ. There is the danger of loud volumes, so prior
to use, it is recommended that you turn the volume down.
→ “Adjust Volume” on page 7-21
l Depending on the status of the Bluetooth au-
dio device, it may take some time until the device is recognized, or playback starts.NOTEl Bluetooth audio device specifications and
settings may mean that connection is not
possible, or result in differences in operation or display.
l Depending on audio data in the Bluetooth
audio device, track information may not be
displayed correctly.
l Depending on the status of the vehicle and
device, the iPod/iPhone may not play back after starting the engine.
Connect a Bluetooth-capable
Audio Device
Regarding how to connect your Bluetooth de-
vice, refer to “Connecting the Bluetooth ®
2.0
interface and Bluetooth device” on page 7-53.
Operation methods below describe situations
once connection has been completed.
NOTEl If the iPod/iPhone is connected via Blue-
tooth as a Bluetooth- capable audio device, then do not connect the iPod/iPhone using
an iPod cable. Connection using both meth- ods will result in erroneous operation.Play Bluetooth Audio
1. Press the MEDIA key to set Bluetooth
Audio as the source.
The selected source is indicated on the display.
2. Press the 5
key. Bluetooth Audio
playback starts.
NOTEl Hold down the 5 key to pause.
l Press the 6
key to stop.
Select the Track (File)
Press the key or key to select the
track.
This enables selection of the next or previous
track.
Fast Forward or Rewind
Hold down the 3 key or the 4 key.
Fast forward/rewind is possible.
Listening to Bluetooth Audio*
7-37OGAE17E2For pleasant driving7
Page 296 of 458
5.When the disabling of the password is
completed, the voice guide will say
“Password is disabled” and the system will return to the main menu.Speaker enrollment function
E00727400238
The Bluetooth ®
2.0 interface can use the
speaker enrollment function to create a voice model for one person per language.
This makes it easier for the Bluetooth ®
2.0
interface to recognise voice commands said by you.
You can turn a voice model registered with
the speaker enrollment function on and off
whenever you want.
Speaker enrollment
E00727500301
It takes about 2 to 3 minutes to complete the speaker enrollment process.
To ensure the best results, run through the
process while in the driver’s seat, in an envi-
ronment that is as quiet as possible (whenthere is no rain or strong winds and the vehi-cle windows are closed). Please turn off your
phone while in speaker enrollment to prevent
interruption of the process.
Use the following procedure for speaker en- rollment. 1. Stop your vehicle in a safe area, put the
gearshift lever in the “N” (Neutral) posi-
tion ( M/T), or the selector lever in the
“P” (PARK) position ( A/T or CVT), and
pull the parking brake lever.NOTEl Speaker enrollment is not possible unless the
vehicle is parked. Make sure you park the
vehicle in a safe area before attempting speaker enrollment.
2. Press the SPEECH button.
3. Say “Voice training”.
4. The voice guide will say “This operation
must be performed in a quiet environ- ment while the vehicle is stopped. See
the owner’s manual for the list of re- quired training phrases. Press and re-
lease the SPEECH button when you are ready to begin. Press the HANG-UP but-
ton to cancel at any time”.
Press the SPEECH button to start the
speaker enrollment process.
NOTEl If you do not start the speaker enrollment
process within 3 minutes of pressing the SPEECH button, the speaker enrollment function will time out.
The voice guide will say “Speaker Enroll-
ment has timed out”. The system will then beep and the voice recognition mode will be
deactivated.5. The voice guide will prompt for phrase
1. Repeat the corresponding phrase lis-
ted in table “Enrollment commands” on page 7-68.
The system will register your voice and
then move on to the registration of the next command. Continue the process un-
til all phrases have been registered.NOTEl To repeat the most recent voice training
command, press and release the SPEECH button.
l If you press the HANG-UP button anytime
during the process, the system will beep and
stop the speaker enrollment process.
6. When all enrollment commands have
been read out, the voice guide will say “Speaker enrollment is complete”.
The system will then end the speaker en-
rollment process and return to the main menu.
NOTEl Completing the speaker enrollment process
will turn on the voice model automatically.
l The commands “Help” and “Cancel” will
not work in this mode.
Bluetooth ®
2.0 interface*
7-52OGAE17E2For pleasant driving7