heater MITSUBISHI ASX 2017 Owner's Manual (in English)
[x] Cancel search | Manufacturer: MITSUBISHI, Model Year: 2017, Model line: ASX, Model: MITSUBISHI ASX 2017Pages: 458, PDF Size: 22.98 MB
Page 72 of 458
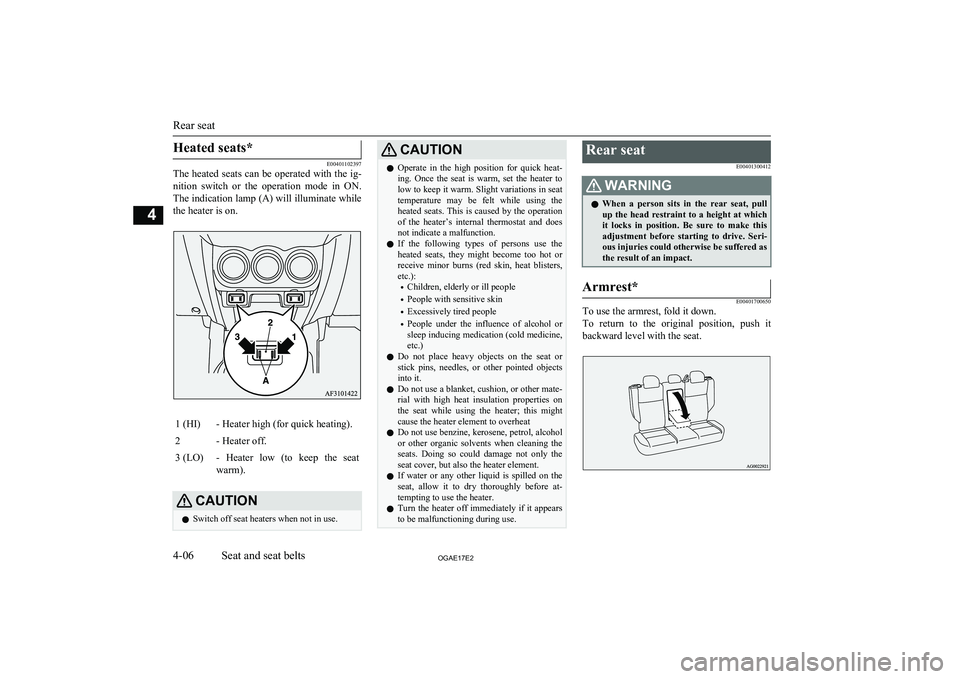
Heated seats*
E00401102397
The heated seats can be operated with the ig-
nition switch or the operation mode in ON.
The indication lamp (A) will illuminate while the heater is on.
1 (HI)- Heater high (for quick heating).2- Heater off.3 (LO)- Heater low (to keep the seat
warm).CAUTIONl Switch off seat heaters when not in use.CAUTIONlOperate in the high position for quick heat-
ing. Once the seat is warm, set the heater to low to keep it warm. Slight variations in seat
temperature may be felt while using the heated seats. This is caused by the operation
of the heater’s internal thermostat and does not indicate a malfunction.
l If the following types of persons use the
heated seats, they might become too hot or receive minor burns (red skin, heat blisters,
etc.):
• Children, elderly or ill people
• People with sensitive skin
• Excessively tired people
• People under the influence of alcohol or
sleep inducing medication (cold medicine, etc.)
l Do not place heavy objects on the seat or
stick pins, needles, or other pointed objects into it.
l Do not use a blanket, cushion, or other mate-
rial with high heat insulation properties on the seat while using the heater; this might
cause the heater element to overheat
l Do not use benzine, kerosene, petrol, alcohol
or other organic solvents when cleaning the seats. Doing so could damage not only the seat cover, but also the heater element.
l If water or any other liquid is spilled on the
seat, allow it to dry thoroughly before at-tempting to use the heater.
l Turn the heater off immediately if it appears
to be malfunctioning during use.Rear seat
E00401300412WARNINGlWhen a person sits in the rear seat, pull
up the head restraint to a height at which
it locks in position. Be sure to make this adjustment before starting to drive. Seri- ous injuries could otherwise be suffered as
the result of an impact.Armrest*
E00401700650
To use the armrest, fold it down.
To return to the original position, push it
backward level with the seat.
Rear seat
4-06OGAE17E2Seat and seat belts4
Page 166 of 458

Precautions to observe whenusing wipers and washers
E00507601444
l If the moving wipers become blocked
partway through a sweep by ice or other deposits on the glass, the wipers maytemporarily stop operating to prevent the
motor from overheating. In this case,
park the vehicle in a safe place, turn the ignition switch to the “LOCK” position
or put the operation mode in OFF, and
then remove the ice or other deposits.The wipers will start operating again af- ter the wiper motor cools down, so
check that the wipers operate before us-
ing them.
l Do not use the wipers when the glass is
dry.
They may scratch the glass surface and the blades wear out prematurely.
l Before using the wipers in cold weather,
check that the wiper blades are not fro-zen onto the glass. The motor may burn
out if the wipers are used with the blades
frozen onto the glass.
l Avoid using the washer continuously for
more than 20 seconds. Do not operate the washer when the fluid reservoir isempty.
Otherwise, the motor may burn out.
l Periodically check the level of washer
fluid in the reservoir and refill if re-
quired.
During cold weather, add a recommen- ded washer solution that will not freeze
in the washer reservoir. Failure to do so
could result in loss of washer function and frost damage to the system compo- nents.Rear window demister
switch E00507901186
The rear window demister switch can be op-erated when the engine is running.
Push the switch to turn on the rear window
demister. It will be turned off automatically
in about 20 minutes. To turn off the demister
within about 20 minutes, push the switch again.
The indication lamp (A) will illuminate while
the demister is on.NOTEl When the rear window demister switch is
pressed, the outside rear-view mirrors are
defogged or defrosted. Refer to “Heated mir-
ror” on page 6-12.
l The demister switch is not to melt snow but
to clear mist.
Remove snow before use of the demister
switch.
l When cleaning the inside of the rear win-
dow, use a soft cloth and wipe gently along
the heater wires, being careful not to damage the wires.
l Do not allow objects to touch the inside of
the rear window glass, damaged or broken wires may result.
Rear window demister switch
5-62OGAE17E2Instruments and controls5
Page 180 of 458
The mirrors automatically retract or extendwhen the doors are locked or unlocked using the remote control switches of the keyless en-
try system.
Refer to “Keyless entry system” on page 3-04.
[Vehicles equipped with keyless operation
system]
The mirrors automatically retract or extend when the doors are locked or unlocked using the remote control switches or the keyless op-eration function of the keyless operation sys-
tem.
Refer to “Keyless operation system: To oper- ate using the keyless operation function, Key-
less entry system” on pages 3-10 and 3-21.NOTEl Functions can be modified as stated below.
Consult a MITSUBISHI MOTORS Author-
ized Service Point.
• Automatically extend when the following
operation is performed.
[Except vehicles equipped with keyless operation system]
Turn the ignition switch to the “ON” or
“ACC” position.
[Vehicles equipped with keyless operation
system]
Put the operation mode in ON or ACC.NOTE• Automatically retract when the driver’s
door is opened after turning the ignition switch to the “LOCK” position or putting the operation mode in OFF.
• Automatically extend when the vehicle
speed reaches 30 km/h (19 mph).
• Deactivate the automatic extension func-
tion.Heated mirror
E00601200497
To demist or defrost the outside rear-view
mirrors, press the rear window demister
switch.
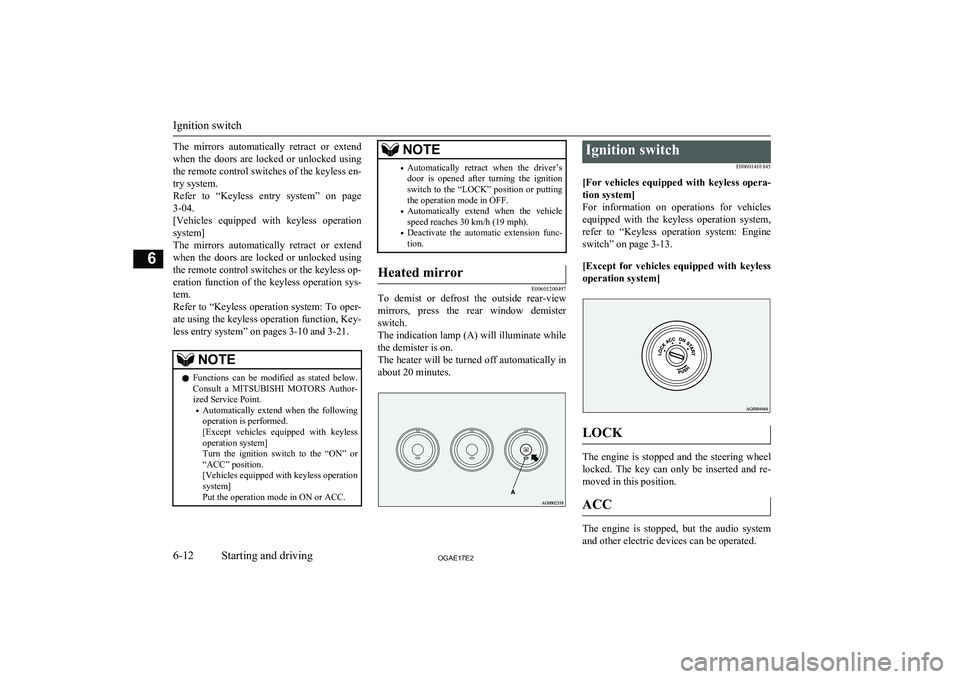
The indication lamp (A) will illuminate while the demister is on.
The heater will be turned off automatically in
about 20 minutes.
Ignition switch
E00601401845
[For vehicles equipped with keyless opera- tion system]
For information on operations for vehicles equipped with the keyless operation system,
refer to “Keyless operation system: Engine
switch” on page 3-13.
[Except for vehicles equipped with keyless operation system]
LOCK
The engine is stopped and the steering wheel
locked. The key can only be inserted and re- moved in this position.
ACC
The engine is stopped, but the audio system
and other electric devices can be operated.
Ignition switch
6-12OGAE17E2Starting and driving6
Page 245 of 458
Ventilators........................................................................................... 7-02
Heater/Air conditioning...................................................................... 7-03
Important operation tips for the air conditioning................................ 7-11 Air purifier.......................................................................................... 7-11
LW/MW/FM radio/CD player*.......................................................... 7-11
Handling of Discs................................................................................7-15 Audio Files (MP3/WMA/AAC)..........................................................7-16
Important Points on Safety for the Customer......................................7-20
Operation Keys................................................................................... 7-21 Listen to Radio.................................................................................... 7-24Listen to DAB*................................................................................... 7-25
Listen to Traffic Messages.................................................................. 7-27
Listen to CDs...................................................................................... 7-27
Listen to MP3s.................................................................................... 7-28
Listen to an iPod................................................................................. 7-29 Listen to Audio Files on a USB Device.............................................. 7-31To play iPod/USB memory device tracks via voice opera-
tion (vehicles with Bluetooth ®
2.0 interface)................................. 7-34
Listening to Bluetooth Audio*............................................................7-37
Use AUX*........................................................................................... 7-38
Display Indicator................................................................................. 7-39
Audio Quality and Volume Balance Adjustment............................... 7-40
System settings....................................................................................7-41
Troubleshooting.................................................................................. 7-45
Link System*...................................................................................... 7-47
Bluetooth ®
2.0 interface*....................................................................7-47
USB input terminal*........................................................................... 7-68
Sun visors............................................................................................ 7-71
Ashtray*.............................................................................................. 7-72Cigarette lighter*.................................................................................7-73
Accessory socket................................................................................. 7-74
Interior lamps...................................................................................... 7-74
Storage spaces..................................................................................... 7-78 Cup holder........................................................................................... 7-81
Bottle holder........................................................................................7-81 Rear shelf panel*.................................................................................7-82
Assist grips.......................................................................................... 7-83
Coat hook*.......................................................................................... 7-83
Luggage hooks.................................................................................... 7-83For pleasant driving
OGAE17E27
Page 247 of 458
Mode selection dial
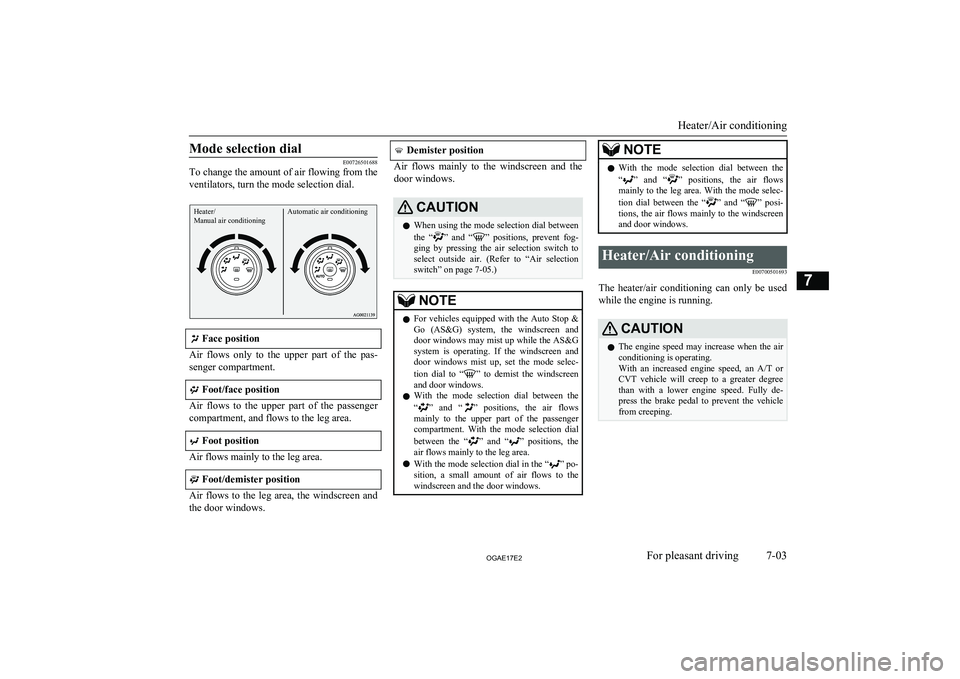
E00726501688
To change the amount of air flowing from the
ventilators, turn the mode selection dial.
Heater/
Manual air conditioningAutomatic air conditioning
Face position
Air flows only to the upper part of the pas-
senger compartment.
Foot/face position
Air flows to the upper part of the passenger
compartment, and flows to the leg area.
Foot position
Air flows mainly to the leg area.
Foot/demister position
Air flows to the leg area, the windscreen and
the door windows.
Demister position
Air flows mainly to the windscreen and the
door windows.
CAUTIONl When using the mode selection dial between
the “” and “” positions, prevent fog-
ging by pressing the air selection switch to
select outside air. (Refer to “Air selection
switch” on page 7-05.)NOTEl For vehicles equipped with the Auto Stop &
Go (AS&G) system, the windscreen and
door windows may mist up while the AS&G system is operating. If the windscreen and
door windows mist up, set the mode selec-
tion dial to “
” to demist the windscreen
and door windows.
l With the mode selection dial between the
“
” and “” positions, the air flows
mainly to the upper part of the passenger compartment. With the mode selection dial
between the “
” and “” positions, the
air flows mainly to the leg area.
l With the mode selection dial in the “
” po-
sition, a small amount of air flows to the windscreen and the door windows.
NOTEl With the mode selection dial between the
“” and “” positions, the air flows
mainly to the leg area. With the mode selec-
tion dial between the “
” and “” posi-
tions, the air flows mainly to the windscreen and door windows.
Heater/Air conditioning
E00700501693
The heater/air conditioning can only be usedwhile the engine is running.
CAUTIONl The engine speed may increase when the air
conditioning is operating.
With an increased engine speed, an A/T or
CVT vehicle will creep to a greater degree
than with a lower engine speed. Fully de-
press the brake pedal to prevent the vehicle
from creeping.
Heater/Air conditioning
7-03OGAE17E2For pleasant driving7
Page 248 of 458
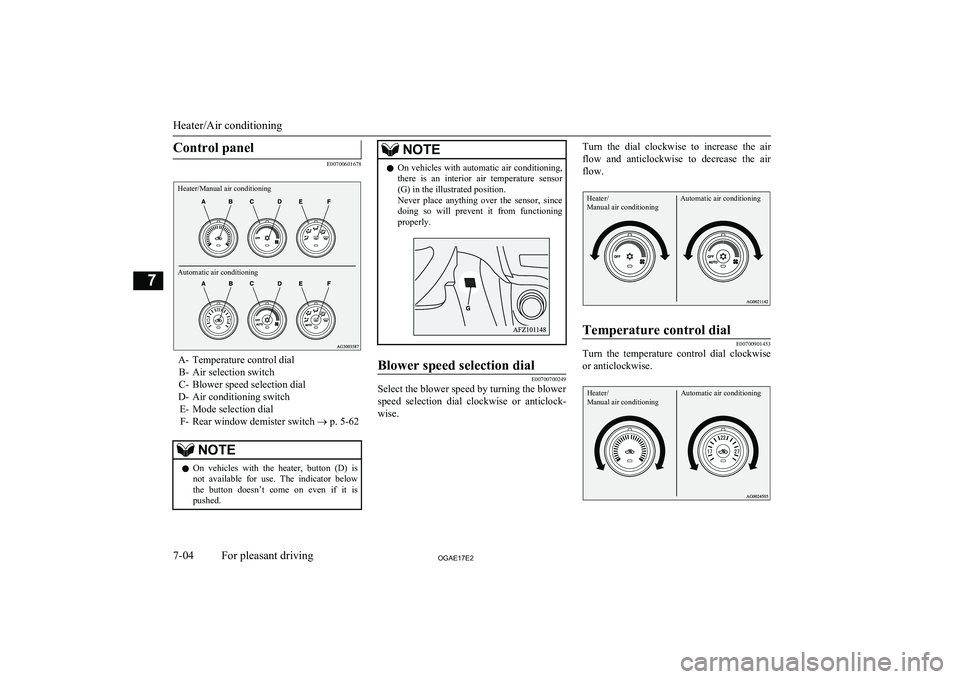
Control panel
E00700601678
Heater/Manual air conditioningAutomatic air conditioning
A- Temperature control dialB- Air selection switch
C- Blower speed selection dial
D- Air conditioning switch E- Mode selection dialF- Rear window demister switch ® p. 5-62
NOTEl On vehicles with the heater, button (D) is
not available for use. The indicator below
the button doesn’t come on even if it is pushed.NOTEl On vehicles with automatic air conditioning,
there is an interior air temperature sensor
(G) in the illustrated position.
Never place anything over the sensor, since
doing so will prevent it from functioning
properly.Blower speed selection dial
E00700700249
Select the blower speed by turning the blower
speed selection dial clockwise or anticlock- wise.
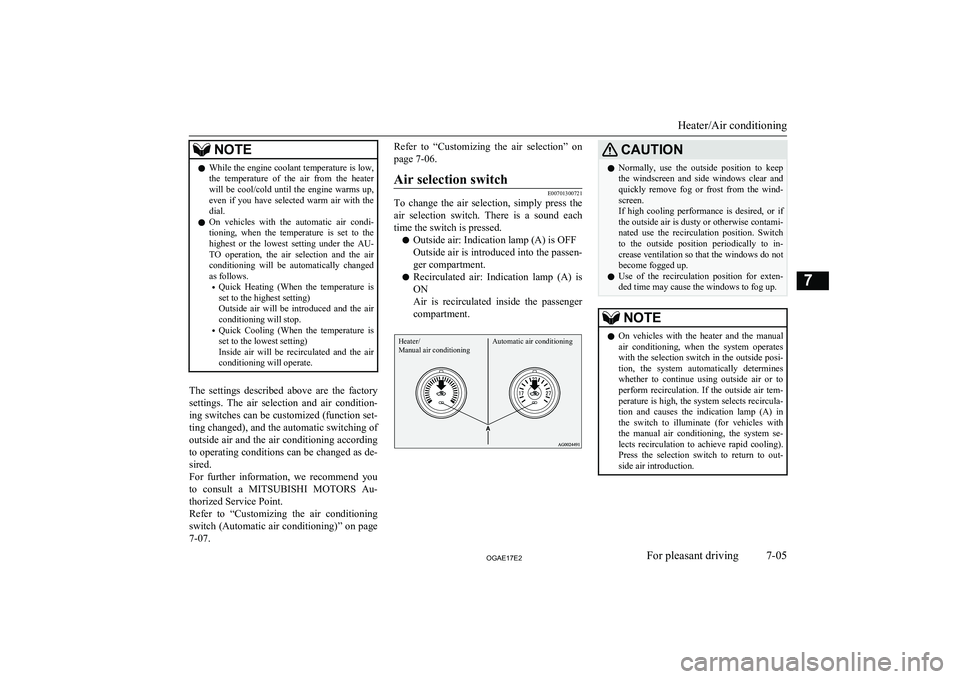
Turn the dial clockwise to increase the air
flow and anticlockwise to decrease the air flow.Heater/
Manual air conditioningAutomatic air conditioning
Temperature control dial
E00700901453
Turn the temperature control dial clockwise
or anticlockwise.
Heater/
Manual air conditioningAutomatic air conditioning
Heater/Air conditioning
7-04OGAE17E2For pleasant driving7
Page 249 of 458
NOTElWhile the engine coolant temperature is low,
the temperature of the air from the heaterwill be cool/cold until the engine warms up, even if you have selected warm air with the
dial.
l On vehicles with the automatic air condi-
tioning, when the temperature is set to the highest or the lowest setting under the AU-
TO operation, the air selection and the air
conditioning will be automatically changed as follows.
• Quick Heating (When the temperature is
set to the highest setting)
Outside air will be introduced and the air
conditioning will stop.
• Quick Cooling (When the temperature is
set to the lowest setting)
Inside air will be recirculated and the air
conditioning will operate.
The settings described above are the factory
settings. The air selection and air condition-
ing switches can be customized (function set-
ting changed), and the automatic switching of outside air and the air conditioning according
to operating conditions can be changed as de- sired.
For further information, we recommend you to consult a MITSUBISHI MOTORS Au-
thorized Service Point.
Refer to “Customizing the air conditioning
switch (Automatic air conditioning)” on page 7-07.
Refer to “Customizing the air selection” on
page 7-06.Air selection switch
E00701300721
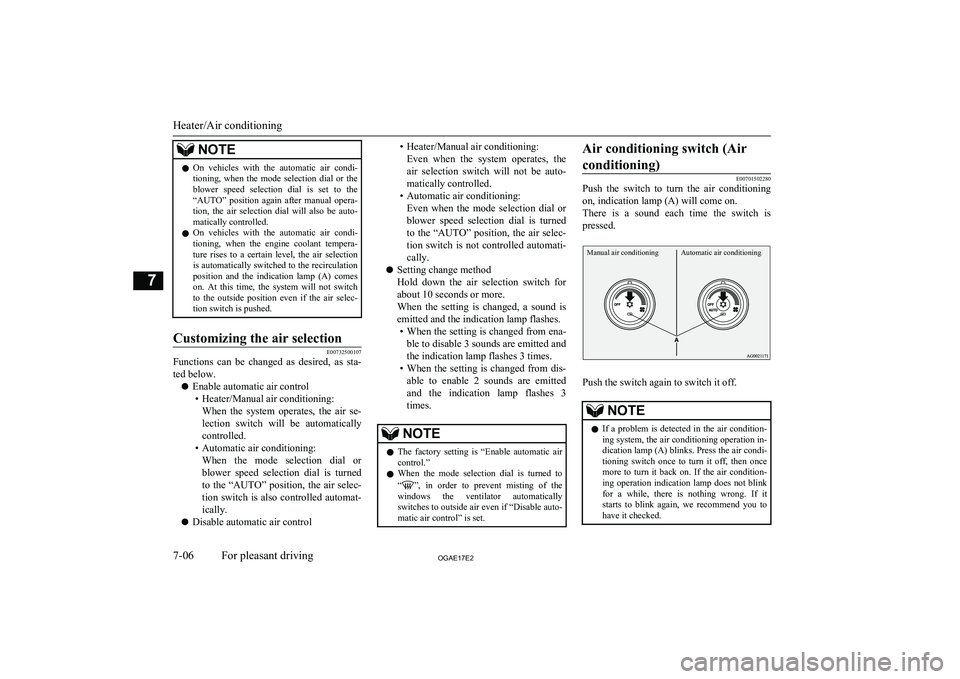
To change the air selection, simply press theair selection switch. There is a sound each
time the switch is pressed.
l Outside air: Indication lamp (A) is OFF
Outside air is introduced into the passen-
ger compartment.
l Recirculated air: Indication lamp (A) is
ON
Air is recirculated inside the passenger
compartment.
Heater/
Manual air conditioningAutomatic air conditioning
CAUTIONl Normally, use the outside position to keep
the windscreen and side windows clear and quickly remove fog or frost from the wind- screen.
If high cooling performance is desired, or if
the outside air is dusty or otherwise contami- nated use the recirculation position. Switch
to the outside position periodically to in- crease ventilation so that the windows do notbecome fogged up.
l Use of the recirculation position for exten-
ded time may cause the windows to fog up.NOTEl On vehicles with the heater and the manual
air conditioning, when the system operateswith the selection switch in the outside posi- tion, the system automatically determines
whether to continue using outside air or to
perform recirculation. If the outside air tem-
perature is high, the system selects recircula- tion and causes the indication lamp (A) in
the switch to illuminate (for vehicles with the manual air conditioning, the system se-
lects recirculation to achieve rapid cooling). Press the selection switch to return to out-
side air introduction.
Heater/Air conditioning
7-05OGAE17E2For pleasant driving7
Page 250 of 458
NOTElOn vehicles with the automatic air condi-
tioning, when the mode selection dial or the
blower speed selection dial is set to the “AUTO” position again after manual opera-tion, the air selection dial will also be auto- matically controlled.
l On vehicles with the automatic air condi-
tioning, when the engine coolant tempera-
ture rises to a certain level, the air selection is automatically switched to the recirculation
position and the indication lamp (A) comes on. At this time, the system will not switch
to the outside position even if the air selec-
tion switch is pushed.Customizing the air selection
E00732500107
Functions can be changed as desired, as sta-
ted below.
l Enable automatic air control
• Heater/Manual air conditioning: When the system operates, the air se-
lection switch will be automatically controlled.
• Automatic air conditioning: When the mode selection dial or
blower speed selection dial is turned
to the “AUTO” position, the air selec-
tion switch is also controlled automat- ically.
l Disable automatic air control
• Heater/Manual air conditioning:
Even when the system operates, theair selection switch will not be auto-
matically controlled.
• Automatic air conditioning: Even when the mode selection dial orblower speed selection dial is turned
to the “AUTO” position, the air selec-
tion switch is not controlled automati- cally.
l Setting change method
Hold down the air selection switch for about 10 seconds or more.
When the setting is changed, a sound is
emitted and the indication lamp flashes. • When the setting is changed from ena-
ble to disable 3 sounds are emitted and
the indication lamp flashes 3 times.
• When the setting is changed from dis-
able to enable 2 sounds are emitted and the indication lamp flashes 3times.NOTEl The factory setting is “Enable automatic air
control.”
l When the mode selection dial is turned to
“
”, in order to prevent misting of the
windows the ventilator automatically switches to outside air even if “Disable auto-matic air control” is set.
Air conditioning switch (Air
conditioning)
E00701502280
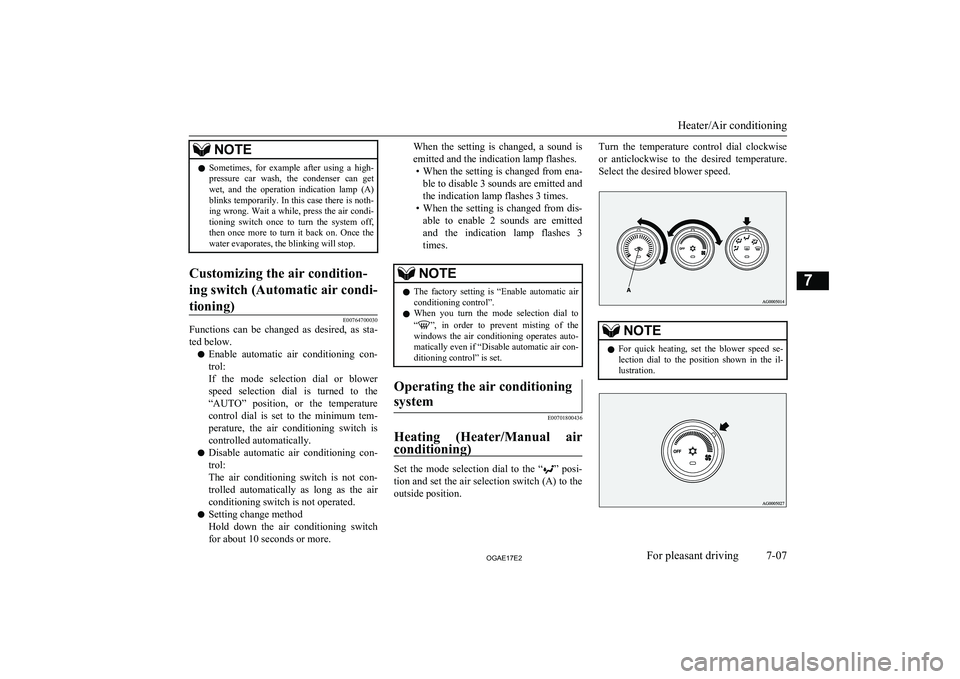
Push the switch to turn the air conditioning
on, indication lamp (A) will come on.
There is a sound each time the switch is pressed.
Manual air conditioningAutomatic air conditioning
Push the switch again to switch it off.
NOTEl If a problem is detected in the air condition-
ing system, the air conditioning operation in- dication lamp (A) blinks. Press the air condi-
tioning switch once to turn it off, then once more to turn it back on. If the air condition-
ing operation indication lamp does not blink for a while, there is nothing wrong. If it
starts to blink again, we recommend you to have it checked.
Heater/Air conditioning
7-06OGAE17E2For pleasant driving7
Page 251 of 458
NOTElSometimes, for example after using a high-
pressure car wash, the condenser can get wet, and the operation indication lamp (A)
blinks temporarily. In this case there is noth- ing wrong. Wait a while, press the air condi-
tioning switch once to turn the system off, then once more to turn it back on. Once the
water evaporates, the blinking will stop.Customizing the air condition-
ing switch (Automatic air condi- tioning)
E00764700030
Functions can be changed as desired, as sta- ted below.
l Enable automatic air conditioning con-
trol:
If the mode selection dial or blower
speed selection dial is turned to the “AUTO” position, or the temperature
control dial is set to the minimum tem-
perature, the air conditioning switch is controlled automatically.
l Disable automatic air conditioning con-
trol:
The air conditioning switch is not con-
trolled automatically as long as the air
conditioning switch is not operated.
l Setting change method
Hold down the air conditioning switch for about 10 seconds or more.
When the setting is changed, a sound is
emitted and the indication lamp flashes. • When the setting is changed from ena-
ble to disable 3 sounds are emitted and
the indication lamp flashes 3 times.
• When the setting is changed from dis-
able to enable 2 sounds are emitted and the indication lamp flashes 3times.NOTEl The factory setting is “Enable automatic air
conditioning control”.
l When you turn the mode selection dial to
“
”, in order to prevent misting of the
windows the air conditioning operates auto- matically even if “Disable automatic air con-
ditioning control” is set.
Operating the air conditioning
system
E00701800436
Heating (Heater/Manual air
conditioning)
Set the mode selection dial to the “” posi-
tion and set the air selection switch (A) to the outside position.
Turn the temperature control dial clockwise
or anticlockwise to the desired temperature.
Select the desired blower speed.NOTEl For quick heating, set the blower speed se-
lection dial to the position shown in the il-
lustration.
Heater/Air conditioning
7-07OGAE17E2For pleasant driving7
Page 252 of 458
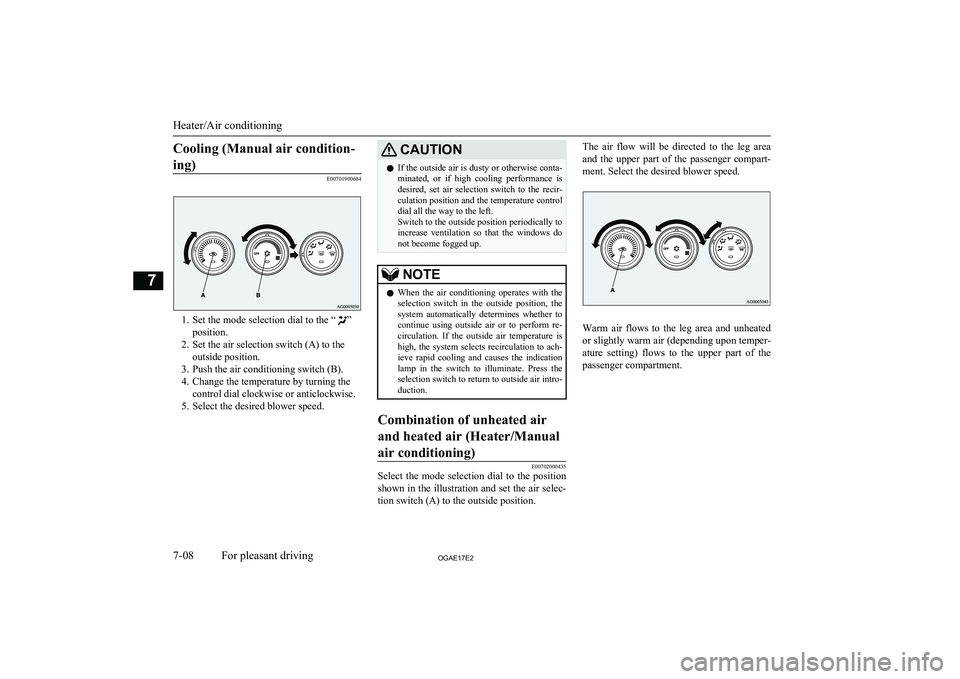
Cooling (Manual air condition-ing)
E00701900684
1. Set the mode selection dial to the “”
position.
2. Set the air selection switch (A) to the outside position.
3. Push the air conditioning switch (B).
4. Change the temperature by turning the control dial clockwise or anticlockwise.
5. Select the desired blower speed.
CAUTIONl If the outside air is dusty or otherwise conta-
minated, or if high cooling performance is
desired, set air selection switch to the recir- culation position and the temperature control
dial all the way to the left.
Switch to the outside position periodically to increase ventilation so that the windows donot become fogged up.NOTEl When the air conditioning operates with the
selection switch in the outside position, the
system automatically determines whether to continue using outside air or to perform re-
circulation. If the outside air temperature is high, the system selects recirculation to ach- ieve rapid cooling and causes the indication
lamp in the switch to illuminate. Press the
selection switch to return to outside air intro- duction.Combination of unheated air
and heated air (Heater/Manual air conditioning)
E00702000435
Select the mode selection dial to the position shown in the illustration and set the air selec- tion switch (A) to the outside position.
The air flow will be directed to the leg area
and the upper part of the passenger compart-
ment. Select the desired blower speed.
Warm air flows to the leg area and unheated or slightly warm air (depending upon temper-
ature setting) flows to the upper part of the
passenger compartment.
Heater/Air conditioning
7-08OGAE17E2For pleasant driving7