ECU MITSUBISHI COLT 2009 10.G Owner's Manual
[x] Cancel search | Manufacturer: MITSUBISHI, Model Year: 2009, Model line: COLT, Model: MITSUBISHI COLT 2009 10.GPages: 273, PDF Size: 17.28 MB
Page 218 of 273
Downloaded from www.Manualslib.com manuals search engine Engine oilE01000402530
To check and refill engine oil
The engine oil used has a significant effect on the
engine’s performance, service life and startability.
Be sure to use oil of the recommended quality and
appropriate viscosity.
All engines consume a certain amount of oil during
normal operation, and engine oil consumption is
greatly influenced by payload, engine speed, etc.
Therefore, it is important to check the oil level at
regular intervals or before starting a long trip.
This check must be made with the engine warm but
not running. Park the vehicle on a level surface,
stop the engine, and then wait a few moments to al-
low the engine oil in circulation to return to the oil
pan to ensure accurate measurement.
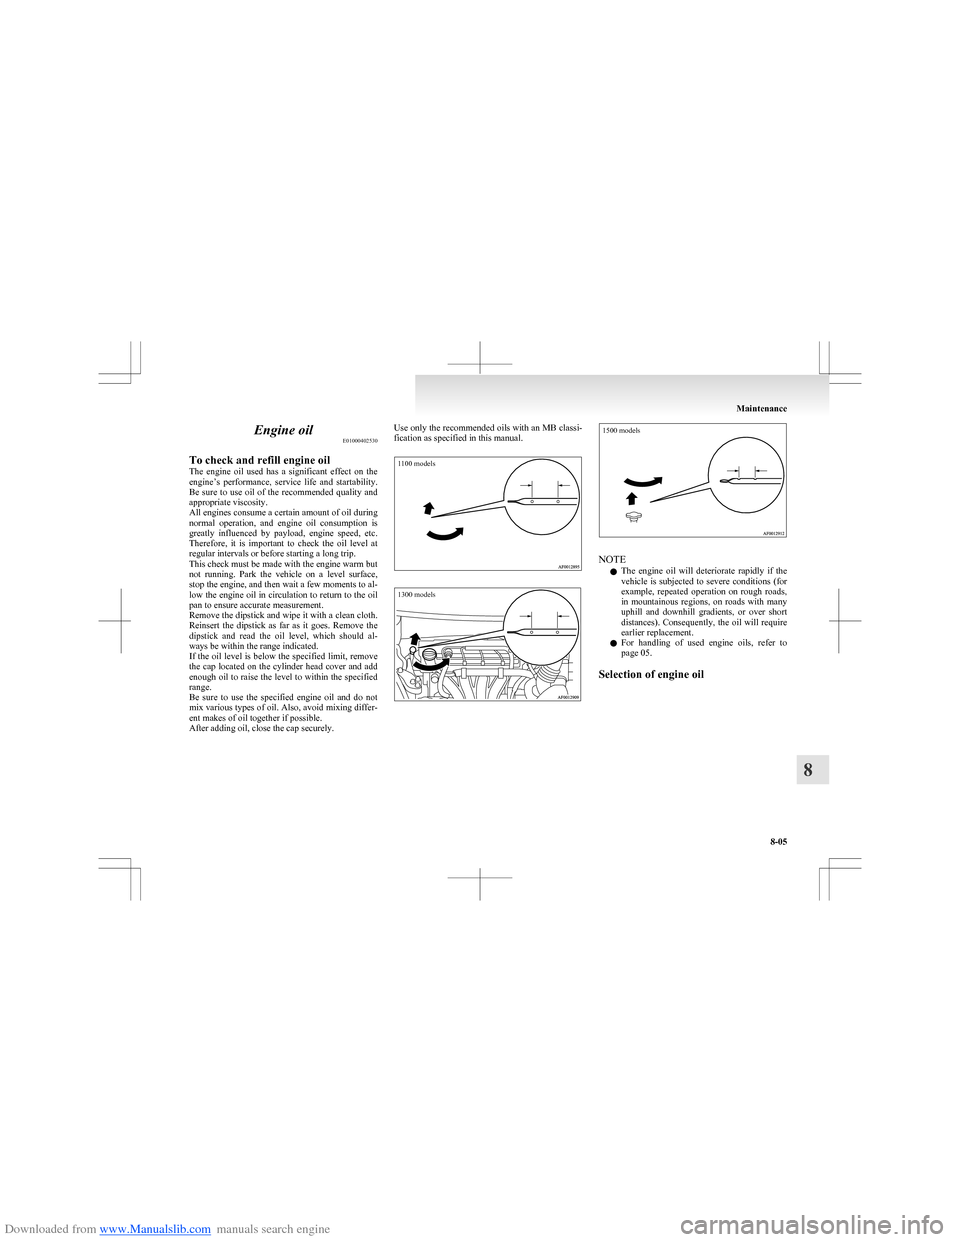
Remove the dipstick and wipe it with a clean cloth.
Reinsert the dipstick as far as it goes. Remove the
dipstick and read the oil level, which should al-
ways be within the range indicated.
If the oil level is below the specified limit, remove
the cap located on the cylinder head cover and add
enough oil to raise the level to within the specified
range.
Be sure to use the specified engine oil and do not
mix various types of oil. Also, avoid mixing differ-
ent makes of oil together if possible.
After adding oil, close the cap securely.
Use only the recommended oils with an MB classi-
fication as specified in this manual.1100 models1300 models1500 models
NOTE
l The engine oil will deteriorate rapidly if the
vehicle is subjected to severe conditions (for
example, repeated operation on rough roads,
in mountainous regions, on roads with many
uphill and downhill gradients, or over short
distances). Consequently, the oil will require
earlier replacement.
l For handling of used engine oils, refer to
page 05.
Selection of engine oil
Maintenance
8-05
8
Page 222 of 273
Downloaded from www.Manualslib.com manuals search engine Washer fluidE01000700702
Check the washer fluid level in the container.
If the level is low, replenish the container with wash-
er fluid.
NOTE
l The washer fluid container serves the wind-
screen and the rear window.
During cold weather
To ensure proper operation of the washers at low
temperatures, use a fluid containing an anti-freez-
ing agent.
Brake fluid/Clutch fluid* E01000800035
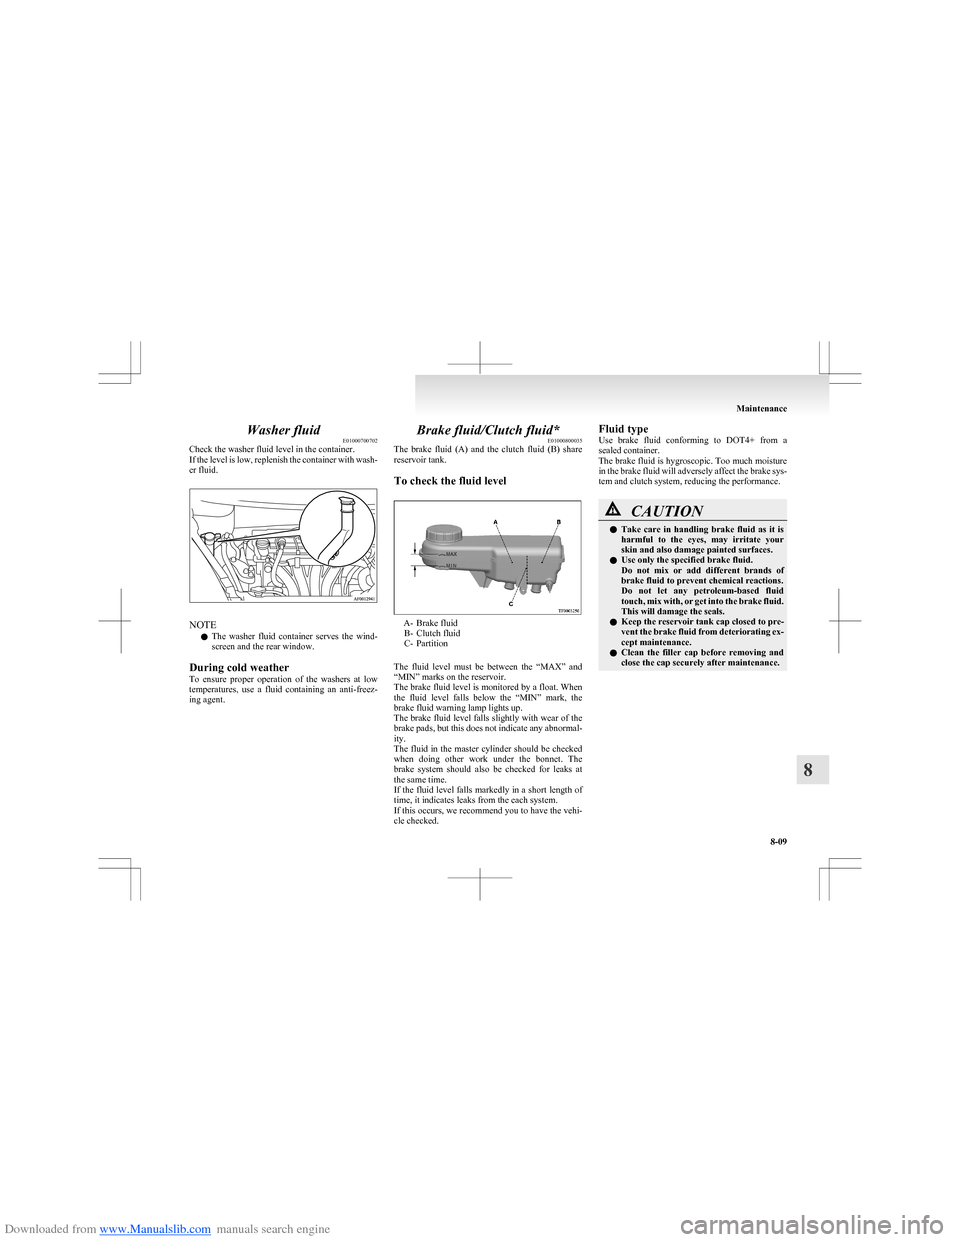
The brake fluid (A) and the clutch fluid (B) share
reservoir tank.
To check the fluid level
A- Brake fluid B- Clutch fluid
C- Partition
The fluid level must be between the “MAX” and
“MIN” marks on the reservoir.
The brake fluid level is monitored by a float. When
the fluid level falls below the “MIN” mark, the
brake fluid warning lamp lights up.
The brake fluid level falls slightly with wear of the
brake pads, but this does not indicate any abnormal-
ity.
The fluid in the master cylinder should be checked
when doing other work under the bonnet. The
brake system should also be checked for leaks at
the same time.
If the fluid level falls markedly in a short length of
time, it indicates leaks from the each system.
If this occurs, we recommend you to have the vehi-
cle checked.
Fluid type
Use brake fluid conforming to DOT4+ from a
sealed container.
The brake fluid is hygroscopic. Too much moisture
in the brake fluid will adversely affect the brake sys-
tem and clutch system, reducing the performance.CAUTIONl Take care in handling brake fluid as it is
harmful to the eyes, may irritate your
skin and also damage painted surfaces.
l Use only the specified brake fluid.
Do not mix or add different brands of
brake fluid to prevent chemical reactions.
Do not let any petroleum-based fluid
touch, mix with, or get into the brake fluid.
This will damage the seals.
l Keep the reservoir tank cap closed to pre-
vent the brake fluid from deteriorating ex-
cept maintenance.
l Clean the filler cap before removing and
close the cap securely after maintenance.
Maintenance
8-09
8
Page 224 of 273
Downloaded from www.Manualslib.com manuals search engine WARNINGlKeep sparks, cigarettes, and flames away
from the battery because the battery
could explode.
l The battery electrolyte is extremely caus-
tic. Do not allow it to come in contact
with your eyes, skin, clothing, or the pain-
ted surfaces of the vehicle. Spilt electro-
lyte should be flushed immediately with
ample amounts of water.
Irritation to eyes or skin from contact
with electrolyte requires immediate medi-
cal attention.
l Ventilate when charging or using the bat-
tery in an enclosed space.CAUTIONl Never disconnect the battery with the ig-
nition switch in the “ON” position; doing
so could damage the vehicle’s electrical
components.
l Never short-circuit the battery; doing so
could cause it to overheat and be damaged.CAUTIONl Always wear protective eye goggles when
working near the battery.
l If the battery is to be quick-charged, first
disconnect the battery cables.
l In order to prevent a short circuit, be
sure to disconnect the negative (-) termi-
nal first.
l Keep it out of reach of children.
l Do not bring the nearby part, the plastic
parts and so on into contact with sulphu-
ric acid (battery electrolyte) which may
crack, stain or discolour them.
If they are in contact, wipe off with soft
cloth, chamois or the like and an aqueous
solution of neutral detergent then imme-
diately rinse the affected parts with plen-
ty of water.
NOTE
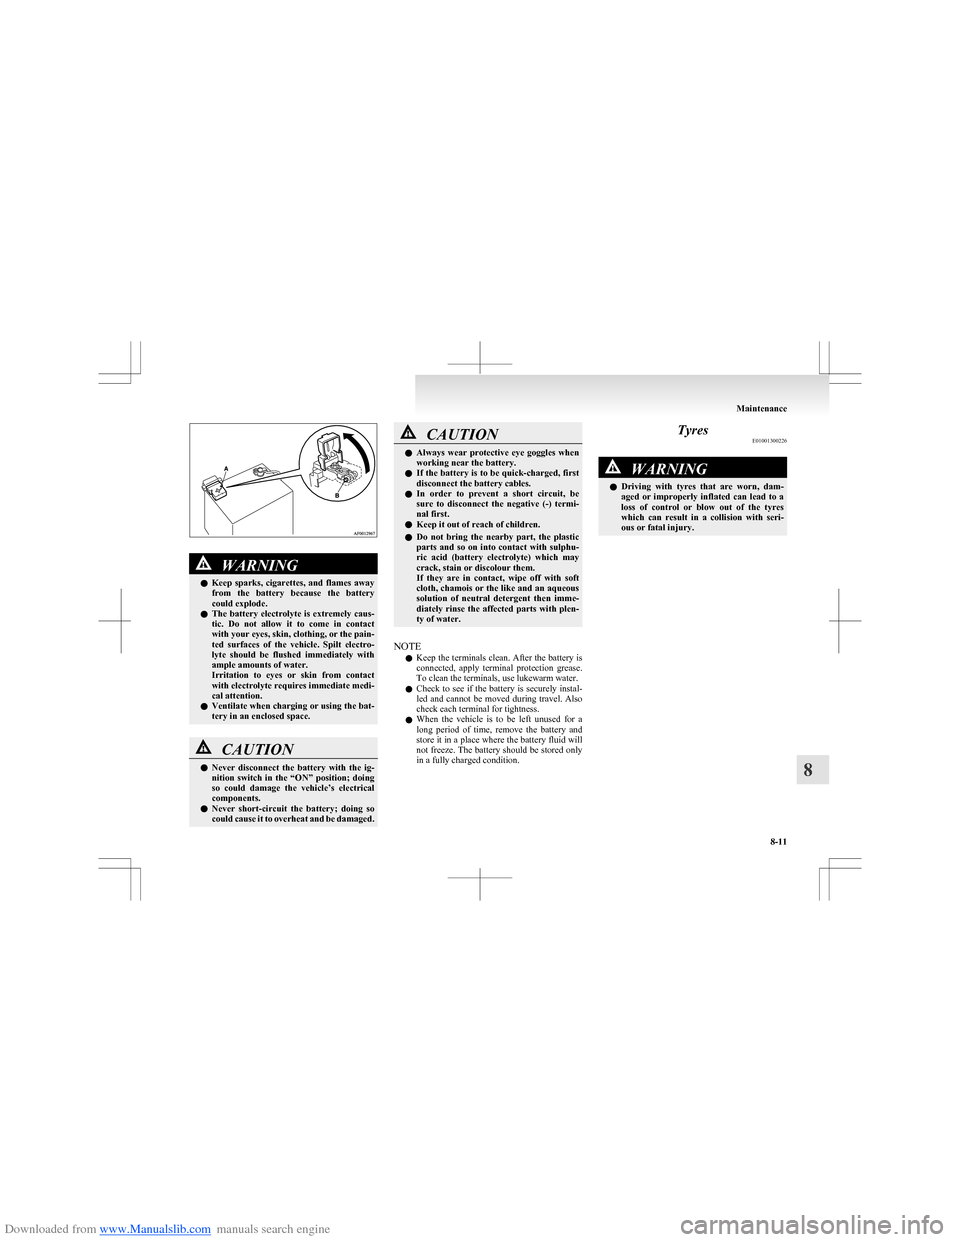
l Keep the terminals clean. After the battery is
connected, apply terminal protection grease.
To clean the terminals, use lukewarm water.
l Check to see if the battery is securely instal-
led and cannot be moved during travel. Also
check each terminal for tightness.
l When the vehicle is to be left unused for a
long period of time, remove the battery and
store it in a place where the battery fluid will
not freeze. The battery should be stored only
in a fully charged condition.
Tyres E01001300226WARNINGlDriving with tyres that are worn, dam-
aged or improperly inflated can lead to a
loss of control or blow out of the tyres
which can result in a collision with seri-
ous or fatal injury.
Maintenance
8-11
8
Page 228 of 273
Downloaded from www.Manualslib.com manuals search engine The speed limit for tyre chain is 50 km/h (30 mph)
and remove the tyre chains as soon as possible on
snow free roads.WARNINGl DO NOT use a jack when fitting the
chains, as in thsee conditions, the tyres
may slip on the icy road causing the vehi-
cle to slip off the jack.CAUTIONl Practice fitting the chains before you
need them.
Don’t expect help from other people in
the cold.
l Choose a clear straight stretch of road
where you can pull over and still be seen
while you are fitting the chains.
l Do not fit chains before you need them.
This will wear out your tyres and the
road surface.
l After driving around 100-300 metres
,
stop and retighten the chains.
l Care should be taken with extremes of
steering lock to prevent possible contact
between the chains and the vehicle body.
l Drive carefully and do not exceed
50 km/h (30 mph). Remember, fitting
chains is not going to stop accidents from
happening.
l When tyre chains are installed, take care
that they do not damage the disc wheel or
body.CAUTIONl Do not install a tyre chain on an emergen-
cy wheel which is compact in size. If one
of the front wheels has punctured, re-
place it with one of the rear wheels and in-
stall the compact spare wheel in that
place before fitting a tyre chain.
l An aluminium wheel can be damaged by
a tyre chain while driving. When fitting a
tyre chain on an aluminium wheel, take
care that any part of the chain and fitting
cannot be brought into contact with the
wheel.
l Remove the wheel covers before instal-
ling a tyre chain, otherwise they may be
damaged by the tyre chain. (Refer to
“Wheel covers” on page 6-17.)
l When installing or removing the tyre
chains, take care that hands and other
parts of your body are not injured by the
sharp edges of the vehicle body.
l Install the chains only on the rear tyres
and tighten them as tightly as possible
with the ends securely fastened.
NOTE
l The laws and regulations concerning the use
of tyre chains vary. Find out and follow the
laws and regulations of the area you’re driv-
ing in.
In most countries, it is prohibited by law to
use tyre chains on roads without snow.
Clutch pedal free play* E01002200222
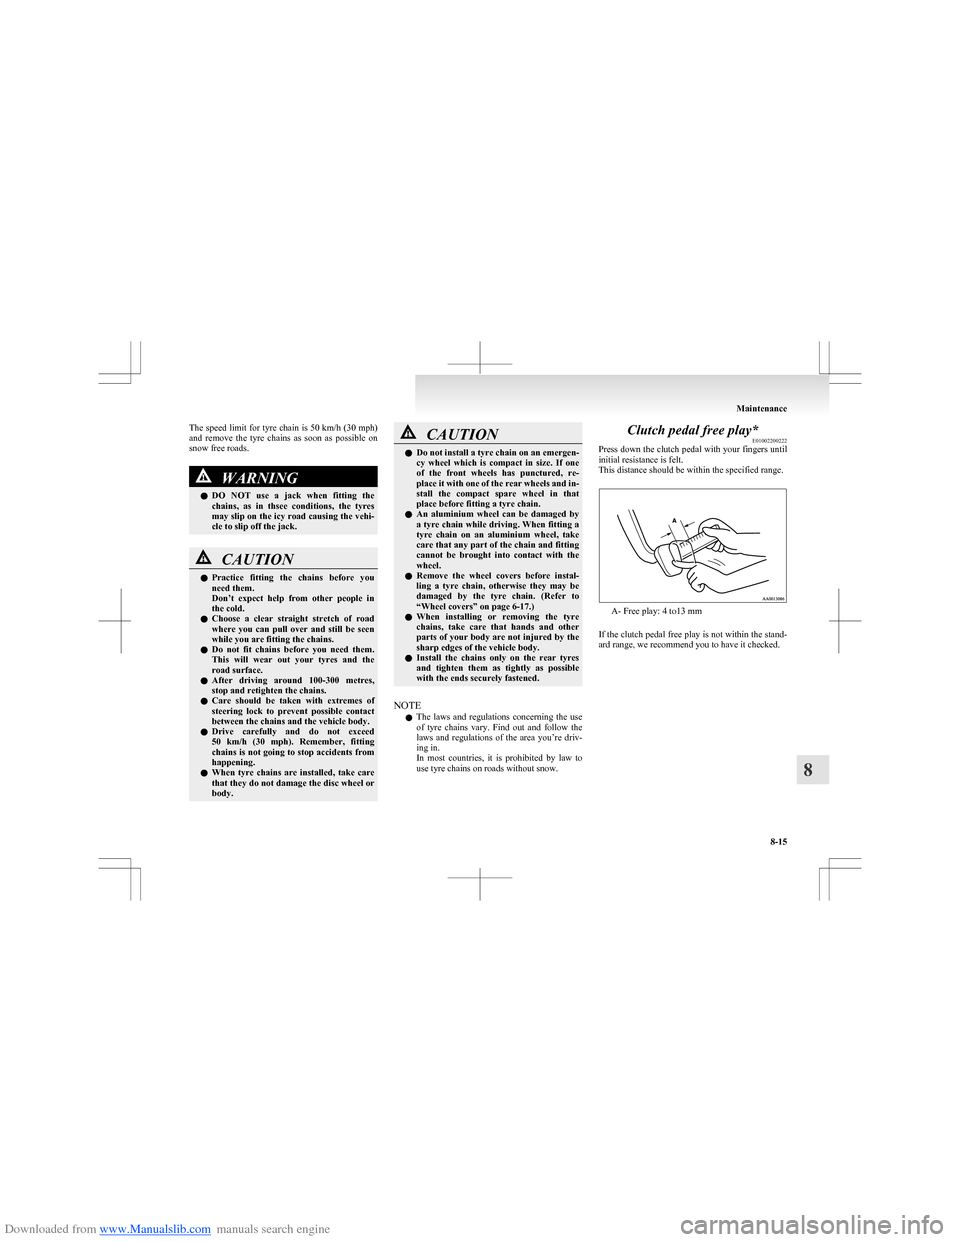
Press down the clutch pedal with your fingers until
initial resistance is felt.
This distance should be within the specified range.
A- Free play: 4 to13 mm
If the clutch pedal free play is not within the stand-
ard range, we recommend you to have it checked.
Maintenance
8-15
8
Page 230 of 273
Downloaded from www.Manualslib.com manuals search engine NOTEl Do not allow the wiper arm to fall onto the
windscreen; it could damage the glass.
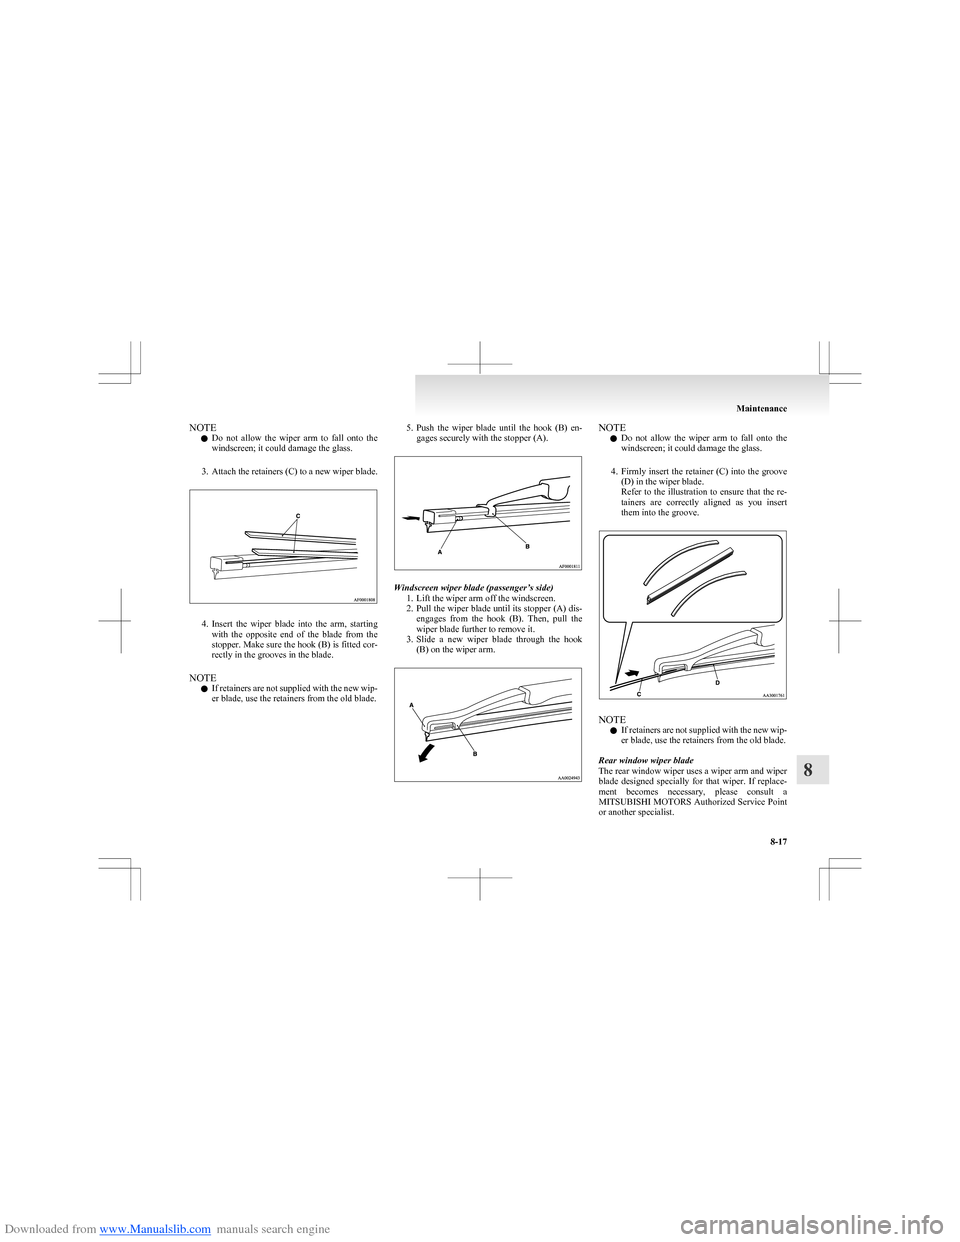
3. Attach the retainers (C) to a new wiper blade.
4.Insert the wiper blade into the arm, starting
with the opposite end of the blade from the
stopper. Make sure the hook (B) is fitted cor-
rectly in the grooves in the blade.
NOTE l If retainers are not supplied with the new wip-
er blade, use the retainers from the old blade.
5. Push the wiper blade until the hook (B) en-
gages securely with the stopper (A).
Windscreen wiper blade (passenger’s side)
1. Lift the wiper arm off the windscreen.
2. Pull the wiper blade until its stopper (A) dis-
engages from the hook (B). Then, pull the
wiper blade further to remove it.
3. Slide a new wiper blade through the hook
(B) on the wiper arm.
NOTE
l Do not allow the wiper arm to fall onto the
windscreen; it could damage the glass.
4. Firmly insert the retainer (C) into the groove
(D) in the wiper blade.
Refer to the illustration to ensure that the re-
tainers are correctly aligned as you insert
them into the groove.
NOTE
l If retainers are not supplied with the new wip-
er blade, use the retainers from the old blade.
Rear window wiper blade
The rear window wiper uses a wiper arm and wiper
blade designed specially for that wiper. If replace-
ment becomes necessary, please consult a
MITSUBISHI MOTORS Authorized Service Point
or another specialist.
Maintenance
8-17
8
Page 238 of 273
Downloaded from www.Manualslib.com manuals search engine HeadlampsE01003501261
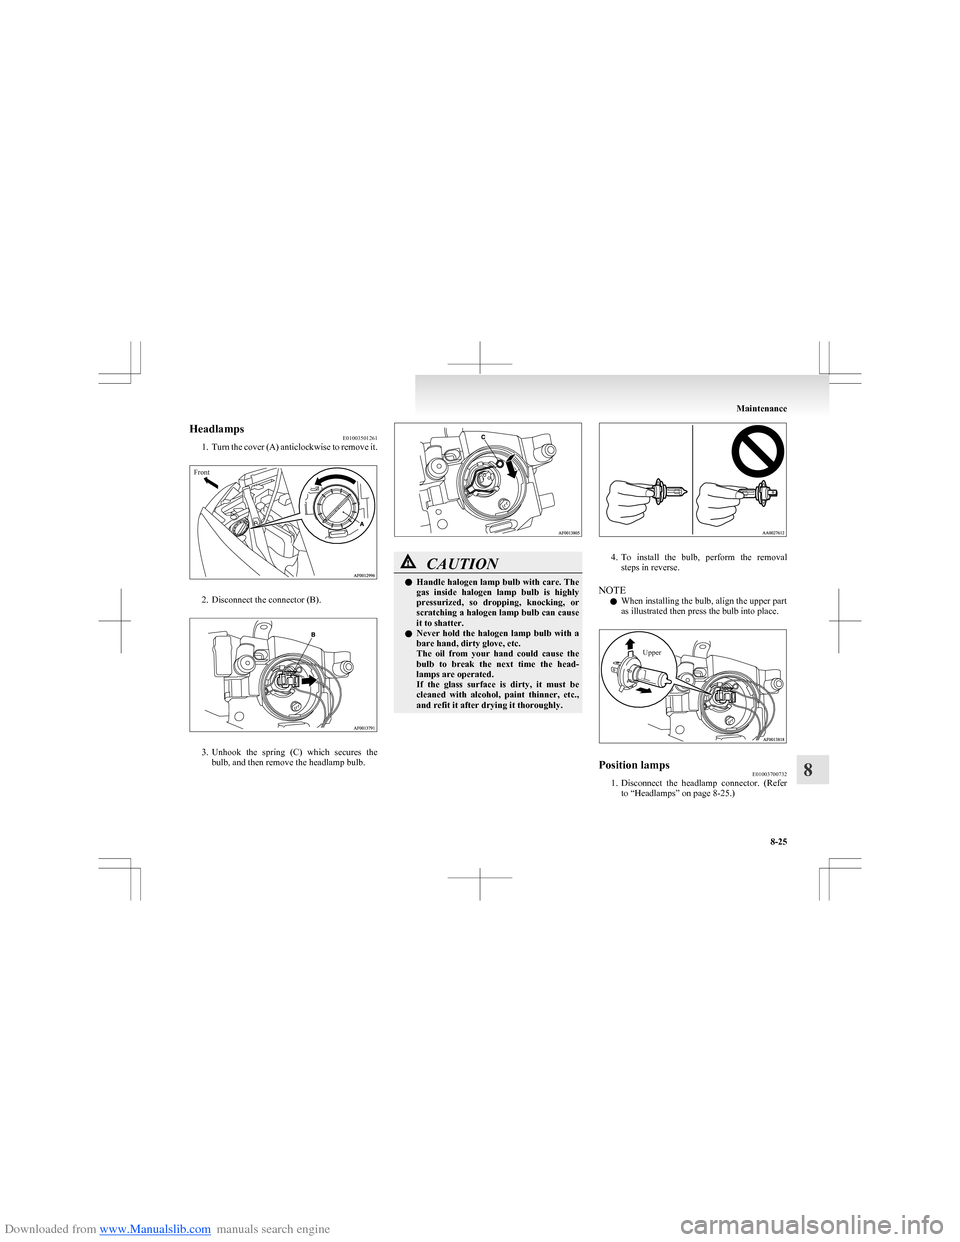
1. Turn the cover (A) anticlockwise to remove it.Front
2. Disconnect the connector (B).
3.Unhook the spring (C) which secures the
bulb, and then remove the headlamp bulb.
CAUTIONl Handle halogen lamp bulb with care. The
gas inside halogen lamp bulb is highly
pressurized, so dropping, knocking, or
scratching a halogen lamp bulb can cause
it to shatter.
l Never hold the halogen lamp bulb with a
bare hand, dirty glove, etc.
The oil from your hand could cause the
bulb to break the next time the head-
lamps are operated.
If the glass surface is dirty, it must be
cleaned with alcohol, paint thinner, etc.,
and refit it after drying it thoroughly.
4. To install the bulb, perform the removal
steps in reverse.
NOTE l When installing the bulb, align the upper part
as illustrated then press the bulb into place.
UpperPosition lamps E01003700732
1.Disconnect the headlamp connector. (Refer
to “Headlamps” on page 8-25.)
Maintenance
8-25
8