stop start MITSUBISHI COLT 2011 (in English) Owner's Guide
[x] Cancel search | Manufacturer: MITSUBISHI, Model Year: 2011, Model line: COLT, Model: MITSUBISHI COLT 2011Pages: 274, PDF Size: 17.88 MB
Page 133 of 274
lThe ABS warning lamp can illuminate if the
battery voltage is insufficient when the en-
gine is started. In this case, it does not indi-
cate an ABS fault.
Charge the battery by allowing the engine to
idle for a while.
If the battery has been charged but the ABS
warning lamp continues to illuminate or illu-
minates intermittently, we recommend you
to consult a MITSUBISHI MOTORS Author-
ized Service Point.
If the ABS warning lamp and brake warning
lamp illuminate at the same time
l The brake force distribution function may
not work, so hard braking could make the ve-
hicle unstable.
Avoid hard braking and high-speed driving.
Stop the vehicle in a safe place and we rec-
ommend you to consult a MITSUBISHI
MOTORS Authorized Service Point.
NOTE l Immediately after the vehicle starts moving
after engine start up, a whining sound of a mo-
tor will be heard from the engine compart-
ment. If the brake pedal is depressed at that
moment, a brake pedal pulsating is felt.
This whining sound and pulsation are due to
the self-diagnosis operation of the ABS and
does not indicate a malfunction.
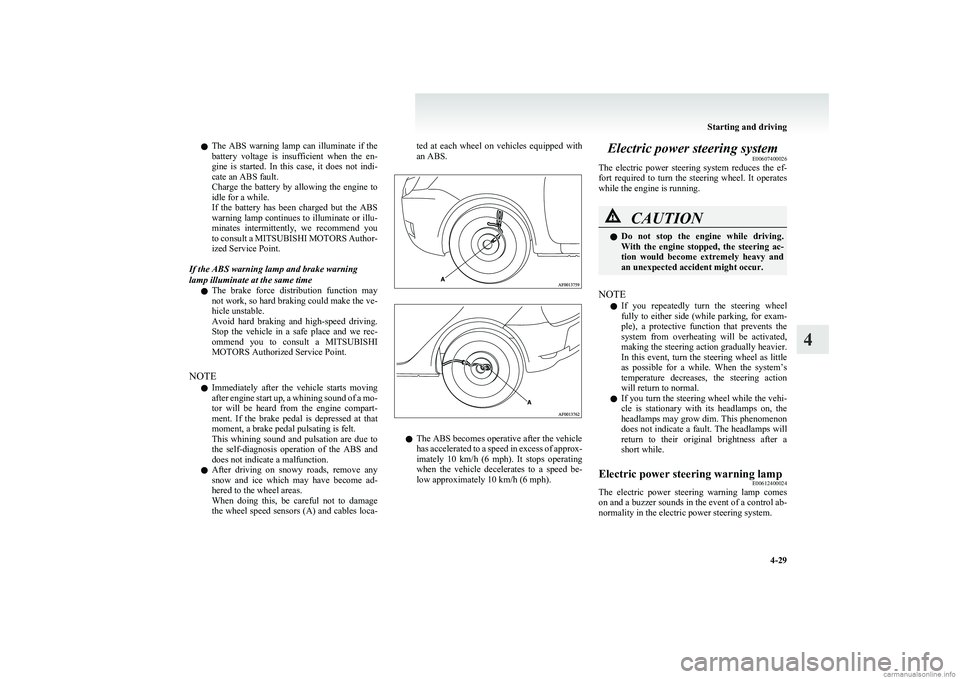
l After driving on snowy roads, remove any
snow and ice which may have become ad-
hered to the wheel areas.
When doing this, be careful not to damage
the wheel speed sensors (A) and cables loca-ted at each wheel on vehicles equipped with
an ABS.
l The ABS becomes operative after the vehicle
has accelerated to a speed in excess of approx-
imately 10 km/h (6 mph). It stops operating
when the vehicle decelerates to a speed be-
low approximately 10 km/h (6 mph).
Electric power steering system E00607400026
The electric power steering system reduces the ef-
fort required to turn the steering wheel. It operates
while the engine is running.CAUTIONl Do not stop the engine while driving.
With the engine stopped, the steering ac-
tion would become extremely heavy and
an unexpected accident might occur.
NOTE
l If you repeatedly turn the steering wheel
fully to either side (while parking, for exam-
ple), a protective function that prevents the
system from overheating will be activated,
making the steering action gradually heavier.
In this event, turn the steering wheel as little
as possible for a while. When the system’s
temperature decreases, the steering action
will return to normal.
l If you turn the steering wheel while the vehi-
cle is stationary with its headlamps on, the
headlamps may grow dim. This phenomenon
does not indicate a fault. The headlamps will
return to their original brightness after a
short while.
Electric power steering warning lamp E00612400024
The electric power steering warning lamp comes
on and a buzzer sounds in the event of a control ab-
normality in the electric power steering system.
Starting and driving
4-29
4
Page 134 of 274
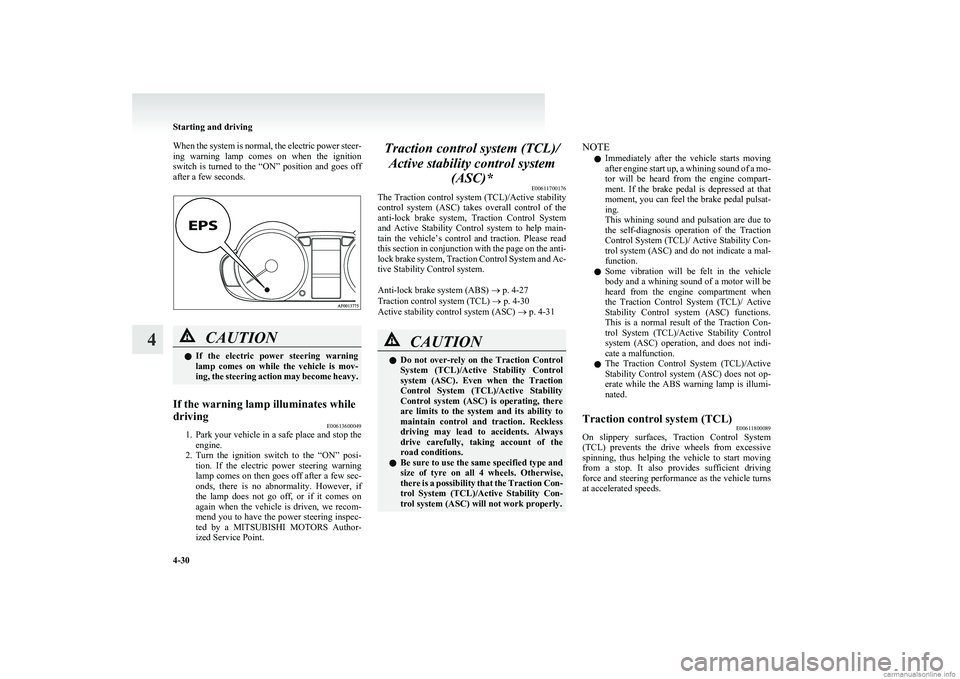
When the system is normal, the electric power steer-
ing warning lamp comes on when the ignition
switch is turned to the “ON” position and goes off
after a few seconds.CAUTIONl If the electric power steering warning
lamp comes on while the vehicle is mov-
ing, the steering action may become heavy.If the warning lamp illuminates while
driving E00613600049
1.Park your vehicle in a safe place and stop the
engine.
2. Turn the ignition switch to the “ON” posi-
tion. If the electric power steering warning
lamp comes on then goes off after a few sec-
onds, there is no abnormality. However, if
the lamp does not go off, or if it comes on
again when the vehicle is driven, we recom-
mend you to have the power steering inspec-
ted by a MITSUBISHI MOTORS Author-
ized Service Point.
Traction control system (TCL)/
Active stability control system (ASC)* E00611700176
The Traction control system (TCL)/Active stability
control system (ASC) takes overall control of the
anti-lock brake system, Traction Control System
and Active Stability Control system to help main-
tain the vehicle’s control and traction. Please read
this section in conjunction with the page on the anti-
lock brake system, Traction Control System and Ac-
tive Stability Control system.
Anti-lock brake system (ABS) ® p. 4-27
Traction control system (TCL) ® p. 4-30
Active stability control system (ASC) ® p. 4-31CAUTIONl Do not over-rely on the Traction Control
System (TCL)/Active Stability Control
system (ASC). Even when the Traction
Control System (TCL)/Active Stability
Control system (ASC) is operating, there
are limits to the system and its ability to
maintain control and traction. Reckless
driving may lead to accidents. Always
drive carefully, taking account of the
road conditions.
l Be sure to use the same specified type and
size of tyre on all 4 wheels. Otherwise,
there is a possibility that the Traction Con-
trol System (TCL)/Active Stability Con-
trol system (ASC) will not work properly.NOTE
l Immediately after the vehicle starts moving
after engine start up, a whining sound of a mo-
tor will be heard from the engine compart-
ment. If the brake pedal is depressed at that
moment, you can feel the brake pedal pulsat-
ing.
This whining sound and pulsation are due to
the self-diagnosis operation of the Traction
Control System (TCL)/ Active Stability Con-
trol system (ASC) and do not indicate a mal-
function.
l Some vibration will be felt in the vehicle
body and a whining sound of a motor will be
heard from the engine compartment when
the Traction Control System (TCL)/ Active
Stability Control system (ASC) functions.
This is a normal result of the Traction Con-
trol System (TCL)/Active Stability Control
system (ASC) operation, and does not indi-
cate a malfunction.
l The Traction Control System (TCL)/Active
Stability Control system (ASC) does not op-
erate while the ABS warning lamp is illumi-
nated.Traction control system (TCL) E00611800089
On slippery surfaces, Traction Control System
(TCL) prevents the drive wheels from excessive
spinning, thus helping the vehicle to start moving
from a stop. It also provides sufficient driving
force and steering performance as the vehicle turns
at accelerated speeds.
Starting and driving
4-30
4
Page 135 of 274
CAUTIONlWhen driving a vehicle on a snowy or icy
road, be sure to install snow tyres and
drive the vehicle at moderate speeds.
NOTE
l When moving out of mud or fresh snow, press-
ing the accelerator pedal may not allow the
engine speed to increase.
Active stability control system (ASC) E00612000091
The Active Stability Control system (ASC) is de-
signed to help maintain the vehicle’s control in slip-
pery conditions, or during rapid steering manoeu-
vres. It works by controlling the engine output and
brake on each wheel.
NOTE l The Active Stability Control system (ASC)
functions at speeds of approximately
10 km/h (6 mph) or higher.
Traction control system (TCL)/Active
stability control system (ASC) indica-
tion lamp E00612100119
The Traction Control System (TCL) and Active Sta-
bility Control system (ASC) share the same indica-
tion lamp.
The indication lamp should illuminate when the ig-
nition switch is turned to the “ON” position, and
should go off after a few seconds. Always make
sure that the lamp goes off before begining to drive.
If the indication lamp stays on or does not illumi-
nate when the ignition switch is turned to the “ON”
position, we recommend you to consult a
MITSUBISHI MOTORS Authorized Service Point.
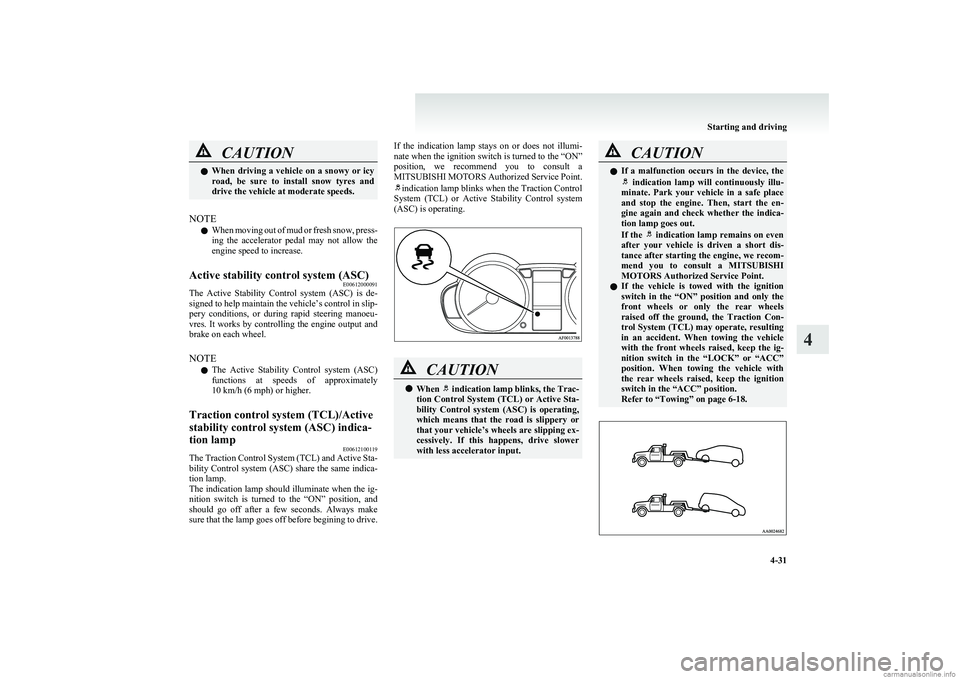
indication lamp blinks when the Traction Control
System (TCL) or Active Stability Control system
(ASC) is operating.
CAUTIONl When indication lamp blinks, the Trac-
tion Control System (TCL) or Active Sta-
bility Control system (ASC) is operating,
which means that the road is slippery or
that your vehicle’s wheels are slipping ex-
cessively. If this happens, drive slower
with less accelerator input.CAUTIONl If a malfunction occurs in the device, the indication lamp will continuously illu-
minate. Park your vehicle in a safe place
and stop the engine. Then, start the en-
gine again and check whether the indica-
tion lamp goes out.
If the
indication lamp remains on even
after your vehicle is driven a short dis-
tance after starting the engine, we recom-
mend you to consult a MITSUBISHI
MOTORS Authorized Service Point.
l If the vehicle is towed with the ignition
switch in the “ON” position and only the
front wheels or only the rear wheels
raised off the ground, the Traction Con-
trol System (TCL) may operate, resulting
in an accident. When towing the vehicle
with the front wheels raised, keep the ig-
nition switch in the “LOCK” or “ACC”
position. When towing the vehicle with
the rear wheels raised, keep the ignition
switch in the “ACC” position.
Refer to “Towing” on page 6-18.
Starting and driving
4-31
4
Page 147 of 274
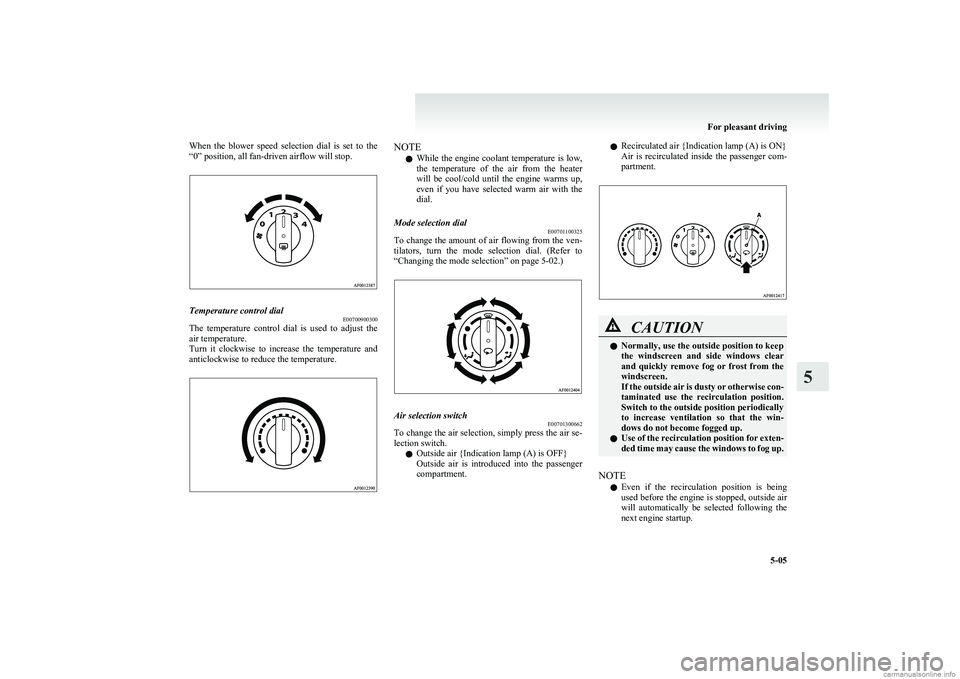
When the blower speed selection dial is set to the
“0” position, all fan-driven airflow will stop.Temperature control dial E00700900300
The temperature control dial is used to adjust the
air temperature.
Turn it clockwise to increase the temperature and
anticlockwise to reduce the temperature.
NOTE
l While the engine coolant temperature is low,
the temperature of the air from the heater
will be cool/cold until the engine warms up,
even if you have selected warm air with the
dial.Mode selection dial E00701100325
To change the amount of air flowing from the ven-
tilators, turn the mode selection dial. (Refer to
“Changing the mode selection” on page 5-02.)
Air selection switch E00701300662
To change the air selection, simply press the air se-
lection switch.
l Outside air {Indication lamp (A) is OFF}
Outside air is introduced into the passenger
compartment.
l Recirculated air {Indication lamp (A) is ON}
Air is recirculated inside the passenger com-
partment.CAUTIONl Normally, use the outside position to keep
the windscreen and side windows clear
and quickly remove fog or frost from the
windscreen.
If the outside air is dusty or otherwise con-
taminated use the recirculation position.
Switch to the outside position periodically
to increase ventilation so that the win-
dows do not become fogged up.
l Use of the recirculation position for exten-
ded time may cause the windows to fog up.
NOTE
l Even if the recirculation position is being
used before the engine is stopped, outside air
will automatically be selected following the
next engine startup.
For pleasant driving
5-05
5
Page 154 of 274
It is recommended that the refrigerant be recovered
and recycled for further use.
During a long period of disuse
The air conditioning should be operated for at least
five minutes each week, even in cold weather. This
is to prevent poor lubrication of the compressor in-
ternal parts and to maintain the air conditioning in
the best operating condition.Air purifier E00708400024
An air filter has been incorporated into this air con-
ditioning so that dirt and dust are cleaned from the
air.
Replace the air filter periodically as its ability to
clean the air will be reduced as it collects pollen
and dirt. For the maintenance interval, refer to the
“SERVICE BOOKLET”.
NOTE l Operation in certain conditions such as driv-
ing on a dusty road and frequent use of the
air conditioning can lead to reduction of serv-
ice life of the filter. When the air flow rate
suddenly drops or when the windscreen or
windows start to fog up easily, the air filter
requires replacement.
We recommend you to have it checked.LW/MW/FM electronic tuning
radio with CD player* E00708502175
The audio system can be used when the ignition
switch is in the “ON” or “ACC” position.
NOTE l To listen to the audio system while the en-
gine is stopped, turn the ignition key to the
“ACC” position.
For Clear Tec models, the audio system will
continue to operate if the ignition switch is in
the “ON” position when the engine stops au-
tomatically. However, in some cases, the au-
dio system may stop producing sound or turn
off.
l If a cellular phone is used inside the vehicle,
it may create noise from the audio equip-
ment. This does not mean that anything is
wrong with your audio equipment. In such a
case, use the cellular phone at a place as far
away as possible from the audio equipment.
l If foreign objects or water get into the audio
equipment, or if smoke or a strange odour
comes from it, immediately turn off the au-
dio system. We recommend you to have it
checked. Never try to repair it by yourself.
Avoid continuous usage without inspection
by a qualified person.
For pleasant driving
5-12
5
Page 166 of 274
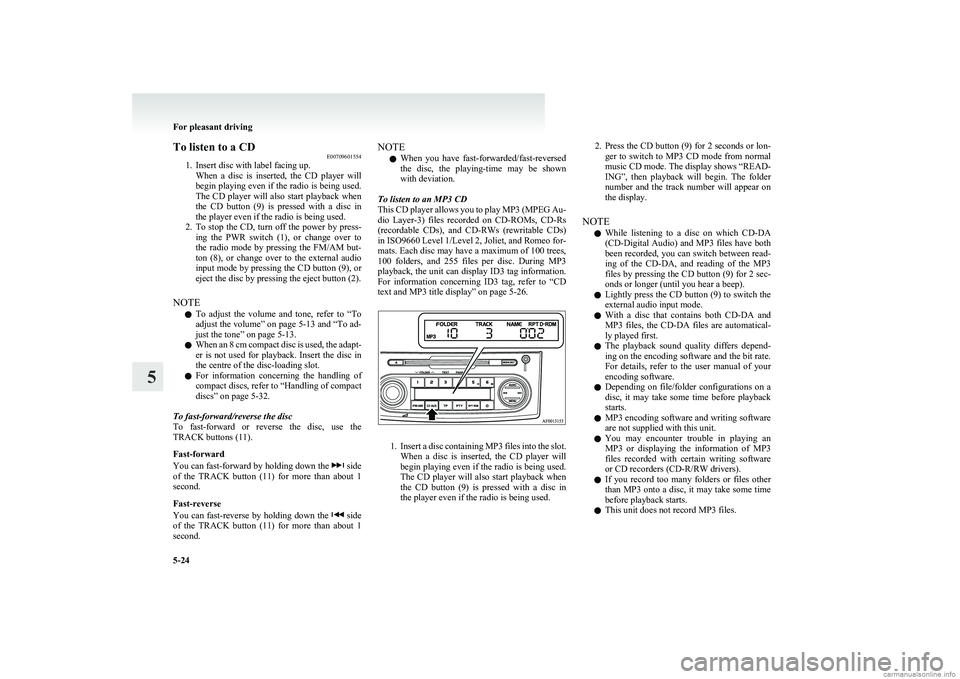
To listen to a CDE00709601554
1. Insert disc with label facing up.
When a disc is inserted, the CD player will
begin playing even if the radio is being used.
The CD player will also start playback when
the CD button (9) is pressed with a disc in
the player even if the radio is being used.
2. To stop the CD, turn off the power by press-
ing the PWR switch (1), or change over to
the radio mode by pressing the FM/AM but-
ton (8), or change over to the external audio
input mode by pressing the CD button (9), or
eject the disc by pressing the eject button (2).
NOTE l To adjust the volume and tone, refer to
“To
adjust the volume” on page 5-13 and “To ad-
just the tone” on page 5-13.
l When an 8 cm compact disc is used, the adapt-
er is not used for playback. Insert the disc in
the centre of the disc-loading slot.
l For information concerning the handling of
compact discs, refer to “Handling of compact
discs” on page 5-32.
To fast-forward/reverse the disc
To fast-forward or reverse the disc, use the
TRACK buttons (11).
Fast-forward
You can fast-forward by holding down the
side
of the TRACK button (11) for more than about 1
second.
Fast-reverse
You can fast-reverse by holding down the
side
of the TRACK button (11) for more than about 1
second.
NOTE
l When you have fast-forwarded/fast-reversed
the disc, the playing-time may be shown
with deviation.
To listen to an MP3 CD
This CD player allows you to play MP3 (MPEG Au-
dio Layer-3) files recorded on CD-ROMs, CD-Rs
(recordable CDs), and CD-RWs (rewritable CDs)
in ISO9660 Level 1/Level 2, Joliet, and Romeo for-
mats. Each disc may have a maximum of 100 trees,
100 folders, and 255 files per disc. During MP3
playback, the unit can display ID3 tag information.
For information concerning ID3 tag, refer to “CD
text and MP3 title display” on page 5-26.
1. Insert a disc containing MP3 files into the slot.
When a disc is inserted, the CD player will
begin playing even if the radio is being used.
The CD player will also start playback when
the CD button (9) is pressed with a disc in
the player even if the radio is being used.
2. Press the CD button (9) for 2 seconds or lon-
ger to switch to MP3 CD mode from normal
music CD mode. The display shows “READ-
ING”, then playback will begin. The folder
number and the track number will appear on
the display.
NOTE l While listening to a disc on which
CD-DA
(CD-Digital Audio) and MP3 files have both
been recorded, you can switch between read-
ing of the CD-DA, and reading of the MP3
files by pressing the CD button (9) for 2 sec-
onds or longer (until you hear a beep).
l Lightly press the CD button (9) to switch the
external audio input mode.
l With a disc that contains both
CD-DA and
MP3 files, the CD-DA files are automatical-
ly played first.
l The playback sound quality differs depend-
ing on the encoding software and the bit rate.
For details, refer to the user manual of your
encoding software.
l Depending on file/folder configurations on a
disc, it may take some time before playback
starts.
l MP3 encoding software and writing software
are not supplied with this unit.
l You may encounter trouble in playing an
MP3 or displaying the information of MP3
files recorded with certain writing software
or CD recorders (CD-R/RW drivers).
l If you record too many folders or files other
than MP3 onto a disc, it may take some time
before playback starts.
l This unit does not record MP3 files.
For pleasant driving
5-24
5
Page 175 of 274
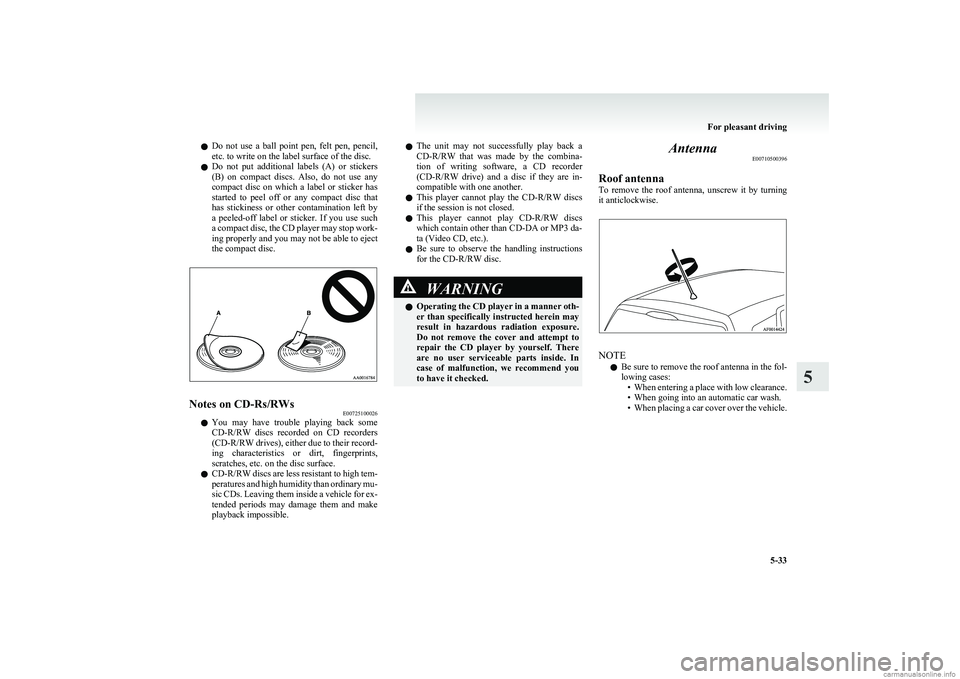
lDo not use a ball point pen, felt pen, pencil,
etc. to write on the label surface of the disc.
l Do not put additional labels (A) or stickers
(B) on compact discs. Also, do not use any
compact disc on which a label or sticker has
started to peel off or any compact disc that
has stickiness or other contamination left by
a peeled-off label or sticker. If you use such
a compact disc, the CD player may stop work-
ing properly and you may not be able to eject
the compact disc.Notes on CD-Rs/RWs E00725100026
lYou may have trouble playing back some
CD-R/RW discs recorded on CD recorders
(CD-R/RW drives), either due to their record-
ing characteristics or dirt, fingerprints,
scratches, etc. on the disc surface.
l CD-R/RW discs are less resistant to high tem-
peratures and high humidity than ordinary mu-
sic CDs. Leaving them inside a vehicle for ex-
tended periods may damage them and make
playback impossible.
l The unit may not successfully play back a
CD-R/RW that was made by the combina-
tion of writing software, a CD recorder
(CD-R/RW drive) and a disc if they are in-
compatible with one another.
l This player cannot play the
CD-R/RW discs
if the session is not closed.
l This player cannot play
CD-R/RW discs
which contain other than CD-DA or MP3 da-
ta (Video CD, etc.).
l Be sure to observe the handling instructions
for the CD-R/RW disc.WARNINGl Operating the CD player in a manner oth-
er than specifically instructed herein may
result in hazardous radiation exposure.
Do not remove the cover and attempt to
repair the CD player by yourself. There
are no user serviceable parts inside. In
case of malfunction, we recommend you
to have it checked.Antenna E00710500396
Roof antenna
To remove the roof antenna, unscrew it by turning
it anticlockwise.
NOTE
l Be sure to remove the roof antenna in the fol-
lowing cases: •When entering a place with low clearance.
• When going into an automatic car wash.
• When placing a car cover over the vehicle.
For pleasant driving
5-33
5
Page 188 of 274
If the vehicle breaks downE00800101254
If the vehicle breaks down on the road, move it to
the shoulder and use the hazard warning flashers and/
or the warning triangle etc.
Refer to “Hazard warning flasher switch” on page
3-23.
If the engine stops/fails
Vehicle operation and control are affected if the en-
gine stops.
Before moving the vehicle to a safe area, be aware
of the following:
l The brake booster becomes inoperative and
the pedal effort will increase. Press down the
brake pedal harder than usual.
l Since the power steering system is no longer
operative, the steering wheel feels heavy
when turning it.Emergency starting E00800501900
If the engine cannot be started because the battery
is weak or dead, the battery from another vehicle
can be used with jumper cables to start the engine.WARNINGl To start the engine using jumper cables
connected to another vehicle, perform the
correct procedures according to the in-
struction below. Incorrect procedures
could result in a fire or explosion or dam-
age to the vehicles.
1. Get the vehicles close enough so the jumper
cables can reach, but be sure the vehicles
aren’t touching each other.
If they are, it could cause a ground connec-
tion you don’t want. The vehicle will not
start, and the bad grounding could damage
the electrical systems.
CAUTIONl Check the other vehicle. It must have a 12-
volt battery.
If the other system isn’t 12-volt, shorting
can damage both vehicles.2. You could be injured if the vehicles move.
Set the parking brake firmly on each vehicle.
Put an automatic transmission in “P”
(PARK) or a manual transmission and an au-
tomated manual transmission in “N” (Neu-
tral). With an automated manual transmis-
sion vehicle, confirm that “N” is shown by
the allshift indicator display. Turn off the ig-
nition switch.WARNINGl Turn off the ignition on both vehicles be-
forehand. Make sure that the cables or
your clothes cannot be caught by the fan
or drive belt. Personal injury could result.
NOTE
l Turn off all lamps, heater and other electrical
loads. This will avoid sparks and help save
both batteries.
3. Make sure battery electrolyte is at the proper
level. Refer to “Battery” on page 8-10.
WARNINGl If electrolyte fluid is not visible, or ap-
pears to be frozen, Do Not Attempt Jump
Starting!
A battery might rupture or explode if the
temperature is below the freezing point
or if it is not filled to the proper level.
For emergencies
6-02
6
Page 190 of 274
CAUTIONlDo not attempt to start the engine by pull-
ing or pushing the vehicle.
It could damage your vehicle.
l Always wear protective eye goggles when
working near the battery.
l Keep the battery out of the reach of chil-
dren.
NOTE
l If the vehicle is put in motion without fully
charging the battery, it might cause the loss
of smooth engine operation and the anti-lock
brake warning lamp to illuminate. Refer to
“ Anti-lock brake system (ABS)” on page
4-27.
l For Clear Tec models, press the “Auto Stop
& Go (AS&G) OFF” switch to deactivate the
Auto Stop & Go (AS&G) system and pre-
vent the engine from automatically stopping
before the battery is sufficiently charged. Re-
fer to “To deactivate” on page 4-16.
Engine overheating E00800601839
If the high coolant temperature warning lamp flash-
es during the engine is running, the engine may be
overheating. If this occurs, take the following cor-
rective measures: 1. Stop the vehicle in a safe place.
2. Check whether steam is coming from the en-
gine compartment.
[ If steam does not come from the engine com-
partment]
With the engine still running, raise the bon-
net to ventilate the engine compartment.
NOTE l For Clear Tec models, press the “Auto Stop
& Go (AS&G) OFF” switch to deactivate the
Auto Stop & Go (AS&G) system before stop-
ping the vehicle. Refer to “To deactivate” on
page 4-16.
[If steam is coming from the engine compart-
ment]
Stop the engine, and when the steam stops,
raise the bonnet to ventilate the engine com-
partment. Restart the engine.WARNINGl Do not open the bonnet while steam is com-
ing from the engine compartment. It
could cause steam or hot water to spurt
out, causing burns. Hot water could spurt
out even when there is no steam coming
out, and some parts will be very hot. Be
very careful when opening the bonnet.WARNINGl Be careful of hot steam, which could blow
off the reserve tank cap.
l Do not attempt to remove the radiator
cap while the engine is hot.
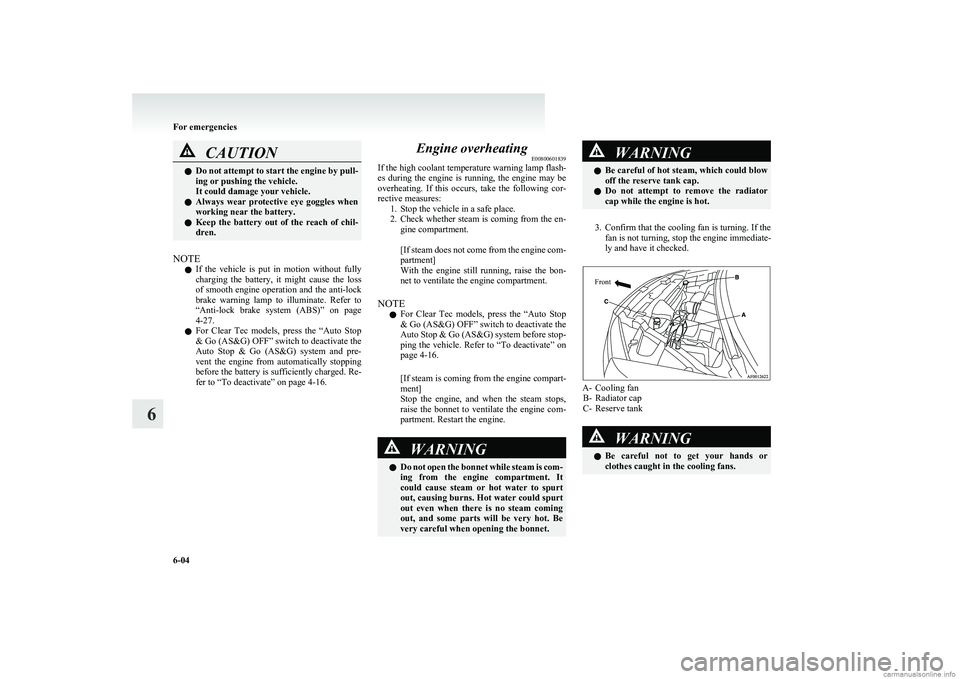
3. Confirm that the cooling fan is turning. If the
fan is not turning, stop the engine immediate-
ly and have it checked.
Front
A- Cooling fan B- Radiator cap
C- Reserve tank
WARNINGl Be careful not to get your hands or
clothes caught in the cooling fans.
For emergencies
6-04
6
Page 196 of 274
lThe surface of the compressor will get hot
while the compressor is running. Do not
keep the compressor running continuously
for more than 6 minutes. After using the com-
pressor, wait for the compressor to cool be-
fore using it again.
l If the tyre pressure does not rise to the neces-
sary of at least 1.8 bar level within 5 mi-
nutes, the tyre may be so severely damaged
that the tyre sealant cannot be used to effect
an emergency repair. Please contact a
MITSUBISHI MOTORS Authorized Service
Point or another specialist in this event.
l Simply putting sealant and air into the tyre us-
ing the tyre repair kit does not seal the punc-
ture hole. Air will leak through the puncture
hole until the emergency repair procedure is
completed (through step 17 of these instruc-
tions).
15. When you have inflated the tyre to the speci-
fied pressure, stow the compressor and bottle
in the vehicle and promptly start driving the
vehicle so that the tire sealant can spread even-
ly in the tyre. Drive with great care. Do not
exceed a speed of 80 km/h (50 mph). Ob-
serve local speed limits.
Remove the “max. 80 km/h ” or “max.
50 mph ” label from the bottle, that must be
displayed on the instrument panel within the
driver’s field of view.CAUTIONl If you sense any abnormality while driv-
ing, stop the vehicle and contact a
MITSUBISHI MOTORS Authorized
Service Point or another specialist. Other-
wise the tyre pressure may drop before
the emergency repair procedure is com-
pleted, rendering the vehicle unsafe.
NOTE
l Driving faster than 80 km/h
(50 mph) can
make the vehicle vibrate.
16. After driving for 10 minutes, check the tyre
pressure using the air pressure gauge on the
compressor.
If the tyre pressure is not sufficient, inflate
the tyre to the specified pressure again and
drive the vehicle carefully without exceeding
a speed of 80 km/h (50 mph).
CAUTIONl If the tyre pressure is lower than the min-
imum permitted pressure (1.3 bar
{ 130 kPa}), the tyre cannot successfully
be repaired with the tyre sealant. Do not
drive the vehicle any further. Contact a
MITSUBISHI MOTORS Authorized
Service Point or another specialist.
17. After driving for 10 minutes, check the tyre
pressure using the air pressure gauge on the
compressor. (Refer to “Tyre inflation pres-
sures” on page 8-12.) If the tyre pressure
has apparently not dropped, the emergency re-
pair procedure is complete. You must still
not exceed a speed of 80 km/h (50 mph).
Observe local speed limits.
NOTE l If the tyre pressure has dropped below the
specified level when you check it at the end
of the repair procedure, do not drive the vehi-
cle any further. Contact a MITSUBISHI
MOTORS Authorized Service Point or anoth-
er specialist.
l In cold conditions (when the ambient temper-
ature is 0 °C or lower), the time and driving
distance necessary until completion of the re-
pair can be longer than in warmer conditions,
meaning that the tyre pressure can drop be-
low the specified level even when you have
inflated the tyre a second time and subsequent-
ly driven the vehicle. If this happens, inflate
the tyre to the specified pressure once more,
drive for about 10 minutes or 5 km (3 miles),
then check the tyre pressure again. If the tyre
pressure has again dropped below the speci-
fied level, stop driving the vehicle and con-
tact a MITSUBISHI MOTORS Authorized
Service Point or another specialist.
18. Then immediately drive with great care to a
MITSUBISHI MOTORS Authorized Service
Point or another specialist and have tyre re-
pair/replacement performed.
For emergencies
6-10
6