start stop button MITSUBISHI COLT 2011 Owner's Manual (in English)
[x] Cancel search | Manufacturer: MITSUBISHI, Model Year: 2011, Model line: COLT, Model: MITSUBISHI COLT 2011Pages: 274, PDF Size: 17.88 MB
Page 51 of 274

CAUTIONlThe seat belts must not be twisted when
worn.
3. Pull the belt slightly to adjust slackness as de-
sired.
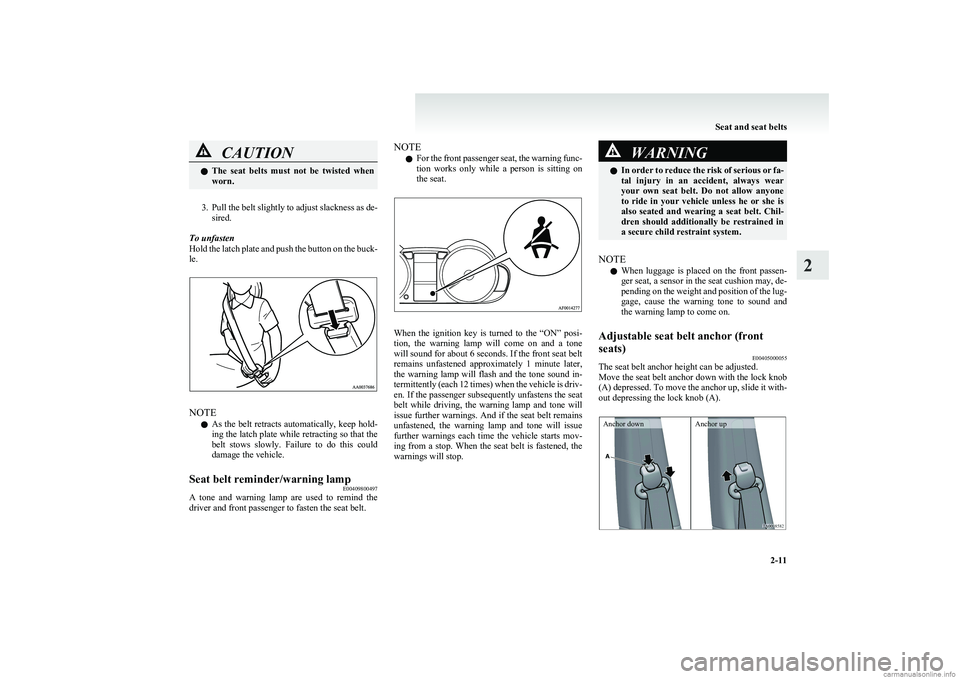
To unfasten
Hold the latch plate and push the button on the buck-
le.
NOTE
l As the belt retracts automatically, keep hold-
ing the latch plate while retracting so that the
belt stows slowly. Failure to do this could
damage the vehicle.
Seat belt reminder/warning lamp E00409800497
A tone and warning lamp are used to remind the
driver and front passenger to fasten the seat belt.
NOTE
l For the front passenger seat, the warning func-
tion works only while a person is sitting on
the seat.
When the ignition key is turned to the “ON” posi-
tion, the warning lamp will come on and a tone
will sound for about 6 seconds. If the front seat belt
remains unfastened approximately 1 minute later,
the warning lamp will flash and the tone sound in-
termittently (each 12 times) when the vehicle is driv-
en. If the passenger subsequently unfastens the seat
belt while driving, the warning lamp and tone will
issue further warnings. And if the seat belt remains
unfastened, the warning lamp and tone will issue
further warnings each time the vehicle starts mov-
ing from a stop. When the seat belt is fastened, the
warnings will stop.
WARNINGl In order to reduce the risk of serious or fa-
tal injury in an accident, always wear
your own seat belt. Do not allow anyone
to ride in your vehicle unless he or she is
also seated and wearing a seat belt. Chil-
dren should additionally be restrained in
a secure child restraint system.
NOTE
l When luggage is placed on the front passen-
ger seat, a sensor in the seat cushion may, de-
pending on the weight and position of the lug-
gage, cause the warning tone to sound and
the warning lamp to come on.
Adjustable seat belt anchor (front
seats) E00405000055
The seat belt anchor height can be adjusted.
Move the seat belt anchor down with the lock knob
(A) depressed. To move the anchor up, slide it with-
out depressing the lock knob (A).
Anchor downAnchor up
Seat and seat belts
2-11
2
Page 110 of 274

Parking brakeE00600501588
To park the vehicle, first bring it to a complete
stop, fully apply the parking brake lever sufficient-
ly to hold the vehicle.
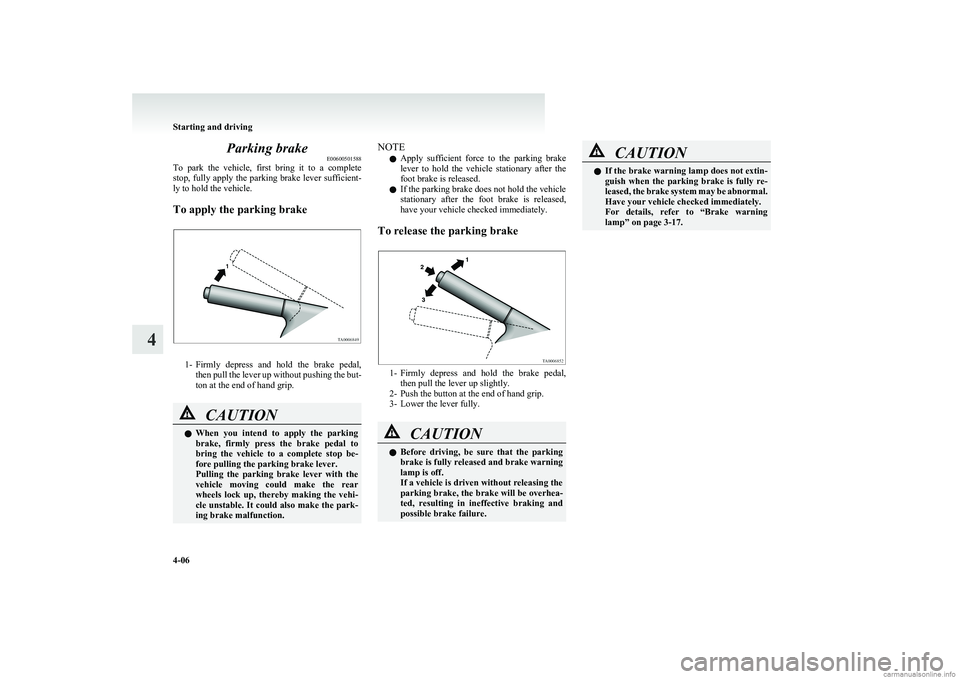
To apply the parking brake
1- Firmly depress and hold the brake pedal,
then pull the lever up without pushing the but-
ton at the end of hand grip.
CAUTIONl When you intend to apply the parking
brake, firmly press the brake pedal to
bring the vehicle to a complete stop be-
fore pulling the parking brake lever.
Pulling the parking brake lever with the
vehicle moving could make the rear
wheels lock up, thereby making the vehi-
cle unstable. It could also make the park-
ing brake malfunction.NOTE
l Apply sufficient force to the parking brake
lever to hold the vehicle stationary after the
foot brake is released.
l If the parking brake does not hold the vehicle
stationary after the foot brake is released,
have your vehicle checked immediately.
To release the parking brake
1- Firmly depress and hold the brake pedal,
then pull the lever up slightly.
2- Push the button at the end of hand grip.
3- Lower the lever fully.
CAUTIONl Before driving, be sure that the parking
brake is fully released and brake warning
lamp is off.
If a vehicle is driven without releasing the
parking brake, the brake will be overhea-
ted, resulting in ineffective braking and
possible brake failure.CAUTIONl If the brake warning lamp does not extin-
guish when the parking brake is fully re-
leased, the brake system may be abnormal.
Have your vehicle checked immediately.
For details, refer to “Brake warning
lamp” on page 3-17.
Starting and driving
4-06
4
Page 166 of 274

To listen to a CDE00709601554
1. Insert disc with label facing up.
When a disc is inserted, the CD player will
begin playing even if the radio is being used.
The CD player will also start playback when
the CD button (9) is pressed with a disc in
the player even if the radio is being used.
2. To stop the CD, turn off the power by press-
ing the PWR switch (1), or change over to
the radio mode by pressing the FM/AM but-
ton (8), or change over to the external audio
input mode by pressing the CD button (9), or
eject the disc by pressing the eject button (2).
NOTE l To adjust the volume and tone, refer to
“To
adjust the volume” on page 5-13 and “To ad-
just the tone” on page 5-13.
l When an 8 cm compact disc is used, the adapt-
er is not used for playback. Insert the disc in
the centre of the disc-loading slot.
l For information concerning the handling of
compact discs, refer to “Handling of compact
discs” on page 5-32.
To fast-forward/reverse the disc
To fast-forward or reverse the disc, use the
TRACK buttons (11).
Fast-forward
You can fast-forward by holding down the
side
of the TRACK button (11) for more than about 1
second.
Fast-reverse
You can fast-reverse by holding down the
side
of the TRACK button (11) for more than about 1
second.
NOTE
l When you have fast-forwarded/fast-reversed
the disc, the playing-time may be shown
with deviation.
To listen to an MP3 CD
This CD player allows you to play MP3 (MPEG Au-
dio Layer-3) files recorded on CD-ROMs, CD-Rs
(recordable CDs), and CD-RWs (rewritable CDs)
in ISO9660 Level 1/Level 2, Joliet, and Romeo for-
mats. Each disc may have a maximum of 100 trees,
100 folders, and 255 files per disc. During MP3
playback, the unit can display ID3 tag information.
For information concerning ID3 tag, refer to “CD
text and MP3 title display” on page 5-26.
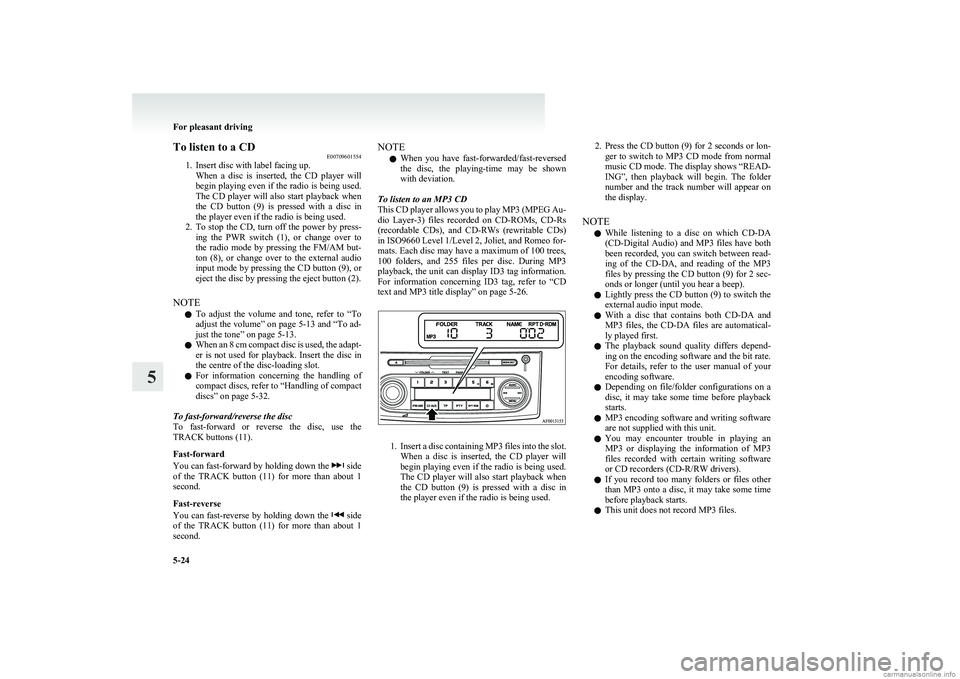
1. Insert a disc containing MP3 files into the slot.
When a disc is inserted, the CD player will
begin playing even if the radio is being used.
The CD player will also start playback when
the CD button (9) is pressed with a disc in
the player even if the radio is being used.
2. Press the CD button (9) for 2 seconds or lon-
ger to switch to MP3 CD mode from normal
music CD mode. The display shows “READ-
ING”, then playback will begin. The folder
number and the track number will appear on
the display.
NOTE l While listening to a disc on which
CD-DA
(CD-Digital Audio) and MP3 files have both
been recorded, you can switch between read-
ing of the CD-DA, and reading of the MP3
files by pressing the CD button (9) for 2 sec-
onds or longer (until you hear a beep).
l Lightly press the CD button (9) to switch the
external audio input mode.
l With a disc that contains both
CD-DA and
MP3 files, the CD-DA files are automatical-
ly played first.
l The playback sound quality differs depend-
ing on the encoding software and the bit rate.
For details, refer to the user manual of your
encoding software.
l Depending on file/folder configurations on a
disc, it may take some time before playback
starts.
l MP3 encoding software and writing software
are not supplied with this unit.
l You may encounter trouble in playing an
MP3 or displaying the information of MP3
files recorded with certain writing software
or CD recorders (CD-R/RW drivers).
l If you record too many folders or files other
than MP3 onto a disc, it may take some time
before playback starts.
l This unit does not record MP3 files.
For pleasant driving
5-24
5