wheel MITSUBISHI ECLIPSE CROSS 2018 (in English) Service Manual
[x] Cancel search | Manufacturer: MITSUBISHI, Model Year: 2018, Model line: ECLIPSE CROSS, Model: MITSUBISHI ECLIPSE CROSS 2018Pages: 417, PDF Size: 74.06 MB
Page 181 of 417
Forward Collision Mitigation sy
stem (FCM) (if so equipped)
5-102 Features and controls
5
• When a vehicle ahead is not completely in your path.• When your vehicle changed lanes, and your vehicle approached immediatelybehind the vehicle ahead.• When a vehicle ahead is towing a trailer.• When a vehicle ahead is a truck loadedwith freight that protrudes rearwardfrom the cargo bed.• When the height of a vehicle ahead isextremely low or its road clearance is extremely high.• When a vehicle ahead is extremely dirty.• When a vehicle ahead is covered with snow.• When a vehicle ahead has a large glasssurface.• When a vehicle ahead does not havereflectors (light reflector) or the position of the reflector is low.• When a vehicle ahead is a car carrier ora similar shaped vehicle.• When accelerating and deceleratingquickly.• When driving on a slippery road coveredby rain water, snow, ice, etc.• When driving on a road with alternating up and down steep slopes.• When driving on a curve.• When driving on a bumpy or rough road.• When driving in dark areas, such as in atunnel or at night.WA R N I N G
• When the system recognizes driver’s steering, accelerating, braking or gear shifting actions as evasive actions to avoid collision.• When the rear of your vehicle is weigheddown with the weight of passengers and luggage.• Up to several seconds after starting driv-ing.• In adverse weather conditions, such asrain, snow, fog or sand-storm.• When the windshield of the sensor por-tion is covered with dirt, water droplets,snow and ice, etc.• When a vehicle ahead or an oncomingvehicle is splashing water, snow or dirt. • When using a windshield washer.• If windshield wipers are not MitsubishiMotors Genuine parts or equivalent. • When the sensor becomes extremely hotor cold.• If the battery becomes weak or runsdown.• When the sensor is affected by stronglight, such as direct sunlight or the head-lights of an oncoming vehicle.
The FCM may not detect a pedestrian in certain situations. Some of these include:• If the pedestrian is shorter than approxi-mately 3.2 feet (1 m) or taller than approximately 6.5 feet (2 m).WA R N I N G
• If the pedestrian is wearing loose-fitting clothes.• If part of a pedestrian’s body is hidden, such as when holdin
g an umbrella, large
bag, etc.• If a pedestrian bends forward, sits or lieson the road.• When a pedestrian is pushing/pullingsomething, such as a stroller, bicycle or wheelchair.• When pedestrians gather in a group.• When a pedestrian clothing appears to be nearly the same color or brightness as its surroundings.• When a pedestrian is very close to anobject, such as a vehicle.• When a pedestrian is in a dark area, suchas at night or in a tunnel.• When a pedestrian is walking fast orrunning.• When a pedestrian suddenly rushes infront of the vehicle.• When the position of a pedestrian is closeto the edge of the vehicle.
When the system recognizes driver’s steering or accelerating actions as evasive actions to avoid a collision, FCM control and alarm functions may be canceled. In certain situations, though there is little or no risk of a collision, the FCM may activate. Examples include: • When overtaking a vehicle.WA R N I N G
BK0252700US.book
102 ページ 2017年10月4日 水曜日 午後4時54分
Page 197 of 417
Tire pressure monitoring system (TPMS) 5-118 Features and controls
5
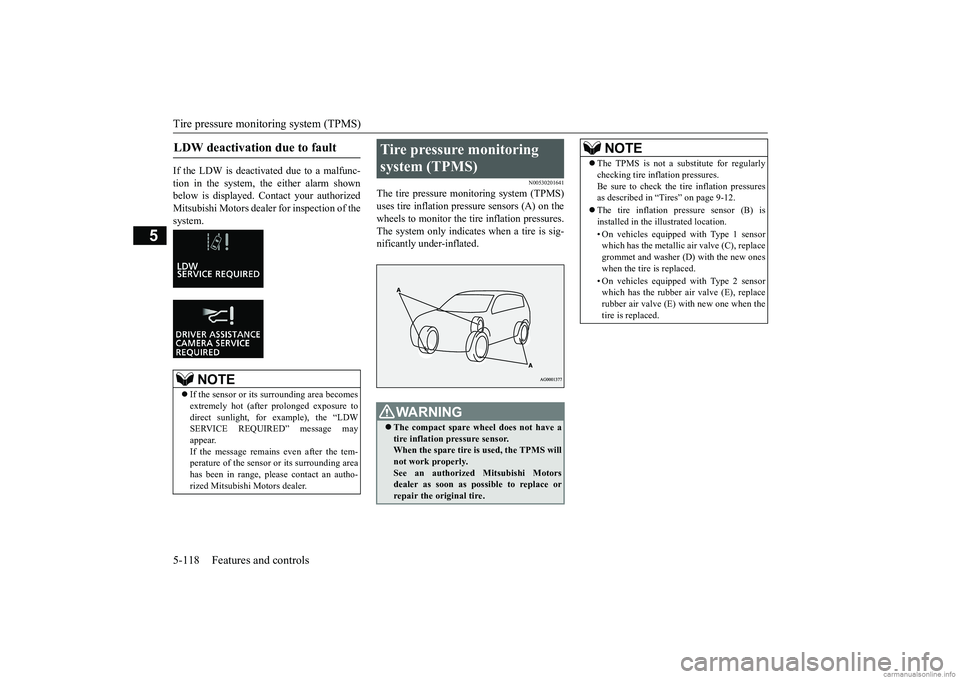
If the LDW is deactivated due to a malfunc- tion in the system, the either alarm shown below is displayed. Contact your authorizedMitsubishi Motors dealer for inspection of the system.
N00530201641
The tire pressure monitoring system (TPMS) uses tire inflation pressure sensors (A) on thewheels to monitor the tire inflation pressures. The system only indicates when a tire is sig- nificantly under-inflated.
LDW deactivation due to fault
NOTE
If the sensor or its surrounding area becomes extremely hot (after prolonged exposure to direct sunlight, for example), the “LDW SERVICE REQUIRED” message mayappear. If the message remains even after the tem- perature of the sensor or its surrounding areahas been in range, please contact an autho- rized Mitsubishi Motors dealer.
Tire pressure monitoring system (TPMS)
WA R N I N G The compact spare wheel does not have a tire inflation pressure sensor. When the spare tire is
used, the TPMS will
not work properly. See an authorized Mitsubishi Motors dealer as soon as possible to replace orrepair the original tire.
NOTE
The TPMS is not a substitute for regularly checking tire inflation pressures. Be sure to check the tire inflation pressures as described in “Tires” on page 9-12. The tire inflation pressure sensor (B) is installed in the illustrated location. • On vehicles equipped with Type 1 sensor which has the metallic air valve (C), replace grommet and washer (D) with the new oneswhen the tire is replaced. • On vehicles equipped with Type 2 sensor which has the rubber air valve (E), replace rubber air valve (E) with new one when the tire is replaced.
BK0252700US.book
118 ページ 2017年10月4日 水曜日 午後4時54分
Page 199 of 417
Tire pressure monitoring system (TPMS) 5-120 Features and controls
5
Each tire, including the spare (if provided), should be checked monthly when cold andinflated to the inflation pressure recom- mended by the vehicle manufacturer on the vehicle placard or tire inflation pressure label.(If your vehicle has tires of a different size than the size indicated on the vehicle placard or tire inflation pressure label, you shoulddetermine the proper tire inflation pressure for those tires.) As an added safety feature, your vehicle hasbeen equipped with a tire pressure monitoring system (TPMS) that illuminates a low tire pressure telltale when one or more of yourtires is significantly under-inflated. Accordingly, when the low tire pressure tell- tale illuminates, you should stop and checkyour tires as soon as possible, and inflate them to the proper pressure. Driving on a sig- nificantly under-inflated tire causes the tire tooverheat and can lead to tire failure.
Under-inflation also reduces fuel efficiency and tire tread life, and may affect the vehi- cle’s handling and stopping ability. Please note that the TPMS is not a substitute forproper tire maintenance, and it is the driver’s responsibility to maintain correct tire pres- sure, even if under-inflation has not reachedthe level to trigger illumination of the TPMS low tire pressure telltale. Your vehicle has also been equipped with a TPMS malfunction indicator to indicate whenthe system is not operating properly. TheTPMS malfunction indicator is combined with the low tire pressure telltale. When the system detects a malfunction, thetelltale will flash for approximately 1 minute and then remain continuously illuminated. This sequence will continue upon subsequentvehicle start-ups as long as the malfunction exists. When the malfunction indicator is illumi-nated, the system may not be able to detect or signal low tire pressure as intended. TPMS malfunctions may occur for a varietyof reasons, including the installation of replacement or alternate tires or wheels on the vehicle that prevent the TPMS from function-ing properly. Always check the TPMS mal- function telltale after replacing one or more tires or wheels on your vehicle to ensure thatthe replacement or alternate tires and wheels
allow the TPMS to continue to function prop- erly.
N00532801579
1. If the tire pressure monitoring system warning light illuminates, avoiding hard braking, sharp steering maneuvers andhigh speeds. You should stop and adjustthe tires to the proper inflation pressure as soon as possible. Adjust the spare tire at the same time. Refer to “Tires” on page9-12.
NOTE
In addition, the warning display is displayed on the information screen in the multi-infor- mation display.
If the warning light / display illuminates while driving
NOTE
In addition, the warning display is displayed on the information screen in the multi-infor- mation display. When inspecting or adjusting the tire pres- sure, do not apply excessive force to thevalve stem to avoid breakage. After inspecting or adjusting the tire pres- sure, always reinstall the valve cap on the valve stem. Without the valve cap, dirt or moisture could get into the valve, resulting in damage to the tire inflation pressure sensor. Do not use metal valve caps, which may cause a metal reaction, resulting in corrosionand damage of the tire inflation pressure sen- sors.
BK0252700US.book
120 ページ 2017年10月4日 水曜日 午後4時54分
Page 200 of 417
Tire pressure monitoring system (TPMS)
Features and controls 5-121
5
2. If the tire pressure monitoring system warning light remains illuminated after you have been driving for approximately20 minutes after you adjust the tire infla- tion pressure, one or more of the tires may have a puncture. Inspect the tire and if ithas a puncture, have it repaired by anauthorized Mitsubishi Motors dealer as soon as possible.
The tire pressure monitoring system may not work normally in the following circum-stances: A wireless facility or device using the same frequency is near the vehicle. Snow or ice is stuck inside the fenders and/or on the wheels. The tire inflation pressure sensor’s battery is dead. Wheels other than Mitsubishi genuine wheels are being used. Wheels that are not fitted with tire infla- tion pressure sensors are being used. Wheels whose ID co
des are not memo-
rized by the vehicle are used. Compact spare tire is fitted as a road wheel.
A window tint that affects the radio wave signals is installed.
N00532900081
If new wheels with new tire inflation pressuresensors are installed, their ID codes must beprogrammed into the tire pressure monitoring system. Have tire and wheel replacement per- formed by an authorized Mitsubishi Motorsdealer to avoid the risk of damaging the tire inflation pressure sensors. If the wheel replacement is not done by an authorizedMitsubishi Motors dealer, it is not covered by your warranty.
Once adjustments have been made, the warn- ing light will go off after a few minutes of driving.WA R N I N G If the warning light / display illuminates while you are driving, avoid hard braking,sharp steering maneuvers and high speeds. Driving with an under-inflated tireadversely affects vehicle performance and can result in an accident.CAUTION If a tire has a puncture, replace that tire with the spare tire. Driving on a punctured tire could lead to an accident. The warning light / display may not illumi- nate immediately in the event of a tire blow-out or rapid leak.NOTE
NOTE
To avoid the risk of damage to the tire infla- tion pressure sensors, have any punctured tire repaired by an authorized Mitsubishi Motors dealer. If the tire repair is not done by an authorized Mitsubishi Motors dealer, it isnot covered by your warranty. Do not use an aerosol puncture-repair spray on any tire. Such a spray could damage the tire inflation pressure sensors.Have any puncture repaired by an authorized Mitsubishi Motors dealer.
NOTE
Tire inflation pressures vary with the ambi- ent temperature. If the vehicle is subjected to large variations in ambient temperature, thetire inflation pressures may be under-inflated (causing the warning light / display come on) when the ambient temperature is relativelylow. If the warning light / display comes on, adjust the tire inflation pressure.
Whenever the tires and wheels are replaced with new ones
BK0252700US.book
121 ページ 2017年10月4日 水曜日 午後4時54分
Page 201 of 417
Tire pressure monitoring system (TPMS) 5-122 Features and controls
5
N00584300042
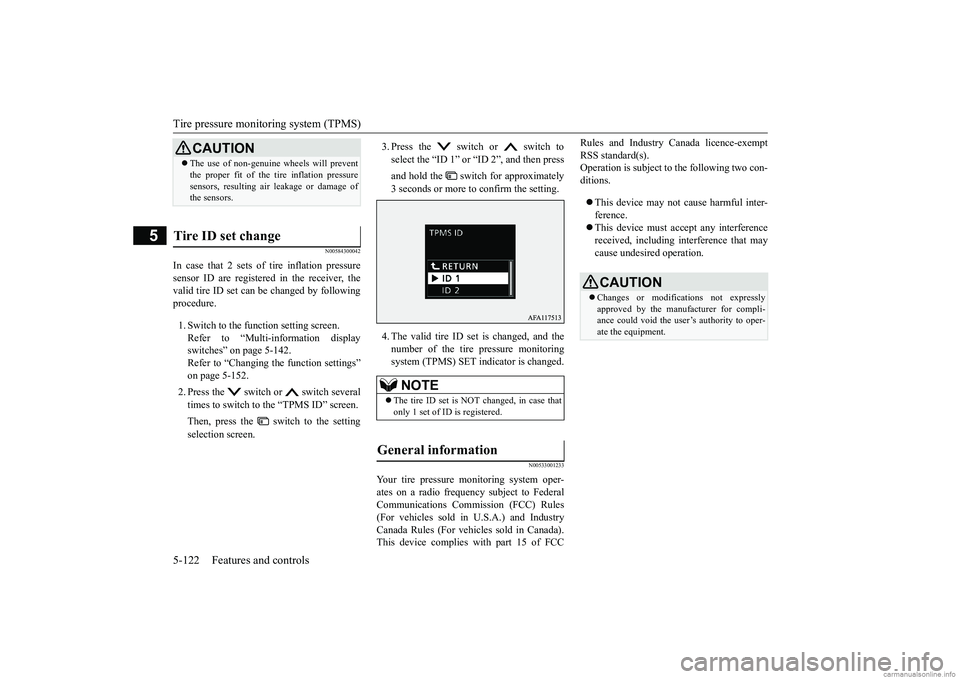
In case that 2 sets of tire inflation pressure sensor ID are registered in the receiver, the valid tire ID set can be changed by followingprocedure. 1. Switch to the function setting screen. Refer to “Multi-information display switches” on page 5-142.Refer to “Changing the function settings” on page 5-152. 2. Press the switch or switch several times to switch to the “TPMS ID” screen. Then, press the switch to the setting selection screen.
3. Press the switch or switch to select the “ID 1” or “ID 2”, and then press and hold the switch for approximately 3 seconds or more to confirm the setting. 4. The valid tire ID set is changed, and the number of the tire pressure monitoringsystem (TPMS) SET indicator is changed.
N00533001233
Your tire pressure monitoring system oper- ates on a radio frequency subject to Federal Communications Commission (FCC) Rules(For vehicles sold in U.S.A.) and Industry Canada Rules (For vehicles sold in Canada). This device complies with part 15 of FCC
Rules and Industry Canada licence-exempt RSS standard(s). Operation is subject to the following two con- ditions. This device may not cause harmful inter- ference. This device must accept any interference received, including interference that maycause undesired operation.
CAUTION The use of non-genuine wheels will prevent the proper fit of the tire inflation pressure sensors, resulting air leakage or damage of the sensors.
Tire ID set change
NOTE
The tire ID set is NOT changed, in case that only 1 set of ID is registered.
General information
CAUTION Changes or modifications not expressly approved by the manufacturer for compli- ance could void the user’s authority to oper-ate the equipment.
BK0252700US.book
122 ページ 2017年10月4日 水曜日 午後4時54分
Page 212 of 417
Multi Around Monitor (if so equipped)
Features and controls 5-133
5
N00587500058
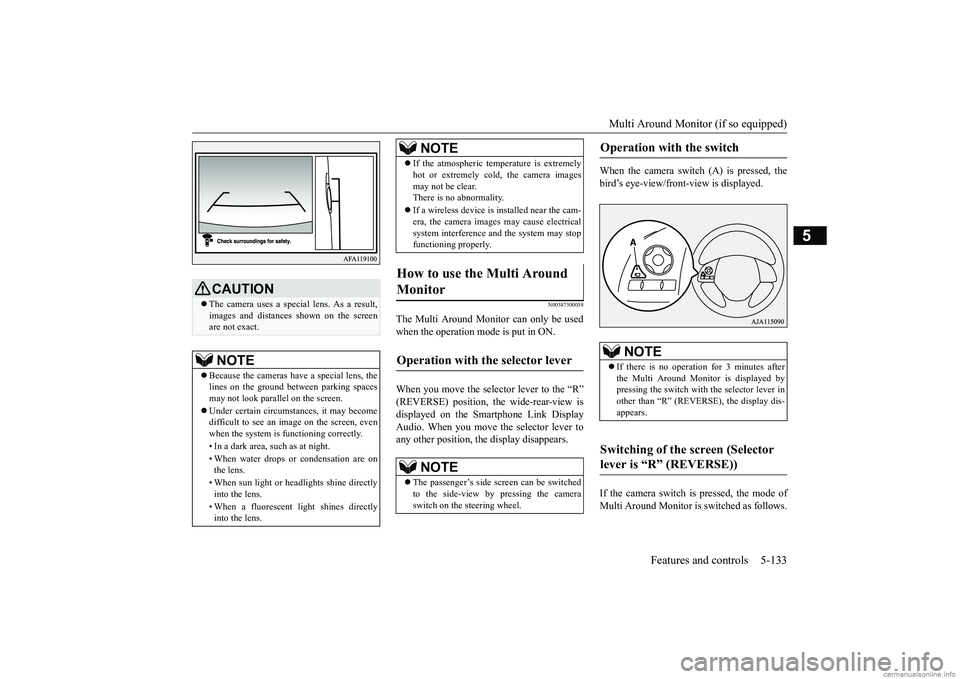
The Multi Around Monitor can only be used when the operation mode is put in ON. When you move the selector lever to the “R” (REVERSE) position, the wide-rear-view isdisplayed on the Smartphone Link Display Audio. When you move the selector lever to any other position, the display disappears.
When the camera switch (A) is pressed, the bird’s eye-view/front-view is displayed. If the camera switch is pressed, the mode of Multi Around Monitor is switched as follows.
CAUTION The camera uses a special lens. As a result, images and distances shown on the screen are not exact.NOTE
Because the cameras have a special lens, the lines on the ground between parking spacesmay not look parallel on the screen. Under certain circumstances, it may become difficult to see an image on the screen, even when the system is functioning correctly. • In a dark area, such as at night. • When water drops or condensation are on the lens. • When sun light or headlights shine directly into the lens. • When a fluorescent light shines directly into the lens.
If the atmospheric temperature is extremely hot or extremely cold, the camera images may not be clear. There is no abnormality. If a wireless device is installed near the cam- era, the camera images may cause electrical system interference and the system may stopfunctioning properly.
How to use the Multi Around Monitor
Operation with the selector lever
NOTE
The passenger’s side screen can be switched to the side-view by pressing the cameraswitch on the steering wheel.NOTE
Operation with the switch
NOTE
If there is no operation for 3 minutes after the Multi Around Monitor is displayed bypressing the switch with the selector lever in other than “R” (REVERSE), the display dis- appears.
Switching of the screen (Selector lever is “R” (REVERSE))
BK0252700US.book
133 ページ 2017年10月4日 水曜日 午後4時54分
Page 213 of 417
Multi Around Monitor (if so equipped) 5-134 Features and controls
5
Wide-rear-view mode
Bird’s eye-
view/Rear-view mode
Side-view/Rear-
view mode If the camera switch is pressed, the mode of Multi Around Monitor is switched, Wide-rear-view mode
Bird’s eye-view/Front-
view mode
Side-view/Front-view mode
OFF
N00587600046
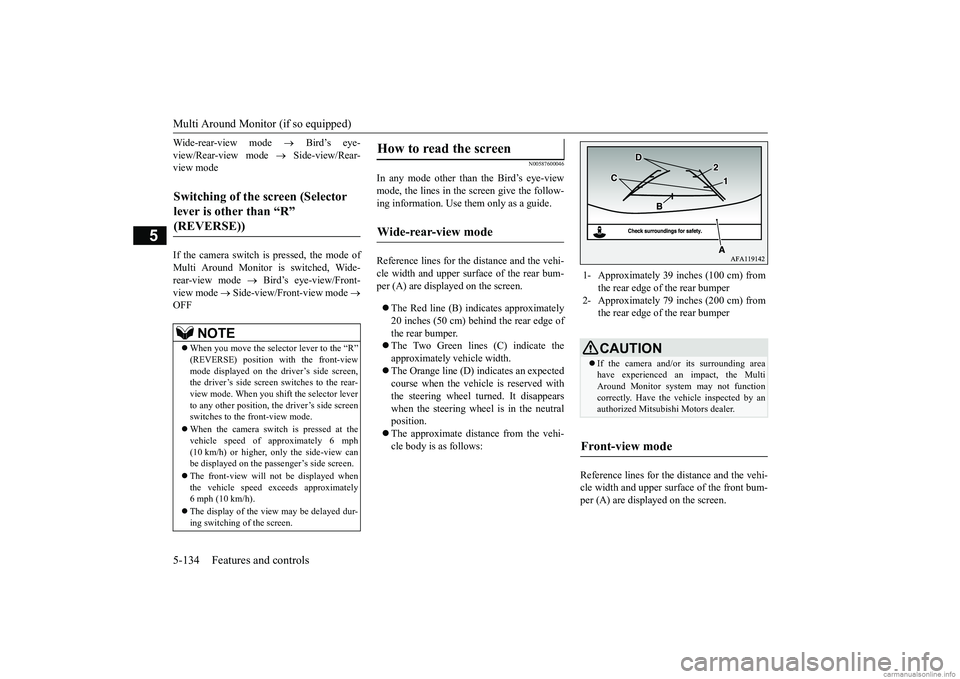
In any mode other than the Bird’s eye-view mode, the lines in the screen give the follow-ing information. Use them only as a guide. Reference lines for the distance and the vehi- cle width and upper surface of the rear bum-per (A) are displayed on the screen. The Red line (B) indicates approximately 20 inches (50 cm) behind the rear edge of the rear bumper. The Two Green lines (C) indicate the approximately vehicle width. The Orange line (D) indicates an expected course when the vehicle is reserved with the steering wheel turned. It disappears when the steering wheel is in the neutralposition. The approximate distance from the vehi- cle body is as follows:
Reference lines for the distance and the vehi- cle width and upper surface of the front bum- per (A) are displayed on the screen.
Switching of the screen (Selector lever is other than “R” (REVERSE))
NOTE
When you move the selector lever to the “R” (REVERSE) position with the front-viewmode displayed on the driver’s side screen, the driver’s side screen switches to the rear- view mode. When you shift the selector leverto any other position, the driver’s side screen switches to the front-view mode. When the camera switch is pressed at the vehicle speed of approximately 6 mph (10 km/h) or higher, only the side-view can be displayed on the passenger’s side screen. The front-view will not be displayed when the vehicle speed exceeds approximately 6 mph (10 km/h). The display of the view may be delayed dur- ing switching of the screen.
How to read the screen
Wide-rear-view mode
1- Approximately 39 inches (100 cm) from
the rear edge of the rear bumper
2- Approximately 79 inches (200 cm) from
the rear edge of the rear bumperCAUTION If the camera and/or its surrounding area have experienced an impact, the MultiAround Monitor system may not function correctly. Have the vehicle inspected by an authorized Mitsubishi Motors dealer.
Front-view mode
BK0252700US.book
134 ページ 2017年10月4日 水曜日 午後4時54分
Page 214 of 417
Multi Around Monitor (if so equipped)
Features and controls 5-135
5
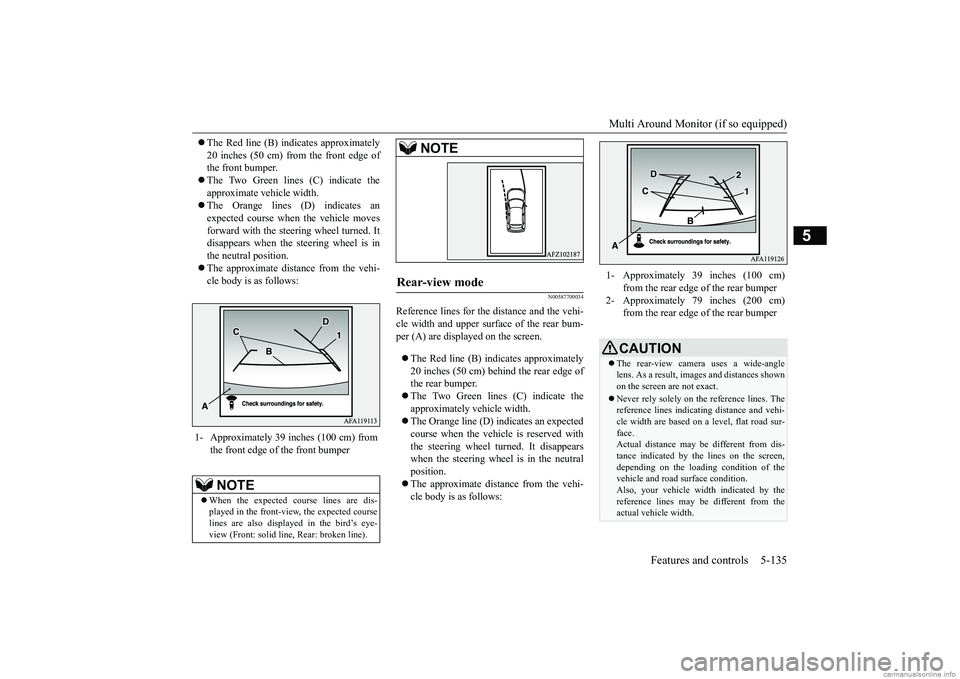
The Red line (B) indicates approximately 20 inches (50 cm) from the front edge of the front bumper. The Two Green lines (C) indicate the approximate vehicle width. The Orange lines (D) indicates an expected course when the vehicle movesforward with the steering wheel turned. It disappears when the steering wheel is in the neutral position. The approximate distance from the vehi- cle body is as follows:
N00587700034
Reference lines for the distance and the vehi-cle width and upper surface of the rear bum-per (A) are displayed on the screen. The Red line (B) indicates approximately 20 inches (50 cm) behind the rear edge of the rear bumper. The Two Green lines (C) indicate the approximately vehicle width. The Orange line (D) indicates an expected course when the vehicle is reserved with the steering wheel turned. It disappears when the steering wheel is in the neutralposition. The approximate distance from the vehi- cle body is as follows:
1- Approximately 39 inches (100 cm) from
the front edge of the front bumperNOTE
When the expected course lines are dis- played in the front-view, the expected courselines are also displayed in the bird’s eye- view (Front: solid line, Rear: broken line).
Rear-view mode
NOTE
1- Approximately 39 inches (100 cm)
from the rear edge of the rear bumper
2- Approximately 79 inches (200 cm)
from the rear edge of the rear bumperCAUTION The rear-view camera uses a wide-angle lens. As a result, images and distances shownon the screen are not exact. Never rely solely on the reference lines. The reference lines indicating distance and vehi- cle width are based on a level, flat road sur- face.Actual distance may be different from dis- tance indicated by the lines on the screen, depending on the loading condition of thevehicle and road surface condition. Also, your vehicle widt
h indicated by the
reference lines may be different from theactual vehicle width.
BK0252700US.book
135 ページ 2017年10月4日 水曜日 午後4時54分
Page 216 of 417
Multi Around Monitor (if so equipped)
Features and controls 5-137
5
N00587900036
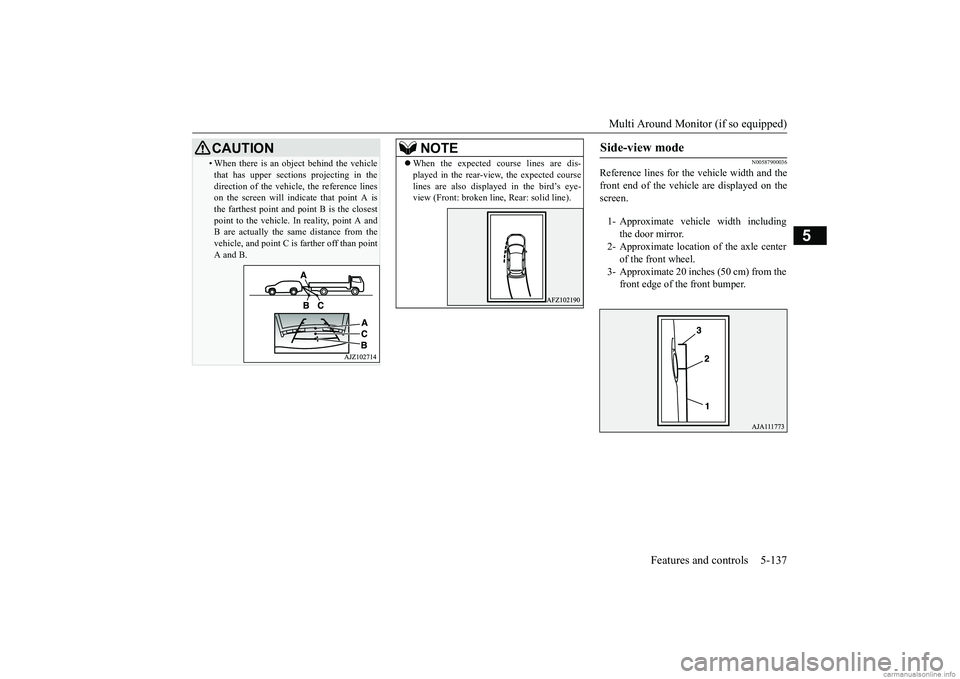
Reference lines for the vehicle width and the front end of the vehicle are displayed on thescreen.
• When there is an object behind the vehicle that has upper sections projecting in the direction of the vehicle, the reference lines on the screen will indicate that point A is the farthest point and point B is the closestpoint to the vehicle. In reality, point A and B are actually the same distance from the vehicle, and point C is farther off than pointA and B.CAUTION
NOTE
When the expected course lines are dis- played in the rear-view, the expected course lines are also displayed in the bird’s eye- view (Front: broken line, Rear: solid line).
Side-view mode
1- Approximate vehicle width including
the door mirror.
2- Approximate location of the axle center
of the front wheel.
3- Approximate 20 inches (50 cm) from the
front edge of the front bumper.
BK0252700US.book
137 ページ 2017年10月4日 水曜日 午後4時54分
Page 231 of 417
Multi-information display 5-152 Features and controls
5
N00578800055
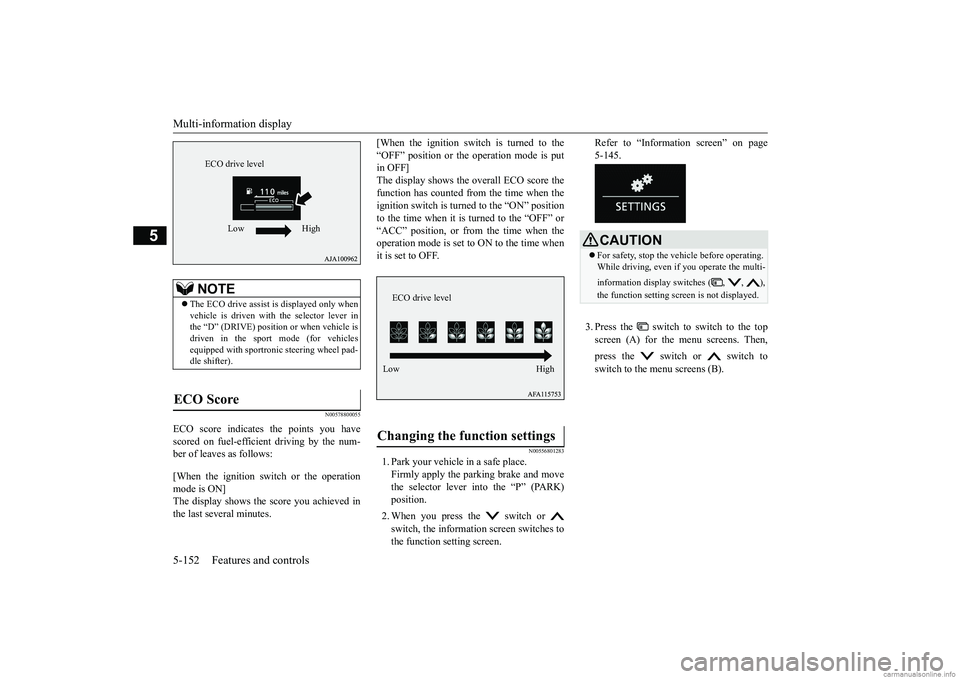
ECO score indicates the points you have scored on fuel-efficient driving by the num- ber of leaves as follows: [When the ignition switch or the operation mode is ON]The display shows the score you achieved in the last several minutes.
[When the ignition switch is turned to the “OFF” position or the operation mode is put in OFF] The display shows the overall ECO score thefunction has counted from the time when the ignition switch is turned to the “ON” position to the time when it is turned to the “OFF” or“ACC” position, or from the time when the operation mode is set to ON to the time when it is set to OFF.
N00556801283
1. Park your vehicle in a safe place.Firmly apply the parking brake and movethe selector lever into the “P” (PARK) position. 2. When you press
the switch or
switch, the information screen switches to the function setting screen.
Refer to “Information screen” on page 5-145. 3. Press the switch to switch to the top screen (A) for the menu screens. Then, press the switch or switch to switch to the menu screens (B).
NOTE
The ECO drive assist is displayed only when vehicle is driven with the selector lever in the “D” (DRIVE) position or when vehicle isdriven in the sport mode (for vehicles equipped with sportronic steering wheel pad- dle shifter).
ECO Score
ECO drive level
Low High
Changing the function settings
ECO drive level Low High
CAUTION For safety, stop the vehicle before operating. While driving, even if you operate the multi- information display switches ( , , ), the function setting scr
een is not displayed.
BK0252700US.book
152 ページ 2017年10月4日 水曜日 午後4時54分