lock MITSUBISHI ECLIPSE CROSS 2019 (in English) Owners Manual
[x] Cancel search | Manufacturer: MITSUBISHI, Model Year: 2019, Model line: ECLIPSE CROSS, Model: MITSUBISHI ECLIPSE CROSS 2019Pages: 423, PDF Size: 75.41 MB
Page 296 of 423
Interior lights
Features and controls 5-213
5
N00525401544
3- The dome light stays off regardless of any door or the liftgate being opened or closed.
N00537601194
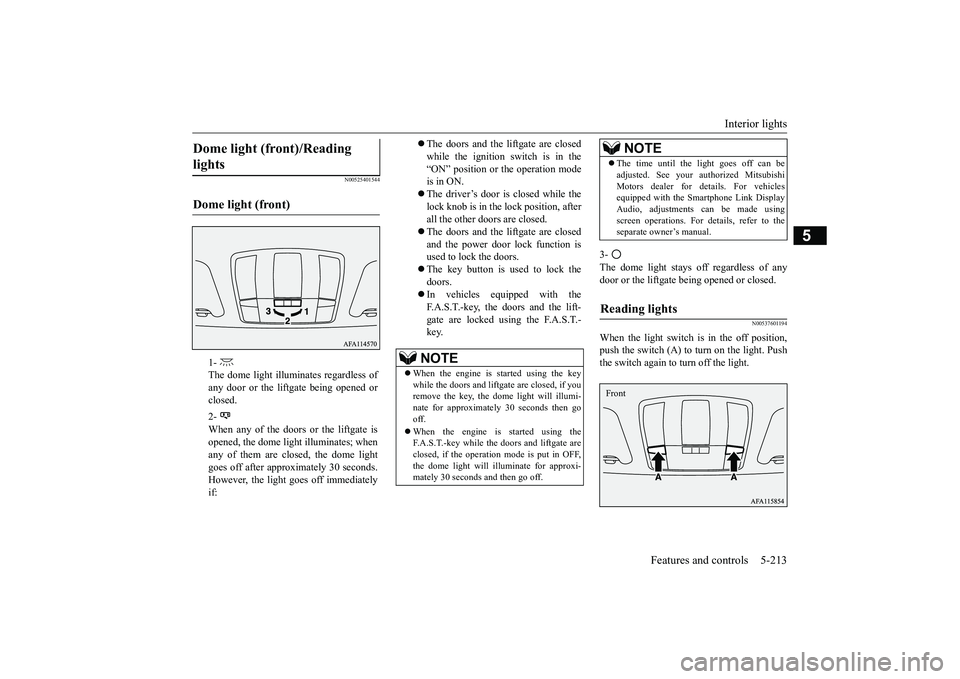
When the light switch is in the off position,push the switch (A) to turn on the light. Push the switch again to turn off the light.
Dome light (front)/Reading lights Dome light (front)
1- The dome light illuminates regardless of any door or the liftgate being opened or closed. 2- When any of the doors or the liftgate is opened, the dome light illuminates; whenany of them are closed, the dome light goes off after approximately 30 seconds. However, the light goes off immediatelyif:
The doors and the liftgate are closed while the ignition switch is in the“ON” position or the operation mode is in ON. The driver’s door is closed while the lock knob is in the lock position, after all the other doors are closed. The doors and the liftgate are closed and the power door lock function is used to lock the doors. The key button is used to lock the doors. In vehicles equipped with the F.A.S.T.-key, the doors and the lift- gate are locked using the F.A.S.T.-key.NOTE
When the engine is started using the key while the doors and liftgate are closed, if you remove the key, the dome light will illumi- nate for approximately 30 seconds then gooff. When the engine is started using the F.A.S.T.-key while the doors and liftgate are closed, if the operation mode is put in OFF, the dome light will illuminate for approxi- mately 30 seconds and then go off.
The time until the light goes off can be adjusted. See your authorized Mitsubishi Motors dealer for details. For vehicles equipped with the Smartphone Link Display Audio, adjustments can be made usingscreen operations. For details, refer to the separate owner’s manual.
Reading lights
NOTE
Front
BK0266800US.book
213 ページ 2018年6月27日 水曜日 午後5時6分
Page 297 of 423
Interior lights 5-214 Features and controls
5
N00525801359
3- The dome light stays off regardless of any door or the liftgate being opened or closed.
N00526101199
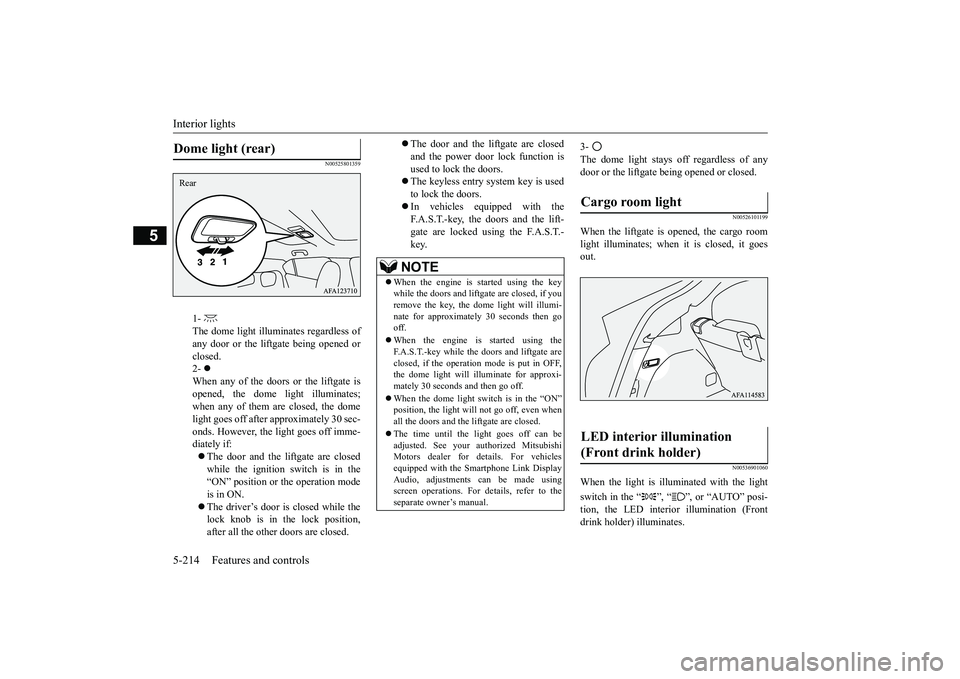
When the liftgate is opened, the cargo roomlight illuminates; when it is closed, it goes out.
N00536901060
When the light is illu
minated with the light
switch in the “ ”, “ ”, or “AUTO” posi- tion, the LED interior illumination (Frontdrink holder) illuminates.
Dome light (rear)
1- The dome light illuminates regardless ofany door or the liftgate being opened orclosed. 2- When any of the doors or the liftgate isopened, the dome light illuminates; when any of them are closed, the dome light goes off after approximately 30 sec-onds. However, the light goes off imme- diately if: The door and the liftgate are closed while the ignition switch is in the “ON” position or the operation mode is in ON. The driver’s door is closed while the lock knob is in the lock position, after all the other doors are closed.
Rear
The door and the liftgate are closed and the power door lock function isused to lock the doors. The keyless entry system key is used to lock the doors. In vehicles equipped with the F.A.S.T.-key, the doors and the lift- gate are locked using the F.A.S.T.-key.NOTE
When the engine is started using the key while the doors and liftgate are closed, if you remove the key, the dome light will illumi-nate for approximately 30 seconds then go off. When the engine is started using the F.A.S.T.-key while the doors and liftgate are closed, if the operation mode is put in OFF,the dome light will illuminate for approxi- mately 30 seconds and then go off. When the dome light switch is in the “ON” position, the light will not go off, even when all the doors and the liftgate are closed. The time until the light goes off can be adjusted. See your au
thorized Mitsubishi
Motors dealer for details. For vehicles equipped with the Smartphone Link Display Audio, adjustments can be made using screen operations. For details, refer to the separate owner’s manual.
Cargo room light LED interior illumination (Front drink holder)
BK0266800US.book
214 ページ 2018年6月27日 水曜日 午後5時6分
Page 309 of 423
Vehicle preparation before driving 6-4 Driving safety
6
N00629001842
For a safer and more enjoyable trip, always check for the following: Before starting the vehicle, make certain that you and all passengers are seated and wearing their seat belts properly (with children in the rear seat, in appropriaterestraints), and that all the doors and the liftgate are locked. Move the driver’s seat as far backward as possible, while keeping good visibility, and good control of the steering wheel, brakes, accelerator, and controls. Checkthe instrument panel indicators and multi- information display for any possible prob- lem. Similarly, the front passenger seat should also be moved as far back as possible. Make sure that infants and small children are properly restrained in accordance with all laws and regulations.
Check these by selecting the defroster mode, and set the blower switch on high. You shouldbe able to feel the air blowing against the windshield. Refer to “Defrosting or defogging (wind-shield, door windows)” on page 7-13, 7-22. Check all the tires for heavy tread wear or uneven wear patterns. Look for stones, nails,glass, or other objects stuck in the tread. Look for any tread cuts or sidewall cracks. Check the wheel nuts for tightness, and the tires(including spare tire) for proper pressure. Replace your tires before they are heavily worn out.As your vehicle is equipped with a tire pres- sure monitoring system, there is a risk of damage to the tire inflation pressure sensorswhen the tire is replaced on the rim. Tire replacement should, only, be performed by an authorized Mitsubishi Motors dealer. Have someone watch while you turn all the exterior lights on and off. Also check the turn
signal indicators and high-beam indicators on the instrument panel. Check the ground under the vehicle after parking overnight, for fuel, water, oil, or other leaks. Make sure all the fluid levels are correct. Also, if you can smell fuel, you needto find out why immediately and have itfixed.
N00629201147
Even this vehicle’s safety equipment, andyour safest driving, cannot guarantee that you can avoid an accident or injury. However, if you give extra attention to the followingareas, you can better protect yourself and your passengers: Drive defensively. Be aware of traffic, road and weather conditions. Leave plentyof stopping distance between your vehicle and the vehicle ahead. Before changing lanes, check your mir- rors, blind spots, and use your turn signal light. While driving, watch the behavior of other drivers, bicyclists, and pedestrians.
Vehicle preparation before driving Seat belts and seats
Defrosters Tires Lights
Fluid leaks Safe driving techniques
BK0266800US.bo
ok 4 ページ 2018年6月27日 水曜日 午後5時6分
Page 311 of 423
Parking 6-6 Driving safety
6
N00629601398
When parking on a hill, set the parking brake, and turn the front wheels toward the curb on adownhill, or away from the curb on an uphill. If necessary, apply chocks to the wheels. Be sure that the parking brake is firmly setwhen parked and that the selector lever is inthe “P” (PARK) position. When parking on a hill, it is important to set the parking brake before moving the selectorlever to the “P” (PARK) position. This pre- vents loading the parking brake against the transaxle. When this happens, it is difficult tomove the selector lever out of the “P” (PARK) position. Never leave the engi
ne running while you
take a short nap or rest. Also, never leave theengine running in a closed or poorly venti- lated place.
Your front bumper can be damaged if you scrape it over curbs or parking stop blocks. Be careful when traveling up or down steep slopes where your bumper can scrape theroad. Always carry the key and lock all doors and the liftgate when leaving the vehicle unat- tended. Always try to park your vehicle in a well litarea.
More effort could be required to turn the steering wheel. Refer to “Electric power steering system (EPS)” on page 5-79.
N00629901450
It is very important to know how much weight your vehicle can carry. This weight is called the vehicle capacity weight andincludes the weight of all occupants, cargo (including the roof load), non-factory- installed options, and the tongue weight ofthe trailer, if any, being towed. The tire and loading information placard located on the driver’s door sill of your vehicle will showhow much weight it may properly carry. It is important to familiarize yourself with the following terms before loading your vehicle:
Parking Parking on a hill Parking with the engine run- ning
WA R N I N G Leaving the engine running risks injury or death from accidentally moving the selec- tor lever or the accumulation of toxic exhaust fumes in the passenger compart- ment.
Where you park
WA R N I N G Do not park your vehicle in areas where combustible materials such as dry grass or leaves can come in contact with a hot exhaust, since a fire could occur.
When leaving the vehicle
Do not keep the steering wheel fully turned for a long time Loading information
WA R N I N G Never overload your vehicle. Overloading can damage your vehicle, adversely affect vehicle performance, including handlingand braking, cause tire failure, and result in an accident.
BK0266800US.bo
ok 6 ページ 2018年6月27日 水曜日 午後5時6分
Page 315 of 423
Cargo loads 6-10 Driving safety
6
N00629700435 N00630301122
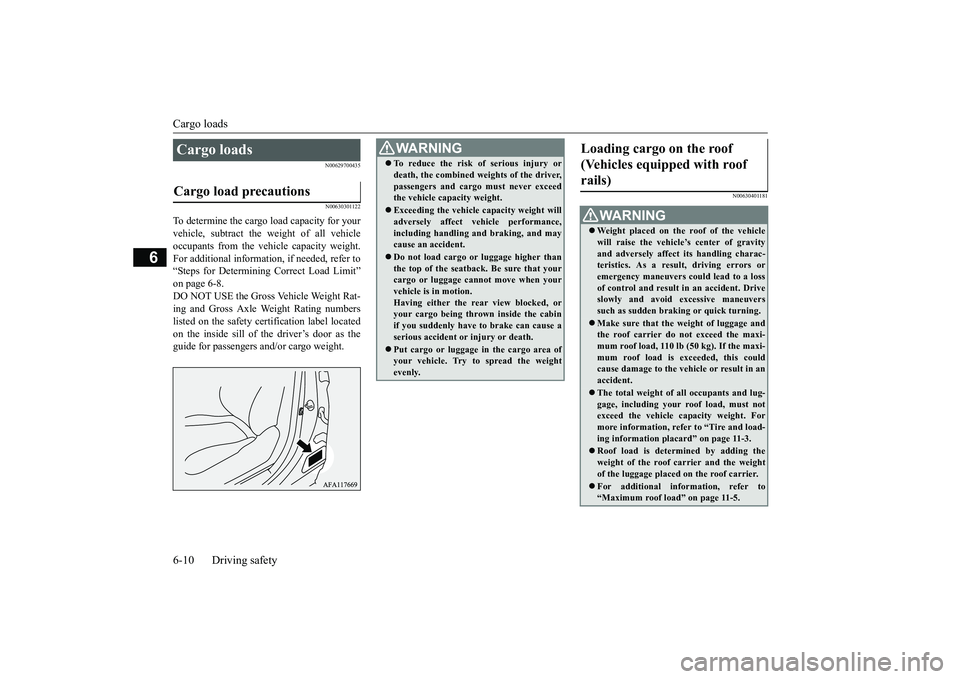
To determine the cargo load capacity for your vehicle, subtract the weight of all vehicleoccupants from the vehicle capacity weight. For additional information, if needed, refer to “Steps for Determining Correct Load Limit”on page 6-8.DO NOT USE the Gross Vehicle Weight Rat- ing and Gross Axle Weight Rating numbers listed on the safety certification label locatedon the inside sill of the driver’s door as the guide for passengers and/or cargo weight.
N00630401181
Cargo loads Cargo load precautions
WA R N I N G To reduce the risk of serious injury or death, the combined weights of the driver, passengers and cargo must never exceed the vehicle capacity weight. Exceeding the vehicle capacity weight will adversely affect vehicle performance, including handling and braking, and maycause an accident. Do not load cargo or luggage higher than the top of the seatback. Be sure that your cargo or luggage cannot move when your vehicle is in motion.Having either the rear view blocked, or your cargo being thrown inside the cabin if you suddenly have to brake can cause aserious accident or injury or death. Put cargo or luggage in the cargo area of your vehicle. Try to spread the weight evenly.
Loading cargo on the roof (Vehicles equipped with roof rails)
WA R N I N G Weight placed on the roof of the vehicle will raise the vehicle’s center of gravity and adversely affect its handling charac-teristics. As a result, driving errors or emergency maneuvers could lead to a loss of control and result in an accident. Driveslowly and avoid excessive maneuvers such as sudden braking or quick turning. Make sure that the weight of luggage and the roof carrier do not exceed the maxi- mum roof load, 110 lb (50 kg). If the maxi-mum roof load is exceeded, this could cause damage to the ve
hicle or result in an
accident. The total weight of all occupants and lug- gage, including your roof load, must notexceed the vehicle capacity weight. For more information, refer to “Tire and load- ing information placard” on page 11-3. Roof load is determined by adding the weight of the roof carrier and the weight of the luggage placed on the roof carrier. For additional information, refer to “Maximum roof load” on page 11-5.
BK0266800US.bo
ok 10 ページ 2018年6月27日 水曜日 午後5時6分
Page 320 of 423

Trailer towing
Driving safety 6-15
6
Avoid jerky or sudden maneuvers. Signal well in advance. Towing a trailer puts additional burden on the engine and transaxle, which may cause over- heating. Following are some suggestions to reduce overheating: When towing at high altitudes, engine coolant and automatic transaxle fluid will overheat at a lower temperature than at normal altitudes.If you turn your engine off immediately after towing at high altitude on steep uphill grades, your vehicle may show signs similar to over-heating. To avoid this
, let the engine run
while parked (preferably on level ground)
with the automatic transaxle in the “P” (PARK) position for a few minutes before turning the engine off. If the engine coolant temperature indica- tor flashes on the information screen in the multi-information display or the engine power drops suddenly, refer to “Engine overheating” on page 8-4. If the warning display or warning display illuminates, refer to “Warning dis- play” on page 5-62.
Reduce speed and downshift before you start down a long or steep
downgrade. If you don’t
downshift, prolonged or frequent applicationof the brakes can cause reduced braking effi- ciency and performance. You can tow in “D” (DRIVE) position. How- ever, you may want to shift the selector leverto the 3rd or a lower position, under heavy loads or hilly conditions. Always place chocks or blocks under both the vehicle and trailer wheels when parking. Be sure that the parking brake is firmly set and
that the selector lever is in the “P” (PARK) position. Avoid parking on a hill with a trailer, but if it cannot be avoided, do so only after performing the following: 1. Apply the brakes and keep them applied. 2. Have someone place chocks or blocks under both the vehicle and trailer wheels. 3. When the chocks or blocks are in place,release your brakes slowly until the chocks or blocks absorb the load. 4. Apply the parking brake firmly.5. Set the selector lever to the “P” (PARK)position and turn off the engine.
When restarting out after parking on a hill: 1. Check that the selector lever is set to the “P” (PARK) position. 2. Start the engine. Be sure to keep the brakepedal depressed. 3. Set the selector lever to the “D” (DRIVE) position or “R” (REVERSE) position.4. Release the parking brake and brake pedal and slowly pull or
back away from the
chocks or blocks. Stop and apply yourbrakes. 5. Have someone retrieve the chocks or blocks.
Overheating
Cause of over-
heating
Solution
Air conditioning on Turn off Highway speeds Reduce speed Going up hills
Select lower gear posi- tion
Stop-and-go city traffic
With the vehicle stopped, shift to the “N” (NEUTRAL) position and idle the engine at high idle.
Driving on hills Parking
BK0266800US.bo
ok 15 ページ 2018年6月27日 水曜日 午後5時6分
Page 345 of 423
General information about your radio 7-24 Comfort controls
7
Because of the limited
range of FM signals
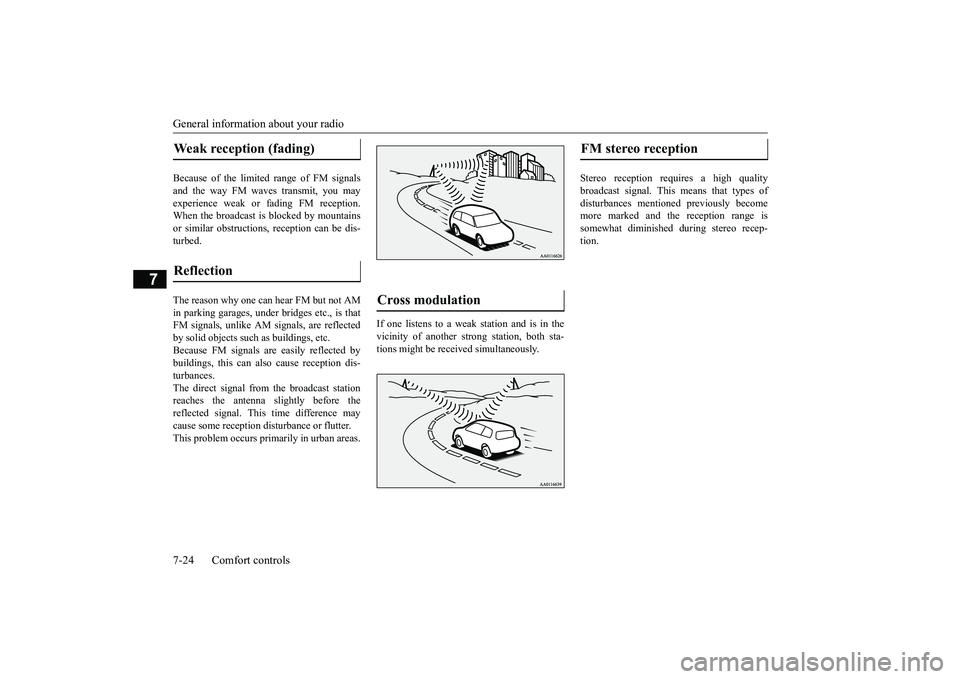
and the way FM waves transmit, you mayexperience weak or fading FM reception. When the broadcast is blocked by mountains or similar obstructions, reception can be dis-turbed. The reason why one can hear FM but not AM in parking garages, under bridges etc., is thatFM signals, unlike AM signals, are reflected by solid objects such as buildings, etc. Because FM signals are easily reflected bybuildings, this can also cause reception dis- turbances. The direct signal from the broadcast stationreaches the antenna slightly before the reflected signal. This time difference may cause some reception disturbance or flutter.This problem occurs primarily in urban areas.
If one listens to a weak station and is in the vicinity of another strong station, both sta- tions might be received simultaneously.
Stereo reception requires a high quality broadcast signal. This means that types ofdisturbances mentioned previously become more marked and the reception range is somewhat diminished during stereo recep-tion.
Weak reception (fading) Reflection
Cross modulation
FM stereo reception
BK0266800US.bo
ok 24 ページ 2018年6月27日 水曜日 午後5時6分
Page 350 of 423
Jump-starting the engine For emergencies 8-3
8
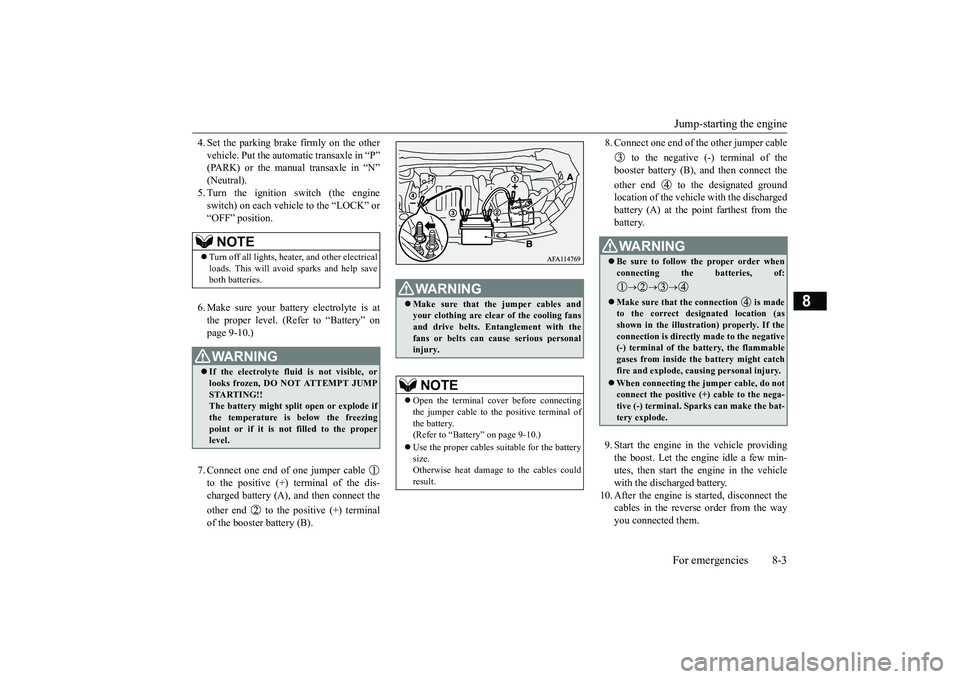
4. Set the parking brake firmly on the other vehicle. Put the automatic transaxle in “P” (PARK) or the manual transaxle in “N” (Neutral).5. Turn the ignition switch (the engine switch) on each vehicle to the “LOCK” or “OFF” position. 6. Make sure your battery electrolyte is at the proper level. (Refer to “Battery” on page 9-10.) 7. Connect one end of one jumper cable to the positive (+) terminal of the dis- charged battery (A), and then connect the other end to the positive (+) terminal of the booster battery (B).
8. Connect one end of the other jumper cable
to the negative (-) terminal of the booster battery (B), and then connect the other end to the designated ground location of the vehicle with the discharged battery (A) at the point farthest from thebattery. 9. Start the engine in the vehicle providing the boost. Let the engine idle a few min- utes, then start the engine in the vehicle with the discharged battery.
10. After the engine is started, disconnect the
cables in the reverse order from the way you connected them.
NOTE
Turn off all lights, heater, and other electrical loads. This will avoid sparks and help save both batteries.WA R N I N G If the electrolyte fluid is not visible, or looks frozen, DO NOT ATTEMPT JUMP STARTING!! The battery might split open or explode ifthe temperature is below the freezing point or if it is not filled to the proper level.
WA R N I N G Make sure that the jumper cables and your clothing are clear of the cooling fans and drive belts. Entanglement with the fans or belts can cause serious personalinjury.NOTE
Open the terminal cover before connecting the jumper cable to the positive terminal ofthe battery. (Refer to “Battery” on page 9-10.) Use the proper cables suitable for the battery size. Otherwise heat damage to the cables couldresult.
WA R N I N G Be sure to follow the proper order when connecting the batteries, of:
Make sure that the connection is made to the correct designated location (as shown in the illustration) properly. If the connection is directly made to the negative(-) terminal of the battery, the flammable gases from inside the battery might catch fire and explode, causing personal injury. When connecting the jumper cable, do not connect the positive (+) cable to the nega-tive (-) terminal. Sparks can make the bat- tery explode.
BK0266800US.bo
ok 3 ページ 2018年6月27日 水曜日 午後5時6分
Page 351 of 423
Engine overheating 8-4 For emergencies
8
If you drive your vehicle with a low battery charge after the engine has been started by using jumper cables, the engine may misfire. This can cause the anti-lock braking systemwarning light to blink on and off. This is only due to the low battery voltage. It is not a problem with the brake system. If this hap-pens, fully charge the battery and ensure thecharging system is operating properly.
N00836501421
When the engine is overheating, the informa-tion screen in the multi-information display will be interrupted and the engine coolant temperature warning display will appear. Also “ ” will blink. If these warnings are displayed: 1. Stop the vehicle in a safe place. Turn on the hazard warning flashers.2. With the engine still running, carefully raise the engine hood to vent the engine compartment.
3. Check that the cooling fan is running. If the fan is not turning, stop the engine immediately and contact an authorized Mitsubishi Motors dealer or a repair facil-ity of your choice for assistance. 4. If you see steam or spray coming from under the hood, turn off the engine. 5. If you do not see steam or spray comingfrom under the hood, leave the engine on until the high coolant temperature warn- ing goes off. After the high coolant tem-perature warning has gone off, you can start driving again. If the high coolant temperature warning stays on, turn off theengine.
Charging the battery by using an external battery charger
WA R N I N G Always remove the battery from your vehicle when the battery is charged by anexternal battery charger. Keep sparks, cigarettes, and flames away from the battery because the battery could explode. Keep your work area well vented when charging or using the battery in an enclosed space. Remove all the caps before charging the battery. Electrolyte (battery acid) is made of corro- sive diluted sulfuric acid. If electrolytecomes in contact with your hands, eyes, clothes, or the painted surface of your vehicle, thoroughly flush with water. Ifelectrolyte gets in your eyes, flush them immediately and thoroughly with water, and get prompt medical attention. Always wear protective clothing and gog- gles when working near the battery. Keep the battery out of the reach of chil- dren.
As your vehicle has anti-lock brakes Engine overheating
WA R N I N G To avoid personal injury, keep hands, hair, jewelry and clothes away from the coolingfan. The cooling fan can start at any time.WA R N I N G Before raising the engine hood, check to see if there is steam or spray coming from under the hood. Steam or spray coming from an overheated engine could seriously scald you.Do not open the hood until there is no steam or spray.
BK0266800US.bo
ok 4 ページ 2018年6月27日 水曜日 午後5時6分
Page 352 of 423
Jack and tools
For emergencies 8-5
8
6. When you do not see any more steam or spray, open the hood. Look for obvious leaks, such as a split radiator hose. Be careful as components will be hot. Anyleak source must be repaired. 7. If there is no obvious leak source, check the coolant level in the engine coolantreserve tank. If there is none, or if it is too low, slowly add coolant. 8. If the engine coolant reserve tank needscoolant, you will probably also need toadd coolant to the radiator. Do not loosen or remove the radiator cap until the engine has cooled down. 9. Start the engine, and slowly add coolant, up to the bottom of the filler neck. Useplain water if you have to (and replace it with the right coolant as soon as possible).
10. Replace the radiator cap and tighten it
fully. Check the engine coolant tempera- ture display on the multi-information dis- play. You can start driving again when thehigh coolant temperature warning does not come on.
11. Have the system inspected by your autho-
rized Mitsubishi Motors dealer or a repair facility of your choice.
N00836601435
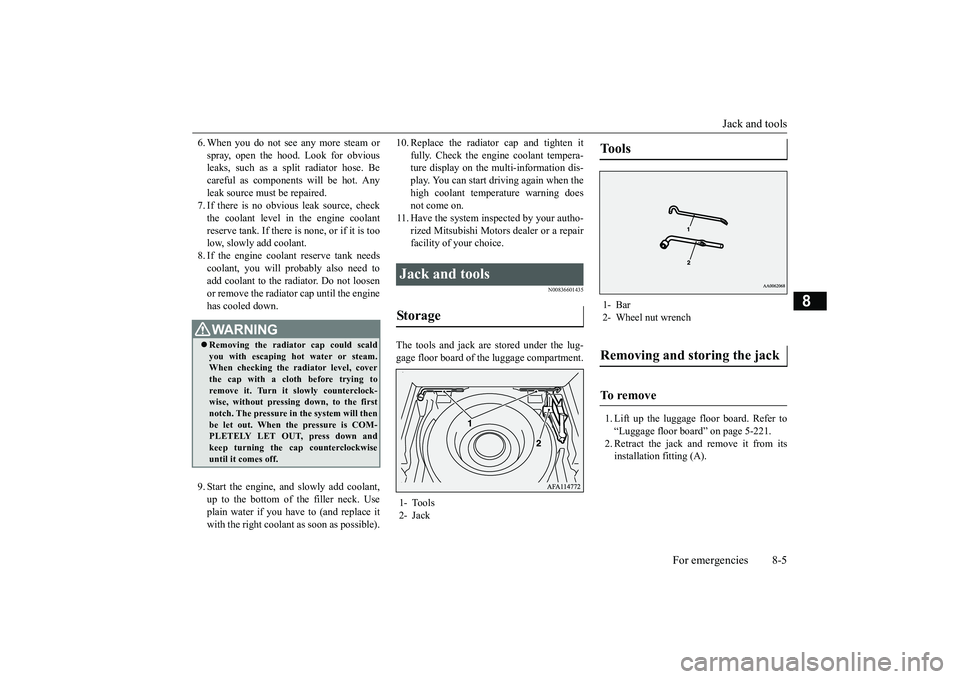
The tools and jack are stored under the lug- gage floor board of the luggage compartment.
1. Lift up the luggage floor board. Refer to “Luggage floor board” on page 5-221. 2. Retract the jack and remove it from its installation fitting (A).
WA R N I N G Removing the radiator cap could scald you with escaping hot water or steam.When checking the radiator level, cover the cap with a cloth before trying to remove it. Turn it slowly counterclock-wise, without pressing down, to the first notch. The pressure in the system will then be let out. When the pressure is COM-PLETELY LET OUT, press down and keep turning the cap counterclockwise until it comes off.
Jack and tools Storage 1- Tools 2- Jack
Tools 1- Bar2- Wheel nut wrenchRemoving and storing the jack To remove
BK0266800US.bo
ok 5 ページ 2018年6月27日 水曜日 午後5時6分