Windows MITSUBISHI ECLIPSE CROSS 2019 (in English) Owner's Guide
[x] Cancel search | Manufacturer: MITSUBISHI, Model Year: 2019, Model line: ECLIPSE CROSS, Model: MITSUBISHI ECLIPSE CROSS 2019Pages: 423, PDF Size: 75.41 MB
Page 339 of 423
Dual-zone automatic climate contro
l air conditioning (if so equipped)
7-18 Comfort controls
7
N00737101292
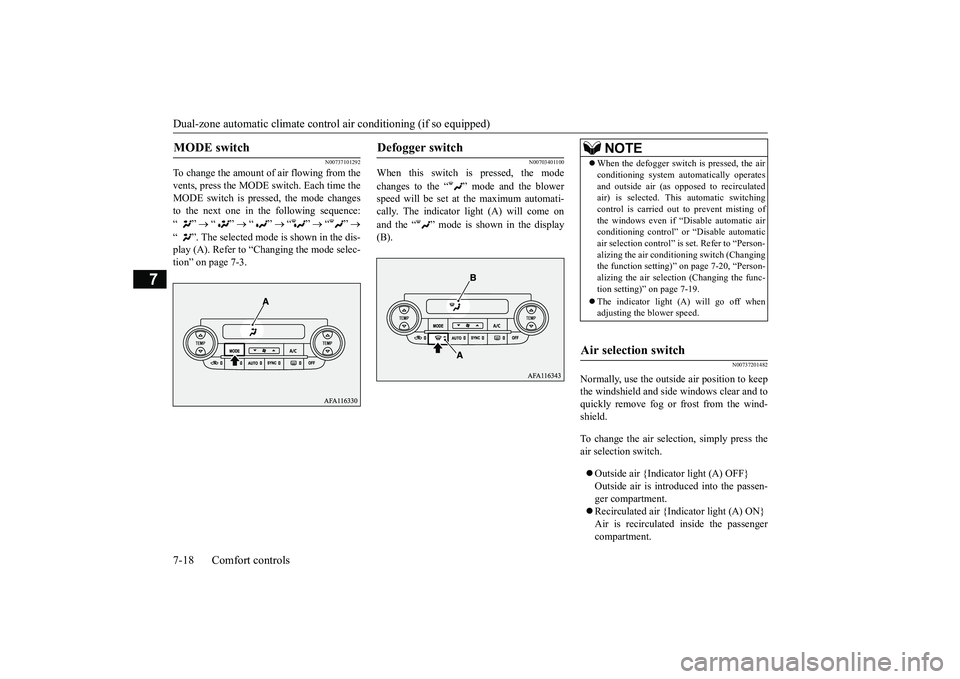
To change the amount of air flowing from the vents, press the MODE switch. Each time theMODE switch is pressed, the mode changes to the next one in the following sequence: “”
“”
“”
“”
“”
“ ”. The selected mode is shown in the dis- play (A). Refer to “Changing the mode selec- tion” on page 7-3.
N00703401100
When this switch is pressed, the mode changes to the “ ” mode and the blower speed will be set at the maximum automati- cally. The indicator light (A) will come on and the “ ” mode is shown in the display (B).
N00737201482
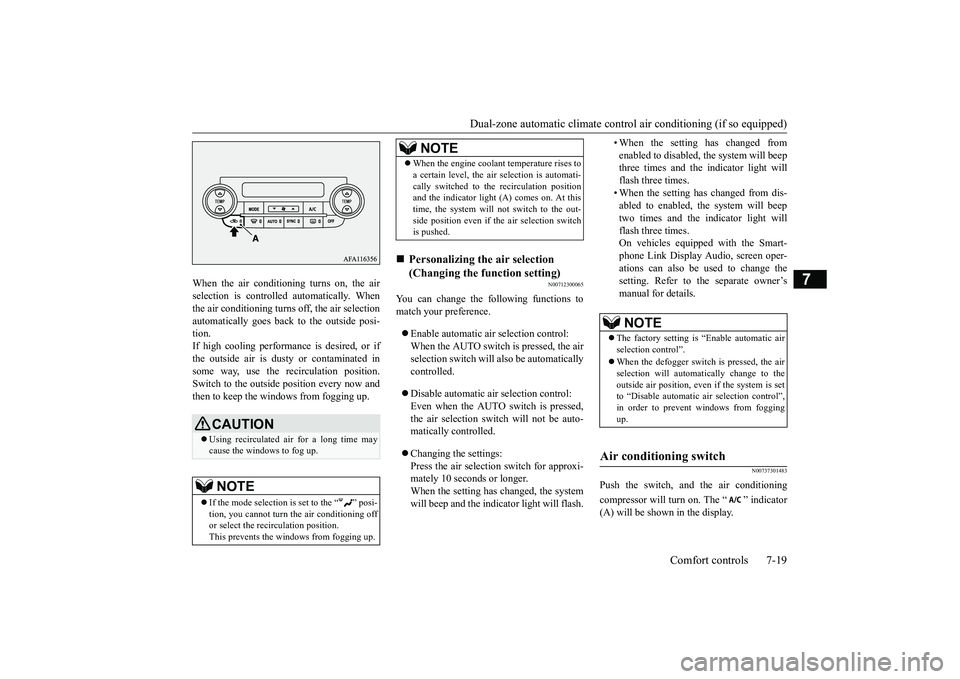
Normally, use the outside air position to keepthe windshield and side windows clear and toquickly remove fog or frost from the wind- shield. To change the air selection, simply press the air selection switch. Outside air {Indicator light (A) OFF} Outside air is introduced into the passen- ger compartment. Recirculated air {Indicator light (A) ON} Air is recirculated inside the passenger compartment.
MODE switch
Defogger switch
NOTE
When the defogger switch is pressed, the air conditioning system automatically operates and outside air (as opposed to recirculated air) is selected. This automatic switching control is carried out to prevent misting ofthe windows even if “Disable automatic air conditioning control” or “Disable automatic air selection control” is set. Refer to “Person-alizing the air conditioning switch (Changing the function setting)” on
page 7-20, “Person-
alizing the air selection (Changing the func-tion setting)” on page 7-19. The indicator light (A) will go off when adjusting the blower speed.
Air selection switch
BK0266800US.bo
ok 18 ページ 2018年6月27日 水曜日 午後5時6分
Page 340 of 423
Dual-zone automatic climate control
air conditioning (if so equipped)
Comfort controls 7-19
7
When the air conditioning turns on, the air selection is controll
ed automatically. When
the air conditioning turns off, the air selection automatically goes back to the outside posi- tion.If high cooling performance is desired, or if the outside air is dusty or contaminated in some way, use the recirculation position.Switch to the outside position every now andthen to keep the windows from fogging up.
N00712300065
You can change the following functions tomatch your preference. Enable automatic air selection control: When the AUTO switch is pressed, the air selection switch will also be automatically controlled. Disable automatic air selection control: Even when the AUTO switch is pressed, the air selection switch will not be auto- matically controlled. Changing the settings: Press the air selection switch for approxi- mately 10 seconds or longer. When the setting has changed, the systemwill beep and the indicator light will flash.
• When the setting has changed from enabled to disabled, the system will beep three times and the indicator light will flash three times.• When the setting has changed from dis- abled to enabled, the system will beep two times and the indicator light willflash three times. On vehicles equipped with the Smart- phone Link Display Audio, screen oper-ations can also be used to change thesetting. Refer to the separate owner’s manual for details.
N00737301483
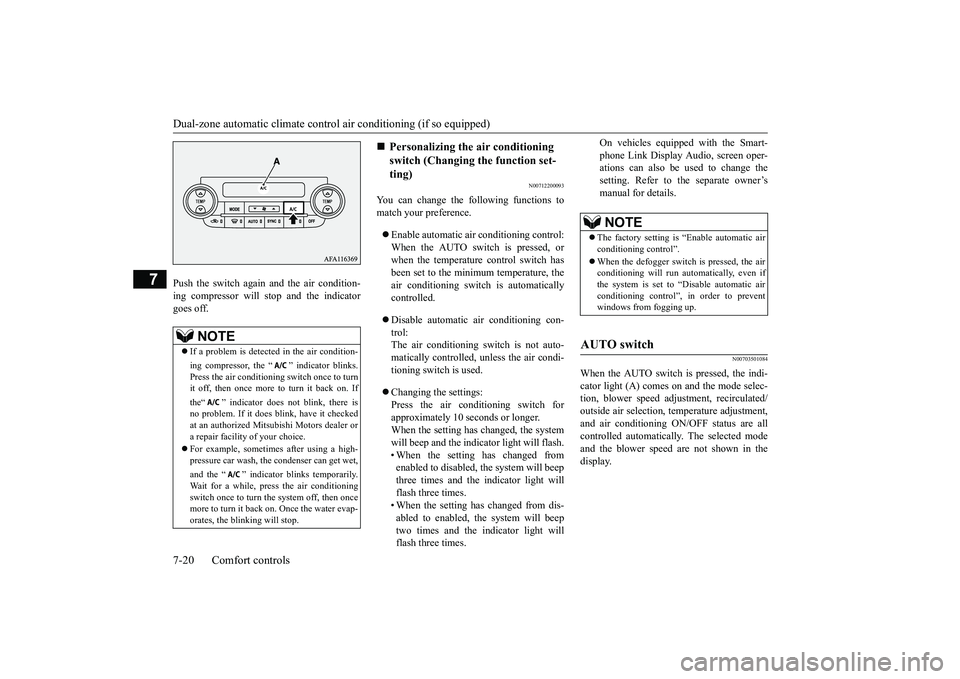
Push the switch, and the air conditioning compressor will turn on. The “ ” indicator (A) will be shown in the display.
CAUTION Using recirculated air for a long time may cause the windows to fog up.NOTE
If the mode selection is set to the “ ” posi- tion, you cannot turn the air conditioning offor select the recirculation position. This prevents the windows from fogging up.
When the engine coolant temperature rises to a certain level, the air
selection is automati-
cally switched to the recirculation position and the indicator light (A) comes on. At this time, the system will not switch to the out-side position even if the air selection switch is pushed.
Personalizing the air selection (Changing the function setting) NOTE
NOTE
The factory setting is “Enable automatic air selection control”. When the defogger switch is pressed, the air selection will automatically change to theoutside air position, even if the system is set to “Disable automatic air selection control”, in order to prevent windows from foggingup.
Air conditioning switch
BK0266800US.bo
ok 19 ページ 2018年6月27日 水曜日 午後5時6分
Page 341 of 423
Dual-zone automatic climate contro
l air conditioning (if so equipped)
7-20 Comfort controls
7
Push the switch again and the air condition- ing compressor will stop and the indicatorgoes off.
N00712200093
You can change the following functions to match your preference. Enable automatic air conditioning control: When the AUTO switch is pressed, orwhen the temperature control switch has been set to the minimum temperature, the air conditioning switch is automaticallycontrolled. Disable automatic air conditioning con- trol: The air conditioning switch is not auto- matically controlled, unless the air condi-tioning switch is used. Changing the settings: Press the air conditioning switch for approximately 10 seconds or longer.When the setting has changed, the system will beep and the indicator light will flash. • When the setting has changed fromenabled to disabled, the system will beep three times and the indicator light will flash three times.• When the setting has changed from dis- abled to enabled, the system will beep two times and the indicator light willflash three times.
On vehicles equipped with the Smart- phone Link Display Audio, screen oper- ations can also be used to change the setting. Refer to the separate owner’smanual for details.
N00703501084
When the AUTO switch is pressed, the indi- cator light (A) comes on and the mode selec- tion, blower speed adjustment, recirculated/outside air selection, temperature adjustment, and air conditioning ON/OFF status are all controlled automatically. The selected modeand the blower speed are not shown in the display.
NOTE
If a problem is detected in the air condition- ing compressor, the “ ” indicator blinks. Press the air conditioning switch once to turn it off, then once more to turn it back on. If the“ ” indicator does not blink, there is no problem. If it does blink, have it checkedat an authorized Mitsubishi Motors dealer or a repair facility of your choice. For example, sometimes after using a high- pressure car wash, the condenser can get wet, and the “ ” indicator blinks temporarily. Wait for a while, press the air conditioning switch once to turn the system off, then once more to turn it back on. Once the water evap- orates, the blinking will stop.
Personalizing the air conditioning switch (Changing the function set-ting)
NOTE
The factory setting is “Enable automatic air conditioning control”. When the defogger switch is pressed, the air conditioning will run automatically, even if the system is set to “Disable automatic airconditioning control”, in order to prevent windows from fogging up.
AUTO switch
BK0266800US.bo
ok 20 ページ 2018年6月27日 水曜日 午後5時6分
Page 343 of 423
Dual-zone automatic climate contro
l air conditioning (if so equipped)
7-22 Comfort controls
7
N00731801125
Blower speed and vent mode may be con- trolled manually by setting the blower speed selection switch and the MODE switch to the desired positions. To return to automaticoperation, press the AUTO switch.
N00732401636
To remove frost or mist from the windshield and door windows, use the MODE switch or defogger switch (“ ” or “ ”). Use this setting to keep the windshield and door windows clear of mist, and to keep the leg area heated (when driving in rain orsnow).
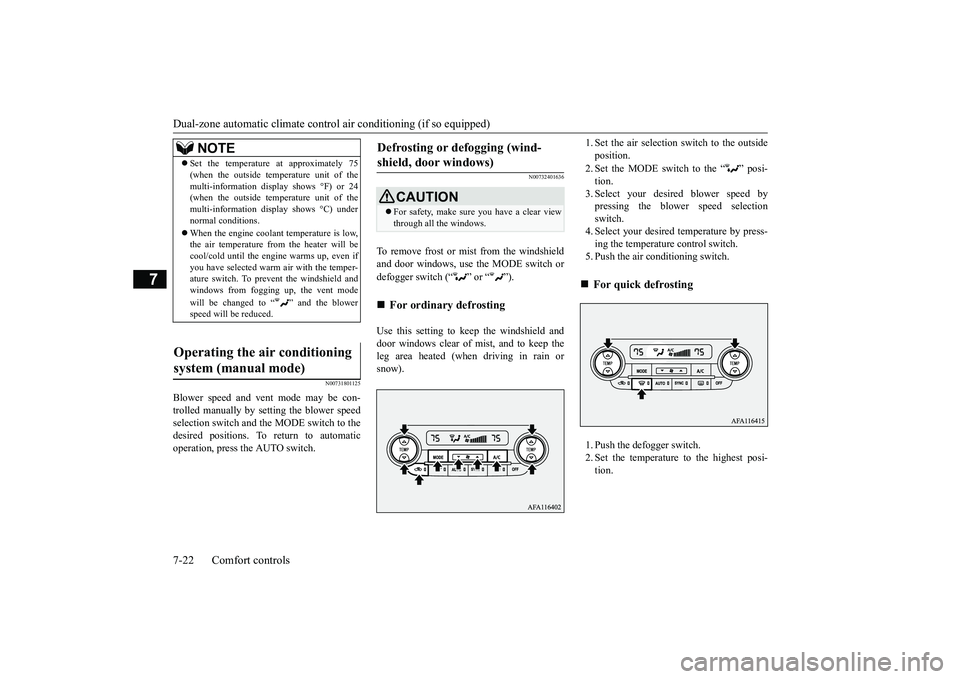
1. Set the air selection switch to the outside position. 2. Set the MODE switch to the “ ” posi- tion.3. Select your desired blower speed by pressing the blower speed selection switch.4. Select your desired temperature by press- ing the temperature control switch. 5. Push the air conditioning switch. 1. Push the defogger switch. 2. Set the temperature to the highest posi-tion.
NOTE
Set the temperature at approximately 75 (when the outside temperature unit of the multi-information display shows °F) or 24 (when the outside temperature unit of the multi-information display shows °C) undernormal conditions. When the engine coolant temperature is low, the air temperature from the heater will be cool/cold until the engine warms up, even if you have selected warm air with the temper-ature switch. To prevent the windshield and windows from fogging up, the vent mode will be changed to “ ” and the blower speed will be reduced.
Operating the air conditioning system (manual mode)
Defrosting or defogging (wind- shield, door windows)
CAUTION For safety, make sure you have a clear view through all the windows.
For ordinary defrosting
For quick defrosting
BK0266800US.bo
ok 22 ページ 2018年6月27日 水曜日 午後5時6分
Page 344 of 423
Air purifier
Comfort controls 7-23
7
N00733801220
The air conditioning system is equipped with an air filter to remove pollen and dust.The air filter’s ability to collect pollen and dirt is reduced as it becomes dirty, so replace it periodically. For the maintenance interval,refer to the “WARRANTY AND MAINTE- NANCE MANUAL”.
N00733901566
Your vehicle’s radio receives both AM andFM stations. The quality of your reception is affected bydistance, obstacles, and signal interference. This radio complies with Part 15 of Federal Communications Commission (FCC) Rules (for vehicles sold in U.S.A.). Operation issubject to the following conditions: The device may not cause harmful inter- ference. This device must accept any interference recieved, including interference that may cause undesirable operation.
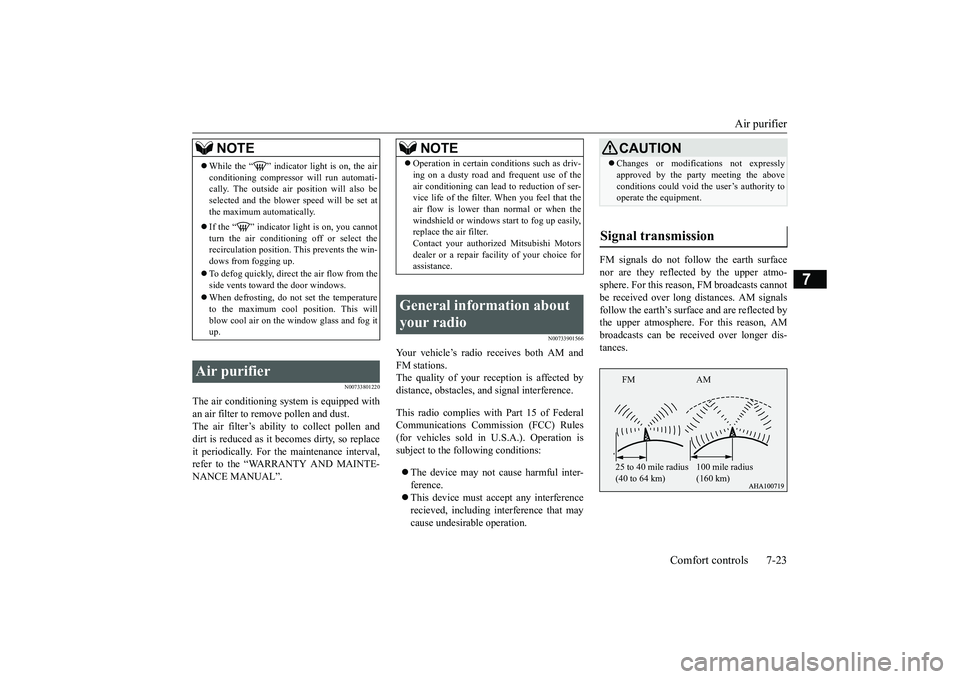
FM signals do not follow the earth surface nor are they reflected by the upper atmo- sphere. For this reason, FM broadcasts cannot be received over long distances. AM signalsfollow the earth’s surface and are reflected by the upper atmosphere. For this reason, AM broadcasts can be received over longer dis-tances.
NOTE
While the “ ” indicator light is on, the air conditioning compressor will run automati- cally. The outside air position will also be selected and the blower speed will be set atthe maximum automatically. If the “ ” indicator light is on, you cannot turn the air conditioning off or select therecirculation position. Th
is prevents the win-
dows from fogging up. To defog quickly, direct
the air flow from the
side vents toward the door windows. When defrosting, do not set the temperature to the maximum cool position. This will blow cool air on the window glass and fog itup.
Air purifier
NOTE
Operation in certain conditions such as driv- ing on a dusty road and frequent use of the air conditioning can lead to reduction of ser- vice life of the filter.
When you feel that the
air flow is lower than normal or when thewindshield or windows start to fog up easily, replace the air filter. Contact your authorized Mitsubishi Motorsdealer or a repair facility of your choice for assistance.
General information about your radio
CAUTION Changes or modifications not expressly approved by the party meeting the above conditions could void the user’s authority to operate the equipment.
Signal transmission
FM AM 25 to 40 mile radius (40 to 64 km)
100 mile radius (160 km)
BK0266800US.bo
ok 23 ページ 2018年6月27日 水曜日 午後5時6分
Page 372 of 423
Battery
Vehicle care and maintenance 9-11
9
The battery is weaker in cold temperatures. This has to do with its chemical and physical properties and is why a very cold battery, especially one with a low charge, will have ahard time starting your vehicle. It is recommended that you have your battery and charging system checked by an autho-rized Mitsubishi Motors dealer or a repair
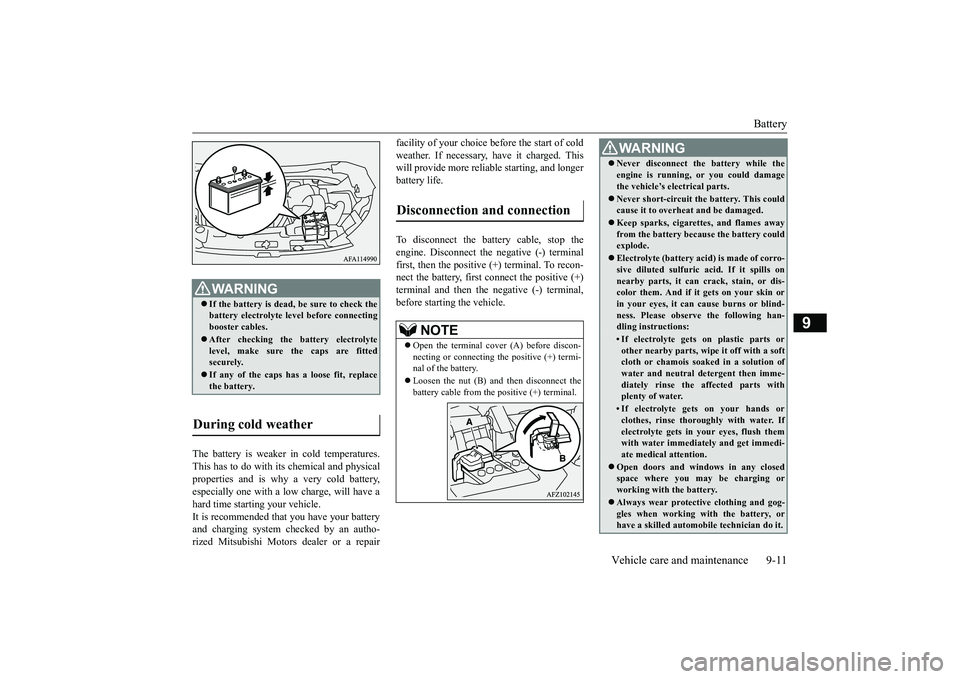
facility of your choice before the start of cold weather. If necessary, have it charged. This will provide more reliable starting, and longer battery life. To disconnect the battery cable, stop the engine. Disconnect the negative (-) terminalfirst, then the positive (+) terminal. To recon-nect the battery, first connect the positive (+) terminal and then the negative (-) terminal, before starting the vehicle.
WA R N I N G If the battery is dead, be sure to check the battery electrolyte level before connecting booster cables. After checking the battery electrolyte level, make sure the caps are fitted securely. If any of the caps has a loose fit, replace the battery.
During cold weather
Disconnection and connection
NOTE
Open the terminal cover (A) before discon- necting or connecting the positive (+) termi- nal of the battery. Loosen the nut (B) and then disconnect the battery cable from the positive (+) terminal.
WA R N I N G Never disconnect the battery while the engine is running, or you could damage the vehicle’s electrical parts. Never short-circuit the battery. This could cause it to overheat and be damaged. Keep sparks, cigarettes, and flames away from the battery because the battery could explode. Electrolyte (battery acid) is made of corro- sive diluted sulfuric
acid. If it spills on
nearby parts, it can crack, stain, or dis-color them. And if it gets on your skin or in your eyes, it can cause burns or blind- ness. Please observe the following han-dling instructions:• If electrolyte gets on plastic parts orother nearby parts, wi
pe it off with a soft
cloth or chamois soaked in a solution of water and neutral detergent then imme-diately rinse the affected parts with plenty of water.• If electrolyte gets on your hands orclothes, rinse thoroughly with water. If electrolyte gets in your eyes, flush themwith water immediately and get immedi- ate medical attention.
Open doors and windows in any closed space where you may be charging or working with the battery. Always wear protective clothing and gog- gles when working with the battery, or have a skilled automobile technician do it.
BK0266800US.bo
ok 11 ページ 2018年6月27日 水曜日 午後5時6分
Page 396 of 423
Vehicle care precautions
Vehicle care and maintenance 9-35
9
N00943901167 N00945100166
In order to maintain the value of your vehicle, perform regular maintenance using the proper materials and procedures. Be sure to use onlythose materials and procedures that meet your local environmental pollution control regula- tions. Choose the materials you will use care-fully, to be sure that they do not contain corrosives. If you are not sure, contact an authorized Mitsubishi Motors dealer for helpin choosing these materials.
These can all be dangerous, and they all can damage your vehicle.
N00945200095
After washing the inside of your vehicle withany cleaner, wipe it dry in a shady, well venti-lated area.
N00945301237
1. Lightly wipe these off with a soft clothsoaked in a 3 % solution of gentle soapand water. 2. To rinse, dip the cloth in fresh water, wring it out well, and wipe off all thesoap.
High-mounted stop light
NOTE
The high-mounted stop light uses an LED type bulb. Check with an authorized Mitsubishi Motors dealer or a repair
facility of your choice
when the light needs to be repaired or replaced.
Vehicle care precautions
CAUTION Cleaning products can be dangerous. Some are poisonous and others are highly flamma- ble. Some are dangerous if you breathe their fumes in a closed space. When you use any- thing in a container to clean your vehicle, besure to follow the instructions. Always open your vehicle doors or windows when you’re cleaning the inside. Never use the followingchemicals to clean your vehicle:• Gasoline• Carbon Tetrachloride• Benzine• Kerosene• Naphtha• Acetone• Turpentine• Paint Thinner• Lacquer Thinner• Nail Polish Remover
Cleaning the inside of your vehicle
CAUTION Do not use organic substances (solvents, benzine, kerosene, alcohol, gasoline, etc.) or alkaline or acidic solutions. These chemicals can cause discoloring, staining or cracking of the surface.If you use cleaners or polishing agents, make sure their ingredients do not include the sub- stances mentioned above.NOTE
Always read the instructions on the cleaner label.
Plastic, vinyl, synthetic leather, fabric and flocked parts
BK0266800US.bo
ok 35 ページ 2018年6月27日 水曜日 午後5時6分
Page 398 of 423

Cleaning the outside of your vehicle Vehicle care and maintenance 9-37
9
N00945901712
Chemicals contained in the dirt and dust picked up from air, rain, snow, or road sur-faces can damage the paint and body of your vehicle if left on. Frequent washing and waxing is the best wayto protect your vehicle from this damage. Do not wash the vehicle in direct sunlight. Park the vehicle in the shade and spray it withwater to remove dust. Next, using plenty ofclean water and a car washing mitt or sponge, wash the vehicle from top to bottom. Use a mild car washing soap if necessary.Rinse thoroughly and wipe dry with a cham- ois or soft cloth. After washing the vehicle, carefully clean the joints and flanges of thedoors, hood, etc., where dirt is likely to remain.
Salt and other chemicals
used on winter roads
in some geographical areas can have a detri- mental effect on the vehicle underbody. You should flush the underbody with a high pres-sure hose every time you wash the outside of your vehicle. Take special care to remove mud or otherdebris which could trap and hold salt and moisture. After washing your vehicle, wipe off allwaterdrops from the rubber parts around the doors to prevent the doors from freezing.
Wa s h i n g
CAUTION When washing the underside of your vehicle or the wheels, wear a pair of gloves to pro-tect your hands. If your vehicle is equipped with the rain sen- sor, place the wiper switch lever in the “OFF” position to deactivate the rain sensorbefore washing the vehicle. Otherwise, the wipers will operate in the presence of water spray on the windshield and may get dam-aged as a result.
Never spray or splash water on the electrical parts in the engine compartment. This may damage them. Be careful also when washing the underbody to ensure that water does not enter the engine compartment. Avoid automatic car washes that use rotating brushes. These brushes may scratch the paintsurface and make it dull. Scratches are more noticeable on darker col- ored vehicles. Some hot water washing equipment uses high pressure and heat
to clean your vehicle.
Because hot water can damage plastic parts and seep inside your vehicle, make sure you do the following when using such equip-ment:• Keep the washing nozzle at least 28 inches(70 cm) away from the vehicle body.• When washing around the door glass, holdthe nozzle at a distance of more than 28 inches (70 cm) and at a right angle to the glass surface.
Make sure to do the following when using an automatic car wash, with help from eitherthis manual or the car wash operator, to avoid damaging your vehicle:• Fold the outside rearview mirrors.• Close the door windows.• Close the front sunroof (if so equipped)• Tape or remove the rear wiper arm assem- bly.CAUTION
• As your vehicle is equipped with the roof spoiler and the rear spoiler, check with the car wash operator before using the car wash.• If your vehicle is equipped with roof rails,check with the car wash operator before using the car wash.• If your vehicle is equipped with the rainsensor, place the wiper switch lever in the“OFF” position to deactivate the rain sen- sor.
During cold weather
CAUTION
BK0266800US.bo
ok 37 ページ 2018年6月27日 水曜日 午後5時6分
Page 417 of 423
Alphabetical index 12-2
12
Convenient hook
...............
...............
5-221
Coolant (engine)
..........................
9-7
, 11-7
Cruise control
....................
.................
5-82
D
Daytime running lights
Bulb location and capacity
...............
9-28
Replacement
.................
.................
9-30
Defogger (rear window)
....................
5-202
Defrosting or defogging (windshield, door windows)
.................
7-9
, 7-13
, 7-18
, 7-22
Dimensions
...................
.....................
11-4
Dimmer (high/low beam change)
.......
5-189
Disc brake pads
.................
.................
9-21
Dome light (front)/Reading lights
.......
5-213
Bulb location and capacity
...............
9-29
Dome light (rear)
...............
...............
5-214
Bulb location and capacity
...............
9-29
Doors
Lock
......................
........................
5-31
Power door locks
............................
5-33
Drink holders
....................
...............
5-217
Driving during cold weather
..................
6-5
Driving precaution
................
................
6-2
Driving, alcohol and drugs
.....................
6-2
Dual-zone automatic climate control air conditioning
....................
.................
7-15
E
ECO mode switch
.............................
5-196
Electric parking brake
..........................
5-46
Electric power steering system (EPS)
....
5-79
Electric rear window defogger switch
..5-202
Electronic immobilizer (Anti-theft starting system)
.....................
................
5-4
, 5-26
Emission-control system maintenance
...
9-20
Engine
Compartment
..................
.................
9-5
Coolant
...................
................
9-7
, 11-7
Hood
.......................
........................
9-3
Malfunction indicator light
.............
5-180
Oil and oil filter
.......................
9-5
, 11-7
Overheating
....................
.................
8-4
Serial number
.................
................
11-2
Specification
...................
................
11-6
Engine hood
....................
....................
9-3
Engine switch
.....................
................
5-17
Exhaust system
...................
................
9-22
F
Floor console box
..............................
5-217
Floor mat
.........................
....................
6-3
Fluid
Brake fluid
..............................
9-9
, 11-7
Continuously variable transmission (CVT)
fluid
....................
.................
9-8
, 11-7
Engine coolant
........................
9-7
, 11-7
Engine oil
...............................
9-5
, 11-7
Rear axle oil
............................
9-9
, 11-7
Transfer oil
.............................
9-9
, 11-7
Washer fluid
...........................
9-9
, 11-7
Fluid capacities and lubricants
.............
11-7
Forward Collision Mitigation system (FCM)
.
5-99 Free-hand advanced security transmitter (F.A.S.T.-key)
.................
.................
5-12
Front fog lights
Bulb location and capacity
...............
9-28
Indicators
..................
...................
5-178
Replacement
.................
.................
9-32
Switch
......................
...................
5-196
Front seat adjustment
............................
4-3
Front side-marker lights
Bulb location and capacity
...............
9-28
Replacement
.................
.................
9-30
Front turn signal light
Bulb location and capacity
...............
9-28
Replacement
.................
.................
9-31
Fuel
Filling the fuel tank
...........................
3-3
Fuel economy
...................
................
6-2
Fuel hoses
.....................
.................
9-21
Fuel selection
...................
................
3-2
Tank capacity
................
.................
11-7
Fuel Pump Shut-off System
.................
8-13
BK0266800US.bo
ok 2 ページ 2018年6月27日 水曜日 午後5時6分
Page 419 of 423
Alphabetical index 12-4
12
Overheating
......................
...................
8-4
P
Parking
.........................
.......................
6-6
Parking brake
................
.................
5-45
Parking brake lever stroke
...................
9-19
Parking lights
Bulb location and capacity
...............
9-28
Replacement
.................
.................
9-30
Polishing
.......................
.....................
9-38
Power brakes
.....................
.................
5-72
Power outlet
..................
...................
5-206
Power panoramic sunroof
....................
5-42
Power windows
.................
.................
5-39
Puncture (Tire changing)
.......................
8-6
R
Radiator cap
......................
...................
9-8
Radio
General information about your radio 7-23
Reading lights
Bulb location and capacity
...............
9-29
Rear axle oil
...............
.................
9-9
, 11-7
Rear combination lights
Bulb location and capacity
...............
9-28
Replacement
.................
.................
9-32
Rear Cross Traffic Alert
....................
5-113
Rear seat adjustment
.............................
4-6
Rear side-marker lights
Bulb location and capacity
...............
9-28
Rear turn signal light
Bulb location and capacity
...............
9-28
Replacement
...................
................
9-32
Rear-view camera
.............................
5-125
Rearview mirror
Inside rearview mirror
.....................
5-50
Outside rearview mirrors
.................
5-52
Replacement of light bulbs
...................
9-27
Replacing tires and wheels
...................
9-16
Reporting Safety Defects
.....................
10-2
S
Safe driving techniques
.........................
6-4
S-AWC (Super-All Wheel Control)
......
5-66
Seat belt
......................
.......................
4-13
Adjustable seat belt shoulder anchor
.4-19
Child restraint systems
.....................
4-22
Front passenger seat belt warning light
.....
4-19 Maintenance and inspection
.............
4-30
Seat belt extender
............................
4-20
Seat belt force limitter
.....................
4-22
Seat belt pre-tensioners
....................
4-21
Seat belt use during pregnancy
.........
4-21
Seats
...........................
........................
4-2
Arm rest
..................
..................
4-6
, 4-8
Front seats
....................
...................
4-3
Head restraints
.................
................
4-9
Making a cargo area
........................
4-12
Rear seats
.....................
...................
4-6
Seats and restraint systems
................
4-3
Service brake
.....................
.................
5-72
Service precautions
...............
................
9-2
Side turn signal light
Bulb location and capacity
...............
9-28
Snow tires
.....................
.....................
9-18
Spark plugs
...................
.....................
9-20
Starting the engine
.....................
5-23
, 5-57
Steering
Steering wheel height and reach adjustment5-49
Stop lights
Bulb location and capacity
...............
9-28
Storage spaces
...................
...............
5-215
Sun visors
.....................
...................
5-205
Super-all wheel control (S-AWC)
S-AWC drive mode display
.............
5-67
S-AWC drive mode-selector
............
5-67
S-AWC operation display
................
5-68
Supplemental Restraint System
............
4-30
How the Supplemental Restraint System works
.....................
.....................
4-33
Maintenance service
.......................
4-44
BK0266800US.bo
ok 4 ページ 2018年6月27日 水曜日 午後5時6分