Windows MITSUBISHI ECLIPSE CROSS 2019 Owner's Manual (in English)
[x] Cancel search | Manufacturer: MITSUBISHI, Model Year: 2019, Model line: ECLIPSE CROSS, Model: MITSUBISHI ECLIPSE CROSS 2019Pages: 423, PDF Size: 75.41 MB
Page 18 of 423
If this problem occurs...
Quick index 2-5
2
The engine does not start and the operation mode cannot be changed to OFF. (for vehicles equipped with the F.A.S.T.-key)
1. Move the selector lever to the “P” (PARK)
position, and then change the operation mode
to OFF. 2. One of the other causes could be low battery
voltage. If this occurs, the keyless entry sys-
tem and the F.A.S.T.-key operation will also no
t operate. Contact an authorized Mitsubishi
Motors dealer or a repair facility of your choice.
P. 5-18
The F.A.S.T.-key does not oper- ate.(for vehicles equipped with the F. A . S . T. - k e y )
Touch the portion of the F.A.S.T.-key to the engine
switch, and then start the engine or change
the operation mode. Use the emergency key to lock and unlock the driver’s door.
P. 5-24, 5-25
Cannot shift the selector lever from the “P” (PARK) position.
Shift the selector lever while pressing the brake pedal. Check that the ignition switch or the operation mode is in ON.
P. 5-59
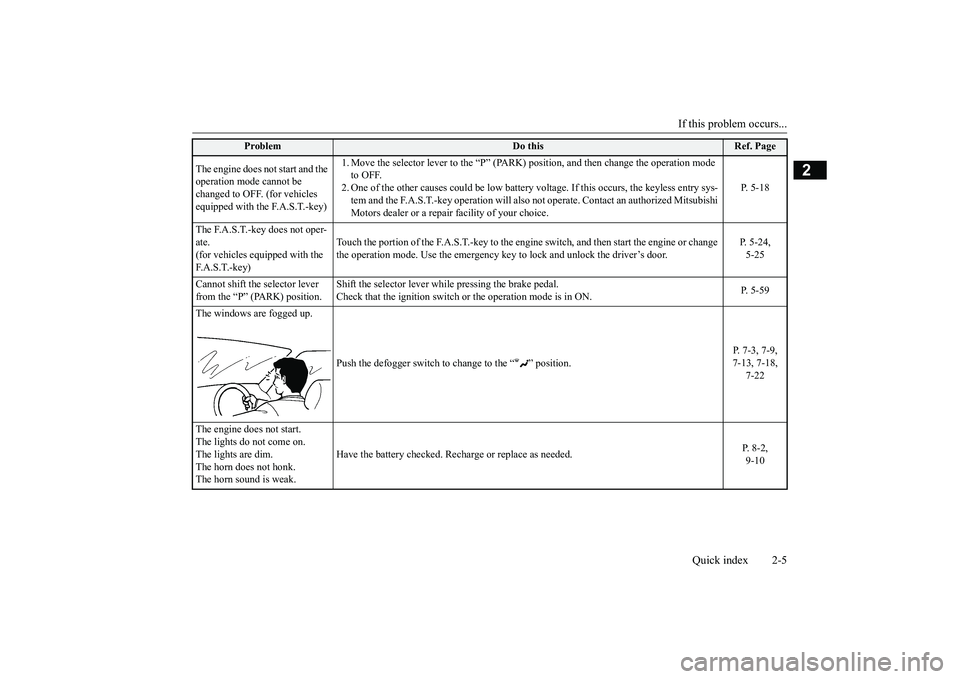
The windows are fogged up.
Push the defogger switch to
change to the “ ” position.
P. 7-3, 7-9, 7-13, 7-18,
7-22
The engine does not start. The lights do not come on. The lights are dim.The horn does not honk. The horn sound is weak.
Have the battery checked. Recharge or replace as needed.
P. 8-2, 9-10
Problem
Do this
Ref. Page
BK0266800US.bo
ok 5 ページ 2018年6月27日 水曜日 午後5時6分
Page 25 of 423
Filling the fuel tank 3-4 General information
3
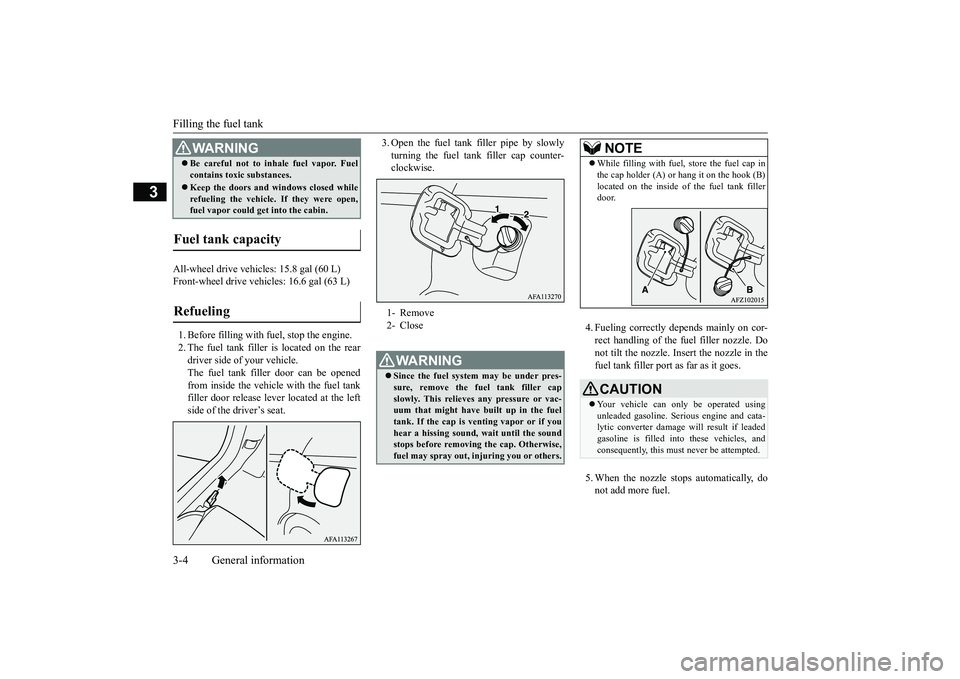
All-wheel drive vehicles: 15.8 gal (60 L) Front-wheel drive vehicles: 16.6 gal (63 L) 1. Before filling with fuel, stop the engine. 2. The fuel tank filler is located on the rear driver side of your vehicle. The fuel tank filler door can be openedfrom inside the vehicle with the fuel tank filler door release le
ver located at the left
side of the driver’s seat.
3. Open the fuel tank filler pipe by slowly turning the fuel tank filler cap counter- clockwise.
4. Fueling correctly depends mainly on cor- rect handling of the fuel filler nozzle. Do not tilt the nozzle. Insert the nozzle in thefuel tank filler port as far as it goes. 5. When the nozzle stops automatically, do not add more fuel.
Be careful not to inhale fuel vapor. Fuel contains toxic substances. Keep the doors and windows closed while refueling the vehicle. If they were open,fuel vapor could get into the cabin.
Fuel tank capacity Refueling
WA R N I N G
1- Remove 2- CloseWA R N I N G Since the fuel system may be under pres- sure, remove the fuel tank filler cap slowly. This relieves any pressure or vac- uum that might have built up in the fueltank. If the cap is venting vapor or if you hear a hissing sound, wait until the sound stops before removing the cap. Otherwise,fuel may spray out, injuring you or others.
NOTE
While filling with fuel, store the fuel cap in the cap holder (A) or hang it on the hook (B) located on the inside of the fuel tank filler door.CAUTION Your vehicle can only be operated using unleaded gasoline. Serious engine and cata- lytic converter damage will result if leadedgasoline is filled into these vehicles, and consequently, this must never be attempted.
BK0266800US.bo
ok 4 ページ 2018年6月27日 水曜日 午後5時6分
Page 67 of 423
Maintenance and inspection of seat belts 4-30 Seat and restraint systems
4
N00407001417
Regularly check your seat belt buckles and their release mechanisms for positive engage-ment and release of the latch plate. Check the retractors for automatic locking when in the Automatic Locking Retractor function. The entire seat belt assembly should be replaced if the webbing shows any obviouscuts, tears, increase in thickness in any sec- tion of the webbing from broken fibers, or severe fading from sunlight. All of these con-ditions indicate a weakening of the belt, which may adversely affect seat belt perfor- mance in an accident.
N00407701876
This vehicle is equipped with a SupplementalRestraint System (SRS), which includes air-bags for the driver and passengers. The SRS front airbags are designed to supple- ment the primary protection of the driver and front passenger seat belt systems by provid- ing those occupants with protection against
head and chest injuries in certain moderate to severe frontal collisions. The SRS front air- bags, together with sensors at the front of the vehicle and sensors attached to the frontseats, form an advanced airbag system. The SRS driver’s knee airbag is designed to supplement the primary protection of the driver’s seat belt system. It can reduce theforward movement of the driver’s lower legs and provide increased overall body protection in certain moderate to severe frontal colli-sions. The SRS side airbags and the curtain airbags are also designed to supplement the seat belts. The SRS side airbags provide the driver and front passenger with protection against chestinjuries by deploying the bag on the side impacted in moderate to severe side impact collisions. The SRS curtain airbags provide the driver and the passengers on the front seat and the rear outboard seats with protection against head injuries by deploying the curtain airbagon the side impacted in moderate to severe side impact collisions and by deploying both curtain airbags when a rollover is detected.The curtain airbags are also designed to help reduce the risk of complete and partial ejec- tion from the vehicle through side windows
Maintenance and inspection of seat belts
WA R N I N G Do not attempt to repair or replace any part of the seat belt assemblies. This work should be done by an authorizedMitsubishi Motors dealer. Failure to have an authorized Mitsubishi Motors dealer perform the work could reduce the effec- tiveness of the belts and could result in a serious injury or death in an accident.
Never use an organic solvent to clean the seat belt webbing. Do not attempt to bleach or re-dye the seat belt webbing. These may weaken the seat belt webbing, increasing risk of injury or death in anaccident. Clean seat belt webbing only with mild soap or detergent solution and rinse itwith lukewarm water, and dry the seat belt webbing completely before retracting it.
Supplemental Restraint Sys- tem (SRS) - airbag
NOTE
The SOS emergency assist (if so equipped) is designed to operate when any of the airbags deploy. Refer to “Telematics Control Unit (TCU)” on page 3-5.WA R N I N G
BK0266800US.bo
ok 30 ページ 2018年6月27日 水曜日 午後5時6分
Page 121 of 423
Theft-alarm system 5-38 Features and controls
5
N00510401243
The alarm will be activated if any of the fol- lowing occur while the vehicle is parked and the system is armed.
One of the doors and the liftgate is opened without using the keyless entry system or the F.A.S.T.-key operation. The engine hood is opened.
N00582500053
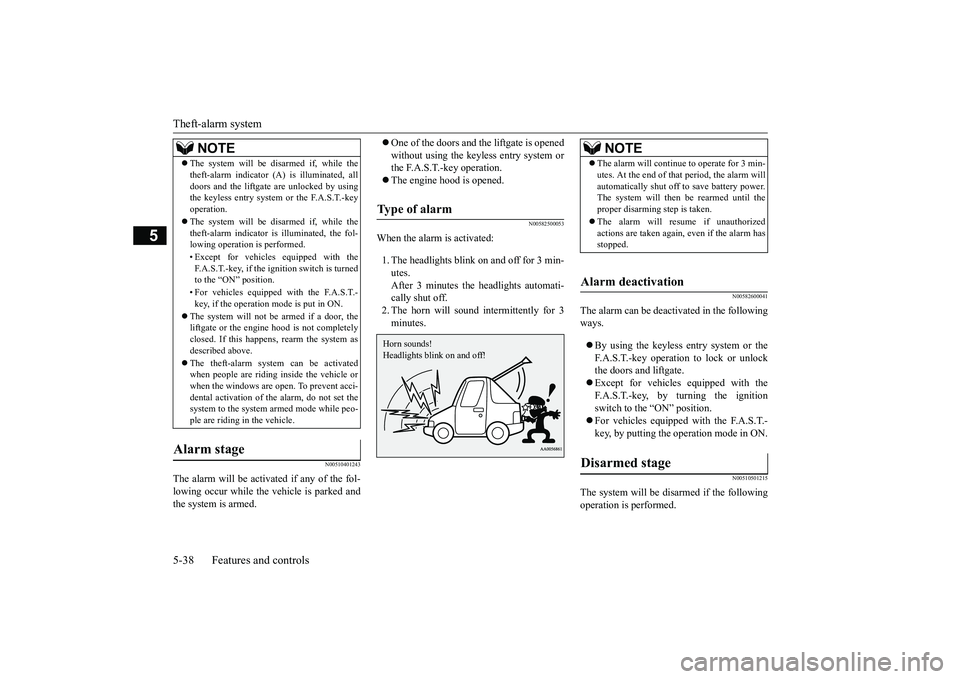
When the alarm is activated: 1. The headlights blink on and off for 3 min- utes.After 3 minutes the headlights automati-cally shut off. 2. The horn will sound intermittently for 3 minutes.
N00582600041
The alarm can be deactivated in the followingways. By using the keyless entry system or the F.A.S.T.-key operation to lock or unlock the doors and liftgate. Except for vehicles equipped with the F.A.S.T.-key, by turning the ignition switch to the “ON” position. For vehicles equipped with the F.A.S.T.- key, by putting the operation mode in ON.
N00510501215
The system will be disarmed if the followingoperation is performed.
The system will be disarmed if, while the theft-alarm indicator (A) is illuminated, all doors and the liftgate are unlocked by using the keyless entry system or the F.A.S.T.-key operation. The system will be disarmed if, while the theft-alarm indicator is illuminated, the fol-lowing operation is performed. • Except for vehicles equipped with the F.A.S.T.-key, if the ignition switch is turned to the “ON” position. • For vehicles equipped with the F.A.S.T.- key, if the operation mode is put in ON.
The system will not be armed if a door, the liftgate or the engine hood is not completely closed. If this happens, rearm the system asdescribed above. The theft-alarm system can be activated when people are riding inside the vehicle or when the windows are open. To prevent acci- dental activation of the alarm, do not set thesystem to the system armed mode while peo- ple are riding in the vehicle.
Alarm stage
NOTE
Type of alarm Horn sounds! Headlights blink on and off!
NOTE
The alarm will continue to operate for 3 min- utes. At the end of that period, the alarm will automatically shut off to save battery power. The system will then
be rearmed until the
proper disarming step is taken. The alarm will resume if unauthorized actions are taken again, even if the alarm hasstopped.
Alarm deactivation Disarmed stage
BK0266800US.bo
ok 38 ページ 2018年6月27日 水曜日 午後5時6分
Page 122 of 423
Power window control
Features and controls 5-39
5
Except for vehicles equipped with the F.A.S.T.-key, if the ignition switch is turned to the “ON” position. For vehicles equipped with the F.A.S.T.- key, if the operation mode is put in ON. All doors and the liftgate are unlocked by using the keyless entry system or theF.A.S.T.-key operation.
N00510601160
Use the following procedure to test the sys- tem: 1. Lower the driver’s window. 2. Arm the system as explained in “Armedstage”. 3. Make sure that the theft-alarm indicator comes on and flashes for approximately20 seconds. 4. Wait a few seconds and then unlock the driver’s side door by using the inside doorlock knob. Open the door. 5. Make sure that the horn sounds intermit- tently and the headlights blink when adoor is opened.
6. Disarm the system by unlocking all doors and the liftgate by using the keyless entry system or the F.A.S.T.-key operation.
N00510801436
NOTE
If the UNLOCK button on the key, or the driver’s or front passenger’s doorlock/unlock switch is pressed when all doors and the liftgate are closed and no door is opened within approximately 30 seconds, re-arming will automatically occur.Disarm...by using the keyless entry system or F.A.S.T.-key operation
The amount of time after unlocking until the vehicle relocks automatically can be adjusted. See an authorized Mitsubishi Motors dealer for details. On vehicles equipped with the SmartphoneLink Display Audio, the functions can be adjusted on the screen. For details, refer to a separate owner’s manual. Once the system has been disarmed, it can- not be rearmed except by repeating the arm-ing procedure.
Testing the theft-alarm system
NOTE
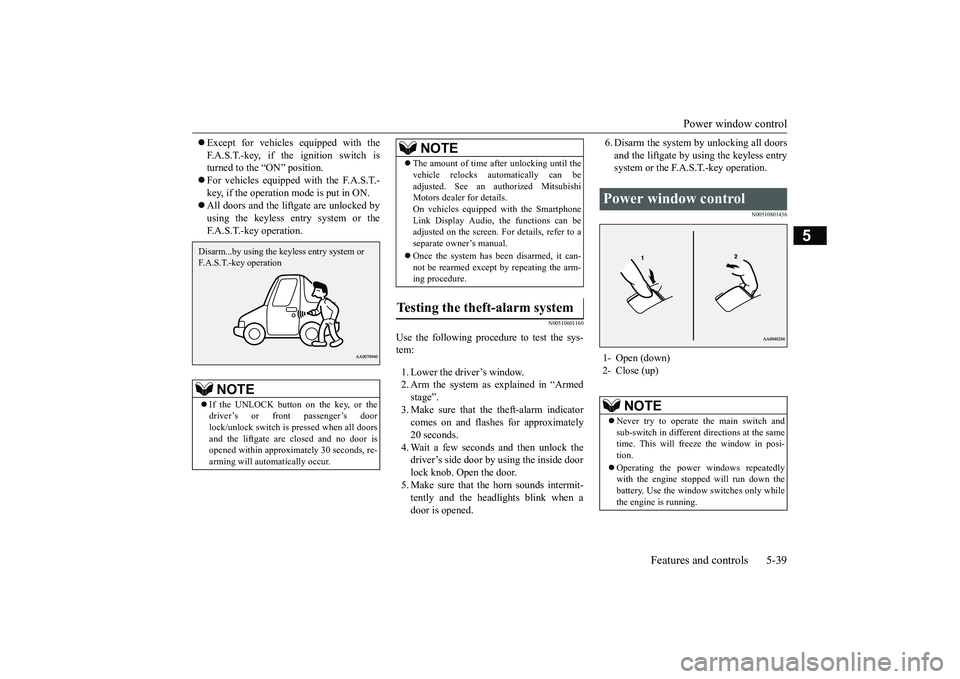
Power window control 1- Open (down) 2- Close (up)
NOTE
Never try to operate the main switch and sub-switch in different directions at the same time. This will freeze the window in posi- tion. Operating the power windows repeatedly with the engine stopped will run down thebattery. Use the window switches only while the engine is running.
BK0266800US.bo
ok 39 ページ 2018年6月27日 水曜日 午後5時6分
Page 123 of 423
Power window control 5-40 Features and controls
5
N00548701153
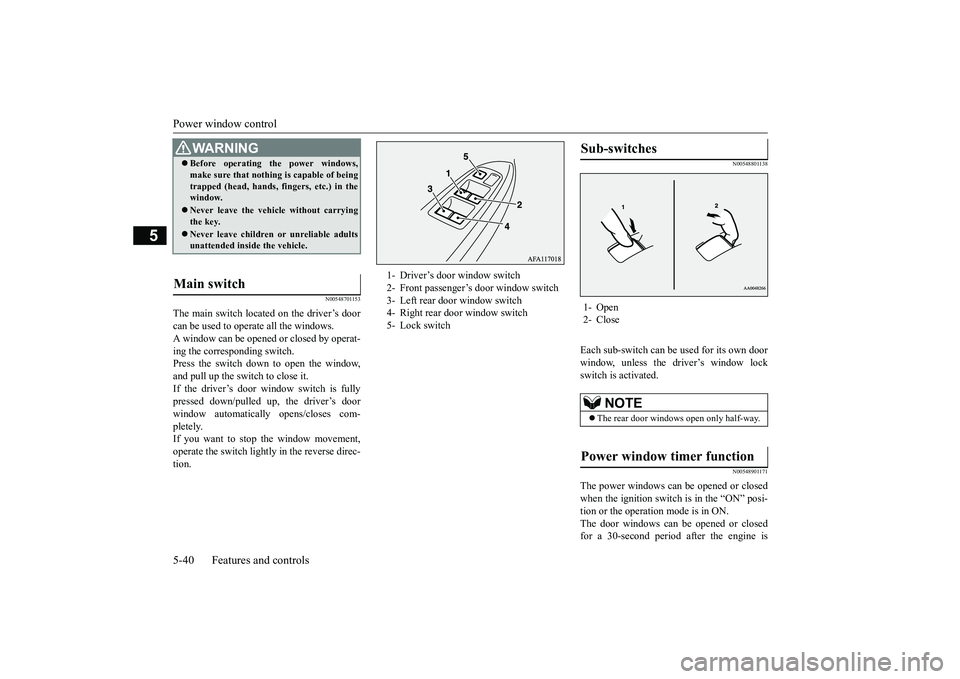
The main switch located on the driver’s door can be used to operate all the windows. A window can be opened or closed by operat-ing the corresponding switch. Press the switch down to open the window, and pull up the switch to close it.If the driver’s door window switch is fully pressed down/pulled up, the driver’s door window automatically opens/closes com-pletely. If you want to stop the window movement, operate the switch lightly in the reverse direc-tion.
N00548801138
Each sub-switch can be used for its own door window, unless the driver’s window lock switch is activated.
N00548901171
The power windows can be opened or closed when the ignition switch is in the “ON” posi- tion or the operation mode is in ON.The door windows can be opened or closed for a 30-second period after the engine is
WA R N I N G Before operating the power windows, make sure that nothing is capable of being trapped (head, hands, fingers, etc.) in the window. Never leave the vehicle without carrying the key. Never leave children or unreliable adults unattended inside the vehicle.
Main switch
1- Driver’s door window switch 2- Front passenger’s door window switch 3- Left rear door window switch 4- Right rear door window switch5- Lock switch
Sub-switches 1- Open 2- Close
NOTE
The rear door windows open only half-way.
Power window timer function
BK0266800US.bo
ok 40 ページ 2018年6月27日 水曜日 午後5時6分
Page 124 of 423
Power window control
Features and controls 5-41
5
stopped. However, once the driver’s door or the front passenger’s door is opened, the power windows cannot be operated.
N00549001182
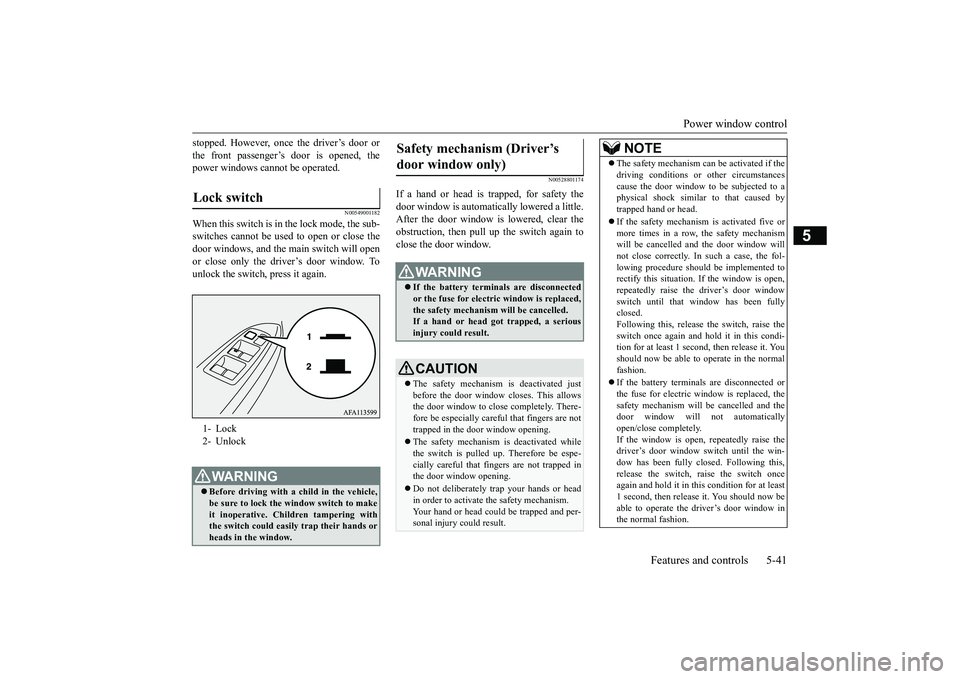
When this switch is in the lock mode, the sub-switches cannot be used to open or close the door windows, and the main switch will openor close only the driver’s door window. Tounlock the switch, press it again.
N00528801174
If a hand or head is trapped, for safety thedoor window is automatically lowered a little. After the door window is lowered, clear the obstruction, then pull up the switch again toclose the door window.
Lock switch 1- Lock 2- UnlockWA R N I N G Before driving with a child in the vehicle, be sure to lock the window switch to make it inoperative. Children tampering withthe switch could easily trap their hands or heads in the window.
Safety mechanism (Driver’s door window only)
WA R N I N G If the battery terminals are disconnected or the fuse for electric window is replaced, the safety mechanism will be cancelled.If a hand or head got trapped, a serious injury could result.CAUTION The safety mechanism is deactivated just before the door window closes. This allows the door window to close completely. There- fore be especially careful that fingers are nottrapped in the door window opening. The safety mechanism is deactivated while the switch is pulled up. Therefore be espe- cially careful that fingers are not trapped inthe door window opening. Do not deliberately trap your hands or head in order to activate the safety mechanism. Your hand or head could be trapped and per- sonal injury could result.
NOTE
The safety mechanism can be activated if the driving conditions or other circumstances cause the door window to be subjected to a physical shock similar to that caused by trapped hand or head. If the safety mechanism is activated five or more times in a row, the safety mechanismwill be cancelled and the door window will not close correctly. In such a case, the fol- lowing procedure should be implemented torectify this situation. If the window is open, repeatedly raise the driver’s door window switch until that window has been fullyclosed. Following this, release the switch, raise the switch once again and hold it in this condi-tion for at least 1 second,
then release it. You
should now be able to operate in the normal fashion. If the battery terminals are disconnected or the fuse for electric window is replaced, thesafety mechanism will be cancelled and the door window will not automatically open/close completely.If the window is open, repeatedly raise the driver’s door window switch until the win- dow has been fully closed. Following this, release the switch, raise the switch once again and hold it in this condition for at least1 second, then release it. You should now be able to operate the driver’s door window in the normal fashion.
BK0266800US.bo
ok 41 ページ 2018年6月27日 水曜日 午後5時6分
Page 125 of 423
Power panoramic sunroof (if so equipped) 5-42 Features and controls
5
N00551400043
Wind buffeting can be described as the per- ception of pressure on the ears or a booming or rumbling sound. Your vehicle may exhibit wind buffeting when driving with one or bothrear door windows down or partially opened. This is a normal occurrence that can be mini- mized. If the buffeting occurs with the reardoor windows open, open the front door win-dows as well as the rear door windows to minimize the condition.
N00594700036
The front sunroof & front shade can be opened or closed with the ignition switch in the “ON” position or the operation mode in ON.
What to do if you hear wind buffeting when driving Power panoramic sunroof
(if
so equipped)
WA R N I N G Do not put head, hands or anything else out of the front sunroof opening whiledriving the vehicle. Never leave children or unreliable adults unattended inside the vehicle. Never leave the vehicle without carrying the key. Before operating the front sunroof, front shade, or rear shade, make sure that noth- ing is capable of being trapped (head,hands, fingers, etc.) in the front sunroof, front shade, or rear shade.
Because the front sunroof opens to the outside of the vehicle, do not open the sun- roof when cleaning the top of the roof, etc. Your hands or arms could be trapped.NOTE
When leaving the vehicle unattended, be sure to close the front sunroof and carry thekey. Do not try to operate the front sunroof if it is frozen closed (after snow fall or during extreme cold). Do not sit or place heavy luggage on the front sunroof or roof opening edge. Do not apply any force that may cause dam- age to the sunroof. Release the switch when the front sunroof, front shade, or rear shade starts to move. If the front sunroof, front shade, or rear shade does not operate when the switch is operated, release the switch and checkwhether something is trapped by the sunroof or shade. If nothing is trapped, we recom- mend you to have the sunroof or shade checked at an authorized Mitsubishi Motors dealer. Be careful when tilting up the front sunroof if a ski carrier or a ro
of carrier is installed.
Depending on the model of ski carrier or roof carrier, the front sunroof may contact the car- rier when the front sunroof is tilted up.WA R N I N G
Be sure to close the front sunroof completely when washing the vehicle or when leaving the vehicle. After washing the vehicle or after rain be sure to wipe off any water that is on the front sunroof before operating it. Operating the front sunroof, front shade, or rear shade repeatedly with the engine turned off will run down the battery. Operate thefront sunroof, front shade, and rear shade only while the engine is running.
Front sunroof & front shade
NOTE
BK0266800US.bo
ok 42 ページ 2018年6月27日 水曜日 午後5時6分
Page 309 of 423
Vehicle preparation before driving 6-4 Driving safety
6
N00629001842
For a safer and more enjoyable trip, always check for the following: Before starting the vehicle, make certain that you and all passengers are seated and wearing their seat belts properly (with children in the rear seat, in appropriaterestraints), and that all the doors and the liftgate are locked. Move the driver’s seat as far backward as possible, while keeping good visibility, and good control of the steering wheel, brakes, accelerator, and controls. Checkthe instrument panel indicators and multi- information display for any possible prob- lem. Similarly, the front passenger seat should also be moved as far back as possible. Make sure that infants and small children are properly restrained in accordance with all laws and regulations.
Check these by selecting the defroster mode, and set the blower switch on high. You shouldbe able to feel the air blowing against the windshield. Refer to “Defrosting or defogging (wind-shield, door windows)” on page 7-13, 7-22. Check all the tires for heavy tread wear or uneven wear patterns. Look for stones, nails,glass, or other objects stuck in the tread. Look for any tread cuts or sidewall cracks. Check the wheel nuts for tightness, and the tires(including spare tire) for proper pressure. Replace your tires before they are heavily worn out.As your vehicle is equipped with a tire pres- sure monitoring system, there is a risk of damage to the tire inflation pressure sensorswhen the tire is replaced on the rim. Tire replacement should, only, be performed by an authorized Mitsubishi Motors dealer. Have someone watch while you turn all the exterior lights on and off. Also check the turn
signal indicators and high-beam indicators on the instrument panel. Check the ground under the vehicle after parking overnight, for fuel, water, oil, or other leaks. Make sure all the fluid levels are correct. Also, if you can smell fuel, you needto find out why immediately and have itfixed.
N00629201147
Even this vehicle’s safety equipment, andyour safest driving, cannot guarantee that you can avoid an accident or injury. However, if you give extra attention to the followingareas, you can better protect yourself and your passengers: Drive defensively. Be aware of traffic, road and weather conditions. Leave plentyof stopping distance between your vehicle and the vehicle ahead. Before changing lanes, check your mir- rors, blind spots, and use your turn signal light. While driving, watch the behavior of other drivers, bicyclists, and pedestrians.
Vehicle preparation before driving Seat belts and seats
Defrosters Tires Lights
Fluid leaks Safe driving techniques
BK0266800US.bo
ok 4 ページ 2018年6月27日 水曜日 午後5時6分
Page 319 of 423
Trailer towing 6-14 Driving safety
6
Towing a trailer requires a certain amount of experience. Before setting out for the open road, you’llwant to get to know your trailer. Acquaint
yourself with the feel
of handling and braking
with the added weight of the trailer. Always keep in mind that the vehicle you are driving is now a good deal longer and not nearly asresponsive as your vehicle is without a trailer. Before you start, check the trailer hitch, safety chains, tires and mirror adjustment. Be sure your vehicle’s tires are inflated to the cold inflation pressure listed in the manual.You’ll find these numbers on the tire and loading information placard at the sill of the driver’s door.Refer to “Tire inflation pressures” on page 9-15. Stay at least twice as far behind the vehicle ahead as you would when driving your vehi-cle without a trailer. This can help you avoid situations that require heavy braking and sud- den turns.
You’ll need more passing distance up ahead when you’re towing a trailer. And, becauseyou’re a good deal longer, you’ll need to go much farther beyond the passed vehicle before you can return to your lane. Hold the bottom of the steering wheel with one hand. Then, to move the trailer to the left, just move that hand to the left. To move thetrailer to the right, move your hand to the right. Always back up slowly and, if possible, have someone guide you. When you’re turning with a trailer, make wider than normal turns to help prevent thetrailer from striking shoulders, curbs, road signs, trees or other objects.
Operating hints
WA R N I N G If you have a rear window open and you tow a trailer with your vehicle, carbon monoxide gas which you cannot see or smell could come into your vehicle. It cancause unconsciousness or death. Refer to “Exhaust system” on page 9-22. To maximize your safety when towing atrailer:• Have your exhaust system inspected forleaks, and make necessary repairs before starting on your trip.• Keep the rear windows closed.• If exhaust does come into your vehicle through a window or another opening, drive with your front, main heating or cooling system on and with the blower onany speed. This will bring fresh, outside air into your vehicle. Do not use recircu- lation because it only recirculates the airinside your vehicle. Refer to “Air selec- tion switch” on page 7-9.
Driver preparation
Vehicle preparation Tire Following distance
Passing Backing up Making turns
CAUTION Making sharp turns while towing a trailer could cause the trailer to come in contact with the vehicle. Your vehicle could be dam- aged. Avoid making sharp turns while tow-ing a trailer.
BK0266800US.bo
ok 14 ページ 2018年6月27日 水曜日 午後5時6分