audio MITSUBISHI ECLIPSE CROSS 2019 (in English) Owner's Guide
[x] Cancel search | Manufacturer: MITSUBISHI, Model Year: 2019, Model line: ECLIPSE CROSS, Model: MITSUBISHI ECLIPSE CROSS 2019Pages: 423, PDF Size: 75.41 MB
Page 210 of 423
Multi Around Monitor (if so equipped)
Features and controls 5-127
5
N00587200068
The Multi Around Monitor system uses four cameras, “Front-view camera”, “Side-view cameras (right and left)” and “Rear-view camera”, and displays composite views fromthose cameras on the Smartphone Link Dis- play Audio. The Multi Around Monitor system will assistthe driver to park the vehicle in a narrow orparallel parking space.
NOTE
Mirror image is displayed on the screen. On vehicles equipped with Smartphone Link Display Audio, it is possible to change the display language of the screen. For details, please refer to the separatedowner’s manual. Under certain circumstances, it may become difficult to see an image on the screen, even when the system is functioning correctly. • In a dark area, such as at night. • When water drops or condensation are on the lens. • When sun light or headlights shine directly into the lens.
Multi Around Monitor
(if so
equipped)
WA R N I N G Before using the Multi Around Monitor system, read this entire section to fully understand the limitations of this system. Failure to follow instructions could resultin an accident. The Multi Around Monitor system is an aid system to help observe around the vehicle. It is not a substitute for your visual confirmation. Never rely solely on the Multi Around Monitor system. The view on the screen is limited, and objects outside the view can- not be seen on the screen.
CAUTION Before using the Multi Around Monitor, make sure that all doors and the liftgate are closed and the outside mirrors are unfolded. If an outside mirror is folded and/or if a front door and/or the liftgate is open, the areas dis-played on the Multi Around Monitor will not be appropriate.
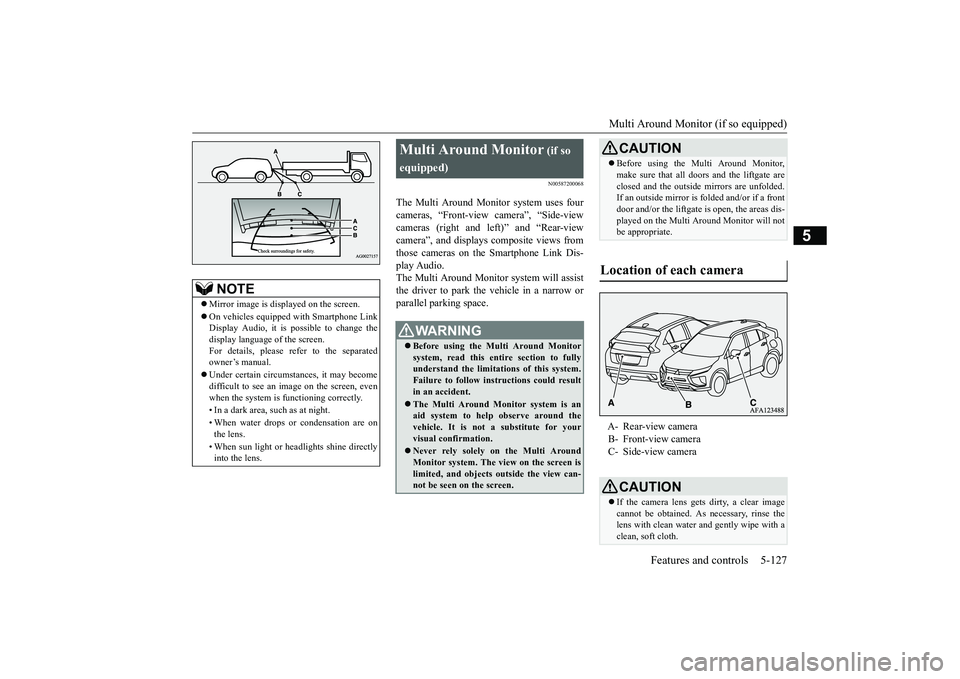
Location of each camera
A- Rear-view camera B- Front-view camera C- Side-view cameraCAUTION If the camera lens gets dirty, a clear image cannot be obtained. As necessary, rinse the lens with clean water and gently wipe with aclean, soft cloth.
BK0266800US.book
127 ページ 2018年6月27日 水曜日 午後5時6分
Page 221 of 423
Multi-information display 5-138 Features and controls
5
N00519201303
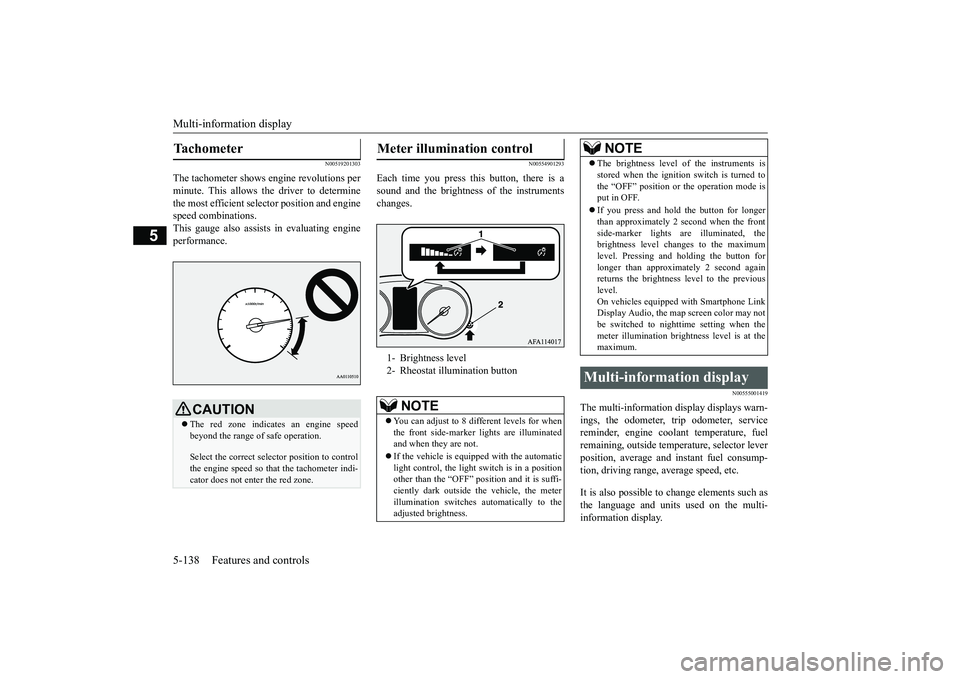
The tachometer shows engine revolutions per minute. This allows the driver to determinethe most efficient selector position and engine speed combinations. This gauge also assist
s in evaluating engine
performance.
N00554901293
Each time you press this button, there is asound and the brightness of the instrumentschanges.
N00555001419
The multi-information display displays warn- ings, the odometer, trip odometer, service reminder, engine coolant temperature, fuelremaining, outside temperature, selector lever position, average and instant fuel consump- tion, driving range, average speed, etc. It is also possible to change elements such as the language and units used on the multi- information display.
Tachometer
CAUTION The red zone indicates an engine speed beyond the range of safe operation. Select the correct selector position to control the engine speed so that the tachometer indi- cator does not enter the red zone.
Meter illumination control 1- Brightness level 2- Rheostat illumination button
NOTE
You can adjust to 8 different levels for when the front side-marker lights are illuminatedand when they are not. If the vehicle is equipped with the automatic light control, the light switch is in a position other than the “OFF” position and it is suffi- ciently dark outside the vehicle, the meterillumination switches automatically to the adjusted brightness.
The brightness level of the instruments is stored when the ignition switch is turned to the “OFF” position or the operation mode is put in OFF. If you press and hold the button for longer than approximately 2 second when the front side-marker lights are illuminated, thebrightness level changes to the maximum level. Pressing and holding the button for longer than approximately 2 second againreturns the brightness level to the previous level. On vehicles equipped with Smartphone LinkDisplay Audio, the map screen color may not be switched to nighttime setting when the meter illumination brightness level is at themaximum.
Multi-information display
NOTE
BK0266800US.book
138 ページ 2018年6月27日 水曜日 午後5時6分
Page 238 of 423
Multi-information display
Features and controls 5-155
5
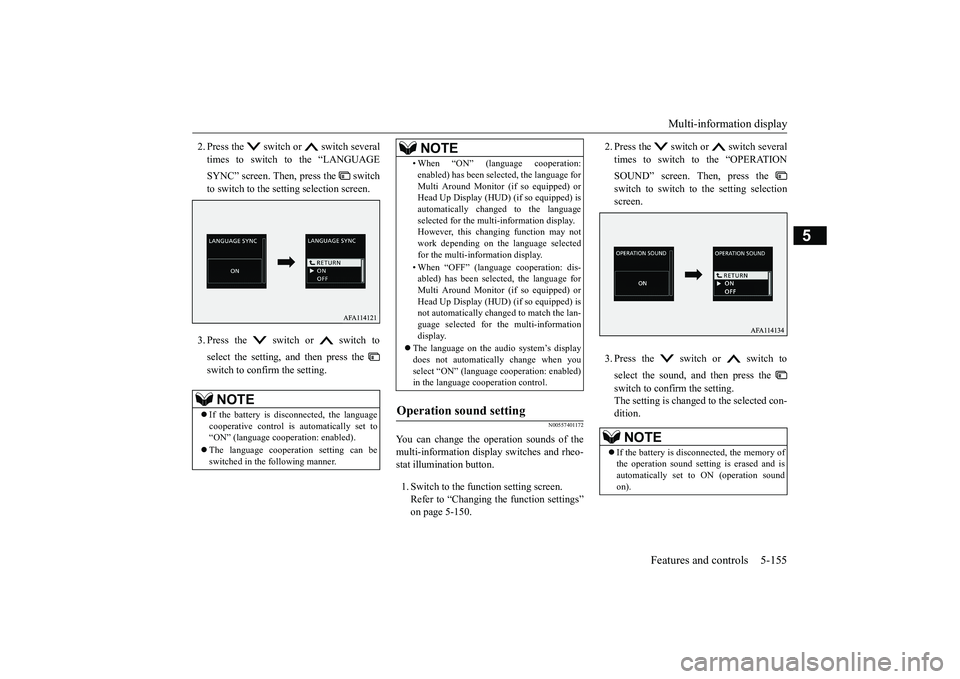
2. Press the switch or switch several times to switch to the “LANGUAGE SYNC” screen. Then, press the switch to switch to the setting selection screen. 3. Press the switch or switch to select the setting, and then press the switch to confirm the setting.
N00557401172
You can change the operation sounds of the multi-information display switches and rheo- stat illumination button. 1. Switch to the function setting screen. Refer to “Changing the function settings”on page 5-150.
2. Press the switch or switch several times to switch to the “OPERATION SOUND” screen. Then, press the switch to switch to the setting selection screen. 3. Press the switch or switch to select the sound, and then press the switch to confirm the setting. The setting is changed to the selected con- dition.
NOTE
If the battery is disconnected, the language cooperative control is automatically set to “ON” (language cooperation: enabled). The language cooperation setting can be switched in the following manner.
• When “ON” (language cooperation:enabled) has been selected, the language for Multi Around Monitor (if so equipped) or Head Up Display (HUD) (if so equipped) is automatically changed to the languageselected for the multi-information display. However, this changing function may not work depending on the language selectedfor the multi-information display. • When “OFF” (language cooperation: dis- abled) has been selected, the language for Multi Around Monitor (if so equipped) or Head Up Display (HUD) (if so equipped) isnot automatically changed to match the lan- guage selected for the multi-information display.
The language on the audio system’s display does not automatically change when youselect “ON” (language cooperation: enabled) in the language cooperation control.
Operation sound setting
NOTE
NOTE
If the battery is disconnected, the memory of the operation sound setting is erased and is automatically set to ON (operation sound on).
BK0266800US.book
155 ページ 2018年6月27日 水曜日 午後5時6分
Page 270 of 423
Combination headlights and dimmer switch
Features and controls 5-187
5
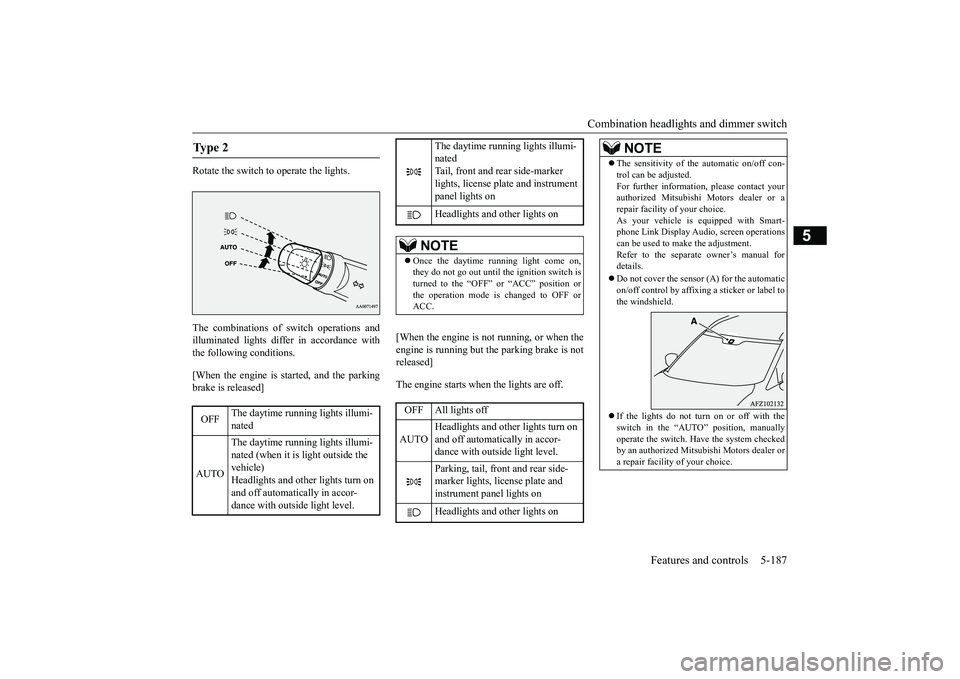
Rotate the switch to operate the lights. The combinations of switch operations and illuminated lights differ in accordance with the following conditions. [When the engine is started, and the parking brake is released]
[When the engine is not running, or when the engine is running but the parking brake is not released] The engine starts when the lights are off.
Ty p e 2 OFF
The daytime running lights illumi- nated
AUTO
The daytime running lights illumi- nated (when it is light outside the vehicle) Headlights and other lights turn on and off automatically in accor- dance with outside light level.
The daytime running lights illumi-nated Tail, front and rear side-marker lights, license plate and instrument panel lights on Headlights and other lights on
NOTE
Once the daytime running light come on, they do not go out until the ignition switch is turned to the “OFF” or “ACC” position or the operation mode is changed to OFF orACC.OFF All lights off AUTO
Headlights and other lights turn on and off automatically in accor- dance with outside light level. Parking, tail, front and rear side- marker lights, license plate and instrument panel lights on Headlights and other lights on
NOTE
The sensitivity of the automatic on/off con- trol can be adjusted. For further information, please contact your authorized Mitsubishi Motors dealer or a repair facility of your choice.As your vehicle is equipped with Smart- phone Link Display Audio, screen operations can be used to make the adjustment.Refer to the separate owner’s manual for details. Do not cover the sensor (A) for the automatic on/off control by affixing a sticker or label to the windshield. If the lights do not turn on or off with the switch in the “AUTO” position, manually operate the switch. Have the system checkedby an authorized Mitsubishi Motors dealer or a repair facility of your choice.
BK0266800US.book
187 ページ 2018年6月27日 水曜日 午後5時6分
Page 271 of 423
Combination headlights and dimmer switch 5-188 Features and controls
5
N00532601652
If the following operation is performed with the combination headlights and dim- mer switch in the “ ” or “ ” position, the lights automatically turn off. [Except for vehicles equipped with the F. A . S . T. - k e y ] The ignition switch is turned to the “OFF”or “ACC” position or the key is removed from the ignition switch and the driver’s door is opened. [For vehicles equipped with the F.A.S.T.- key] The operation mode is changed to OFF or ACC and the driver’s door is opened. If the following operation is performed with the combination headlights and dim- mer switch in the “ ” or “ ” position, the lights automatically turn off after approximately 3 minutes. [Except for vehicles equipped with the F. A . S . T. - k e y ] The ignition switch is turned to the “OFF” or “ACC” position or the key is removedfrom the ignition switch and the driver’sdoor is not opened.
[For vehicles equipped with the F.A.S.T.- key] The operation mode is changed to OFF or ACC and the driver’s door is not opened.
If the combination headlights and dimmer switch is turned to the “ ” or “ ” posi- tion again after the engine is turned off, theapproximately 3-minute auto-cutout function described above will not work. The lights (the parking lights, tail lights and license platelights) will stay on and will not turn off auto- matically.
N00584500044
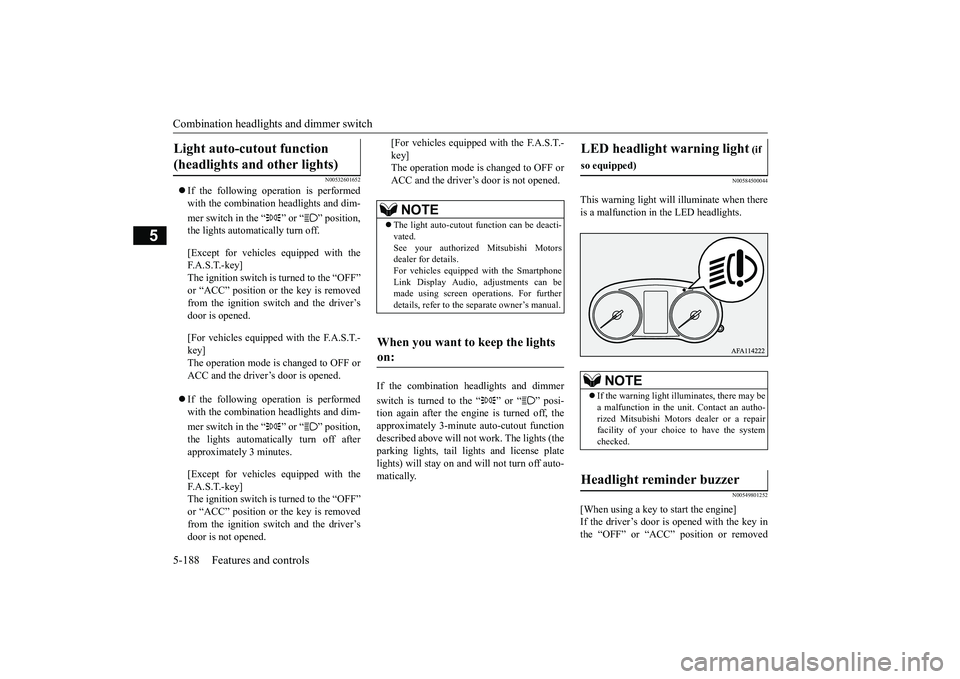
This warning light will illuminate when thereis a malfunction in the LED headlights.
N00549801252
[When using a key to start the engine]If the driver’s door is opened with the key in the “OFF” or “ACC” position or removed
Light auto-cutout function (headlights and other lights)
NOTE
The light auto-cutout function can be deacti- vated.See your authorized Mitsubishi Motors dealer for details. For vehicles equipped with the SmartphoneLink Display Audio, adjustments can be made using screen operations. For further details, refer to the separate owner’s manual.
When you want to keep the lights on:
LED headlight warning light
(if
so equipped)
NOTE
If the warning light illuminates, there may be a malfunction in the unit. Contact an autho- rized Mitsubishi Motors dealer or a repairfacility of your choice to have the system checked.
Headlight reminder buzzer
BK0266800US.book
188 ページ 2018年6月27日 水曜日 午後5時6分
Page 276 of 423
Combination headlights and dimmer switch
Features and controls 5-193
5
If the AHB determines that its performance has been degraded, the warning display will appear. This can occur when: Foreign objects, such as dirt, snow or ice, adhere to the windshield of the sensor portion. In adverse weather
conditions, such as
rain, snow, sandstorms, etc. A front vehicle or an oncoming vehicle is splashing water, snow or dirt.
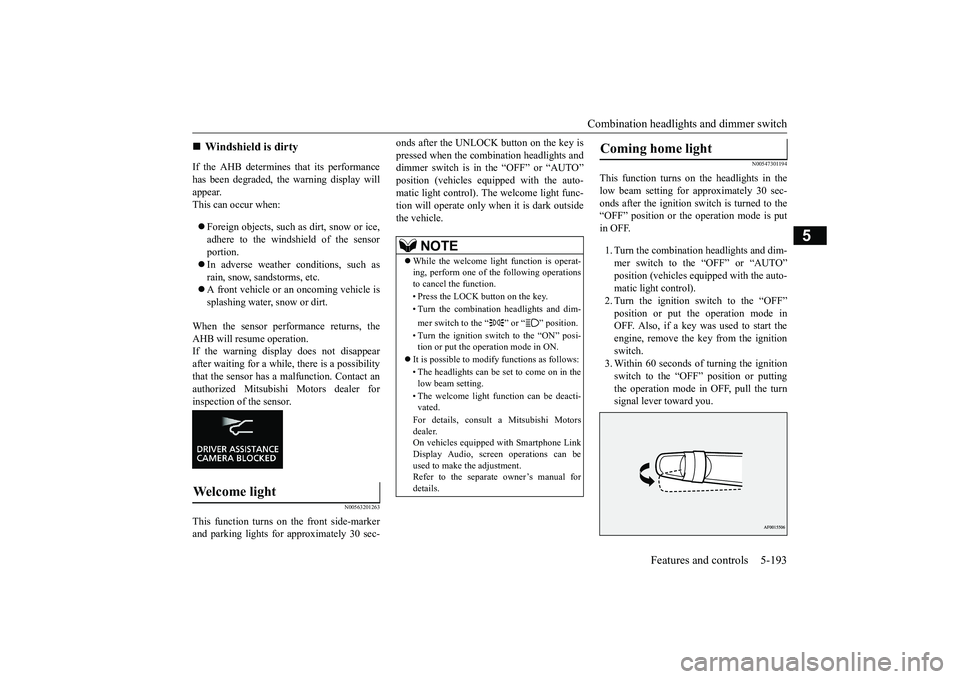
When the sensor performance returns, the AHB will resume operation.If the warning display does not disappear after waiting for a while, there is a possibility that the sensor has a malfunction. Contact anauthorized Mitsubishi Motors dealer for inspection of the sensor.
N00563201263
This function turns on the front side-markerand parking lights for approximately 30 sec-
onds after the UNLOCK button on the key is pressed when the combination headlights and dimmer switch is in the “OFF” or “AUTO” position (vehicles equipped with the auto-matic light control). The welcome light func- tion will operate only when it is dark outside the vehicle.
N00547301194
This function turns on the headlights in thelow beam setting for approximately 30 sec-onds after the ignition switch is turned to the “OFF” position or the operation mode is put in OFF. 1. Turn the combination headlights and dim- mer switch to the “OFF” or “AUTO”position (vehicles equipped with the auto- matic light control). 2. Turn the ignition switch to the “OFF”position or put the operation mode in OFF. Also, if a key was used to start the engine, remove the key from the ignitionswitch. 3. Within 60 seconds of turning the ignition switch to the “OFF” position or puttingthe operation mode in OFF, pull the turn signal lever toward you.
Windshield is dirty
Welcome light
NOTE
While the welcome light function is operat- ing, perform one of the following operationsto cancel the function. • Press the LOCK button on the key.• Turn the combination headlights and dim- mer switch to the “ ” or “ ” position. • Turn the ignition switch to the “ON” posi- tion or put the operation mode in ON.
It is possible to modify functions as follows: • The headlights can be set to come on in the low beam setting. • The welcome light function can be deacti- vated. For details, consult a Mitsubishi Motors dealer. On vehicles equipped with Smartphone Link Display Audio, screen operations can beused to make the adjustment. Refer to the separate owner’s manual for details.
Coming home light
BK0266800US.book
193 ページ 2018年6月27日 水曜日 午後5時6分
Page 277 of 423
Headlight leveling switch (if so equipped) 5-194 Features and controls
5
4. The headlights will come on in the low beam setting for approximately 30 sec- onds. After the headlights go off, the headlights can be turned on again in thelow beam setting for approximately 30 seconds by pulling the turn signal lever toward you within 60 seconds of turningthe ignition switch to the “OFF” position or putting the operation mode in OFF. To turn on the headlights again after 60 sec-onds of turning the ignition switch to the“OFF” position or putting the operation mode in OFF, repeat the process from step 1.
N00537101131
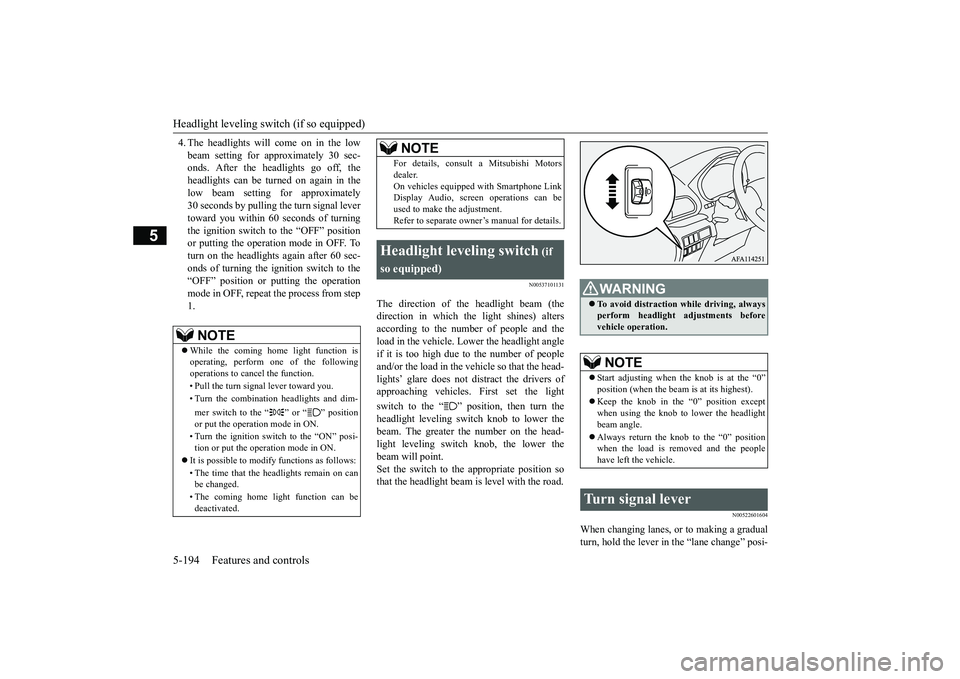
The direction of the headlight beam (thedirection in which the light shines) altersaccording to the number of people and the load in the vehicle. Lower the headlight angle if it is too high due to the number of peopleand/or the load in the vehicle so that the head- lights’ glare does not distract the drivers of approaching vehicles. First set the light switch to the “ ” position, then turn the headlight leveling switch knob to lower the beam. The greater the number on the head- light leveling switch knob, the lower thebeam will point. Set the switch to the appropriate position so that the headlight beam is level with the road.
N00522601604
When changing lanes, or to making a gradualturn, hold the lever in the “lane change” posi-
NOTE
While the coming home light function is operating, perform one of the following operations to cancel the function. • Pull the turn signal lever toward you. • Turn the combination headlights and dim- mer switch to the “ ” or “ ” position or put the operation mode in ON. • Turn the ignition switch to the “ON” posi- tion or put the operation mode in ON.
It is possible to modify functions as follows: • The time that the headlights remain on can be changed. • The coming home light function can be deactivated.
For details, consult a Mitsubishi Motors dealer. On vehicles equipped with Smartphone Link Display Audio, screen operations can be used to make the adjustment.Refer to separate owner’s manual for details.
Headlight leveling switch
(if
so equipped)
NOTE
WA R N I N G To avoid distraction while driving, always perform headlight adjustments before vehicle operation.NOTE
Start adjusting when the knob is at the “0” position (when the beam is at its highest). Keep the knob in the “0” position except when using the knob to lower the headlight beam angle. Always return the knob to the “0” position when the load is removed and the people have left the vehicle.
Turn signal lever
BK0266800US.book
194 ページ 2018年6月27日 水曜日 午後5時6分
Page 278 of 423
Hazard warning flasher switch Features and controls 5-195
5
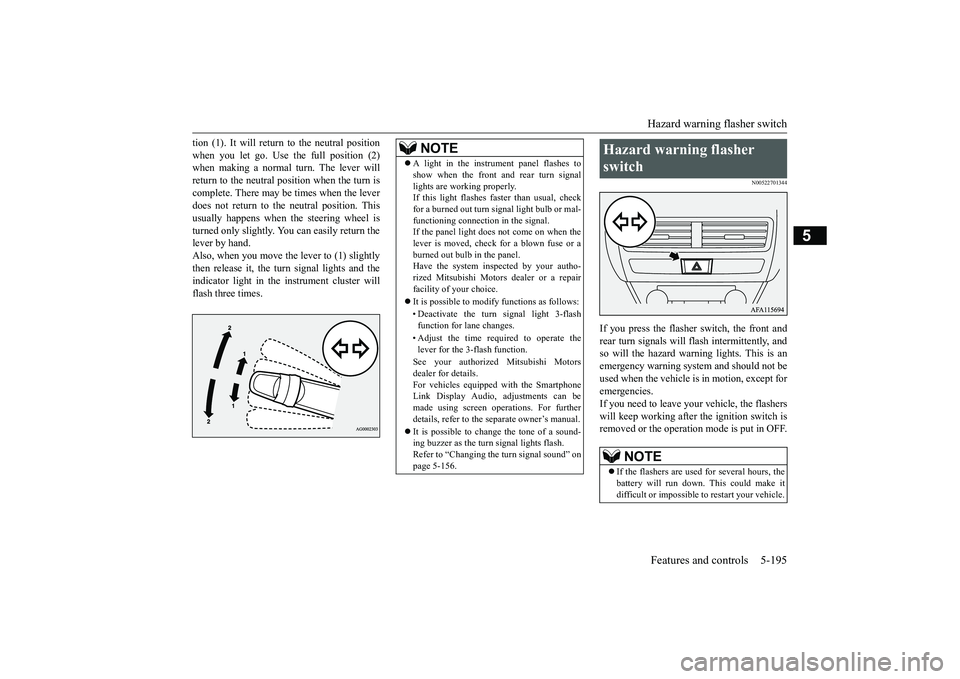
tion (1). It will return to the neutral position when you let go. Use the full position (2) when making a normal turn. The lever will return to the neutral position when the turn iscomplete. There may be times when the lever does not return to the neutral position. This usually happens when the steering wheel isturned only slightly. You can easily return the lever by hand. Also, when you move the lever to (1) slightlythen release it, the turn signal lights and theindicator light in the instrument cluster will flash three times.
N00522701344
If you press the flasher switch, the front and rear turn signals will flash intermittently, and so will the hazard warning lights. This is an emergency warning system and should not beused when the vehicle is in motion, except foremergencies. If you need to leave your vehicle, the flashers will keep working after the ignition switch isremoved or the operation mode is put in OFF.
NOTE
A light in the instrument panel flashes to show when the front and rear turn signal lights are working properly. If this light flashes faster than usual, check for a burned out turn signal light bulb or mal-functioning connection in the signal. If the panel light does not come on when the lever is moved, check for a blown fuse or aburned out bulb in the panel. Have the system inspected by your autho- rized Mitsubishi Motors dealer or a repairfacility of your choice. It is possible to modify functions as follows: • Deactivate the turn signal light 3-flash function for lane changes. • Adjust the time required to operate the lever for the 3-flash function. See your authorized Mitsubishi Motors dealer for details.For vehicles equipped with the Smartphone Link Display Audio, adjustments can be made using screen operations. For furtherdetails, refer to the separate owner’s manual. It is possible to change the tone of a sound- ing buzzer as the turn signal lights flash. Refer to “Changing the turn signal sound” on page 5-156.
Hazard warning flasher switch
NOTE
If the flashers are used for several hours, the battery will run down. This could make it difficult or impossible to restart your vehicle.
BK0266800US.book
195 ページ 2018年6月27日 水曜日 午後5時6分
Page 280 of 423
Wiper and washer switch
Features and controls 5-197
5
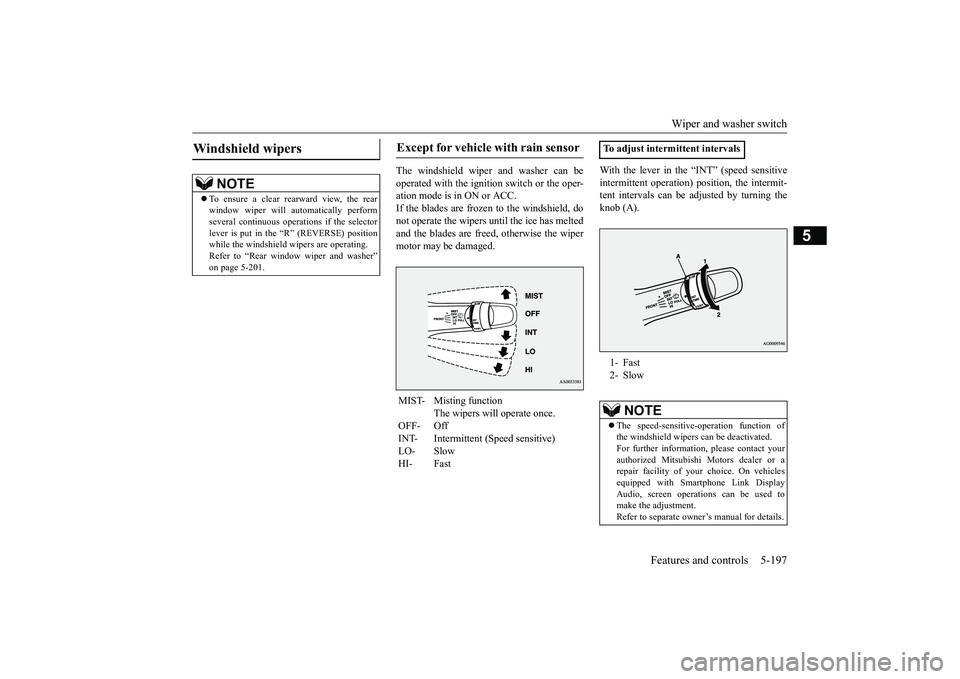
The windshield wiper and washer can be operated with the ignition switch or the oper- ation mode is in ON or ACC.If the blades are frozen to the windshield, do not operate the wipers until the ice has melted and the blades are freed, otherwise the wipermotor may be damaged.
With the lever in the “INT” (speed sensitive intermittent operation) position, the intermit- tent intervals can be adjusted by turning the knob (A).
Windshield wipers
NOTE
To ensure a clear rearward view, the rear window wiper will automatically perform several continuous operat
ions if the selector
lever is put in the “R” (REVERSE) positionwhile the windshield wipers are operating. Refer to “Rear window wiper and washer” on page 5-201.
Except for vehicle with rain sensor MIST- Misting function
The wipers will operate once.
OFF- Off INT- Intermittent (Speed sensitive) LO- SlowHI- Fast
To adjust intermittent intervals 1- Fast 2- Slow
NOTE
The speed-sensitive-operation function of the windshield wipers can be deactivated. For further information, please contact yourauthorized Mitsubishi Motors dealer or a repair facility of your choice. On vehicles equipped with Smartphone Link DisplayAudio, screen operations can be used to make the adjustment. Refer to separate owner’s manual for details.
BK0266800US.book
197 ページ 2018年6月27日 水曜日 午後5時6分
Page 282 of 423
Wiper and washer switch
Features and controls 5-199
5
If your hands get trapped, you could suffer injuries or the wipers could malfunction. Besure to turn the igniti
on switch to the “OFF”
position or put the operation mode in OFF, or move the lever to the
“OFF” position to deac-
tivate the rain sensor.
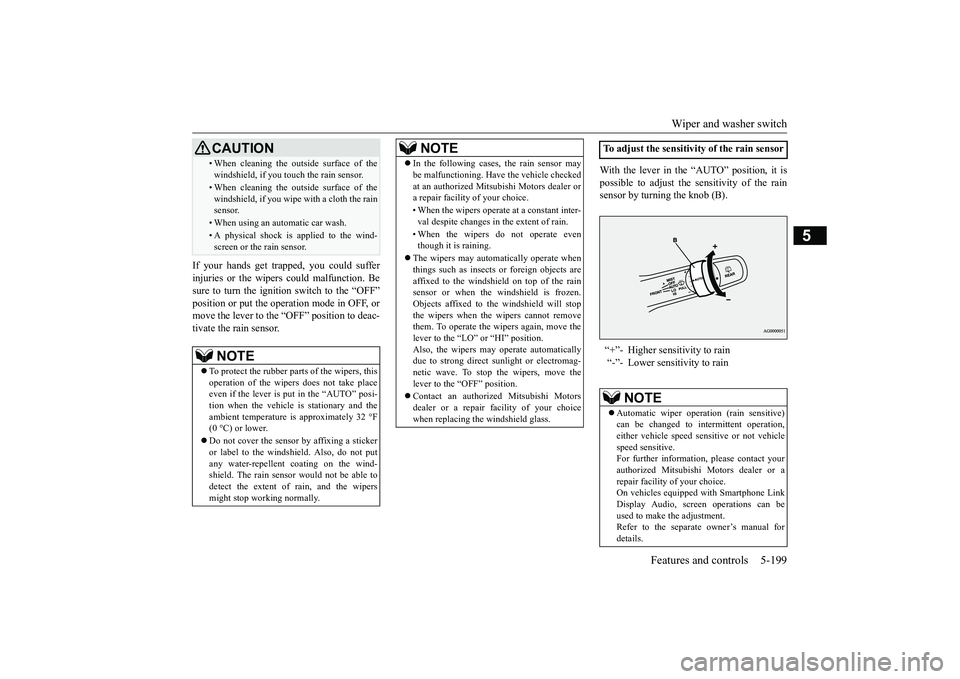
With the lever in the “AUTO” position, it is possible to adjust the sensitivity of the rain sensor by turning the knob (B).
• When cleaning the outside surface of the windshield, if you touch the rain sensor.• When cleaning the outside surface of the windshield, if you wipe with a cloth the rainsensor.• When using an automatic car wash.• A physical shock is applied to the wind-screen or the rain sensor.NOTE
To protect the rubber parts of the wipers, this operation of the wipers does not take place even if the lever is put in the “AUTO” posi-tion when the vehicle is stationary and the ambient temperature is approximately 32 °F (0 °C) or lower. Do not cover the sensor by affixing a sticker or label to the windshield. Also, do not put any water-repellent coating on the wind- shield. The rain sensor would not be able todetect the extent of rain, and the wipers might stop working normally.CAUTION
In the following cases, the rain sensor may be malfunctioning. Have the vehicle checked at an authorized Mitsubishi Motors dealer or a repair facility of your choice. • When the wipers operate at a constant inter- val despite changes in the extent of rain. • When the wipers do not operate even though it is raining.
The wipers may automatically operate when things such as insects or foreign objects are affixed to the windshield on top of the rainsensor or when the windshield is frozen. Objects affixed to the windshield will stop the wipers when the wipers cannot removethem. To operate the wipers again, move the lever to the “LO” or “HI” position. Also, the wipers may operate automaticallydue to strong direct sunlight or electromag- netic wave. To stop the wipers, move the lever to the “OFF” position. Contact an authorized Mitsubishi Motors dealer or a repair facility of your choicewhen replacing the windshield glass.NOTE
To adjust the sensitivity of the rain sensor “+”- Higher sensitivity to rain “-”- Lower sensitivity to rain
NOTE
Automatic wiper operation (rain sensitive) can be changed to intermittent operation,either vehicle speed sensitive or not vehicle speed sensitive. For further information, please contact yourauthorized Mitsubishi Motors dealer or a repair facility of your choice. On vehicles equipped with Smartphone LinkDisplay Audio, screen operations can be used to make the adjustment. Refer to the separate owner’s manual fordetails.
BK0266800US.book
199 ページ 2018年6月27日 水曜日 午後5時6分