fog lights MITSUBISHI ECLIPSE CROSS 2020 (in English) User Guide
[x] Cancel search | Manufacturer: MITSUBISHI, Model Year: 2020, Model line: ECLIPSE CROSS, Model: MITSUBISHI ECLIPSE CROSS 2020Pages: 427, PDF Size: 78.05 MB
Page 277 of 427

Combination headlights and dimmer switch 5-196 Features and controls
5
The sensitivity of the sensor can be temporar- ily lowering in the following ways. 1. Park your vehicle in a safe place and the ignition switch is turned to the “OFF” position or the operation mode is put inOFF.
NOTE
The headlights may not be switched from high beam to low beam under the following circumstances. • A vehicle in front or oncoming vehicle is hindered by any object such as continuous bends, elevated median/island, traffic signs, roadside trees. • Your vehicle passes an oncoming vehicle suddenly on a bend with poor visibility. • Another vehicle crosses ahead of your vehi- cle.
The headlights may remain at low beam (or be switched from high beam to low beam)when a reflective object (e.g. street light, traffic signal, noticeboard and signboard) reflects light. Any of the following factors may influence the headlight beam switching timing: • How brightly the exterior lights of a vehicle in front or oncoming vehicle illuminate. • Movement or direction of a vehicle in front or oncoming vehicle. • Only right or left exterior light of a vehicle in front or oncoming vehicle is illuminat-ing. • A vehicle in front or oncoming vehicle is a motorcycle. • Road conditions (gradient, bends and road surface). • The number of occupants and luggage load.
The AHB recognizes environmental condi- tions by sensing a light source ahead of your vehicle. Therefore, you may feel like some- thing is not quite right when the headlight beams are switched automatically. The system may not detect a light vehicle such as a bicycle. The system may not detect an ambient brightness precisely. This causes the trafficto be dazzled by high beam or the low beam to be maintained. In such cases, you should switch the headlight beams manually. • In bad weather (heavy rain, fog, snow or sandstorm). • The windshield is dirty or fogged up. • The windshield is cracked or broken. • The sensor is deformed or dirty.• A light, which is similar to the headlights or tail lights, is shining around your vehicle. • A vehicle in front or oncoming vehicle is driven without lights,
the exterior lights are
dirty or discolored, or the direction of the headlight beams is adjusted improperly. • It becomes dark and bright suddenly and continuously around your vehicle. • Your vehicle is driven on uneven surfaces. • Your vehicle is driven on a winding road.• A reflective object such as a noticeboard or a mirror reflects a light ahead of your vehi- cle.NOTE
• When lights of the vehicle in front or head-lights of an oncoming vehicle blend into the other lights. • The rear end of a vehicle in front (such as a container truck) reflect a strong light. • Your vehicle's headlight
is broken or dirty.
• Your vehicle is inclined due to a flat tire or towing. • The warning display appears. (Refer to “System problem warning” onpage 5-197.)
Observe the precautions below to maintain good usage conditions: • Do not attempt to disassemble the sensor.• Do not affix a sticker or label on the wind- shield near the sensor. • Avoid overload. • Do not modify your vehicle. • When the windshield is replaced, use the Mitsubishi Motors genuine parts.
To adjust the sensitivity of the sensor
NOTE
BK0277700US.book
196 ページ 2019年3月8日 金曜日 午前9時23分
Page 282 of 427
ECO mode switch
Features and controls 5-201
5
N00579300099
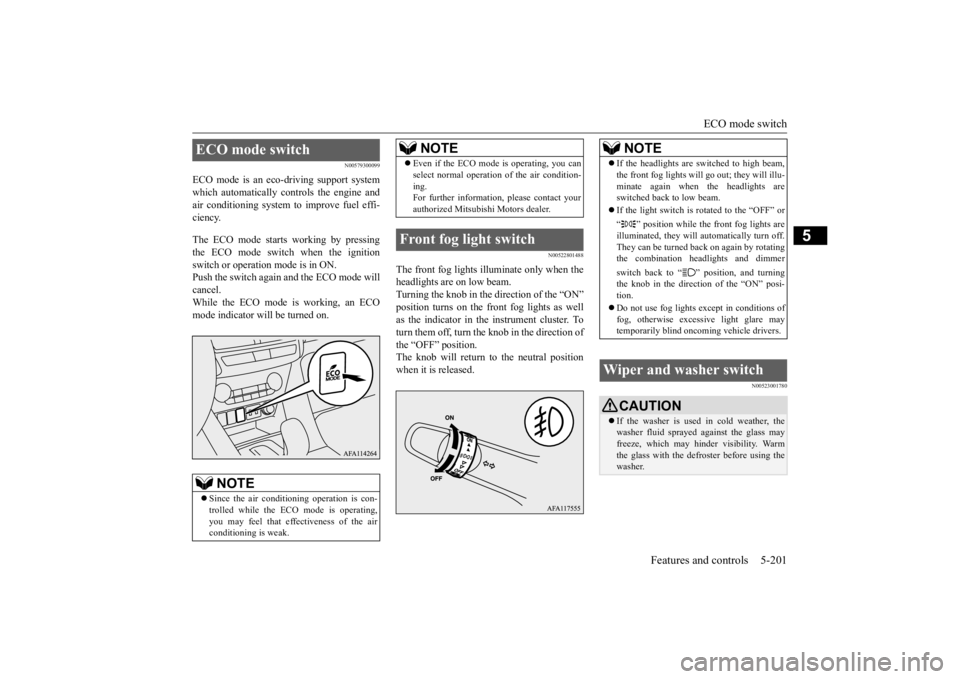
ECO mode is an eco-driving support system which automatically controls the engine andair conditioning system to improve fuel effi- ciency. The ECO mode starts working by pressing the ECO mode switch when the ignitionswitch or operation mode is in ON.Push the switch again and the ECO mode will cancel. While the ECO mode is working, an ECOmode indicator will be turned on.
N00522801488
The front fog lights illuminate only when theheadlights are on low beam.Turning the knob in the direction of the “ON” position turns on the front fog lights as well as the indicator in the instrument cluster. Toturn them off, turn the knob in the direction of the “OFF” position. The knob will return to the neutral positionwhen it is released.
N00523001780
ECO mode switch
NOTE
Since the air conditioning operation is con- trolled while the ECO mode is operating, you may feel that effectiveness of the airconditioning is weak.
Even if the ECO mode is operating, you can select normal operation of the air condition- ing. For further information, please contact your authorized Mitsubishi Motors dealer.
Front fog light switch
NOTE
NOTE
If the headlights are switched to high beam, the front fog lights will
go out; they will illu-
minate again when the headlights are switched back to low beam. If the light switch is rotated to the “OFF” or “ ” position while the front fog lights are illuminated, they will automatically turn off. They can be turned back on again by rotating the combination headlights and dimmer switch back to “ ” position, and turning the knob in the direction of the “ON” posi- tion. Do not use fog lights
except in conditions of
fog, otherwise excessive light glare may temporarily blind oncoming vehicle drivers.
Wiper and washer switch
CAUTION If the washer is used in cold weather, the washer fluid sprayed against the glass may freeze, which may hinder visibility. Warmthe glass with the defroster before using the washer.
BK0277700US.book
201 ページ 2019年3月8日 金曜日 午前9時23分
Page 313 of 427
Vehicle preparation before driving 6-4 Driving safety
6
N00629001842
For a safer and more enjoyable trip, always check for the following: Before starting the vehicle, make certain that you and all passengers are seated and wearing their seat belts properly (with children in the rear seat, in appropriaterestraints), and that all the doors and the liftgate are locked. Move the driver’s seat as far backward as possible, while keeping good visibility, and good control of the steering wheel, brakes, accelerator, and controls. Checkthe instrument panel indicators and multi- information display for any possible prob- lem. Similarly, the front passenger seat should also be moved as far back as possible. Make sure that infants and small children are properly restrained in accordance with all laws and regulations.
Check these by selecting the defroster mode, and set the blower switch on high. You shouldbe able to feel the air blowing against the windshield. Refer to “Defrosting or defogging (wind-shield, door windows)” on page 7-13, 7-22. Check all the tires for heavy tread wear or uneven wear patterns. Look for stones, nails,glass, or other objects stuck in the tread. Look for any tread cuts or sidewall cracks. Check the wheel nuts for tightness, and the tires(including spare tire) for proper pressure. Replace your tires before they are heavily worn out.As your vehicle is equipped with a tire pres- sure monitoring system, there is a risk of damage to the tire inflation pressure sensorswhen the tire is replaced on the rim. Tire replacement should, only, be performed by an authorized Mitsubishi Motors dealer. Have someone watch while you turn all the exterior lights on and off. Also check the turn
signal indicators and high-beam indicators on the instrument panel. Check the ground under the vehicle after parking overnight, for fuel, water, oil, or other leaks. Make sure all the fluid levels are correct. Also, if you can smell fuel, you needto find out why immediately and have itfixed.
N00629201147
Even this vehicle’s safety equipment, andyour safest driving, cannot guarantee that you can avoid an accident or injury. However, if you give extra attention to the followingareas, you can better protect yourself and your passengers: Drive defensively. Be aware of traffic, road and weather conditions. Leave plentyof stopping distance between your vehicle and the vehicle ahead. Before changing lanes, check your mir- rors, blind spots, and use your turn signal light. While driving, watch the behavior of other drivers, bicyclists, and pedestrians.
Vehicle preparation before driving Seat belts and seats
Defrosters Tires Lights
Fluid leaks Safe driving techniques
BK0277700US.bo
ok 4 ページ 2019年3月8日 金曜日 午前9時23分
Page 389 of 427
Fuses 9-24 Vehicle care and maintenance
9
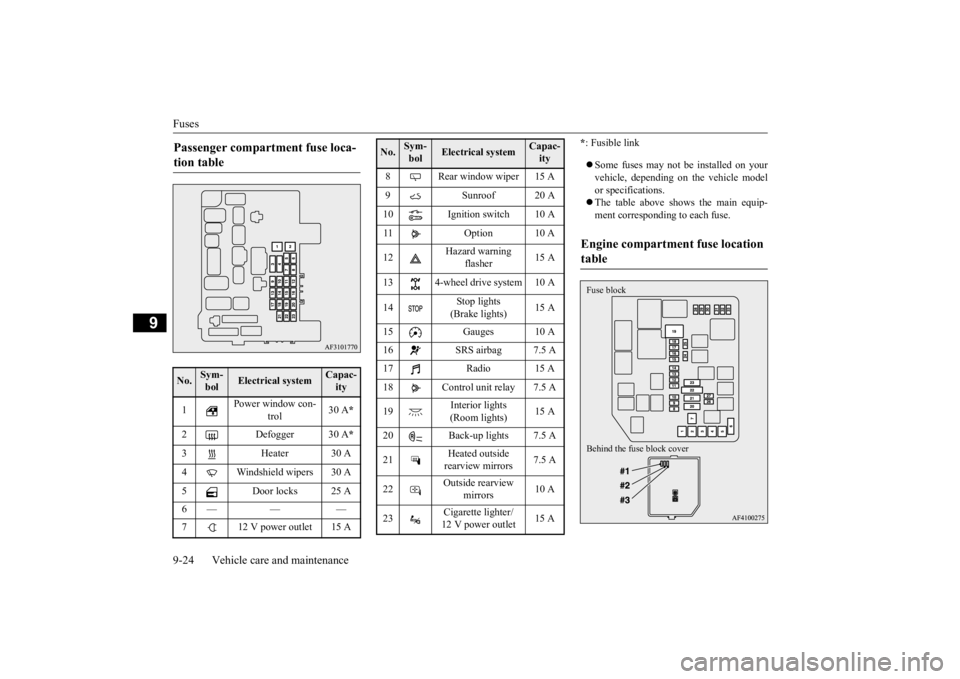
* : Fusible link Some fuses may not be installed on your vehicle, depending on the vehicle model or specifications. The table above shows the main equip- ment corresponding to each fuse.
Passenger compartment fuse loca- tion table No.
Sym- bol
Electrical system
Capac-ity
1
Power window con-
trol
30 A
*
2 Defogger 30 A
*
3 Heater 30 A 4 Windshield wipers 30 A 5 Door locks 25 A 6— — — 7 12 V power outlet 15 A
8 Rear window wiper 15 A 9 Sunroof 20 A 10 Ignition switch 10 A 11 Option 10 A 12
Hazard warning
flasher
15 A
13 4-wheel drive system 10 A14
Stop lights (Brake lights)
15 A
15 Gauges 10 A 16 SRS airbag 7.5 A 17 Radio 15 A 18 Control unit relay 7.5 A 19
Interior lights (Room lights)
15 A
20 Back-up lights 7.5 A21
Heated outside rearview mirrors
7.5 A
22
Outside rearview
mirrors
10 A
23
Cigarette lighter/ 12 V power outlet
15 A
No.
Sym- bol
Electrical system
Capac-ity
Engine compartment fuse location table Behind the fuse block cover Fuse block
BK0277700US.bo
ok 24 ページ 2019年3月8日 金曜日 午前9時23分
Page 390 of 427
Fuses
Vehicle care and maintenance 9-25
9
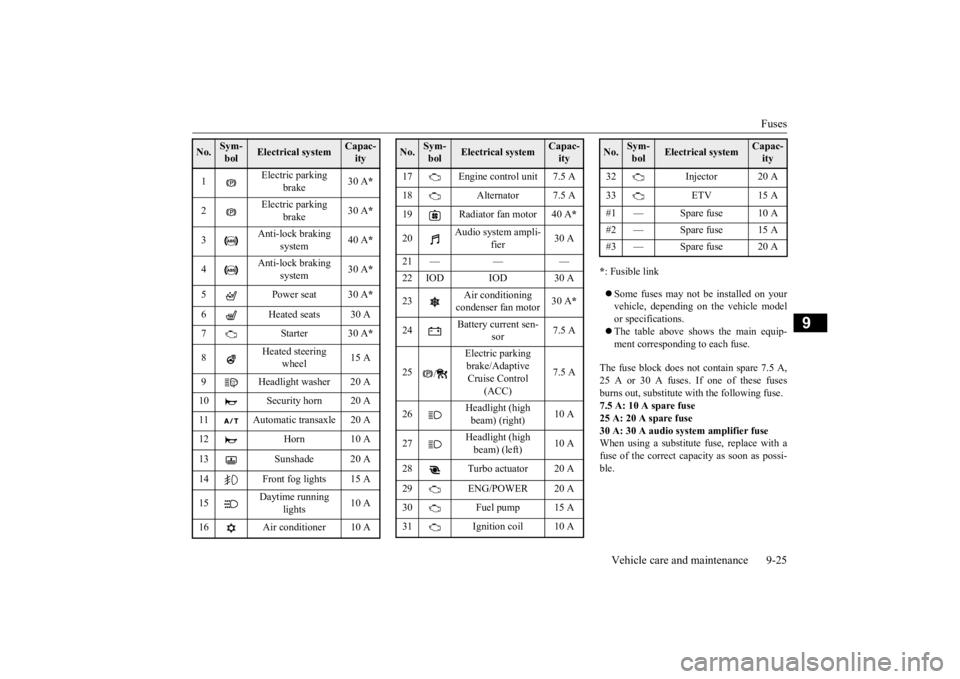
* : Fusible link Some fuses may not be installed on your vehicle, depending on the vehicle model or specifications. The table above shows the main equip- ment corresponding to each fuse.
The fuse block does not contain spare 7.5 A, 25 A or 30 A fuses. If one of these fusesburns out, substitute with the following fuse.7.5 A: 10 A spare fuse 25 A: 20 A spare fuse 30 A: 30 A audio system amplifier fuseWhen using a substitute fuse, replace with a fuse of the correct capacity as soon as possi- ble.
No.
Sym- bol
Electrical system
Capac-ity
1
Electric parking
brake
30 A
*
2
Electric parking
brake
30 A
*
3
Anti-lock braking
system
40 A
*
4
Anti-lock braking
system
30 A
*
5 Power seat 30 A
*
6 Heated seats 30 A 7Starter30 A
*
8
Heated steering
wheel
15 A
9 Headlight washer 20 A 10 Security horn 20 A 11 Automatic transaxle 20 A 12 Horn 10 A 13 Sunshade 20 A14 Front fog lights 15 A 15
Daytime running
lights
10 A
16 Air conditioner 10 A
17 Engine control unit 7.5 A 18 Alternator 7.5 A 19 Radiator fan motor 40 A
*
20
Audio system ampli-
fier
30 A
21 — — — 22 IOD IOD 30 A 23
Air conditioning condenser fan motor
30 A
*
24
Battery current sen-
sor
7.5 A
25
/
Electric parking brake/Adaptive Cruise Control
(ACC)
7.5 A
26
Headlight (high beam) (right)
10 A
27
Headlight (high beam) (left)
10 A
28 Turbo actuator 20 A 29 ENG/POWER 20 A 30 Fuel pump 15 A31 Ignition coil 10 ANo.
Sym- bol
Electrical system
Capac-ity
32 Injector 20 A 33 ETV 15 A #1 — Spare fuse 10 A #2 — Spare fuse 15 A#3 — Spare fuse 20 ANo.
Sym- bol
Electrical system
Capac-ity
BK0277700US.bo
ok 25 ページ 2019年3月8日 金曜日 午前9時23分
Page 392 of 427
Replacement of light bulbs
Vehicle care and maintenance 9-27
9
N00942901434
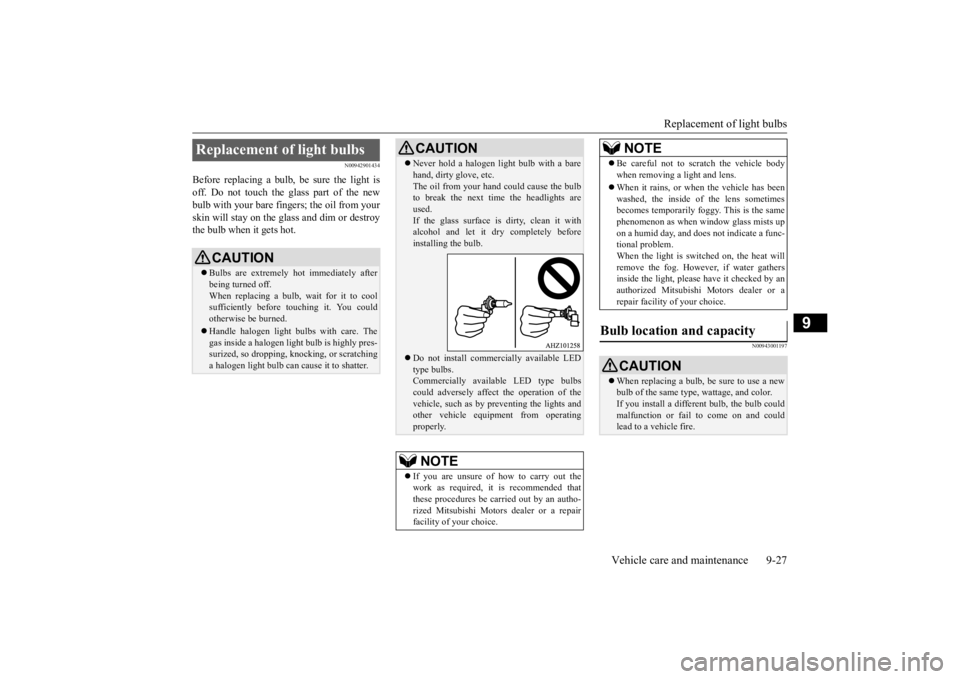
Before replacing a bulb, be sure the light is off. Do not touch the glass part of the newbulb with your bare fingers; the oil from your skin will stay on the glass and dim or destroy the bulb when it gets hot.
N00943001197
Replacement of light bulbs
CAUTION Bulbs are extremely hot immediately after being turned off.When replacing a bulb, wait for it to cool sufficiently before touching it. You could otherwise be burned. Handle halogen light bulbs with care. The gas inside a halogen light bulb is highly pres-surized, so dropping, knocking, or scratching a halogen light bulb can cause it to shatter.
Never hold a halogen light bulb with a bare hand, dirty glove, etc. The oil from your hand could cause the bulb to break the next time the headlights are used.If the glass surface is dirty, clean it with alcohol and let it dry completely before installing the bulb. Do not install commercially available LED type bulbs.Commercially available LED type bulbs could adversely affect the operation of the vehicle, such as by preventing the lights andother vehicle equipment from operating properly.NOTE
If you are unsure of how to carry out the work as required, it is recommended that these procedures be carried out by an autho- rized Mitsubishi Motors dealer or a repairfacility of your choice.CAUTION
Be careful not to scratch the vehicle body when removing a light and lens. When it rains, or when the vehicle has been washed, the inside of the lens sometimesbecomes temporarily foggy. This is the same phenomenon as when window glass mists up on a humid day, and does not indicate a func-tional problem. When the light is switched on, the heat will remove the fog. However, if water gathersinside the light, please have it checked by an authorized Mitsubishi Motors dealer or a repair facility of your choice.
Bulb location and capacity
CAUTION When replacing a bulb, be sure to use a new bulb of the same type, wattage, and color.If you install a different bulb, the bulb could malfunction or fail to come on and could lead to a vehicle fire.NOTE
BK0277700US.bo
ok 27 ページ 2019年3月8日 金曜日 午前9時23分
Page 393 of 427
Replacement of light bulbs 9-28 Vehicle care and maintenance
9
N00950302173
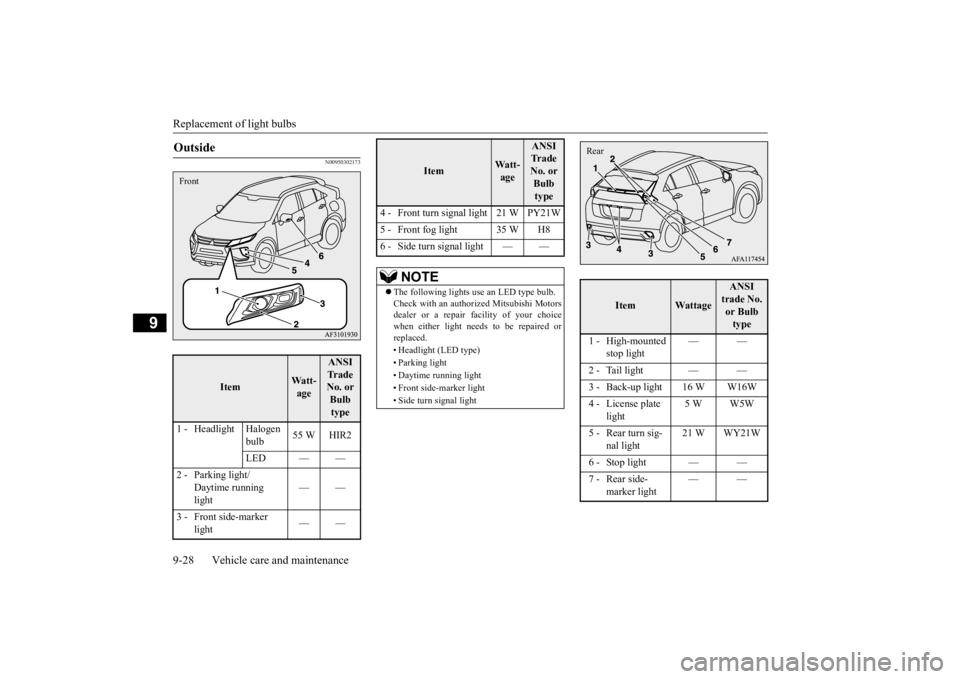
Outside
Item
Wa t t - age
ANSI Tr a d e No. or Bulb type
1 - Headlight Halogen
bulb
55 W HIR2
LED — —
2 - Parking light/
Daytime running light
——
3 - Front side-marker
light
——
Front
4 - Front turn signal light 21 W PY21W 5 - Front fog light 35 W H86 - Side turn signal light — —
NOTE
The following lights use an LED type bulb. Check with an authorized Mitsubishi Motorsdealer or a repair
facility of your choice
when either light needs to be repaired or replaced. • Headlight (LED type) • Parking light • Daytime running light• Front side-marker light • Side turn signal light
Item
Wa t t - age
ANSI Tr a d e No. or Bulb type
Item
Wattage
ANSI trade No. or Bulb type
1 - High-mounted
stop light
——
2 - Tail light — — 3 - Back-up light 16 W W16W4 - License plate
light
5 W W5W
5 - Rear turn sig-
nal light
21 W WY21W
6 - Stop light — — 7 - Rear side-
marker light
——
Rear
BK0277700US.bo
ok 28 ページ 2019年3月8日 金曜日 午前9時23分
Page 397 of 427
Replacement of light bulbs 9-32 Vehicle care and maintenance
9
N00943601991
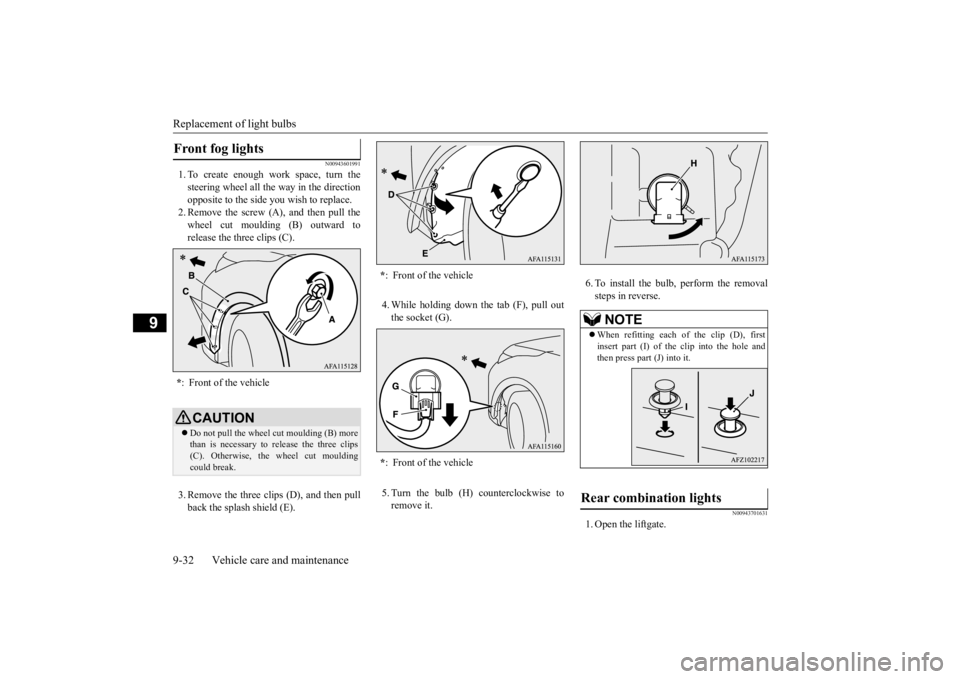
1. To create enough work space, turn the steering wheel all the way in the directionopposite to the side you wish to replace. 2. Remove the screw (A), and then pull the wheel cut moulding (B) outward torelease the three clips (C). 3. Remove the three clips (D), and then pull back the splash shield (E).
4. While holding down the tab (F), pull out the socket (G). 5. Turn the bulb (H) counterclockwise to remove it.
6. To install the bulb, perform the removal steps in reverse.
N00943701631
1. Open the liftgate.
Front fog lights * : Front of the vehicleCAUTIONDo not pull the wheel cut moulding (B) more than is necessary to release the three clips(C). Otherwise, the wheel cut moulding could break.
* : Front of the vehicle * : Front of the vehicle
NOTE
When refitting each of the clip (D), first insert part (I) of the clip into the hole and then press part (J) into it.
Rear combination lights
BK0277700US.bo
ok 32 ページ 2019年3月8日 金曜日 午前9時23分
Page 421 of 427
Alphabetical index 12-2
12
Convenient hook
...............
...............
5-226
Coolant (engine)
..........................
9-7
, 11-7
Cruise control
....................
.................
5-87
D
Daytime running lights
Bulb location and capacity
...............
9-28
Replacement
.................
.................
9-30
Defogger (rear window)
....................
5-207
Defrosting or defogging (windshield, door windows)
.................
7-9
, 7-13
, 7-18
, 7-22
Dimensions
...................
.....................
11-4
Dimmer (high/low beam change)
.......
5-194
Disc brake pads
.................
.................
9-21
Dome light (front)/Reading lights
.......
5-218
Bulb location and capacity
...............
9-29
Dome light (rear)
...............
...............
5-219
Bulb location and capacity
...............
9-29
Doors
Lock
......................
........................
5-35
Power door locks
............................
5-37
Drink holders
....................
...............
5-222
Driving during cold weather
..................
6-5
Driving precaution
................
................
6-2
Driving, alcohol and drugs
.....................
6-2
Dual-zone automatic climate control air conditioning
....................
.................
7-15
E
ECO mode switch
.............................
5-201
Electric parking brake
..........................
5-50
Electric power steering system (EPS)
....
5-84
Electric rear window defogger switch
..5-207
Electronic immobilizer (Anti-theft starting system)
.....................
................
5-4
, 5-28
Emission-control system maintenance
...
9-20
Engine
Compartment
..................
.................
9-5
Coolant
...................
................
9-7
, 11-7
Hood
.......................
........................
9-3
Malfunction indicator light
.............
5-185
Oil and oil filter
.......................
9-5
, 11-7
Overheating
....................
.................
8-4
Serial number
.................
................
11-2
Specification
...................
................
11-6
Engine hood
....................
....................
9-3
Engine switch
.....................
................
5-19
Event data recorder (EDR)
...................
3-14
Exhaust system
...................
................
9-22
F
Floor console box
..............................
5-222
Floor mat
.........................
....................
6-3
Fluid
Brake fluid
..............................
9-9
, 11-7
Continuously variable transmission (CVT) fluid
....................
.................
9-8
, 11-7
Engine coolant
........................
9-7
, 11-7
Engine oil
...............................
9-5
, 11-7
Rear axle oil
............................
9-9
, 11-7
Transfer oil
.............................
9-9
, 11-7
Washer fluid
...........................
9-9
, 11-7
Fluid capacities and lubricants
.............
11-7
Forward Collision Mitigation system (FCM)
.
5-104 Free-hand advanced security transmitter (F.A.S.T.-key)
.................
.................
5-13
Front fog lights
Bulb location and capacity
...............
9-28
Indicators
..................
...................
5-183
Replacement
.................
.................
9-32
Switch
......................
...................
5-201
Front seat adjustment
............................
4-3
Front side-marker lights
Bulb location and capacity
...............
9-28
Replacement
.................
.................
9-30
Front turn signal light
Bulb location and capacity
...............
9-28
Replacement
.................
.................
9-31
Fuel
Filling the fuel tank
...........................
3-3
Fuel economy
...................
................
6-2
Fuel hoses
.....................
.................
9-21
Fuel selection
...................
................
3-2
Tank capacity
................
.................
11-7
BK0277700US.bo
ok 2 ページ 2019年3月8日 金曜日 午前9時23分