headlights MITSUBISHI ECLIPSE CROSS 2020 (in English) Owner's Guide
[x] Cancel search | Manufacturer: MITSUBISHI, Model Year: 2020, Model line: ECLIPSE CROSS, Model: MITSUBISHI ECLIPSE CROSS 2020Pages: 427, PDF Size: 78.05 MB
Page 275 of 427
Combination headlights and dimmer switch 5-194 Features and controls
5
from the ignition switch while the lights are on, the tone will sound to remind you to turn off the lights. [When using the F.A.S.T.-key to start the engine]If the driver’s door is opened with the opera- tion mode is put in OFF or ACC, or if the operation mode is changed to OFF while thelights are on, the tone will sound to remind you to turn off the lights. In either case, the lights will turn off automat- ically and so will the tone. Or you can turn the light switch to the
“OFF” position to stop
the tone.
N00549901178
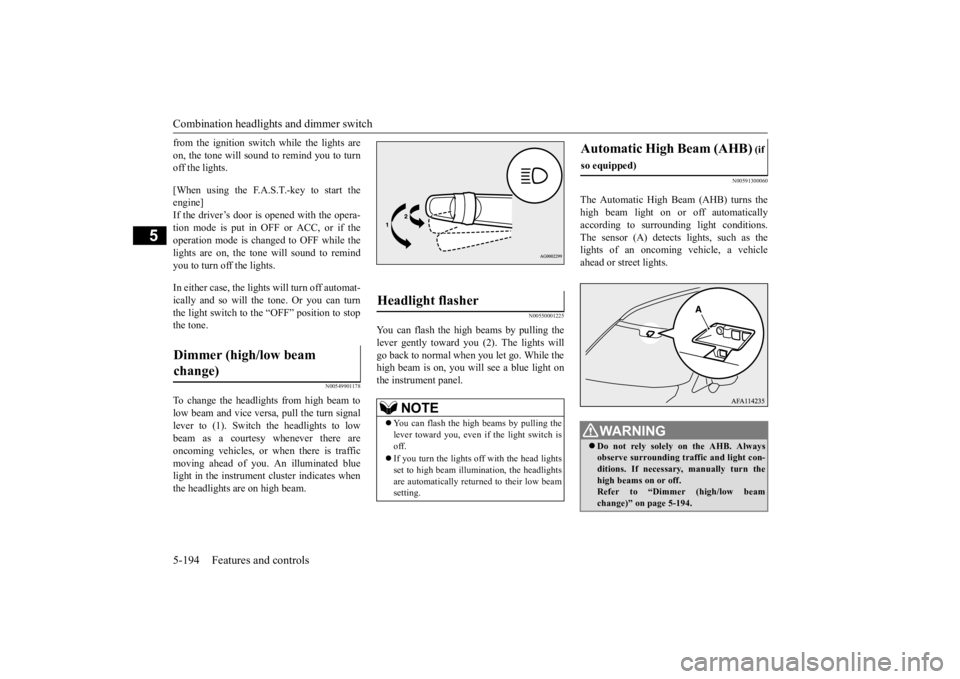
To change the headlights from high beam to low beam and vice versa, pull the turn signal lever to (1). Switch the headlights to lowbeam as a courtesy whenever there are oncoming vehicles, or when there is traffic moving ahead of you. An illuminated bluelight in the instrument cluster indicates when the headlights are on high beam.
N00550001225
You can flash the high beams by pulling the lever gently toward you (2). The lights willgo back to normal when you let go. While the high beam is on, you will see a blue light on the instrument panel.
N00591300060
The Automatic High Beam (AHB) turns the high beam light on or off automatically according to surrounding light conditions.The sensor (A) detects lights, such as the lights of an oncoming vehicle, a vehicle ahead or street lights.
Dimmer (high/low beam change)
Headlight flasher
NOTE
You can flash the high beams by pulling the lever toward you, even if the light switch isoff. If you turn the lights off with the head lights set to high beam illumin
ation, the headlights
are automatically returned to their low beam setting.
Automatic High Beam (AHB)
(if
so equipped)
WA R N I N G Do not rely solely on the AHB. Always observe surrounding traffic and light con- ditions. If necessary, manually turn the high beams on or off.Refer to “Dimmer (high/low beam change)” on page 5-194.
BK0277700US.book
194 ページ 2019年3月8日 金曜日 午前9時23分
Page 276 of 427
Combination headlights and dimmer switch
Features and controls 5-195
5
N00593600100
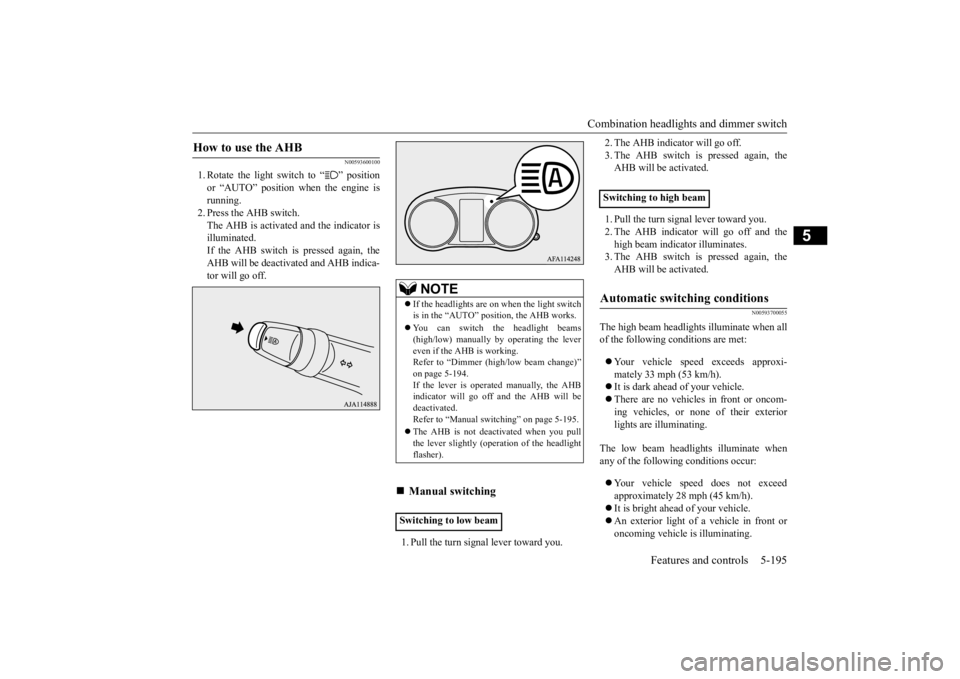
1. Rotate the light switch to “ ” position or “AUTO” position when the engine is running.2. Press the AHB switch. The AHB is activated and the indicator is illuminated.If the AHB switch is pressed again, theAHB will be deactivated and AHB indica- tor will go off.
1. Pull the turn signal lever toward you.
2. The AHB indicator will go off. 3. The AHB switch is pressed again, the AHB will be activated. 1. Pull the turn signal lever toward you. 2. The AHB indicator will go off and thehigh beam indicator illuminates. 3. The AHB switch is pressed again, the AHB will be activated.
N00593700055
The high beam headlights illuminate when all of the following conditions are met: Your vehicle speed exceeds approxi- mately 33 mph (53 km/h). It is dark ahead of your vehicle. There are no vehicles in front or oncom- ing vehicles, or none of their exteriorlights are illuminating.
The low beam headlights illuminate when any of the following conditions occur: Your vehicle speed does not exceed approximately 28 mph (45 km/h). It is bright ahead of your vehicle. An exterior light of a vehicle in front or oncoming vehicle is illuminating.
How to use the AHB
NOTE
If the headlights are on when the light switch is in the “AUTO” position, the AHB works. You can switch the headlight beams (high/low) manually by operating the lever even if the AHB is working. Refer to “Dimmer (high/low beam change)”on page 5-194. If the lever is operated manually, the AHB indicator will go off and the AHB will bedeactivated. Refer to “Manual switching” on page 5-195. The AHB is not deactivated when you pull the lever slightly (operation of the headlight flasher).
Manual switching
Switching to low beam
Switching to high beamAutomatic switching conditions
BK0277700US.book
195 ページ 2019年3月8日 金曜日 午前9時23分
Page 277 of 427

Combination headlights and dimmer switch 5-196 Features and controls
5
The sensitivity of the sensor can be temporar- ily lowering in the following ways. 1. Park your vehicle in a safe place and the ignition switch is turned to the “OFF” position or the operation mode is put inOFF.
NOTE
The headlights may not be switched from high beam to low beam under the following circumstances. • A vehicle in front or oncoming vehicle is hindered by any object such as continuous bends, elevated median/island, traffic signs, roadside trees. • Your vehicle passes an oncoming vehicle suddenly on a bend with poor visibility. • Another vehicle crosses ahead of your vehi- cle.
The headlights may remain at low beam (or be switched from high beam to low beam)when a reflective object (e.g. street light, traffic signal, noticeboard and signboard) reflects light. Any of the following factors may influence the headlight beam switching timing: • How brightly the exterior lights of a vehicle in front or oncoming vehicle illuminate. • Movement or direction of a vehicle in front or oncoming vehicle. • Only right or left exterior light of a vehicle in front or oncoming vehicle is illuminat-ing. • A vehicle in front or oncoming vehicle is a motorcycle. • Road conditions (gradient, bends and road surface). • The number of occupants and luggage load.
The AHB recognizes environmental condi- tions by sensing a light source ahead of your vehicle. Therefore, you may feel like some- thing is not quite right when the headlight beams are switched automatically. The system may not detect a light vehicle such as a bicycle. The system may not detect an ambient brightness precisely. This causes the trafficto be dazzled by high beam or the low beam to be maintained. In such cases, you should switch the headlight beams manually. • In bad weather (heavy rain, fog, snow or sandstorm). • The windshield is dirty or fogged up. • The windshield is cracked or broken. • The sensor is deformed or dirty.• A light, which is similar to the headlights or tail lights, is shining around your vehicle. • A vehicle in front or oncoming vehicle is driven without lights,
the exterior lights are
dirty or discolored, or the direction of the headlight beams is adjusted improperly. • It becomes dark and bright suddenly and continuously around your vehicle. • Your vehicle is driven on uneven surfaces. • Your vehicle is driven on a winding road.• A reflective object such as a noticeboard or a mirror reflects a light ahead of your vehi- cle.NOTE
• When lights of the vehicle in front or head-lights of an oncoming vehicle blend into the other lights. • The rear end of a vehicle in front (such as a container truck) reflect a strong light. • Your vehicle's headlight
is broken or dirty.
• Your vehicle is inclined due to a flat tire or towing. • The warning display appears. (Refer to “System problem warning” onpage 5-197.)
Observe the precautions below to maintain good usage conditions: • Do not attempt to disassemble the sensor.• Do not affix a sticker or label on the wind- shield near the sensor. • Avoid overload. • Do not modify your vehicle. • When the windshield is replaced, use the Mitsubishi Motors genuine parts.
To adjust the sensitivity of the sensor
NOTE
BK0277700US.book
196 ページ 2019年3月8日 金曜日 午前9時23分
Page 278 of 427
Combination headlights and dimmer switch
Features and controls 5-197
5
2. Press the AHB switch more than 15 times within 5 seconds after operation mode is turned on.
N00593800056
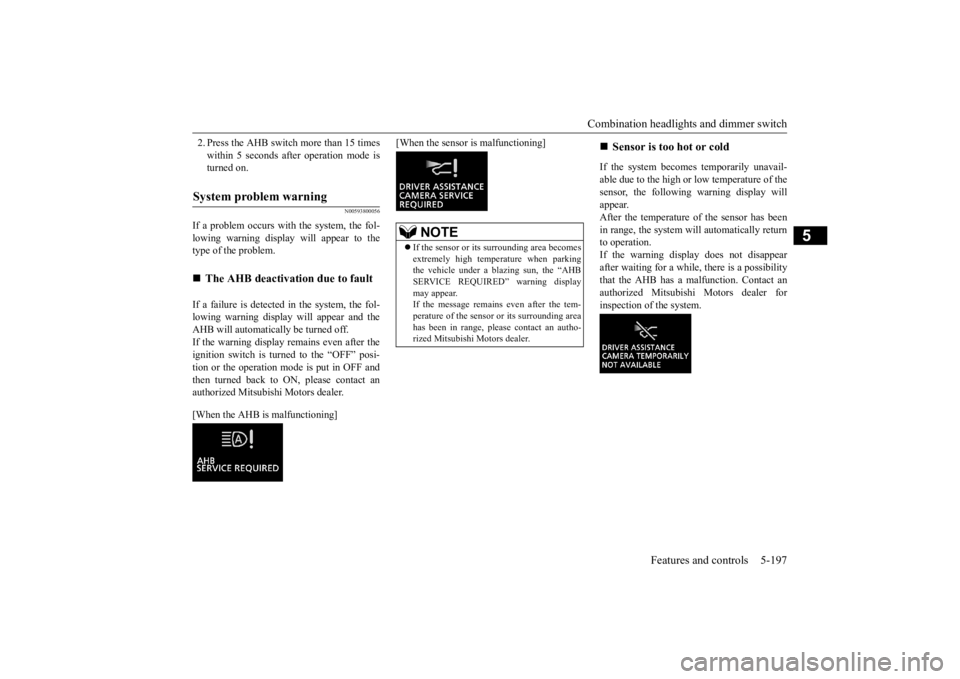
If a problem occurs with the system, the fol-lowing warning display will appear to the type of the problem. If a failure is detected in the system, the fol- lowing warning display will appear and the AHB will automatically be turned off. If the warning display remains even after theignition switch is turned to the “OFF” posi- tion or the operation mode is put in OFF and then turned back to ON, please contact anauthorized Mitsubishi Motors dealer. [When the AHB is malfunctioning]
[When the sensor is malfunctioning]
If the system becomes temporarily unavail- able due to the high or
low temperature of the
sensor, the following warning display will appear.After the temperature of the sensor has been in range, the system will automatically return to operation.If the warning display does not disappear after waiting for a while, there is a possibility that the AHB has a malfunction. Contact anauthorized Mitsubishi Motors dealer forinspection of the system.
System problem warning
The AHB deactivation due to fault
NOTE
If the sensor or its surrounding area becomes extremely high temperature when parkingthe vehicle under a blazing sun, the “AHB SERVICE REQUIRED” warning display may appear. If the message remains even after the tem- perature of the sensor or its surrounding areahas been in range, please contact an autho- rized Mitsubishi Motors dealer.
Sensor is too hot or cold
BK0277700US.book
197 ページ 2019年3月8日 金曜日 午前9時23分
Page 279 of 427
Combination headlights and dimmer switch 5-198 Features and controls
5
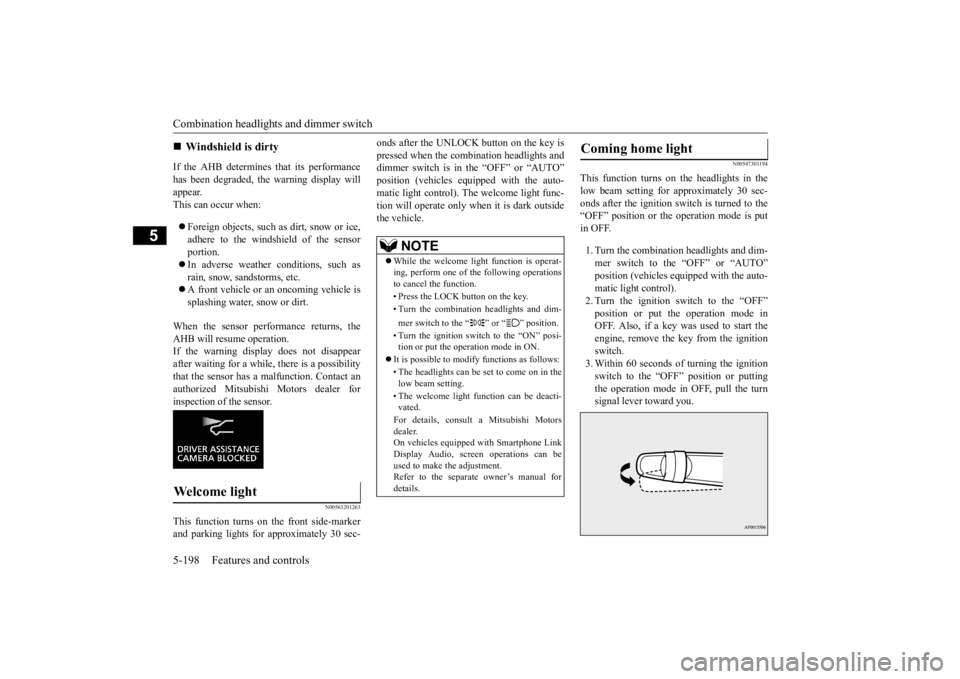
If the AHB determines that its performance has been degraded, the warning display will appear. This can occur when: Foreign objects, such as dirt, snow or ice, adhere to the windshield of the sensor portion. In adverse weather conditions, such as rain, snow, sandstorms, etc. A front vehicle or an oncoming vehicle is splashing water, snow or dirt.
When the sensor performance returns, the AHB will resume operation.If the warning display does not disappear after waiting for a while, there is a possibility that the sensor has a malfunction. Contact anauthorized Mitsubishi Motors dealer for inspection of the sensor.
N00563201263
This function turns on the front side-markerand parking lights for approximately 30 sec-
onds after the UNLOCK button on the key is pressed when the combination headlights and dimmer switch is in the “OFF” or “AUTO” position (vehicles equipped with the auto-matic light control). The welcome light func- tion will operate only when it is dark outside the vehicle.
N00547301194
This function turns on the headlights in thelow beam setting for approximately 30 sec-onds after the ignition switch is turned to the “OFF” position or the operation mode is put in OFF. 1. Turn the combination headlights and dim- mer switch to the “OFF” or “AUTO”position (vehicles equipped with the auto- matic light control). 2. Turn the ignition switch to the “OFF”position or put the operation mode in OFF. Also, if a key was used to start the engine, remove the key from the ignitionswitch. 3. Within 60 seconds of turning the ignition switch to the “OFF” position or puttingthe operation mode in OFF, pull the turn signal lever toward you.
Windshield is dirty
Welcome light
NOTE
While the welcome light function is operat- ing, perform one of the following operationsto cancel the function. • Press the LOCK button on the key.• Turn the combination headlights and dim- mer switch to the “ ” or “ ” position. • Turn the ignition switch to the “ON” posi- tion or put the operation mode in ON.
It is possible to modify functions as follows: • The headlights can be set to come on in the low beam setting. • The welcome light function can be deacti- vated. For details, consult a Mitsubishi Motors dealer. On vehicles equipped with Smartphone Link Display Audio, screen operations can beused to make the adjustment. Refer to the separate owner’s manual for details.
Coming home light
BK0277700US.book
198 ページ 2019年3月8日 金曜日 午前9時23分
Page 280 of 427
Headlight leveling switch (if so equipped)
Features and controls 5-199
5
4. The headlights will come on in the low beam setting for approximately 30 sec- onds. After the headlights go off, the headlights can be turned on again in thelow beam setting for approximately 30 seconds by pulling the turn signal lever toward you within 60 seconds of turningthe ignition switch to the “OFF” position or putting the operation mode in OFF. To turn on the headlights again after 60 sec-onds of turning the ignition switch to the“OFF” position or putting the operation mode in OFF, repeat the process from step 1.
N00537101131
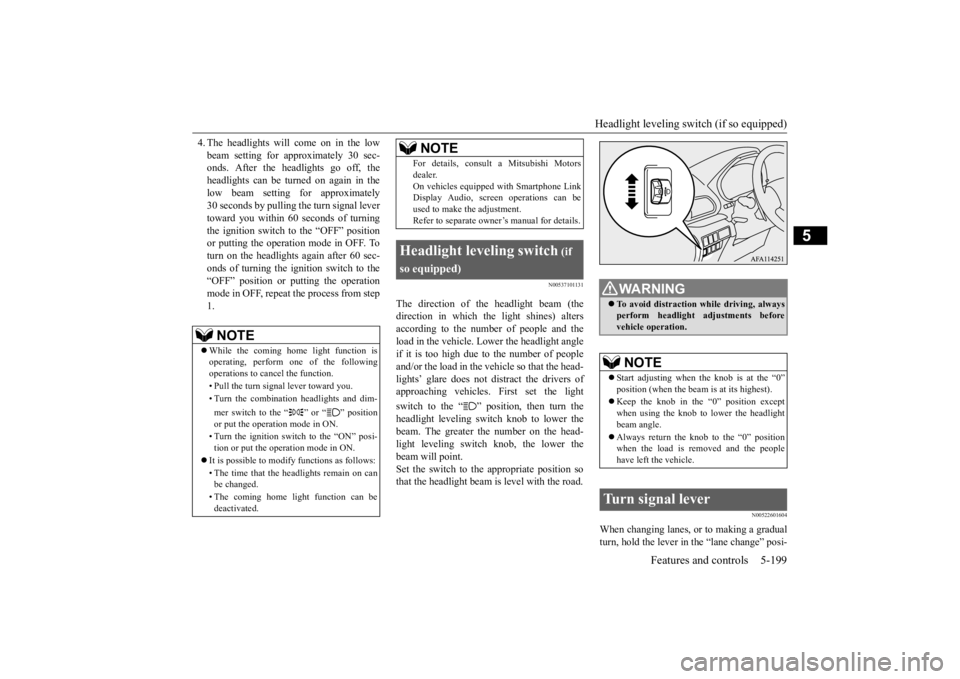
The direction of the headlight beam (thedirection in which the light shines) altersaccording to the number of people and the load in the vehicle. Lower the headlight angle if it is too high due to the number of peopleand/or the load in the vehicle so that the head- lights’ glare does not distract the drivers of approaching vehicles. First set the light switch to the “ ” position, then turn the headlight leveling switch knob to lower the beam. The greater the number on the head- light leveling switch knob, the lower thebeam will point. Set the switch to the appropriate position so that the headlight beam is level with the road.
N00522601604
When changing lanes, or to making a gradualturn, hold the lever in
the “lane change” posi-
NOTE
While the coming home light function is operating, perform one of the following operations to cancel the function. • Pull the turn signal lever toward you. • Turn the combination headlights and dim- mer switch to the “ ” or “ ” position or put the operation mode in ON. • Turn the ignition switch to the “ON” posi- tion or put the operation mode in ON.
It is possible to modify functions as follows: • The time that the headlights remain on can be changed. • The coming home light function can be deactivated.
For details, consult a Mitsubishi Motors dealer. On vehicles equipped with Smartphone Link Display Audio, screen operations can be used to make the adjustment.Refer to separate owner’s manual for details.
Headlight leveling switch
(if
so equipped)
NOTE
WA R N I N G To avoid distraction while driving, always perform headlight adjustments before vehicle operation.NOTE
Start adjusting when
the knob is at the “0”
position (when the beam is at its highest). Keep the knob in the “0” position except when using the knob to lower the headlight beam angle. Always return the knob to the “0” position when the load is removed and the people have left the vehicle.
Turn signal lever
BK0277700US.book
199 ページ 2019年3月8日 金曜日 午前9時23分
Page 282 of 427
ECO mode switch
Features and controls 5-201
5
N00579300099
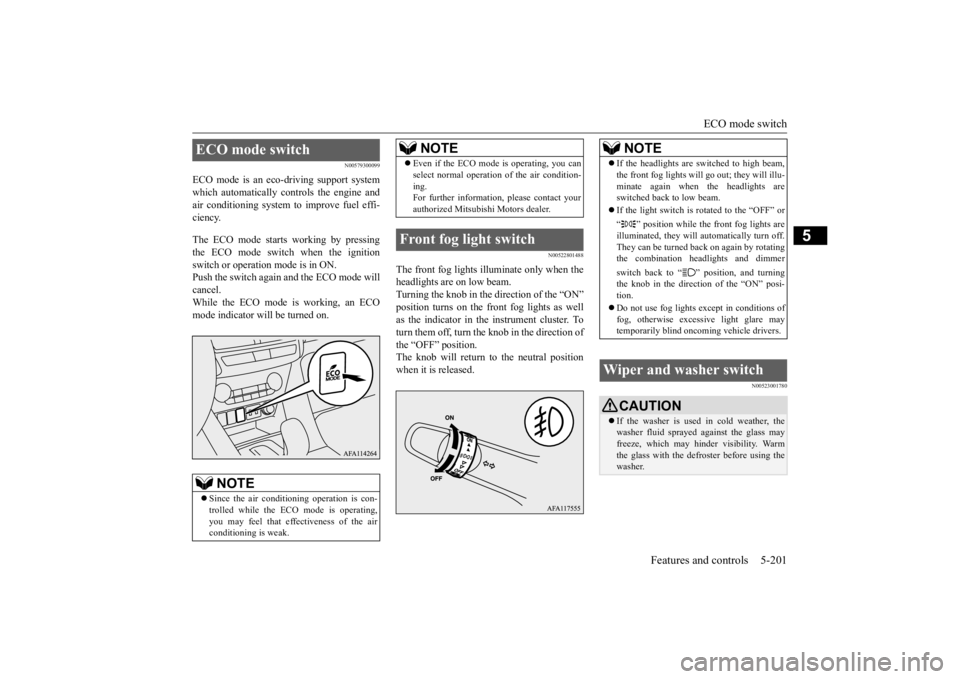
ECO mode is an eco-driving support system which automatically controls the engine andair conditioning system to improve fuel effi- ciency. The ECO mode starts working by pressing the ECO mode switch when the ignitionswitch or operation mode is in ON.Push the switch again and the ECO mode will cancel. While the ECO mode is working, an ECOmode indicator will be turned on.
N00522801488
The front fog lights illuminate only when theheadlights are on low beam.Turning the knob in the direction of the “ON” position turns on the front fog lights as well as the indicator in the instrument cluster. Toturn them off, turn the knob in the direction of the “OFF” position. The knob will return to the neutral positionwhen it is released.
N00523001780
ECO mode switch
NOTE
Since the air conditioning operation is con- trolled while the ECO mode is operating, you may feel that effectiveness of the airconditioning is weak.
Even if the ECO mode is operating, you can select normal operation of the air condition- ing. For further information, please contact your authorized Mitsubishi Motors dealer.
Front fog light switch
NOTE
NOTE
If the headlights are switched to high beam, the front fog lights will
go out; they will illu-
minate again when the headlights are switched back to low beam. If the light switch is rotated to the “OFF” or “ ” position while the front fog lights are illuminated, they will automatically turn off. They can be turned back on again by rotating the combination headlights and dimmer switch back to “ ” position, and turning the knob in the direction of the “ON” posi- tion. Do not use fog lights
except in conditions of
fog, otherwise excessive light glare may temporarily blind oncoming vehicle drivers.
Wiper and washer switch
CAUTION If the washer is used in cold weather, the washer fluid sprayed against the glass may freeze, which may hinder visibility. Warmthe glass with the defroster before using the washer.
BK0277700US.book
201 ページ 2019年3月8日 金曜日 午前9時23分
Page 314 of 427
Driving during cold weather
Driving safety 6-5
6
Always obey applicable laws and regula- tions. Be a polite and alert driver. Always leave room for unexpected events, such as sudden braking. If you plan to drive in another country, obey their vehicle registration laws and make sure you will be able to get the rightfuel.
N00629400445
Check the battery. At the same time, check the terminals and wiring. Duringextremely cold weather, the battery will not be as strong. Also, the battery power level may drop because more power isused for cold starting and driving. Before driving the vehicle, check to see if the engine runs at the proper speed and ifthe headlights are as bright as normally. Charge or replace the battery if necessary. During extreme cold weather, it is possi-ble that a very low battery could freeze.
Warm the engine sufficiently. After start- ing the engine, allow a short warm-up time to distribute oil to all cylinders. Then drive your vehicle slowly.Stay at low speeds at first so that the transaxle, transfer case and rear axle oil have time to spread to all lubricationpoints. Check the engine antifreeze. If there is not enough coolant because of aleak or from engine overheating, addMitsubishi Motors Genuine Super Long Life Coolant Premium or equivalent. Please read this section in conjunctionwith the “Engine coolant” on page 9-7.
N00629501528
All the parts of the brake system are criticalto safety. Have the vehicle serviced by an authorized Mitsubishi Motors dealer or a repair facility of your choice at regular inter-vals according to the “WARRANTY AND MAINTENANCE MANUAL”.
Check the brake system while driving at a low speed immediately after starting, espe-cially when the brakes are wet, to confirm they work normally. A film of water can be formed on the brakediscs and prevent normal braking after driv- ing in heavy rain or through large puddles, or after the vehicle is wash
ed. If this occurs, dry
the brakes out by driving slowly while lightlydepressing the brake pedal. On snowy roads, ice can form on the braking system, making the brakes less effective. While driving in such conditions, pay close attention to surrounding vehicles and to thecondition of the road surface. From time to time, lightly depress the brake pedal and check how effective the brakes are. It is important to take advantage of the engine braking by downshifting while driving onsteep downhill roads in order to prevent the brakes from overheating.
Driving during cold weather
WA R N I N G The battery gives off explosive hydrogen gas. Any spark or flame can cause the bat-tery to explode, which could cause serious injury or death. Always wear protective clothes and a facemask when working with your battery, or let a skilled mechanic do it.
WA R N I N G Never open the radiator cap when the radiator is hot. You could be seriously burned.
Braking
When brakes are wet When driving in cold weather When driving downhill
BK0277700US.bo
ok 5 ページ 2019年3月8日 金曜日 午前9時23分
Page 392 of 427
Replacement of light bulbs
Vehicle care and maintenance 9-27
9
N00942901434
Before replacing a bulb, be sure the light is off. Do not touch the glass part of the newbulb with your bare fingers; the oil from your skin will stay on the glass and dim or destroy the bulb when it gets hot.
N00943001197
Replacement of light bulbs
CAUTION Bulbs are extremely hot immediately after being turned off.When replacing a bulb, wait for it to cool sufficiently before touching it. You could otherwise be burned. Handle halogen light bulbs with care. The gas inside a halogen light bulb is highly pres-surized, so dropping, knocking, or scratching a halogen light bulb can cause it to shatter.
Never hold a halogen light bulb with a bare hand, dirty glove, etc. The oil from your hand could cause the bulb to break the next time the headlights are used.If the glass surface is dirty, clean it with alcohol and let it dry completely before installing the bulb. Do not install commercially available LED type bulbs.Commercially available LED type bulbs could adversely affect the operation of the vehicle, such as by preventing the lights andother vehicle equipment from operating properly.NOTE
If you are unsure of how to carry out the work as required, it is recommended that these procedures be carried out by an autho- rized Mitsubishi Motors dealer or a repairfacility of your choice.CAUTION
Be careful not to scratch the vehicle body when removing a light and lens. When it rains, or when the vehicle has been washed, the inside of the lens sometimesbecomes temporarily foggy. This is the same phenomenon as when window glass mists up on a humid day, and does not indicate a func-tional problem. When the light is switched on, the heat will remove the fog. However, if water gathersinside the light, please have it checked by an authorized Mitsubishi Motors dealer or a repair facility of your choice.
Bulb location and capacity
CAUTION When replacing a bulb, be sure to use a new bulb of the same type, wattage, and color.If you install a different bulb, the bulb could malfunction or fail to come on and could lead to a vehicle fire.NOTE
BK0277700US.bo
ok 27 ページ 2019年3月8日 金曜日 午前9時23分
Page 394 of 427
Replacement of light bulbs
Vehicle care and maintenance 9-29
9
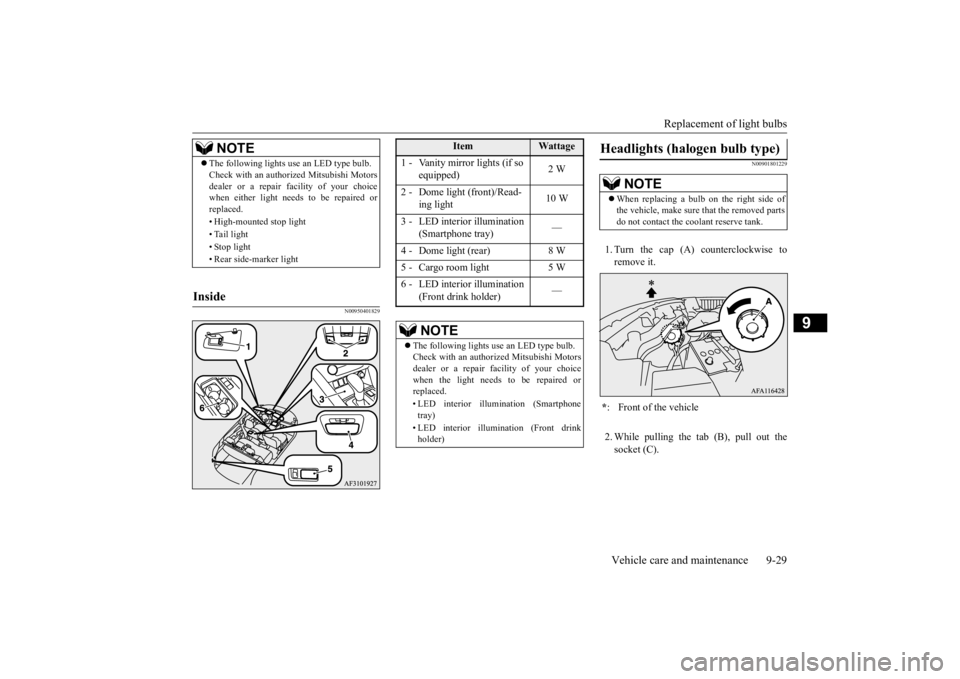
N00950401829
N00901801229
1. Turn the cap (A) counterclockwise to remove it. 2. While pulling the tab (B), pull out the socket (C).
NOTE
The following lights use an LED type bulb. Check with an authorized Mitsubishi Motors dealer or a repair
facility of your choice
when either light needs to be repaired or replaced. • High-mounted stop light • Tail light • Stop light• Rear side-marker light
Inside
Item
Wattage
1 - Vanity mirror lights (if so
equipped)
2 W
2 - Dome light (front)/Read-
ing light
10 W
3 - LED interior illumination
(Smartphone tray)
—
4 - Dome light (rear) 8 W 5 - Cargo room light 5 W6 - LED interior illumination
(Front drink holder)
—
NOTE
The following lights use an LED type bulb. Check with an authorized Mitsubishi Motorsdealer or a repair facility of your choice when the light needs to be repaired or replaced. • LED interior illumination (Smartphone tray) • LED interior illumination (Front drink holder)
Headlights (halogen bulb type)
NOTE
When replacing a bulb on the right side of the vehicle, make sure that the removed parts do not contact the coolant reserve tank.
* : Front of the vehicle
BK0277700US.bo
ok 29 ページ 2019年3月8日 金曜日 午前9時23分