change wheel MITSUBISHI ECLIPSE CROSS 2020 Owner's Manual (in English)
[x] Cancel search | Manufacturer: MITSUBISHI, Model Year: 2020, Model line: ECLIPSE CROSS, Model: MITSUBISHI ECLIPSE CROSS 2020Pages: 427, PDF Size: 78.05 MB
Page 20 of 427
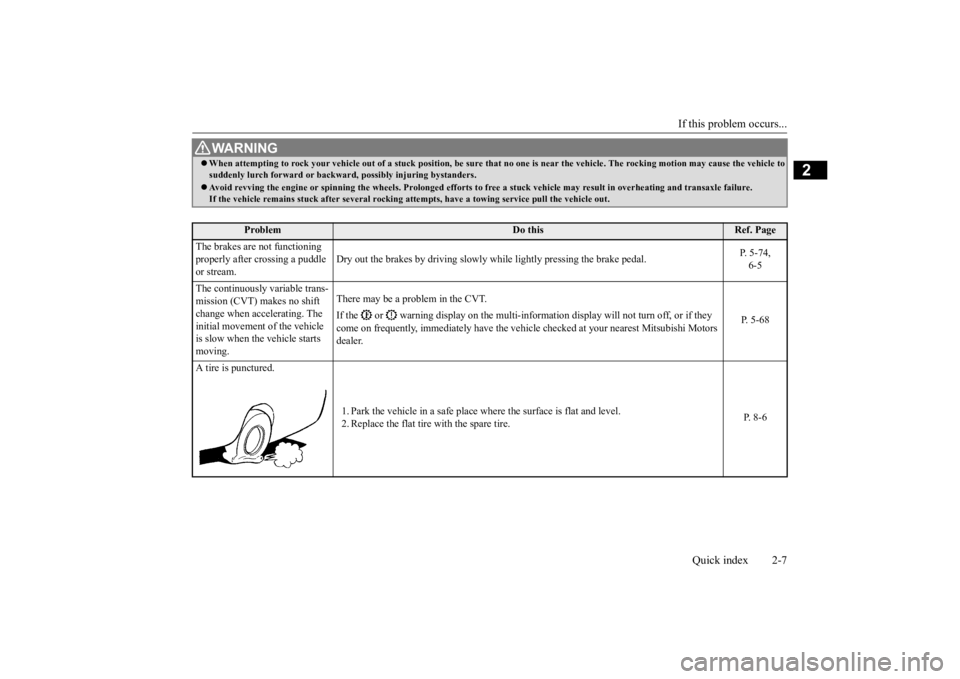
If this problem occurs...
Quick index 2-7
2
WA R N I N G When attempting to rock your vehicle out of
a stuck position, be sure that no one is
near the vehicle. The rocking motion may c
ause the vehicle to
suddenly lurch forward or backward, possibly injuring bystanders. Avoid revving the engine or spinning the
wheels. Prolonged efforts to free a stuck ve
hicle may result in overheating and transa
xle failure.
If the vehicle remains stuck after several rocking at
tempts, have a towing service pull the vehicle out.
Problem
Do this
Ref. Page
The brakes are not functioning properly after crossing a puddle or stream.
Dry out the brakes by driving slowly while lightly pressing the brake pedal.
P. 5-74, 6-5
The continuously variable trans- mission (CVT) makes no shift change when accelerating. The initial movement of the vehicle is slow when the vehicle starts moving.
There may be a problem in the CVT. If the or warning display on the multi-inform
ation display will not turn off, or if they
come on frequently, immediately have the vehicle
checked at your nearest Mitsubishi Motors
dealer.
P. 5-68
A tire is punctured.
1. Park the vehicle in a safe place where the surface is flat and level. 2. Replace the flat tire with the spare tire.
P. 8-6
BK0277700US.bo
ok 7 ページ 2019年3月8日 金曜日 午前9時23分
Page 49 of 427
Seat belts 4-14 Seat and restraint systems
4
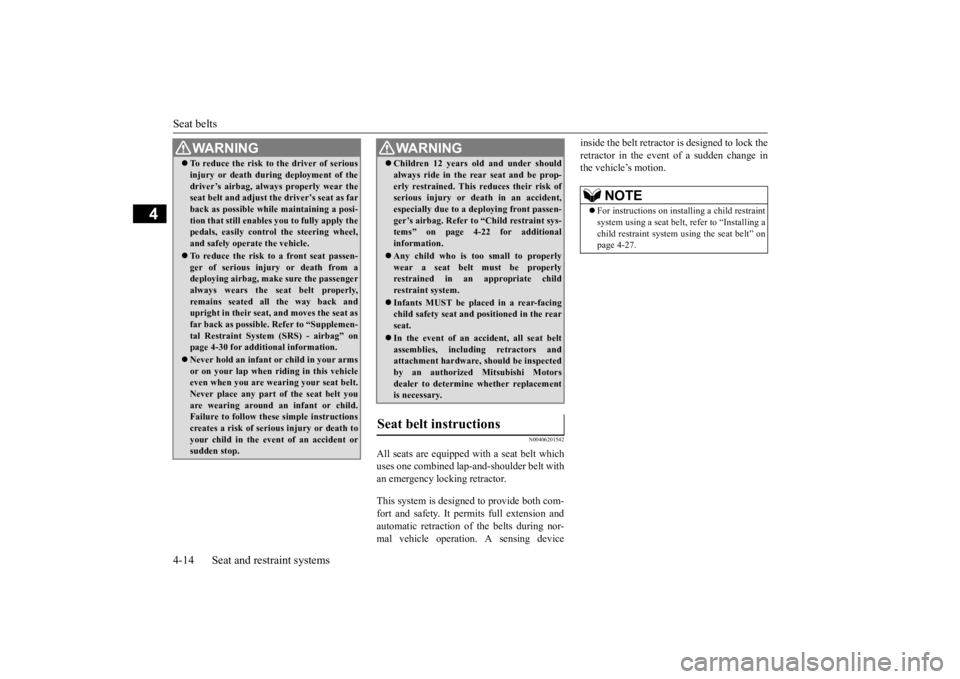
N00406201542
All seats are equipped with a seat belt which uses one combined lap-and-shoulder belt with an emergency locking retractor. This system is designed to provide both com- fort and safety. It permits full extension and automatic retraction of the belts during nor- mal vehicle operation. A sensing device
inside the belt retractor is designed to lock the retractor in the event of a sudden change in the vehicle’s motion.
To reduce the risk to the driver of serious injury or death during deployment of the driver’s airbag, always properly wear the seat belt and adjust the driver’s seat as far back as possible while maintaining a posi-tion that still enables you to fully apply the pedals, easily control the steering wheel, and safely operate the vehicle. To reduce the risk to a front seat passen- ger of serious injury or death from adeploying airbag, make sure the passenger always wears the seat belt properly, remains seated all the way back andupright in their seat, and moves the seat as far back as possible. Refer to “Supplemen- tal Restraint System (SRS) - airbag” onpage 4-30 for additional information. Never hold an infant or child in your arms or on your lap when riding in this vehicle even when you are wearing your seat belt. Never place any part of the seat belt youare wearing around an infant or child. Failure to follow these simple instructions creates a risk of serious injury or death toyour child in the event of an accident or sudden stop.WA R N I N G
Children 12 years old and under should always ride in the rear seat and be prop- erly restrained. This reduces their risk of serious injury or death in an accident, especially due to a deploying front passen-ger’s airbag. Refer to “Child restraint sys- tems” on page 4-22 for additional information. Any child who is too small to properly wear a seat belt must be properlyrestrained in an appropriate child restraint system. Infants MUST be placed in a rear-facing child safety seat and positioned in the rear seat. In the event of an accident, all seat belt assemblies, including retractors andattachment hardware, should be inspected by an authorized Mitsubishi Motors dealer to determine whether replacementis necessary.
Seat belt instructions
WA R N I N G
NOTE
For instructions on installing a child restraint system using a seat belt, refer to “Installing a child restraint system using the seat belt” on page 4-27.
BK0277700US.bo
ok 14 ページ 2019年3月8日 金曜日 午前9時23分
Page 148 of 427
Continuously variable transmission (CVT)
Features and controls 5-67
5
At this position, the transmission is disen- gaged. It is the same as the neutral position ona manual transaxle and
should be used when
the vehicle is not moving for an extended length of time during driving, such as in atraffic jam.
This position is used for most city and high- way driving. The transmission will automati-cally and continuously change its gear ratio depending on road and driving conditions.
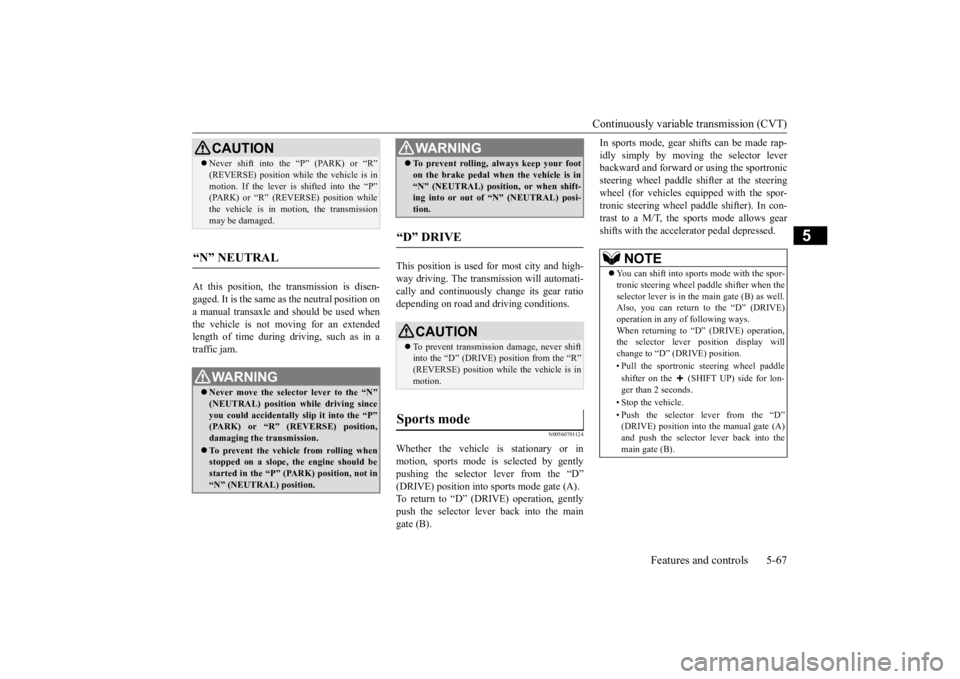
N00560701124
Whether the vehicle is stationary or inmotion, sports mode is selected by gently pushing the selector lever from the “D”(DRIVE) position into sports mode gate (A). To return to “D” (DRIVE) operation, gently push the selector lever back into the maingate (B).
In sports mode, gear shifts can be made rap- idly simply by moving the selector lever backward and forward or using the sportronic steering wheel paddle sh
ifter at the steering
wheel (for vehicles equipped with the spor- tronic steering wheel paddle shifter). In con- trast to a M/T, the sports mode allows gearshifts with the accelerator pedal depressed.
CAUTION Never shift into the “P” (PARK) or “R” (REVERSE) position while the vehicle is in motion. If the lever is shifted into the “P” (PARK) or “R” (REVERSE) position while the vehicle is in motion, the transmissionmay be damaged.
“N” NEUTRAL
WA R N I N G Never move the selector lever to the “N” (NEUTRAL) position while driving since you could accidentally slip it into the “P” (PARK) or “R” (REVERSE) position,damaging the transmission. To prevent the vehicle from rolling when stopped on a slope, the engine should be started in the “P” (PARK) position, not in“N” (NEUTRAL) position.
To prevent rolling, always keep your foot on the brake pedal when the vehicle is in “N” (NEUTRAL) position, or when shift- ing into or out of “N” (NEUTRAL) posi- tion.
“D” DRIVE
CAUTION To prevent transmission damage, never shift into the “D” (DRIVE) position from the “R”(REVERSE) position while the vehicle is in motion.
Sports mode
WA R N I N G
NOTE
You can shift into sports mode with the spor- tronic steering wheel paddle shifter when the selector lever is in the main gate (B) as well.Also, you can return to the “D” (DRIVE) operation in any of following ways. When returning to “D” (DRIVE) operation,the selector lever position display will change to “D” (DRIVE) position. • Pull the sportronic steering wheel paddle shifter on the (SHIFT UP) side for lon- ger than 2 seconds. • Stop the vehicle.• Push the selector lever from the “D” (DRIVE) position into the manual gate (A)and push the selector lever back into the main gate (B).
BK0277700US.bo
ok 67 ページ 2019年3月8日 金曜日 午前9時23分
Page 149 of 427

Continuously variable transmission (CVT) 5-68 Features and controls
5
N00560901083
In sports mode, the currently selected shift range is displayed on the information screenin the multi-information display.
N00560801109
1-
(SHIFT UP) Transmission shifts up once by eachoperation.
2-
(SHIFT DOWN) Transmission shifts down once by eachoperation.CAUTION In sports mode, the
driver must execute
upward shifts in accordance with prevailing road conditions, taking care to keep the engine speed below the tachometer’s redzone. Repeated continuous operation of the selec- tor lever or the sportronic steering wheel paddle shifter will continuously switch shift position. Shift ranges may not change when the lateral paddle shifters are operated at the same time.
NOTE
Shift ranges can only be selected in a for- ward direction from 1st to 8th. To reverse or park the vehicle, move the selector lever to the “R” (REVERSE) or “P” (PARK) posi- tion. To maintain good running performance, the transmission may refuse to perform anupshift when the selector lever or the spor- tronic steering wheel paddle shifter on the “ (SHIFT UP)” side is pulled at certain vehicle speeds. Also, to prevent over-revving of the engine, the transmission may refuse toperform a downshift when the selector lever or the sportronic steering wheel paddle shifter on the “ (SHIFT DOWN)” side is pulled at certain vehicle speeds. When this happens, a buzzer sounds to indicate that a downshift is not going to take place. Downward shifts are made automatically when the vehicle slows down. Before the vehicle stops, 1st gear is automatically selected. The upward shift may be made automatically in sports mode when the engine speed risesand approaches the tachometer’s red zone.
Sports mode display
Operation of the CVT
CAUTION Before selecting a position with the engine running and the vehicle stationary, firmlydepress the brake pedal to prevent the vehi- cle from creeping. The vehicle will begin to move as soon as theCVT is engaged, especially when the engine speed or idle speed is high, or with the air conditioning operating.Do not release the brake pedal until you are ready to drive away. Depress the brake pedal
with the right foot at
all times. Using the left foot could cause driver move-ment delay in case of an emergency. To prevent sudden acceleration, never run the engine at high revolutions when shifting from the “P” (PARK) or “N” (NEUTRAL).
BK0277700US.bo
ok 68 ページ 2019年3月8日 金曜日 午前9時23分
Page 152 of 427
S-AWC (Super-All Wheel Control) (if so equipped)
Features and controls 5-71
5
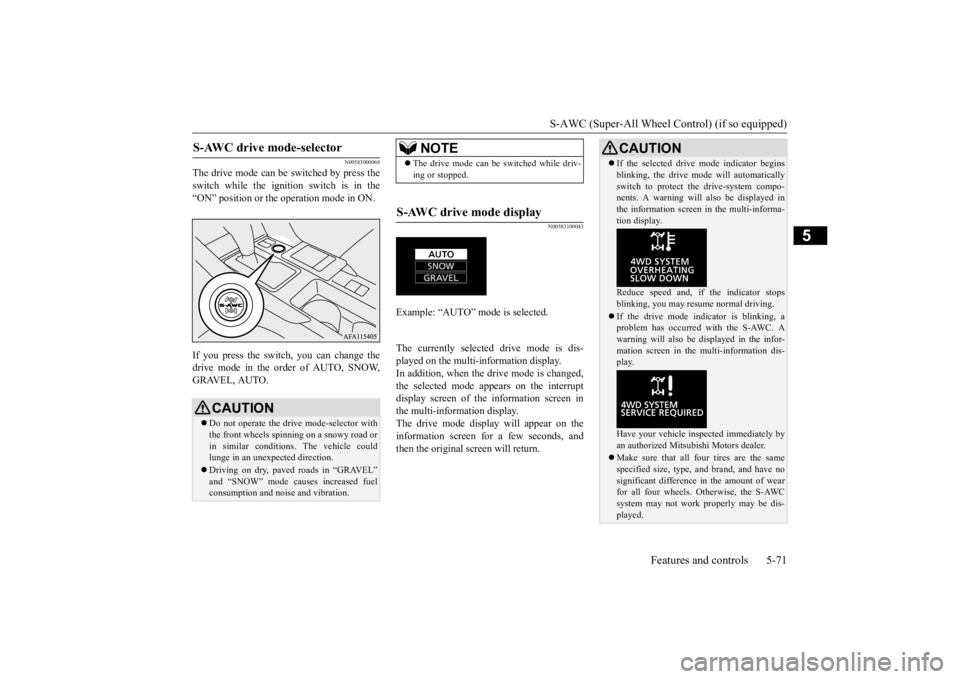
N00583000068
The drive mode can be switched by press the switch while the ignition switch is in the“ON” position or the operation mode in ON. If you press the switch, you can change the drive mode in the order of AUTO, SNOW,GRAVEL, AUTO.
N00583100043
The currently selected drive mode is dis-played on the multi-information display.In addition, when the drive mode is changed, the selected mode appears on the interrupt display screen of the information screen inthe multi-information display. The drive mode display will appear on the information screen for a few seconds, andthen the original screen will return.
S-AWC drive mode-selector
CAUTION Do not operate the drive mode-selector with the front wheels spinning on a snowy road or in similar conditions. The vehicle couldlunge in an unexpected direction. Driving on dry, paved roads in “GRAVEL” and “SNOW” mode causes increased fuel consumption and noise and vibration.
NOTE
The drive mode can be switched while driv- ing or stopped.
S-AWC drive mode display
Example: “AUTO” mode is selected.
CAUTION If the selected drive mode indicator begins blinking, the drive mode will automatically switch to protect the drive-system compo- nents. A warning will also be displayed in the information screen in the multi-informa-tion display. Reduce speed and, if the indicator stops blinking, you may resume normal driving. If the drive mode indicator is blinking, a problem has occurred with the S-AWC. A warning will also be displayed in the infor-mation screen in the multi-information dis- play. Have your vehicle inspected immediately by an authorized Mitsubishi Motors dealer. Make sure that all four tires are the same specified size, type, and brand, and have no significant difference in the amount of wear for all four wheels. Otherwise, the S-AWCsystem may not work properly may be dis- played.
BK0277700US.bo
ok 71 ページ 2019年3月8日 金曜日 午前9時23分
Page 153 of 427
4-wheel drive operation 5-72 Features and controls
5
N00542501087
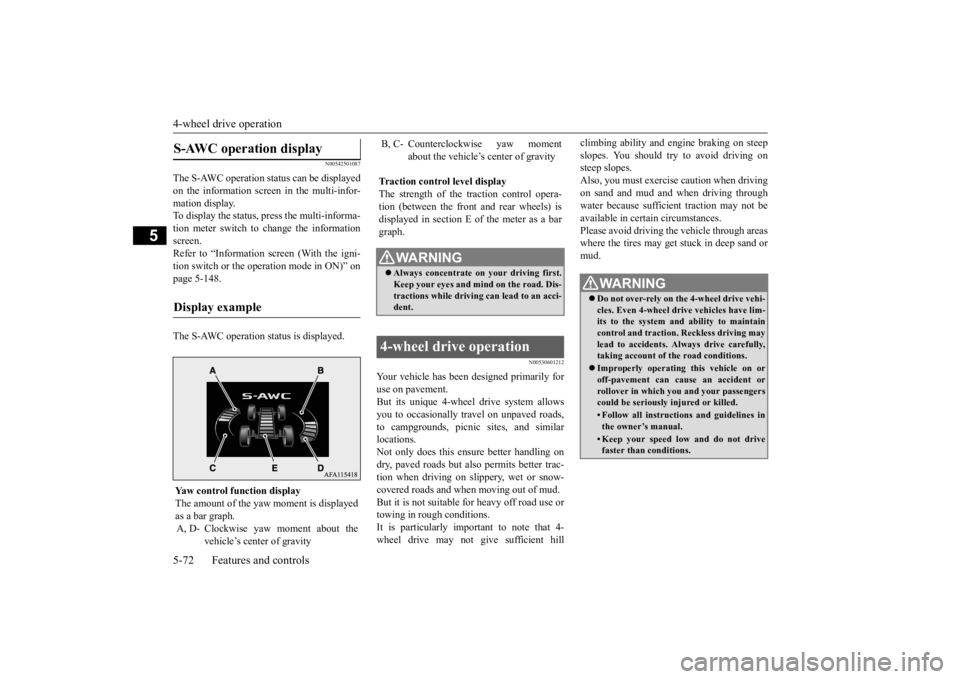
The S-AWC operation status can be displayed on the information screen in the multi-infor-mation display. To display the status, press the multi-informa- tion meter switch to change the informationscreen. Refer to “Information screen (With the igni- tion switch or the operation mode in ON)” onpage 5-148. The S-AWC operation status is displayed.
N00530601212
Your vehicle has been designed primarily for use on pavement. But its unique 4-wheel drive system allowsyou to occasionally travel on unpaved roads, to campgrounds, picnic sites, and similar locations.Not only does this ensure better handling on dry, paved roads but also permits better trac- tion when driving on slippery, wet or snow-covered roads and when moving out of mud. But it is not suitable for heavy off road use or towing in rough conditions.It is particularly important to note that 4- wheel drive may not give sufficient hill
climbing ability and engine braking on steep slopes. You should try to avoid driving on steep slopes. Also, you must exercise caution when drivingon sand and mud and when driving through water because sufficient traction may not be available in certain circumstances.Please avoid driving the vehicle through areas where the tires may get stuck in deep sand or mud.
S-AWC operation display
Display example
Yaw control function displayThe amount of the yaw
moment is displayed
as a bar graph. A, D- Clockwise yaw moment about the
vehicle’s center of gravity
B, C- Counterclockwise yaw moment
about the vehicle’s center of gravity
Traction control level display The strength of the traction control opera-tion (between the front and rear wheels) is displayed in section E of the meter as a bar graph.
WA R N I N G Always concentrate on your driving first. Keep your eyes and mi
nd on the road. Dis-
tractions while driving can lead to an acci- dent.
4-wheel drive operation
WA R N I N G Do not over-rely on the 4-wheel drive vehi- cles. Even 4-wheel drive vehicles have lim-its to the system and ability to maintain control and traction. Reckless driving may lead to accidents. Always drive carefully,taking account of the road conditions. Improperly operating this vehicle on or off-pavement can cause an accident or rollover in which you and your passengers could be seriously injured or killed.• Follow all instructions and guidelines inthe owner’s manual.• Keep your speed low and do not drivefaster than conditions.
BK0277700US.bo
ok 72 ページ 2019年3月8日 金曜日 午前9時23分
Page 154 of 427
4-wheel drive operation
Features and controls 5-73
5
When turning a sharp corner in “GRAVEL” position at low speed, a slight difference in steering may be experienced similar to feel- ing as if the brakes were applied. This iscalled tight corner braking and results from each of the four tires being at a different dis- tance from the corner. The phenomenon istypical of 4-wheel drive vehicles. If this occurs, either straighten out the steering wheel or change to another mode. Set the drive mode-selector to “SNOW” in accordance with the road conditions, and thengradually depress the accelerator pedal for a smooth start.
Set the drive mode-selector to “GRAVEL” and then gradually depress the accelerator pedal for a smooth start. Keep the pressure onthe accelerator pedal as constant as possible, and drive at low speed.
NOTE
Driving on rough roads can be hard on a vehicle. Before you leave the pavement, be sure all scheduled maintenance and service has been done, and that you have inspected your vehicle. Pay special attention to thecondition of the tires, and check the tire pres- sures. Mitsubishi Motors is not responsible to the operator for any damage or injury caused or liability incurred by improper and negligentoperation of a vehicle. All techniques of vehicle operation depend on the skill and experience of the operator and other partici-pating parties. Any deviation from the rec- ommended operating instructions above is at their own risk. Note that the stopping distance required of the 4-wheel drive vehicle differs very littlefrom that of the front-wheel drive vehicle. When driving on a snow-covered road or a slippery, muddy surface, make sure that youkeep a sufficient distance between your vehi- cle and the one ahead of you. The driving posture should be more upright; adjust the seat to a good position for easy steering and pedal operation. Be sure to wearthe seat belt. After driving on rough roads, check each part of the vehicle and wash it thoroughly with water. Refer to the “Inspection andmaintenance following rough road opera- tion” section and “Vehicle care and Mainte- nance” sections.
CAUTION Setting the drive mode-selector to “GRAVEL” and “SNOW” position to drive on dry paved road will increase fuel con- sumption, with possible noise and vibration generation.
Turning sharp corners On snowy or icy roads
NOTE
The use of snow tires is recommended.
Maintain a safe distance between vehicles, avoid sudden braking, and use engine brak- ing (downshifting).CAUTION Avoid sudden braking, sudden acceleration and sharp turning. Skidding occurs and con- trol of the vehicle could be lost.
Driving on sandy or muddy roads
CAUTION Do not force the vehicle or drive recklessly on sandy surfaces. In comparison with nor- mal road surfaces, the engine and other drive-system components are put underexcessive strain when driving on such a sur- face. This could lead to accidents. If any of the following conditions occur while the vehicle is being driven, immedi- ately park your vehicle in a safe place andfollow these procedures:NOTE
BK0277700US.bo
ok 73 ページ 2019年3月8日 金曜日 午前9時23分
Page 155 of 427
Inspection and maintenance foll
owing rough road operation
5-74 Features and controls
5
Your vehicle may not provide sufficient hill climbing ability and engine braking on steep slope. Avoid driving on steep slopes eventhough the vehicle is an 4-wheel drive vehi- cle.
N00537800085
If the electrical circuits become wet, furtheroperation of the vehicle will be impossible; therefore, avoid driving through water unlessabsolutely necessary. If driving through water is unavoidable, use the following procedure: Check the depth of the water and the terrain before attempting to drive through it. Drive
slowly to avoid creating excessive water splashing.
N00530700085
After operating the vehicle in rough road con- ditions, be sure to perform the following inspection and maintenance procedures: Check that the vehicle has not been dam- aged by rocks, gravel, etc.
• If the engine coolant temperature display
flashes on the information screen in the multi-information display or the engine power drops suddenly.Refer to “Engine overheating” on page 8-4.• If the “ ” warning display and “SLOW DOWN” or the “ ” warning display and “SERVICE REQUIRED” appear on the information screen in the multi-information display.Refer to “Warning display” on page 5-66.WA R N I N G When attempting to rock your vehicle out of a stuck position, be sure that the area around the vehicle is clear of people andphysical objects. The rocking motion may cause the vehicle to suddenly launch for- ward/backward, causing injury or dam-age to nearby people or objects.NOTE
Avoid sudden braking, sudden acceleration and sharp turning; such operations could result in the vehicle becoming stuck.CAUTION
If the vehicle becomes stuck in sandy or muddy roads, it can often be moved with a rocking motion. Move the selector lever alternately between the “D” (DRIVE) and “R” (REVERSE) positions while pressinglightly on the accelerator pedal. Driving on rough road can cause rust on the vehicle; wash the vehicle thoroughly as soon as possible after such use.
Climbing/descending sharp grades Driving through water
NOTE
CAUTION Never drive through water that is deep enough to cover wheel hubs, axles or exhaust pipe. Do not change the selector lever posi-tion while driving through water. Frequent driving through water can adversely affect the life span of the vehicle;consult an authorized Mitsubishi Motors dealer or a repair facility of your choice and take the necessary measures to prepare,inspect, and repair the vehicle. After driving through water, apply the brakes to be sure they are functioning properly. If the brakes are wet and not functioning prop- erly, dry them out by driving slowly whilelightly depressing the brake pedal. Inspect each part of the vehicle carefully.
Inspection and maintenance following rough road opera-tion
BK0277700US.bo
ok 74 ページ 2019年3月8日 金曜日 午前9時23分
Page 162 of 427
Active Yaw Control (AYC) Features and controls 5-81
5
N00596700027
The Active Yaw Control (AYC) is a system with a yaw control function, that controls the left-right driving/braking force using the brakes. The yaw control function is a function that enhances vehicle cornering performance andvehicle stability with management of vehicle turning power (yaw moment) by controlling the drive power difference of the left andright wheels and the braking force when the vehicle does not turn in response to steering input, such as when the steering wheel isturned quickly or when driving on slippery road.
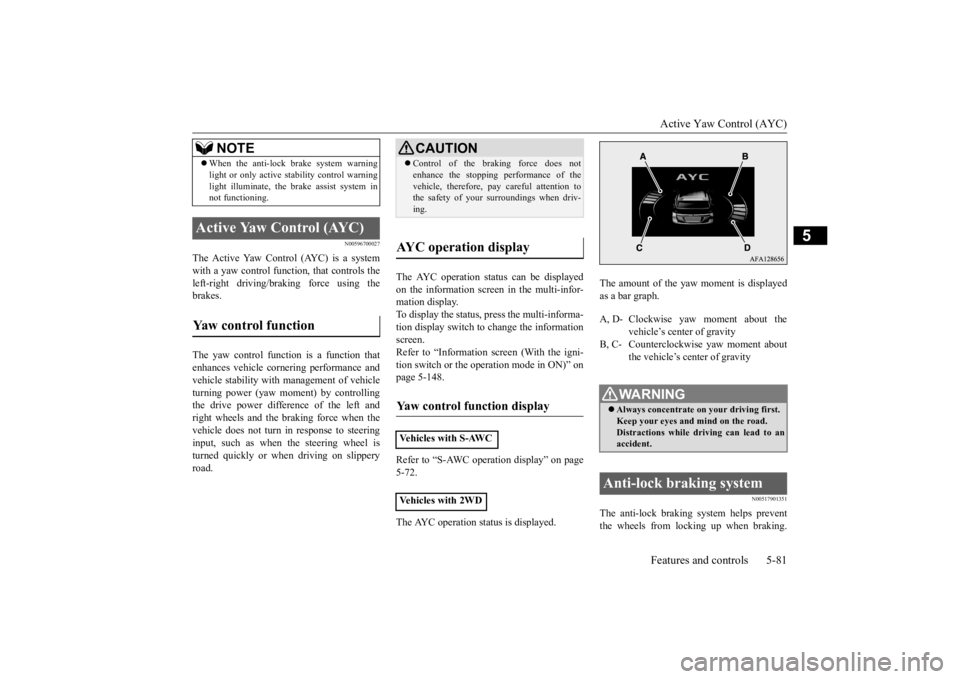
The AYC operation status can be displayed on the information screen in the multi-infor- mation display. To display the status, press the multi-informa-tion display switch to change the information screen. Refer to “Information screen (With the igni-tion switch or the operation mode in ON)” on page 5-148. Refer to “S-AWC operation display” on page 5-72. The AYC operation status is displayed.
The amount of the yaw moment is displayed as a bar graph.
N00517901351
The anti-lock braking system helps preventthe wheels from locking up when braking.
When the anti-lock brake system warning light or only active stability control warning light illuminate, the brake assist system in not functioning.
Active Yaw Control (AYC) Yaw control function
NOTE
CAUTION Control of the braking force does not enhance the stopping performance of the vehicle, therefore, pay careful attention to the safety of your surroundings when driv- ing.
AYC operation display Yaw control function display Vehicles with S-AWC Vehicles with 2WD
A, D- Clockwise yaw moment about the
vehicle’s center of gravity
B, C- Counterclockwise yaw moment about
the vehicle’s center of gravityWA R N I N G Always concentrate on your driving first. Keep your eyes and
mind on the road.
Distractions while driving can lead to anaccident.
Anti-lock braking system
BK0277700US.bo
ok 81 ページ 2019年3月8日 金曜日 午前9時23分
Page 211 of 427
Tire pressure monitoring system (TPMS) 5-130 Features and controls
5
A window tint that affects the radio wave signals is installed.
N00532900081
If new wheels with new tire inflation pressuresensors are installed, their ID codes must beprogrammed into the tire pressure monitoring system. Have tire and wheel replacement per- formed by an authorized Mitsubishi Motorsdealer to avoid the risk of damaging the tire inflation pressure sensors. If the wheel replacement is not done by an authorizedMitsubishi Motors dealer, it is not covered by your warranty.
N00584300042
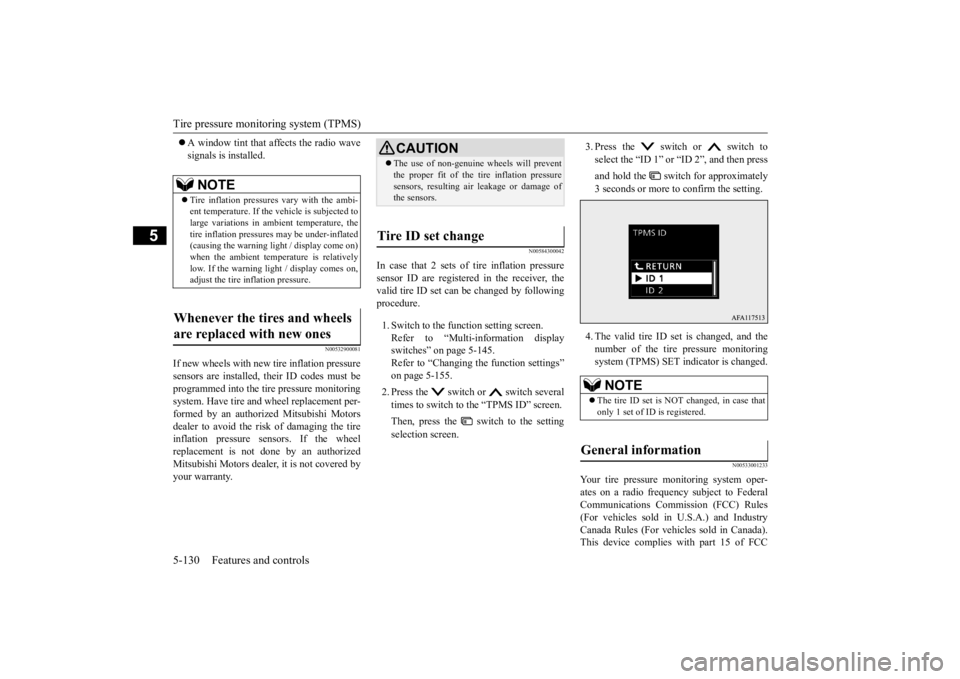
In case that 2 sets of tire inflation pressuresensor ID are registered in the receiver, the valid tire ID set can be changed by followingprocedure. 1. Switch to the function setting screen. Refer to “Multi-information display switches” on page 5-145.Refer to “Changing the function settings” on page 5-155. 2. Press the switch or switch several times to switch to the “TPMS ID” screen. Then, press the switch to the setting selection screen.
3. Press the switch or switch to select the “ID 1” or “ID 2”, and then press and hold the switch for approximately 3 seconds or more to confirm the setting. 4. The valid tire ID set is changed, and the number of the tire pressure monitoringsystem (TPMS) SET indicator is changed.
N00533001233
Your tire pressure monitoring system oper- ates on a radio frequency subject to Federal Communications Commission (FCC) Rules(For vehicles sold in U.S.A.) and Industry Canada Rules (For vehicles sold in Canada). This device complies with part 15 of FCC
NOTE
Tire inflation pressures vary with the ambi- ent temperature. If the
vehicle is subjected to
large variations in ambient temperature, thetire inflation pressures may be under-inflated (causing the warning light / display come on) when the ambient temperature is relativelylow. If the warning light / display comes on, adjust the tire inflation pressure.
Whenever the tires and wheels are replaced with new ones
CAUTION The use of non-genuine wheels will prevent the proper fit of the tire inflation pressure sensors, resulting air leakage or damage of the sensors.
Tire ID set change
NOTE
The tire ID set is NOT changed, in case that only 1 set of ID is registered.
General information
BK0277700US.book
130 ページ 2019年3月8日 金曜日 午前9時23分