warning MITSUBISHI GRANDIS 2008 (in English) Repair Manual
[x] Cancel search | Manufacturer: MITSUBISHI, Model Year: 2008, Model line: GRANDIS, Model: MITSUBISHI GRANDIS 2008Pages: 458, PDF Size: 18.52 MB
Page 140 of 458
3-14 Instruments and controls
3
Oil pressure warning lamp
E00502800330
This lamp illuminates when the ignition key is
turned “ON”, and the lamp goes off after the
engine has started. If it illuminates while the
engine is running, the oil pressure is too low.
If the warning lamp illuminates while the engine
is running, turn the engine off and have it
inspected.NOTE●The oil pressure warning lamp should not
be treated as an indication of the engine’s
oil level. The oil level must be checked
using the dipstick.
Door-ajar warning lamp
E00503300417
This lamp illuminates when a door or tailgate is
either open or incompletely closed.
If the vehicle speed reaches approximately
8 km/h (5 mph) with a door or the tailgate open
or incompletely closed, the warning lamp flashes
8 times and a buzzer simultaneously sounds
8 times as a warning.NOTE●On vehicles with keyless entry system, the
lamp remains illuminated for a certain
period and then goes out automatically to
prevent complete discharge of the battery.
Refer to “Lamps (room lamps, etc.) auto-
cutout function” on page 5-63.
●It is possible to change the buzzer setting
for either of the following types of opera-
tion. For further information, we recom-
mend you to consult a MITSUBISHI
MOTORS Authorized Service Point.
• No buzzer operation (buzzer disabled)
• Continuous buzzer operation
CAUTION
!●If this lamp illuminates when the
engine oil level is not low, have it
inspected.●This warning lamp does not indicate
the amount of oil in the crankcase.
This must be determined by checking
the oil level on the dipstick, while the
engine is switched off.●If you continue driving with low engine
oil level or with this warning lamp illu-
minated, engine seizure may occur.
CAUTION
!●Before moving your vehicle, check that
the warning lamp is OFF.
BK-XP08E1ENUK.en-uk.book Page 14 Monday, August 13, 2007 2:20 PM
Page 141 of 458

Instruments and controls
3-15
3 Multi centre display
E00503600120
When the ignition switch is in the “ACC” position, the digital
clock is displayed in the multi centre display. When the igni-
tion switch is in the “ON” position, the momentary fuel con-
sumption and outside temperature are displayed besides the
digital clock.
WARNING
!●When operating the system for a prolonged period,
make sure the vehicle is parked in a well ventilated
area to avoid the accumulation of toxic fumes inside
and outside of the passenger compartment.
CAUTION
!●The driver should not operate the display while the
vehicle is in motion.●When operating the system, stop the vehicle in a safe
area.
BK-XP08E1ENUK.en-uk.book Page 15 Monday, August 13, 2007 2:20 PM
Page 152 of 458
3-26 Instruments and controls
3
NOTE●If the driving range drops below 50 km (30 miles) while
the driving range is displayed, the display shows “---”.
When this occurs, top up the fuel tank as soon as possible.
●The driving range varies depending on road conditions,
the manner of driving and other related factors. Conse-
quently, the display should be used only as a guide. It is
recommended to add fuel as soon as the low fuel warning
lamp in the instrument cluster illuminates.
(Refer to “Low fuel warning lamp” on page 3-6.)
●Refueling will update the driving range indication.
●The driving range displayed is based on previous fuel con-
sumption data. Disconnecting the battery cable will result
in the deletion of existing fuel consumption data, which
will affect the unit’s calculations.
●The driving range figure can occasionally increase if the
vehicle is stopped on an incline. This is because the fuel
has moved in the tank because of the incline and is not
considered as a fault.
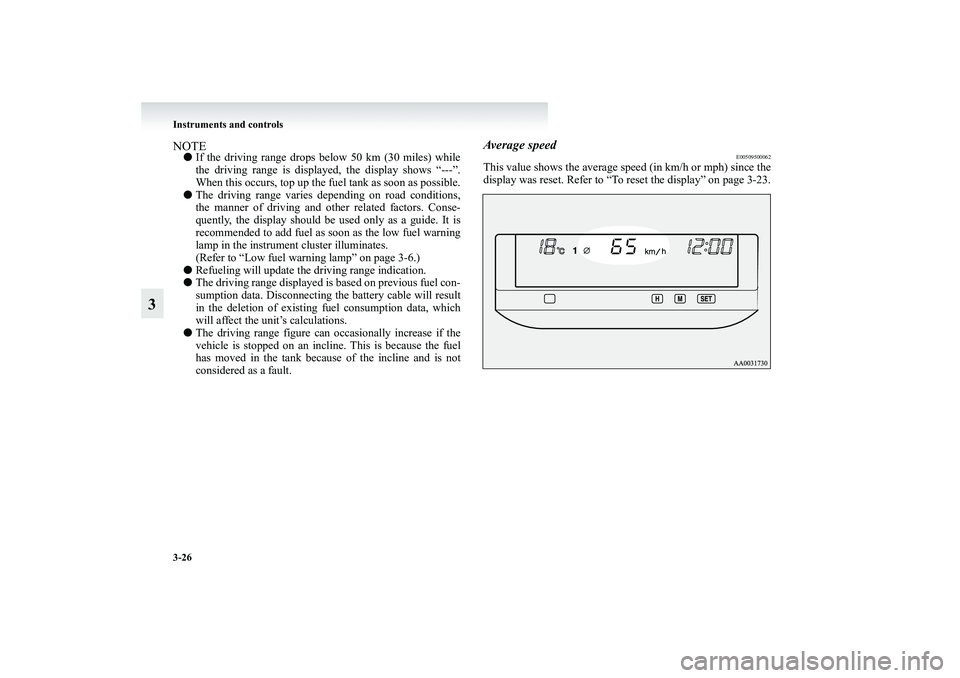
Average speed
E00509500062
This value shows the average speed (in km/h or mph) since the
display was reset. Refer to “To reset the display” on page 3-23.
BK-XP08E1ENUK.en-uk.book Page 26 Monday, August 13, 2007 2:20 PM
Page 162 of 458

3-36 Instruments and controls
3
<7-person seat>
●:1 person
: Full luggage loading
Automatic headlamp levelling*Vehicles with discharge headlampsThis function automatically adjusts the illumination distance of
the headlamps according to the number of people and the load
in the vehicle.
When the ignition switch is in the “ON” position and the lamp
switch is in the “ ” position, the illumination distance of the
headlamps is automatically adjusted when the vehicle is
stopped or travelling at a constant speed.Automatic headlamp levelling warning lampThe automatic headlamp levelling warning lamp should illumi-
nate when the ignition switch is turned “ON”, and should go
off in a few seconds.
Vehicle
conditionSwitch
position“0” “1” “2” “3” “4”
Switch position 0- Driver only/Driver + 1 front passenger
Switch position 1- Driver + 1 front passenger + 2 third seat passen-
ger
Switch position 2- All passengers
Switch position 3- All passengers + Full luggage loading
Switch position 4- Driver + Full luggage loading
BK-XP08E1ENUK.en-uk.book Page 36 Monday, August 13, 2007 2:20 PM
Page 163 of 458
Instruments and controls
3-37
3 Turn/Lane-change signals
E00506500393
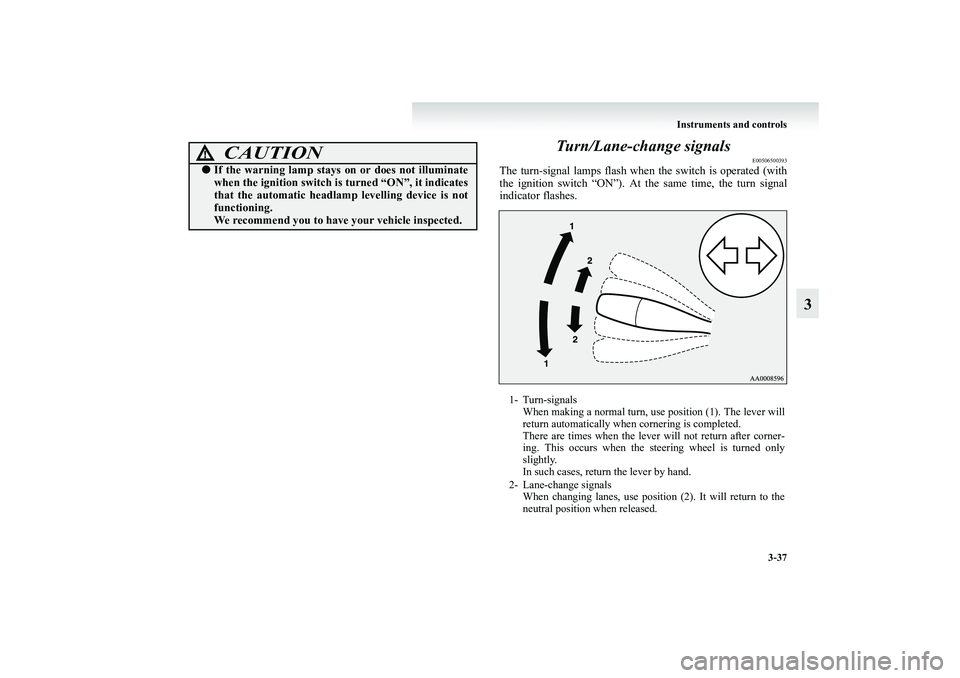
The turn-signal lamps flash when the switch is operated (with
the ignition switch “ON”). At the same time, the turn signal
indicator flashes.
CAUTION
!●If the warning lamp stays on or does not illuminate
when the ignition switch is turned “ON”, it indicates
that the automatic headlamp levelling device is not
functioning.
We recommend you to have your vehicle inspected.
1- Turn-signals
When making a normal turn, use position (1). The lever will
return automatically when cornering is completed.
There are times when the lever will not return after corner-
ing. This occurs when the steering wheel is turned only
slightly.
In such cases, return the lever by hand.
2- Lane-change signals
When changing lanes, use position (2). It will return to the
neutral position when released.
BK-XP08E1ENUK.en-uk.book Page 37 Monday, August 13, 2007 2:20 PM
Page 164 of 458

3-38 Instruments and controls
3
NOTE●If the lamp flashes unusually quickly, the bulb in a turn-
signal lamp may have burned out. We recommend you to
have the vehicle inspected.
●It is possible to activate the following functions. For fur-
ther information, we recommend you to consult a MIT-
SUBISHI MOTORS Authorized Service Point.
On a vehicle equipped with a Multi Display Station
(MDS), the functions can be adjusted on the screen. For
details, refer to a separate operation manual.
• Sounding of a buzzer as the turn-signal lamps flash
• Flashing of the turn-signal lamps and the indication
lamp in the meter when the lever is operated with the
ignition switch in the “ACC” position
Hazard warning flasher switch
E00506600567
Use the hazard warning flasher switch when the vehicle has to
be parked on the road for any emergency.
The hazard warning flashers can always be operated, regard-
less of the position of the ignition key.
Push the switch to turn on the hazard warning flashers; push
the switch again to turn them off.
When this switch is operated, all turn-signal lamps flash con-
tinuously, as do the turn-signal indication lamps in the instru-
ment cluster.
BK-XP08E1ENUK.en-uk.book Page 38 Monday, August 13, 2007 2:20 PM
Page 175 of 458

Starting and driving
4-3
4 Driving, alcohol and drugs
E00600200012
Drunk driving is one of the most frequent causes of accidents.
Your driving ability can be seriously impaired even with blood
alcohol levels far below the legal minimum. If you have been
drinking, don’t drive. Ride with a designated non-drinking
driver, call a cab or a friend, or use public transportation.
Drinking coffee or taking a cold shower will not make you
sober.
Similarly, prescription and nonprescription drugs affect your
alertness, perception and reaction time. Consult with your doc-
tor or pharmacist before driving while under the influence of
any of these medications.
Safe driving techniques
E00600300202
Driving safety and protection against injury cannot be fully
ensured. However, we recommend that you pay extra attention
to the following:Seat beltsBefore starting the vehicle, make sure that you and your pas-
sengers have fastened your seat belts.
WARNING
!●NEVER DRINK AND DRIVE.
Your perceptions are less accurate, your reflexes are
slower and your judgment is impaired.
BK-XP08E1ENUK.en-uk.book Page 3 Monday, August 13, 2007 2:20 PM
Page 176 of 458

4-4 Starting and driving
4
Floor mats Carrying children in the vehicle
●Never leave your vehicle unattended with the key in the
ignition and children inside the vehicle. Children may
play with the driving controls and this could lead to an
accident.
●Make sure that infants and small children are properly
restrained in accordance with the laws and regulations,
and for maximum protection in case of an accident.
●Prevent children from playing in the luggage compart-
ment. It is quite dangerous to allow them to play there
while the vehicle is moving.Loading luggageWhen loading luggage, be careful not to load above the height
of seats. This is dangerous not only because rearward vision
will be obstructed, but also the luggage may be projected into
the passenger compartment under hard braking.
WARNING
!●Keep floor mats clear of the pedals by correctly lay-
ing floor mats that are suitable for the vehicle.
To prevent the floor mats from slipping out position,
securely retain them using the hook etc.
Note that laying a floor mat over a pedal or laying
one floor mat on top of another can obstruct pedal
operation and lead to a serious accident.
BK-XP08E1ENUK.en-uk.book Page 4 Monday, August 13, 2007 2:20 PM
Page 179 of 458

Starting and driving
4-7
4
When parking on a hill, apply the parking brake and turn the
front wheels towards the kerb on a downhill grade, away from
the kerb on an uphill grade.
Parking
E00600600830
Parking on a hillTo prevent the vehicle from rolling into the street, follow these
procedures:Parking on a downhill slopeTurn the front wheels towards the kerb and move the vehicle
forward until the kerb side wheel gently touches the kerb.
Set the parking brake and place the gearshift lever into the
“R” (Reverse) position (with M/T) or the selector lever into the
“P” (PARK) position (with A/T).
If necessary, apply chocks to wheels.Parking on an uphill slopeTurn the front wheels away from the kerb and move the vehicle
back until the kerb side wheel gently touches the kerb.
Set the parking brake and place the gearshift lever into the
1st position (with M/T) or the selector lever into the
“P” (PARK) position (with A/T).
If necessary, apply chocks to wheels.NOTE●If your vehicle is equipped with A/T, be sure to apply the
parking brake before moving the selector lever to the
“P” (PARK) position. If you move the selector lever to the
“P” (PARK) position before applying the parking brake, it
may be difficult to disengage the selector lever from the
“P” (PARK) position when next you drive the vehicle,
requiring application of a strong force to the selector lever
to move from the “P” (PARK) position.
CAUTION
!●Before driving, be sure that the parking brake is
fully released and brake warning lamp is off.
If a vehicle is driven without releasing the parking
brake, the brake will be overheated, resulting in
ineffective braking and possible brake failure.●When you intend to apply the parking brake, firmly
press the brake pedal to bring the vehicle to a com-
plete stop before pulling the parking brake lever.
Pulling the parking brake lever with the vehicle
moving could make the rear wheels lock up, thereby
making the vehicle unstable.●If the brake warning lamp does not extinguish when
the parking brake is fully released, the brake system
may be abnormal. For details, refer to “Brake
warning lamp” on page 3-10.
BK-XP08E1ENUK.en-uk.book Page 7 Monday, August 13, 2007 2:20 PM
Page 180 of 458

4-8 Starting and driving
4
Parking with the engine runningNever leave the engine running while you take a short
sleep/rest. Also, never leave the engine running in a closed or
poorly ventilated place. Leaving the engine running risks
injury or death from accidentally moving the gearshift lever
(M/T) or selector lever (A/T) or the accumulation of toxic
exhaust fumes on the passenger compartment.Where you parkYour front bumper can be damaged if you scrape it over kerbs
or parking stop blocks. Be careful when travelling up or down
steep slopes where your bumper can scrape the road.When leaving the vehicleAlways remove the key from the ignition switch and lock all
doors and the tailgate when leaving the vehicle unattended.
Always try to park your vehicle in a well lit area.
Steering wheel height adjustment
E00600700121
To adjust the steering wheel height, release the tilt lock lever
while holding the steering wheel by hand, and raise or lower
the steering wheel to the desired height.
After adjustment, securely lock the lever by pulling it upward.
WARNING
!●Do not park your vehicle in areas where combustible
materials such as dry grass or leaves can come in
contact with the hot exhaust, since fire could occur.
1- Locked
2- Release
WARNING
!●After adjusting to the desired height, check to be
sure that the lever is locked.●Do not attempt to adjust the steering wheel while
you are driving the vehicle.
BK-XP08E1ENUK.en-uk.book Page 8 Monday, August 13, 2007 2:20 PM