tow MITSUBISHI GRANDIS 2008 Owner's Manual (in English)
[x] Cancel search | Manufacturer: MITSUBISHI, Model Year: 2008, Model line: GRANDIS, Model: MITSUBISHI GRANDIS 2008Pages: 458, PDF Size: 18.52 MB
Page 28 of 458
1-6 Locking and unlocking
1
Operation of the outside rear-view mirrorsTo f o l dWithin 30 seconds of locking the doors and tailgate using the
LOCK switch (1), press the LOCK switch twice rapidly to fold
the door mirrors.To e x t e n dWithin 30 seconds of unlocking the doors and tailgate using the
UNLOCK switch (2), press the UNLOCK switch twice rapidly
to return the door mirrors to their extended positions.NOTE●The keyless entry system does not operate in the follow-
ing conditions:
• The key is left in the key cylinder.
• The door or tailgate is open.
●The remote control switch will operate within about 4 m
from the vehicle. However, the operating range of the
remote control switch may change if the vehicle is located
near a TV transmitting tower, power station, or radio
broadcasting station.
●If either of the following problems occurs, the battery may
be exhausted. Have the battery replaced by a MITSUBI-
SHI MOTORS Authorized Service Point.
• The remote control switch is operated at the correct dis-
tance from the vehicle, but the doors and tailgate are not
locked/unlocked in response.
• The indication lamp (3) is dim or does not come on.●If your remote control switch is lost or damaged, please
contact your MITSUBISHI MOTORS Authorized Service
Point for a replacement remote control switch.
●If you wish to add remote control switch, we recommend
that you contact your MITSUBISHI MOTORS Author-
ized Service Point.
A maximum of 4 remote control switches are available for
your vehicle.
BK-XP08E1ENUK.en-uk.book Page 6 Monday, August 13, 2007 2:20 PM
Page 30 of 458
1-8 Locking and unlocking
1
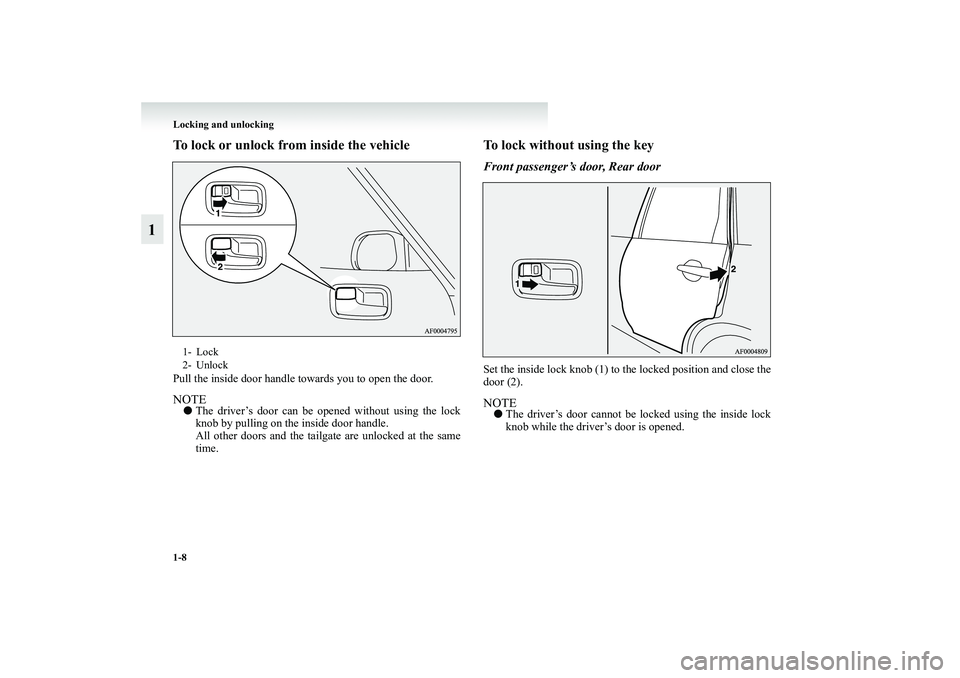
To lock or unlock from inside the vehiclePull the inside door handle towards you to open the door.NOTE●The driver’s door can be opened without using the lock
knob by pulling on the inside door handle.
All other doors and the tailgate are unlocked at the same
time.
To lock without using the keyFront passenger’s door, Rear doorSet the inside lock knob (1) to the locked position and close the
door (2).NOTE●The driver’s door cannot be locked using the inside lock
knob while the driver’s door is opened.
1- Lock
2- Unlock
BK-XP08E1ENUK.en-uk.book Page 8 Monday, August 13, 2007 2:20 PM
Page 31 of 458
Locking and unlocking
1-9
1 Central door locks
E00300800897
NOTE●Each of the doors can be locked or unlocked independ-
ently by using the inside lock knob.
●Repeated continuous operation between lock and unlock
could activate the central door locking systems built-in
protection circuit and prevent the system from operating.
If this occurs, wait about one minute before operating the
inside lock knob or the key.
●When the driver’s door is open, neither the key nor the
lock knob can be used to lock it.
All of the doors and the tailgate can be locked and unlocked as
described hereafter.
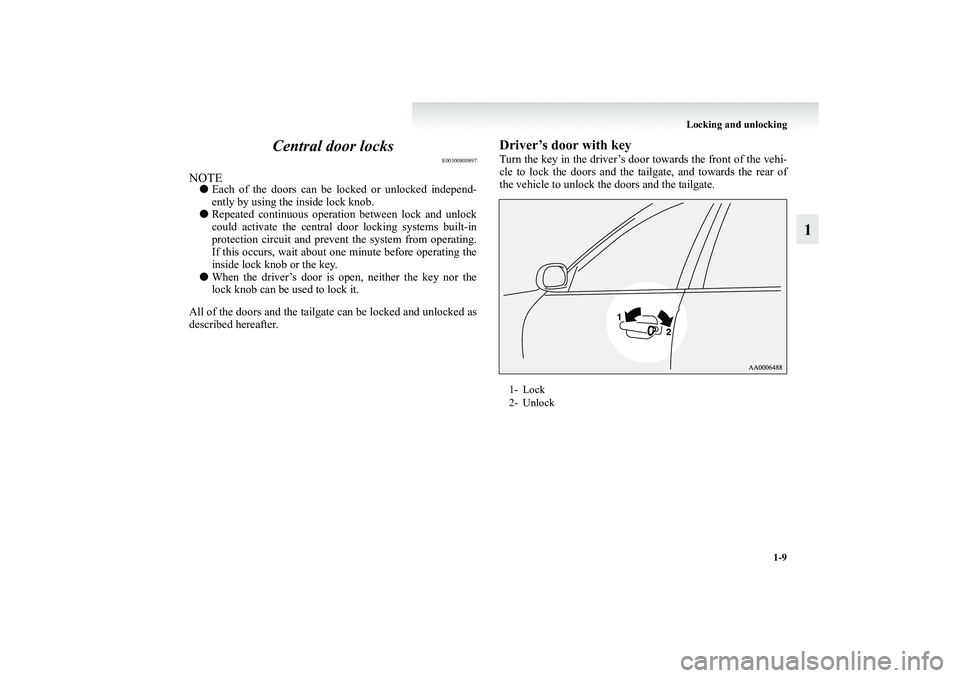
Driver’s door with keyTurn the key in the driver’s door towards the front of the vehi-
cle to lock the doors and the tailgate, and towards the rear of
the vehicle to unlock the doors and the tailgate.1- Lock
2- Unlock
BK-XP08E1ENUK.en-uk.book Page 9 Monday, August 13, 2007 2:20 PM
Page 32 of 458
1-10 Locking and unlocking
1
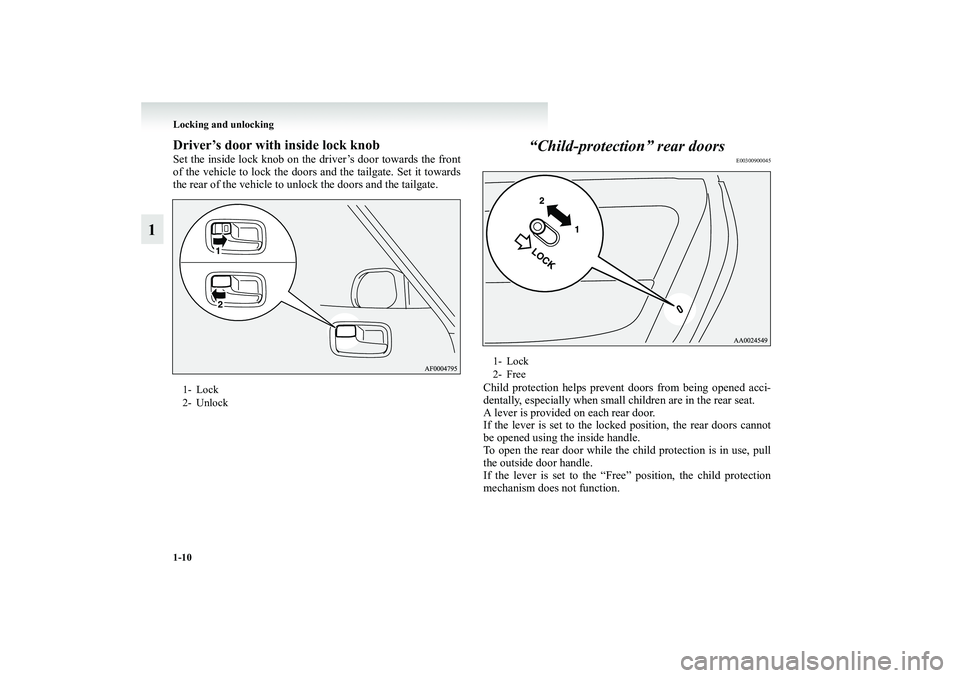
Driver’s door with inside lock knobSet the inside lock knob on the driver’s door towards the front
of the vehicle to lock the doors and the tailgate. Set it towards
the rear of the vehicle to unlock the doors and the tailgate.
“Child-protection” rear doors
E00300900045
Child protection helps prevent doors from being opened acci-
dentally, especially when small children are in the rear seat.
A lever is provided on each rear door.
If the lever is set to the locked position, the rear doors cannot
be opened using the inside handle.
To open the rear door while the child protection is in use, pull
the outside door handle.
If the lever is set to the “Free” position, the child protection
mechanism does not function.
1- Lock
2- Unlock
1- Lock
2- Free
BK-XP08E1ENUK.en-uk.book Page 10 Monday, August 13, 2007 2:20 PM
Page 50 of 458
2-2 Seat and seat belts
2Seat
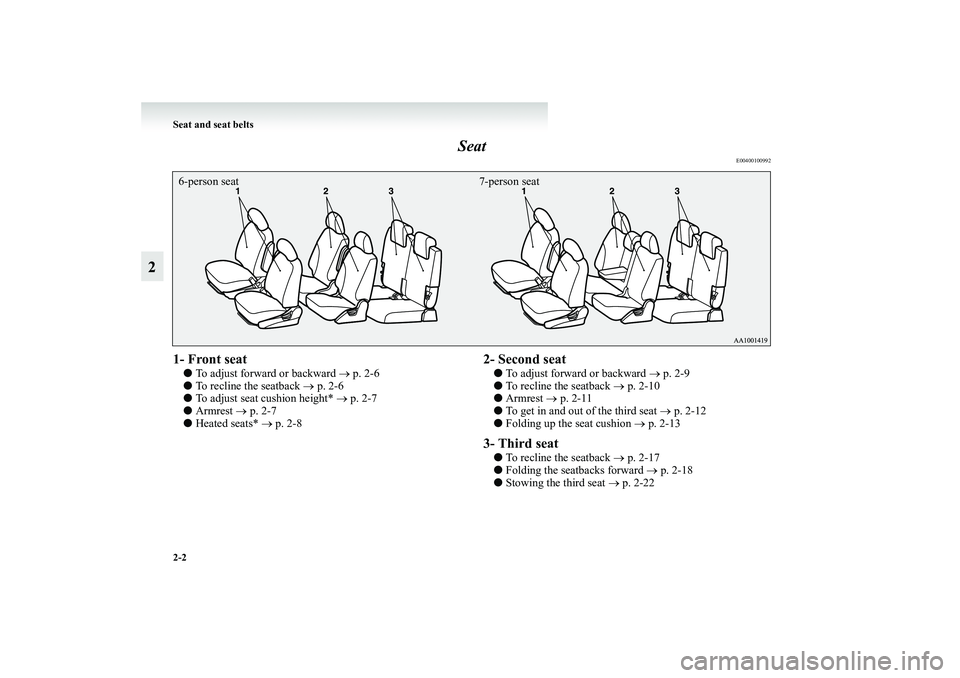
E00400100992
1- Front seat ●To adjust forward or backward → p. 2-6
●To recline the seatback → p. 2-6
●To adjust seat cushion height* → p. 2-7
●Armrest → p. 2-7
●Heated seats* → p. 2-8
2- Second seat●To adjust forward or backward → p. 2-9
●To recline the seatback → p. 2-10
●Armrest → p. 2-11
●To get in and out of the third seat → p. 2-12
●Folding up the seat cushion → p. 2-133- Third seat●To recline the seatback → p. 2-17
●Folding the seatbacks forward → p. 2-18
●Stowing the third seat → p. 2-22
6-person seat 7-person seatBK-XP08E1ENUK.en-uk.book Page 2 Monday, August 13, 2007 2:20 PM
Page 52 of 458
2-4 Seat and seat belts
2
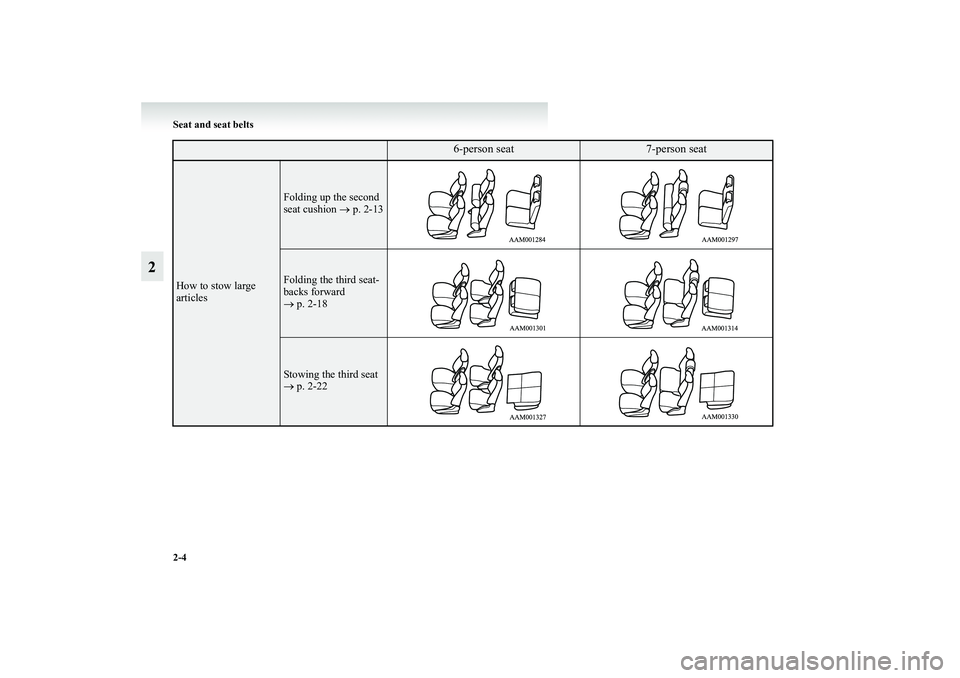
How to stow large
articles
Folding up the second
seat cushion → p. 2-13Folding the third seat-
backs forward
→ p. 2-18Stowing the third seat
→ p. 2-22
6-person seat
7-person seat
BK-XP08E1ENUK.en-uk.book Page 4 Monday, August 13, 2007 2:20 PM
Page 70 of 458
2-22 Seat and seat belts
2
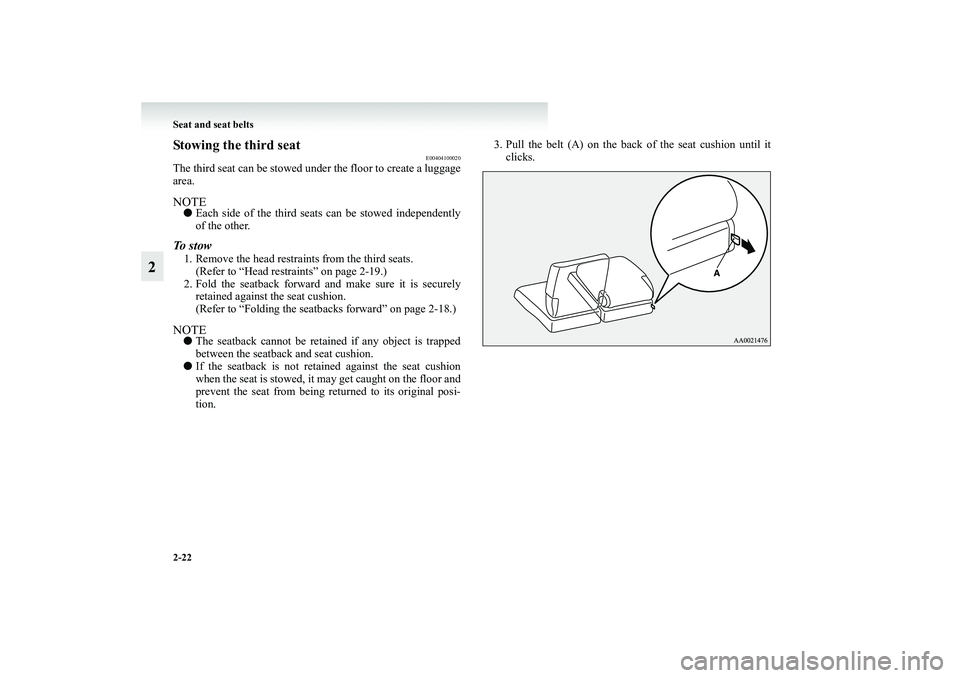
Stowing the third seat
E00404100020
The third seat can be stowed under the floor to create a luggage
area.NOTE●Each side of the third seats can be stowed independently
of the other.To s t o w1. Remove the head restraints from the third seats.
(Refer to “Head restraints” on page 2-19.)
2. Fold the seatback forward and make sure it is securely
retained against the seat cushion.
(Refer to “Folding the seatbacks forward” on page 2-18.)NOTE●The seatback cannot be retained if any object is trapped
between the seatback and seat cushion.
●If the seatback is not retained against the seat cushion
when the seat is stowed, it may get caught on the floor and
prevent the seat from being returned to its original posi-
tion.3. Pull the belt (A) on the back of the seat cushion until it
clicks.
BK-XP08E1ENUK.en-uk.book Page 22 Monday, August 13, 2007 2:20 PM
Page 71 of 458
Seat and seat belts
2-23
2
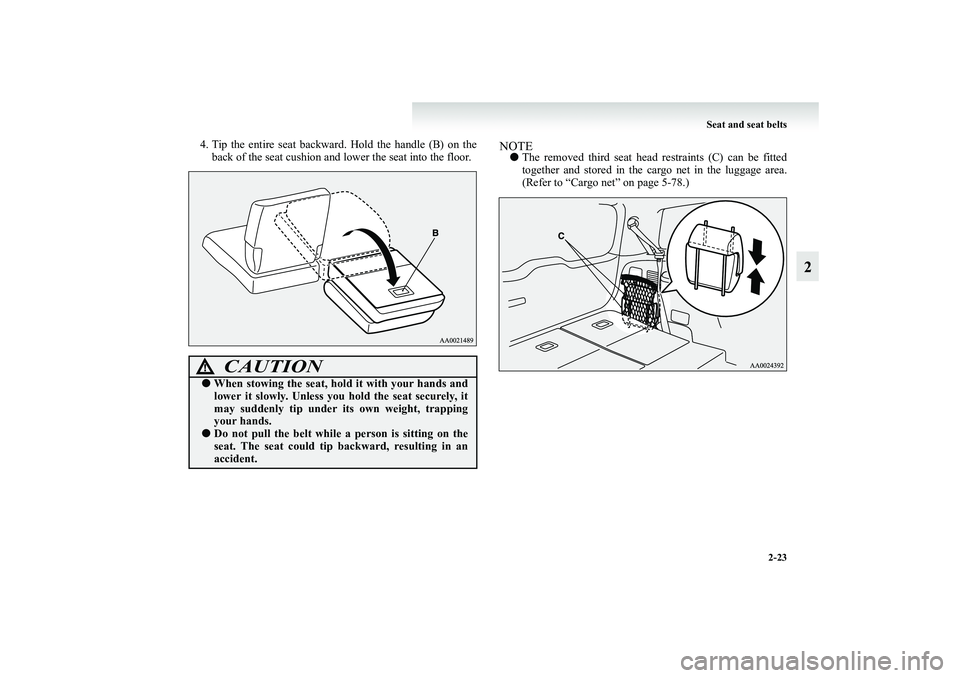
4. Tip the entire seat backward. Hold the handle (B) on the
back of the seat cushion and lower the seat into the floor.
NOTE●The removed third seat head restraints (C) can be fitted
together and stored in the cargo net in the luggage area.
(Refer to “Cargo net” on page 5-78.)
CAUTION
!●When stowing the seat, hold it with your hands and
lower it slowly. Unless you hold the seat securely, it
may suddenly tip under its own weight, trapping
your hands.●Do not pull the belt while a person is sitting on the
seat. The seat could tip backward, resulting in an
accident.
BK-XP08E1ENUK.en-uk.book Page 23 Monday, August 13, 2007 2:20 PM
Page 83 of 458
Seat and seat belts
2-35
2
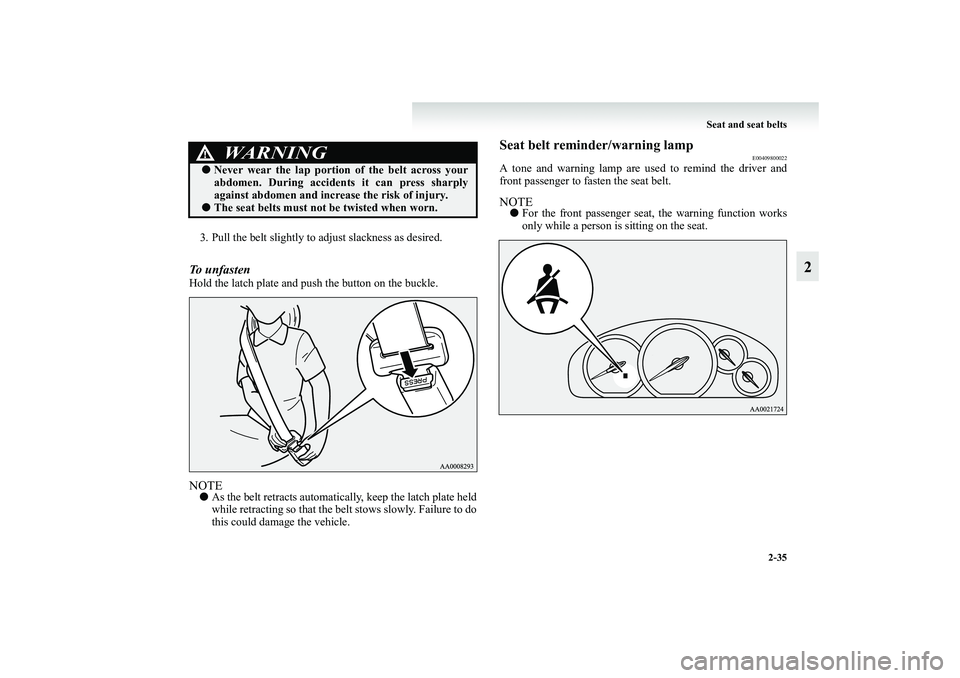
3. Pull the belt slightly to adjust slackness as desired.To unfasten Hold the latch plate and push the button on the buckle.NOTE●As the belt retracts automatically, keep the latch plate held
while retracting so that the belt stows slowly. Failure to do
this could damage the vehicle.
Seat belt reminder/warning lamp
E00409800022
A tone and warning lamp are used to remind the driver and
front passenger to fasten the seat belt.NOTE●For the front passenger seat, the warning function works
only while a person is sitting on the seat.
WARNING
!●Never wear the lap portion of the belt across your
abdomen. During accidents it can press sharply
against abdomen and increase the risk of injury.●The seat belts must not be twisted when worn.
BK-XP08E1ENUK.en-uk.book Page 35 Monday, August 13, 2007 2:20 PM
Page 137 of 458
Instruments and controls
3-11
3
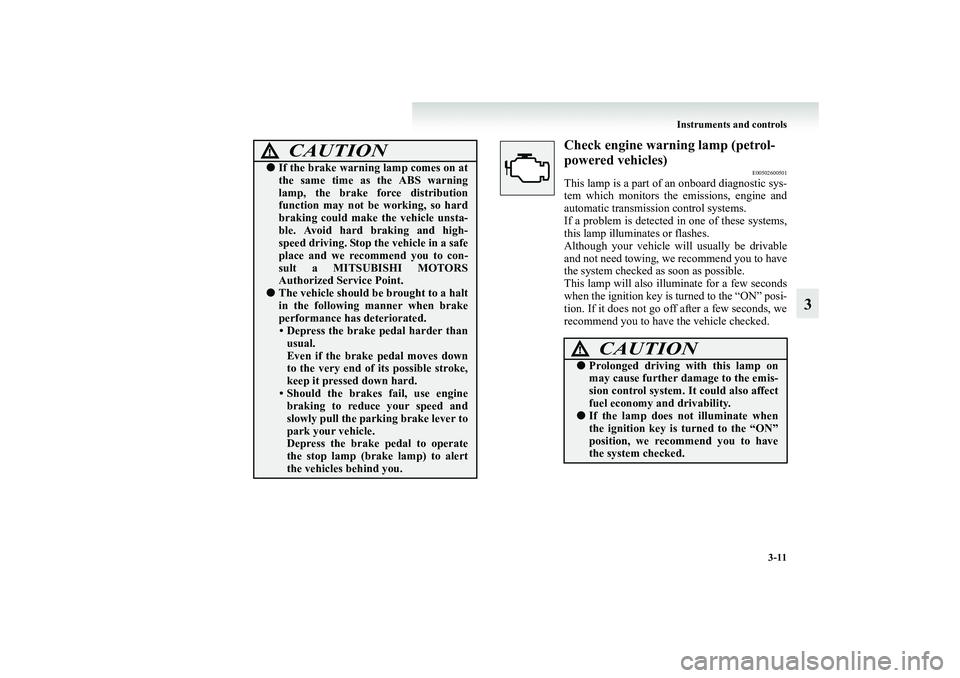
Check engine warning lamp (petrol-
powered vehicles)
E00502600501
This lamp is a part of an onboard diagnostic sys-
tem which monitors the emissions, engine and
automatic transmission control systems.
If a problem is detected in one of these systems,
this lamp illuminates or flashes.
Although your vehicle will usually be drivable
and not need towing, we recommend you to have
the system checked as soon as possible.
This lamp will also illuminate for a few seconds
when the ignition key is turned to the “ON” posi-
tion. If it does not go off after a few seconds, we
recommend you to have the vehicle checked.
●If the brake warning lamp comes on at
the same time as the ABS warning
lamp, the brake force distribution
function may not be working, so hard
braking could make the vehicle unsta-
ble. Avoid hard braking and high-
speed driving. Stop the vehicle in a safe
place and we recommend you to con-
sult a MITSUBISHI MOTORS
Authorized Service Point.●The vehicle should be brought to a halt
in the following manner when brake
performance has deteriorated.
• Depress the brake pedal harder than
usual.
Even if the brake pedal moves down
to the very end of its possible stroke,
keep it pressed down hard.
• Should the brakes fail, use engine
braking to reduce your speed and
slowly pull the parking brake lever to
park your vehicle.
Depress the brake pedal to operate
the stop lamp (brake lamp) to alert
the vehicles behind you.CAUTION
!
CAUTION
!●Prolonged driving with this lamp on
may cause further damage to the emis-
sion control system. It could also affect
fuel economy and drivability.●If the lamp does not illuminate when
the ignition key is turned to the “ON”
position, we recommend you to have
the system checked.
BK-XP08E1ENUK.en-uk.book Page 11 Monday, August 13, 2007 2:20 PM