warning light MITSUBISHI GRANDIS 2008 Owner's Manual (in English)
[x] Cancel search | Manufacturer: MITSUBISHI, Model Year: 2008, Model line: GRANDIS, Model: MITSUBISHI GRANDIS 2008Pages: 458, PDF Size: 18.52 MB
Page 6 of 458
Overview
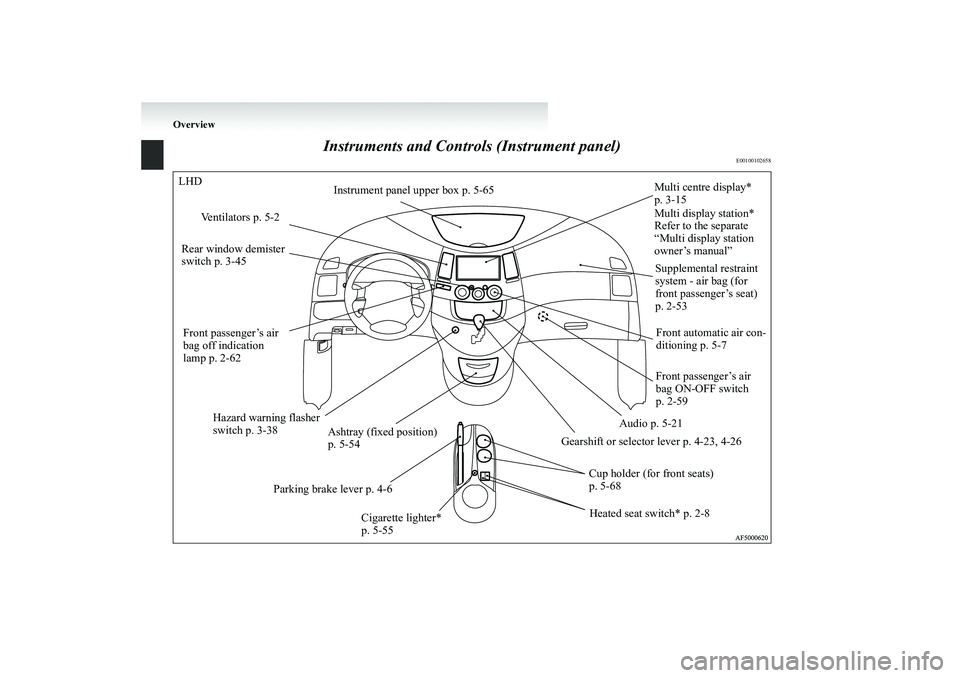
Instruments and Controls (Instrument panel)
E00100102658
LHD
Multi centre display*
p. 3-15
Ventilators p. 5-2
Rear window demister
switch p. 3-45
Hazard warning flasher
switch p. 3-38
Ashtray (fixed position)
p. 5-54
Cup holder (for front seats)
p. 5-68 Gearshift or selector lever p. 4-23, 4-26
Parking brake lever p. 4-6
Cigarette lighter*
p. 5-55Supplemental restraint
system - air bag (for
front passenger’s seat)
p. 2-53
Front automatic air con-
ditioning p. 5-7
Audio p. 5-21 Instrument panel upper box p. 5-65
Heated seat switch* p. 2-8Front passenger’s air
bag ON-OFF switch
p. 2-59 Front passenger’s air
bag off indication
lamp p. 2-62Multi display station*
Refer to the separate
“Multi display station
owner’s manual”BK-XP08E1ENUK.en-uk.book Page 3 Monday, August 13, 2007 2:20 PM
Page 39 of 458
Locking and unlocking
1-17
1
NOTE●Repeated operation with the engine stopped will run down
the battery. Operate the window switches only while the
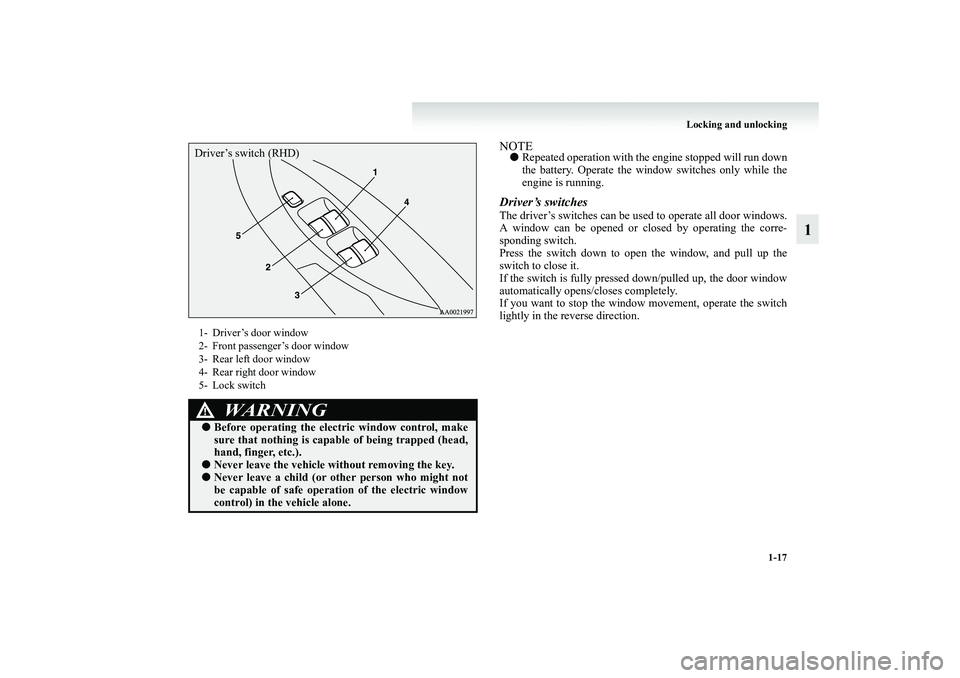
engine is running.Driver’s switchesThe driver’s switches can be used to operate all door windows.
A window can be opened or closed by operating the corre-
sponding switch.
Press the switch down to open the window, and pull up the
switch to close it.
If the switch is fully pressed down/pulled up, the door window
automatically opens/closes completely.
If you want to stop the window movement, operate the switch
lightly in the reverse direction.
1- Driver’s door window
2- Front passenger’s door window
3- Rear left door window
4- Rear right door window
5- Lock switch
WARNING
!●Before operating the electric window control, make
sure that nothing is capable of being trapped (head,
hand, finger, etc.).●Never leave the vehicle without removing the key.●Never leave a child (or other person who might not
be capable of safe operation of the electric window
control) in the vehicle alone.Driver’s switch (RHD)
BK-XP08E1ENUK.en-uk.book Page 17 Monday, August 13, 2007 2:20 PM
Page 54 of 458
2-6 Seat and seat belts
2Front seat
E00400400012
To adjust forward or backward
E00400500491
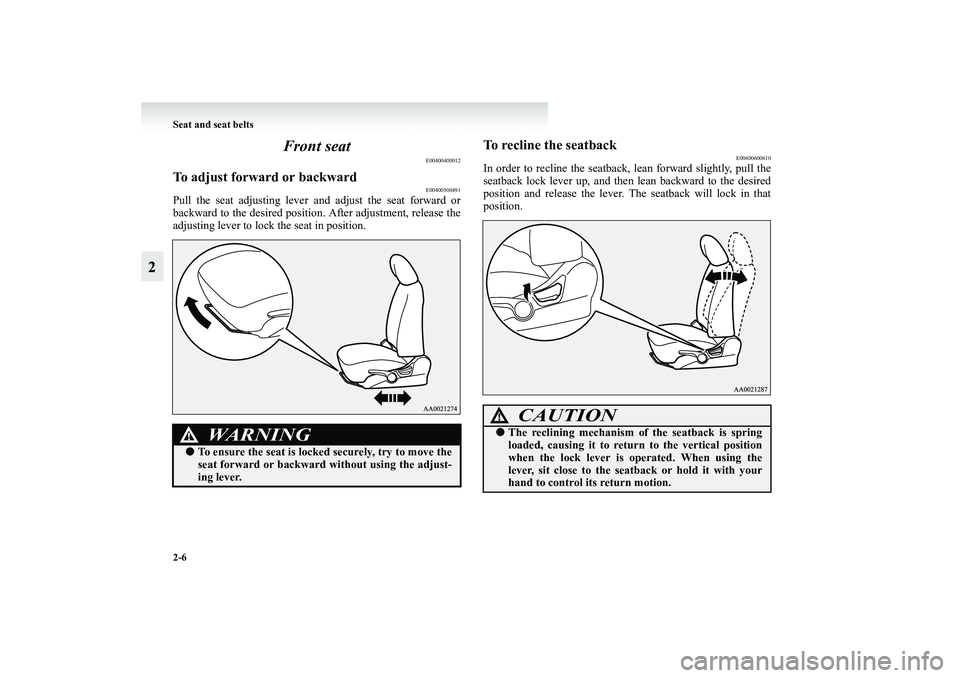
Pull the seat adjusting lever and adjust the seat forward or
backward to the desired position. After adjustment, release the
adjusting lever to lock the seat in position.
To recline the seatback
E00400600610
In order to recline the seatback, lean forward slightly, pull the
seatback lock lever up, and then lean backward to the desired
position and release the lever. The seatback will lock in that
position.
WARNING
!●To ensure the seat is locked securely, try to move the
seat forward or backward without using the adjust-
ing lever.
CAUTION
!●The reclining mechanism of the seatback is spring
loaded, causing it to return to the vertical position
when the lock lever is operated. When using the
lever, sit close to the seatback or hold it with your
hand to control its return motion.
BK-XP08E1ENUK.en-uk.book Page 6 Monday, August 13, 2007 2:20 PM
Page 58 of 458
2-10 Seat and seat belts
2
To recline the seatback
E00402200186
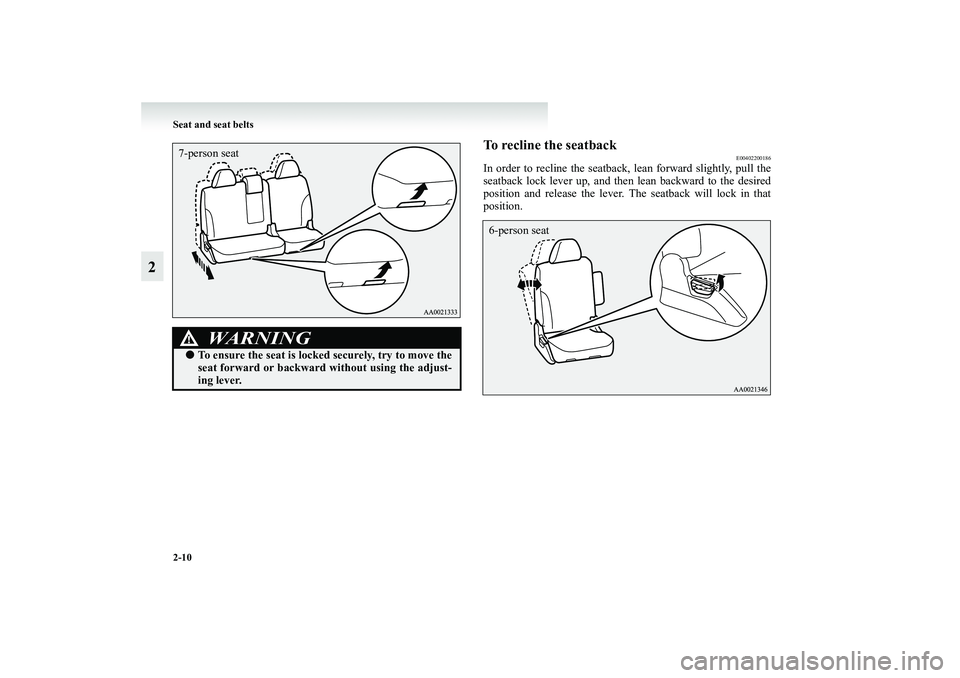
In order to recline the seatback, lean forward slightly, pull the
seatback lock lever up, and then lean backward to the desired
position and release the lever. The seatback will lock in that
position.
WARNING
!●To ensure the seat is locked securely, try to move the
seat forward or backward without using the adjust-
ing lever.7-person seat
6-person seat
BK-XP08E1ENUK.en-uk.book Page 10 Monday, August 13, 2007 2:20 PM
Page 66 of 458
2-18 Seat and seat belts
2
Folding the seatbacks forward
E00402900024
Larger objects can be loaded into the vehicle if a seatback is
folded forwards.
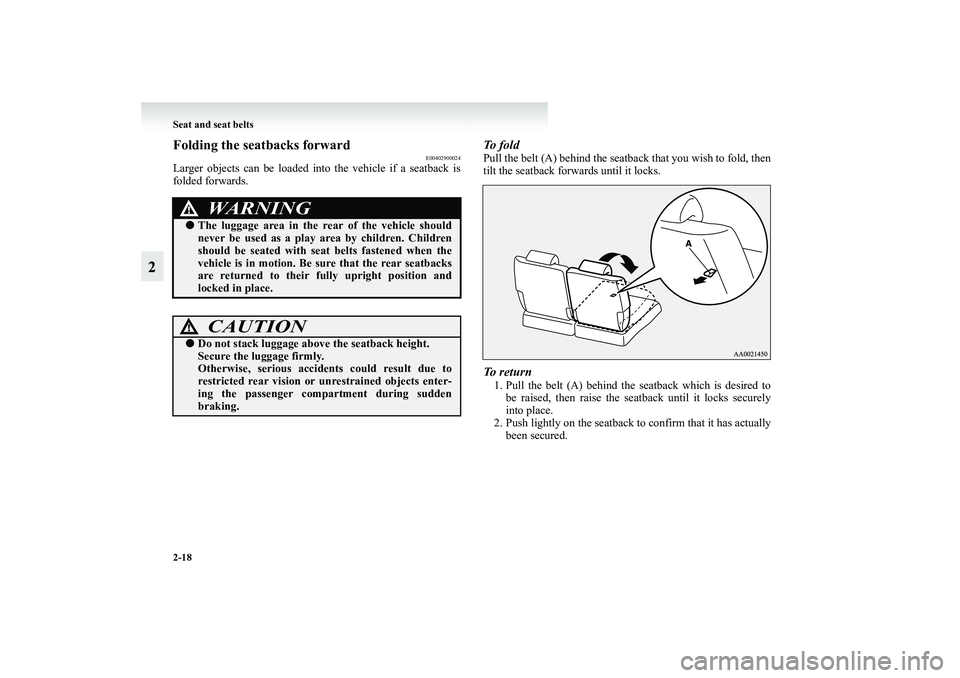
To f o l dPull the belt (A) behind the seatback that you wish to fold, then
tilt the seatback forwards until it locks.To r e t u r n1. Pull the belt (A) behind the seatback which is desired to
be raised, then raise the seatback until it locks securely
into place.
2. Push lightly on the seatback to confirm that it has actually
been secured.
WARNING
!●The luggage area in the rear of the vehicle should
never be used as a play area by children. Children
should be seated with seat belts fastened when the
vehicle is in motion. Be sure that the rear seatbacks
are returned to their fully upright position and
locked in place.
CAUTION
!●Do not stack luggage above the seatback height.
Secure the luggage firmly.
Otherwise, serious accidents could result due to
restricted rear vision or unrestrained objects enter-
ing the passenger compartment during sudden
braking.
BK-XP08E1ENUK.en-uk.book Page 18 Monday, August 13, 2007 2:20 PM
Page 83 of 458
Seat and seat belts
2-35
2
3. Pull the belt slightly to adjust slackness as desired.To unfasten Hold the latch plate and push the button on the buckle.NOTE●As the belt retracts automatically, keep the latch plate held
while retracting so that the belt stows slowly. Failure to do
this could damage the vehicle.
Seat belt reminder/warning lamp
E00409800022
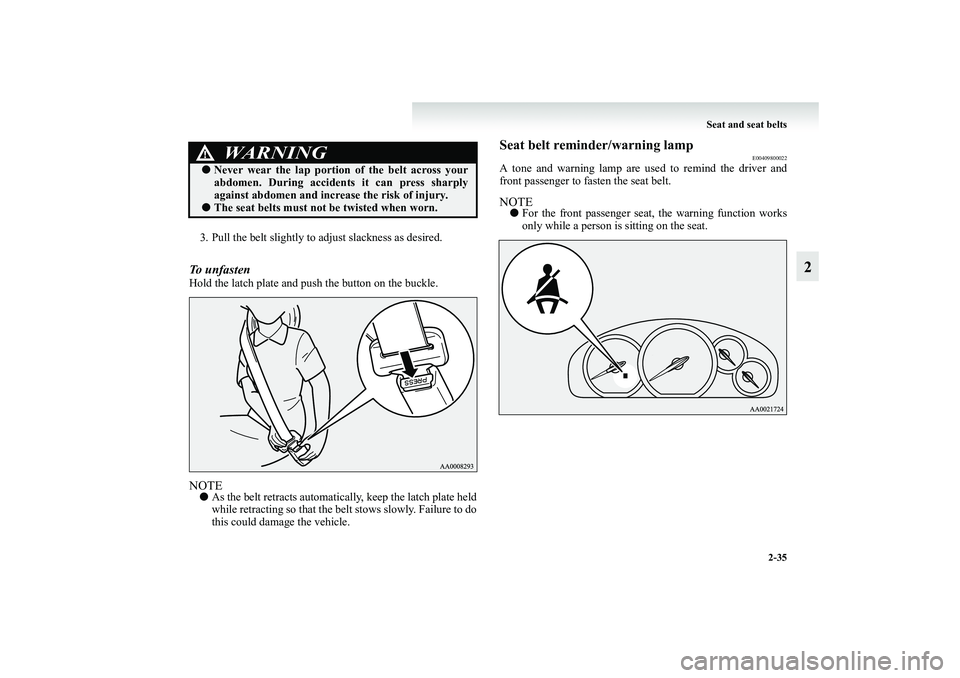
A tone and warning lamp are used to remind the driver and
front passenger to fasten the seat belt.NOTE●For the front passenger seat, the warning function works
only while a person is sitting on the seat.
WARNING
!●Never wear the lap portion of the belt across your
abdomen. During accidents it can press sharply
against abdomen and increase the risk of injury.●The seat belts must not be twisted when worn.
BK-XP08E1ENUK.en-uk.book Page 35 Monday, August 13, 2007 2:20 PM
Page 163 of 458
Instruments and controls
3-37
3 Turn/Lane-change signals
E00506500393
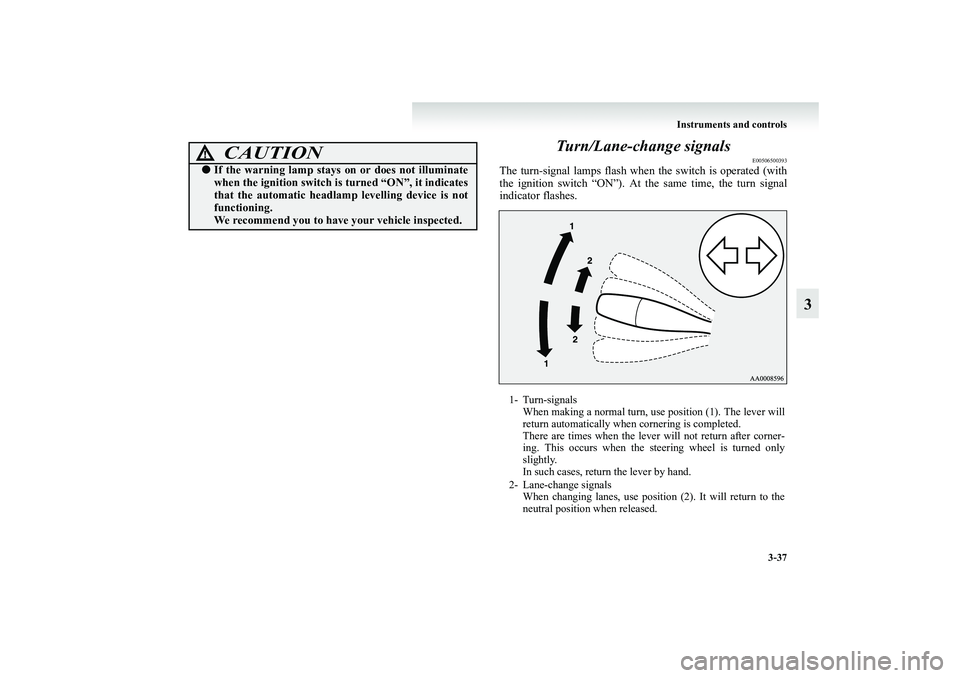
The turn-signal lamps flash when the switch is operated (with
the ignition switch “ON”). At the same time, the turn signal
indicator flashes.
CAUTION
!●If the warning lamp stays on or does not illuminate
when the ignition switch is turned “ON”, it indicates
that the automatic headlamp levelling device is not
functioning.
We recommend you to have your vehicle inspected.
1- Turn-signals
When making a normal turn, use position (1). The lever will
return automatically when cornering is completed.
There are times when the lever will not return after corner-
ing. This occurs when the steering wheel is turned only
slightly.
In such cases, return the lever by hand.
2- Lane-change signals
When changing lanes, use position (2). It will return to the
neutral position when released.
BK-XP08E1ENUK.en-uk.book Page 37 Monday, August 13, 2007 2:20 PM
Page 207 of 458
Starting and driving
4-35
4 Braking
E00607000888
All the parts of the brake system are critical to safety. We rec-
ommend you to have the vehicle checked at regular intervals
according to the service booklet.Brake systemThe service brake is divided into two brake circuits so that
when one brake circuit fails, the other is available to stop the
vehicle. In this situation, even if the brake pedal moves down
to the very end of its possible stroke, keep it pressed down
hard; stop driving as soon as possible and have the brake sys-
tem repaired.Power brakesYour vehicle is equipped with power brakes for more braking
force with less brake pedal effort.
Your brakes are designed to operate at full capacity, even if the
power assist is not being used.
If the power assist is not being used, the effort needed to press
the brake pedal is greater.
If you should lose the power assist for some reason, the brakes
will still work.If the power brake unit or either of the two brake hydraulic sys-
tems stops working properly, the rest of the brake system will
still work, but the vehicle will not slow down as quickly.
You will know this has happened if you find you need to press
the brake down further, or harder when slowing down or stop-
ping, or if the brake warning lamp comes on.
Wa r n i n g l a m pThe brake warning lamp illuminates to indicate a fault in the
braking system. Read “Brake warning lamp” on page 3-10.When brakes are wetCheck the brake system while driving at a low speed immedi-
ately after starting, especially when the brakes are wet, to con-
firm they work normally.
A film of water can be formed on the brake discs and prevent
normal braking after driving in heavy rain or through large
puddles, or after the vehicle is washed. If this occurs, dry the
brakes out by driving slowly while lightly depressing the brake
pedal.
CAUTION
!●Avoid driving habits that cause heavy braking and
never “ride” the brakes by resting your foot on the
brake pedal while driving.
It causes brake overheating and fade.
WARNING
!●Never coast downhill with the engine OFF. Keep the
engine running whenever your vehicle is in motion.
If you turn off the engine while driving, the power
brake booster will stop working and your brakes
will not work as well.●If the power assist is lost or if either brake hydraulic
system stops working properly, have your vehicle
checked immediately.
BK-XP08E1ENUK.en-uk.book Page 35 Monday, August 13, 2007 2:20 PM
Page 208 of 458
4-36 Starting and driving
4
When driving downhillIt is important to take advantage of the engine braking by shift-
ing to a lower shift position while driving on steep downhill
roads in order to prevent the brakes from overheating.Brake pads●With new brake pads, avoid where possible sudden full
application of the brakes for the first 200 km (124 miles)
of driving.
●The disc brakes are provided with a warning device which
emits a shrieking metallic sound while braking if the
brake pads have reached their limit.
If you hear this sound, have the brake pads replaced.
Anti-lock brake system (ABS)
E00607100560
Environmental conditions can have an effect on braking. Dur-
ing sudden braking when there is snow, ice, oil, water etc. on
the road surface, a skid may occur. In this situation, steering
control and braking effectiveness is reduced and the stopping
distance is increased. The vehicle may also go into an uncon-
trolled spin.
The ABS helps prevent the wheels from locking during brak-
ing, thus maintaining directional stability, ensuring controlla-
bility and providing optimum braking force.Driving hints●With ABS fitted, steering during sudden braking (when
the ABS functions) differs slightly from when the brakes
are not being applied.
Steer the vehicle carefully in these conditions.
●Always maintain the same distance from the vehicle in
front of you as you would for a vehicle not equipped with
ABS.
Compared with vehicles not fitted with ABS, your vehicle
may require a longer stopping distance in the following
cases:
• Driving on gravel or snow-covered roads.
• Driving with tyre chains installed.
• Driving on roads where the road surface is pitted or has
other differences in surface height.
• Driving on bumpy roads or other poor driving surfaces.
WARNING
!●Do not leave any objects near the brake pedal or let
a floor mat slide under it; doing so could prevent the
full pedal stroke that would be necessary in an emer-
gency. Make sure that the pedal can be operated
freely at all times. Make sure the floor mat is
securely held in place.
WARNING
!●Driving with worn brake pads will make it harder to
stop, and can cause an accident.
BK-XP08E1ENUK.en-uk.book Page 36 Monday, August 13, 2007 2:20 PM
Page 210 of 458
4-38 Starting and driving
4
ABS warning lamp
E00607200721
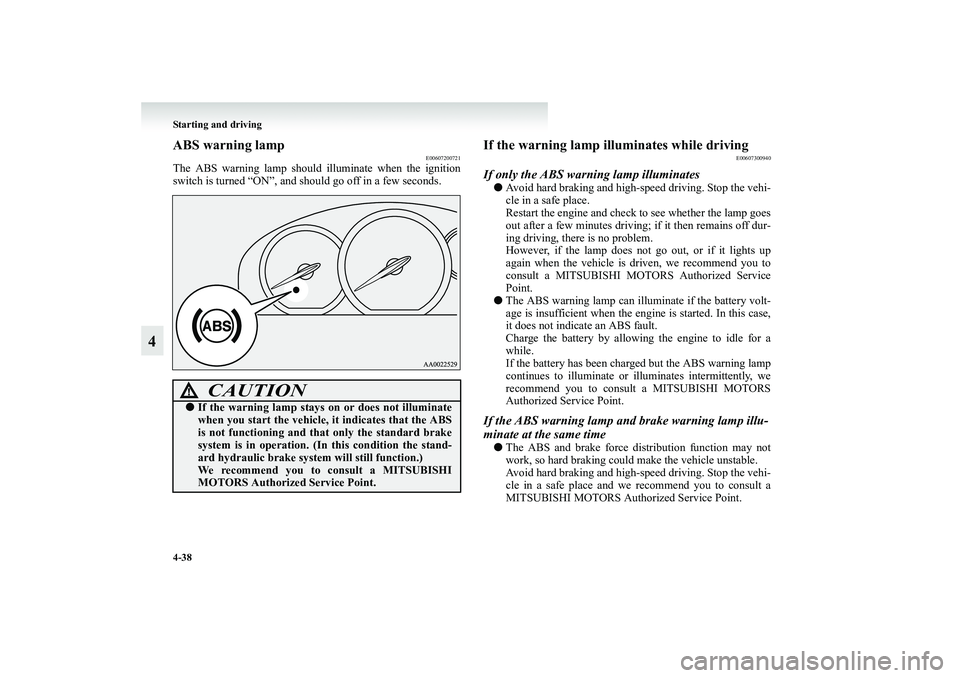
The ABS warning lamp should illuminate when the ignition
switch is turned “ON”, and should go off in a few seconds.
If the warning lamp illuminates while driving
E00607300940
If only the ABS warning lamp illuminates●Avoid hard braking and high-speed driving. Stop the vehi-
cle in a safe place.
Restart the engine and check to see whether the lamp goes
out after a few minutes driving; if it then remains off dur-
ing driving, there is no problem.
However, if the lamp does not go out, or if it lights up
again when the vehicle is driven, we recommend you to
consult a MITSUBISHI MOTORS Authorized Service
Point.
●The ABS warning lamp can illuminate if the battery volt-
age is insufficient when the engine is started. In this case,
it does not indicate an ABS fault.
Charge the battery by allowing the engine to idle for a
while.
If the battery has been charged but the ABS warning lamp
continues to illuminate or illuminates intermittently, we
recommend you to consult a MITSUBISHI MOTORS
Authorized Service Point.If the ABS warning lamp and brake warning lamp illu-
minate at the same time●The ABS and brake force distribution function may not
work, so hard braking could make the vehicle unstable.
Avoid hard braking and high-speed driving. Stop the vehi-
cle in a safe place and we recommend you to consult a
MITSUBISHI MOTORS Authorized Service Point.
CAUTION
!●If the warning lamp stays on or does not illuminate
when you start the vehicle, it indicates that the ABS
is not functioning and that only the standard brake
system is in operation. (In this condition the stand-
ard hydraulic brake system will still function.)
We recommend you to consult a MITSUBISHI
MOTORS Authorized Service Point.
BK-XP08E1ENUK.en-uk.book Page 38 Monday, August 13, 2007 2:20 PM