service MITSUBISHI GRANDIS 2010 (in English) User Guide
[x] Cancel search | Manufacturer: MITSUBISHI, Model Year: 2010, Model line: GRANDIS, Model: MITSUBISHI GRANDIS 2010Pages: 273, PDF Size: 21.01 MB
Page 64 of 273
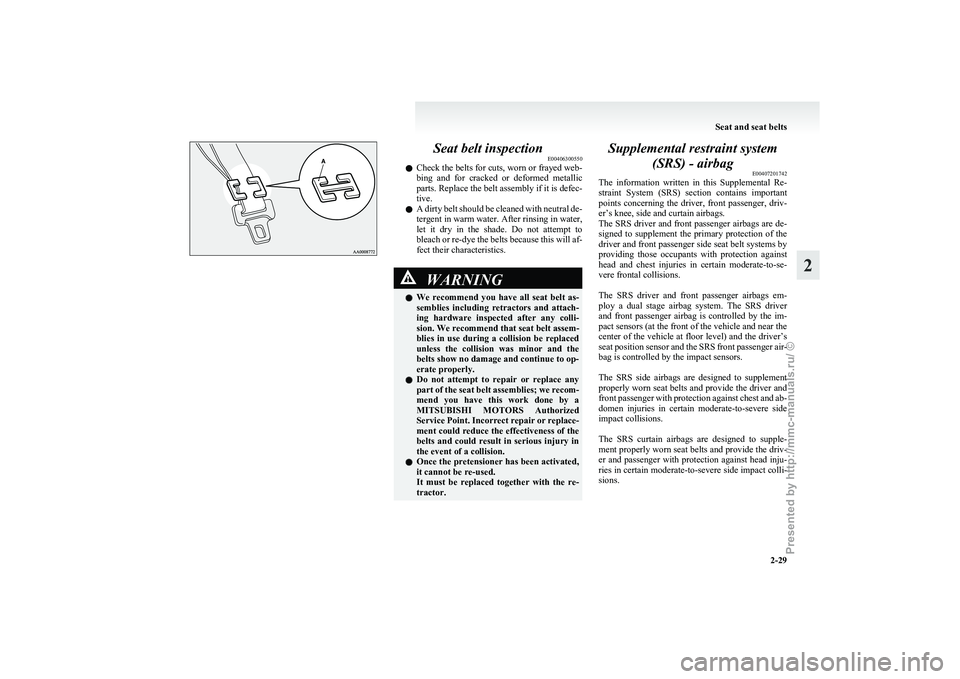
Seat belt inspection
E00406300550
l Check
the belts for cuts, worn or frayed web-
bing and for cracked or deformed metallic
parts. Replace the belt assembly if it is defec-
tive.
l A dirty belt should be cleaned with neutral de-
tergent in warm water. After rinsing in water,
let it dry in the shade. Do not attempt to
bleach or re-dye the belts because this will af-
fect their characteristics. WARNING
l We
recommend you have all seat belt as-
semblies including retractors and attach-
ing hardware inspected after any colli-
sion. We recommend that seat belt assem-
blies in use during a collision be replaced
unless the collision was minor and the
belts show no damage and continue to op-
erate properly.
l Do not attempt to repair or replace any
part of the seat belt assemblies; we recom-
mend you have this work done by a
MITSUBISHI MOTORS Authorized
Service Point. Incorrect repair or replace-
ment could reduce the effectiveness of the
belts and could result in serious injury in
the event of a collision.
l Once the pretensioner has been activated,
it cannot be re-used.
It must be replaced together with the re-
tractor. Supplemental restraint system
(SRS) - airbag E00407201742
The
information written in this Supplemental Re-
straint System (SRS) section contains important
points concerning the driver, front passenger, driv-
er’s knee, side and curtain airbags.
The SRS driver and front passenger airbags are de-
signed to supplement the primary protection of the
driver and front passenger side seat belt systems by
providing those occupants with protection against
head and chest injuries in certain moderate-to-se-
vere frontal collisions.
The SRS driver and front passenger airbags em-
ploy a dual stage airbag system. The SRS driver
and front passenger airbag is controlled by the im-
pact sensors (at the front of the vehicle and near the
center of the vehicle at floor level) and the driver’s
seat position sensor and the SRS front passenger air-
bag is controlled by the impact sensors.
The SRS side airbags are designed to supplement
properly worn seat belts and provide the driver and
front passenger with protection against chest and ab-
domen injuries in certain moderate-to-severe side
impact collisions.
The SRS curtain airbags are designed to supple-
ment properly worn seat belts and provide the driv-
er and passenger with protection against head inju-
ries in certain moderate-to-severe side impact colli-
sions.
Seat and seat belts
2-29 2
Presented by http://mmc-manuals.ru/ \251
Page 68 of 273
WARNING
l If the SRS warning lamp comes on, we rec-
ommend you to have the vehicle inspec-
ted by a MITSUBISHI MOTORS Author-
ized Service Point as soon as possible.
l Please observe the following instructions
to ensure that the driver’s seat position
sensor can sense the seat position correct-
ly. Otherwise, the dual stage airbags may
not operate correctly.
• Adjust the seat to the correct position,and sit correctly with your back
against the seatback.
Refer to “Front seat” on page 2-05.
• Do not have the seatback reclined more than necessary when driving.
• Do not place metallic objects or lug- gage under the seat.
l If the vehicle suffers a severe impact, we
recommend you to have the sensor inspec-
ted by a MITSUBISHI MOTORS Author-
ized Service Point as soon as possible.
Front passenger’s airbag ON-OFF
switch E00410100214
The front passenger’s airbag ON-OFF
switch can
be used to disable the front passenger’s airbag. If
you have a rearward facing child restraint system
that cannot be fitted to any seat other than the front
passenger seat, be sure to turn OFF the front passen-
ger’s airbag ON-OFF switch before using it. (Refer
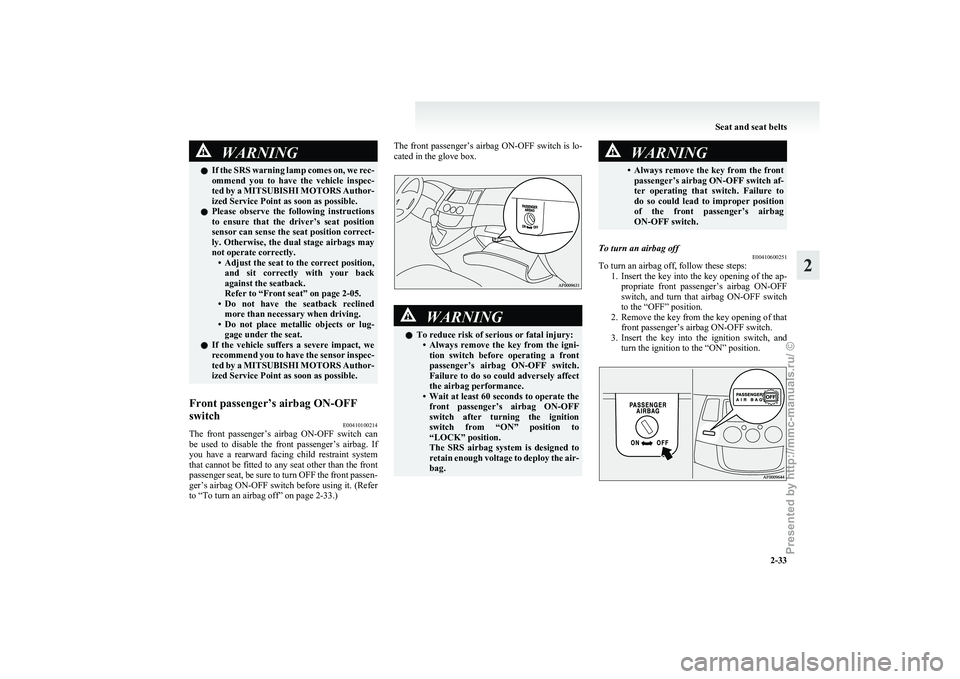
to “To turn an airbag off” on page 2-33.) The front passenger’s airbag ON-OFF
switch is lo-
cated in the glove box. WARNING
l To reduce risk of serious or fatal injury:
• Always
remove the key from the igni-
tion switch before operating a front
passenger’s airbag ON-OFF switch.
Failure to do so could adversely affect
the airbag performance.
• Wait at least 60 seconds to operate the front passenger’s airbag ON-OFF
switch after turning the ignition
switch from “ON” position to
“LOCK” position.
The SRS airbag system is designed to
retain enough voltage to deploy the air-
bag. WARNING
• Always
remove the key from the front passenger’s airbag ON-OFF switch af-
ter operating that switch. Failure to
do so could lead to improper position
of the front passenger’s airbag
ON-OFF switch.
To turn an airbag off E00410600251
To turn an airbag off, follow these steps:
1. Insert
the key into the key opening of the ap-
propriate front passenger’s airbag ON-OFF
switch, and turn that airbag ON-OFF switch
to the “OFF” position.
2. Remove the key from the key opening of that front passenger’s airbag ON-OFF switch.
3. Insert the key into the ignition switch, and turn the ignition to the “ON” position. Seat and seat belts
2-33 2
Presented by http://mmc-manuals.ru/ \251
Page 70 of 273
WARNING
l If the indication lamp behaves in any of
the following ways, there may be a fault
in the airbag system. We recommend you
to have the vehicle inspected by a
MITSUBISHI MOTORS Authorized
Service Point as soon as possible. • The indication lamp does not come onwhen the front passenger’s airbag
ON-OFF switch is turned OFF.
• The indication lamp stays on when the front passenger’s airbag ON-OFF
switch is turned ON. WARNING
l Do not fit any accessory that makes the in-
dication lamp impossible to see, and do
not cover the indication lamp with a stick-
er. You would not be able to verify the sta-
tus of the passenger airbag system.
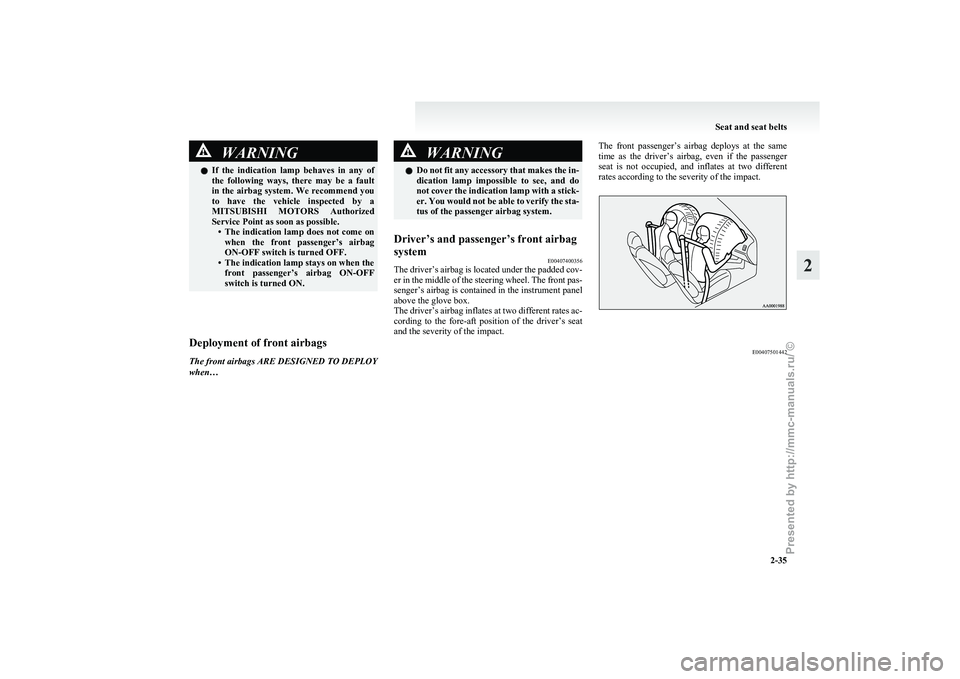
Driver’s and passenger’s front airbag
system E00407400356
The driver’s airbag is located under the padded cov-
er
in the middle of the steering wheel. The front pas-
senger’s airbag is contained in the instrument panel
above the glove box.
The driver’s airbag inflates at two different rates ac-
cording to the fore-aft position of the driver’s seat
and the severity of the impact. The front passenger’s airbag deploys at the same
time
as the driver’s airbag, even if the passenger
seat is not occupied, and inflates at two different
rates according to the severity of the impact. Deployment of front airbags
E00407501442
The front airbags ARE DESIGNED TO DEPLOY
when… Seat and seat belts
2-35 2
Presented by http://mmc-manuals.ru/ \251
Page 73 of 273
WARNING
l Do not attach anything to the steering
wheel padded cover, such as trim materi-
al, badges, etc. It might strike and injure
an occupant if the airbag inflates.
l Do not set anything on, or attach any-
thing to, the instrument panel above the
glove box. It might strike and injure an oc-
cupant if the airbag inflates. WARNING
l Do
not attach accessories to, or put them
in front of, the windscreen. These objects
could restrict the airbag inflation, or
strike and injure an occupant if the air-
bags inflate.
l Do not put packages, pets or other ob-
jects between the airbags and the driver
or front passenger. It could affect airbag
performance, or could cause injury when
the airbag inflates. WARNING
l Right
after the airbag inflation, several
airbag system components will be hot. Do
not touch them; you could be burned.
l The airbag system is designed to work on-
ly once. Once the airbags have deployed,
they will not work again. They must
promptly be replaced, and we recom-
mend you to have the entire airbag sys-
tem inspected by a MITSUBISHI
MOTORS Authorized Service Point.
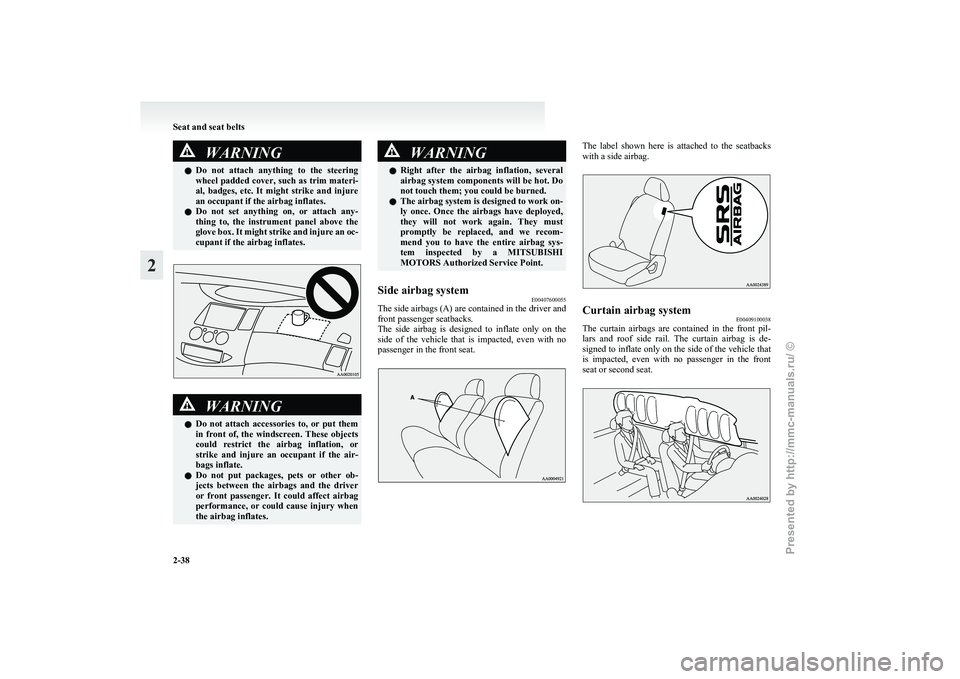
Side airbag system E00407600055
The side airbags (A) are contained in the driver and
front passenger seatbacks.
The
side airbag is designed to inflate only on the
side of the vehicle that is impacted, even with no
passenger in the front seat. The label shown here is attached to the seatbacks
with a side airbag.
Curtain airbag system
E00409100038
The curtain airbags are contained in the front pil-
lars
and roof side rail. The curtain airbag is de-
signed to inflate only on the side of the vehicle that
is impacted, even with no passenger in the front
seat or second seat. Seat and seat belts
2-38
2
Presented by http://mmc-manuals.ru/ \251
Page 76 of 273
WARNING
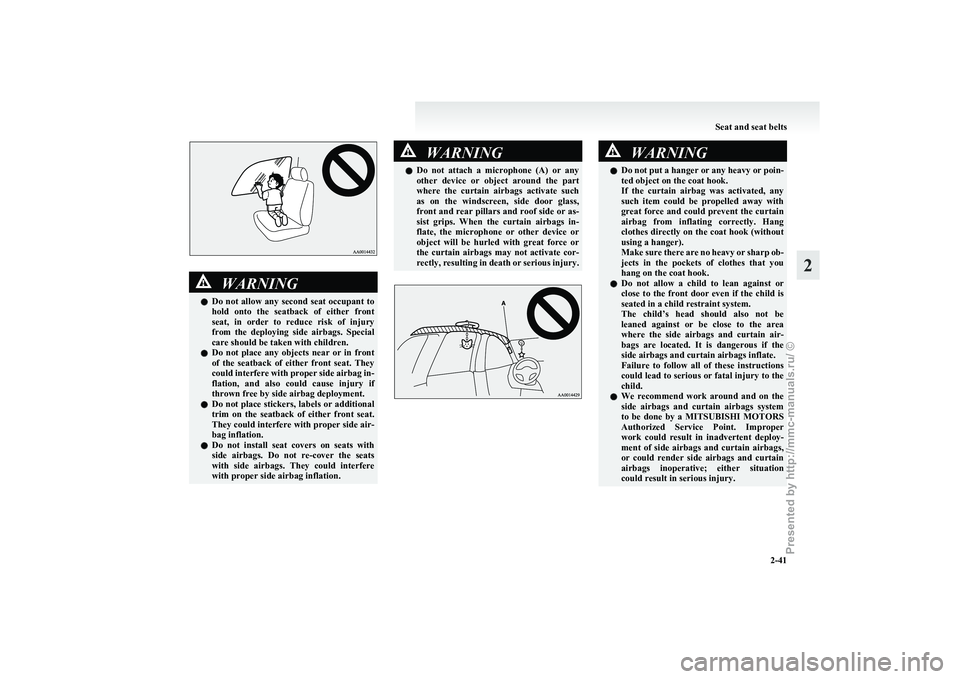
l Do not allow any second seat occupant to
hold onto the seatback of either front
seat, in order to reduce risk of injury
from the deploying side airbags. Special
care should be taken with children.
l Do not place any objects near or in front
of the seatback of either front seat. They
could interfere with proper side airbag in-
flation, and also could cause injury if
thrown free by side airbag deployment.
l Do not place stickers, labels or additional
trim on the seatback of either front seat.
They could interfere with proper side air-
bag inflation.
l Do not install seat covers on seats with
side airbags. Do not re-cover the seats
with side airbags. They could interfere
with proper side airbag inflation. WARNING
l Do
not attach a microphone (A) or any
other device or object around the part
where the curtain airbags activate such
as on the windscreen, side door glass,
front and rear pillars and roof side or as-
sist grips. When the curtain airbags in-
flate, the microphone or other device or
object will be hurled with great force or
the curtain airbags may not activate cor-
rectly, resulting in death or serious injury. WARNING
l Do not put a hanger or any heavy or poin-
ted object on the coat hook.
If the curtain airbag was activated, any
such item could be propelled away with
great force and could prevent the curtain
airbag from inflating correctly. Hang
clothes directly on the coat hook (without
using a hanger).
Make sure there are no heavy or sharp ob-
jects in the pockets of clothes that you
hang on the coat hook.
l Do not allow a child to lean against or
close to the front door even if the child is
seated in a child restraint system.
The child’s head should also not be
leaned against or be close to the area
where the side airbags and curtain air-
bags are located. It is dangerous if the
side airbags and curtain airbags inflate.
Failure to follow all of these instructions
could lead to serious or fatal injury to the
child.
l We recommend work around and on the
side airbags and curtain airbags system
to be done by a MITSUBISHI MOTORS
Authorized Service Point. Improper
work could result in inadvertent deploy-
ment of side airbags and curtain airbags,
or could render side airbags and curtain
airbags inoperative; either situation
could result in serious injury. Seat and seat belts
2-41 2
Presented by http://mmc-manuals.ru/ \251
Page 77 of 273
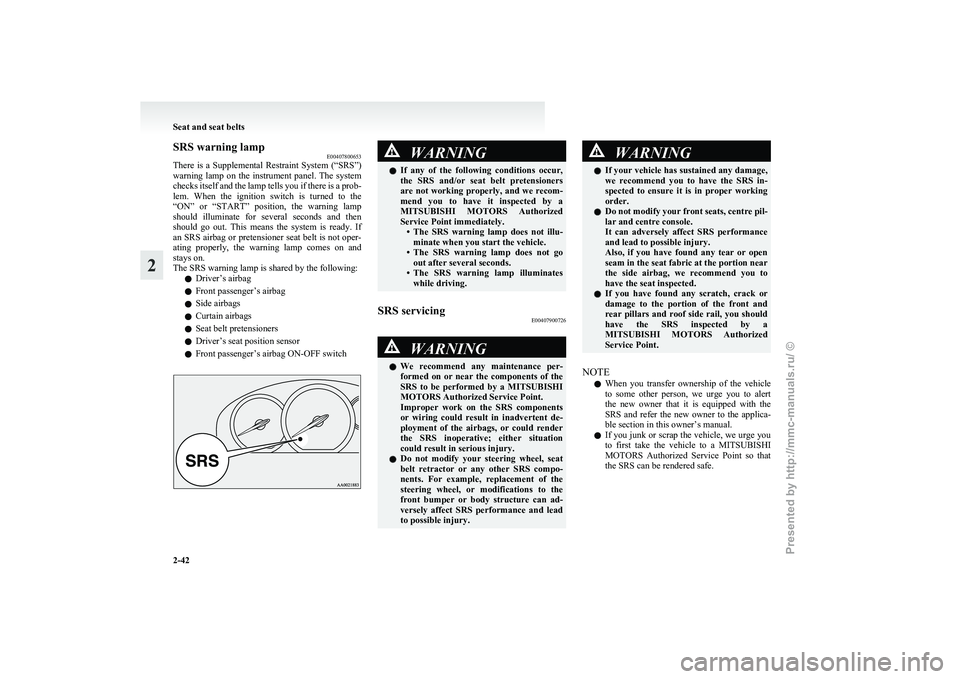
SRS warning lamp
E00407800653
There
is a Supplemental Restraint System (“SRS”)
warning lamp on the instrument panel. The system
checks itself and the lamp tells you if there is a prob-
lem. When the ignition switch is turned to the
“ON” or “START” position, the warning lamp
should illuminate for several seconds and then
should go out. This means the system is ready. If
an SRS airbag or pretensioner seat belt is not oper-
ating properly, the warning lamp comes on and
stays on.
The SRS warning lamp is shared by the following:
l Driver’s airbag
l Front passenger’s airbag
l Side airbags
l Curtain airbags
l Seat belt pretensioners
l Driver’s seat position sensor
l Front passenger’s airbag ON-OFF switch WARNING
l If
any of the following conditions occur,
the SRS and/or seat belt pretensioners
are not working properly, and we recom-
mend you to have it inspected by a
MITSUBISHI MOTORS Authorized
Service Point immediately. • The SRS warning lamp does not illu-minate when you start the vehicle.
• The SRS warning lamp does not go out after several seconds.
• The SRS warning lamp illuminates while driving.
SRS servicing E00407900726 WARNING
l We
recommend any maintenance per-
formed on or near the components of the
SRS to be performed by a MITSUBISHI
MOTORS Authorized Service Point.
Improper work on the SRS components
or wiring could result in inadvertent de-
ployment of the airbags, or could render
the SRS inoperative; either situation
could result in serious injury.
l Do not modify your steering wheel, seat
belt retractor or any other SRS compo-
nents. For example, replacement of the
steering wheel, or modifications to the
front bumper or body structure can ad-
versely affect SRS performance and lead
to possible injury. WARNING
l If
your vehicle has sustained any damage,
we recommend you to have the SRS in-
spected to ensure it is in proper working
order.
l Do not modify your front seats, centre pil-
lar and centre console.
It can adversely affect SRS performance
and lead to possible injury.
Also, if you have found any tear or open
seam in the seat fabric at the portion near
the side airbag, we recommend you to
have the seat inspected.
l If you have found any scratch, crack or
damage to the portion of the front and
rear pillars and roof side rail, you should
have the SRS inspected by a
MITSUBISHI MOTORS Authorized
Service Point.
NOTE l When
you transfer ownership of the vehicle
to some other person, we urge you to alert
the new owner that it is equipped with the
SRS and refer the new owner to the applica-
ble section in this owner’s manual.
l If you junk or scrap the vehicle, we urge you
to first take the vehicle to a MITSUBISHI
MOTORS Authorized Service Point so that
the SRS can be rendered safe. Seat and seat belts
2-42
2
Presented by http://mmc-manuals.ru/ \251
Page 86 of 273
CAUTION
l
If you continue driving with
low engine oil level or with this
warning lamp illuminated, en-
gine seizure may occur.
NOTE l The
oil pressure warning lamp
should not be treated as an indica-
tion of the engine’s oil level. The
oil level must be checked using
the dipstick. Door ajar warning lamp
E00503300765
This
lamp illuminates when a door or
the tailgate is either open or incomplete-
ly closed.
If the vehicle speed reaches approximate-
ly 8 km/h (5 mph) with a door or the tail-
gate open or incompletely closed, the
warning lamp flashes 8 times and a buz-
zer simultaneously sounds 8 times as a
warning. CAUTION
l
Before
moving your vehicle,
check that the warning lamp is
OFF. NOTE
l On
vehicles with keyless entry sys-
tem, the lamp remains illuminated
for a certain period and then goes
out automatically. Refer to
“Lamps (room lamps, etc.) auto-
cutout function” on page 5-37.
l It is possible to change the buzzer
setting for either of the following
types of operation. For further in-
formation, we recommend you to
consult a MITSUBISHI
MOTORS Authorized Service
Point.
• No buzzer operation (buzzerdisabled)
• Continuous buzzer operation Multi centre display
E00503600120 WARNING
l When
operating the system for a pro-
longed period, make sure the vehicle is
parked in a well ventilated area to avoid
the accumulation of toxic fumes inside
and outside of the passenger compartment. CAUTION
l
The
driver should not operate the display
while the vehicle is in motion.
l When operating the system, stop the vehi-
cle in a safe area.
When the ignition switch is in the “ACC” position,
the
digital clock is displayed in the multi centre dis-
play. When the ignition switch is in the “ON” posi-
tion, the momentary fuel consumption and outside
temperature are displayed besides digital clock. Instruments and controls
3-09 3
Presented by http://mmc-manuals.ru/ \251
Page 96 of 273
l
When the key has been turned to either the
“LOCK” or “ACC” position or removed
from the ignition switch with the lamp
switch in the “ ”
position, and the lamp
switch is turned to the “OFF” position within
approximately 3 minutes, the auto-cutout
function will not be activated.
(Even if the lamp switch is again turned to
the “ ”
position, the lamps will not go off
automatically; the lamps will remain on as
normal.)
When you want to keep the lamps on l Turn the switch in the “OFF” position to
switch off all lamps while the key is in the
“LOCK” or “ACC” position or remove the
key from the ignition switch.
l Turn on the lamps with the switch in the
“ ”
or “ ” position again, then the
lamps will remain on.
NOTE l It is possible to disable the lamps auto-cutout
function. For further information, we recom-
mend you to consult a MITSUBISHI
MOTORS Authorized Service Point.
Lamp monitor buzzer E00506100012
If the driver’s door is opened when the key is in the
“LOCK”
or “ACC” position or removed from the
ignition switch while the lamps are on, a buzzer
will sound to remind the driver to turn off the
lamps. When the lamp auto-cutout function acts,
the buzzer will stop automatically. When this func-
tion does not act, turn off the lamp switch to stop
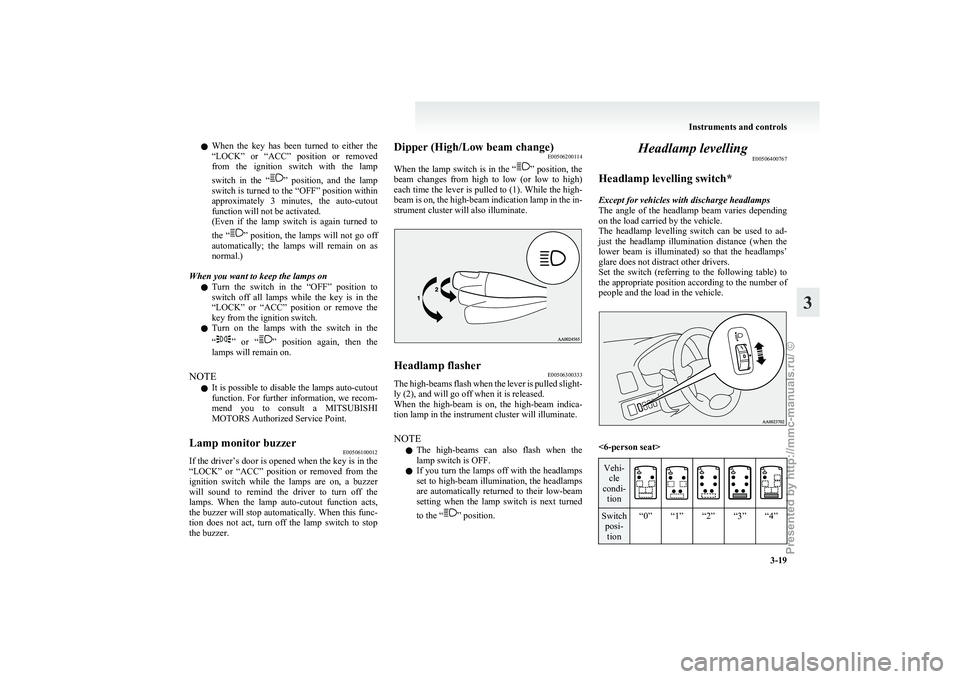
the buzzer. Dipper (High/Low beam change)
E00506200114
When
the lamp switch is in the “ ”
position, the
beam changes from high to low (or low to high)
each time the lever is pulled to (1). While the high-
beam is on, the high-beam indication lamp in the in-
strument cluster will also illuminate. Headlamp flasher
E00506300333
The high-beams flash when the lever is pulled slight-
ly (2), and will go off when it is released.
When
the high-beam is on, the high-beam indica-
tion lamp in the instrument cluster will illuminate.
NOTE
l The high-beams can also flash when the
lamp switch is OFF.
l If you turn the lamps off with the headlamps
set to high-beam illumination, the headlamps
are automatically returned to their low-beam
setting when the lamp switch is next turned
to the “ ” position.Headlamp levelling
E00506400767
Headlamp levelling switch*
Except for vehicles with discharge headlamps
The
angle of the headlamp beam varies depending
on the load carried by the vehicle.
The headlamp levelling switch can be used to ad-
just the headlamp illumination distance (when the
lower beam is illuminated) so that the headlamps’
glare does not distract other drivers.
Set the switch (referring to the following table) to
the appropriate position according to the number of
people and the load in the vehicle. <6-person seat>
Vehi-
cle
condi- tion Switch
posi-tion “0” “1” “2” “3” “4” Instruments and controls
3-19 3
Presented by http://mmc-manuals.ru/ \251
Page 98 of 273
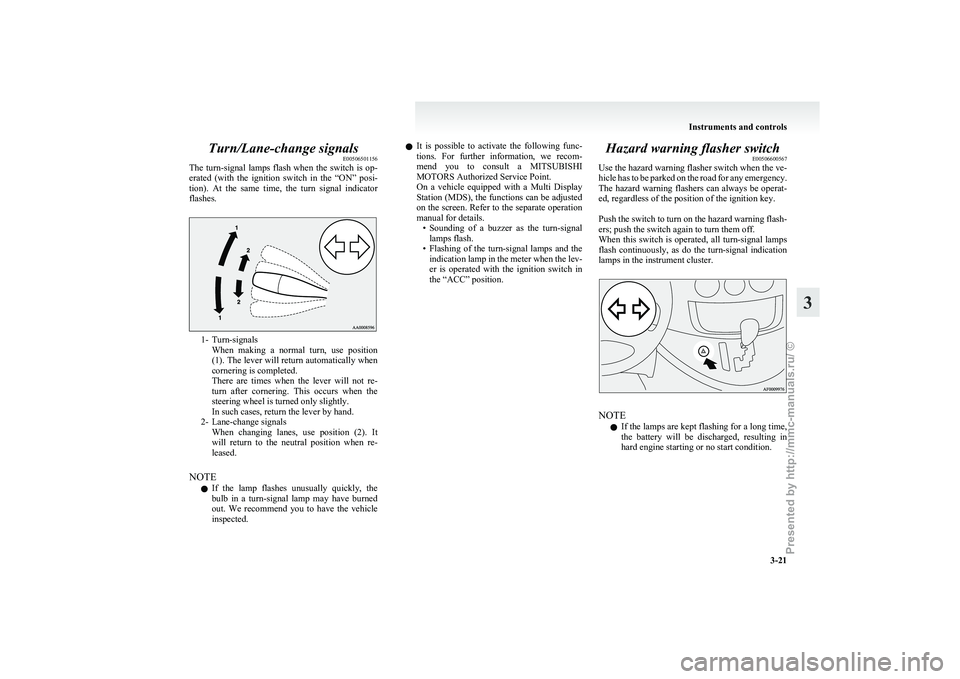
Turn/Lane-change signals
E00506501156
The
turn-signal lamps flash when the switch is op-
erated (with the ignition switch in the “ON” posi-
tion). At the same time, the turn signal indicator
flashes. 1- Turn-signals
When
making a normal turn, use position
(1). The lever will return automatically when
cornering is completed.
There are times when the lever will not re-
turn after cornering. This occurs when the
steering wheel is turned only slightly.
In such cases, return the lever by hand.
2- Lane-change signals When changing lanes, use position (2). It
will return to the neutral position when re-
leased.
NOTE l If the lamp flashes unusually quickly, the
bulb in a turn-signal lamp may have burned
out. We recommend you to have the vehicle
inspected. l
It
is possible to activate the following func-
tions. For further information, we recom-
mend you to consult a MITSUBISHI
MOTORS Authorized Service Point.
On a vehicle equipped with a Multi Display
Station (MDS), the functions can be adjusted
on the screen. Refer to the separate operation
manual for details. • Sounding of a buzzer as the turn-signallamps flash.
• Flashing of the turn-signal lamps and the indication lamp in the meter when the lev-
er is operated with the ignition switch in
the “ACC” position. Hazard warning flasher switch
E00506600567
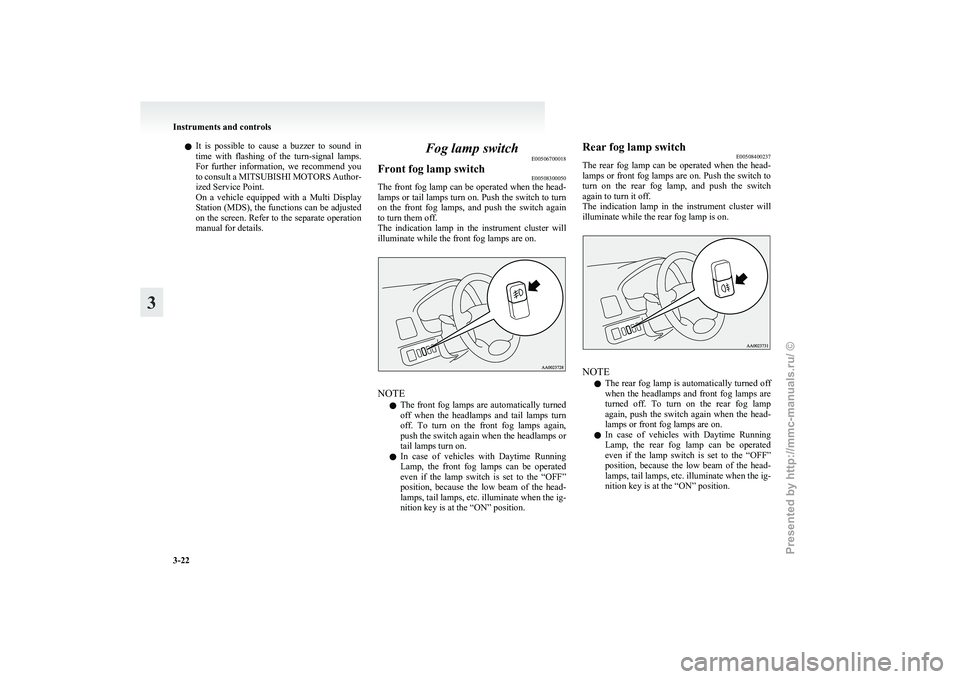
Use
the hazard warning flasher switch when the ve-
hicle has to be parked on the road for any emergency.
The hazard warning flashers can always be operat-
ed, regardless of the position of the ignition key.
Push the switch to turn on the hazard warning flash-
ers; push the switch again to turn them off.
When this switch is operated, all turn-signal lamps
flash continuously, as do the turn-signal indication
lamps in the instrument cluster. NOTE
l If
the lamps are kept flashing for a long time,
the battery will be discharged, resulting in
hard engine starting or no start condition. Instruments and controls
3-21 3
Presented by http://mmc-manuals.ru/ \251
Page 99 of 273
l
It is possible to cause a buzzer to sound in
time with flashing of the turn-signal lamps.
For further information, we recommend you
to consult a MITSUBISHI MOTORS Author-
ized Service Point.
On a vehicle equipped with a Multi Display
Station (MDS), the functions can be adjusted
on the screen. Refer to the separate operation
manual for details. Fog lamp switch
E00506700018
Front fog lamp switch E00508300050
The front fog lamp can be operated when the head-
lamps
or tail lamps turn on. Push the switch to turn
on the front fog lamps, and push the switch again
to turn them off.
The indication lamp in the instrument cluster will
illuminate while the front fog lamps are on. NOTE
l The
front fog lamps are automatically turned
off when the headlamps and tail lamps turn
off. To turn on the front fog lamps again,
push the switch again when the headlamps or
tail lamps turn on.
l In case of vehicles with Daytime Running
Lamp, the front fog lamps can be operated
even if the lamp switch is set to the “OFF”
position, because the low beam of the head-
lamps, tail lamps, etc. illuminate when the ig-
nition key is at the “ON” position. Rear fog lamp switch
E00508400237
The
rear fog lamp can be operated when the head-
lamps or front fog lamps are on. Push the switch to
turn on the rear fog lamp, and push the switch
again to turn it off.
The indication lamp in the instrument cluster will
illuminate while the rear fog lamp is on. NOTE
l The
rear fog lamp is automatically turned off
when the headlamps and front fog lamps are
turned off. To turn on the rear fog lamp
again, push the switch again when the head-
lamps or front fog lamps are on.
l In case of vehicles with Daytime Running
Lamp, the rear fog lamp can be operated
even if the lamp switch is set to the “OFF”
position, because the low beam of the head-
lamps, tail lamps, etc. illuminate when the ig-
nition key is at the “ON” position. Instruments and controls
3-22
3
Presented by http://mmc-manuals.ru/ \251