belt MITSUBISHI I-MIEV 2011 Owners Manual
[x] Cancel search | Manufacturer: MITSUBISHI, Model Year: 2011, Model line: I-MIEV, Model: MITSUBISHI I-MIEV 2011Pages: 193, PDF Size: 12.2 MB
Page 2 of 193

Table of contents
Overview
General information
Charging 1
Locking and unlocking 2
Seat and seat belts 3
Instruments and controls 4
Starting and driving 5
For pleasant driving 6
For emergencies 7
Vehicle care and Maintenance 8
Specifications 9
Presented by http://mmc-manuals.ru/ \251
Page 7 of 193
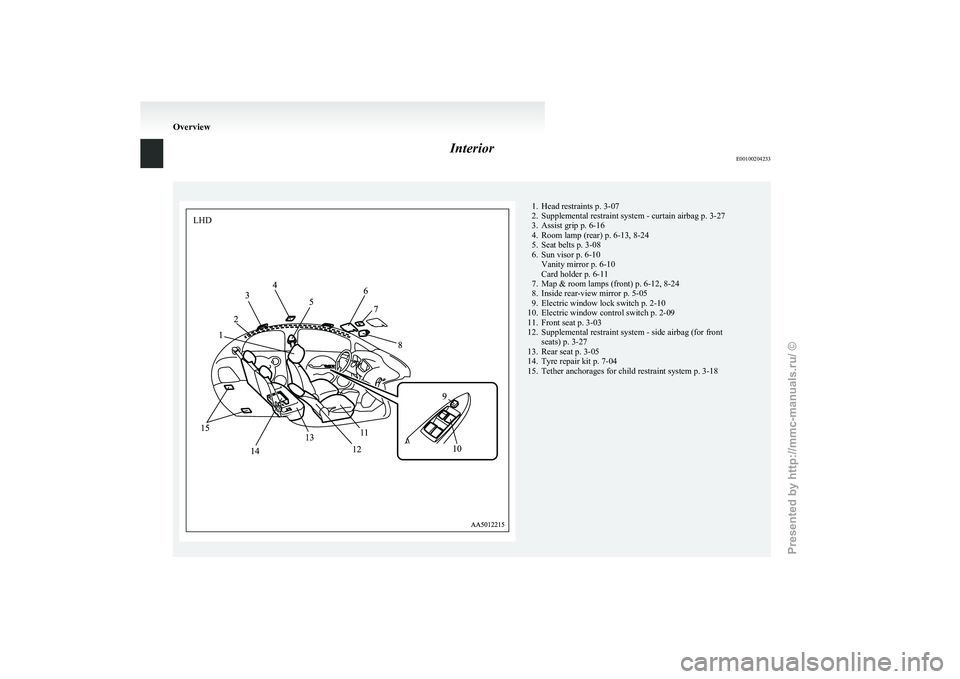
Interior
E00100204233 1. Head restraints p. 3-07
2.
Supplemental restraint system - curtain airbag p. 3-27
3. Assist grip p. 6-16
4. Room lamp (rear) p. 6-13, 8-24
5. Seat belts p. 3-08
6. Sun visor p. 6-10 Vanity mirror p. 6-10
Card holder p. 6-11
7. Map & room lamps (front) p. 6-12, 8-24
8. Inside rear-view mirror p. 5-05
9. Electric window lock switch p. 2-10
10. Electric window control switch p. 2-09
11. Front seat p. 3-03
12. Supplemental restraint system - side airbag (for front seats) p. 3-27
13. Rear seat p. 3-05
14. Tyre repair kit p. 7-04
15. Tether anchorages for child restraint system p. 3-18 OverviewLHD
Presented by http://mmc-manuals.ru/ \251
Page 8 of 193
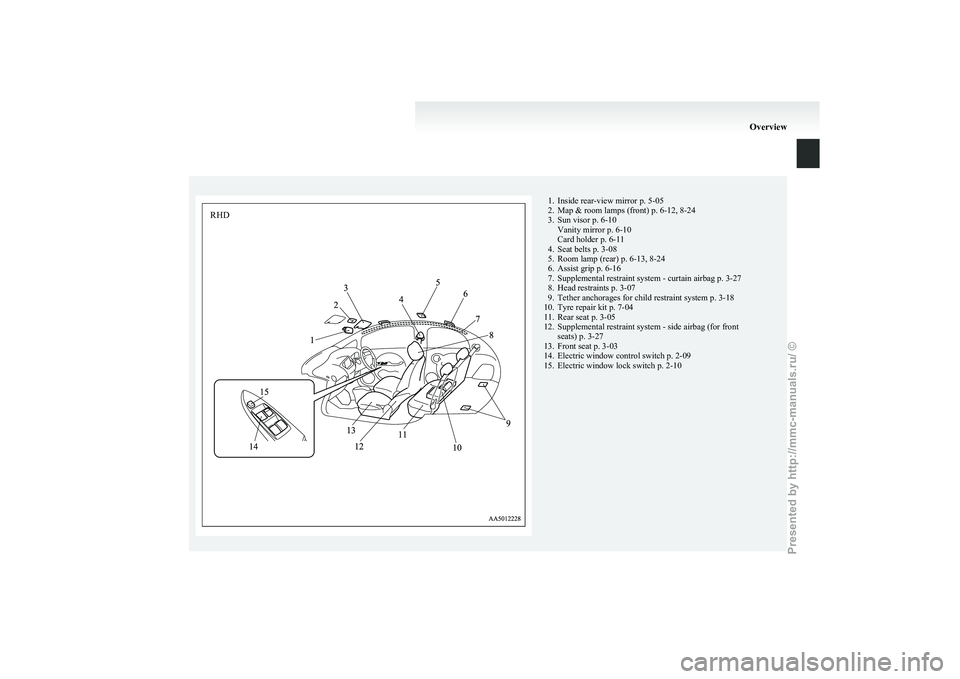
1. Inside rear-view mirror p. 5-05
2.
Map & room lamps (front) p. 6-12, 8-24
3. Sun visor p. 6-10 Vanity mirror p. 6-10
Card holder p. 6-11
4. Seat belts p. 3-08
5. Room lamp (rear) p. 6-13, 8-24
6. Assist grip p. 6-16
7. Supplemental restraint system - curtain airbag p. 3-27
8. Head restraints p. 3-07
9. Tether anchorages for child restraint system p. 3-18
10. Tyre repair kit p. 7-04
11. Rear seat p. 3-05
12. Supplemental restraint system - side airbag (for front seats) p. 3-27
13. Front seat p. 3-03
14. Electric window control switch p. 2-09
15. Electric window lock switch p. 2-10 OverviewRHD
Presented by http://mmc-manuals.ru/ \251
Page 40 of 193
Seat...............................................................................................
3-02
Seat adjustment ............................................................................. 3-03
Front seat...................................................................................... 3-03
Rear seat ....................................................................................... 3-05
Head restraints .............................................................................. 3-07
Seat belts ....................................................................................... 3-08
Pregnant women restraint ............................................................. 3-10
Seat belt pretensioner system and force limiter system ................3-11
Child restraint ............................................................................... 3-11
Seat belt inspection ....................................................................... 3-20
Supplemental restraint system (SRS) - airbag ..............................3-20Seat and seat belts
3
Presented by http://mmc-manuals.ru/ \251
Page 41 of 193
Seat
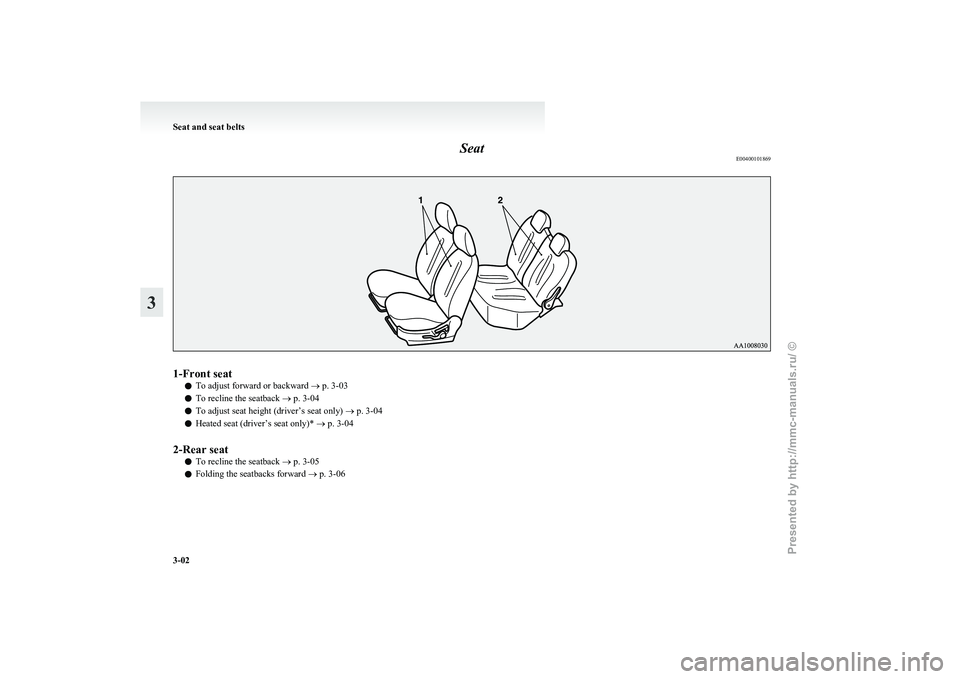
E004001018691-Front seat
l To adjust forward or backward
® p. 3-03
l To recline the seatback
® p. 3-04
l To adjust seat height (driver’s seat only)
® p. 3-04
l Heated seat (driver’s seat only)* ® p. 3-04
2-Rear seat l To recline the seatback
® p. 3-05
l Folding the seatbacks forward
® p. 3-06Seat and seat belts
3-02
3
Presented by http://mmc-manuals.ru/ \251
Page 42 of 193
Seat adjustment
E00400300633
Adjust
the driver’s seat so that you are comfortable
and that you can reach the pedals, steering wheel,
switches etc. while retaining a clear field of vision. WARNING
l Do
not attempt to adjust the seat while
driving. This can cause loss of vehicle con-
trol and result in an accident. After ad-
justments are made, ensure the seating is
locked in position by attempting to move
the seat forward and rearward without us-
ing the adjusting mechanism.
l Do not allow people or children to ride in
any area of your vehicle that is not equip-
ped with seats and seat belts, and make
sure that everyone travelling in your vehi-
cle is in a seat and wearing a seat belt, or
in the case of a child is strapped in a child
restraint.
l To minimize the risk of personal injury
in the event of a collision or sudden brak-
ing, the seatbacks should always be in the
almost upright position while the vehicle
is in motion. The protection provided by
the seat belts may be reduced significant-
ly when the seatback is reclined. There is
greater risk that the passenger will slide
under the seat belt, resulting in serious in-
jury, when the seatback is reclined. CAUTION
l
Make
sure the seat is adjusted by an
adult or with adult supervision for cor-
rect and safe operation.
l Do not place a cushion or the like be-
tween your back and the seatback while
driving. The effectiveness of the head re-
straints will be reduced in the event of an
accident.
l When sliding the seats, be careful not to
catch your hand or foot. Front seat
E00400400197
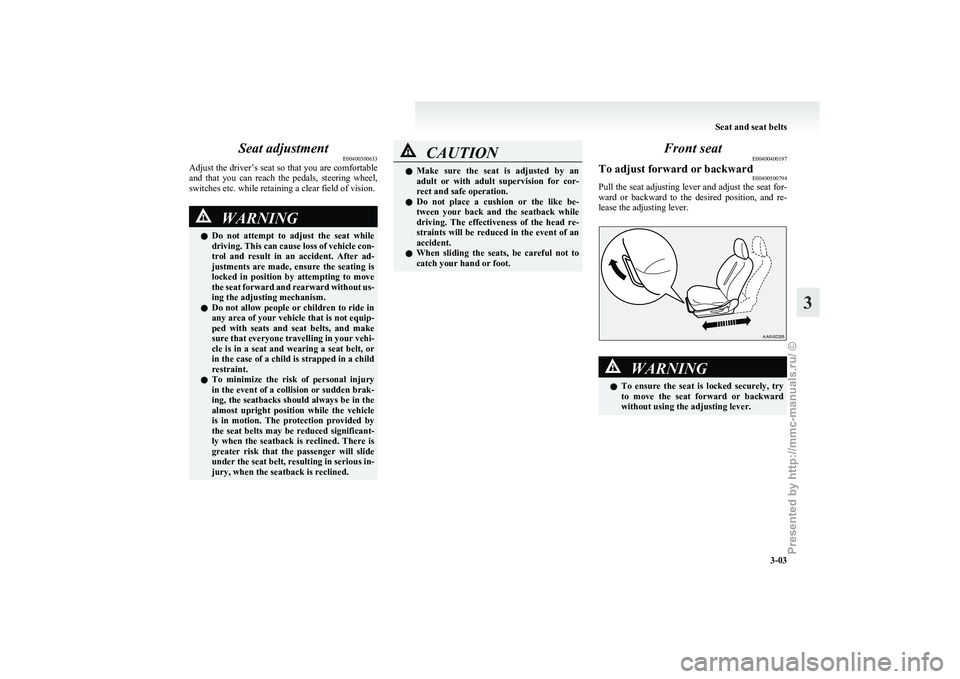
To adjust forward or backward E00400500794
Pull the seat adjusting lever and adjust the seat for-
ward
or backward to the desired position, and re-
lease the adjusting lever. WARNING
l To
ensure the seat is locked securely, try
to move the seat forward or backward
without using the adjusting lever. Seat and seat belts
3-03 3
Presented by http://mmc-manuals.ru/ \251
Page 43 of 193
To recline the seatback
E00400601008
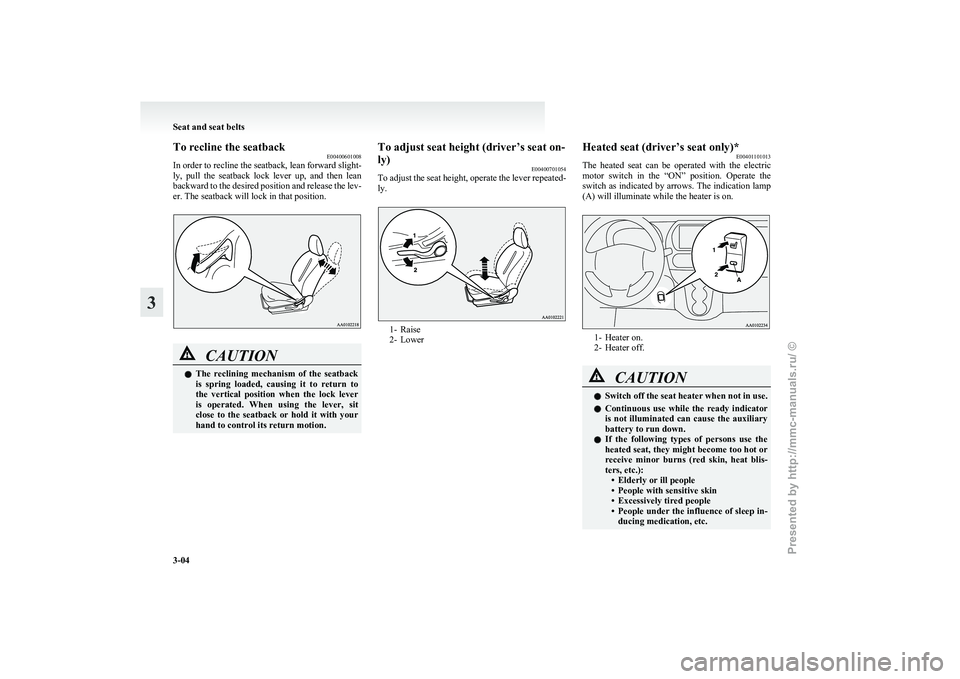
In
order to recline the seatback, lean forward slight-
ly, pull the seatback lock lever up, and then lean
backward to the desired position and release the lev-
er. The seatback will lock in that position. CAUTION
l
The
reclining mechanism of the seatback
is spring loaded, causing it to return to
the vertical position when the lock lever
is operated. When using the lever, sit
close to the seatback or hold it with your
hand to control its return motion. To adjust seat height (driver’s seat on-
ly)
E00400701054
To
adjust the seat height, operate the lever repeated-
ly. 1- Raise
2-
Lower Heated seat (driver’s seat only)*
E00401101013
The
heated seat can be operated with the electric
motor switch in the “ON” position. Operate the
switch as indicated by arrows. The indication lamp
(A) will illuminate while the heater is on. 1- Heater on.
2-
Heater off. CAUTION
l
Switch
off the seat heater when not in use.
l Continuous use while the ready indicator
is not illuminated can cause the auxiliary
battery to run down.
l If the following types of persons use the
heated seat, they might become too hot or
receive minor burns (red skin, heat blis-
ters, etc.):
• Elderly or ill people
• People with sensitive skin
• Excessively tired people
• People under the influence of sleep in-ducing medication, etc. Seat and seat belts
3-04
3
Presented by http://mmc-manuals.ru/ \251
Page 44 of 193
CAUTION
l
Do not place heavy objects on the seat or
stick pins, needles, or other pointed ob-
jects into it.
l Do not use a blanket, cushion, or other ma-
terial with high heat insulation properties
on the seat while using the heater; this
might cause the heater element to overheat
l Do not use benzine, kerosene, petrol, alco-
hol or other organic solvents when clean-
ing the seat. Doing so could damage not
only the seat cover, but also the heater el-
ement.
l If water or any other liquid is spilled on
the seat, allow it to dry thoroughly before
attempting to use the heater.
l Turn the heater off immediately if it ap-
pears to be malfunctioning during use. Rear seat
E00401300353 WARNING
l When
a person sits in the rear seat, pull
up the head restraint to a height at which
it locks in position. Be sure to make this
adjustment before starting to drive. Seri-
ous injuries could otherwise be suffered
as the result of an impact. Refer to “Head
restraints” on page 3-07. CAUTION
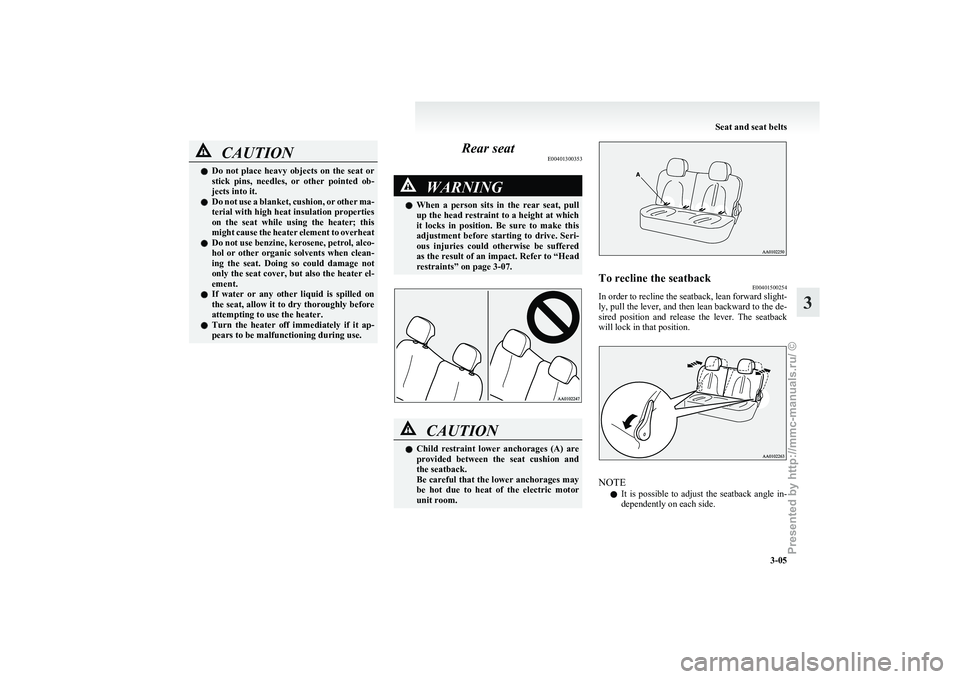
l
Child
restraint lower anchorages (A) are
provided between the seat cushion and
the seatback.
Be careful that the lower anchorages may
be hot due to heat of the electric motor
unit room. To recline the seatback
E00401500254
In order to recline the seatback, lean forward slight-
ly,
pull the lever, and then lean backward to the de-
sired position and release the lever. The seatback
will lock in that position. NOTE
l It
is possible to adjust the seatback angle in-
dependently on each side. Seat and seat belts
3-05 3
Presented by http://mmc-manuals.ru/ \251
Page 45 of 193
Folding the seatbacks forward
E00401600330
Larger
objects can be loaded into the vehicle if a
seatback is folded forward. CAUTION
l
Do
not stack luggage in the vehicle higher
than the seatback height. Also, firmly se-
cure the luggage.
Serious accidents could result due to un-
restrained objects entering the passenger
compartment during sudden braking.
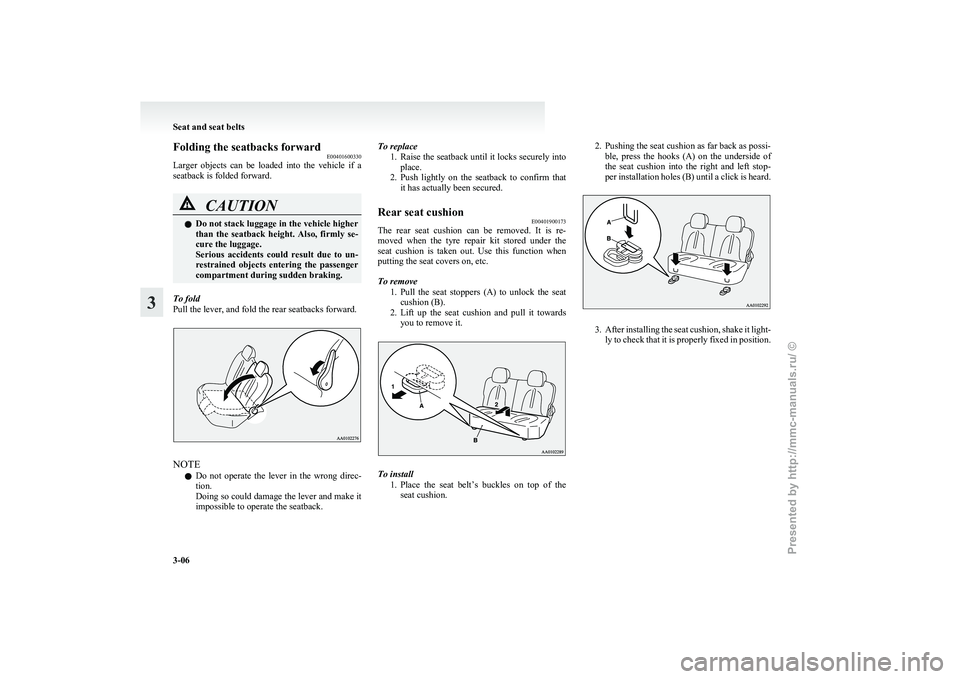
To fold
Pull the lever, and fold the rear seatbacks forward. NOTE
l Do
not operate the lever in the wrong direc-
tion.
Doing so could damage the lever and make it
impossible to operate the seatback. To replace
1. Raise
the seatback until it locks securely into
place.
2. Push lightly on the seatback to confirm that it has actually been secured.
Rear seat cushion E00401900173
The rear seat cushion can be removed. It is re-
moved
when the tyre repair kit stored under the
seat cushion is taken out. Use this function when
putting the seat covers on, etc.
To remove
1. Pull the seat stoppers (A) to unlock the seatcushion (B).
2. Lift up the seat cushion and pull it towards you to remove it. To install
1. Place
the seat belt’s buckles on top of the
seat cushion. 2. Pushing the seat cushion as far back as possi-
ble,
press the hooks (A) on the underside of
the seat cushion into the right and left stop-
per installation holes (B) until a click is heard. 3. After
installing the seat cushion, shake it light-
ly to check that it is properly fixed in position. Seat and seat belts
3-06
3
Presented by http://mmc-manuals.ru/ \251
Page 46 of 193
Head restraints
E00403301497WARNING
l Driving without the head restraints in
place can cause you and your passengers
serious injury or death in an accident. To
reduce the risk of injury in an accident, al-
ways make sure the head restraints are in-
stalled and properly positioned when the
seat is occupied.
l Never place a cushion or similar device
on the seatback. This can adversely affect
head restraint performance by increasing
the distance between your head and the
restraint.
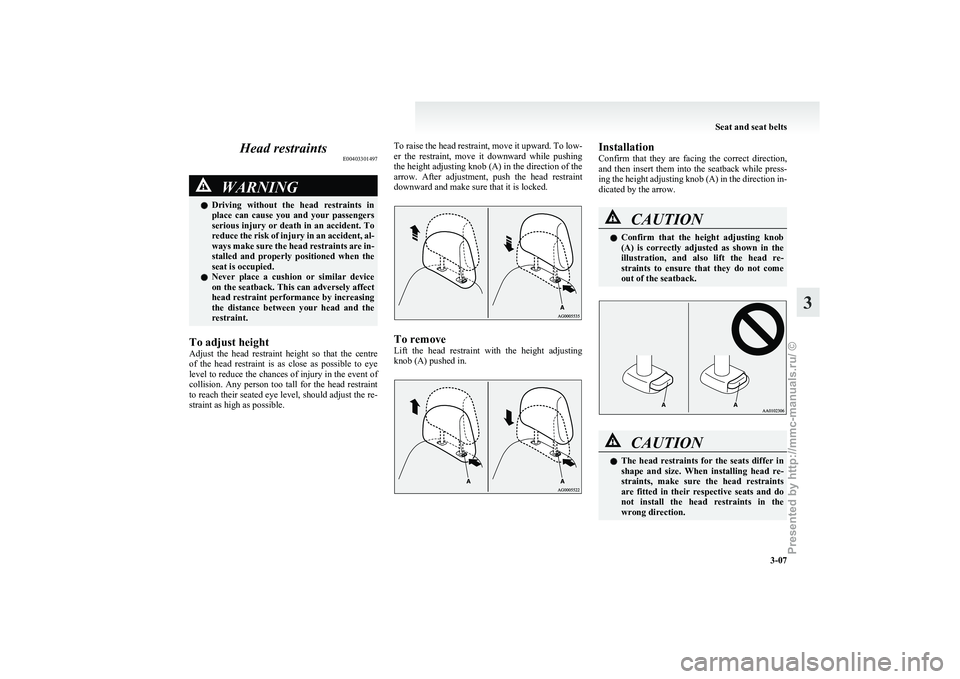
To adjust height
Adjust
the head restraint height so that the centre
of the head restraint is as close as possible to eye
level to reduce the chances of injury in the event of
collision. Any person too tall for the head restraint
to reach their seated eye level, should adjust the re-
straint as high as possible. To raise the head restraint, move it upward. To low-
er
the restraint, move it downward while pushing
the height adjusting knob (A) in the direction of the
arrow. After adjustment, push the head restraint
downward and make sure that it is locked. To remove
Lift
the head restraint with the height adjusting
knob (A) pushed in. Installation
Confirm
that they are facing the correct direction,
and then insert them into the seatback while press-
ing the height adjusting knob (A) in the direction in-
dicated by the arrow. CAUTION
l
Confirm
that the height adjusting knob
(A) is correctly adjusted as shown in the
illustration, and also lift the head re-
straints to ensure that they do not come
out of the seatback. CAUTION
l
The
head restraints for the seats differ in
shape and size. When installing head re-
straints, make sure the head restraints
are fitted in their respective seats and do
not install the head restraints in the
wrong direction. Seat and seat belts
3-07 3
Presented by http://mmc-manuals.ru/ \251