length MITSUBISHI I-MIEV 2011 Owners Manual
[x] Cancel search | Manufacturer: MITSUBISHI, Model Year: 2011, Model line: I-MIEV, Model: MITSUBISHI I-MIEV 2011Pages: 193, PDF Size: 12.2 MB
Page 15 of 193
Modification/alterations to the
electrical systems E00200400414
MITSUBISHI MOTORS
CORPORATION has al-
ways manufactured safe, high quality vehicles. In
order to maintain this safety and quality, it is impor-
tant that any accessory that is to be fitted, or any
modifications carried out which involve the electri-
cal systems, should be carried out in accordance
with MITSUBISHI guidelines. CAUTION
l
If
the wires interfere with the vehicle
body or improper installation methods
are used (protective fuses not included,
etc.), electronic devices may be adversely
affected, resulting in a fire or other acci-
dent. Genuine parts
E00200500499
MITSUBISHI MOTORS
has gone to great lengths
to bring you a superbly crafted automobile offering
the highest quality and dependability.
Use MITSUBISHI MOTORS Genuine Parts, de-
signed and manufactured to maintain your
MITSUBISHI MOTORS automobile at top per-
formance. MITSUBISHI MOTORS Genuine Parts
are identified by this mark and are available at all
MITSUBISHI MOTORS Authorized Service
Points. Disposal information for used
batteries E00201300045 Your vehicle contains batteries
and/or accumulators.
Do
not mix with general house-
hold waste.
For proper treatment, recovery
and recycling of used batteries,
please take them to applicable col-
lection points, in accordance
with your national legislation
and the Directives 2006/66/EC.
MITSUBISHI MOTORS col-
lects traction batteries. If you
scrap your vehicle, please con-
sult a MITSUBISHI MOTORS
Authorized Service Point.
By disposing of these batteries
correctly, you will help to save
valuable resources and prevent
any potential negative effects on
human health and the environ-
ment which could otherwise
arise from inappropriate waste
handling. General information
04
Presented by http://mmc-manuals.ru/ \251
Page 47 of 193
Seat belts
E00404800636
To
protect you and your passengers in the event of
an accident, it is most important that the seat belts
be worn correctly while driving.
The front seat belts have a pretensioner system.
These belts are used the same way as a convention-
al seat belt.
Refer to “Seat belt pretensioner system and force
limiter system” on page 3-11 WARNING
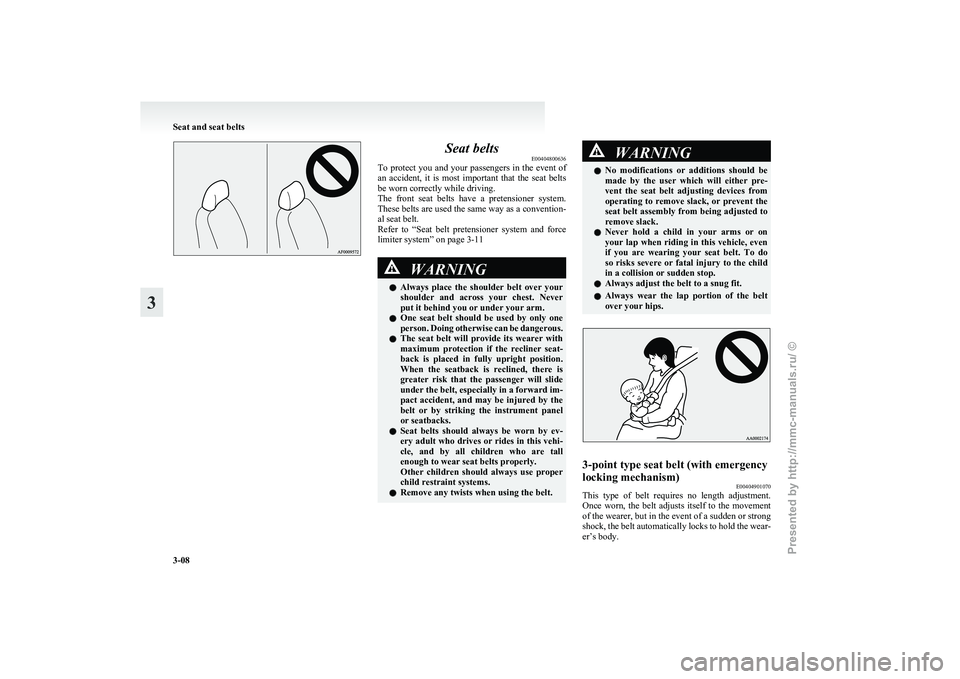
l Always
place the shoulder belt over your
shoulder and across your chest. Never
put it behind you or under your arm.
l One seat belt should be used by only one
person. Doing otherwise can be dangerous.
l The seat belt will provide its wearer with
maximum protection if the recliner seat-
back is placed in fully upright position.
When the seatback is reclined, there is
greater risk that the passenger will slide
under the belt, especially in a forward im-
pact accident, and may be injured by the
belt or by striking the instrument panel
or seatbacks.
l Seat belts should always be worn by ev-
ery adult who drives or rides in this vehi-
cle, and by all children who are tall
enough to wear seat belts properly.
Other children should always use proper
child restraint systems.
l Remove any twists when using the belt. WARNING
l No
modifications or additions should be
made by the user which will either pre-
vent the seat belt adjusting devices from
operating to remove slack, or prevent the
seat belt assembly from being adjusted to
remove slack.
l Never hold a child in your arms or on
your lap when riding in this vehicle, even
if you are wearing your seat belt. To do
so risks severe or fatal injury to the child
in a collision or sudden stop.
l Always adjust the belt to a snug fit.
l Always wear the lap portion of the belt
over your hips. 3-point type seat belt (with emergency
locking mechanism)
E00404901070
This type of belt requires no length adjustment.
Once
worn, the belt adjusts itself to the movement
of the wearer, but in the event of a sudden or strong
shock, the belt automatically locks to hold the wear-
er’s body. Seat and seat belts
3-08
3
Presented by http://mmc-manuals.ru/ \251
Page 99 of 193
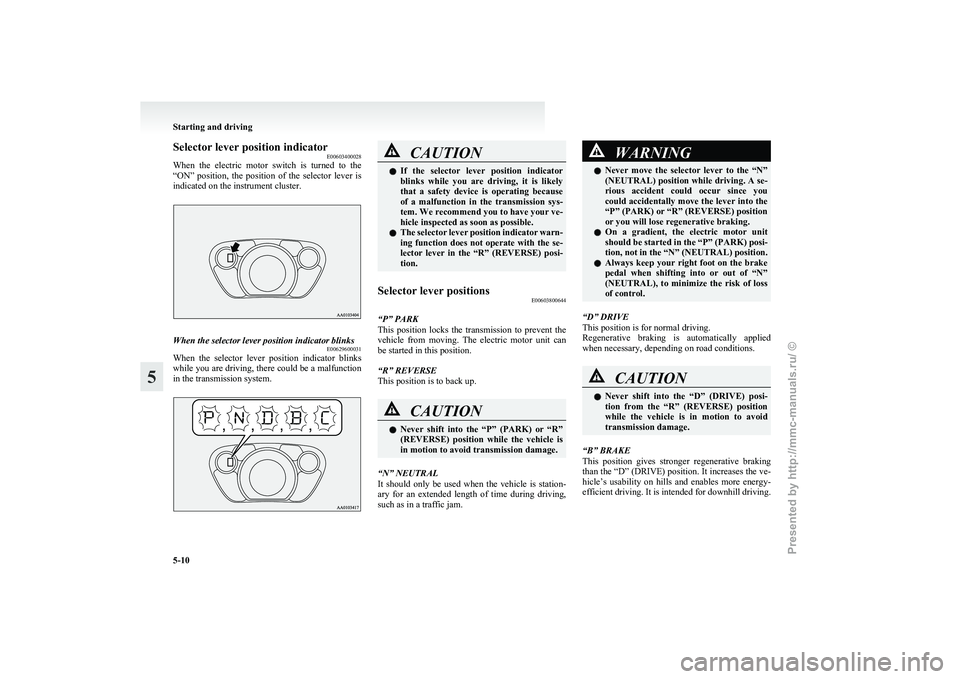
Selector lever position indicator
E00603400028
When
the electric motor switch is turned to the
“ON” position, the position of the selector lever is
indicated on the instrument cluster. When the selector lever position indicator blinks
E00629600031
When the selector lever position indicator blinks
while
you are driving, there could be a malfunction
in the transmission system. CAUTION
l
If
the selector lever position indicator
blinks while you are driving, it is likely
that a safety device is operating because
of a malfunction in the transmission sys-
tem. We recommend you to have your ve-
hicle inspected as soon as possible.
l The selector lever position indicator warn-
ing function does not operate with the se-
lector lever in the “R” (REVERSE) posi-
tion.
Selector lever positions E00603800644
“P” PARK
This
position locks the transmission to prevent the
vehicle from moving. The electric motor unit can
be started in this position.
“R” REVERSE
This position is to back up. CAUTION
l
Never
shift into the “P” (PARK) or “R”
(REVERSE) position while the vehicle is
in motion to avoid transmission damage.
“N” NEUTRAL
It
should only be used when the vehicle is station-
ary for an extended length of time during driving,
such as in a traffic jam. WARNING
l Never
move the selector lever to the “N”
(NEUTRAL) position while driving. A se-
rious accident could occur since you
could accidentally move the lever into the
“P” (PARK) or “R” (REVERSE) position
or you will lose regenerative braking.
l On a gradient, the electric motor unit
should be started in the “P” (PARK) posi-
tion, not in the “N” (NEUTRAL) position.
l Always keep your right foot on the brake
pedal when shifting into or out of “N”
(NEUTRAL), to minimize the risk of loss
of control.
“D” DRIVE
This position is for normal driving.
Regenerative
braking is automatically applied
when necessary, depending on road conditions. CAUTION
l
Never
shift into the “D” (DRIVE) posi-
tion from the “R” (REVERSE) position
while the vehicle is in motion to avoid
transmission damage.
“B” BRAKE
This
position gives stronger regenerative braking
than the “D” (DRIVE) position. It increases the ve-
hicle’s usability on hills and enables more energy-
efficient driving. It is intended for downhill driving. Starting and driving
5-10
5
Presented by http://mmc-manuals.ru/ \251
Page 130 of 193
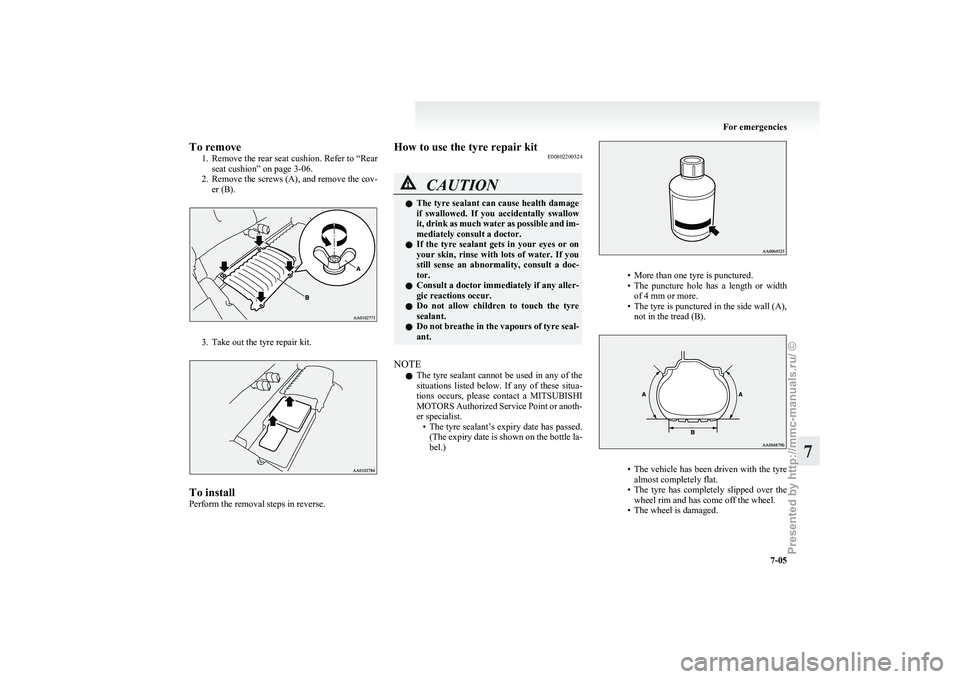
To remove
1. Remove the rear seat cushion. Refer to “Rear
seat cushion” on page 3-06.
2. Remove the screws (A), and remove the cov- er (B). 3. Take out the tyre repair kit.
To install
Perform the removal steps in reverse. How to use the tyre repair kit
E00802200324 CAUTION
l
The
tyre sealant can cause health damage
if swallowed. If you accidentally swallow
it, drink as much water as possible and im-
mediately consult a doctor.
l If the tyre sealant gets in your eyes or on
your skin, rinse with lots of water. If you
still sense an abnormality, consult a doc-
tor.
l Consult a doctor immediately if any aller-
gic reactions occur.
l Do not allow children to touch the tyre
sealant.
l Do not breathe in the vapours of tyre seal-
ant.
NOTE l The
tyre sealant cannot be used in any of the
situations listed below. If any of these situa-
tions occurs, please contact a MITSUBISHI
MOTORS Authorized Service Point or anoth-
er specialist. • The tyre sealant’s expiry date has passed.(The expiry date is shown on the bottle la-
bel.) • More than one tyre is punctured.
• The
puncture hole has a length or width
of 4 mm or more.
• The tyre is punctured in the side wall (A), not in the tread (B). • The
vehicle has been driven with the tyre
almost completely flat.
• The tyre has completely slipped over the wheel rim and has come off the wheel.
• The wheel is damaged. For emergencies
7-05 7
Presented by http://mmc-manuals.ru/ \251
Page 150 of 193
Washer fluid
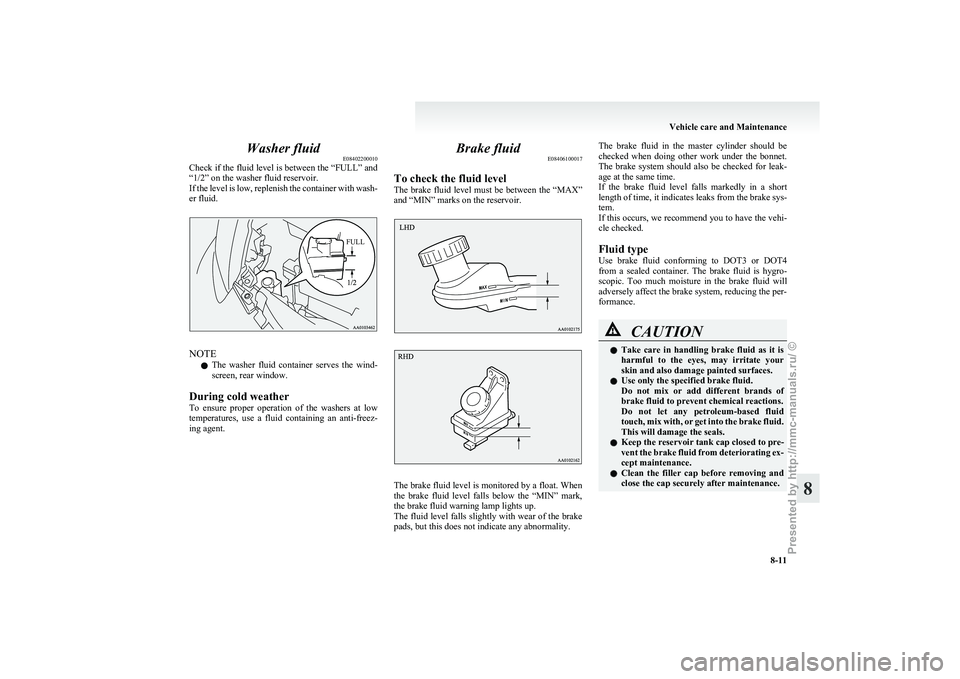
E08402200010
Check
if the fluid level is between the “FULL” and
“1/2” on the washer fluid reservoir.
If the level is low, replenish the container with wash-
er fluid.
FULL NOTE
l The
washer fluid container serves the wind-
screen, rear window.
During cold weather
To ensure proper operation of the washers at low
temperatures, use a fluid containing an anti-freez-
ing agent. Brake fluid
E08406100017
To check the fluid level
The
brake fluid level must be between the “MAX”
and “MIN” marks on the reservoir. The brake fluid level is monitored by a float. When
the
brake fluid level falls below the “MIN” mark,
the brake fluid warning lamp lights up.
The fluid level falls slightly with wear of the brake
pads, but this does not indicate any abnormality.
The brake fluid in the master cylinder should be
checked
when doing other work under the bonnet.
The brake system should also be checked for leak-
age at the same time.
If the brake fluid level falls markedly in a short
length of time, it indicates leaks from the brake sys-
tem.
If this occurs, we recommend you to have the vehi-
cle checked.
Fluid type
Use brake fluid conforming to DOT3 or DOT4
from a sealed container. The brake fluid is hygro-
scopic. Too much moisture in the brake fluid will
adversely affect the brake system, reducing the per-
formance. CAUTION
l
Take
care in handling brake fluid as it is
harmful to the eyes, may irritate your
skin and also damage painted surfaces.
l Use only the specified brake fluid.
Do not mix or add different brands of
brake fluid to prevent chemical reactions.
Do not let any petroleum-based fluid
touch, mix with, or get into the brake fluid.
This will damage the seals.
l Keep the reservoir tank cap closed to pre-
vent the brake fluid from deteriorating ex-
cept maintenance.
l Clean the filler cap before removing and
close the cap securely after maintenance. Vehicle care and Maintenance
8-11 8
Presented by http://mmc-manuals.ru/ \251
Page 178 of 193
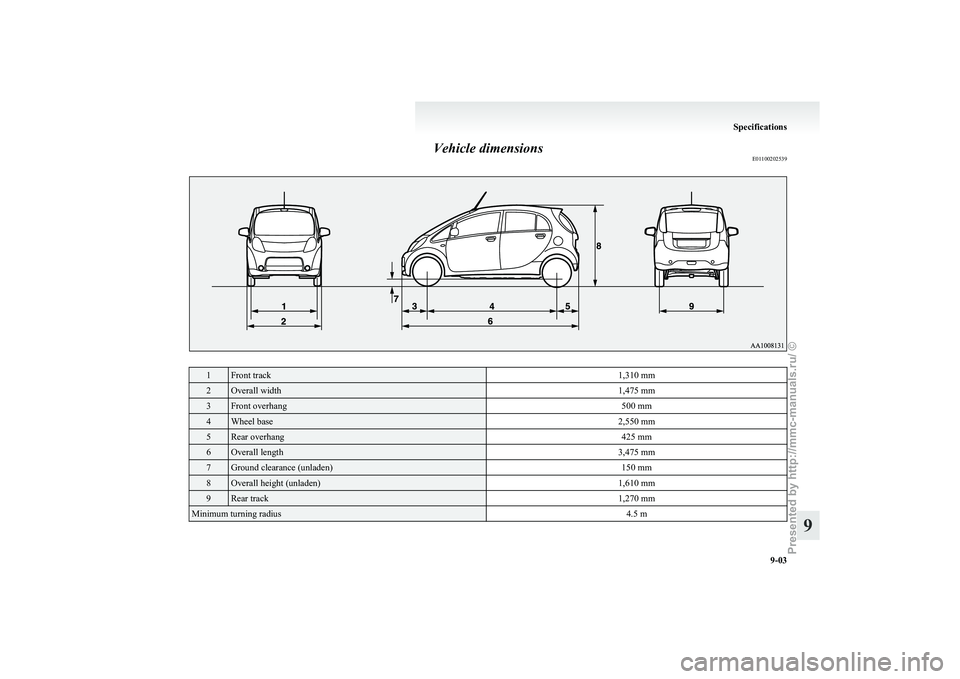
Vehicle dimensions
E011002025391 Front track
1,310 mm2 Overall width
1,475 mm3 Front overhang
500 mm4 Wheel base
2,550 mm5 Rear overhang
425 mm6 Overall length
3,475 mm7 Ground clearance (unladen)
150 mm8 Overall height (unladen)
1,610 mm9 Rear track
1,270 mmMinimum turning radius
4.5 m Specifications
9-03 9
Presented by http://mmc-manuals.ru/ \251