weight MITSUBISHI I-MIEV 2011 Owners Manual
[x] Cancel search | Manufacturer: MITSUBISHI, Model Year: 2011, Model line: I-MIEV, Model: MITSUBISHI I-MIEV 2011Pages: 193, PDF Size: 12.2 MB
Page 13 of 193
Familiarizing yourself with
i-MiEV E00202600016
This
section describes features that the i-MiEV has
as an electric vehicle and gives precautions that
you should observe. It is important. Please read it
carefully.
Main features E00202700017
l Energy
required for driving is only electrici-
ty and fuel supply is not required.
l The traction battery and electric motor unit
are mounted outside the passenger compart-
ment. In this way, passenger space is ob-
tained for riding of four adults.
l With the high performance motor, noise and
vibration during driving are greatly limited
and powerful acceleration can also be ob-
tained.
l With regenerative braking, the traction bat-
tery is automatically charged when the accel-
erator is released.
l The vehicle can be charged from general pow-
er outlets (rated AC 220-240 V).
l Charge with the quick charger for i-MiEV is
also available.
l The creeping behaviour occurs in i-MiEV
like a vehicle with automatic transmission.
Regenerative braking
It is equivalent to engine braking of an engine vehi-
cle. If you step off the accelerator pedal during driv-
ing, motion energy is converted into electric energy
using the motor as a power generator.
In this conversion, braking force is generated and
converted electric energy is charged in the traction
battery. Regenerative braking is stronger in the order of the
selector
lever position of “C” (COMFORT), “D”
(DRIVE), “B” (BRAKE).
Put the selector lever to the “B” (BRAKE) or “C”
(COMFORT) position according to the driving con-
dition.
“B”: Strong regenerative braking (For downhill)
“C”: Weak regenerative braking (For long cruising)
Traction battery E00202800018
l It
is the battery to operate the motor (electric
motor unit) and the air conditioning.
In addition to the traction battery, i-MiEV
has the auxiliary battery to operate lamps, wip-
ers, etc.
l Compact, light-weight lithium ion battery
with high energy density is used for the trac-
tion battery.
l The lithium ion battery has the following char-
acteristics. Please read this carefully and
treat the battery paying attention to the fol-
lowing:
Characteristics l It is not necessary to consume the battery com-
pletely before charging.
l The capacity is gradually degraded depend-
ing on time used and operating conditions.
l The performance may be changed due to the
outside temperature. At low temperature, in
particular, the cruising range is short and the
charging time is long, compared to operation
at normal temperature.
l If you store your vehicle at an extremely
high or low temperature, the battery capacity
may be lowered.
l The battery is gradually discharged without
use and the battery charge is lowered. Precautions for operation
l Do
not store your vehicle with the energy lev-
el gauge showing 0 bars.
Doing so could damage the traction battery.
The battery may have to be replaced depend-
ing on the low capacity.
l If you do not use your vehicle for a long
time, please charge the traction battery to the
full every 3 months so that the energy level
gauge may not be 0 bars.
l MITSUBISHI MOTORS collects traction bat-
teries. If you scrap your vehicle, please con-
sult a MITSUBISHI MOTORS Authorized
Service Point.
NOTE l The progress of the battery capacity loss de-
pends on the vehicle usage and the environ-
ment.
We recommend to do regular charging from
2 bars or less to charge completely at least
once in 3 months.
The procedure lets the battery remaining indi-
cator adjusted automatically.
Cruising range E00202900019
l Even
if the charge level is the same, the cruis-
ing range may vary depending on the driving
conditions. Since driving at high speed or
climbing on a hill requires higher consump-
tion of the traction battery than usual, the
cruising range is shortened.
l Since the air conditioning (cooling or heat-
ing) consumes power of the traction battery,
its operation results in a shorter cruising
range. Maintain an appropriate temperature. General information
02
Presented by http://mmc-manuals.ru/ \251
Page 22 of 193
EV charging cable
E08301100024
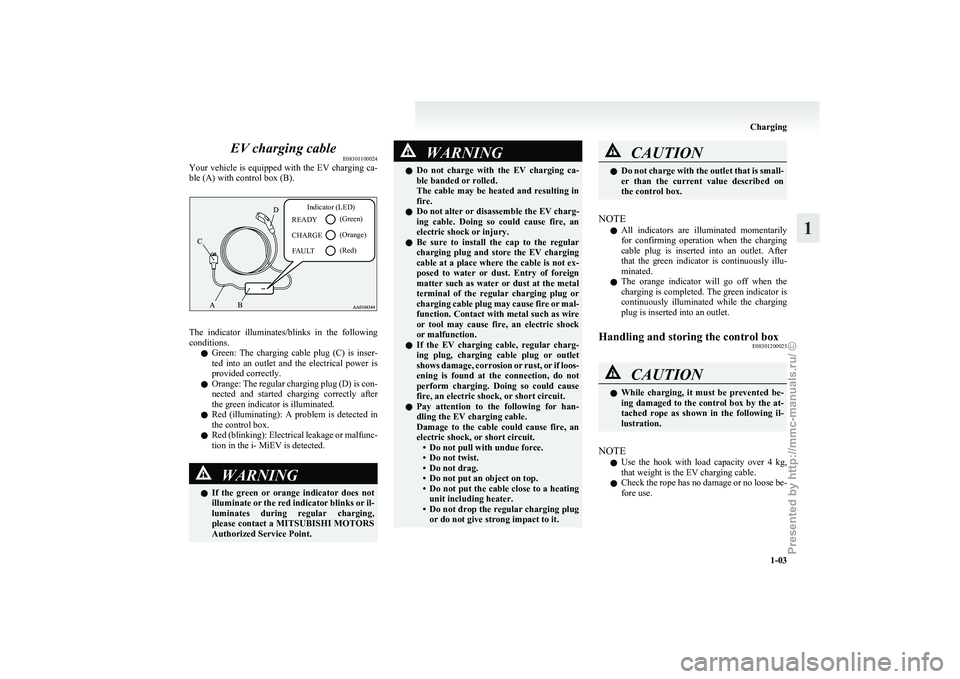
Your
vehicle is equipped with the EV charging ca-
ble (A) with control box (B).
Indicator (LED)
(Green)
(Orange) (Red)
READY
CHARGE
FAULT The indicator illuminates/blinks in the following
conditions.
l Green:
The charging cable plug (C) is inser-
ted into an outlet and the electrical power is
provided correctly.
l Orange: The regular charging plug (D) is con-
nected and started charging correctly after
the green indicator is illuminated.
l Red (illuminating): A problem is detected in
the control box.
l Red (blinking): Electrical leakage or malfunc-
tion in the i- MiEV is detected. WARNING
l If
the green or orange indicator does not
illuminate or the red indicator blinks or il-
luminates during regular charging,
please contact a MITSUBISHI MOTORS
Authorized Service Point. WARNING
l Do
not charge with the EV charging ca-
ble banded or rolled.
The cable may be heated and resulting in
fire.
l Do not alter or disassemble the EV charg-
ing cable. Doing so could cause fire, an
electric shock or injury.
l Be sure to install the cap to the regular
charging plug and store the EV charging
cable at a place where the cable is not ex-
posed to water or dust. Entry of foreign
matter such as water or dust at the metal
terminal of the regular charging plug or
charging cable plug may cause fire or mal-
function. Contact with metal such as wire
or tool may cause fire, an electric shock
or malfunction.
l If the EV charging cable, regular charg-
ing plug, charging cable plug or outlet
shows damage, corrosion or rust, or if loos-
ening is found at the connection, do not
perform charging. Doing so could cause
fire, an electric shock, or short circuit.
l Pay attention to the following for han-
dling the EV charging cable.
Damage to the cable could cause fire, an
electric shock, or short circuit.
• Do not pull with undue force.
• Do not twist.
• Do not drag.
• Do not put an object on top.
• Do not put the cable close to a heatingunit including heater.
• Do not drop the regular charging plug or do not give strong impact to it. CAUTION
l
Do not charge with the outlet that is small-
er than the current value described on
the control box.
NOTE l All
indicators are illuminated momentarily
for confirming operation when the charging
cable plug is inserted into an outlet. After
that the green indicator is continuously illu-
minated.
l The orange indicator will go off when the
charging is completed. The green indicator is
continuously illuminated while the charging
plug is inserted into an outlet.
Handling and storing the control box E08301200025 CAUTION
l
While
charging, it must be prevented be-
ing damaged to the control box by the at-
tached rope as shown in the following il-
lustration.
NOTE l Use
the hook with load capacity over 4 kg,
that weight is the EV charging cable.
l Check the rope has no damage or no loose be-
fore use. Charging
1-03 1
Presented by http://mmc-manuals.ru/ \251
Page 49 of 193
NOTE
l For
the front passenger seat, the warning func-
tion works only while a person is sitting on
the seat.
l When luggage is placed on the front passen-
ger seat, a sensor in the seat cushion may, de-
pending on the weight and position of the lug-
gage, cause the warning tone to sound and
the warning lamp to come on.
Rear passenger’s seat belt warning lamps E00414900018
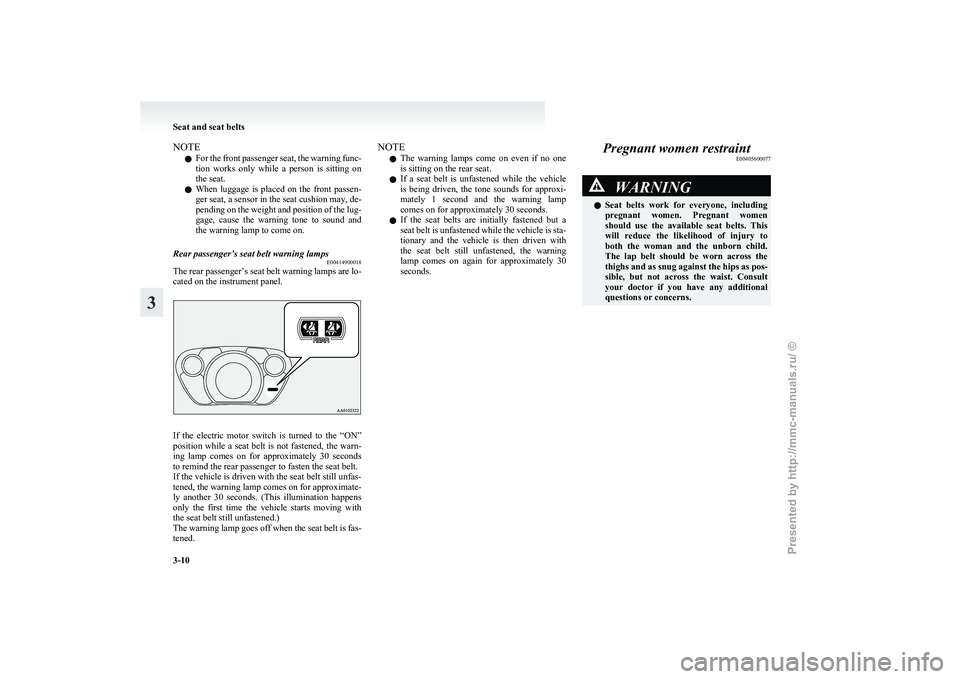
The rear passenger’s seat belt warning lamps are lo-
cated on the instrument panel. If the electric motor switch is turned to the “ON”
position
while a seat belt is not fastened, the warn-
ing lamp comes on for approximately 30 seconds
to remind the rear passenger to fasten the seat belt.
If the vehicle is driven with the seat belt still unfas-
tened, the warning lamp comes on for approximate-
ly another 30 seconds. (This illumination happens
only the first time the vehicle starts moving with
the seat belt still unfastened.)
The warning lamp goes off when the seat belt is fas-
tened. NOTE
l The
warning lamps come on even if no one
is sitting on the rear seat.
l If a seat belt is unfastened while the vehicle
is being driven, the tone sounds for approxi-
mately 1 second and the warning lamp
comes on for approximately 30 seconds.
l If the seat belts are initially fastened but a
seat belt is unfastened while the vehicle is sta-
tionary and the vehicle is then driven with
the seat belt still unfastened, the warning
lamp comes on again for approximately 30
seconds. Pregnant women restraint
E00405600077 WARNING
l Seat
belts work for everyone, including
pregnant women. Pregnant women
should use the available seat belts. This
will reduce the likelihood of injury to
both the woman and the unborn child.
The lap belt should be worn across the
thighs and as snug against the hips as pos-
sible, but not across the waist. Consult
your doctor if you have any additional
questions or concerns. Seat and seat belts
3-10
3
Presented by http://mmc-manuals.ru/ \251
Page 51 of 193
Caution for installing the child re-
straint on vehicles with a front passen-
ger airbag
E00406500318
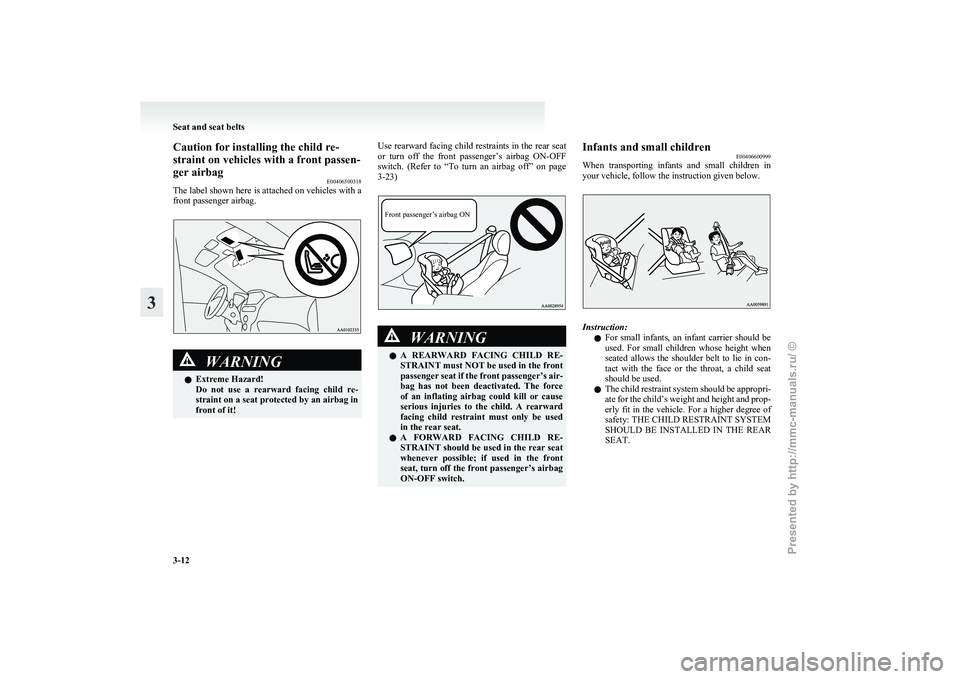
The
label shown here is attached on vehicles with a
front passenger airbag. WARNING
l Extreme Hazard!
Do
not use a rearward facing child re-
straint on a seat protected by an airbag in
front of it! Use rearward facing child restraints in the rear seat
or
turn off the front passenger’s airbag ON-OFF
switch. (Refer to “To turn an airbag off” on page
3-23)
Front passenger’s airbag ON WARNING
l A
REARWARD FACING CHILD RE-
STRAINT must NOT be used in the front
passenger seat if the front passenger’s air-
bag has not been deactivated. The force
of an inflating airbag could kill or cause
serious injuries to the child. A rearward
facing child restraint must only be used
in the rear seat.
l A FORWARD FACING CHILD RE-
STRAINT should be used in the rear seat
whenever possible; if used in the front
seat, turn off the front passenger’s airbag
ON-OFF switch. Infants and small children
E00406600999
When
transporting infants and small children in
your vehicle, follow the instruction given below. Instruction:
l For
small infants, an infant carrier should be
used. For small children whose height when
seated allows the shoulder belt to lie in con-
tact with the face or the throat, a child seat
should be used.
l The child restraint system should be appropri-
ate for the child’s weight and height and prop-
erly fit in the vehicle. For a higher degree of
safety: THE CHILD RESTRAINT SYSTEM
SHOULD BE INSTALLED IN THE REAR
SEAT. Seat and seat belts
3-12
3
Presented by http://mmc-manuals.ru/ \251
Page 108 of 193
Cargo loads
E00609901413
Cargo load precautions CAUTION
l
Do not load cargo or luggage higher than
the top of the seatback. Be sure that your
cargo or luggage cannot move once your
vehicle is moving. Having the driver’s vi-
sion blocked, and your cargo being
thrown inside the cabin if you suddenly
have to brake can cause a serious acci-
dent or injury.
l Load heavy cargo or luggage in the front
of the vehicle. If the load in the back of
the vehicle is too heavy, steering may be-
come unstable.
Loading a roof carrier CAUTION
l
Use
a roof carrier that properly fits your
vehicle. Do not load luggage directly onto
the roof.
For installation, refer to the instruction
manual accompanying the roof carrier.
l When attaching/removing the roof carri-
er and loading/removing luggage, do not
apply excessive pressure on a single point.
Depending on how and where the force is
applied, this may cause dents on the vehi-
cle roof. NOTE
l We
recommend you to use a genuine
MITSUBISHI roof carrier.
Roof carrier precautions CAUTION
l
Make
sure that the weight of the luggage
does not exceed the allowable roof load
(43 kg).
If the allowable roof load is exceeded, this
may cause damage to the vehicle.
The roof load is the total allowable load
on the roof (the weight of the roof carrier
plus the weight of luggage placed on the
roof carrier).
l When luggage is loaded onto the vehicle,
please make sure to drive slowly and
avoid excessive manoeuvres such as sud-
den braking or quick turning.
In addition, place the luggage on the car-
rier so that its weight is distributed even-
ly with the heaviest items on the bottom.
Do not load items that are wider than the
roof carrier.
The additional weight on the roof could
raise the vehicle’s centre of gravity and af-
fect vehicle handling characteristics.
As a result, driving errors or emergency
manoeuvres could lead to a loss of control
and result in an accident. CAUTION
l
Before
driving and after travelling a
short distance, always check the load to
make sure it is securely fastened to the
roof carrier.
Check periodically during your travel
that the load remains secure.
NOTE l To
prevent wind noise, remove the roof carri-
er when not in use.
l Remove the roof carrier before using an auto-
matic car wash.
l Be sure that adequate clearance is main-
tained for raising the tailgate when installing
a roof carrier. Starting and driving
5-19 5
Presented by http://mmc-manuals.ru/ \251
Page 125 of 193
Assist grips
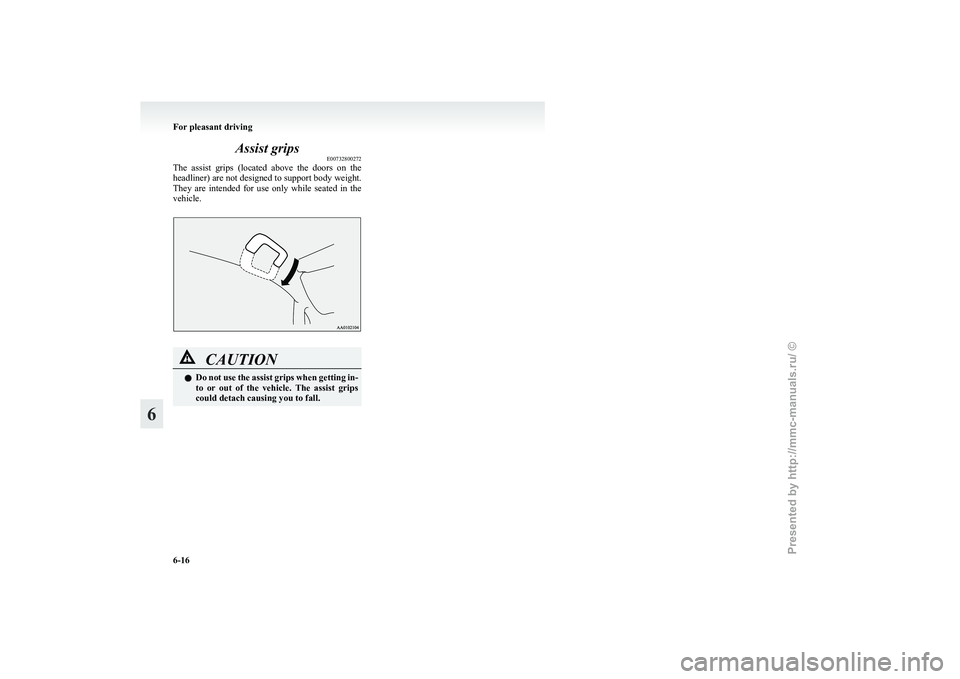
E00732800272
The
assist grips (located above the doors on the
headliner) are not designed to support body weight.
They are intended for use only while seated in the
vehicle. CAUTION
l
Do
not use the assist grips when getting in-
to or out of the vehicle. The assist grips
could detach causing you to fall. For pleasant driving
6-16
6
Presented by http://mmc-manuals.ru/ \251