steering wheel MITSUBISHI L200 2004 (in English) User Guide
[x] Cancel search | Manufacturer: MITSUBISHI, Model Year: 2004, Model line: L200, Model: MITSUBISHI L200 2004Pages: 264, PDF Size: 4.14 MB
Page 87 of 264
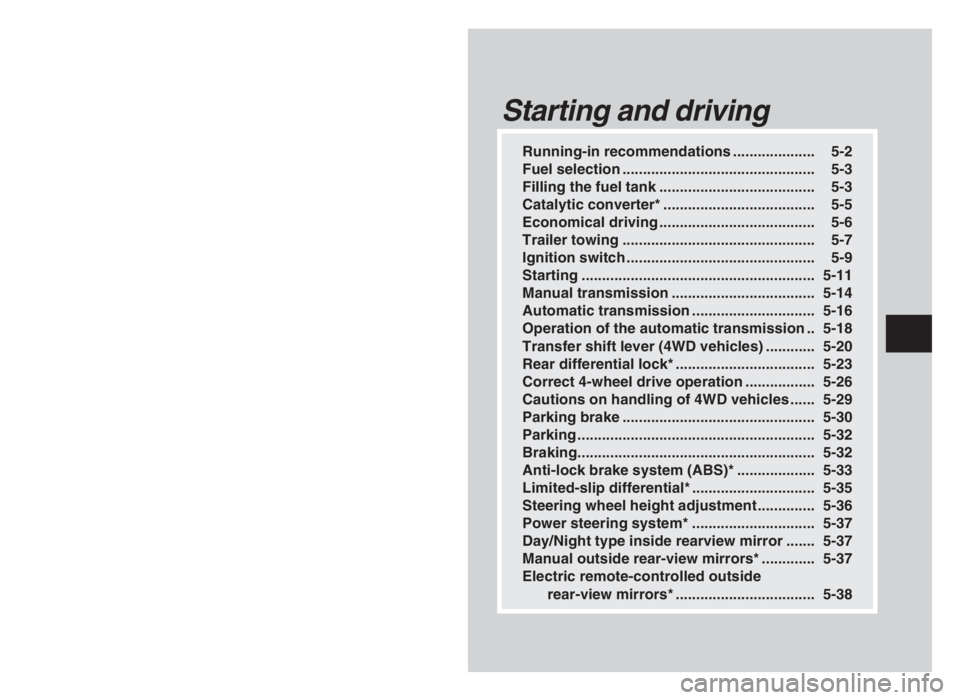
Running-in recommendations .................... 5-2
Fuel selection ............................................... 5-3
Filling the fuel tank ...................................... 5-3
Catalytic converter* ..................................... 5-5
Economical driving ...................................... 5-6
Trailer towing ............................................... 5-7
Ignition switch .............................................. 5-9
Starting ......................................................... 5-11
Manual transmission ................................... 5-14
Automatic transmission .............................. 5-16
Operation of the automatic transmission .. 5-18
Transfer shift lever (4WD vehicles) ............ 5-20
Rear differential lock* .................................. 5-23
Correct 4-wheel drive operation ................. 5-26
Cautions on handling of 4WD vehicles ...... 5-29
Parking brake ............................................... 5-30
Parking .......................................................... 5-32
Braking.......................................................... 5-32
Anti-lock brake system (ABS)* ................... 5-33
Limited-slip differential* .............................. 5-35
Steering wheel height adjustment .............. 5-36
Power steering system* .............................. 5-37
Day/Night type inside rearview mirror ....... 5-37
Manual outside rear-view mirrors* ............. 5-37
Electric remote-controlled outside
rear-view mirrors* .................................. 5-38
Starting and driving
5
05engL2_240082_4 22-01-2004 13:04 Page 5-1
Page 96 of 264
STARTING AND DRIVING
5-10
NOTE
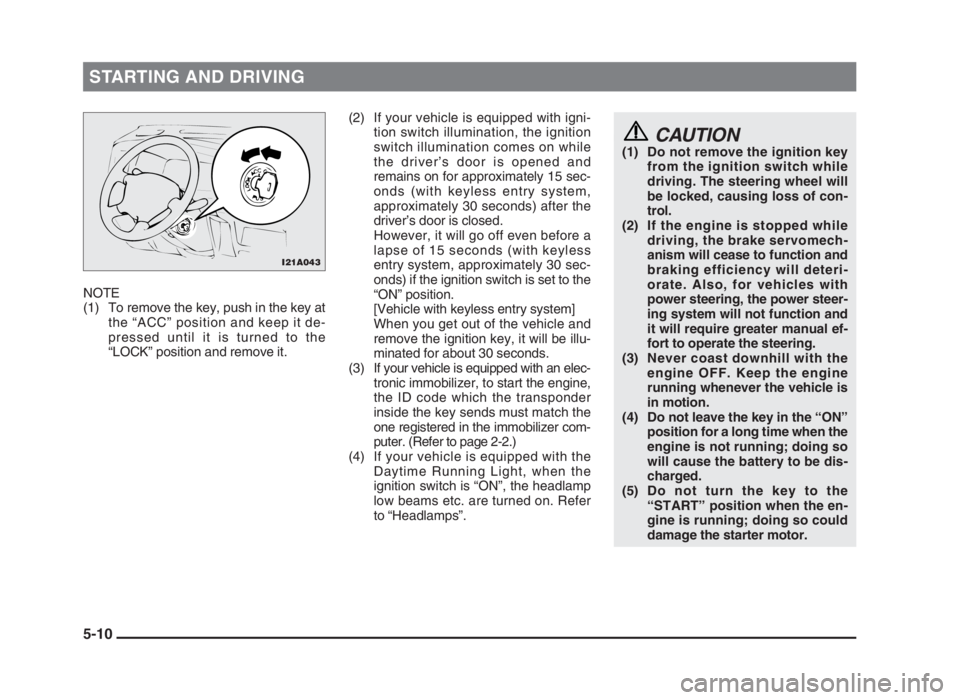
(1) To remove the key, push in the key at
the “ACC” position and keep it de-
pressed until it is turned to the
“LOCK” position and remove it.(2) If your vehicle is equipped with igni-
tion switch illumination, the ignition
switch illumination comes on while
the driver’s door is opened and
remains on for approximately 15 sec-
onds (with keyless entry system,
approximately 30 seconds) after the
driver’s door is closed.
However, it will go off even before a
lapse of 15 seconds (with keyless
entry system, approximately 30 sec-
onds) if the ignition switch is set to the
“ON” position.
[Vehicle with keyless entry system]
When you get out of the vehicle and
remove the ignition key, it will be illu-
minated for about 30 seconds.
(3) If your vehicle is equipped with an elec-
tronic immobilizer, to start the engine,
the ID code which the transponder
inside the key sends must match the
one registered in the immobilizer com-
puter. (Refer to page 2-2.)
(4) If your vehicle is equipped with the
Daytime Running Light, when the
ignition switch is “ON”, the headlamp
low beams etc. are turned on. Refer
to “Headlamps”.
CAUTION(1) Do not remove the ignition key
from the ignition switch while
driving. The steering wheel will
be locked, causing loss of con-
trol.
(2) If the engine is stopped while
driving, the brake servomech-
anism will cease to function and
braking efficiency will deteri-
orate. Also, for vehicles with
power steering, the power steer-
ing system will not function and
it will require greater manual ef-
fort to operate the steering.
(3) Never coast downhill with the
engine OFF. Keep the engine
running whenever the vehicle is
in motion.
(4) Do not leave the key in the “ON”
position for a long time when the
engine is not running; doing so
will cause the battery to be dis-
charged.
(5) Do not turn the key to the
“START” position when the en-
gine is running; doing so could
damage the starter motor.
I21A043
05engL2_240082_4 22-01-2004 13:04 Page 5-10
Page 97 of 264
STARTING AND DRIVING
5-11 How to lock and unlock the
steering wheel
EI01B-Ka
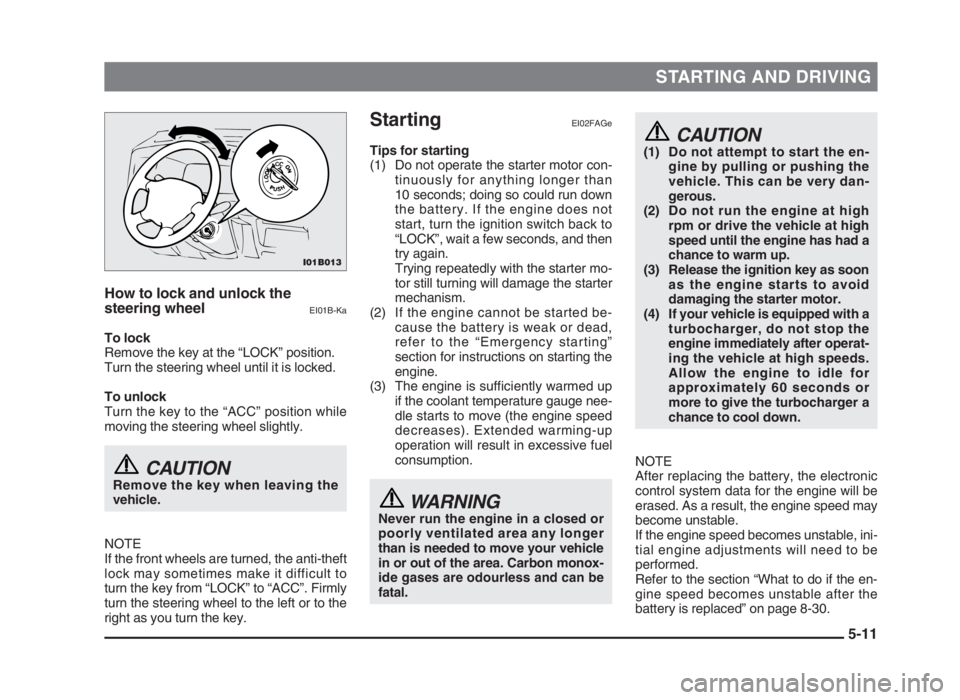
To lock
Remove the key at the “LOCK” position.
Turn the steering wheel until it is locked.
To unlock
Turn the key to the “ACC” position while
moving the steering wheel slightly.
CAUTIONRemove the key when leaving the
vehicle.
NOTE
If the front wheels are turned, the anti-theft
lock may sometimes make it difficult to
turn the key from “LOCK” to “ACC”. Firmly
turn the steering wheel to the left or to the
right as you turn the key.
CAUTION(1) Do not attempt to start the en-
gine by pulling or pushing the
vehicle. This can be very dan-
gerous.
(2) Do not run the engine at high
rpm or drive the vehicle at high
speed until the engine has had a
chance to warm up.
(3) Release the ignition key as soon
as the engine starts to avoid
damaging the starter motor.
(4) If your vehicle is equipped with a
turbocharger, do not stop the
engine immediately after operat-
ing the vehicle at high speeds.
Allow the engine to idle for
approximately 60 seconds or
more to give the turbocharger a
chance to cool down.
NOTE
After replacing the battery, the electronic
control system data for the engine will be
erased. As a result, the engine speed may
become unstable.
If the engine speed becomes unstable, ini-
tial engine adjustments will need to be
performed.
Refer to the section “What to do if the en-
gine speed becomes unstable after the
battery is replaced” on page 8-30.
StartingEI02FAGe
Tips for starting
(1) Do not operate the starter motor con-
tinuously for anything longer than
10 seconds; doing so could run down
the battery. If the engine does not
start, turn the ignition switch back to
“LOCK”, wait a few seconds, and then
try again.
Trying repeatedly with the starter mo-
tor still turning will damage the starter
mechanism.
(2) If the engine cannot be started be-
cause the battery is weak or dead,
refer to the “Emergency starting”
section for instructions on starting the
engine.
(3) The engine is sufficiently warmed up
if the coolant temperature gauge nee-
dle starts to move (the engine speed
decreases). Extended warming-up
operation will result in excessive fuel
consumption.
WARNING
Never run the engine in a closed or
poorly ventilated area any longer
than is needed to move your vehicle
in or out of the area. Carbon monox-
ide
gases are odourless and can be
fatal.
I01B013
05engL2_240082_4 22-01-2004 13:04 Page 5-11
Page 108 of 264
STARTING AND DRIVING
NOTE
(1) When shifting from “2H” to “4H” soon
after driving the vehicle in a cold
weather district, the transmission
gear may make a noise. So try to shift
the gear while the vehicle is stopped.
(2) The 4WD operation indication lamp
will go out momentarily during shifting
process from “4H” to “4L” or vice
versa, as the shift lever passes
through the neutral position.
Be sure to operate the shift lever until
the 4WD operation indicator lamp illu-
minates again.
(3) There may be a case that the transfer
shift lever fees heavy when it is
moved from “4H” to “2H” with the
steering wheel in turned position. This
is normal and not any indication of
trouble.
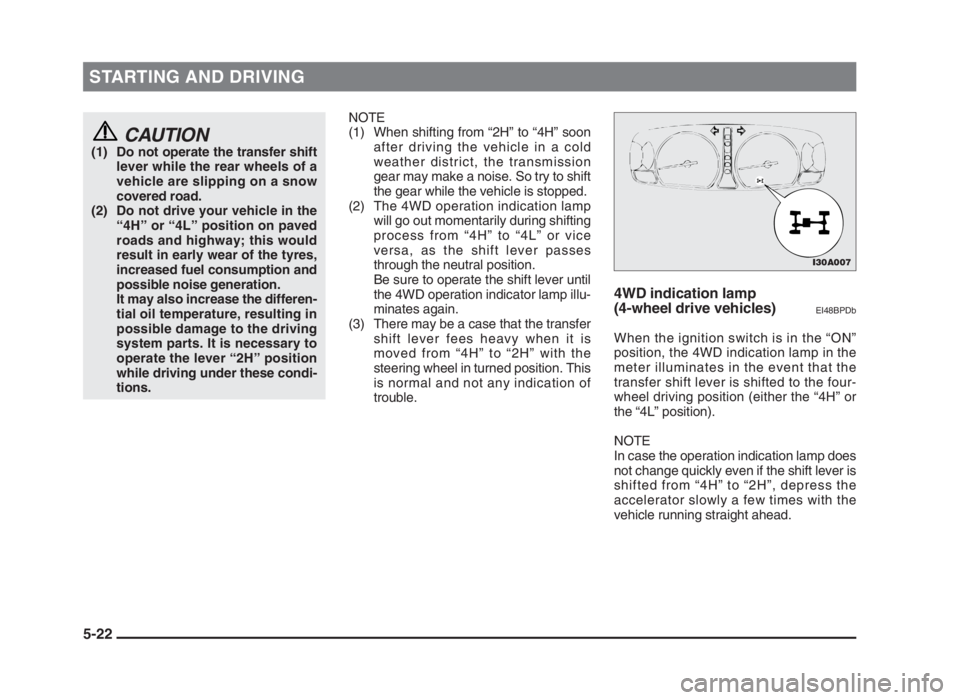
4WD indication lamp
(4-wheel drive vehicles)
EI48BPDb
When the ignition switch is in the “ON”
position, the 4WD indication lamp in the
meter illuminates in the event that the
transfer shift lever is shifted to the four-
wheel driving position (either the “4H” or
the “4L” position).
NOTE
In case the operation indication lamp does
not change quickly even if the shift lever is
shifted from “4H” to “2H”, depress the
accelerator slowly a few times with the
vehicle running straight ahead.
5-22
I30A007
CAUTION(1) Do not operate the transfer shift
lever while the rear wheels of a
vehicle are slipping on a snow
covered road.
(2) Do not drive your vehicle in the
“4H” or “4L” position on paved
roads and highway; this would
result in early wear of the tyres,
increased fuel consumption and
possible noise generation.
It may also increase the differen-
tial oil temperature, resulting in
possible damage to the driving
system parts. It is necessary to
operate the lever “2H” position
while driving under these condi-
tions.
05engL2_240082_4 22-01-2004 13:05 Page 5-22
Page 109 of 264
STARTING AND DRIVING
5-23
Rear differential lock*EI34A-D
The rear differential lock is a device which
makes it easy for the vehicle to get moving
when, with one of the rear wheels idling,
the vehicle has stuck and can not move
even with transfer shift lever in Low-range
4WD.
In case of operating the rear
differential lock:
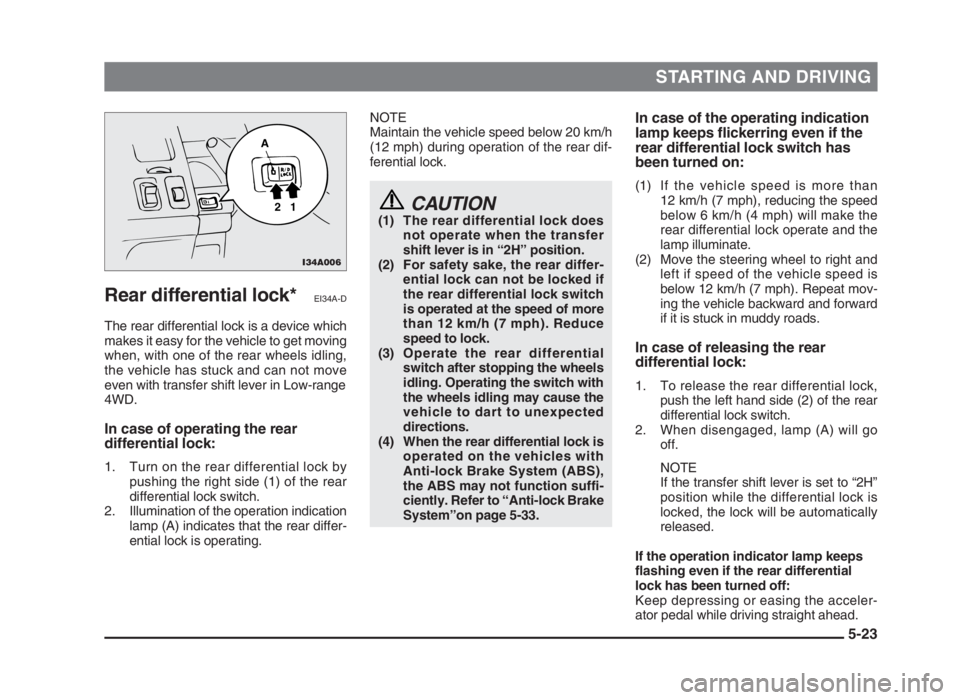
1. Turn on the rear differential lock by
pushing the right side (1) of the rear
differential lock switch.
2. Illumination of the operation indication
lamp (A) indicates that the rear differ-
ential lock is operating.
In case of the operating indication
lamp keeps flickerring even if the
rear differential lock switch has
been turned on:
(1) If the vehicle speed is more than
12 km/h (7 mph), reducing the speed
below 6 km/h (4 mph) will make the
rear differential lock operate and the
lamp illuminate.
(2) Move the steering wheel to right and
left if speed of the vehicle speed is
below 12 km/h (7 mph). Repeat mov-
ing the vehicle backward and forward
if it is stuck in muddy roads.
In case of releasing the rear
differential lock:
1. To release the rear differential lock,
push the left hand side (2) of the rear
differential lock switch.
2. When disengaged, lamp (A) will go
off.
NOTE
If the transfer shift lever is set to “2H”
position while the differential lock is
locked, the lock will be automatically
released.
If the operation indicator lamp keeps
flashing even if the rear differential
lock has been turned off:
Keep depressing or easing the acceler-
ator pedal while driving straight ahead. NOTE
Maintain the vehicle speed below 20 km/h
(12 mph) during operation of the rear dif-
ferential lock.
CAUTION(1) The rear differential lock does
not operate when the transfer
shift lever is in “2H” position.
(2) For safety sake, the rear differ-
ential lock can not be locked if
the rear differential lock switch
is operated at the speed of more
than 12 km/h (7 mph). Reduce
speed to lock.
(3) Operate the rear differential
switch after stopping the wheels
idling. Operating the switch with
the wheels idling may cause the
vehicle to dart to unexpected
directions.
(4) When the rear differential lock is
operated on the vehicles with
Anti-lock Brake System (ABS),
the ABS may not function suffi-
ciently. Refer to “Anti-lock Brake
System”on page 5-33.
I34A006
2 1 A
05engL2_240082_4 22-01-2004 13:05 Page 5-23
Page 111 of 264
STARTING AND DRIVING
5-25 Examples of incorrect use of the
rear differential lock
EI34C-Ab
WARNINGDo not use the rear differential lock
when driving on normal roads.
Incorrect use of it may make the
vehicles difficult to turn or may
change its direction abruptly. Be
sure to confirm that the operation
indication lamp is off when driving
on normal roads.
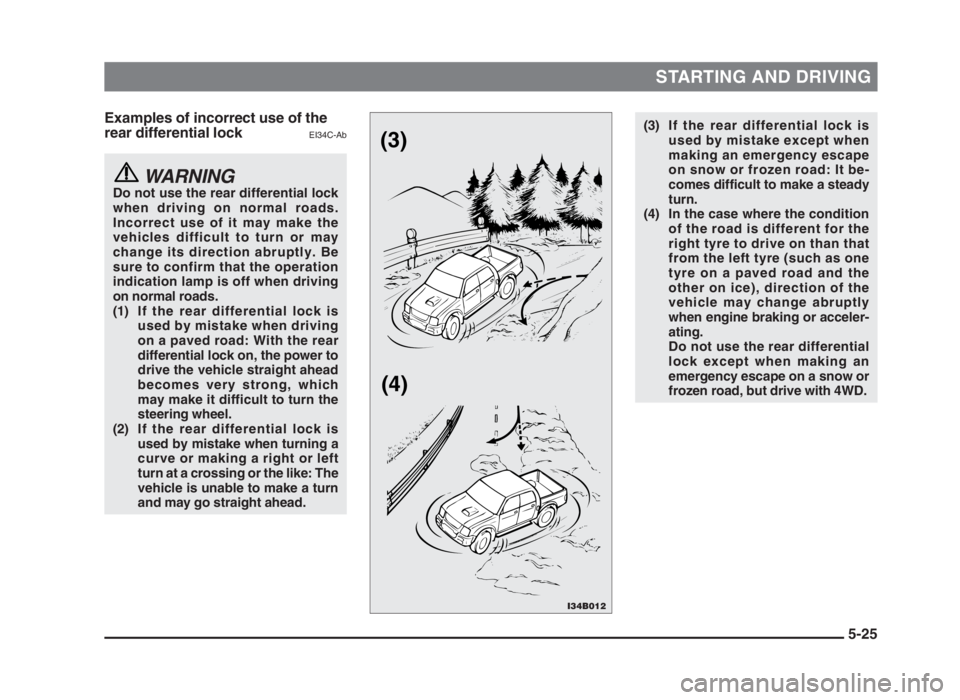
(1) If the rear differential lock is
used by mistake when driving
on a paved road: With the rear
differential lock on, the power to
drive the vehicle straight ahead
becomes very strong, which
may make it difficult to turn the
steering wheel.
(2) If the rear differential lock is
used by mistake when turning a
curve or making a right or left
turn at a crossing or the like: The
vehicle is unable to make a turn
and may go straight ahead.
(3) If the rear differential lock is
used by mistake except when
making an emergency escape
on snow or frozen road: It be-
comes difficult to make a steady
turn.
(4) In the case where the condition
of the road is different for the
right tyre to drive on than that
from the left tyre (such as one
tyre on a paved road and the
other on ice), direction of the
vehicle may change abruptly
when engine braking or acceler-
ating.
Do not use the rear differential
lock except when making an
emergency escape on a snow or
frozen road, but drive with 4WD.
I34B012
(3)
(4)
05engL2_240082_4 22-01-2004 13:05 Page 5-25
Page 112 of 264
STARTING AND DRIVING
5-26
Correct 4-wheel drive
operation
EI32ABDa
By shifting lock to 4-wheel drive (4H, 4L),
both axles of the vehicle are rigidly con-
nected with each other. This improves the
traction characteristics. When turning
sharp corners or moving forward and
backward repeatedly, however, the drive
line is stressed, which is felt as a braking
effect. A 4-wheel drive vehicle can accele-
rate more quickly and smoothly.
However, note that the braking distance is
not shorter than that of a rear-wheel drive
vehicle.
When using 4-wheel drive on rough roads
(snow, mud, sand, etc.), it is important to
operate the vehicle correctly.
NOTE
(1) The driving posture should be more
upright and closer to the wheel than
usual; adjust the seat to a good posi-
tion for easy steering and pedal oper-
ation. Be sure to wear the seat belt.
(2) After driving on rough roads, check
each part of the vehicle and wash it
thoroughly with water. Refer to the
“Vehicle care” section and “Inspection
and maintenance following rough
road operation” sections.Driving on dry paved road and highway
Select 2WD (2H) to drive on dry paved
roads. Especially on dry highway, never
select the 4WD (4H or 4L).
CAUTIONSelecting 4-wheel drive to drive on
dry paved road will increase the fuel
consumption with possible noise
generation and early tyre wear.
It may also increase the differential
oil temperature, resulting in possible
damage to the driving system. Fur-
ther, the drive train will be subjected
to excessive loading, possibly lead-
ing to oil leakage, component
seizure, or other serious faults.
Driving on snowy or icy roads
Set the transfer shift lever to “4H” or “4L” in
accordance with the road conditions, and
then gradually depress the accelerator
pedal for a smooth start.
NOTE
(1) The use of snow tyres and/or tyre
chains is recommended.
(2) Maintain a safe distance between
vehicles, avoid sudden braking, and
use engine braking (downshifting).
CAUTIONAvoid sudden braking, sudden ac-
celeration, and sharp turning; such
operations could cause skidding
and spinouts.
Driving on sandy or muddy roads
Set the transfer shift lever to “4H” or “4L”,
and then gradually depress the accelera-
tor pedal for a smooth start. Keep the
pressure on the accelerator pedal as con-
stant as possible, and drive at low speed.
05engL2_240082_4 22-01-2004 13:05 Page 5-26
Page 114 of 264
STARTING AND DRIVING
5-28 Climbing sharp grades
Set the transfer shift lever to “4L” to max-
imize the engine torque.
WARNING(1) Go straight up. Do not try to
traverse across a steep slope.
(2) If you begin to lose traction,
ease off the accelerator pedal
and gently turn the steering
wheel alternately left and right to
regain adequate traction again.
NOTE
(1) Choose as smooth a slope as possi-
ble with few stones or other obsta-
cles.
(2) The climbing ability is approximate
35° grade on dry pavement.
(3) Before attempting to drive up the
slope, walk up it to confirm that the
vehicle can handle the gradient.
Descending sharp grades
Set the transfer shift lever to “4L”, use the
engine brake (downshifting) and descend
slowly.
WARNINGAvoid snaking down a sharp gra-
dient. Descend the grade as straight
as possible.
NOTE
(1) When descending a sharp grade, if the
brakes are applied suddenly because
of an obstacle encountered, control of
the vehicle could be lost. Before de-
scending the slope, walk down it and
confirm the path.
(2) Before descending a grade, it is neces-
sary to choose the appropriate gear.
Avoid changing gears or depressing the
clutch while descending the grade.
(3) MITSUBISHI is not responsible to the
operator for any damage or injury
caused or liability incurred by the im-
proper and negligent operation of a ve-
hicle. All techniques of vehicle opera-
tion described herein depend on the
skill and experience of the operator
and other participating parties, and any
deviation from the recommended oper-
ating instructions above is at their own
risk.
Turning sharp corners
When turning a sharp corner in “4H” or
“4L” position at low speed, a slight differ-
ence in steering may be experienced
similar to as if the brakes were applied.
This is called tight corner braking and
results from each of the four tyres being at
a different distance from the corner.
The phenomenon is peculiar to 4-wheel
drive vehicles. If this occurs, either
straighten the steering wheel, or change
to rear-wheel drive.
Crossing a stream (fording)
4-wheel drive vehicles are not necessarily
waterproof. If the electrical circuits be-
come wet, further operation of the vehicle
will be impossible; therefore, avoid cross-
ing streams unless absolutely necessary.
If crossing a stream is unavoidable, use
the following procedure:
(1) Check depths of a stream and geo-
graphical features before attempting
to cross a stream and ford the stream
where the water is as shallow as prac-
ticable.
(2) Set the transfer shift lever to “4L”.
(3) Drive slowly at a speed of approxi-
mately 5 km/h (3 mph) to avoid
splashing too much water.
05engL2_240082_4 22-01-2004 13:05 Page 5-28
Page 119 of 264
STARTING AND DRIVING
5-33 Brake pads and linings
(1) With new brake pads or linings, avoid
where possible sudden full applica-
tion of the brakes for the first 200 km
(125 miles) of driving.
(2) The disc brakes are provided with a
warning device which emits a shriek-
ing metallic sound while braking if the
brake pads have reached their limit.
If you hear this sound, have the brake
pads replaced by your MITSUBISHI
dealer.
CAUTION(1) Do not leave any objects or
place a thick floor mat around
the brake pedal; doing so could
prevent the full pedal stroke that
would be necessary in an emer-
gency. Make sure that the pedal
can be operated freely at all
times.
(2) Avoid driving habits that may
lead to sudden braking and
never “ride” the brakes by rest-
ing your foot on the brake pedal
while driving.
It causes brake overheating and
fade.
• Driving on gravel or snow-covered
roads.
• Driving with tyre chains installed.
• Driving on roads where the road
surface is pitted or has other differ-
ences in surface height.
• Driving on bumpy roads or other
poor driving surfaces.
(3) Operation of the ABS is not restricted
to situations where brakes are applied
suddenly. This system may also oper-
ate to prevent wheel lock when you
are driving over manholes, steel road-
work plates, or the vehicle is driven
over steps or level differences in the
road, road markings, or other sur-
faces which are difficult for the wheels
to grip.
(4) When the ABS is activated, you may
feel the brake pedal pulsating and
hear a characteristic noise. Also at
this time, it may feel as if the pedal at-
tempts to resist being depressed.
In this situation, to let the ABS
work for you, just hold the brake
pedal down more firmly. Do not
pump the brake. This will result in
reduced braking performance.Anti-lock brake system
(ABS)*
EI24APD
Environmental conditions can have an ef-
fect on braking. During sudden braking
when there is snow, ice, oil, water etc; on
the road surface, a skid may occur. In this
situation, steering control and braking ef-
fectiveness is reduced and the stopping
distance is increased. The vehicle may
also go into an uncontrolled spin.
The ABS helps prevent the wheels from
locking during braking, thus maintaining
directional stability, ensuring controllabi-
lity, and providing optimum braking force.
Driving hints
(1) With ABS fitted, steering during sud-
den braking (when the ABS functions)
differs slightly from when the brakes
are not being applied.
Steer the vehicle carefully in these
conditions.
(2) Always maintain the same distance
from the vehicle in front of you as you
would for a vehicle not equipped with
an ABS.
Compared with vehicles not fitted
with ABS, your vehicle may require a
longer stopping distance in the follow-
ing cases:
05engL2_240082_4 22-01-2004 13:05 Page 5-33
Page 122 of 264
STARTING AND DRIVING
5-36
CAUTION
(1) Never start the engine while one
of the rear wheels is jacked up
and the other in contact with the
ground; doing so may cause the
vehicle to jump forward.
(2) When attempting to extract the
vehicle from snow, mud, etc.,
and the engine is run continu-
ously at high speed, the limited-
slip differential will be adversely
affected.
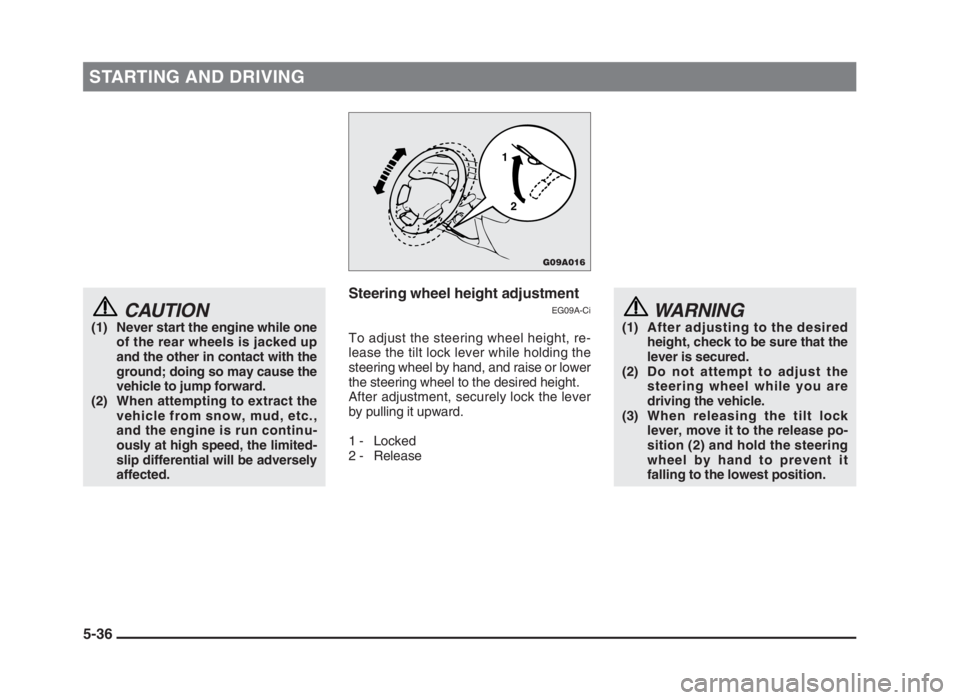
Steering wheel height adjustment
EG09A-Ci
To adjust the steering wheel height, re-
lease the tilt lock lever while holding the
steering wheel by hand, and raise or lower
the steering wheel to the desired height.
After adjustment, securely lock the lever
by pulling it upward.
1 - Locked
2 - Release
WARNING
(1) After adjusting to the desired
height, check to be sure that the
lever is secured.
(2) Do not attempt to adjust the
steering wheel while you are
driving the vehicle.
(3) When releasing the tilt lock
lever, move it to the release po-
sition (2) and hold the steering
wheel by hand to prevent it
falling to the lowest position.
G09A016
1
2
05engL2_240082_4 22-01-2004 13:05 Page 5-36