seat adjustment MITSUBISHI L200 2004 Owner's Manual (in English)
[x] Cancel search | Manufacturer: MITSUBISHI, Model Year: 2004, Model line: L200, Model: MITSUBISHI L200 2004Pages: 264, PDF Size: 4.14 MB
Page 33 of 264
Seat adjustment ........................................... 3-2
Front seat...................................................... 3-3
Rear seat* ..................................................... 3-5
Head restraints ............................................. 3-5
Armrest* ........................................................ 3-7
Heated seats* ............................................... 3-7
Seat belts ...................................................... 3-8
Child restraint............................................... 3-11
Pregnant women restraint........................... 3-20
Seat belt inspection ..................................... 3-20
Supplemental restraint system
(SRS) - air bag* ....................................... 3-20
Seat and seat belts
3
03engL2_240082_4 22-01-2004 13:01 Page 3-1
Page 34 of 264
SEAT AND SEAT BELTS
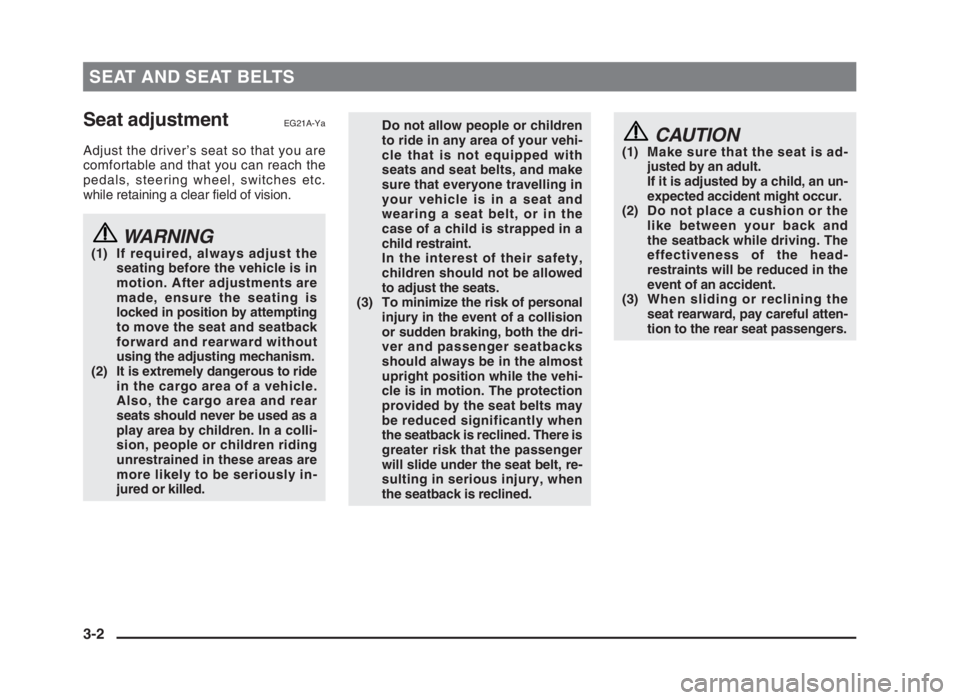
Seat adjustmentEG21A-Ya
Adjust the driver’s seat so that you are
comfortable and that you can reach the
pedals, steering wheel, switches etc.
while retaining a clear field of vision.
WARNING(1) If required, always adjust the
seating before the vehicle is in
motion. After adjustments are
made, ensure the seating is
locked in position by attempting
to move the seat and seatback
forward and rearward without
using the adjusting mechanism.
(2) It is extremely dangerous to ride
in the cargo area of a vehicle.
Also, the cargo area and rear
seats should never be used as a
play area by children. In a colli-
sion, people or children riding
unrestrained in these areas are
more likely to be seriously in-
jured or killed.
Do not allow people or children
to ride in any area of your vehi-
cle that is not equipped with
seats and seat belts, and make
sure that everyone travelling in
your vehicle is in a seat and
wearing a seat belt, or in the
case of a child is strapped in a
child restraint.
In the interest of their safety,
children should not be allowed
to adjust the seats.
(3) To minimize the risk of personal
injury in the event of a collision
or sudden braking, both the dri-
ver and passenger seatbacks
should always be in the almost
upright position while the vehi-
cle is in motion. The protection
provided by the seat belts may
be reduced significantly when
the seatback is reclined. There is
greater risk that the passenger
will slide under the seat belt, re-
sulting in serious injury, when
the seatback is reclined.CAUTION(1) Make sure that the seat is ad-
justed by an adult.
If it is adjusted by a child, an un-
expected accident might occur.
(2) Do not place a cushion or the
like between your back and
the seatback while driving. The
effectiveness of the head-
restraints will be reduced in the
event of an accident.
(3) When sliding or reclining the
seat rearward, pay careful atten-
tion to the rear seat passengers.
3-2
03engL2_240082_4 22-01-2004 13:01 Page 3-2
Page 35 of 264
SEAT AND SEAT BELTS
Front seatEG21B-V
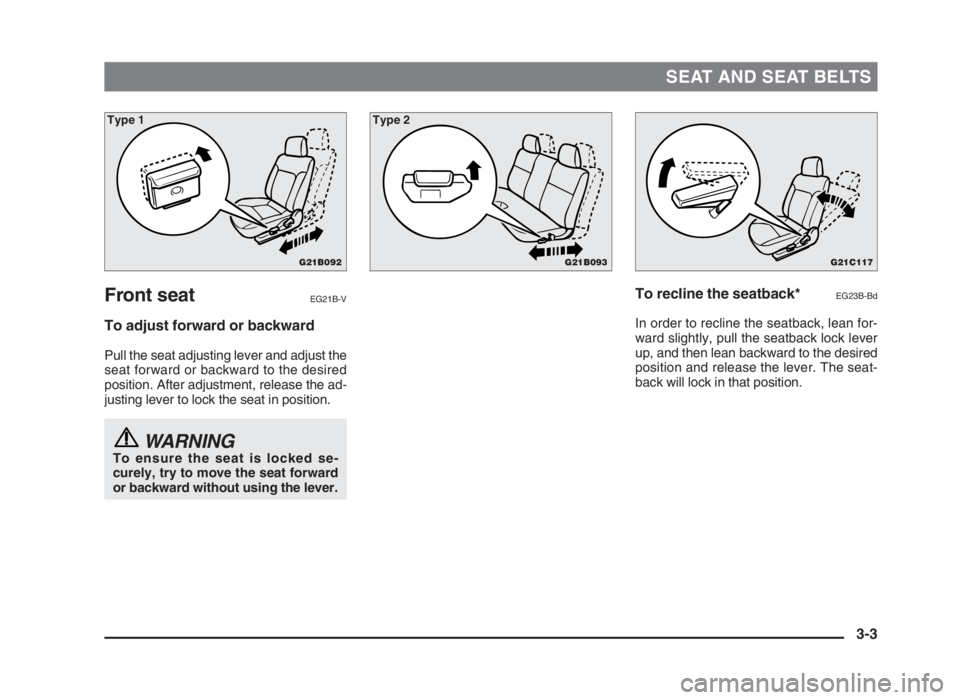
To adjust forward or backward
Pull the seat adjusting lever and adjust the
seat forward or backward to the desired
position. After adjustment, release the ad-
justing lever to lock the seat in position.
WARNINGTo ensure the seat is locked se-
curely, try to move the seat forward
or backward without using the lever.
To recline the seatback*EG23B-Bd
In order to recline the seatback, lean for-
ward slightly, pull the seatback lock lever
up, and then lean backward to the desired
position and release the lever. The seat-
back will lock in that position.
3-3
G21B092
Type 1
G21B093
Type 2
G21C117
03engL2_240082_4 22-01-2004 13:01 Page 3-3
Page 37 of 264
SEAT AND SEAT BELTS
Rear seat*EG02C-R
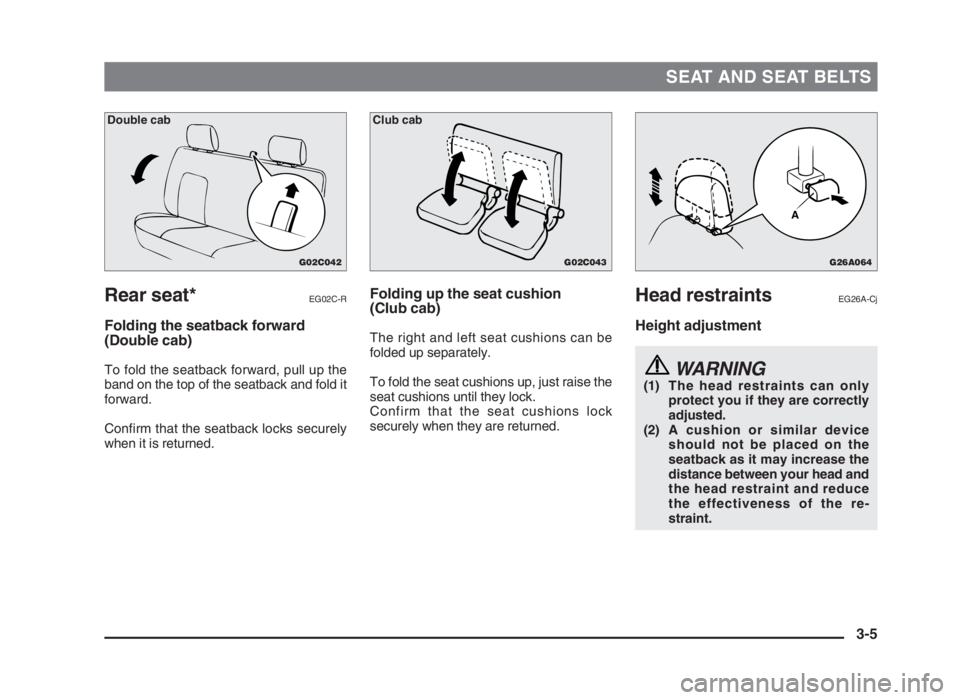
Folding the seatback forward
(Double cab)
To fold the seatback forward, pull up the
band on the top of the seatback and fold it
forward.
Confirm that the seatback locks securely
when it is returned.
Head restraintsEG26A-Cj
Height adjustment
WARNING(1) The head restraints can only
protect you if they are correctly
adjusted.
(2) A cushion or similar device
should not be placed on the
seatback as it may increase the
distance between your head and
the head restraint and reduce
the effectiveness of the re-
straint.
Folding up the seat cushion
(Club cab)
The right and left seat cushions can be
folded up separately.
To fold the seat cushions up, just raise the
seat cushions until they lock.
Confirm that the seat cushions lock
securely when they are returned.
3-5
G02C042
Double cab
G02C043
Club cab
G26A064
A
03engL2_240082_4 22-01-2004 13:01 Page 3-5
Page 38 of 264
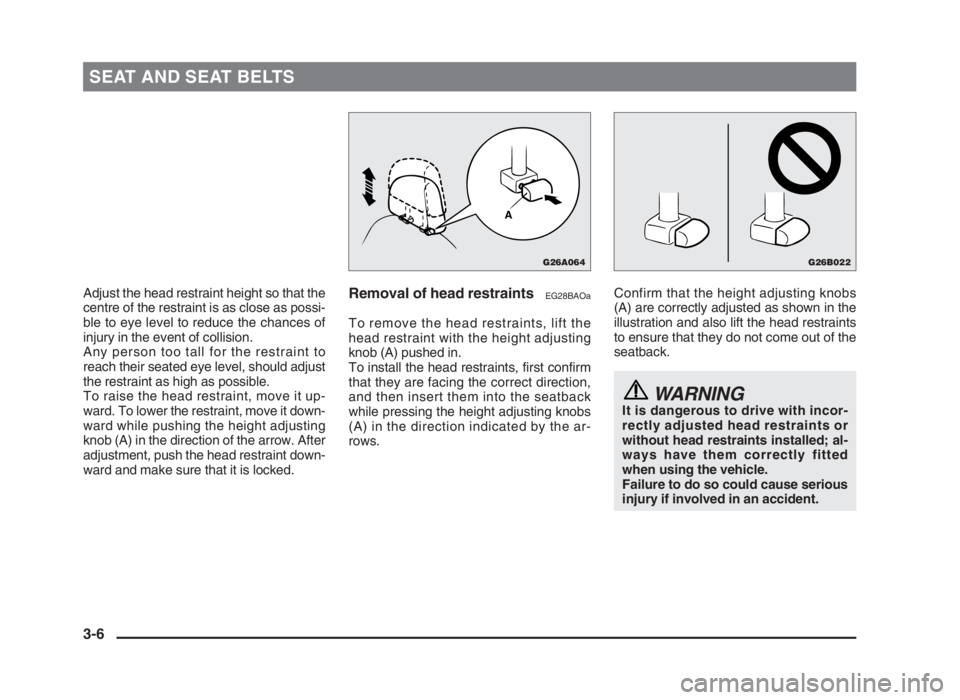
Adjust the head restraint height so that the
centre of the restraint is as close as possi-
ble to eye level to reduce the chances of
injury in the event of collision.
Any person too tall for the restraint to
reach their seated eye level, should adjust
the restraint as high as possible.
To raise the head restraint, move it up-
ward. To lower the restraint, move it down-
ward while pushing the height adjusting
knob (A) in the direction of the arrow. After
adjustment, push the head restraint down-
ward and make sure that it is locked.
SEAT AND SEAT BELTS
Removal of head restraintsEG28BAOa
To remove the head restraints, lift the
head restraint with the height adjusting
knob (A) pushed in.
To install the head restraints, first confirm
that they are facing the correct direction,
and then insert them into the seatback
while pressing the height adjusting knobs
(A) in the direction indicated by the ar-
rows.Confirm that the height adjusting knobs
(A) are correctly adjusted as shown in the
illustration and also lift the head restraints
to ensure that they do not come out of the
seatback.
WARNINGIt is dangerous to drive with incor-
rectly adjusted head restraints or
without head restraints installed; al-
ways have them correctly fitted
when using the vehicle.
Failure to do so could cause serious
injury if involved in an accident.
3-6
G26A064
A
G26B022
03engL2_240082_4 22-01-2004 13:01 Page 3-6
Page 51 of 264
SEAT AND SEAT BELTS
3-19
Installation:
1. Fasten the seat belt to secure the
child restraint system. Make sure you
hear a “click” when you insert the
latch plate in the buckle.
2. Remove all slack of a lap belt by
pulling the webbing through the belt’s
adjustment feature.
3-point type seat belt requires no
length adjustment, remove all slack
by using the locking clip.
3. Push and pull the child restraint in all
directions to be sure it is secure.
Older childrenEG20F-J
Children who have outgrown the child re-
straint system should wear the combina-
tion lap shoulder belt.
The lap portion of the belt should be snug
and positioned low on the abdomen so
that it is below the top of the hip-bone.
Otherwise, the belt could intrude into the
child’s abdomen during an accident and
cause injury.
CAUTION(1) Children who are not buckled up
can be thrown out of the vehicle
in an accident.
(2) Children who are not buckled up
can strike other people.
(3) A child should never be left un-
attended in your vehicle. When
you leave the vehicle, take the
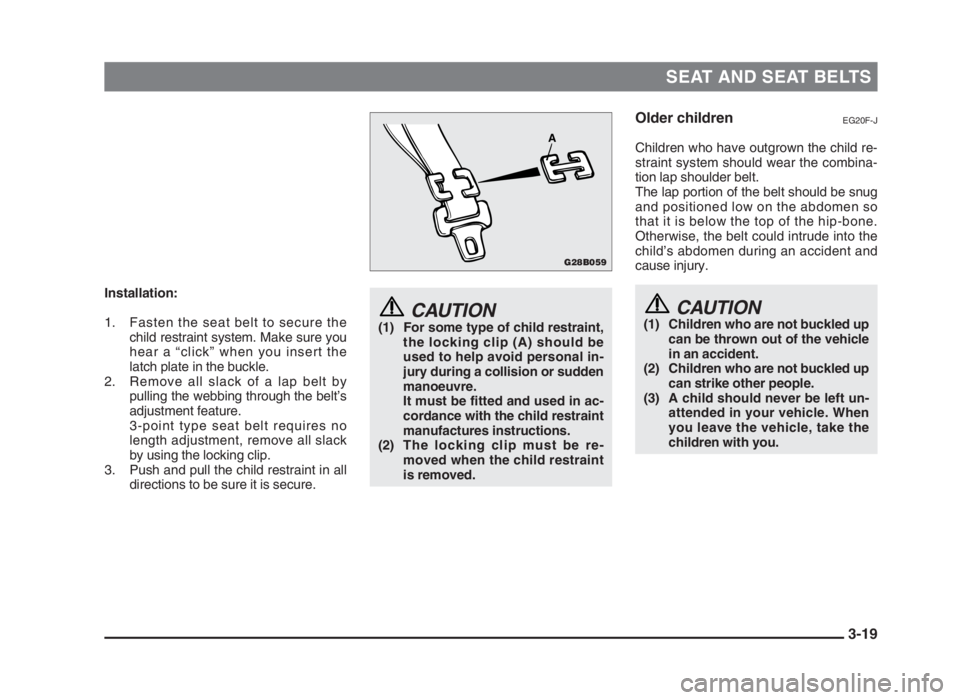
children with you.CAUTION(1) For some type of child restraint,
the locking clip (A) should be
used to help avoid personal in-
jury during a collision or sudden
manoeuvre.
It must be fitted and used in ac-
cordance with the child restraint
manufactures instructions.
(2) The locking clip must be re-
moved when the child restraint
is removed.
G28B059
A
03engL2_240082_4 22-01-2004 13:01 Page 3-19
Page 261 of 264

INDEX
Running-in recommendations ..................... 5-2
Safe driving techniques ............................. 1-16
Seat belts
Child restraint .......................................... 3-11
Inspection................................................ 3-20
Pregnant women restraint....................... 3-20
Seat belts .................................................. 3-8
Seat
Adjustment ................................................ 3-2
Armrest ..................................................... 3-7
Front seat .................................................. 3-3
Head restraints.......................................... 3-5
Heated seats ............................................. 3-7
Rear seat .................................................. 3-5
Snow tyres ................................................. 9-12
Spare wheel............................................... 8-12
Specifications ............................................ 10-2
Speedometer ............................................... 4-2
Starting ...................................................... 5-11
Starting the engine ........................... 5-11, 5-12
Steering
Power steering fluid ....................... 9-9, 10-26
Power steering system............................ 5-37
Steering lock ........................................... 5-11
Steering wheel height adjustment........... 5-36
Sun visors .................................................. 6-32
Supplemental restraint system
(SRS)-air bag .......................................... 3-20Washing....................................................... 7-4
Water temperature gauge ........................... 4-4
Waxing......................................................... 7-5
Weatherstripping ....................................... 9-17
Wheel
Caps........................................................ 8-15
Condition ................................................. 9-10
Windscreen wiper and washer switch ....... 4-15
Wiper blades ...................................... 7-7, 9-16 Tachometer ................................................. 4-3
Thermometer ............................................... 4-5
Tools..................................................... 8-3, 8-4
Towing ....................................................... 8-19
Trailer towing ............................................... 5-7
Transfer shift lever ..................................... 5-20
Transmission
Automatic transmission........................... 5-16
Fluid ............................................... 9-4, 10-26
Manual transmission ............................... 5-14
Tray under seat ......................................... 6-39
Tripmeter ..................................................... 4-3
Turn-signal
Indication lamps ........................................ 4-7
Switch ..................................................... 4-13
Tyre and wheels
Size................................... 10-8, 10-14, 10-22
Spare wheel ............................................ 8-12
Tyre chains ............................................. 9-13
Tyre inflation pressure ............................ 9-11
Tyre rotation .............................................. 9-11
UKW/MW/LW electronic tuning radio
with tape player ......................................... 6-2
Used engine oils safety instructions .......... 1-16
Vanity mirror .............................................. 6-32
Vehicle information code plate .................. 10-3
Ventilators.................................................. 6-18
Visor
Sun visors ............................................... 6-32
Voltage meter .............................................. 4-5
Washer fluid............................................... 9-10
10-29
10engL2_240082_4 22-01-2004 13:14 Page 10-29