MITSUBISHI L200 2011 Owner's Manual (in English)
Manufacturer: MITSUBISHI, Model Year: 2011, Model line: L200, Model: MITSUBISHI L200 2011Pages: 330, PDF Size: 22.34 MB
Page 211 of 330
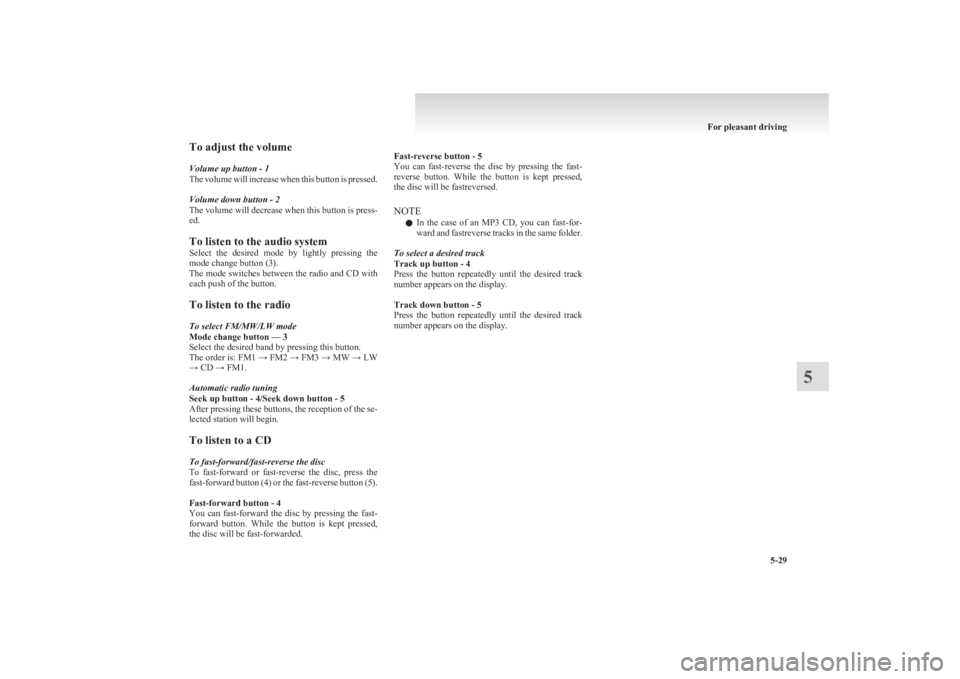
To adjust the volume
Volume up button - 1
The volume will increase when this button is pressed.
Volume down button - 2
The volume will decrease when this button is press-
ed.
To listen to the audio system
Select the desired mode by lightly pressing the
mode change button (3).
The mode switches between the radio and CD with
each push of the button.
To listen to the radio
To select FM/MW/LW mode
Mode change button — 3
Select the desired band by pressing this button.
The order is: FM1 → FM2 → FM3 → MW → LW
→ CD → FM1.
Automatic radio tuning
Seek up button - 4/Seek down button - 5
After pressing these buttons, the reception of the se-
lected station will begin.
To listen to a CD
To fast-forward/fast-reverse the disc
To fast-forward or fast-reverse the disc, press the
fast-forward button (4) or the fast-reverse button (5).
Fast-forward button - 4
You can fast-forward the disc by pressing the fast-
forward button. While the button is kept pressed,
the disc will be fast-forwarded.
Fast-reverse button - 5
You can fast-reverse the disc by pressing the fast-
reverse button. While the button is kept pressed,
the disc will be fastreversed.
NOTE l In the case of an MP3 CD, you can fast-for-
ward and fastreverse tracks in the same folder.
To select a desired track
Track up button - 4
Press the button repeatedly until the desired track
number appears on the display.
Track down button - 5
Press the button repeatedly until the desired track
number appears on the display.
For pleasant driving
5-29
5
Page 212 of 330
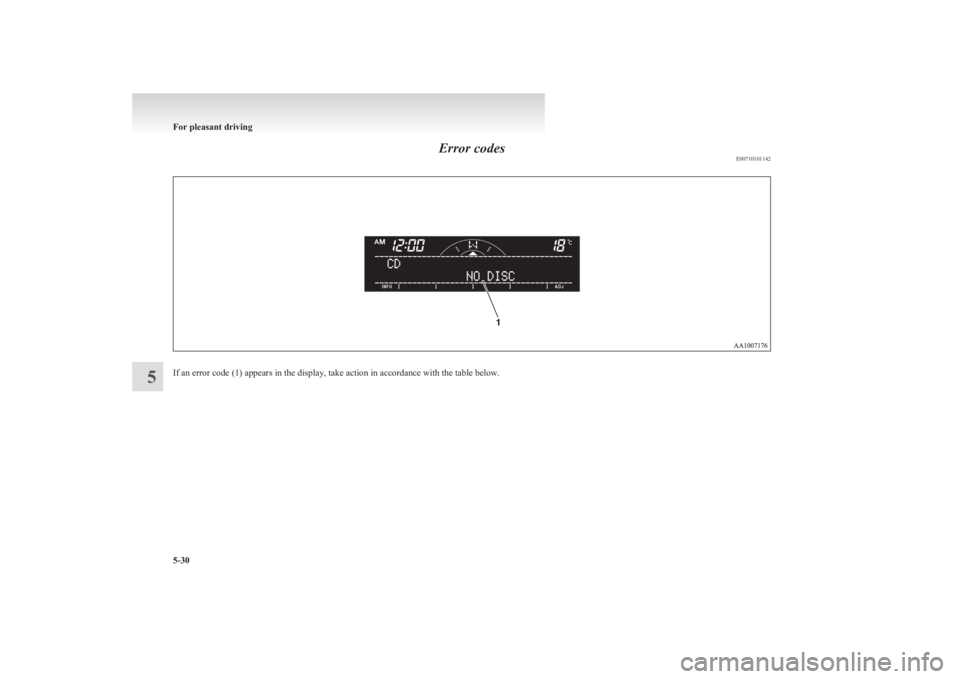
Error codesE00710101142
If an error code (1) appears in the display, take action in accordance with the table below.
For pleasant driving
5-30
5
Page 213 of 330
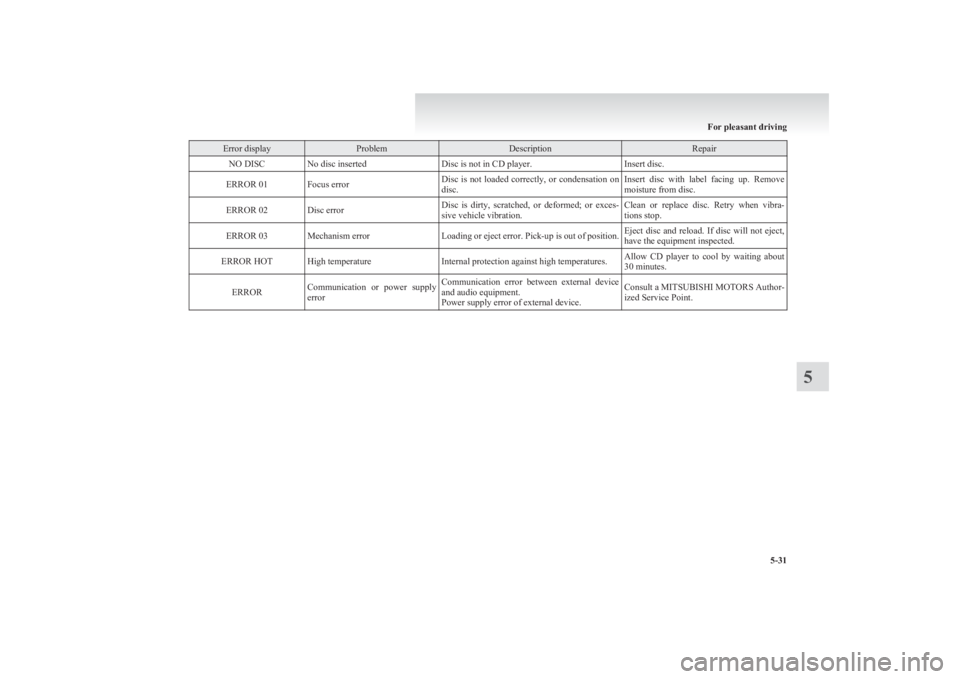
Error displayProblemDescriptionRepairNO DISCNo disc insertedDisc is not in CD player.Insert disc.ERROR 01Focus errorDisc is not loaded correctly, or condensation on
disc.Insert disc with label facing up. Remove
moisture from disc.ERROR 02Disc errorDisc is dirty, scratched, or deformed; or exces-
sive vehicle vibration.Clean or replace disc. Retry when vibra-
tions stop.ERROR 03Mechanism errorLoading or eject error. Pick-up is out of position.Eject disc and reload. If disc will not eject,
have the equipment inspected.ERROR HOTHigh temperatureInternal protection against high temperatures.Allow CD player to cool by waiting about
30 minutes.ERRORCommunication or power supply
errorCommunication error between external device
and audio equipment.
Power supply error of external device.Consult a MITSUBISHI MOTORS Author-
ized Service Point.
For pleasant driving
5-31
5
Page 214 of 330
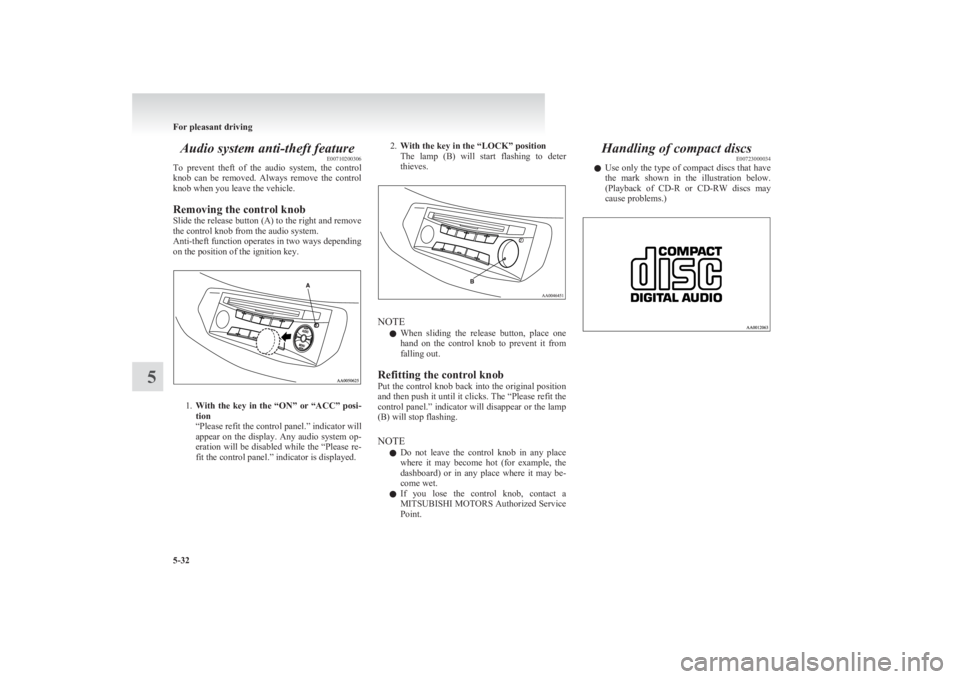
Audio system anti-theft featureE00710200306
To prevent theft of the audio system, the control
knob can be removed. Always remove the control
knob when you leave the vehicle.
Removing the control knob
Slide the release button (A) to the right and remove
the control knob from the audio system.
Anti-theft function operates in two ways depending
on the position of the ignition key.
1. With the key in the “ON” or “ACC” posi-
tion
“Please refit the control panel.” indicator will
appear on the display. Any audio system op-
eration will be disabled while the “Please re-
fit the control panel.” indicator is displayed.
2. With the key in the “LOCK” position
The lamp (B) will start flashing to deter
thieves.
NOTE
l When sliding the release button, place one
hand on the control knob to prevent it from
falling out.
Refitting the control knob
Put the control knob back into the original position
and then push it until it clicks. The “Please refit the
control panel.” indicator will disappear or the lamp
(B) will stop flashing.
NOTE l Do not leave the control knob in any place
where it may become hot (for example, the
dashboard) or in any place where it may be-
come wet.
l If you lose the control knob, contact a
MITSUBISHI MOTORS Authorized Service
Point.
Handling of compact discs E00723000034
l Use only the type of compact discs that have
the mark shown in the illustration below.
(Playback of CD-R or CD-RW discs may
cause problems.)
For pleasant driving
5-32
5
Page 215 of 330
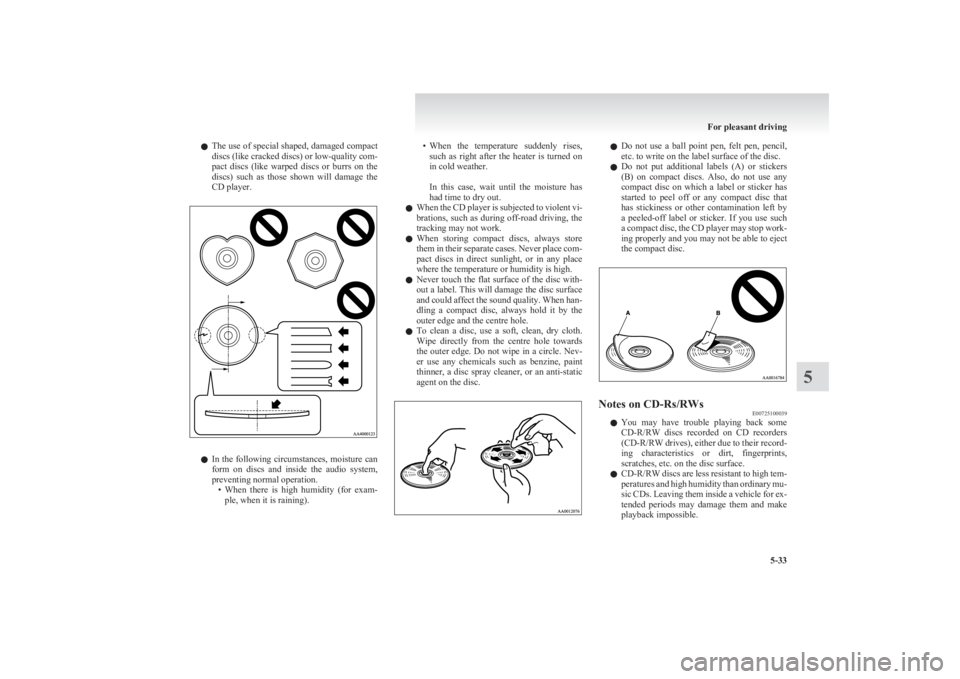
lThe use of special shaped, damaged compact
discs (like cracked discs) or low-quality com-
pact discs (like warped discs or burrs on the
discs) such as those shown will damage the
CD player.
l In the following circumstances, moisture can
form on discs and inside the audio system,
preventing normal operation. •When there is high humidity (for exam-
ple, when it is raining).
• When the temperature suddenly rises,
such as right after the heater is turned on
in cold weather.
In this case, wait until the moisture has
had time to dry out.
l When the CD player is subjected to violent vi-
brations, such as during off-road driving, the
tracking may not work.
l When storing compact discs, always store
them in their separate cases. Never place com-
pact discs in direct sunlight, or in any place
where the temperature or humidity is high.
l Never touch the flat surface of the disc with-
out a label. This will damage the disc surface
and could affect the sound quality. When han-
dling a compact disc, always hold it by the
outer edge and the centre hole.
l To clean a disc, use a soft, clean, dry cloth.
Wipe directly from the centre hole towards
the outer edge. Do not wipe in a circle. Nev-
er use any chemicals such as benzine, paint
thinner, a disc spray cleaner, or an anti-static
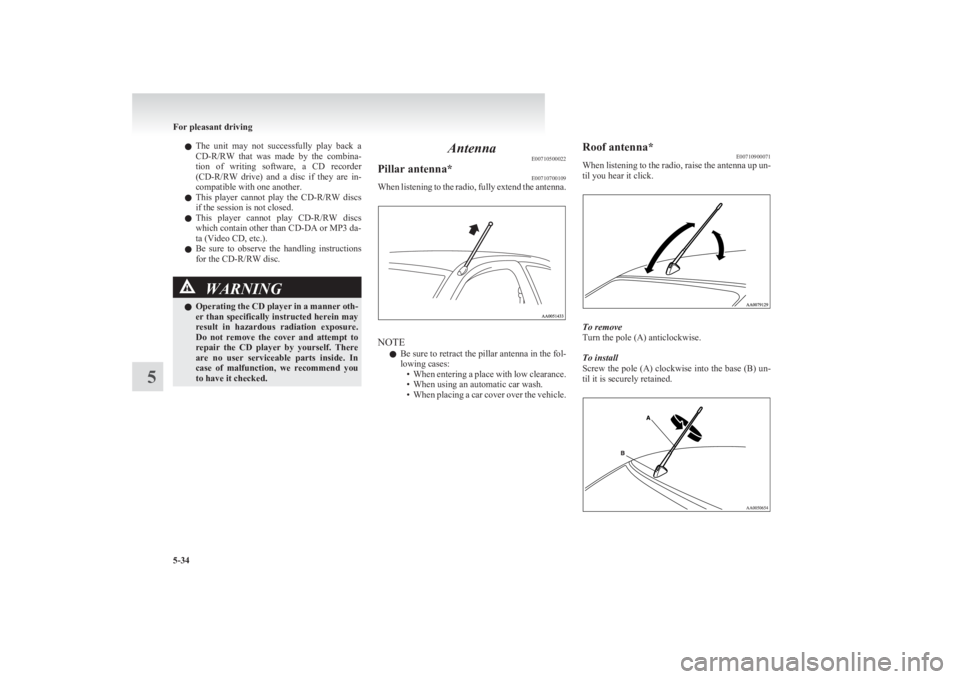
agent on the disc.l Do not use a ball point pen, felt pen, pencil,
etc. to write on the label surface of the disc.
l Do not put additional labels (A) or stickers
(B) on compact discs. Also, do not use any
compact disc on which a label or sticker has
started to peel off or any compact disc that
has stickiness or other contamination left by
a peeled-off label or sticker. If you use such
a compact disc, the CD player may stop work-
ing properly and you may not be able to eject
the compact disc.Notes on CD-Rs/RWs E00725100039
lYou may have trouble playing back some
CD-R/RW discs recorded on CD recorders
(CD-R/RW drives), either due to their record-
ing characteristics or dirt, fingerprints,
scratches, etc. on the disc surface.
l CD-R/RW
discs are less resistant to high tem-
peratures and high humidity than ordinary mu-
sic CDs. Leaving them inside a vehicle for ex-
tended periods may damage them and make
playback impossible.
For pleasant driving
5-33
5
Page 216 of 330
lThe unit may not successfully play back a
CD-R/RW that was made by the combina-
tion of writing software, a CD recorder
(CD-R/RW drive) and a disc if they are in-
compatible with one another.
l This player cannot play the
CD-R/RW discs
if the session is not closed.
l This player cannot play
CD-R/RW discs
which contain other than CD-DA or MP3 da-
ta (Video CD, etc.).
l Be sure to observe the handling instructions
for the CD-R/RW disc.WARNINGl Operating the CD player in a manner oth-
er than specifically instructed herein may
result in hazardous radiation exposure.
Do not remove the cover and attempt to
repair the CD player by yourself. There
are no user serviceable parts inside. In
case of malfunction, we recommend you
to have it checked.Antenna E00710500022Pillar antenna* E00710700109
When listening to the radio, fully extend the antenna.
NOTE
l Be sure to retract the pillar antenna in the fol-
lowing cases: •When entering a place with low clearance.
• When using an automatic car wash.
• When placing a car cover over the vehicle.
Roof antenna*
E00710900071
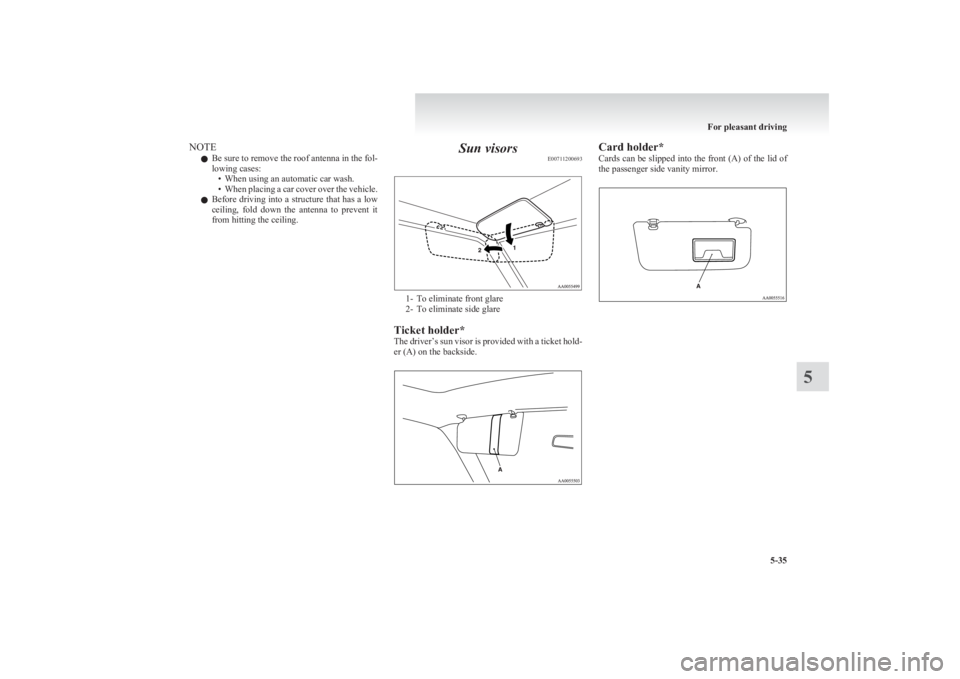
When listening to the radio, raise the antenna up un-
til you hear it click.
To remove
Turn the pole (A) anticlockwise.
To install
Screw the pole (A) clockwise into the base (B) un-
til it is securely retained.
For pleasant driving
5-34
5
Page 217 of 330
NOTEl Be sure to remove the roof antenna in the fol-
lowing cases: • When using an automatic car wash.
• When placing a car cover over the vehicle.
l Before driving into a structure that has a low
ceiling, fold down the antenna to prevent it
from hitting the ceiling.Sun visors E00711200693
1- To eliminate front glare
2- To eliminate side glare
Ticket holder*
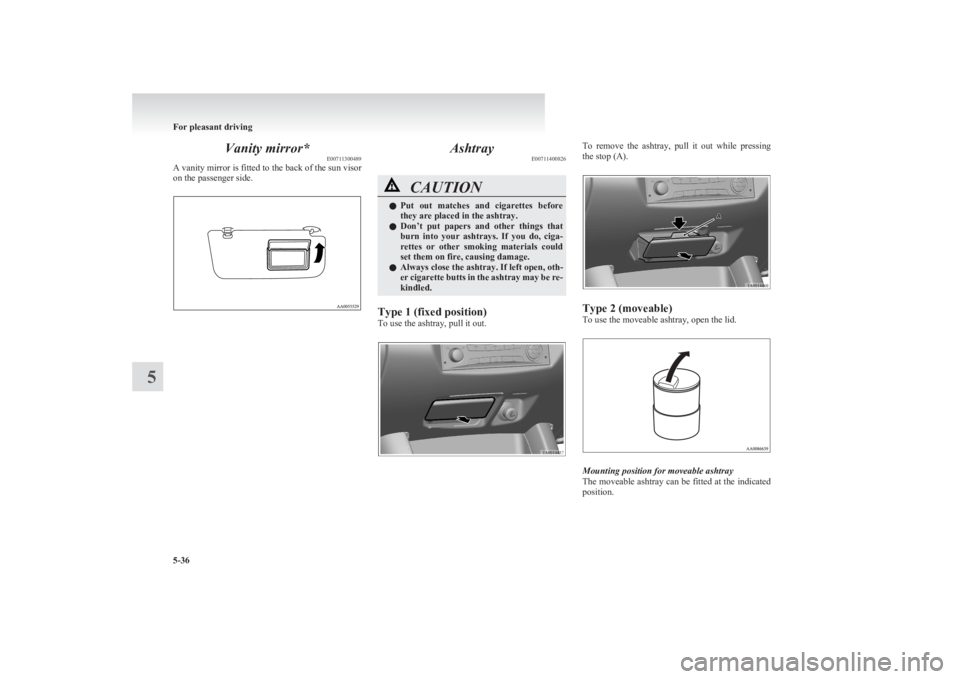
The driver’s sun visor is provided with a ticket hold-
er (A) on the backside.
Card holder*
Cards can be slipped into the front (A) of the lid of
the passenger side vanity mirror.
For pleasant driving
5-35
5
Page 218 of 330
Vanity mirror*E00711300489
A vanity mirror is fitted to the back of the sun visor
on the passenger side.Ashtray E00711400826CAUTIONlPut out matches and cigarettes before
they are placed in the ashtray.
l Don’t put papers and other things that
burn into your ashtrays. If you do, ciga-
rettes or other smoking materials could
set them on fire, causing damage.
l Always close the ashtray. If left open, oth-
er cigarette butts in the ashtray may be re-
kindled.
Type 1 (fixed position)
To use the ashtray, pull it out.
To remove the ashtray, pull it out while pressing
the stop (A).
Type 2 (moveable)
To use the moveable ashtray, open the lid.
Mounting position for moveable ashtray
The moveable ashtray can be fitted at the indicated
position.
For pleasant driving
5-36
5
Page 219 of 330
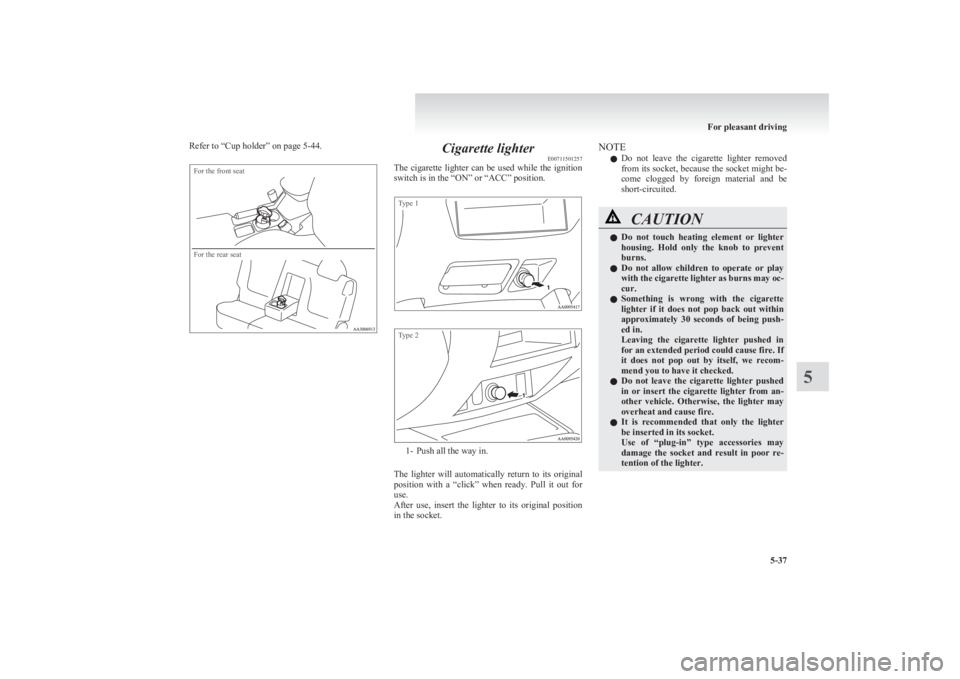
Refer to “Cup holder” on page 5-44.For the front seatFor the rear seat
Cigarette lighterE00711501257
The cigarette lighter can be used while the ignition
switch is in the “ON” or “ACC” position.
Type 1Type 2
1- Push all the way in.
The lighter will automatically return to its original
position with a “click” when ready. Pull it out for
use.
After use, insert the lighter to its original position
in the socket.
NOTE
l Do not leave the cigarette lighter removed
from its socket, because the socket might be-
come clogged by foreign material and be
short-circuited.CAUTIONl Do not touch heating element or lighter
housing. Hold only the knob to prevent
burns.
l Do not allow children to operate or play
with the cigarette lighter as burns may oc-
cur.
l Something is wrong with the cigarette
lighter if it does not pop back out within
approximately 30 seconds of being push-
ed in.
Leaving the cigarette lighter pushed in
for an extended period could cause fire. If
it does not pop out by itself, we recom-
mend you to have it checked.
l Do not leave the cigarette lighter pushed
in or insert the cigarette lighter from an-
other vehicle. Otherwise, the lighter may
overheat and cause fire.
l It is recommended that only the lighter
be inserted in its socket.
Use of “plug-in” type accessories may
damage the socket and result in poor re-
tention of the lighter.
For pleasant driving
5-37
5
Page 220 of 330
CAUTIONlWhen the cigarette lighter socket is used
as a power source for an electric appli-
ance, be sure that the electric appliance
operates at 12 V and has an electric ca-
pacity of 120 W or less. In addition, long
use of the electric appliance without run-
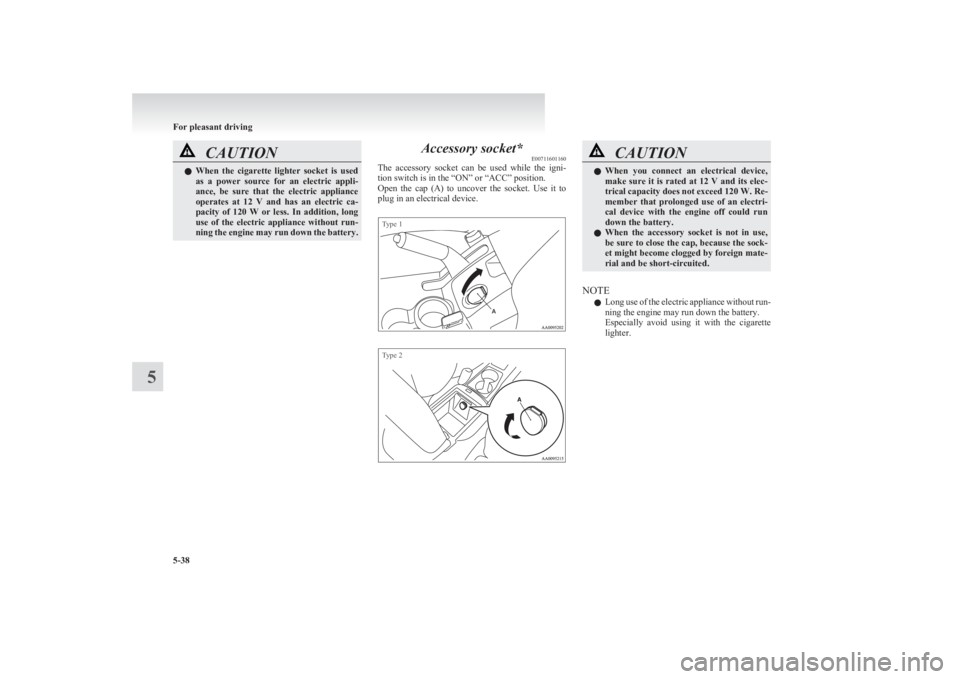
ning the engine may run down the battery.Accessory socket* E00711601160
The accessory socket can be used while the igni-
tion switch is in the “ON” or “ACC” position.
Open the cap (A) to uncover the socket. Use it to
plug in an electrical device.
Type 1Type 2
CAUTIONl When you connect an electrical device,
make sure it is rated at 12 V and its elec-
trical capacity does not exceed 120 W. Re-
member that prolonged use of an electri-
cal device with the engine off could run
down the battery.
l When the accessory socket is not in use,
be sure to close the cap, because the sock-
et might become clogged by foreign mate-
rial and be short-circuited.
NOTE
l Long use of the electric appliance without run-
ning the engine may run down the battery.
Especially avoid using it with the cigarette
lighter.
For pleasant driving
5-38
5