MITSUBISHI L200 2013 Owner's Manual (in English)
Manufacturer: MITSUBISHI, Model Year: 2013, Model line: L200, Model: MITSUBISHI L200 2013Pages: 362, PDF Size: 21.07 MB
Page 241 of 362
Switching between hands-free mode and private
mode E00761400036
The Bluetooth ®
2.0 interface can switch between
Hands-free mode (Hands-free calls) and private
mode (calls using cellular phone).
If you press the SPEECH button and say “Transfer
call” during a Hands-free call, you can stop the
Hands-free mode and talk in private mode.
To return to Hands-free mode, press the SPEECH
button again and say “Transfer call”.Phone book function E00763700017
The Bluetooth®
2.0 interface has 2 types of unique
phone books that are different from the phone book
stored in the cellular phone. They are the vehicle
phone book and the mobile phone book.
These phone books are used to register telephone
numbers and to make calls to desired numbers via
the voice recognition function.
NOTE l Disconnecting the battery cable will not de-
lete information registered in the phone book.
Vehicle phone book E00763800177
This phone book is used when making calls with
the voice recognition function.
Up to 32 names can be registered in the vehicle
phone book per language.
Also, each entry has 4 locations associated with:
home, work, mobile and other. You can register
one telephone number for each location.
You can register a desired name as a name for any
phone book entry registered in the vehicle phone
book.
Names and telephone numbers can be changed lat-
er on.
The vehicle phone book can be used with all paired
cellular phones.
To register a telephone number in the vehicle
phone book
You can register a telephone number in the vehicle
phone book in the following 2 ways: Reading out a
telephone number, and selecting and transferring 1
phone book entry from the phone book of the cellu-
lar phone.
To register by reading out a telephone number 1. Press the SPEECH button.
2. Say “Phone book.”
3. The voice guide will say “Select one of the
following: new entry, edit number, edit
name, list names, delete, erase all, or import
contact.” Say “New entry.”
4. The voice guide will say “Name please.” Say
your preferred name to register it.
NOTE l If the maximum number of entries are al-
ready registered, the voice guide will say
“The phone book is full. Would you like to
delete a name?” Say “Yes” if you want to de-
lete a registered name.
Say “No,” to return to the main menu.
5. When the name has been registered, the
voice guide will say “home, work, mobile, or
other?” Say the location for which you want
to register a telephone number.NOTE
l When the confirmation function is on, the
voice guide will say “
rect?” Answer “Yes.”
Answer “No” to return to location selection
in Step 5.
If a telephone number has been registered for
the selected location, the voice guide will say
“The current number is
number please.”
If you do not want to change the telephone
number, say “cancel” or the original number
to keep it registered.
6. The voice guide will say “Number please.”
Say the telephone number to register it.
NOTE l In the case of English, the system will recog-
nise both “zero” and “oh” (Letter “o”) for the
number “0.”
7. The voice guide will repeat the telephone
number you have just read, and then register
the number.
When the telephone number has been regis-
tered, the voice guide will say “Number
saved. Would you like to add another num-
ber for this entry?”
To add another telephone number for a new
location for the current entry, answer “Yes.”
The system will return to location selection
in Step 5.
Answer “No” to end the registration process
and return to the main menu.
For pleasant driving
5-61
OKTE13E1
5
Page 242 of 362
NOTEl When the confirmation function is on, after
repeating the telephone number you have
read, the voice guide will ask “Is this cor-
rect?” Answer “Yes.”
Answer “No” to return to telephone number
registration in step 6.
To select and transfer one phone book entry
from the phone book of the cellular phone
You can select 1 phone book entry from the phone
book of the cellular phone and register it in the ve-
hicle phone book.
NOTE l Transfer is not permitted unless the vehicle
is parked. Before transferring, make sure that
the vehicle is parked in a safe location.
l All or part of data may not be transferred,
even when the cellular phone supports Blue-
tooth ®
, depending on the compatibility of the
device.
l The maximum supported telephone number
length is 19 digits. Any telephone number of
20 digits or more will be truncated to the
first 19 digits.
l If telephone numbers contain characters oth-
er than 0 to 9, *, # or +, these characters are
deleted before the transfer.
l For the connection settings on the cellular
phone side, refer to the instructions for the
cellular phone.
1. Press the SPEECH button.
2. Say “Phone book.”3. The voice guide will say “Select one of the
following: new entry, edit number, edit
name, list names, delete, erase all, or import
contact.” Say “Import contact.”
4. The voice guide will say “Would you like to
import a single entry or all contacts?” Say
“Single entry.”
The Bluetooth ®
2.0 interface will become
ready to receive transferred phone book data.
NOTE l If the maximum number of entries are al-
ready registered, the voice guide will say
“The phone book is full. Would you like to
delete a name?” Say “Yes” if you want to de-
lete a registered name.
Say “No,” to return to the main menu.
5. After the voice guide says “Ready to receive
a contact from the phone. Only a home, a
work, and a mobile number can be impor-
ted,” the Bluetooth ®
2.0 interface will re-
ceive the phone book data from the Blue-
tooth ®
compatible cellular phone.
6. Operate the Bluetooth ®
compatible cellular
phone to set it up so that the phone book en-
try you want to register in the vehicle phone
book can be transferred to the Bluetooth ®
2.0
interface.NOTE
l If the Bluetooth ®
2.0 interface cannot recog-
nise the Bluetooth ®
compatible cellular
phone or the connection takes too much
time, the voice guide will say “Import con-
tact has timed out” and then the system will
cancel the registration. In such case, start
over again from Step 1.
l Pressing the
HANG-UP button or pressing
and holding the SPEECH button will cancel
the registration.
7. When the reception is complete, the voice
guide will say “
source> numbers have been imported. What
name would you like to use for these num-
bers?”
Say the name you want to register for this
phone book entry.
NOTE l If the entered name is already used for other
phone book entry or similar to a name used
for other phone book entry, that name cannot
be registered.
8. The voice guide will say “Adding
tem will ask if the name is correct. Answer
“Yes.”
Answer “No,” and the voice guide will say
“Name please.” Register a different name.
9. The voice guide will say “Numbers saved.”
For pleasant driving
5-62 OKTE13E1
5
Page 243 of 362
10.The voice guide will say “Would you like to
import another contact?”
Answer “Yes” if you want to continue with
the registration. You can continue to register
a new phone book entry from Step 5.
Answer “No,” to return to the main menu.
To change the content registered in the vehicle
phone book
You can change or delete a name or telephone num-
ber registered in the vehicle phone book.
You can also listen to the list of names registered
in the vehicle phone book.
NOTE l The system must have at least one entry.
[Editing a telephone number] 1. Press the SPEECH button.
2. Say “Phone book.”
3. The voice guide will say “Select one of the
following: new entry, edit number, edit
name, list names, delete, erase all, or import
contact.” Say “Edit number.”
4. The voice guide will say “Please say the
name of the entry you would like to edit, or
say list names.” Say the name of the phone
book entry you want to edit.
NOTE l Say “List names,” and the names registered
in the phone book will be read out in order.
Refer to “Listening to the list of registered
names” on page 5-61.5. The voice guide will say “Home, work, mo-
bile or other?” Select and say the location
where the telephone number you want to
change or add is registered.
When the confirmation function is on, the sys-
tem will check the target name and location
again. Answer “Yes” if you want to continue
with the editing.
Answer “No” to return to Step 3.
6. The voice guide will say “Number please.”
Say the telephone number you want to register.
NOTE l If the telephone number is already registered
in the selected location, the voice guide will
say “The current number is
phone number to change the current number.
7. The voice guide will repeat the telephone
number.
When the confirmation function is on, the sys-
tem will ask if the number is correct. Answer
“Yes.”
Answer “No” to return to Step 3.
8. Once the telephone number is registered, the
voice guide will say “Number saved” and
then the system will return to the main menu.
NOTE l If the location where a telephone number
was already registered has been overwritten
with a new number, the voice guide will say
“Number changed” and then the system will
return to the main menu.
[Editing a name] 1. Press the SPEECH button.2. Say “Phone book.”
3. The voice guide will say “Select one of the
following: new entry, edit number, edit
name, list names, delete, erase all, or import
contact.” Say “Edit name.”
4. The voice guide will say “Please say the
name of the entry you would like to edit, or
say list names.” Say the name you want to edit.
NOTE l Say “List names,” and the names registered
in the phone book will be read out in order.
Refer to “Vehicle phone book: Listening to
the list of registered names” on page 5-61.
5. The voice guide will say “Changing
When the confirmation function is on, the sys-
tem will ask if the name is correct. Answer
“Yes” if you want to continue with the edit-
ing based on this information.
Answer “No” to return to Step 4.
6. The voice guide will say “Name please.” Say
the new name you want to register.
7. The registered name will be changed. When the change is complete, the system
will return to the main menu.
[Listening to the list of registered names] 1. Press the SPEECH button.
2. Say “Phone book.”
3. The voice guide will say “Select one of the
following: new entry, edit number, edit
name, list names, delete, erase all, or import
contact.” Say “List names.”
4. Bluetooth ®
2.0 interface will read out the en-
tries in the phone book in order.
For pleasant driving
5-63
OKTE13E1
5
Page 244 of 362
5.When the voice guide is done reading the
list, it will say “End of list, would you like to
start from the beginning?”
When you want to check the list again from
the beginning, answer “Yes.”
When you are done, answer “No” to return to
the previous or main menu.
NOTE l You can call, edit or delete a name that is be-
ing read out.
Press the SPEECH button and say “Call” to
call the name, “Edit name” to edit it, or “De-
lete” to delete it.
The system will beep and then execute your
command.
l If you press the SPEECH button and say “Con-
tinue” or “Previous” while the list is being
read, the system will advance or rewind the
list. Say “Continue” to proceed to the next en-
try or “Previous” to return to the previous en-
try.
[Deleting a telephone number] 1. Press the SPEECH button.
2. Say “Phone book.”
3. The voice guide will say “Select one of the
following: new entry, edit number, edit
name, list names, delete, erase all, or import
contact.” Say “Delete.”
4. The voice guide will say “Please say the
name of the entry you would like to delete,
or say list names.” Say the name of the
phone book entry in which the telephone num-
ber you want to delete is registered.NOTE
l Say “List names,” and the names registered
in the phone book will be read out in order.
Refer to “Vehicle phone book: Listening to
the list of registered names” on page 5-61.
5. If only one telephone number is registered in
the selected phone book entry, the voice
guide will say “Deleting
If multiple telephone numbers are registered
in the selected phone book entry, the voice
guide will say “Would you like to delete
[home], [work], [mobile], [other], or all?”
Select the location to delete, and the voice
guide will say “Deleting
NOTE l To delete the telephone numbers from all lo-
cations, say “All.”
6. The system will ask if you really want to de-
lete the selected telephone number(s) to go
ahead with the deletion, answer “Yes.”
Answer “No,” the system will cancel delet-
ing the telephone number(s) and then return
to Step 4.
7. When the deletion of the telephone number
is completed, the voice guide will say
“
system will return to the main menu.
If all locations are deleted, the system will
say “
the name will be removed from the phone
book. If numbers still remain under the en-
try, the name will retain the other associated
numbers.
Erasing the phone bookYou can delete all registered information from the
vehicle phone book. 1. Press the SPEECH button.
2. Say “Phone book.”
3. The voice guide will say “Select one of the
following: new entry, edit number, edit
name, list names, delete, erase all, or import
contact.” Say “Erase all.”
4. For confirmation purposes, the voice guide
will ask “Are you sure you want to erase ev-
erything from your handsfree system phone
book?” Answer “Yes.”
Answer “No” to cancel the deletion of all reg-
istered information in the phone book and re-
turn to the main menu.
5. The voice guide will say “You are about to
delete everything from your hands-free sys-
tem phone book. Do you want to continue?”
Answer “Yes” to continue.
Answer “No” to cancel the deletion of all reg-
istered information in the phone book and re-
turn to the main menu.
6. The voice guide will say “Please wait, eras-
ing the handsfree system phone book” and
then the system will delete all data in the
phone book.
When the deletion is complete, the voice
guide will say “Hands-free system phone
book erased” and then the system will return
to the main menu.Mobile phone book E00763900048
All entries in the phone book stored in the cellular
phone can be transferred in a batch and registered
in the mobile phone book.
Up to 7 mobile phone books, each containing up to
1,000 names, can be registered.
For pleasant driving
5-64 OKTE13E1
5
Page 245 of 362
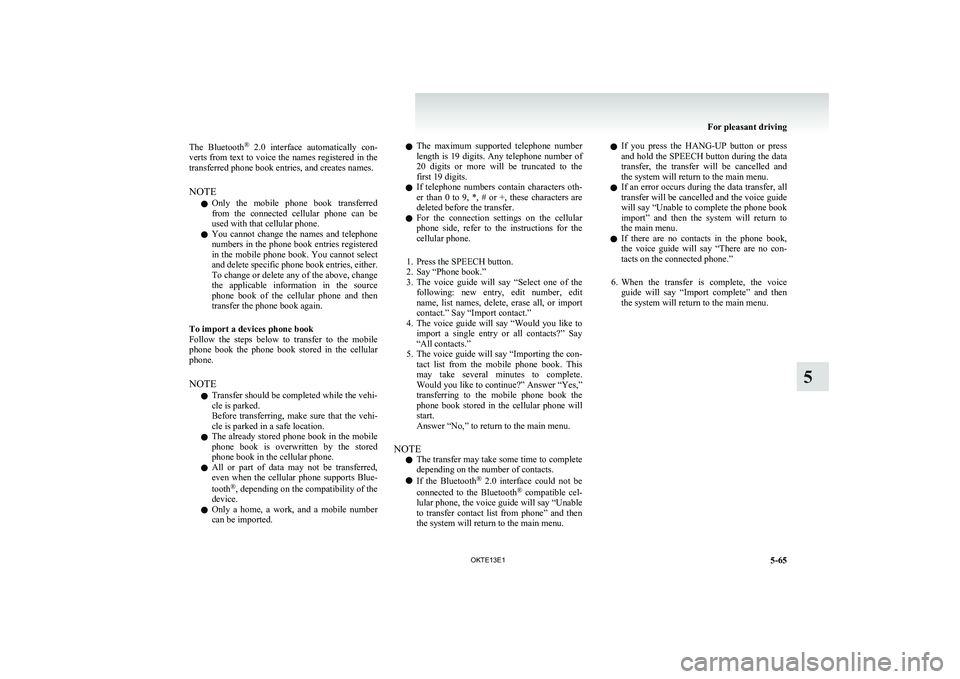
The Bluetooth®
2.0 interface automatically con-
verts from text to voice the names registered in the
transferred phone book entries, and creates names.
NOTE l Only the mobile phone book transferred
from the connected cellular phone can be
used with that cellular phone.
l You cannot change the names and telephone
numbers in the phone book entries registered
in the mobile phone book. You cannot select
and delete specific phone book entries, either.
To change or delete any of the above, change
the applicable information in the source
phone book of the cellular phone and then
transfer the phone book again.
To import a devices phone book
Follow the steps below to transfer to the mobile
phone book the phone book stored in the cellular
phone.
NOTE l Transfer should be completed while the vehi-
cle is parked.
Before transferring, make sure that the vehi-
cle is parked in a safe location.
l The already stored phone book in the mobile
phone book is overwritten by the stored
phone book in the cellular phone.
l All or part of data may not be transferred,
even when the cellular phone supports Blue-
tooth ®
, depending on the compatibility of the
device.
l Only a home, a work, and a mobile number
can be imported.l The maximum supported telephone number
length is 19 digits. Any telephone number of
20 digits or more will be truncated to the
first 19 digits.
l If telephone numbers contain characters oth-
er than 0 to 9, *, # or +, these characters are
deleted before the transfer.
l For the connection settings on the cellular
phone side, refer to the instructions for the
cellular phone.
1. Press the SPEECH button.
2. Say “Phone book.”
3. The voice guide will say “Select one of the
following: new entry, edit number, edit
name, list names, delete, erase all, or import
contact.” Say “Import contact.”
4. The voice guide will say “Would you like to
import a single entry or all contacts?” Say
“All contacts.”
5. The voice guide will say “Importing the con-
tact list from the mobile phone book. This
may take several minutes to complete.
Would you like to continue?” Answer “Yes,”
transferring to the mobile phone book the
phone book stored in the cellular phone will
start.
Answer “No,” to return to the main menu.
NOTE l The transfer may take some time to complete
depending on the number of contacts.
l If the Bluetooth ®
2.0 interface could not be
connected to the Bluetooth ®
compatible cel-
lular phone, the voice guide will say “Unable
to transfer contact list from phone” and then
the system will return to the main menu.l If you press the
HANG-UP button or press
and hold the SPEECH button during the data
transfer, the transfer will be cancelled and
the system will return to the main menu.
l If an error occurs during the data transfer, all
transfer will be cancelled and the voice guide
will say “Unable to complete the phone book
import” and then the system will return to
the main menu.
l If there are no contacts in the phone book,
the voice guide will say “There are no con-
tacts on the connected phone.”
6. When the transfer is complete, the voice
guide will say “Import complete” and then
the system will return to the main menu.
For pleasant driving
5-65
OKTE13E1
5
Page 246 of 362
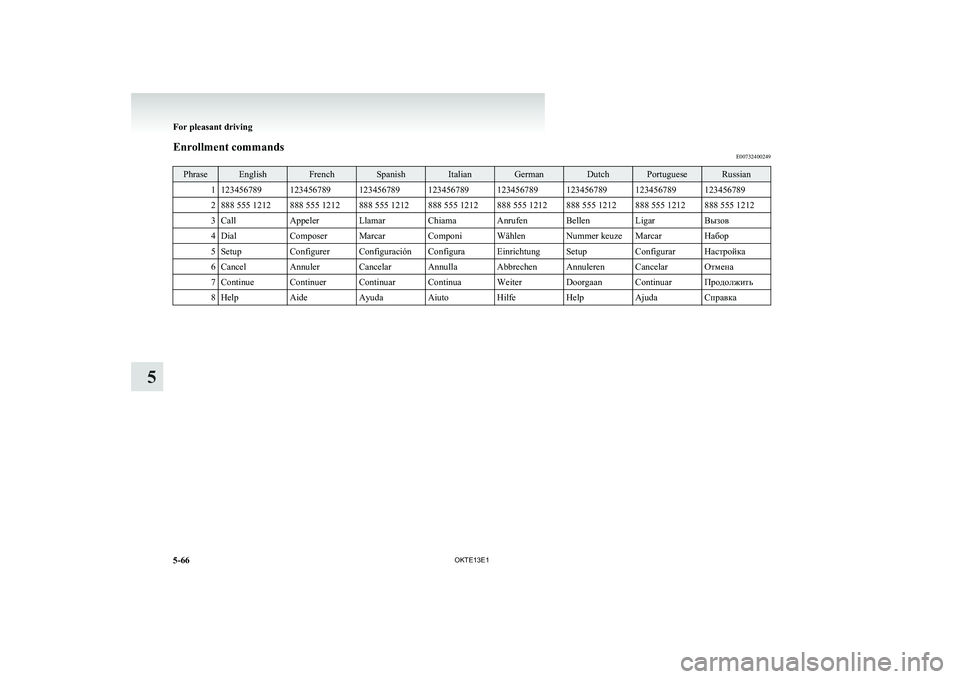
Enrollment commandsE00732400249PhraseEnglishFrenchSpanishItalianGermanDutchPortugueseRussian11234567891234567891234567891234567891234567891234567891234567891234567892888 555 1212888 555 1212888 555 1212888 555 1212888 555 1212888 555 1212888 555 1212888 555 12123CallAppelerLlamarChiamaAnrufenBellenLigarВызов4DialComposerMarcarComponiWählenNummer keuzeMarcarНабор5SetupConfigurerConfiguraciónConfiguraEinrichtungSetupConfigurarНастройка6CancelAnnulerCancelarAnnullaAbbrechenAnnulerenCancelarОтмена7ContinueContinuerContinuarContinuaWeiterDoorgaanContinuarПродолжить8HelpAideAyudaAiutoHilfeHelpAjudaСправка
For pleasant driving
5-66OKTE13E1
5
Page 247 of 362
USB input terminal*E00761900015
You can connect your USB memory device or
iPod* to play music files stored in the USB memo-
ry device or iPod.
The following explains how to connect and remove
a USB memory device or iPod.
Refer to the following sections for details on how
to play music files:
Refer to “To play tracks from USB device” on
page 5-27.
*: “iPod” is a registered trademark of Apple Inc. in
the United States and other countries.How to connect a USB memory device E00762000202
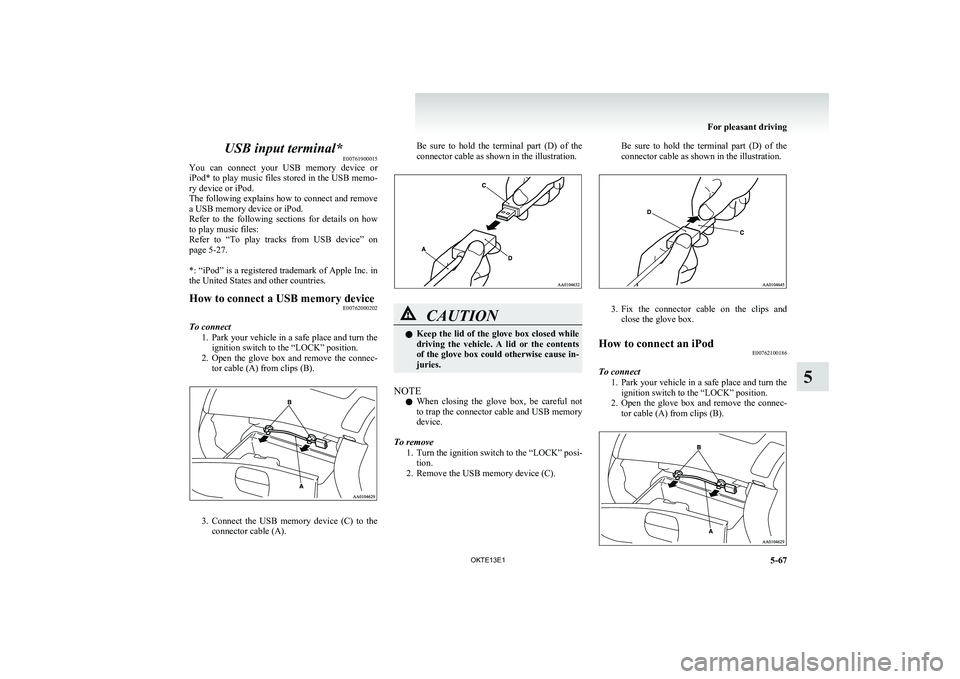
To connect
1.Park your vehicle in a safe place and turn the
ignition switch to the “LOCK” position.
2. Open the glove box and remove the connec-
tor cable (A) from clips (B).
3. Connect the USB memory device (C) to the
connector cable (A).
Be sure to hold the terminal part (D) of the
connector cable as shown in the illustration.CAUTIONl Keep the lid of the glove box closed while
driving the vehicle. A lid or the contents
of the glove box could otherwise cause in-
juries.
NOTE
l When closing the glove box, be careful not
to trap the connector cable and USB memory
device.
To remove 1.Turn the ignition switch to the “LOCK” posi-
tion.
2. Remove the USB memory device (C).
Be sure to hold the terminal part (D) of the
connector cable as shown in the illustration.
3. Fix the connector cable on the clips and
close the glove box.
How to connect an iPod E00762100186
To connect
1.Park your vehicle in a safe place and turn the
ignition switch to the “LOCK” position.
2. Open the glove box and remove the connec-
tor cable (A) from clips (B).
For pleasant driving
5-67
OKTE13E1
5
Page 248 of 362
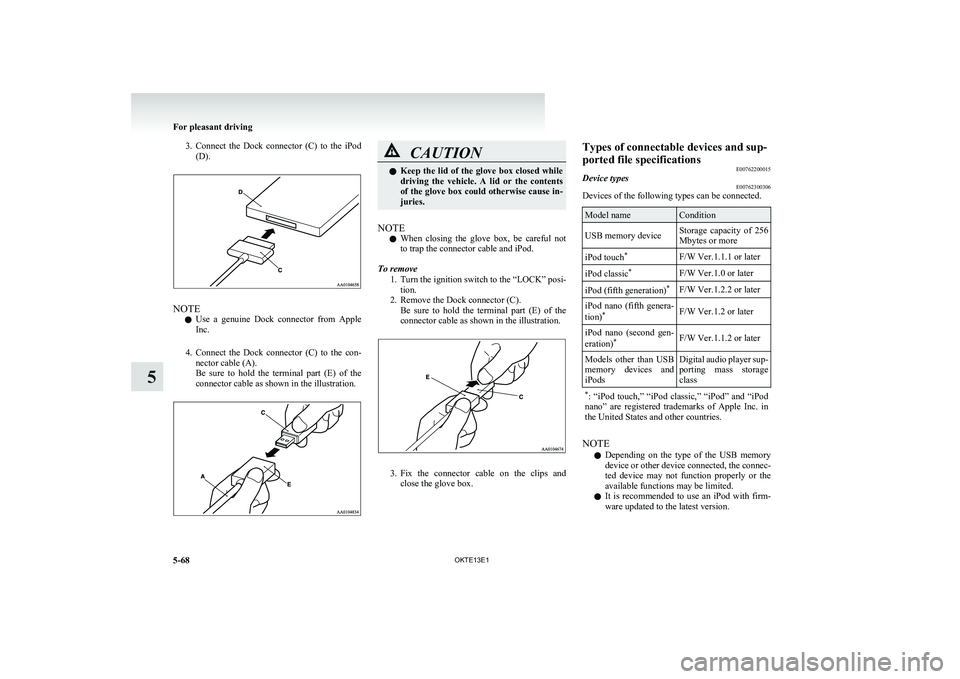
3.Connect the Dock connector (C) to the iPod
(D).
NOTE
l Use a genuine Dock connector from Apple
Inc.
4. Connect the Dock connector (C) to the con-
nector cable (A).
Be sure to hold the terminal part (E) of the
connector cable as shown in the illustration.
CAUTIONl Keep the lid of the glove box closed while
driving the vehicle. A lid or the contents
of the glove box could otherwise cause in-
juries.
NOTE
l When closing the glove box, be careful not
to trap the connector cable and iPod.
To remove 1.Turn the ignition switch to the “LOCK” posi-
tion.
2. Remove the Dock connector (C). Be sure to hold the terminal part (E) of the
connector cable as shown in the illustration.
3. Fix the connector cable on the clips and
close the glove box.
Types of connectable devices and sup-
ported file specifications E00762200015Device typesE00762300306
Devices of the following types can be connected.
Model nameConditionUSB memory deviceStorage capacity of 256
Mbytes or moreiPod touch *F/W Ver.1.1.1 or lateriPod classic *F/W Ver.1.0 or lateriPod (fifth generation) *F/W Ver.1.2.2 or lateriPod nano (fifth genera-
tion) *F/W Ver.1.2 or lateriPod nano (second gen-
eration) *F/W Ver.1.1.2 or laterModels other than USB
memory devices and
iPodsDigital audio player sup-
porting mass storage
class* : “iPod touch,” “iPod classic,” “iPod” and “iPod
nano” are registered trademarks of Apple Inc. in
the United States and other countries.
NOTE
l Depending on the type of the USB memory
device or other device connected, the connec-
ted device may not function properly or the
available functions may be limited.
l It is recommended to use an iPod with firm-
ware updated to the latest version.
For pleasant driving
5-68 OKTE13E1
5
Page 249 of 362
lYou can charge your iPod by connecting it to
the USB input terminal when the ignition
switch is in the “ACC” or “ON” position.
l Do not keep your USB memory device or
iPod in your vehicle.
l It is recommended that you back up files in
case of data damage.
l Do not connect to the USB input terminal
any device (hard disk, card reader, memory
reader, etc.) other than the connectable devi-
ces specified in the previous section. The de-
vice and/or data may be damaged. If any of
these devices was connected by mistake, re-
move it after turning the ignition switch to
the “LOCK” position.File specifications E00762400017
You can play music files of the following specifica-
tions that are saved in a USB memory device or oth-
er device supporting mass storage class.
ItemConditionFile formatMP3, WMA, AAC,
WAVMaximum number of
levels (including the
root)Level 8Number of folders700Number of files65,535Sun visors E00711200693
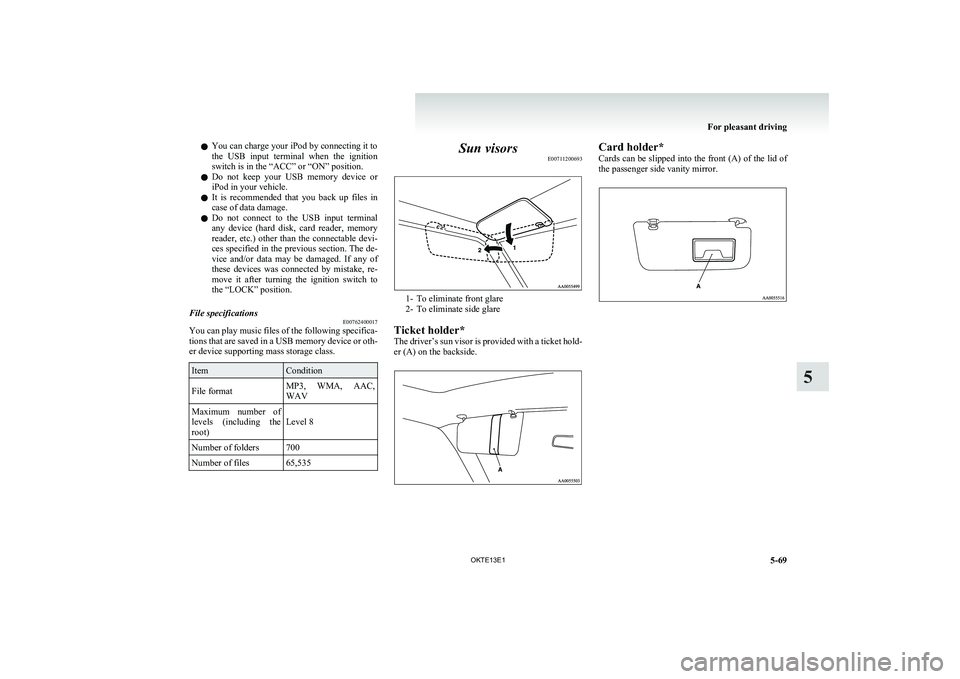
1- To eliminate front glare
2- To eliminate side glare
Ticket holder*
The driver’s sun visor is provided with a ticket hold-
er (A) on the backside.
Card holder*
Cards can be slipped into the front (A) of the lid of
the passenger side vanity mirror.
For pleasant driving
5-69
OKTE13E1
5
Page 250 of 362
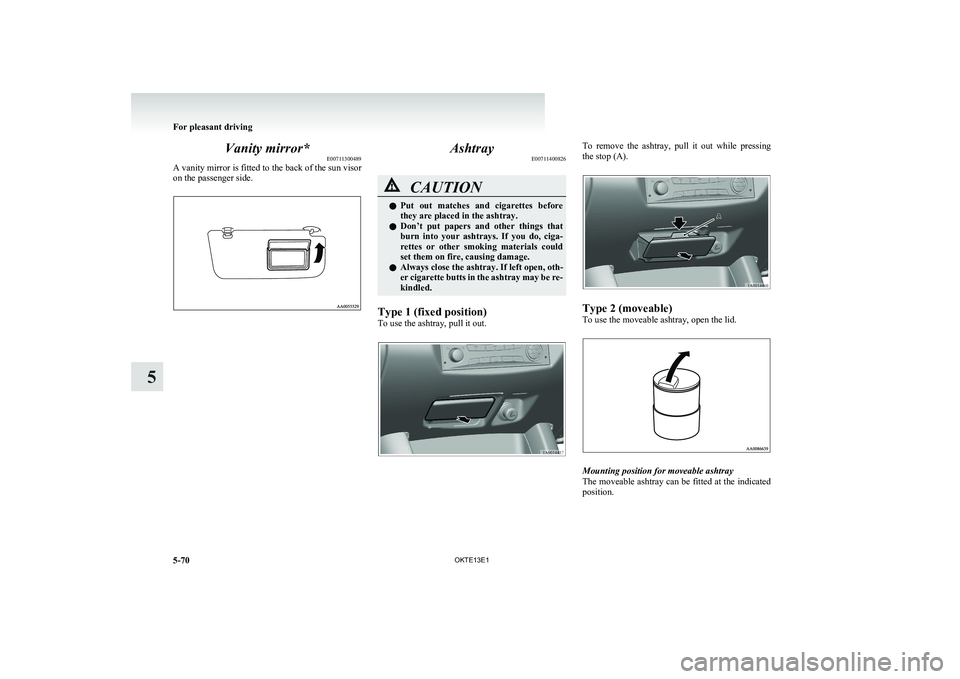
Vanity mirror*E00711300489
A vanity mirror is fitted to the back of the sun visor
on the passenger side.Ashtray E00711400826CAUTIONlPut out matches and cigarettes before
they are placed in the ashtray.
l Don’t put papers and other things that
burn into your ashtrays. If you do, ciga-
rettes or other smoking materials could
set them on fire, causing damage.
l Always close the ashtray. If left open, oth-
er cigarette butts in the ashtray may be re-
kindled.
Type 1 (fixed position)
To use the ashtray, pull it out.
To remove the ashtray, pull it out while pressing
the stop (A).
Type 2 (moveable)
To use the moveable ashtray, open the lid.
Mounting position for moveable ashtray
The moveable ashtray can be fitted at the indicated
position.
For pleasant driving
5-70 OKTE13E1
5