service MITSUBISHI L200 2014 (in English) Owner's Guide
[x] Cancel search | Manufacturer: MITSUBISHI, Model Year: 2014, Model line: L200, Model: MITSUBISHI L200 2014Pages: 362, PDF Size: 20.97 MB
Page 115 of 362
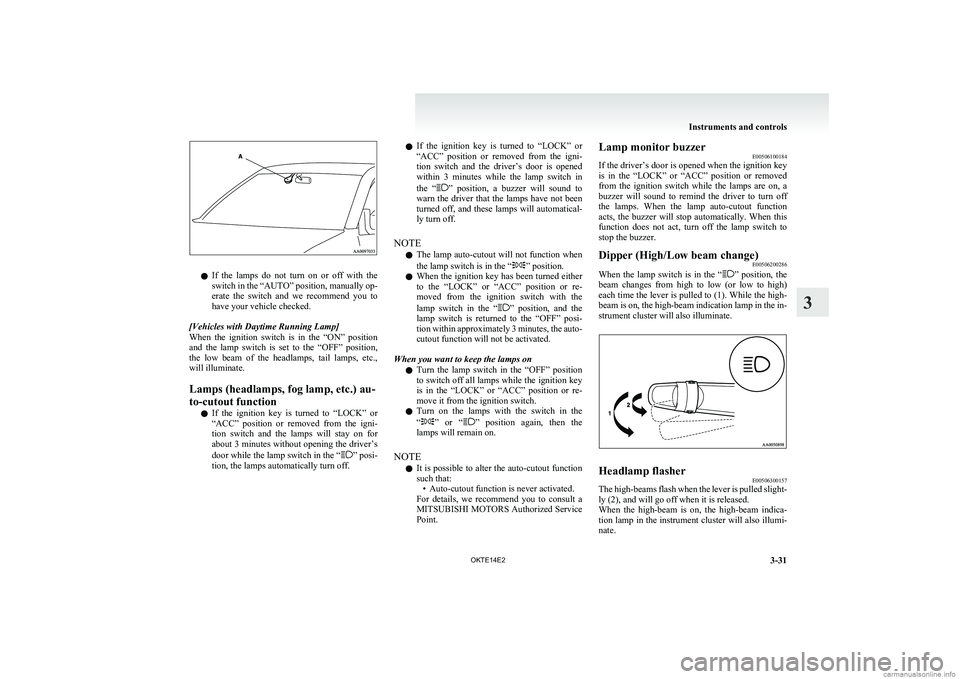
lIf the lamps do not turn on or off with the
switch in the “AUTO” position, manually op-
erate the switch and we recommend you to
have your vehicle checked.
[Vehicles with Daytime Running Lamp]
When the ignition switch is in the “ON” position
and the lamp switch is set to the “OFF” position,
the low beam of the headlamps, tail lamps, etc.,
will illuminate.
Lamps (headlamps, fog lamp, etc.) au-
to-cutout function
l If the ignition key is turned to “LOCK” or
“ACC” position or removed from the igni-
tion switch and the lamps will stay on for
about 3 minutes without opening the driver’s
door while the lamp switch in the “
” posi-
tion, the lamps automatically turn off.
l If the ignition key is turned to “LOCK” or
“ACC” position or removed from the igni-
tion switch and the driver’s door is opened
within 3 minutes while the lamp switch in
the “
” position, a buzzer will sound to
warn the driver that the lamps have not been
turned off, and these lamps will automatical-
ly turn off.
NOTE l The lamp auto-cutout will not function when
the lamp switch is in the “
” position.
l When the ignition key has been turned either
to the “LOCK” or “ACC” position or re-
moved from the ignition switch with the
lamp switch in the “
” position, and the
lamp switch is returned to the “OFF” posi-
tion within approximately 3 minutes, the auto-
cutout function will not be activated.
When you want to keep the lamps on l Turn the lamp switch in the “OFF” position
to switch off all lamps while the ignition key
is in the “LOCK” or “ACC” position or re-
move it from the ignition switch.
l Turn on the lamps with the switch in the
“
” or “” position again, then the
lamps will remain on.
NOTE l It is possible to alter the auto-cutout function
such that: • Auto-cutout function is never activated.
For details, we recommend you to consult a
MITSUBISHI MOTORS Authorized Service
Point.
Lamp monitor buzzer E00506100184
If the driver’s door is opened when the ignition key
is in the “LOCK” or “ACC” position or removed
from the ignition switch while the lamps are on, a
buzzer will sound to remind the driver to turn off
the lamps. When the lamp auto-cutout function
acts, the buzzer will stop automatically. When this
function does not act, turn off the lamp switch to
stop the buzzer.Dipper (High/Low beam change) E00506200286
When the lamp switch is in the “” position, the
beam changes from high to low (or low to high)
each time the lever is pulled to (1). While the high-
beam is on, the high-beam indication lamp in the in-
strument cluster will also illuminate.
Headlamp flasher E00506300157
The high-beams flash when the lever is pulled slight-
ly (2), and will go off when it is released.
When the high-beam is on, the high-beam indica-
tion lamp in the instrument cluster will also illumi-
nate.
Instruments and controls
3-31
OKTE14E2
3
Page 118 of 362
lIt is possible to activate the following func-
tions. For further information, we recom-
mend you to consult a MITSUBISHI
MOTORS Authorized Service Point. •Flashing of the turn-signal lamps and the
indication lamp in the instrument cluster
when the lever is operated with the igni-
tion switch in the “ACC” position
• Flashing of the turn-signal lamps and the
indication lamp in the instrument cluster
three times when you move the lever to
(2) slightly then release it
• The time required to operate the lever for
the 3-flash function can be adjusted.Hazard warning flasher switch E00506600903
Use the hazard warning flasher switch when the ve-
hicle has to be parked on the road for any emergency.
The hazard warning flashers can always be operat-
ed, regardless of the position of the ignition key.
Push the switch to turn on the hazard warning flash-
ers; push the switch again to turn them off.
When this switch is operated, all turn-signal lamps
flash continuously, as do the turn-signal indication
lamps in the instrument cluster.
NOTE
l If the lamps are kept flashing for a long time,
the battery will be discharged, resulting in
hard engine starting or no start condition.
l If the lamp flashes unusually quickly, the
bulb in a turn-signal lamp may have burned
out.
We recommend you to have the vehicle in-
spected.
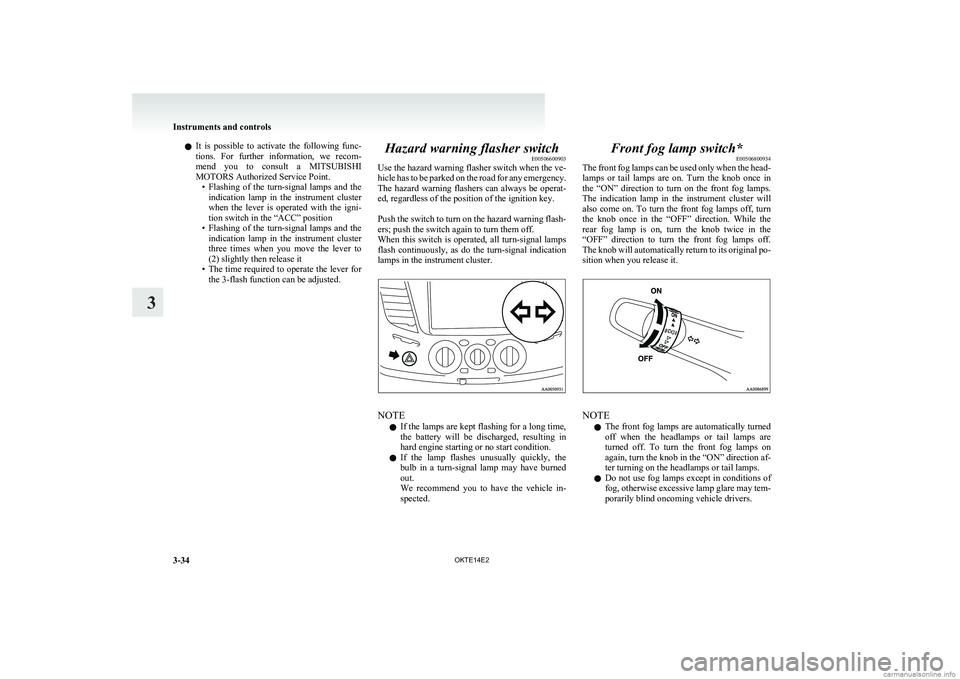
Front fog lamp switch* E00506800934
The front fog lamps can be used only when the head-
lamps or tail lamps are on. Turn the knob once in
the “ON” direction to turn on the front fog lamps.
The indication lamp in the instrument cluster will
also come on. To turn the front fog lamps off, turn
the knob once in the “OFF” direction. While the
rear fog lamp is on, turn the knob twice in the
“OFF” direction to turn the front fog lamps off.
The knob will automatically return to its original po-
sition when you release it.
NOTE
l The front fog lamps are automatically turned
off when the headlamps or tail lamps are
turned off. To turn the front fog lamps on
again, turn the knob in the “ON” direction af-
ter turning on the headlamps or tail lamps.
l Do not use fog lamps except in conditions of
fog, otherwise excessive lamp glare may tem-
porarily blind oncoming vehicle drivers.
Instruments and controls
3-34 OKTE14E2
3
Page 120 of 362
Wiper and washer switchE00507101191CAUTIONlIf the washer is used in cold weather, the
washer fluid sprayed against the glass
may freeze, which may hinder visibility.
Warm the glass with the defroster or rear
window demister before using the washer.Windscreen wipers E00516900303
Except for vehicles equipped with rain sensor
The windscreen wipers can be operated with the ig-
nition switch in the “ON” or “ACC” position.
If the blades are frozen to the windscreen, do not
operate the wipers until the ice has melted and the
blades are freed, otherwise the wiper motor may be
damaged.
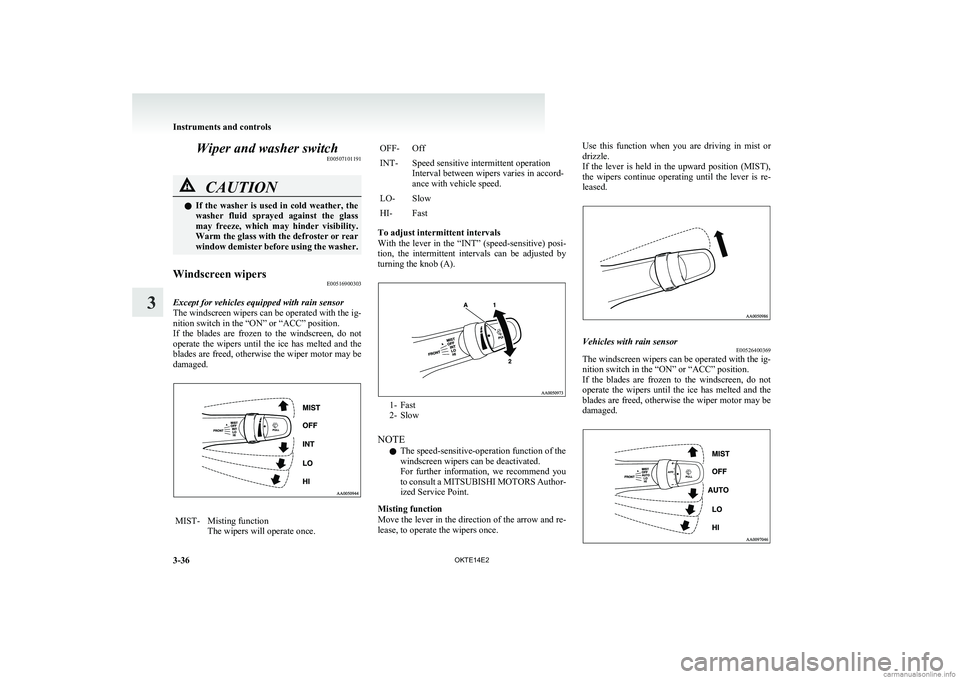
MIST-Misting function
The wipers will operate once.OFF-OffINT-Speed sensitive intermittent operation
Interval between wipers varies in accord-
ance with vehicle speed.LO-SlowHI-Fast
To adjust intermittent intervals
With the lever in the “INT” (speed-sensitive) posi-
tion, the intermittent intervals can be adjusted by
turning the knob (A).
1- Fast
2- Slow
NOTE l The speed-sensitive-operation function of the
windscreen wipers can be deactivated.
For further information, we recommend you
to consult a MITSUBISHI MOTORS Author-
ized Service Point.
Misting function
Move the lever in the direction of the arrow and re-
lease, to operate the wipers once.
Use this function when you are driving in mist or
drizzle.
If the lever is held in the upward position (MIST),
the wipers continue operating until the lever is re-
leased.Vehicles with rain sensor E00526400369
The windscreen wipers can be operated with the ig-
nition switch in the “ON” or “ACC” position.
If the blades are frozen to the windscreen, do not
operate the wipers until the ice has melted and the
blades are freed, otherwise the wiper motor may be
damaged.
Instruments and controls
3-36 OKTE14E2
3
Page 121 of 362
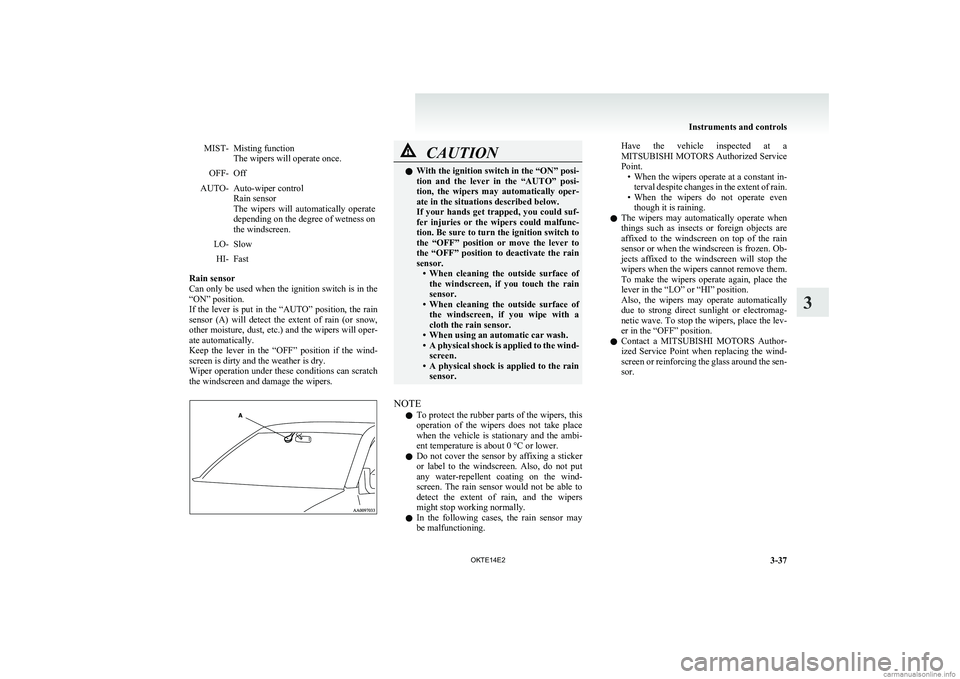
MIST-Misting function
The wipers will operate once.OFF-OffAUTO-Auto-wiper control
Rain sensor
The wipers will automatically operate
depending on the degree of wetness on
the windscreen.LO-SlowHI-Fast
Rain sensor
Can only be used when the ignition switch is in the
“ON” position.
If the lever is put in the “AUTO” position, the rain
sensor (A) will detect the extent of rain (or snow,
other moisture, dust, etc.) and the wipers will oper-
ate automatically.
Keep the lever in the “OFF” position if the wind-
screen is dirty and the weather is dry.
Wiper operation under these conditions can scratch
the windscreen and damage the wipers.
CAUTIONl With the ignition switch in the “ON” posi-
tion and the lever in the “AUTO” posi-
tion, the wipers may automatically oper-
ate in the situations described below.
If your hands get trapped, you could suf-
fer injuries or the wipers could malfunc-
tion. Be sure to turn the ignition switch to
the “OFF” position or move the lever to
the “OFF” position to deactivate the rain
sensor. •When cleaning the outside surface of
the windscreen, if you touch the rain
sensor.
• When cleaning the outside surface of
the windscreen, if you wipe with a
cloth the rain sensor.
• When using an automatic car wash.
• A physical shock is applied to the wind-
screen.
• A physical shock is applied to the rain
sensor.
NOTE
l To protect the rubber parts of the wipers, this
operation of the wipers does not take place
when the vehicle is stationary and the ambi-
ent temperature is about 0 °C or lower.
l Do not cover the sensor by affixing a sticker
or label to the windscreen. Also, do not put
any water-repellent coating on the wind-
screen. The rain sensor would not be able to
detect the extent of rain, and the wipers
might stop working normally.
l In the following cases, the rain sensor may
be malfunctioning.
Have the vehicle inspected at a
MITSUBISHI MOTORS Authorized Service
Point. •When the wipers operate at a constant in-
terval despite changes in the extent of rain.
• When the wipers do not operate even
though it is raining.
l The wipers may automatically operate when
things such as insects or foreign objects are
affixed to the windscreen on top of the rain
sensor or when the windscreen is frozen. Ob-
jects affixed to the windscreen will stop the
wipers when the wipers cannot remove them.
To make the wipers operate again, place the
lever in the “LO” or “HI” position.
Also, the wipers may operate automatically
due to strong direct sunlight or electromag-
netic wave. To stop the wipers, place the lev-
er in the “OFF” position.
l Contact a
MITSUBISHI MOTORS Author-
ized Service Point when replacing the wind-
screen or reinforcing the glass around the sen-
sor.
Instruments and controls
3-37
OKTE14E2
3
Page 122 of 362
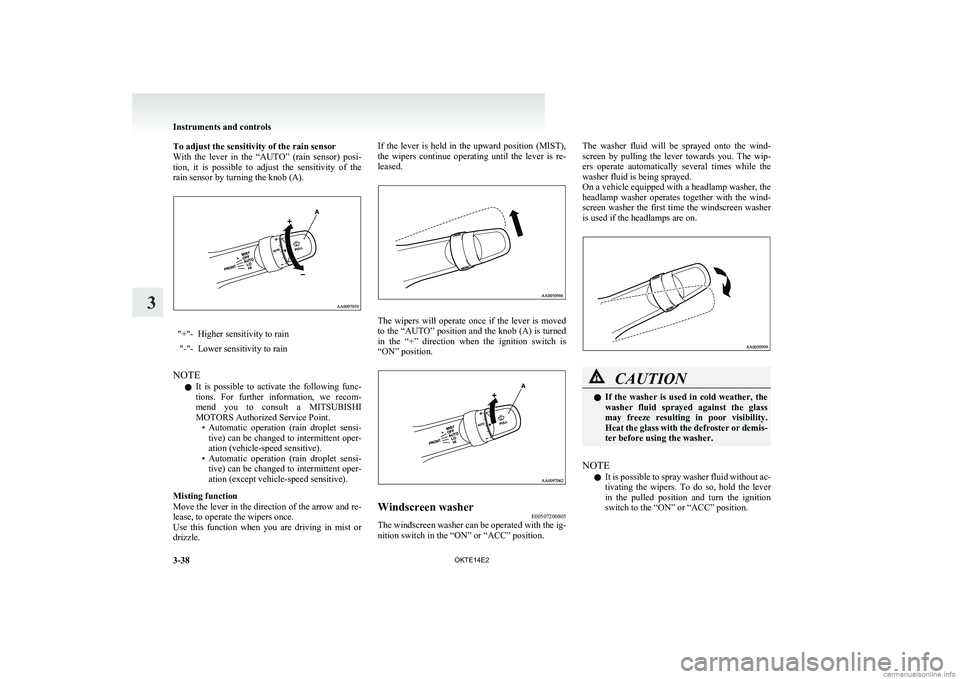
To adjust the sensitivity of the rain sensor
With the lever in the “AUTO” (rain sensor) posi-
tion, it is possible to adjust the sensitivity of the
rain sensor by turning the knob (A)."+"-Higher sensitivity to rain"-"-Lower sensitivity to rain
NOTE
l It is possible to activate the following func-
tions. For further information, we recom-
mend you to consult a MITSUBISHI
MOTORS Authorized Service Point. •Automatic operation (rain droplet sensi-
tive) can be changed to intermittent oper-
ation (vehicle-speed sensitive).
• Automatic operation (rain droplet sensi-
tive) can be changed to intermittent oper-
ation (except vehicle-speed sensitive).
Misting function
Move the lever in the direction of the arrow and re-
lease, to operate the wipers once.
Use this function when you are driving in mist or
drizzle.
If the lever is held in the upward position (MIST),
the wipers continue operating until the lever is re-
leased.
The wipers will operate once if the lever is moved
to the “AUTO” position and the knob (A) is turned
in the “+” direction when the ignition switch is
“ON” position.
Windscreen washer E00507200805
The windscreen washer can be operated with the ig-
nition switch in the “ON” or “ACC” position.
The washer fluid will be sprayed onto the wind-
screen by pulling the lever towards you. The wip-
ers operate automatically several times while the
washer fluid is being sprayed.
On a vehicle equipped with a headlamp washer, the
headlamp washer operates together with the wind-
screen washer the first time the windscreen washer
is used if the headlamps are on.CAUTIONl If the washer is used in cold weather, the
washer fluid sprayed against the glass
may freeze resulting in poor visibility.
Heat the glass with the defroster or demis-
ter before using the washer.
NOTE
l It is possible to spray washer fluid without ac-
tivating the wipers. To do so, hold the lever
in the pulled position and turn the ignition
switch to the “ON” or “ACC” position.
Instruments and controls
3-38 OKTE14E2
3
Page 123 of 362
lIt is possible to cause the wipers never to op-
erate when washer fluid is sprayed. For fur-
ther information, we recommend you to con-
sult a MITSUBISHI MOTORS Authorized
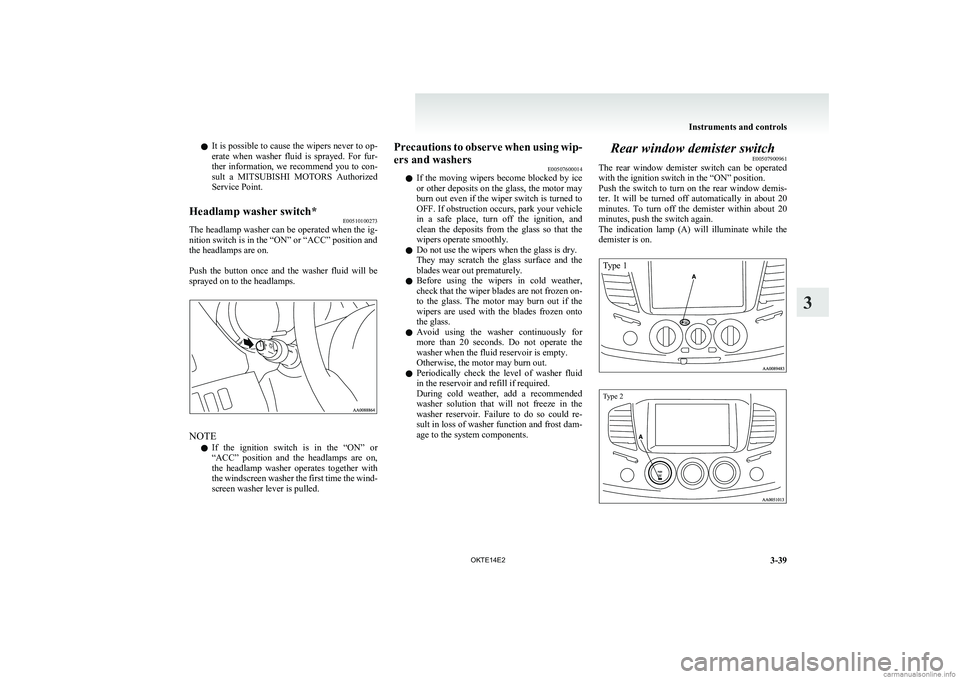
Service Point.Headlamp washer switch* E00510100273
The headlamp washer can be operated when the ig-
nition switch is in the “ON” or “ACC” position and
the headlamps are on.
Push the button once and the washer fluid will be
sprayed on to the headlamps.
NOTE
l If the ignition switch is in the “ON” or
“ACC” position and the headlamps are on,
the headlamp washer operates together with
the windscreen washer the first time the wind-
screen washer lever is pulled.
Precautions to observe when using wip-
ers and washers E00507600014
l If the moving wipers become blocked by ice
or other deposits on the glass, the motor may
burn out even if the wiper switch is turned to
OFF. If obstruction occurs, park your vehicle
in a safe place, turn off the ignition, and
clean the deposits from the glass so that the
wipers operate smoothly.
l Do not use the wipers when the glass is dry.
They may scratch the glass surface and the
blades wear out prematurely.
l Before using the wipers in cold weather,
check that the wiper blades are not frozen on-
to the glass. The motor may burn out if the
wipers are used with the blades frozen onto
the glass.
l Avoid using the washer continuously for
more than 20 seconds. Do not operate the
washer when the fluid reservoir is empty.
Otherwise, the motor may burn out.
l Periodically check the level of washer fluid
in the reservoir and refill if required.
During cold weather, add a recommended
washer solution that will not freeze in the
washer reservoir. Failure to do so could re-
sult in loss of washer function and frost dam-
age to the system components.Rear window demister switch E00507900961
The rear window demister switch can be operated
with the ignition switch in the “ON” position.
Push the switch to turn on the rear window demis-
ter. It will be turned off automatically in about 20
minutes. To turn off the demister within about 20
minutes, push the switch again.
The indication lamp (A) will illuminate while the
demister is on.
Type 1Type 2
Instruments and controls
3-39
OKTE14E2
3
Page 126 of 362
Economical drivingE00600100620
For economical driving, there are some technical re-
quirements that have to be met. The prerequisite
for low fuel consumption is a properly adjusted en-
gine. In order to achieve longer life of the vehicle
and the most economical operation, we recommend
you to have the vehicle checked at regular intervals
in accordance with the service standards.
Fuel economy and generation of exhaust gas and
noise are highly influenced by personal driving hab-
its as well as the particular operating conditions.
The following points should be observed in order
to minimize wear of brakes, tyres and engine as
well as to reduce environmental pollution.
Starting
Avoid rapid acceleration and sudden starts; such op-
eration will result in higher fuel consumption.
Shifting
Shift only at an appropriate speed and engine
speed. Always use the highest gear possible.
The transfer shift lever should be set to “2H” when
driving 4WD vehicles on normal roads and express
ways to obtain best possible fuel economy.
City traffic
Frequent starting and stopping increases the aver-
age fuel consumption. Use roads with smooth traf-
fic flow whenever possible. When driving on con-
gested roads, avoid use of a low gear at high en-
gine speeds.
Idling
The vehicle consumes fuel even during idling.
Avoid extended idling whenever possible.Speed
The higher the vehicle speed, the more fuel con-
sumed. Avoid driving at full speed. Even a slight re-
lease of the accelerator pedal will save a significant
amount of fuel.
Tyre inflation pressure
Check the tyre inflation pressures at regular inter-
vals. Low tyre inflation pressure increases road re-
sistance and fuel consumption. In addition, low
tyre pressures adversely affect tyre wear and driv-
ing stability.
Load
Do not drive with unnecessary articles in the cargo
area. Especially during city driving where frequent
starting and stopping is necessary, the increased
weight of the vehicle will greatly affect fuel con-
sumption.
Cold engine starting
Starting of a cold engine consumes more fuel.
Unnecessary fuel consumption is also caused by
keeping a hot engine running. After the engine is
started, commence driving as soon as possible.
Air conditioning*
The use of the air conditioning will increase the
fuel consumption.Driving, alcohol and drugs E00600200012
Driving after drinking alcohol is one of the most fre-
quent causes of accidents.
Your driving ability can be seriously impaired even
with blood alcohol levels far below the legal mini-
mum. If you have been drinking, don’t drive. Ride
with a designated non-drinking driver, call a cab or
a friend, or use public transportation.
Drinking coffee or taking a cold shower will not
make you sober.
Similarly, prescription and nonprescription drugs af-
fect your alertness, perception and reaction time.
Consult with your doctor or pharmacist before driv-
ing while under the influence of any of these medi-
cations.WARNINGl NEVER DRINK AND DRIVE.
Your perceptions are less accurate, your
reflexes are slower and your judgment is
impaired.
Starting and driving
4-02 OKTE14E2
4
Page 138 of 362
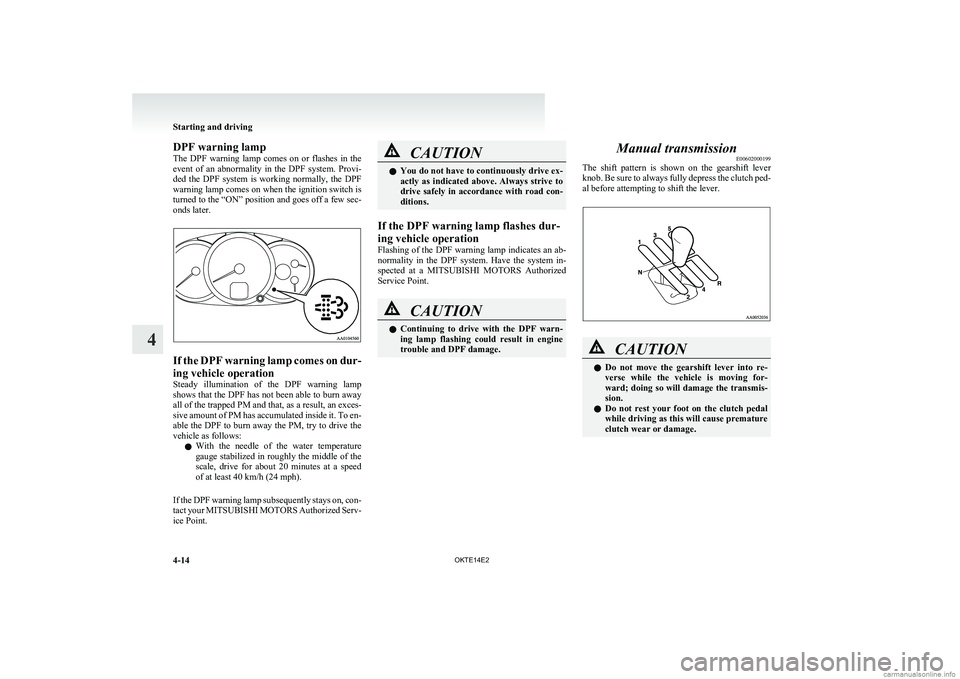
DPF warning lamp
The DPF warning lamp comes on or flashes in the
event of an abnormality in the DPF system. Provi-
ded the DPF system is working normally, the DPF
warning lamp comes on when the ignition switch is
turned to the “ON” position and goes off a few sec-
onds later.
If the DPF warning lamp comes on dur-
ing vehicle operation
Steady illumination of the DPF warning lamp
shows that the DPF has not been able to burn away
all of the trapped PM and that, as a result, an exces-
sive amount of PM has accumulated inside it. To en-
able the DPF to burn away the PM, try to drive the
vehicle as follows:
l With the needle of the water temperature
gauge stabilized in roughly the middle of the
scale, drive for about 20 minutes at a speed
of at least 40 km/h (24 mph).
If the DPF warning lamp subsequently stays on, con-
tact your MITSUBISHI MOTORS Authorized Serv-
ice Point.
CAUTIONl You do not have to continuously drive ex-
actly as indicated above. Always strive to
drive safely in accordance with road con-
ditions.
If the DPF warning lamp flashes dur-
ing vehicle operation
Flashing of the DPF warning lamp indicates an ab-
normality in the DPF system. Have the system in-
spected at a MITSUBISHI MOTORS Authorized
Service Point.
CAUTIONl Continuing to drive with the DPF warn-
ing lamp flashing could result in engine
trouble and DPF damage.Manual transmission E00602000199
The shift pattern is shown on the gearshift lever
knob. Be sure to always fully depress the clutch ped-
al before attempting to shift the lever.CAUTIONl Do not move the gearshift lever into re-
verse while the vehicle is moving for-
ward; doing so will damage the transmis-
sion.
l Do not rest your foot on the clutch pedal
while driving as this will cause premature
clutch wear or damage.
Starting and driving
4-14 OKTE14E2
4
Page 145 of 362
CAUTIONlOperating the accelerator pedal while the
other foot is resting on the brake pedal
will affect braking efficiency and may
cause premature wear of brake pads.
l Use the selector lever in the correct shift
position in accordance with driving condi-
tions.
Never coast downhill backward with the
driving shift position {“D” (DRIVE) or
sports mode} or coast forward with the
“R” (REVERSE) position.
The engine stops and the brake pedal ef-
fort or the steering wheel handling weight
increasing could lead to an accident.
l Do not race the engine with brake pedal
pressed when the vehicle is stationary.
This can damage the automatic transmis-
sion.Passing acceleration E00604500329
To gain extra acceleration in “D” (DRIVE) posi-
tion, push the accelerator to the floor. The automat-
ic transmission will automatically downshift.
NOTE l In “Sports mode”, downshifts do not take
place when the accelerator is depressed all
the way to the floor.
Waiting E00604600304
For short waiting periods, such as at traffic signals,
the vehicle can be left in gear and held stationary
with the service brake.
For longer waiting periods with the engine running,
place the selector lever in the “N” (NEUTRAL) po-
sition..CAUTIONl Never hold the vehicle stationary on a hill
using the accelerator pedal (without us-
ing the brake pedal). Always apply the
parking brake and/or service brakes.
l Unexpected acceleration may occur if the
selector lever is in a position other than
“P” (PARK) or “N” (NEUTRAL). Prior
to moving off after having stopped the ve-
hicle, make sure that the selector lever is
in the “D” (DRIVE) position.Parking E00604700262
To park the vehicle, first bring it to a complete
stop, fully engage the parking brake, and then
move the selector lever to the “P” (PARK) position.
If you are going to leave the vehicle unattended, al-
ways switch off the engine and remove the ignition
key.
NOTE
l On a slope, be sure to apply the parking
brake before moving the selector lever to the
“P” (PARK) position. If you move the selec-
tor lever to the “P” (PARK) position before
applying the parking brake, it may be diffi-
cult to disengage the selector lever from the
“P” (PARK) position when next you drive
the vehicle, requiring application of a strong
force to the selector lever to move from the
“P” (PARK) position.When the automatic transmission makes no speed
change E00604800683
If the transmission does not change speeds while
driving, or your vehicle does not pick up enough
speed when starting on an uphill slope, it may be
that there is something unusual happening in the
transmission, causing a safety device to activate.
We recommend you to have your vehicle checked
as soon as possible. 1.If your vehicle has difficulty moving uphill,
shift the selector lever into 2 nd
gear of the
“Sports mode”.
This method might not work depending on
the type of transmission malfunction.
2. Once the vehicle is moving on a level road,
move the selector lever back to “D” (DRIVE).
NOTE l When the selector lever position indicator in
the instrument panel blinks, it means that
there is an abnormal condition in the trans-
mission. Refer to “When the selector lever po-
sition indicator blinks” on page 4-20.
Starting and driving
4-21
OKTE14E2
4
Page 160 of 362
Crossing a stream
4-wheel drive vehicles are not necessarily water-
proof. If the electrical circuits become wet, further
operation of the vehicle will be impossible; there-
fore, avoid crossing streams unless absolutely nec-
essary. If crossing a stream is unavoidable, use the
following procedure: 1.Check depths of a stream and geographical
features before attempting to cross a stream
and ford the stream where the water is as shal-
low as practicable.
2. Set the transfer shift lever to “4L” position
(easy select 4WD), “4LLc” position (super se-
lect 4WD).
3. Drive slowly at a speed of approximately
5 km/h (3 mph) to avoid splashing too much
water.CAUTIONl Never cross a stream where the water is
deep.
Do not change gears while crossing the
stream.
Frequent crossing of streams can adverse-
ly affect the life span of the vehicle; we rec-
ommend you to take the necessary meas-
ures to prepare, inspect, and repair the ve-
hicle.
After crossing a stream, apply the brakes to be sure
they are functioning properly. If the brakes are wet
and not functioning properly, dry them out by driv-
ing slowly while lightly depressing the brake pedal.
Inspect each part of the vehicle carefully.
Inspection and maintenance
following rough road operation E00606700048
After operating the vehicle in rough road condi-
tions, be sure to perform the following inspection
and maintenance procedures:
l Check that the vehicle has not been damaged
by rocks, gravel, etc.
l Carefully wash the vehicle with water.
After washing, drive the vehicle slowly
while lightly depressing the brake pedal in or-
der to dry out the brakes. If the brakes still
do not function properly, we recommend you
to have the brakes checked as soon as possible.
l Remove the insects, dried grass, etc. clog-
ging the radiator core.
l After crossing a stream, be sure to have the
following items inspected at a MITSUBISHI
MOTORS Authorized Service Point and take
the necessary measures. •Check the brake system and, if necessary,
have it serviced.
• Check the engine, transmission, transfer,
and differential oil or grease level and tur-
bidity. If the oil or grease is milky, it indi-
cates water contamination. Replace it
with new oil or grease.
• Grease the propeller shaft.
• Check the inside of the vehicle. If ingress
of water is found, dry the carpet etc.
• Inspect the headlamps. If the headlamp
bulb is flooded with water, we recom-
mend you to have it drained.Cautions on handling of 4-wheel
drive vehicles E00606800368
Tyres and wheels
Since the driving torque can be applied to the 4
wheels, the performance of the vehicle when oper-
ating in 4-wheel drive is greatly affected by the con-
dition of the tyres.
Pay close attention to the tyres.
l Install specified tyres on all wheels. Refer to
“Tyres and wheels” on page 9-17.
l Be sure to fit all 4 tyres and wheels of the
same size and type.
When replacement of any of the tyres or
wheels is necessary, replace all of them.
l All tyres should be rotated whenever the
wear difference between the front and rear
tyres is recognizable.
Good vehicle performance cannot be expected if
there is a difference in wear between tyres. Refer to
“Tyre rotation” on page 8-13.
l Check the tyre inflation pressure regularly.
Starting and driving
4-36
OKTE14E2
4