mirror MITSUBISHI L200 2015 (in English) User Guide
[x] Cancel search | Manufacturer: MITSUBISHI, Model Year: 2015, Model line: L200, Model: MITSUBISHI L200 2015Pages: 418, PDF Size: 25.8 MB
Page 22 of 418
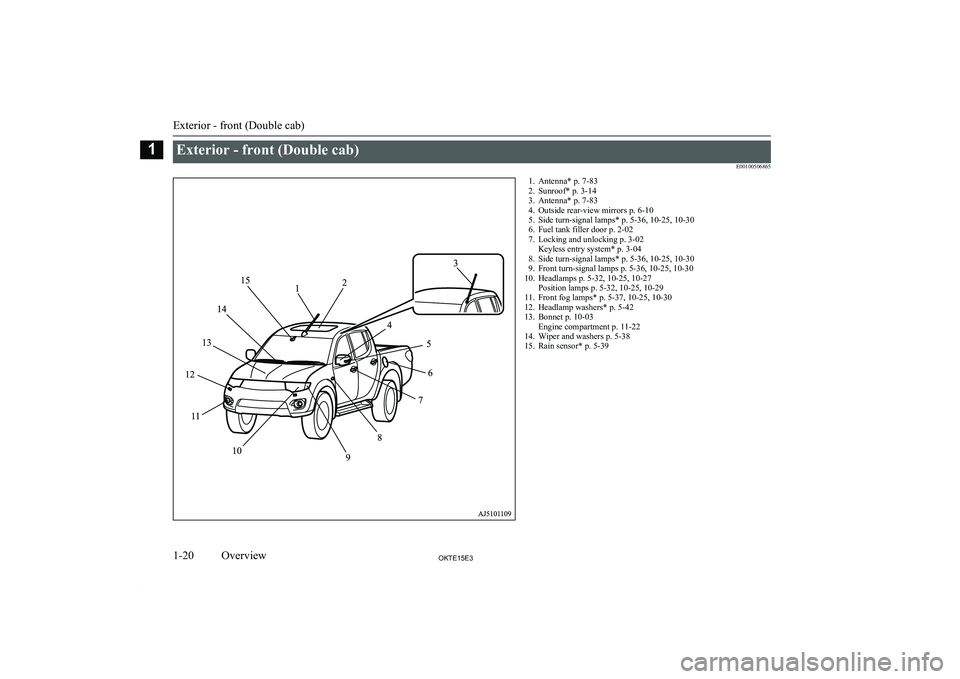
Exterior - front (Double cab)E001005068651. Antenna* p. 7-832. Sunroof* p. 3-14
3. Antenna* p. 7-83
4. Outside rear-view mirrors p. 6-10
5. Side turn-signal lamps* p. 5-36, 10-25, 10-30
6. Fuel tank filler door p. 2-02
7. Locking and unlocking p. 3-02 Keyless entry system* p. 3-04
8. Side turn-signal lamps* p. 5-36, 10-25, 10-30
9. Front turn-signal lamps p. 5-36, 10-25, 10-30
10. Headlamps p. 5-32, 10-25, 10-27 Position lamps p. 5-32, 10-25, 10-29
11. Front fog lamps* p. 5-37, 10-25, 10-30
12. Headlamp washers* p. 5-42
13. Bonnet p. 10-03 Engine compartment p. 11-22
14. Wiper and washers p. 5-38
15. Rain sensor* p. 5-39
Exterior - front (Double cab)
1-20OKTE15E3Overview1
Page 131 of 418
NOTElIf the ignition switch is in the “ON” or
“ACC” position and the headlamps are on,
the headlamp washer operates together with the windscreen washer the first time thewindscreen washer lever is pulled.Precautions to observe when
using wipers and washers
E00507600014
l If the moving wipers become blocked by
ice or other deposits on the glass, the
motor may burn out even if the wiper switch is turned to OFF. If obstruction
occurs, park your vehicle in a safe place, turn off the ignition, and clean the de- posits from the glass so that the wipersoperate smoothly.
l Do not use the wipers when the glass is
dry.
They may scratch the glass surface and
the blades wear out prematurely.
l Before using the wipers in cold weather,
check that the wiper blades are not fro-
zen onto the glass. The motor may burn out if the wipers are used with the blades
frozen onto the glass.
l Avoid using the washer continuously for
more than 20 seconds. Do not operate the washer when the fluid reservoir isempty.
Otherwise, the motor may burn out.
l Periodically check the level of washer
fluid in the reservoir and refill if re- quired.
During cold weather, add a recommen- ded washer solution that will not freeze
in the washer reservoir. Failure to do so
could result in loss of washer function and frost damage to the system compo- nents.Rear window demister
switch E00507900961
The rear window demister switch can be op-erated with the ignition switch in the “ON”position.
Push the switch to turn on the rear window
demister. It will be turned off automatically
in about 20 minutes. To turn off the demister
within about 20 minutes, push the switch again.
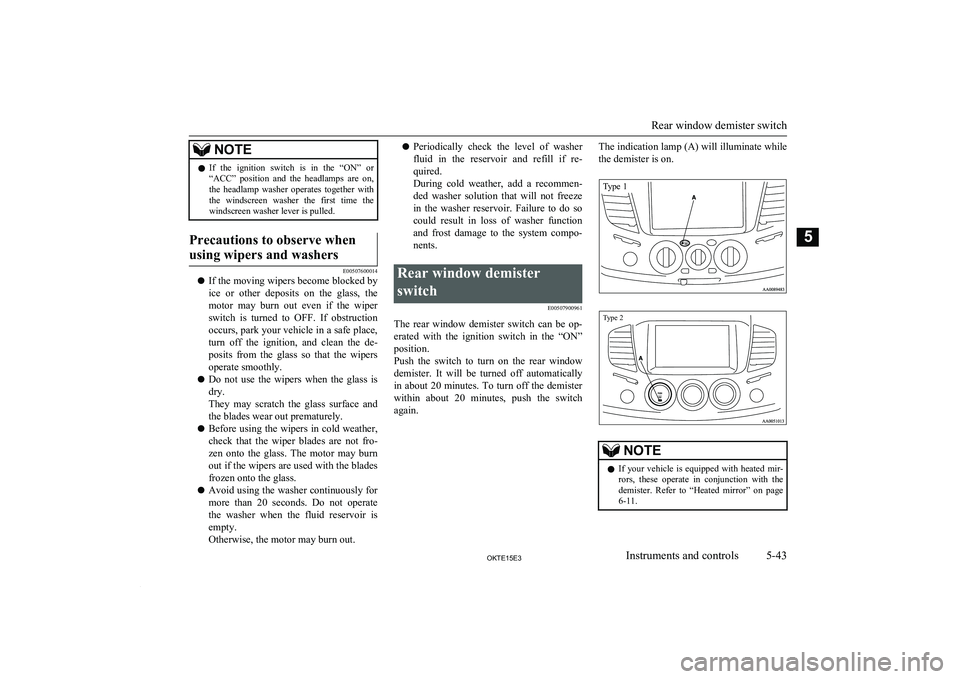
The indication lamp (A) will illuminate while
the demister is on.Type 1Type 2
NOTEl If your vehicle is equipped with heated mir-
rors, these operate in conjunction with thedemister. Refer to “Heated mirror” on page
6-11.
Rear window demister switch
5-43OKTE15E3Instruments and controls5
Page 133 of 418
Economical driving............................................................................. 6-02
Driving, alcohol and drugs.................................................................. 6-02
Safe driving techniques....................................................................... 6-03
Running-in recommendations............................................................. 6-04 Parking brake...................................................................................... 6-07
Parking................................................................................................ 6-08
Steering wheel height adjustment....................................................... 6-09
Inside rear-view mirror....................................................................... 6-09 Outside rear-view mirrors................................................................... 6-10
Ignition switch.....................................................................................6-12 Steering wheel lock............................................................................. 6-13
Starting................................................................................................ 6-13 Diesel particulate filter (DPF)*........................................................... 6-15Manual transmission........................................................................... 6-16Automatic transmission Sports Mode 4A/T, 5A/T............................. 6-19Easy select 4WD*............................................................................... 6-25
Super select 4WD*..............................................................................6-29
Rear differential lock*........................................................................ 6-34 4-wheel drive operation...................................................................... 6-38
Inspection and maintenance following rough road operation............. 6-41
Cautions on handling of 4-wheel drive vehicles................................. 6-41
Limited-slip differential*.................................................................... 6-43
Braking................................................................................................ 6-43
Brake assist system*........................................................................... 6-44
Anti-lock brake system (ABS)*.......................................................... 6-45
Power steering system.........................................................................6-48 Active Stability & Traction Control (ASTC)*....................................6-48
Cruise control*.................................................................................... 6-50 Cargo loads......................................................................................... 6-55Trailer towing......................................................................................6-55Starting and driving
OKTE15E36
Page 141 of 418
Where you park
Your front bumper can be damaged if you
scrape it over kerbs or parking stop blocks.
Be careful when travelling up or down steep slopes where your bumper can scrape theroad.
WARNINGl Do not park your vehicle in areas where
combustible materials such as dry grass
or leaves can come in contact with a hot
exhaust, since a fire could occur.
When leaving the vehicle
Always remove the key from the ignition
switch and lock all doors when leaving the vehicle unattended.
Always try to park your vehicle in a well lit
area.
Steering wheel height
adjustment E00600700219
To adjust the steering wheel height, releasethe tilt lock lever while holding the steering
wheel by hand, and raise or lower the steer- ing wheel to the desired height.
After adjustment, securely lock the lever by
pulling it upward.
1- Locked
2- Release
WARNINGl After adjusting to the desired height,
check to be sure that the lever is locked.
l Do not attempt to adjust the steering
wheel while you are driving the vehicle.
l When releasing the tilt lock lever, move it
to the release position (2) and hold the
steering wheel by hand to prevent it fall- ing to the lowest position.Inside rear-view mirror
E00600800106
Adjust the rear-view mirror only after mak-
ing any seat adjustments so you have a clear
view to the rear of the vehicle.
WARNINGl Do not attempt to adjust the rear-view
mirror while driving. This can be danger-
ous.
Always adjust the mirror before driving.
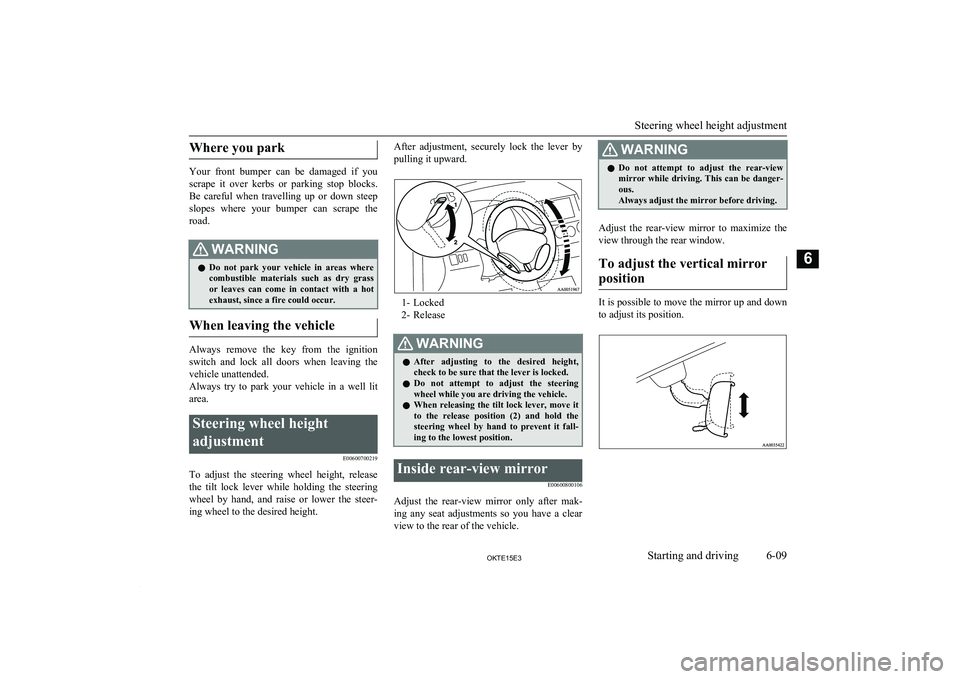
Adjust the rear-view mirror to maximize the
view through the rear window.
To adjust the vertical mirror position
It is possible to move the mirror up and down
to adjust its position.
Steering wheel height adjustment
6-09OKTE15E3Starting and driving6
Page 142 of 418

To reduce the glare
The lever (A) at the bottom of the mirror canbe used to adjust the mirror to reduce the
glare from the headlamps of vehicles behind
you during night driving.
1- Normal
2- Anti-glare
Outside rear-view mirrors
E00600900149To adjust the mirror position
E00601000482WARNINGlDo not attempt to adjust the rear-view
mirrors while driving. This can be dan-
gerous.
Always adjust the mirrors before driving.WARNINGl Your vehicle is equipped with convex type
mirrors.
Please take into consideration, that ob- jects you see in the mirror will look small-er and farther away compared to a nor-mal flat mirror.
Do not use this mirror to estimate dis-
tance of following vehicles when changing lanes.
Manual outside rear-view mir-
rors*
Adjust the mirror surface by hands as indica-
ted by the arrows.
Electric remote-controlled out-
side rear-view mirrors*
The electric remote-controlled outside rear-view mirrors can be operated when the igni-
tion switch is in the “ON” or “ACC” posi- tion.
Push the switch (A) on the same side as the
mirror whose adjustment is desired.
Type 1Type 2
L- Left outside mirror adjustment
R- Right outside mirror adjustment
Outside rear-view mirrors
6-10OKTE15E3Starting and driving6
Page 143 of 418

NOTElAfter adjustment, lightly push the switch on
the opposite side to return it to the neutral
position.
Press the switch (B) to the left, right, up or down to adjust the mirror position.
1- Up
2- Down
3- Right
4- Left
To fold the mirror
E00601100467
The outside mirror can be folded in towards the side window to prevent damage when
parking in narrow areas.
Mirror retractor switch*
The mirror retractor switch can be operated
with the ignition switch in the “ON” or
“ACC” position.
Push the switch to fold the mirrors inward,
and push the switch again to return them to extended position.
NOTEl It is also possible to fold and return the mir-
rors by hand.
l When freezing has occurred and mirrors fail
to operate as intended, please refrain from repeated pushing of the retractor switch as
this action can result in burn-out of the mir-
ror motor circuits.Heated mirror*
E00601200253
When the rear window demister switch (C) is
pressed, the outside rear-view mirrors aredemisted or defrosted. Current will flow
through the heater element inside the mirrors, thus clearing away frost or condensation.
The indication lamp (D) will illuminate while the demister is on. The heater will be turned
off automatically in about 20 minutes.
Type 1Type 2
Outside rear-view mirrors
6-11OKTE15E3Starting and driving6
Page 191 of 418
Ventilators........................................................................................... 7-02
Heater/Manual air conditioning*........................................................ 7-04 Automatic air conditioning*............................................................... 7-09
Important operation tips for the air conditioning................................ 7-14 Air purifier*........................................................................................ 7-14LW/MW/FM electronic tuning radio with CD player (au- dio system type 1) *........................................................................ 7-15
To play tracks from USB device (audio system type 1) *.................. 7-30
To play tracks from a Bluetooth ®
device (audio system type 1) *..... 7-40
To use the external audio input function (audio system type 1) *...... 7-43
Steering wheel remote control switch (audio system type 1) *.......... 7-44
Error codes (audio system type 1).......................................................7-47 Audio system anti-theft feature (audio system type 1)....................... 7-49
Handling of compact discs (audio system type 1).............................. 7-49
LW/MW/FM radio/CD player (audio system type 2)*.......................7-51
Handling of Discs (audio system type 2)............................................ 7-55
Audio Files (MP3/WMA/AAC) (audio system type 2)...................... 7-56
Important Points on Safety for the Customer (audio system type 2)............................................................................................. 7-60
Operation Keys (audio system type 2)................................................ 7-60
Listen to Radio (audio system type 2)................................................ 7-63
Listen to DAB (audio system type 2) *...............................................7-64
Listen to Traffic Messages (audio system type 2).............................. 7-66
Listen to CDs (audio system type 2)................................................... 7-66
Listen to MP3s (audio system type 2).................................................7-67
Listen to an iPod (audio system type 2).............................................. 7-68
Listen to Audio Files on a USB Device (audio system type 2).......... 7-70
Listen to Bluetooth Audio (audio system type 2) *............................ 7-72
Use AUX (audio system type 2) *...................................................... 7-74Display Indicator (audio system type 2)............................................. 7-75
Audio Quality and Volume Balance Adjustment (audio system type 2)................................................................................. 7-75
System Settings (audio system type 2)............................................... 7-76 Troubleshooting (audio system type 2)...............................................7-80
Antenna............................................................................................... 7-83 Link System*...................................................................................... 7-84
Bluetooth ®
2.0 interface......................................................................7-84
USB input terminal*......................................................................... 7-103
Sun visors.......................................................................................... 7-106 Vanity mirror*...................................................................................7-107Ashtray.............................................................................................. 7-107Cigarette lighter.................................................................................7-108
Accessory socket*............................................................................. 7-109
Digital clock*.................................................................................... 7-109
Interior lamps.................................................................................... 7-110
Storage spaces................................................................................... 7-112
Cup holder*....................................................................................... 7-115
Bottle holder......................................................................................7-115
Convenient hook............................................................................... 7-116
Coat hook*........................................................................................ 7-116
First-aid kit and warning triangle securing bands*........................... 7-117For pleasant driving
OKTE15E37
Page 296 of 418
NOTElDepending on the type of the USB memory
device or other device connected, the con-
nected device may not function properly or the available functions may be limited.
l It is recommended to use an iPod with firm-
ware updated to the latest version.
l You can charge your iPod by connecting it
to the USB input terminal when the ignition switch is in the “ACC” or “ON” position.
l Do not keep your USB memory device or
iPod in your vehicle.
l It is recommended that you back up files in
case of data damage.
l Do not connect to the USB input terminal
any device (hard disk, card reader, memory reader, etc.) other than the connectable devi- ces specified in the previous section. The de-
vice and/or data may be damaged. If any of these devices was connected by mistake, re-move it after turning the ignition switch to
the “LOCK” position.File specifications
E00762400017
You can play music files of the following
specifications that are saved in a USB memo-ry device or other device supporting mass
storage class.
ItemConditionFile formatMP3, WMA, AAC,
WAVItemConditionMaximum number of levels (including the
root)
Level 8
Number of folders700Number of files65,535Sun visors
E00711200693
1- To eliminate front glare2- To eliminate side glare
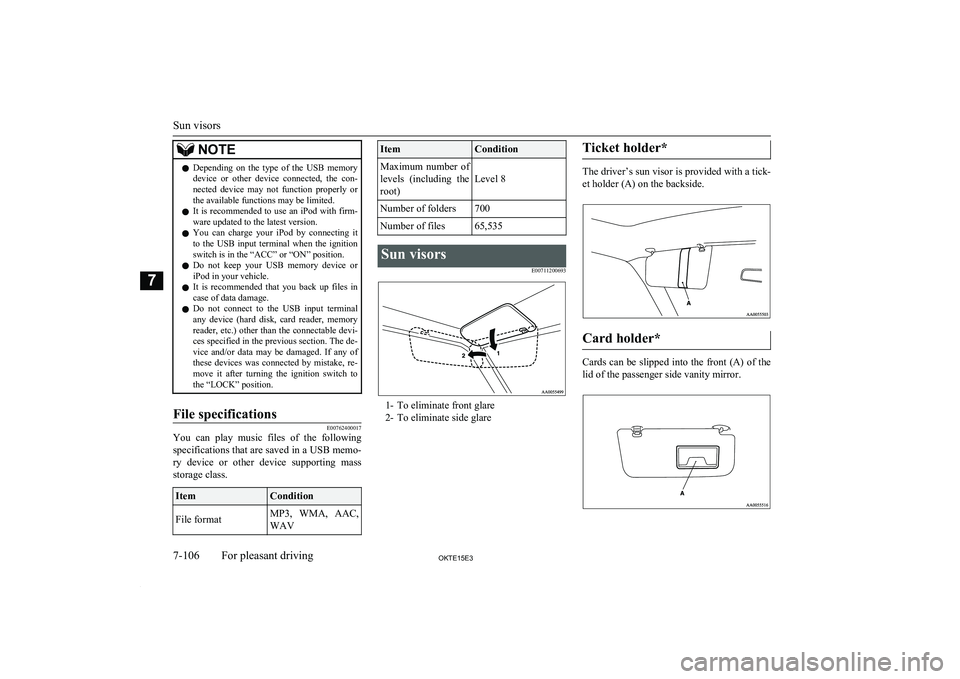
Ticket holder*
The driver’s sun visor is provided with a tick-
et holder (A) on the backside.
Card holder*
Cards can be slipped into the front (A) of the lid of the passenger side vanity mirror.
Sun visors
7-106OKTE15E3For pleasant driving7
Page 297 of 418

Vanity mirror*E00711300489
A vanity mirror is fitted to the back of the sun visor on the passenger side.Ashtray
E00711400826CAUTIONlPut out matches and cigarettes before they
are placed in the ashtray.
l Don’t put papers and other things that burn
into your ashtrays. If you do, cigarettes or
other smoking materials could set them on fire, causing damage.
l Always close the ashtray. If left open, other
cigarette butts in the ashtray may be rekin-
dled.Type 1 (fixed position)
To use the ashtray, pull it out.
To remove the ashtray, pull it out while
pressing the stop (A).
Type 2 (moveable)
To use the moveable ashtray, open the lid.
Mounting position for moveable
ashtray
The moveable ashtray can be fitted at the in- dicated position.
Vanity mirror*
7-107OKTE15E3For pleasant driving7
Page 340 of 418
CAUTIONlSome types of hot water washing equipment
apply high pressure and heat to the vehicle.
They may cause heat distortion and damage to the vehicle resin parts and may result in
flooding of the vehicle interior. Therefore;
observe the following.
• Maintain a distance of approx. 50 cm or
more between the vehicle body and the washing nozzle.
• When washing around the door glass,
hold the nozzle at a distance of more than
50 cm and at right angles to the glass sur-
face.
l After washing the vehicle, drive the vehicle
slowly while lightly depressing the brake
pedal several times in order to dry out the brakes.
Leaving the brakes wet could result in re-
duced braking performance. Also, there is a possibility that they could freeze up or be-
come inoperative due to rust, rendering the vehicle unable to move.
l When using an automatic car wash, pay at-
tention to the following items, referring to the operation manual or consulting a car
wash operator. If the following procedure is not followed, it could result in damage to
your vehicle.
• The outside mirrors are retracted.
• If your vehicle is equipped with the pillar
antenna, it can be retracted.
• If your vehicle is equipped with the roof
antenna, it can be removed.During cold weather
Salt and other chemicals spread on the roads
in some areas in winter can have a harmful effect on the vehicle body. You should there-
fore wash the vehicle as often as possible in accordance with our care-instructions. It is
recommended to have a preservative applied
and the underfloor protection checked before and after the cold weather season.
After washing your vehicle, wipe off all wa- terdrops from the rubber parts around the
doors to prevent the doors from freezing.
NOTEl To prevent freezing of the weatherstripping
on the doors, bonnet, etc., they should be treated with silicone spray.Waxing
E00901000687
Waxing the vehicle will help prevent the ad-
herence of dust and road chemicals to the paintwork. Apply a wax solution after wash- ing the vehicle, or at least once every three
months to assist displacing of water.
Do not wax your vehicle in direct sunlight.
You should wax after the surfaces have
cooled.
CAUTIONl Waxes containing high abrasive compounds
should not be used. Such waxes remove rust and stains effectively from the paintwork but
they are harmful to the lustre on the painted
surface and the plated surface.
Further, they are harmful to glossy surfaces such as grille, garnish, mouldings, etc.
l Do not use petrol or paint thinners to remove
road tar or other contamination to the vehi-
cle surface.
l Do not apply wax on the areas having black
mat coating as it can cause uneven discolou-
ration, patches, blurs, etc. If stained with wax, immediately wipe off with a piece of
soft cloth and warm water.
l On vehicles with a sunroof, be careful when
waxing the area around the sunroof opening, not to put any wax on the weatherstrip
(black rubber). If stained with wax, the weatherstrip cannot maintain a weatherproof
seal with the sunroof.Polishing
E00901100011
The vehicle should only be polished if the
paintwork has become stained or lost its lus- tre. Matt-finish parts and plastic bumpers
must not be polished, polishing these parts will stain them or damage their finish.
Cleaning the exterior of your vehicle
9-04OKTE15E3Vehicle care9