transmission MITSUBISHI L200 2015 (in English) Owner's Guide
[x] Cancel search | Manufacturer: MITSUBISHI, Model Year: 2015, Model line: L200, Model: MITSUBISHI L200 2015Pages: 418, PDF Size: 25.8 MB
Page 159 of 418
To shift fromToProcedureVehicles with manual transmissionVehicles with automatic transmission
4H2H
When the vehicle is not in motion, shift the gearshift
lever to the “N” (Neutral) position before operating
the transfer shift lever.
When the vehicle is moving, and only while it can be steered straight ahead, release the accelerator pedal
before operating the transfer shift lever.When the vehicle is not in motion, shift the selector
lever to the “N” (NEUTRAL) position before oper-
ating the transfer shift lever.
When the vehicle is moving, and only while it can
be steered straight ahead, shift the selector lever to
the “D” (DRIVE) position, and release the accelera- tor pedal before operating the transfer shift lever.4H4L
Stop the vehicle, depress the clutch pedal to the floor
and operate the transfer shift lever.
Stop the vehicle, shift the selector lever to the “N”
(NEUTRAL) position, and operate the transfer shift
lever.
If operation is made with the selector lever placed
in any other position than “N” (NEUTRAL) posi-
tion, a gear noise may be generated, with a possible
failure to shift into a proper gear.
4L4H
NOTEl Shifting of the transfer shift lever between
“2H” ↔ “4H” should only be done at speeds below 100 km/h (62 mph).
l During driving, never attempt to shift from
“4H” to “4L”.
l When shifting from “2H” to “4H” in cold
weather while the vehicle is in motion, the transmission gear may make some noise. In
cold weather, try to shift the gear while the
vehicle is stopped.NOTEl There may be a case that the transfer shift
lever feels heavy when it is moved from
“4H” to “2H” with the steering wheel in
turned position.
This is normal and not any indication of trouble.CAUTIONl Do not operate the transfer shift lever while
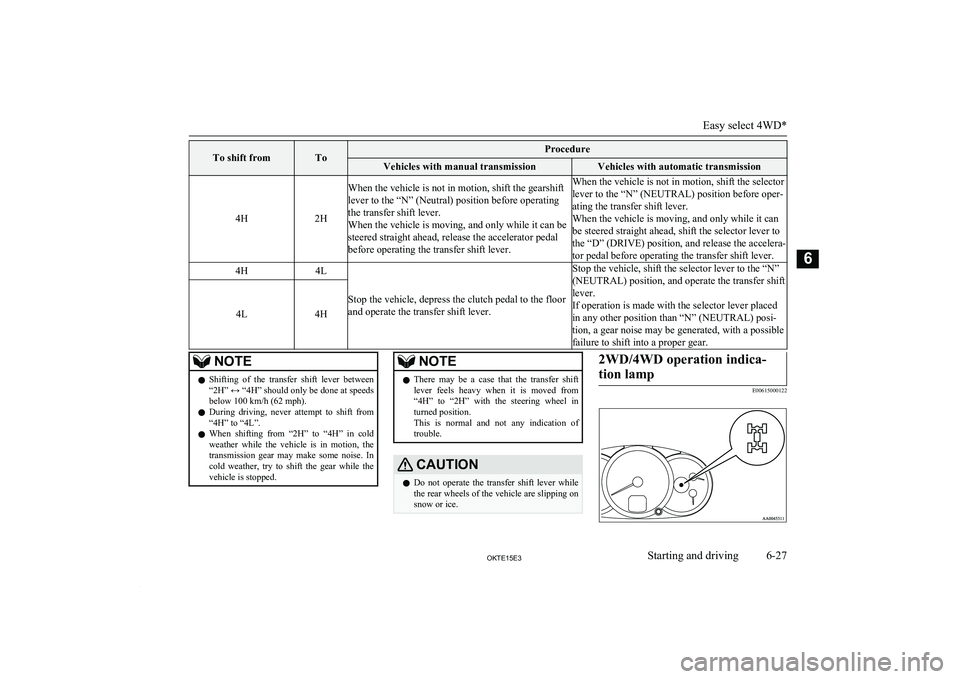
the rear wheels of the vehicle are slipping on snow or ice.2WD/4WD operation indica-
tion lamp
E00615000122Easy select 4WD*
6-27OKTE15E3Starting and driving6
Page 161 of 418
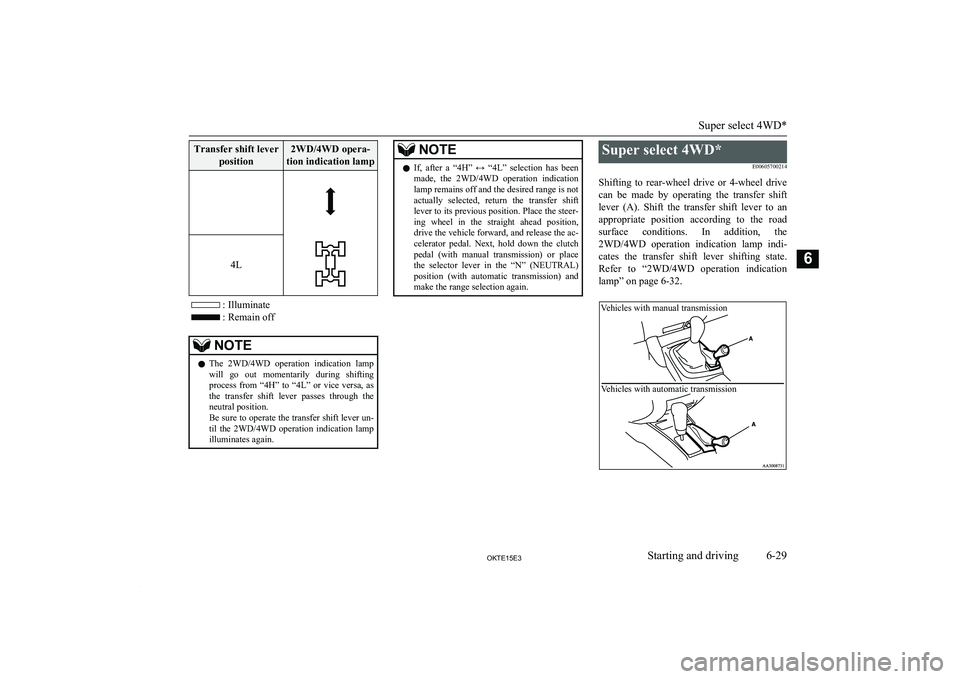
Transfer shift leverposition2WD/4WD opera-
tion indication lamp
4L
: Illuminate
: Remain off
NOTEl The 2WD/4WD operation indication lamp
will go out momentarily during shiftingprocess from “4H” to “4L” or vice versa, as
the transfer shift lever passes through the neutral position.
Be sure to operate the transfer shift lever un- til the 2WD/4WD operation indication lampilluminates again.NOTEl If, after a “4H” ↔ “4L” selection has been
made, the 2WD/4WD operation indication lamp remains off and the desired range is not
actually selected, return the transfer shift
lever to its previous position. Place the steer- ing wheel in the straight ahead position,
drive the vehicle forward, and release the ac- celerator pedal. Next, hold down the clutch
pedal (with manual transmission) or place the selector lever in the “N” (NEUTRAL)
position (with automatic transmission) and make the range selection again.Super select 4WD*
E00605700214
Shifting to rear-wheel drive or 4-wheel drive can be made by operating the transfer shiftlever (A). Shift the transfer shift lever to an
appropriate position according to the road surface conditions. In addition, the
2WD/4WD operation indication lamp indi- cates the transfer shift lever shifting state.Refer to “2WD/4WD operation indicationlamp” on page 6-32.
Super select 4WD*
6-29OKTE15E3Starting and driving6 Vehicles with manual transmissionVehicles with automatic transmission
Page 162 of 418
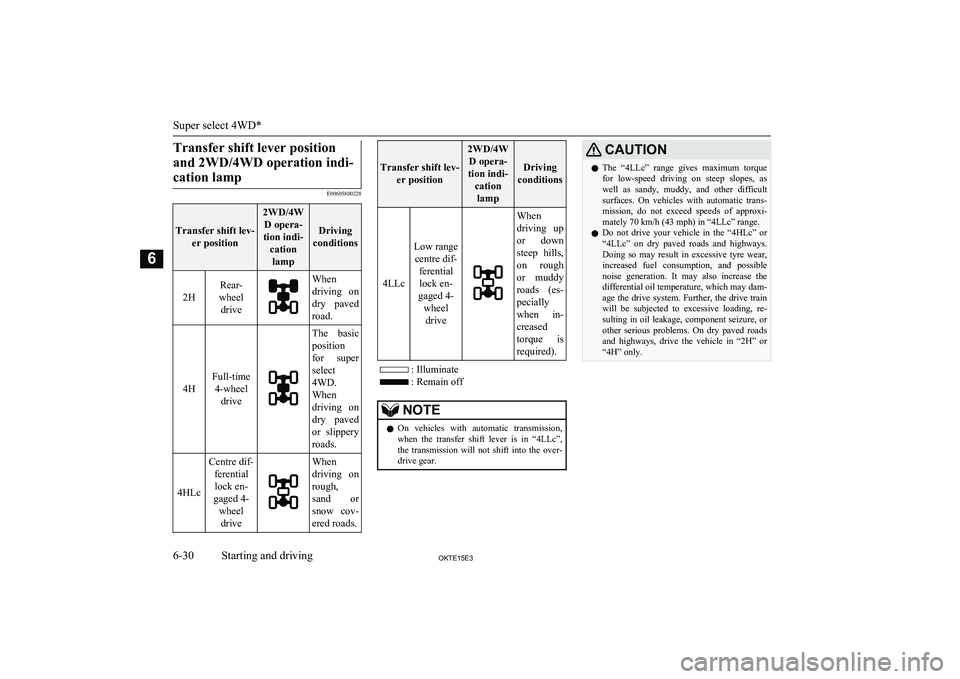
Transfer shift lever positionand 2WD/4WD operation indi- cation lamp
E00605800228
Transfer shift lev- er position
2WD/4WD opera-
tion indi- cationlamp
Driving
conditions2H
Rear-
wheel driveWhen
driving on
dry paved road.
4H
Full-time 4-wheel drive
The basic
position
for super select
4WD.
When
driving on
dry paved
or slippery roads.
4HLc
Centre dif- ferentiallock en-
gaged 4- wheeldriveWhen
driving on
rough,
sand or snow cov-ered roads.
Transfer shift lev- er position
2WD/4WD opera-
tion indi- cationlamp
Driving
conditions
4LLc
Low range centre dif- ferentiallock en-
gaged 4- wheeldrive
When
driving up
or down steep hills,on rough or muddy
roads (es- pecially
when in-
creased
torque is required).
: Illuminate
: Remain off
NOTEl On vehicles with automatic transmission,
when the transfer shift lever is in “4LLc”, the transmission will not shift into the over-drive gear.CAUTIONl The “4LLc” range gives maximum torque
for low-speed driving on steep slopes, as
well as sandy, muddy, and other difficult
surfaces. On vehicles with automatic trans- mission, do not exceed speeds of approxi- mately 70 km/h (43 mph) in “4LLc” range.
l Do not drive your vehicle in the “4HLc” or
“4LLc” on dry paved roads and highways. Doing so may result in excessive tyre wear, increased fuel consumption, and possible
noise generation. It may also increase the
differential oil temperature, which may dam- age the drive system. Further, the drive train will be subjected to excessive loading, re-
sulting in oil leakage, component seizure, or other serious problems. On dry paved roads
and highways, drive the vehicle in “2H” or
“4H” only.
Super select 4WD*
6-30OKTE15E3Starting and driving6
Page 163 of 418
Transfer shift lever operation
E00605900173
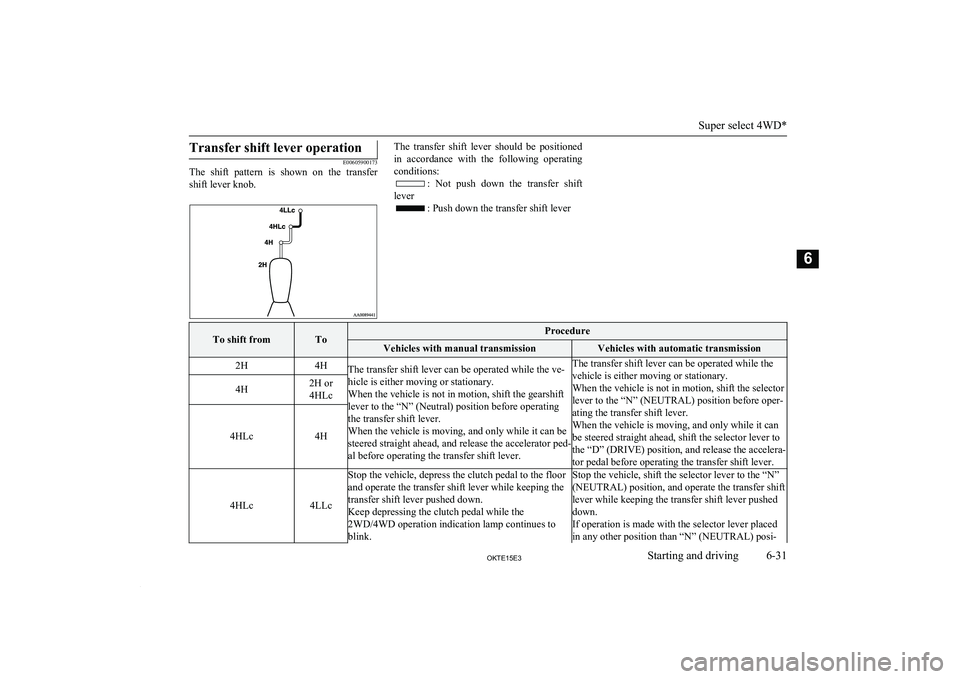
The shift pattern is shown on the transfer
shift lever knob.
The transfer shift lever should be positioned
in accordance with the following operating conditions:
: Not push down the transfer shift
lever
: Push down the transfer shift lever
To shift fromToProcedureVehicles with manual transmissionVehicles with automatic transmission2H4HThe transfer shift lever can be operated while the ve- hicle is either moving or stationary.
When the vehicle is not in motion, shift the gearshift
lever to the “N” (Neutral) position before operating
the transfer shift lever.
When the vehicle is moving, and only while it can be
steered straight ahead, and release the accelerator ped- al before operating the transfer shift lever.The transfer shift lever can be operated while the
vehicle is either moving or stationary.
When the vehicle is not in motion, shift the selector
lever to the “N” (NEUTRAL) position before oper-
ating the transfer shift lever.
When the vehicle is moving, and only while it can
be steered straight ahead, shift the selector lever to
the “D” (DRIVE) position, and release the accelera-
tor pedal before operating the transfer shift lever.4H2H or 4HLc
4HLc4H4HLc4LLc
Stop the vehicle, depress the clutch pedal to the floor
and operate the transfer shift lever while keeping the
transfer shift lever pushed down.
Keep depressing the clutch pedal while the
2WD/4WD operation indication lamp continues to
blink.Stop the vehicle, shift the selector lever to the “N”
(NEUTRAL) position, and operate the transfer shift
lever while keeping the transfer shift lever pushed
down.
If operation is made with the selector lever placed
in any other position than “N” (NEUTRAL) posi-
Super select 4WD*
6-31OKTE15E3Starting and driving6
Page 164 of 418
To shift fromToProcedureVehicles with manual transmissionVehicles with automatic transmission4LLc4HLction, a gear noise may be generated, with a possible
failure to shift into a proper gear.NOTEl Shifting of the transfer shift lever between
“2H” ↔ “4H” should only be done at speeds below 100 km/h (62 mph).
l During driving, never attempt to shift from
“4HLc” to “4LLc”.
l When shifting from “2H” to “4H” in cold
weather while the vehicle is in motion, the transmission gear may make some noise. In
cold weather, try to shift the gear while the
vehicle is stopped.
l When the transfer shift lever is shifted from
“4H” to “4HLc” while the vehicle is stop- ped, the 2WD/4WD operation indication lamp blinks while the selection is in process. Drive slowly and normally after confirmingthat the lamp is illuminated. (Refer to “2WD/4WD operation indication lamp” on
page 6-32.)
l Do not move the selector lever while the
2WD/4WD operation indication lamp is blinking.
l The 2WD/4WD operation indication lamp
will go out momentarily during shifting process from “4HLc” to “4LLc” or vice ver-sa, as the transfer shift lever passes through the neutral position.
Be sure to operate the transfer shift lever un-
til the 2WD/4WD operation indication lamp illuminates again.NOTEl There may be a case that the transfer shift
lever feels heavy when it is moved from
“2H” to “4H” with the steering wheel in
turned position.
This is normal and not any indication of trouble.CAUTIONl Do not operate the transfer shift lever while
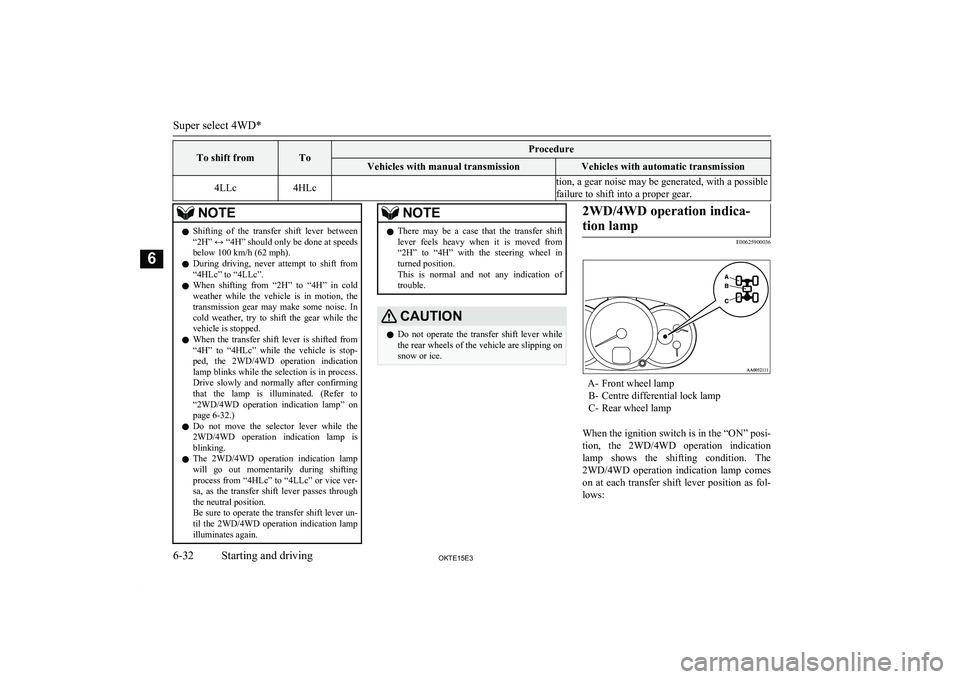
the rear wheels of the vehicle are slipping on snow or ice.2WD/4WD operation indica-
tion lamp
E00625900036
A- Front wheel lamp B- Centre differential lock lamp
C- Rear wheel lamp
When the ignition switch is in the “ON” posi-
tion, the 2WD/4WD operation indication lamp shows the shifting condition. The 2WD/4WD operation indication lamp comeson at each transfer shift lever position as fol-
lows:
Super select 4WD*
6-32OKTE15E3Starting and driving6
Page 171 of 418
CAUTIONlSelecting “4H” or “4L” position (easy select
4WD), “4HLc” or “4LLc” position (super
select 4WD) to drive on dry paved road will
increase the fuel consumption with possible noise generation and early tyre wear.
It may also increase the differential oil tem- perature, resulting in possible damage to the
driving system.
Further, the drive train will be subjected to excessive loading, possibly leading to oilleakage, component seizure, or other serious faults.
Driving on snowy or icy roads
Set the transfer shift lever to “4H” or “4L”
position (easy select 4WD), “4H” or “4HLc” position (super select 4WD) in accordance
with the road conditions, and then gradually
depress the accelerator pedal for a smooth start.
NOTEl The use of snow tyres and/or tyre chains is
recommended.
l Maintain a safe distance between vehicles,
avoid sudden braking, and use engine brak-
ing (downshifting).CAUTIONl Avoid sudden braking, sudden acceleration,
and sharp turning; such operations could
cause skidding and spinouts.
Driving on sandy or muddy
roads
Set the transfer shift lever to “4H” or “4L”
position (easy select 4WD), “4HLc” or “4LLc” position (super select 4WD) and then
gradually depress the accelerator pedal for a
smooth start. Keep the pressure on the accel-
erator pedal as constant as possible, and drive at low speed.
CAUTIONl Do not force the vehicle or drive recklessly
on sandy surfaces. In comparison with nor-
mal road surfaces, the engine and other
drive-system components are put under ex- cessive strain when driving on such a sur-
face, and this could lead to accidents.
l If any of following conditions occur while
the vehicle is being driven, immediately park your vehicle in a safe place and follow these procedures:
• The needle in the temperature gauge ap-
proaches the overheating zone.
Refer to “Engine overheating” on page
8-04.CAUTION• Automatic transmission fluid temperature
warning lamp comes on.
Refer to “When the A/T (automatic trans-
mission) fluid temperature warning lamp comes on” on page 6-23.WARNINGl When attempting to rock your vehicle out
of a stuck position, be sure that the area
around the vehicle is clear of people and physical objects. The rocking motion may
cause the vehicle to suddenly launch for- ward or backward, causing injury or damage to nearby people or objects.NOTEl Avoid sudden braking, acceleration, and
turning; such operations could result in thevehicle becoming stuck.
l If the vehicle becomes stuck in sandy or
muddy roads, it can often be moved a rock-
ing motion. Move the selector lever rhythmi- cally between the “D” (DRIVE) and “R”
(REVERSE) position (with M/T, between 1 st
and Reverse), while applying slight pressure
to the accelerator pedal.
4-wheel drive operation
6-39OKTE15E3Starting and driving6
Page 173 of 418
Crossing a stream
4-wheel drive vehicles are not necessarilywaterproof. If the electrical circuits become
wet, further operation of the vehicle will be impossible; therefore, avoid crossing streams
unless absolutely necessary. If crossing a stream is unavoidable, use the following pro-
cedure: 1. Check depths of a stream and geographi-
cal features before attempting to cross a stream and ford the stream where the
water is as shallow as practicable.
2. Set the transfer shift lever to “4L” posi-
tion (easy select 4WD), “4LLc” position (super select 4WD).
3. Drive slowly at a speed of approximate-
ly 5 km/h (3 mph) to avoid splashing too
much water.
CAUTIONl Never cross a stream where the water is
deep.
Do not change gears while crossing the stream.
Frequent crossing of streams can adversely
affect the life span of the vehicle; we recom- mend you to take the necessary measures toprepare, inspect, and repair the vehicle.After crossing a stream, apply the brakes to
be sure they are functioning properly. If the
brakes are wet and not functioning properly,
dry them out by driving slowly while lightly depressing the brake pedal.
Inspect each part of the vehicle carefully.Inspection and maintenance
following rough roadoperation E00606700048
After operating the vehicle in rough road
conditions, be sure to perform the following inspection and maintenance procedures:
l Check that the vehicle has not been dam-
aged by rocks, gravel, etc.
l Carefully wash the vehicle with water.
After washing, drive the vehicle slowly
while lightly depressing the brake pedal in order to dry out the brakes. If the brakes still do not function properly, we
recommend you to have the brakes
checked as soon as possible.
l Remove the insects, dried grass, etc.
clogging the radiator core.
l After crossing a stream, be sure to have
the following items inspected at a
MITSUBISHI MOTORS Authorized
Service Point and take the necessary
measures.
• Check the brake system and, if neces-
sary, have it serviced.
• Check the engine, transmission, trans-
fer, and differential oil or grease level
and turbidity. If the oil or grease is
milky, it indicates water contamina-
tion. Replace it with new oil or grease.
• Grease the propeller shaft.
• Check the inside of the vehicle. If in-
gress of water is found, dry the carpetetc.
• Inspect the headlamps. If the head-
lamp bulb is flooded with water, we
recommend you to have it drained.Cautions on handling of 4-
wheel drive vehicles E00606800368
Tyres and wheels
Since the driving torque can be applied to the
4 wheels, the performance of the vehicle when operating in 4-wheel drive is greatly af- fected by the condition of the tyres.
Pay close attention to the tyres.
l Install specified tyres on all wheels. Re-
fer to “Tyres and wheels” on page
11-19.
Inspection and maintenance following rough road operation
6-41OKTE15E3Starting and driving6
Page 175 of 418
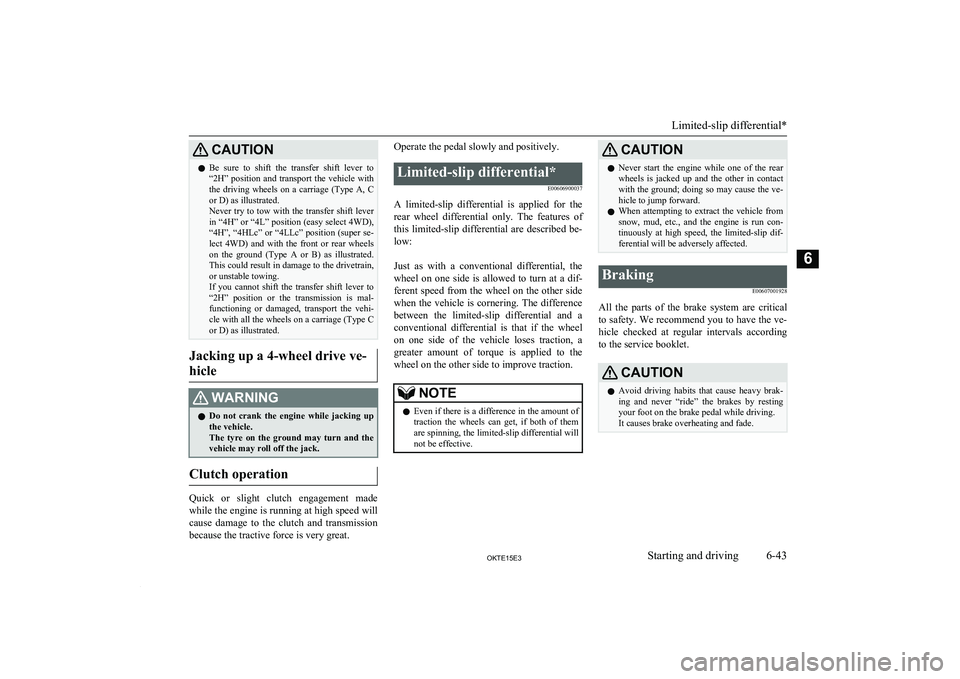
CAUTIONlBe sure to shift the transfer shift lever to
“2H” position and transport the vehicle with the driving wheels on a carriage (Type A, C
or D) as illustrated.
Never try to tow with the transfer shift lever
in “4H” or “4L” position (easy select 4WD), “4H”, “4HLc” or “4LLc” position (super se-
lect 4WD) and with the front or rear wheels
on the ground (Type A or B) as illustrated. This could result in damage to the drivetrain,
or unstable towing.
If you cannot shift the transfer shift lever to “2H” position or the transmission is mal-
functioning or damaged, transport the vehi- cle with all the wheels on a carriage (Type C
or D) as illustrated.
Jacking up a 4-wheel drive ve-
hicle
WARNINGl Do not crank the engine while jacking up
the vehicle.
The tyre on the ground may turn and the
vehicle may roll off the jack.
Clutch operation
Quick or slight clutch engagement made
while the engine is running at high speed will
cause damage to the clutch and transmission because the tractive force is very great.
Operate the pedal slowly and positively.Limited-slip differential*
E00606900037
A limited-slip differential is applied for therear wheel differential only. The features of
this limited-slip differential are described be- low:
Just as with a conventional differential, the wheel on one side is allowed to turn at a dif-
ferent speed from the wheel on the other side
when the vehicle is cornering. The difference between the limited-slip differential and aconventional differential is that if the wheelon one side of the vehicle loses traction, a greater amount of torque is applied to the wheel on the other side to improve traction.
NOTEl Even if there is a difference in the amount of
traction the wheels can get, if both of them
are spinning, the limited-slip differential will not be effective.CAUTIONl Never start the engine while one of the rear
wheels is jacked up and the other in contact
with the ground; doing so may cause the ve- hicle to jump forward.
l When attempting to extract the vehicle from
snow, mud, etc., and the engine is run con-
tinuously at high speed, the limited-slip dif- ferential will be adversely affected.Braking
E00607001928
All the parts of the brake system are critical
to safety. We recommend you to have the ve- hicle checked at regular intervals according
to the service booklet.
CAUTIONl Avoid driving habits that cause heavy brak-
ing and never “ride” the brakes by resting
your foot on the brake pedal while driving.
It causes brake overheating and fade.
Limited-slip differential*
6-43OKTE15E3Starting and driving6
Page 183 of 418
CAUTIONlWhen you do not wish to drive at a set
speed, turn off the cruise control for safety.
l Do not use cruise control when driving con-
ditions will not allow you to stay at the same
speed, such as in heavy traffic or on roads that are winding, icy, snow-covered, wet,
slippery, on a steep downhill slope.
l On vehicles with manual transmission, do
not move the gearshift lever to the “N” (Neutral) position while driving at a setspeed without depressing the clutch pedal.The engine will run too fast and might be damaged.NOTEl Cruise control may not be able to keep your
speed on uphills or downhills.
l Your speed may decrease on a steep uphill.
You may use the accelerator pedal if you
want to stay at your set speed.
l Your speed may increase to more than the
set speed on a steep downhill. You must use the brake to control your speed. As a result, the set speed driving is deactivated.Cruise control switches
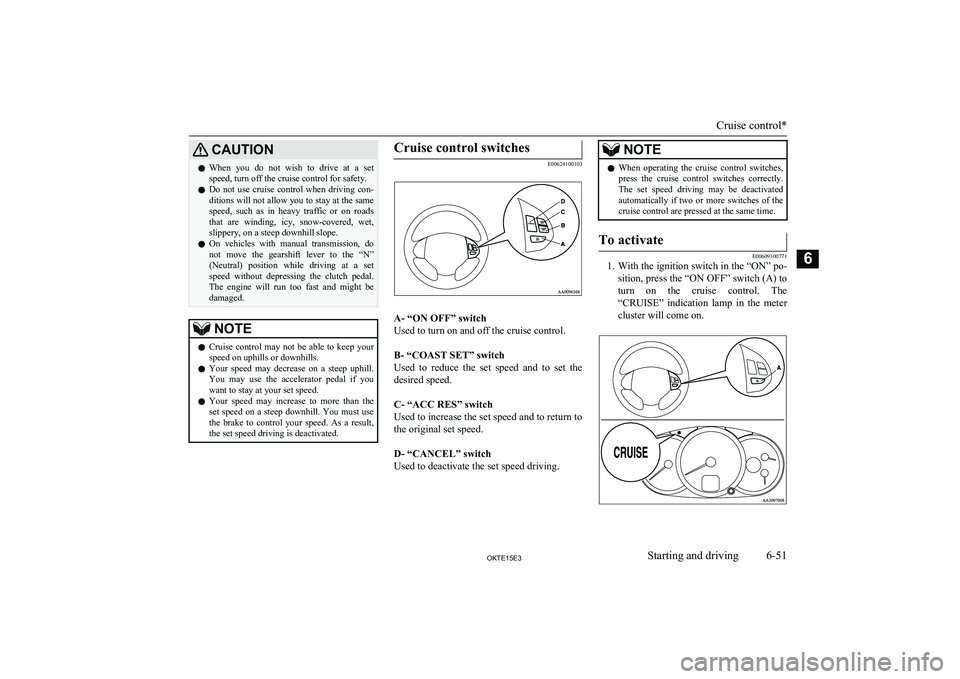
E00624100103
A- “ON OFF” switch
Used to turn on and off the cruise control.
B- “COAST SET” switch
Used to reduce the set speed and to set the
desired speed.
C- “ACC RES” switch
Used to increase the set speed and to return to
the original set speed.
D- “CANCEL” switch
Used to deactivate the set speed driving.
NOTEl When operating the cruise control switches,
press the cruise control switches correctly.
The set speed driving may be deactivated automatically if two or more switches of the
cruise control are pressed at the same time.To activate
E00609300771
1. With the ignition switch in the “ON” po-
sition, press the “ON OFF” switch (A) to turn on the cruise control. The
“CRUISE” indication lamp in the meter cluster will come on.
Cruise control*
6-51OKTE15E3Starting and driving6
Page 190 of 418
lBe sure that the driving speed does not
exceed the maximum speed for trailer
operation.
l To prevent shocks from the overrun
brake, depress the brake pedal lightly at first and then more strongly.
l To make full use of engine braking,
change to a lower gear before descend-
ing a slope.
l The body, brakes, clutch, and chassis
will be under additional strain when
towing a trailer.
l The heavier weight and higher rolling
and air resistance will increase fuel con- sumption.
Additional precautions for vehi-
cles equipped with an automatic
transmission
The 2 nd
gear (in “Sports mode”) is recom-
mended on slopes or at low speed. Use the 1 st
gear (in “Sports mode”) in mountainous areas
in order to make better use of engine braking and to assist the brake system. However, be
sure that the speed does not exceed the maxi- mum speed limit for the selected gear.
Trailer towing
6-58OKTE15E3Starting and driving6