oil temperature MITSUBISHI L200 2018 Owner's Manual (in English)
[x] Cancel search | Manufacturer: MITSUBISHI, Model Year: 2018, Model line: L200, Model: MITSUBISHI L200 2018Pages: 466, PDF Size: 28.42 MB
Page 140 of 466
Diesel particulate filter(DPF) E00619801457
The diesel particulate filter (DPF) is a device that captures most of the particulate matter
(PM) in the exhaust emissions of the diesel engine. The DPF automatically burns away trapped PM during vehicle operation. Under
certain driving conditions, however, the DPF is not able to burn away all of the trapped PM
and, as a result, an excessive amount of PM accumulates inside it.WARNINGl The DPF reaches very high temperatures.
Do not park your vehicle in areas where combustible materials such as dry grass
or leaves can come in contact with a hot exhaust system since a fire could occur.CAUTIONl Do not use any type of fuel or engine oil that
is not specified for your vehicle. Also, do not use any moisture-removing agent or oth-
er fuel additive. Such substances could have a detrimental effect on the DPF.
Refer to “Fuel selection” on page 2-02 and
“Engine oil” on page 10-05.NOTEl To minimize the likelihood of excessive ac-
cumulation of PM, try to avoid driving for long periods at low speeds and repeatedly
driving short distances, and try to keep high
engine speed driving as much as possible.
l The engine sounds slightly different than
usual while the DPF automatically burns
away trapped PM. The change in the engine
sound does not indicate a fault.
DPF warning lamp
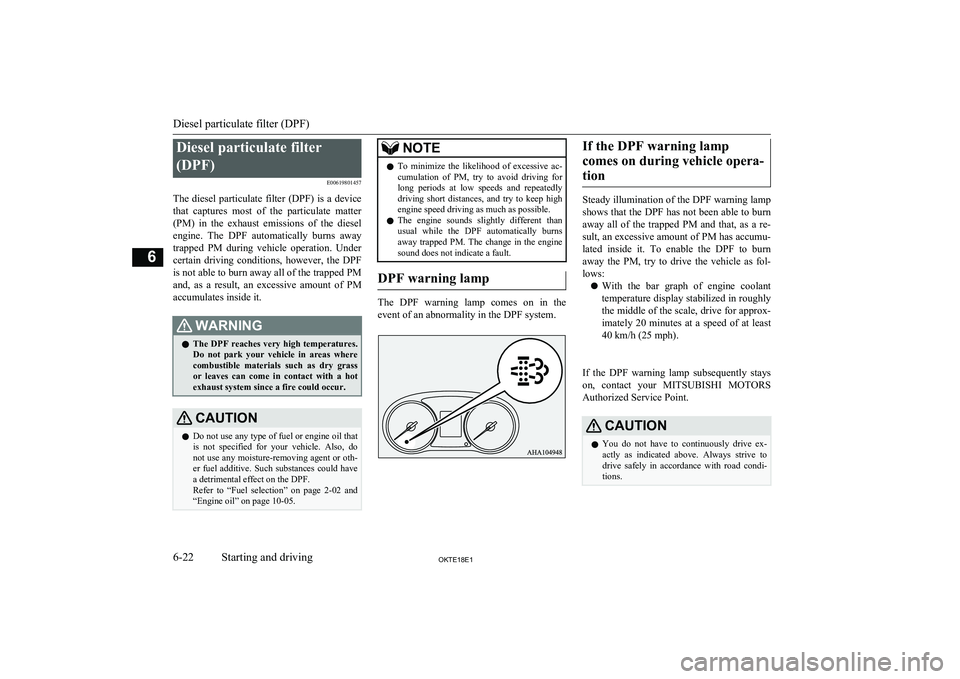
The DPF warning lamp comes on in the
event of an abnormality in the DPF system.
If the DPF warning lamp
comes on during vehicle opera- tion
Steady illumination of the DPF warning lamp shows that the DPF has not been able to burn
away all of the trapped PM and that, as a re-
sult, an excessive amount of PM has accumu- lated inside it. To enable the DPF to burn
away the PM, try to drive the vehicle as fol-
lows:
l With the bar graph of engine coolant
temperature display stabilized in roughly
the middle of the scale, drive for approx- imately 20 minutes at a speed of at least
40 km/h (25 mph).
If the DPF warning lamp subsequently stays
on, contact your MITSUBISHI MOTORS
Authorized Service Point.
CAUTIONl You do not have to continuously drive ex-
actly as indicated above. Always strive to
drive safely in accordance with road condi- tions.
Diesel particulate filter (DPF)
6-22OKTE18E1Starting and driving6
Page 141 of 466
If the DPF warning lamp flash-es during vehicle operation
Flashing of the DPF warning lamp indicates an abnormality in the DPF system. Have the system inspected by a MITSUBISHI
MOTORS Authorized Service Point.
CAUTIONl Continuing to drive with the DPF warning
lamp flashing could result in engine trouble and DPF damage.Turbocharger operation*
E00611200083CAUTIONlDo not run the engine at high speeds (for ex-
ample, by revving it or by accelerating rap-
idly) immediately after starting it.
l Do not stop the engine immediately after
high-speed or uphill driving. First allow the
engine to idle to give the turbocharger a
chance to cool down.Turbocharger
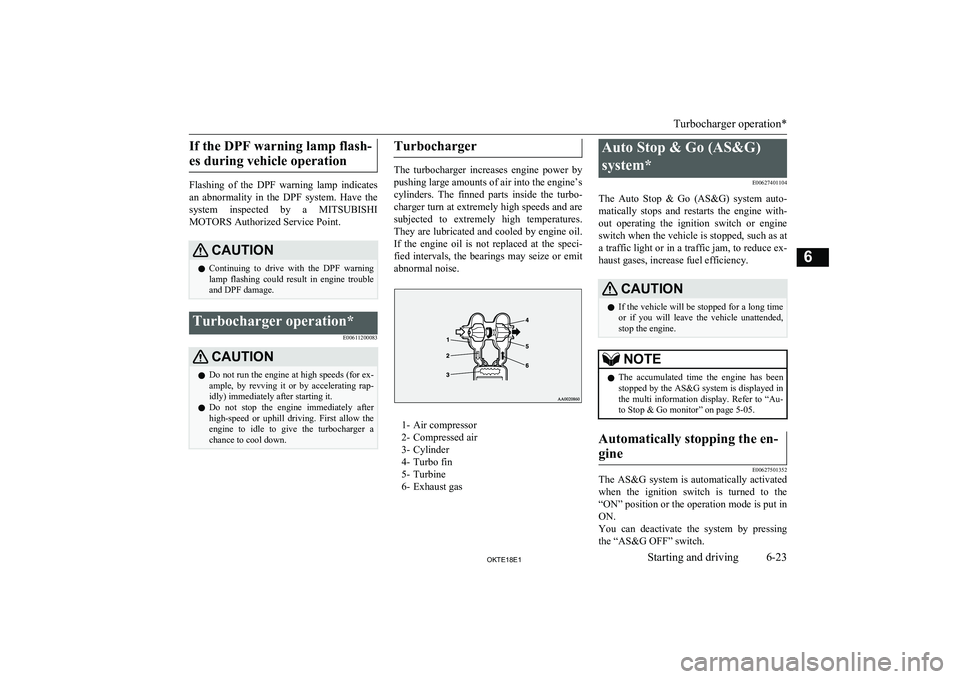
The turbocharger increases engine power by
pushing large amounts of air into the engine’s
cylinders. The finned parts inside the turbo- charger turn at extremely high speeds and aresubjected to extremely high temperatures.
They are lubricated and cooled by engine oil.
If the engine oil is not replaced at the speci- fied intervals, the bearings may seize or emit
abnormal noise.
1- Air compressor
2- Compressed air
3- Cylinder
4- Turbo fin
5- Turbine
6- Exhaust gas
Auto Stop & Go (AS&G)
system* E00627401104
The Auto Stop & Go (AS&G) system auto- matically stops and restarts the engine with- out operating the ignition switch or engineswitch when the vehicle is stopped, such as at
a traffic light or in a traffic jam, to reduce ex- haust gases, increase fuel efficiency.CAUTIONl If the vehicle will be stopped for a long time
or if you will leave the vehicle unattended,
stop the engine.NOTEl The accumulated time the engine has been
stopped by the AS&G system is displayed in
the multi information display. Refer to “Au-
to Stop & Go monitor” on page 5-05.Automatically stopping the en-
gine
E00627501352
The AS&G system is automatically activated when the ignition switch is turned to the
“ON” position or the operation mode is put in
ON.
You can deactivate the system by pressing the “AS&G OFF” switch.
Turbocharger operation*
6-23OKTE18E1Starting and driving6
Page 145 of 466
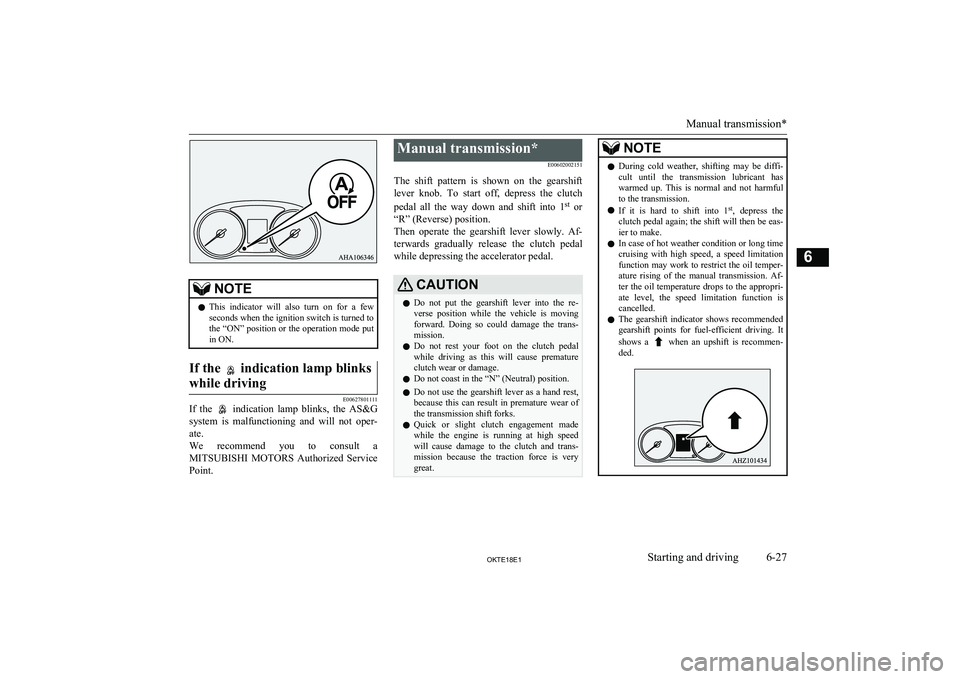
NOTElThis indicator will also turn on for a few
seconds when the ignition switch is turned to
the “ON” position or the operation mode put in ON.If the indication lamp blinks
while driving
E00627801111
If the indication lamp blinks, the AS&G
system is malfunctioning and will not oper-
ate.
We recommend you to consult a MITSUBISHI MOTORS Authorized Service
Point.
Manual transmission*
E00602002151
The shift pattern is shown on the gearshift lever knob. To start off, depress the clutch
pedal all the way down and shift into 1 st
or
“R” (Reverse) position.
Then operate the gearshift lever slowly. Af- terwards gradually release the clutch pedal
while depressing the accelerator pedal.CAUTIONl Do not put the gearshift lever into the re-
verse position while the vehicle is moving forward. Doing so could damage the trans-
mission.
l Do not rest your foot on the clutch pedal
while driving as this will cause premature
clutch wear or damage.
l Do not coast in the “N” (Neutral) position.
l Do not use the gearshift lever as a hand rest,
because this can result in premature wear of
the transmission shift forks.
l Quick or slight clutch engagement made
while the engine is running at high speed
will cause damage to the clutch and trans-
mission because the traction force is very great.NOTEl During cold weather, shifting may be diffi-
cult until the transmission lubricant has
warmed up. This is normal and not harmful
to the transmission.
l If it is hard to shift into 1 st
, depress the
clutch pedal again; the shift will then be eas-
ier to make.
l In case of hot weather condition or long time
cruising with high speed, a speed limitation
function may work to restrict the oil temper-
ature rising of the manual transmission. Af- ter the oil temperature drops to the appropri-
ate level, the speed limitation function is cancelled.
l The gearshift indicator shows recommended
gearshift points for fuel-efficient driving. It
shows a
when an upshift is recommen-
ded.
Manual transmission*
6-27OKTE18E1Starting and driving6
Page 154 of 466
Drive mode-selector positionand 2WD/4WD operation indi- cation lamp
E00641100052
Drive mode-se- lector positionIndication lampDriving
conditions
2HRear-wheel driveWhen driv-
ing on dry paved road.
4H4-wheel drive
When driv-
ing on rough, sand
or snow covered
roads.
4L
Low range 4-wheel drive
and
When driv-
ing up or down steep
hills, on rough or
muddy
roads (es- pecially
when in-
creased tor-
que is re- quired).: Illuminate
: Remain offCAUTIONl The “4L” range gives maximum torque for
low-speed driving on steep slopes, as well assandy, muddy, and other difficult surfaces.
On vehicles with automatic transmission, do not exceed speeds of approximately 70 km/h
(43 mph) in “4L” range.
l Do not drive your vehicle in the “4H” or
“4L” on dry paved roads and highways. Do-
ing so may result in excessive tyre wear, in-
creased fuel consumption, and possible noise
generation. It may also increase the differen-
tial oil temperature, which may damage the drive system. Further, the drive train will besubjected to excessive loading, resulting in
oil leakage, component seizure, or other seri-
ous problems. On dry paved roads and high- ways, drive the vehicle in “2H” only.Drive mode-selector operation
E00641200024
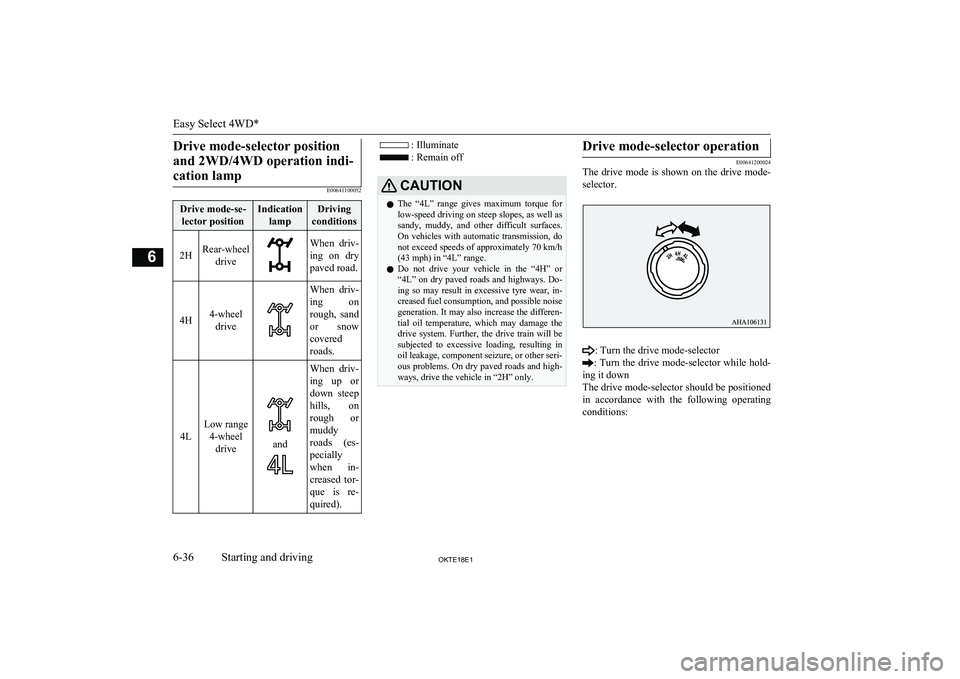
The drive mode is shown on the drive mode-
selector.
: Turn the drive mode-selector
: Turn the drive mode-selector while hold-
ing it down
The drive mode-selector should be positioned
in accordance with the following operating conditions:
Easy Select 4WD*
6-36OKTE18E1Starting and driving6
Page 159 of 466
CAUTIONlDo not drive your vehicle in the “4HLc” or
“4LLc” position on dry paved roads and highways. Doing so may result in excessivetyre wear, increased fuel consumption, and
possible noise generation. It may also in-
crease the differential oil temperature, which
may damage the drive system. Further, the drive train will be subjected to excessive loading, resulting in oil leakage, component
seizure, or other serious problems. On dry
paved roads and highways, drive the vehicle
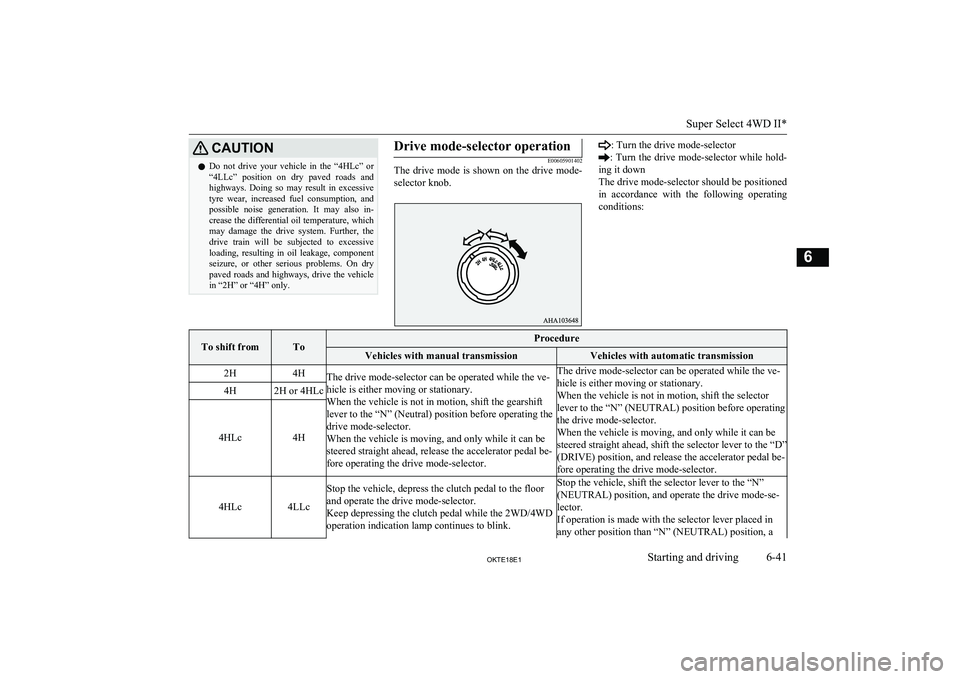
in “2H” or “4H” only.Drive mode-selector operation
E00605901402
The drive mode is shown on the drive mode-
selector knob.
: Turn the drive mode-selector
: Turn the drive mode-selector while hold-
ing it down
The drive mode-selector should be positioned
in accordance with the following operating conditions:To shift fromToProcedureVehicles with manual transmissionVehicles with automatic transmission2H4HThe drive mode-selector can be operated while the ve-
hicle is either moving or stationary.
When the vehicle is not in motion, shift the gearshift
lever to the “N” (Neutral) position before operating the
drive mode-selector.
When the vehicle is moving, and only while it can be
steered straight ahead, release the accelerator pedal be- fore operating the drive mode-selector.The drive mode-selector can be operated while the ve-
hicle is either moving or stationary.
When the vehicle is not in motion, shift the selector
lever to the “N” (NEUTRAL) position before operating
the drive mode-selector.
When the vehicle is moving, and only while it can be
steered straight ahead, shift the selector lever to the “D”
(DRIVE) position, and release the accelerator pedal be-
fore operating the drive mode-selector.4H2H or 4HLc
4HLc4H4HLc4LLc
Stop the vehicle, depress the clutch pedal to the floor
and operate the drive mode-selector.
Keep depressing the clutch pedal while the 2WD/4WD
operation indication lamp continues to blink.Stop the vehicle, shift the selector lever to the “N”
(NEUTRAL) position, and operate the drive mode-se-
lector.
If operation is made with the selector lever placed in any other position than “N” (NEUTRAL) position, a
Super Select 4WD II*
6-41OKTE18E1Starting and driving6
Page 198 of 466
How to use the rear-view cam-era
When you place the gearshift lever or the se- lector lever in the “R” position with the igni-
tion switch in the “ON” position or the opera- tion mode in ON, the view behind the vehiclewill automatically appear on the screen of theMITSUBISHI Multi Communication System
(MMCS), the Smartphone Link Display Au- dio or the DISPLAY AUDIO. When you
move the gearshift lever or the selector lever to any other position, the screen will return toits original indication.
CAUTIONl The rear-view camera has a special lens that
can make objects shown on the screen ap- pear to be closer or further away than they
actually are.NOTEl Because the rear-view camera has a special
lens, the lines on the ground between park-
ing spaces may not look parallel on the screen.
l In the following situations, the screen indi-
cation may be difficult to see. There is no abnormality.
• Low light (nighttime).NOTE•When the light of the sun or the light from
a vehicle’s headlamps shines directly into
the lens.
• If a fluorescent light shines directly into
the lens, the screen indication may be
flicker.
There is no abnormality.
l If the camera is hot and is then cooled by
rain or a car wash, the lens can mist up. This
phenomenon does not indicate a malfunc- tion.
l If the atmospheric temperature is extremely
hot or extremely cold, the rear-view camera
images may not be clear.
There is no abnormality.
l If a radio set is installed near the camera, the
rear-view camera images may cause electri- cal system interference and the system may
stop functioning properly.
l It is not possible to fully see obstacles when
the lens is dirty. If the lens becomes conta-
minated by water droplets, snow, mud or oil, wipe off the contamination, taking care not
to scratch the lens.
l Please observe the following cautions. Ig-
noring them could lead to a camera malfunc-tion.
• Do not subject the camera to a physical
shook such as striking it strongly or throwing a thing at it.
• Do not adhere organic substances, waxes,
oil remover, and glass cleaner to the cam-
era.
If adhered to them, immediately wipe off.NOTE• Do not splash the camera with boiling wa-
ter.
• Never spray or splash water on the cam-
era or around it.
• Do not disconnect, disassemble or modify
the camera.
• Do not scratch the camera, as this may
cause damage to the rear-view camera im-
ages.
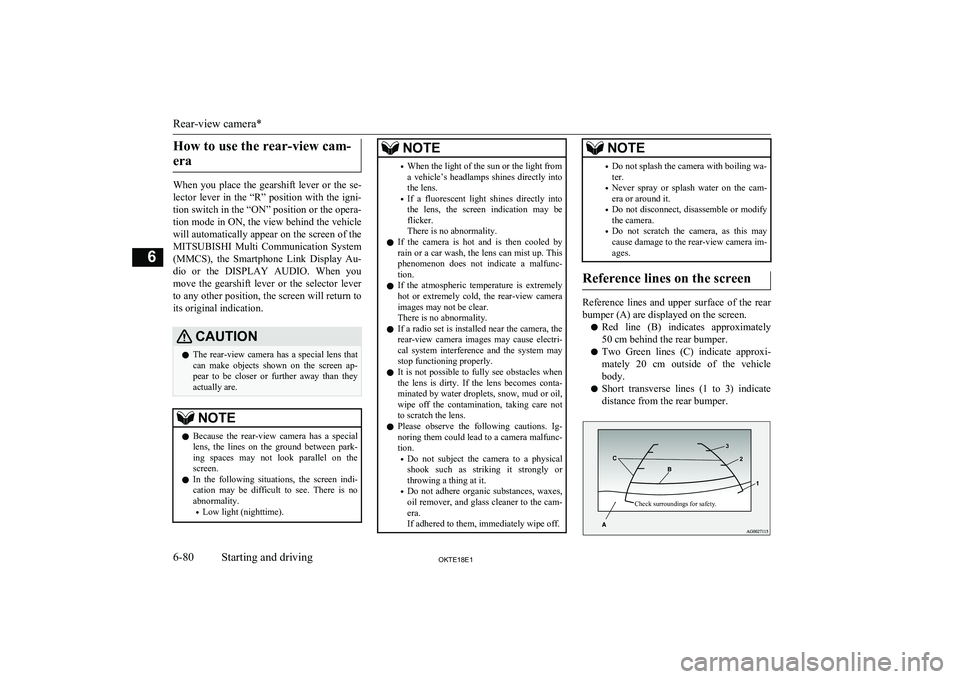
Reference lines on the screen
Reference lines and upper surface of the rear
bumper (A) are displayed on the screen.
l Red line (B) indicates approximately
50 cm behind the rear bumper.
l Two Green lines (C) indicate approxi-
mately 20 cm outside of the vehicle body.
l Short transverse lines (1 to 3) indicate
distance from the rear bumper.
Check surroundings for safety.
Rear-view camera*
6-80OKTE18E1Starting and driving6
Page 341 of 466
If your vehicle tows another ve-
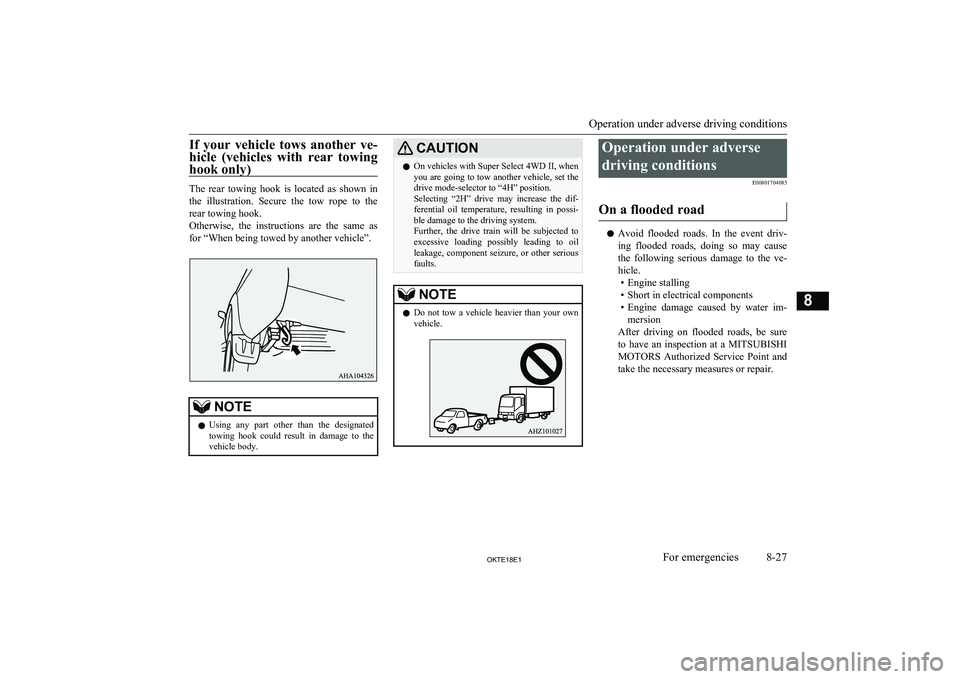
hicle (vehicles with rear towing hook only)
The rear towing hook is located as shown inthe illustration. Secure the tow rope to the
rear towing hook.
Otherwise, the instructions are the same as for “When being towed by another vehicle”.
NOTEl Using any part other than the designated
towing hook could result in damage to thevehicle body.CAUTIONl On vehicles with Super Select 4WD II, when
you are going to tow another vehicle, set the drive mode-selector to “4H” position.
Selecting “2H” drive may increase the dif-
ferential oil temperature, resulting in possi-
ble damage to the driving system.
Further, the drive train will be subjected to excessive loading possibly leading to oilleakage, component seizure, or other serious faults.NOTEl Do not tow a vehicle heavier than your own
vehicle.Operation under adverse
driving conditions E00801704085
On a flooded road
l Avoid flooded roads. In the event driv-
ing flooded roads, doing so may cause the following serious damage to the ve-
hicle.
• Engine stalling
• Short in electrical components
• Engine damage caused by water im-
mersion
After driving on flooded roads, be sure to have an inspection at a MITSUBISHI
MOTORS Authorized Service Point and
take the necessary measures or repair.
Operation under adverse driving conditions
8-27OKTE18E1For emergencies8
Page 345 of 466
Genuine leather*
E00900601999
1. To clean, lightly wipe the leather with a
soft cloth soaked in a mild soap and wa-
ter solution.
2. Dip cloth in fresh water and wring it out
well. Using this cloth, wipe off the deter-
gent thoroughly.
3. Apply leather protecting agent to the
genuine leather surface.
NOTEl If genuine leather is wet with water or is
washed in water, wipe off water as quickly
as possible with a dry, soft cloth.
If left damp, mildew may grow.
l Organic solvents such as benzine, kerosene,
alcohol and petrol, acid or alkaline solvents
may discolour the genuine leather surface. Be sure to use neutral detergents.
l Remove dirty patches or oil substances
quickly as they can stain genuine leather.
l The genuine leather surface may harden and
shrink if it is exposed to direct sun for long
hours. When your vehicle is parked, place it in the shade as much as possible.
l When the temperature of the vehicle interior
rises in summer, vinyl products left on the
genuine leather seat may deteriorate and stick to the seat.Cleaning the exterior of
your vehicle E00900701264
If the following is left on your vehicle, it may cause corrosion, discolouration and stains, wash the vehicle as soon as possible.
l Seawater, road deicing products.
l Soot and dust, iron powder from facto-
ries, chemical substance (acids, alkalis, coaltar, etc.).
l Droppings from birds, carcasses of in-
sects, tree sap, etc.Washing
E00900903794
Chemicals contained in the dirt and dustpicked up from the road surface can damagethe paint coat and body of your vehicle if left
in prolonged contact.
Frequent washing and waxing is the best way to protect your vehicle from this damage.
This will also be effective in protecting it from environmental elements such as rain,snow, salt air, etc.
Do not wash the vehicle in direct sunlight.
Park the vehicle in the shade and spray it
with water to remove dust. Next, using an ample amount of clean water and a car wash- ing brush or sponge, wash the vehicle from
top to bottom.
Use a mild car washing soap if necessary.
Rinse thoroughly and wipe dry with a soft
cloth. After washing the vehicle, carefully clean the joints and flanges of the doors, bon-
net and other sections where dirt is likely to remain.CAUTIONl When washing the under side of your vehi-
cle or wheel, be careful not to injure your
hands.
l If your vehicle has rain sensor wipers, place
the wiper switch lever in the “OFF” position to deactivate the rain sensor before washing
the vehicle. Otherwise, the wipers will oper- ate in the presence of water spray on the
windscreen and may get damaged as a result.
l Refrain from excessively using a car wash as
its brushes may scratch the paint surface,
causing it to lose its gloss.
Scratches will be especially visible on darker
coloured vehicles.
l Never spray or splash water on the electrical
components in the engine compartment. Do- ing so could have an adverse effect on the
engine startability.
Exercise caution also when washing the un-
derbody; be careful not to spray water into the engine compartment.
l Some types of hot water washing equipment
apply high pressure and heat to the vehicle. They may cause heat distortion and damage
to the vehicle resin parts and may result in flooding of the vehicle interior. Therefore;
Cleaning the exterior of your vehicle
9-03OKTE18E1Vehicle care9
Page 354 of 466
NOTE•On vehicles with DPF, the engine oil will
increase due to a little fuel getting mixed
in the engine oil when the DPF regener- ates to burn away the PM (particulate
matter). However, it does not indicate a
malfunction.
• The engine oil level will be increased due
to an amount of the fuel being mixed in
the engine oil when the DPF regenerates
to burn away the PM (particulate matter). It does not indicate a malfunction.
In the following conditions, the engine oil level may increase easily. We recommendyou to have it checked frequently.
•frequent driving at uphill and down-
hill
• frequent driving at high altitudes
• frequent and extended idling
• frequent driving through a traffic
jam
l The engine oil will deteriorate rapidly if the
vehicle is subjected to severe conditions, re- quiring earlier oil replacement. Please refer
to the maintenance schedule.
l For handling of used engine oils, refer to
page 2-06.Selection of engine oil
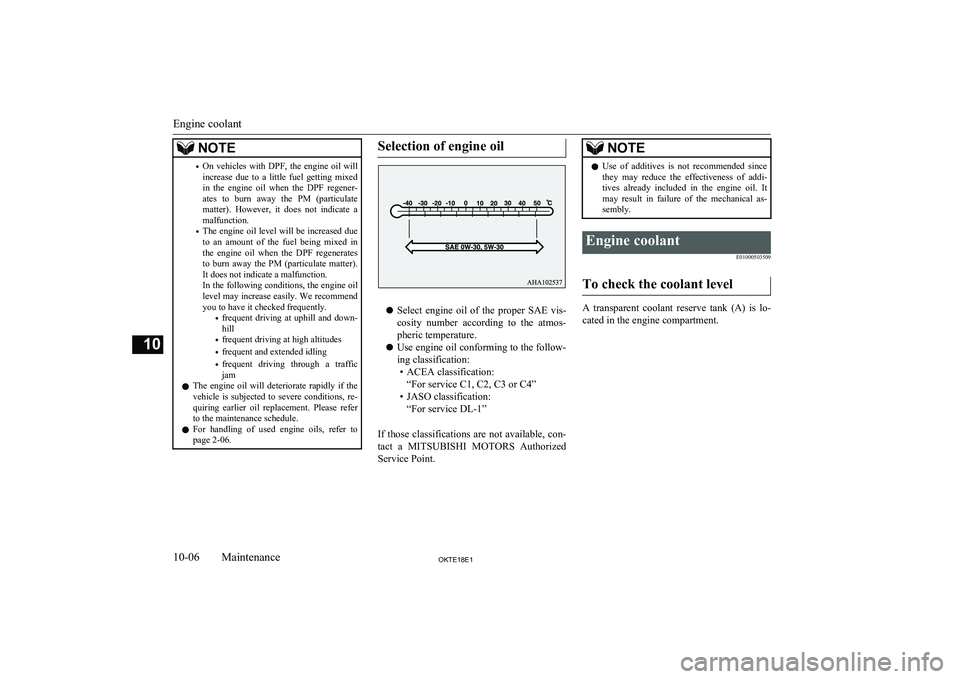
l Select engine oil of the proper SAE vis-
cosity number according to the atmos-pheric temperature.
l Use engine oil conforming to the follow-
ing classification: • ACEA classification: “For service C1, C2, C3 or C4”
• JASO classification: “For service DL-1”
If those classifications are not available, con- tact a MITSUBISHI MOTORS Authorized
Service Point.
NOTEl Use of additives is not recommended since
they may reduce the effectiveness of addi-
tives already included in the engine oil. It may result in failure of the mechanical as-
sembly.Engine coolant
E01000503509
To check the coolant level
A transparent coolant reserve tank (A) is lo-cated in the engine compartment.
Engine coolant
10-06OKTE18E1Maintenance10
Page 361 of 466
Wheel condition
E01001802010
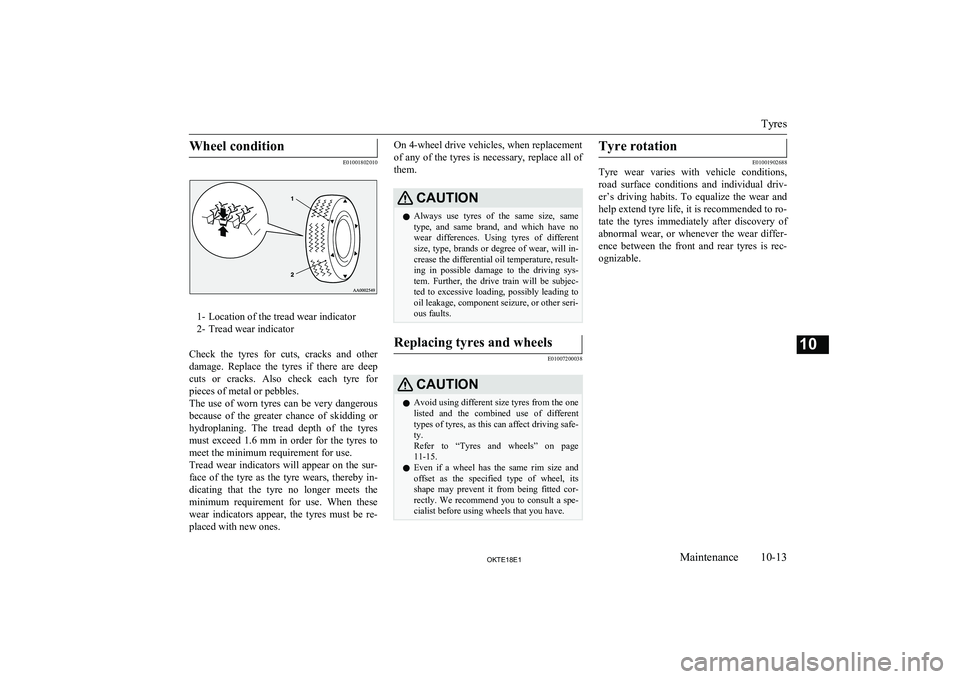
1- Location of the tread wear indicator
2- Tread wear indicator
Check the tyres for cuts, cracks and other damage. Replace the tyres if there are deep
cuts or cracks. Also check each tyre for pieces of metal or pebbles.
The use of worn tyres can be very dangerous
because of the greater chance of skidding or
hydroplaning. The tread depth of the tyres
must exceed 1.6 mm in order for the tyres to meet the minimum requirement for use.
Tread wear indicators will appear on the sur-
face of the tyre as the tyre wears, thereby in-
dicating that the tyre no longer meets the
minimum requirement for use. When these wear indicators appear, the tyres must be re-
placed with new ones.
On 4-wheel drive vehicles, when replacement
of any of the tyres is necessary, replace all of
them.CAUTIONl Always use tyres of the same size, same
type, and same brand, and which have no wear differences. Using tyres of differentsize, type, brands or degree of wear, will in-
crease the differential oil temperature, result-
ing in possible damage to the driving sys-
tem. Further, the drive train will be subjec- ted to excessive loading, possibly leading tooil leakage, component seizure, or other seri-
ous faults.Replacing tyres and wheels
E01007200038
CAUTIONl Avoid using different size tyres from the one
listed and the combined use of different
types of tyres, as this can affect driving safe- ty.
Refer to “Tyres and wheels” on page
11-15.
l Even if a wheel has the same rim size and
offset as the specified type of wheel, its
shape may prevent it from being fitted cor- rectly. We recommend you to consult a spe-
cialist before using wheels that you have.Tyre rotation
E01001902688
Tyre wear varies with vehicle conditions,
road surface conditions and individual driv- er’s driving habits. To equalize the wear andhelp extend tyre life, it is recommended to ro-
tate the tyres immediately after discovery of
abnormal wear, or whenever the wear differ- ence between the front and rear tyres is rec-
ognizable.
Tyres
10-13OKTE18E1Maintenance10