engine MITSUBISHI LANCER 2016 8.G Owners Manual
[x] Cancel search | Manufacturer: MITSUBISHI, Model Year: 2016, Model line: LANCER, Model: MITSUBISHI LANCER 2016 8.GPages: 392, PDF Size: 13.12 MB
Page 239 of 392
Vehicle preparation before driving
Driving safety 6-3
6
N00629001741
For a safer and more enjoyable trip, always observe the following: Before starting the vehicle, make certain that you and all passengers are seated and wearing their seat belts properly (with children in the rear seat, in appropriaterestraints), and that all the doors are locked.
Move the driver’s seat as far backward as possible, while still keeping good visibil- ity, and good control of the steering wheel, brakes, accelerator, and controls.Check the instrument panel indicators and multi-information display for any possible problem. Move the front passenger seat as far back as possible. Make sure that infants and small children are properly restrained in accordance withall laws and regulations.
Check these by selecting the defroster mode, and set the blower switch on high. You should be able to feel the air blowing against the windshield. (Refer to “Defrosting or defogging the wind- shield and door windows” on page 7-7, 7-12, 7-17.) Check all the tires for heavy tread wear or uneven wear patterns. Look for stones, nails,glass, or other objects stuck in the tread. Look for any tread cuts or sidewall cracks. Check the wheel nuts for tightness, and the tires(including spare tire) for proper pressures.
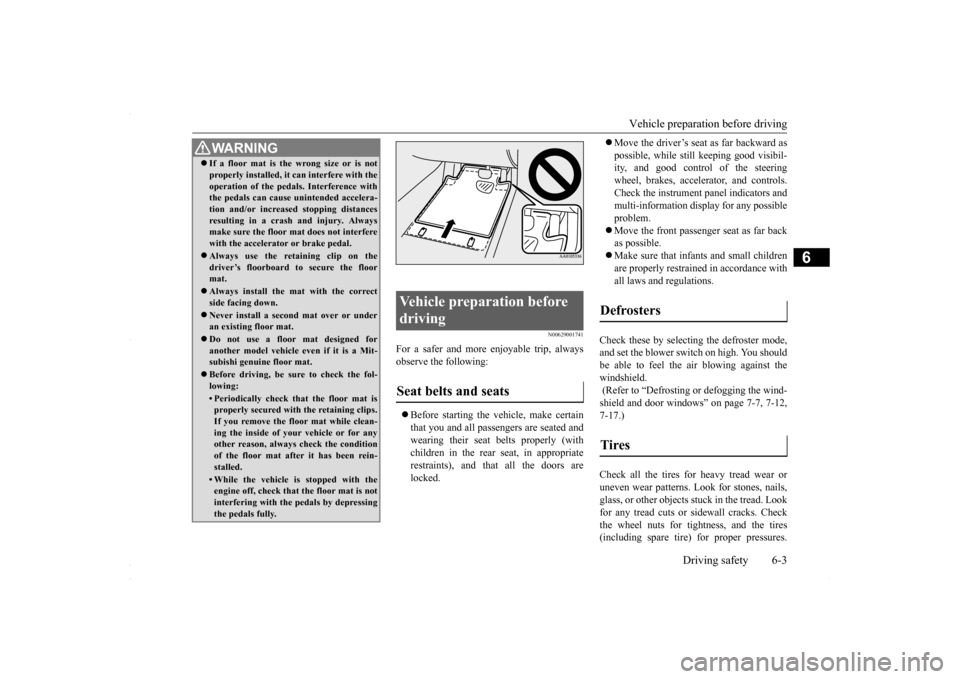
WA R N I N G If a floor mat is the wrong size or is not properly installed, it can interfere with the operation of the pedals. Interference with the pedals can cause unintended accelera- tion and/or increased stopping distancesresulting in a crash and injury. Always make sure the floor mat does not interfere with the accelerator or brake pedal. Always use the retaining clip on the driver’s floorboard to secure the floormat. Always install the mat with the correct side facing down. Never install a second mat over or under an existing floor mat. Do not use a floor mat designed for another model vehicle ev
en if it is a Mit-
subishi genuine floor mat. Before driving, be sure to check the fol- lowing:• Periodically check that the floor mat isproperly secured with the retaining clips. If you remove the floor mat while clean-ing the inside of your vehicle or for any other reason, always check the condition of the floor mat after it has been rein-stalled.• While the vehicle is stopped with the engine off, check that the floor mat is not interfering with the pedals by depressingthe pedals fully.
Vehicle preparation before driving Seat belts and seats
Defrosters Tires
BK0230300US.bo
ok 3 ページ 2015年7月30日 木曜日 午後8時38分
Page 240 of 392
Safe driving techniques 6-4 Driving safety
6
Replace your tires before they are heavily worn out. As your vehicle is equipped with a tire pres- sure monitoring system, there is a risk ofdamage to the tire inflation pressure sensors when the tire is replaced on the rim. Tire replacement should, therefore, be performedonly by an authorized Mitsubishi Motors dealer. Have someone watch while you turn all the exterior lights on and off. Also check the turn signal indicators and high-beam indicators on the instrument panel. Check the ground under the vehicle after parking overnight, for fuel, water, oil, orother leaks. Make sure all the fluid levels are correct. Also, if you can smell fuel, you need to find out why immediately and have itfixed.
N00629200111
Even this vehicle’s safety equipment, andyour safest driving, cannot guarantee that you
can avoid an accident or injury. However, if you give extra attention to the following areas, you can better protect yourself and your passengers: Drive defensively. Be aware of traffic, road and weather conditions. Leave plenty of stopping distance between your vehicle and the vehicle ahead. Before changing lanes, check your mir- rors and use your turn signal light. While driving, watch the behavior of other drivers, bicyclists, and pedestrians. Always obey applicable laws and regula- tions. Be a polite and alert driver. Always leave room for unexpected events, such assudden braking. If you plan to drive in another country, obey their vehicle registration laws andmake sure you will be able to get the right fuel.
N00629401497
Check the battery, including terminals and cables. During extremely cold weather, the battery will not be as strong. Also, thebattery power level may drop because more power is used for cold starting and driving.
Before driving the vehicle, check to see if the engine runs at the proper speed and if the headlights are as bright as normally. Charge or replace the battery if necessary.During extreme cold weather, it is possi- ble that a very low battery could freeze. Warm the engine sufficiently. After start- ing the engine, allow a short warm-up time to distribute oil to all cylinders. Thendrive your vehicle slowly. Stay at low speeds at first so that the transaxle, transfer case and rear axle oilhave time to spread to all the lubrication points. Manual transaxle can be harder to shift in cold weather conditions. This is normal and shifting will get easier as the transaxle warms up. Check the engine antifreeze. If there is not enough coolant because of a leak or from engine overheating, add Mit-subishi Motors Genuine Super Long Life Coolant Premium or equivalent.
Lights Fluid leaks Safe driving techniques
Driving during cold weather
WA R N I N G The battery gives off explosive hydrogen gas. Any spark or flame can cause the bat- tery to explode, which could cause seriousinjury or death. Always wear protective clothes and a face mask when working with your battery, orlet a skilled mechanic do it.
BK0230300US.bo
ok 4 ページ 2015年7月30日 木曜日 午後8時38分
Page 241 of 392
Braking
Driving safety 6-5
6
Please read this section in conjunction with the “Engine coolant” on page 9-7.
N00629500446
All the parts of the brake system are criticalto safety. Have the vehicle serviced by anauthorized Mitsubishi Motors dealer or a repair facility of your choice at regular inter- vals according to the “WARRANTY ANDMAINTENANCE MANUAL”. Check the brake system while driving at a low speed immediately after starting, espe- cially when the brakes are wet, to confirm they work normally.A film of water can be formed on the brake discs or brake drums and prevent normal braking after driving in heavy rain or throughlarge puddles, or after the vehicle is washed. If this occurs, dry the brakes out by driving slowly while lightly depressing the brakepedal.
On snowy roads, ice can form on the braking system, making the brakes less effective.While driving in such conditions, pay close attention to preceding and following vehicles and to the condition of
the road surface. From
time to time, lightly depress the brake pedal and check how effective the brakes are. It is important to take advantage of the engine braking by shifting to a lower gear while driving on steep downhill roads in order to prevent the brakes from overheating.
N00629601356
When parking on a hill, set the parking brake,and turn the front wheels toward the curb on adownhill, or away from the curb on an uphill. If necessary, apply chocks to wheels.
Place the gearshift lever into the “R” (Reverse) position when parking on a down- hill slope, into the 1s
t position when parking
on an uphill slope. Be sure that the parking brake is firmly set when parked and that the selector lever is in the “P” (PARK) position.When parking on a hill, it is important to set the parking brake before moving the selector lever to the “P” (PARK) position. This pre-vents loading the parking brake against the transaxle gear. When this happens, it is diffi- cult to move the selector lever out of the “P”(PARK) position. Never leave the engine running while you take a short sleep/rest. Also, never leave the engine running in a closed or poorly venti-lated place.
WA R N I N G Never open the radiator cap when the radiator is hot. You could be seriouslyburned.
Braking When brakes are wet
When driving in cold weather When driving downhill Parking Parking on a hill
For vehicles with manual trans- axle For vehicles with continuously variable transmission (CVT) Parking with the engine run- ning
BK0230300US.bo
ok 5 ページ 2015年7月30日 木曜日 午後8時38分
Page 242 of 392
Loading information 6-6 Driving safety
6
Your front bumper can be damaged if you scrape it over curbs or parking stop blocks.Be careful when traveling up or down steep slopes where your bumper can scrape the road. When leaving the vehicle unattended, always carry the key and lock all doors.Always try to park your vehicle in a well lit area.
N00629900349
It is very important to know how much weight your vehicle can carry. This weight iscalled the vehicle capacity weight and includes the weight of all occupants, cargo and non-factory-installed options. The tireand loading information placard located on the driver’s door sill of your vehicle will show how much weight it may properly carry. It is important to familiarize yourself with the following terms before loading your vehicle: Vehicle maximum load on the tire: load on an individual tire that is determined by distributing to each axle its share of the maximum loaded vehicle weight anddividing by two. Vehicle normal load on the tire: load on an individual tire that is determined by dis-tributing to each axle its share of the curb weight, accessory weight, and normal occupant weight and dividing by two.
Maximum loaded vehicle weight: the sum of - (a) Curb weight; (b) Accessory weight;(c) Vehicle capacity weight; and (d) Production options weight. Curb weight: the weight of a motor vehi- cle with standard equipment including the maximum capacity of fuel, oil, and cool- ant. Accessory weight: the combined weight (in excess of those standard items which may be replaced) of automatic transmis- sion, power steering, power brakes, powerwindows, power seats, radio, and heater, to the extent that these items are available as factory- installed equipment (whetherinstalled or not). Vehicle capacity weight: the rated cargo and luggage load plus 150 lbs (68 kg)
*
times the vehicle’s designated seating capacity. Production options weight: the combined weight of those installed regular produc- tion options weighing over 5 lbs (2.3 kg) in excess of those standard items whichthey replace, not previously considered in curb weight or accessory weight, includ- ing heavy duty brakes, ride levelers, roofrack, heavy duty battery, and special trim.
WA R N I N G Leaving the engine running risks injury or death from accidentally moving the gear- shift lever (manual transaxle or the selec- tor lever (CVT) or from the accumulation of toxic exhaust fumes in the passengercompartment.
Where you park
WA R N I N G Do not park your vehicle in areas where combustible materials such as dry grass or leaves can come in contact with a hotexhaust, since a fire could occur.
When leaving the vehicle
Loading information
WA R N I N G Never overload your vehicle. Overloading can damage your vehicle, adversely affectvehicle performance, including handling and braking, cause tire failure, and result in an accident.
BK0230300US.bo
ok 6 ページ 2015年7月30日 木曜日 午後8時38分
Page 254 of 392
Heater without air conditioni
ng function (if so equipped)
7-4 Comfort controls
7
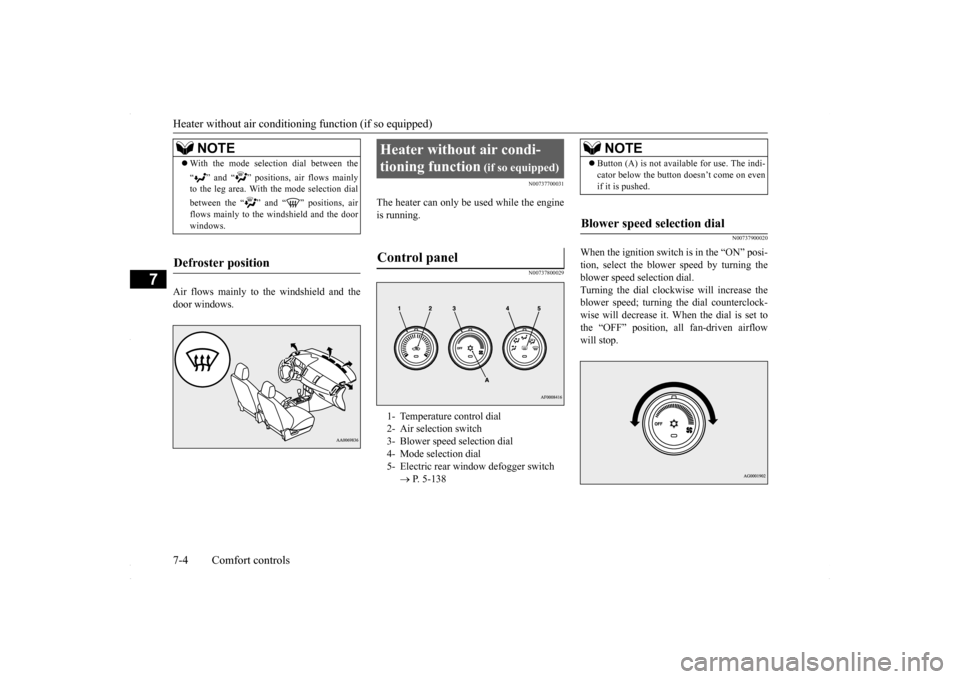
Air flows mainly to the windshield and the door windows.
N00737700031
The heater can only be used while the engineis running.
N00737800029
N00737900020
When the ignition switch is in the “ON” posi- tion, select the blower speed by turning theblower speed selection dial. Turning the dial clockwise will increase the blower speed; turning the dial counterclock-wise will decrease it. When the dial is set to the “OFF” position, all fan-driven airflow will stop.
NOTE
With the mode selection dial between the “ ” and “ ” positions, air flows mainly to the leg area. With the mode selection dial between the “ ” and “ ” positions, air flows mainly to the windshield and the door windows.
Defroster position
Heater without air condi- tioning function
(if so equipped)
Control panel
1- Temperature control dial 2- Air selection switch 3- Blower speed selection dial 4- Mode selection dial5- Electric rear window defogger switch
P. 5-138
NOTE
Button (A) is not available for use. The indi- cator below the button doesn’t come on even if it is pushed.
Blower speed selection dial
BK0230300US.bo
ok 4 ページ 2015年7月30日 木曜日 午後8時38分
Page 255 of 392
Heater without air conditioni
ng function (if so equipped) Comfort controls 7-5
7
N00738000044
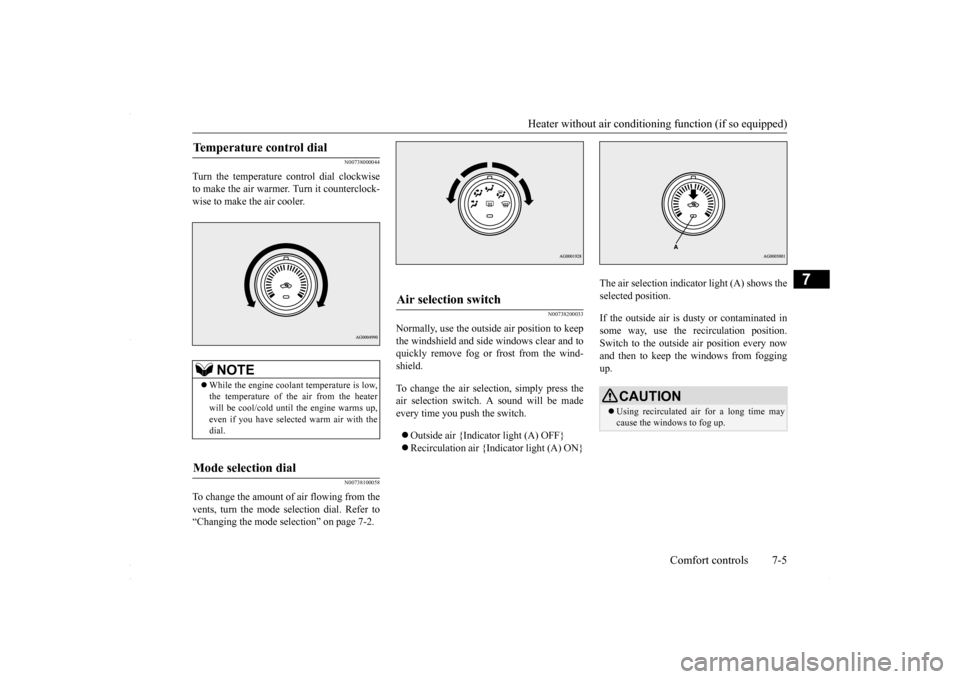
Turn the temperature control dial clockwise to make the air warmer. Turn it counterclock-wise to make the air cooler.
N00738100058
To change the amount of air flowing from thevents, turn the mode selection dial. Refer to“Changing the mode selection” on page 7-2.
N00738200033
Normally, use the outside air position to keepthe windshield and side windows clear and toquickly remove fog or frost from the wind- shield. To change the air selection, simply press the air selection switch. A sound will be made every time you push the switch. Outside air {Indicator light (A) OFF} Recirculation air {Indicator light (A) ON}
The air selection indicator light (A) shows the selected position. If the outside air is dusty or contaminated in some way, use the recirculation position.Switch to the outside air position every now and then to keep th
e windows from fogging
up.
Temperature control dial
NOTE
While the engine coolant temperature is low, the temperature of the air from the heater will be cool/cold until the engine warms up, even if you have selected warm air with thedial.
Mode selection dial
Air selection switch
CAUTION Using recirculated air for a long time may cause the windows to fog up.
BK0230300US.bo
ok 5 ページ 2015年7月30日 木曜日 午後8時38分
Page 257 of 392
Automatic air conditioning with
Fahrenheit scale (if so equipped)
Comfort controls 7-7
7
N00738500065
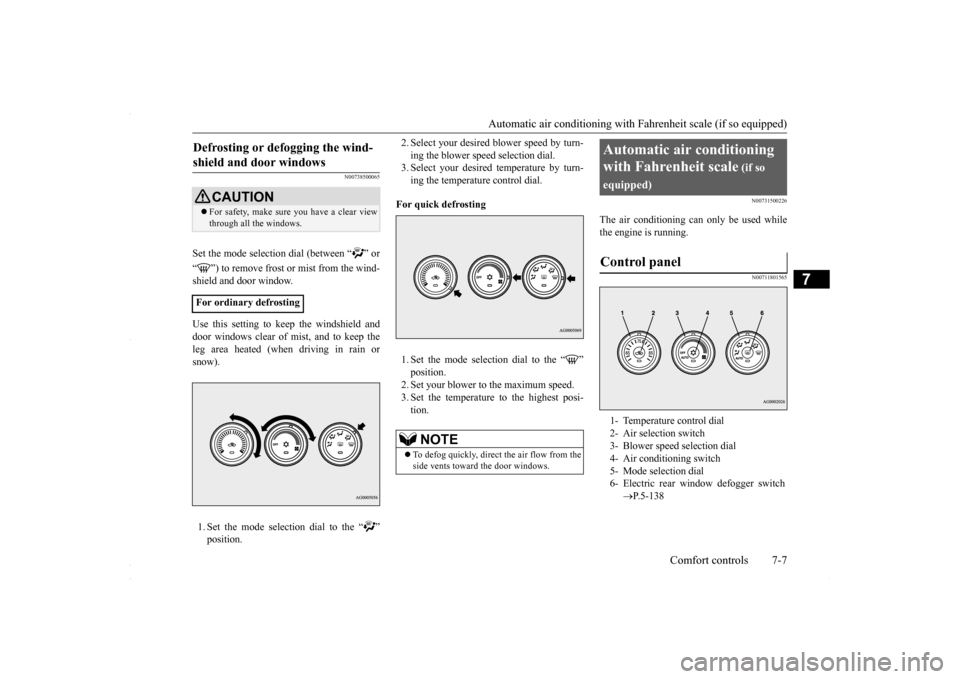
Set the mode selection dial (between “ ” or “ ”) to remove frost or mist from the wind- shield and door window. Use this setting to keep the windshield and door windows clear of mist, and to keep the leg area heated (when driving in rain orsnow). 1. Set the mode selection dial to the “ ”
2. Select your desired blower speed by turn- ing the blower speed selection dial. 3. Select your desired temperature by turn- ing the temperature control dial.
For quick defrosting 1. Set the mode selection dial to the “ ” 2. Set your blower to the maximum speed. 3. Set the temperature to the highest posi-tion.
N00731500226
The air conditioning can only be used whilethe engine is running.
N00711801565
Defrosting or defogging the wind- shield and door windows
CAUTION For safety, make sure you have a clear view through all the windows.
For ordinary defrosting
NOTE
To defog quickly, direct
the air flow from the
side vents toward the door windows.
Automatic air conditioning with Fahrenheit scale
(if so
equipped)Control panel
1- Temperature control dial 2- Air selection switch 3- Blower speed selection dial4- Air conditioning switch 5- Mode selection dial 6- Electric rear window defogger switch
P.5-138
BK0230300US.bo
ok 7 ページ 2015年7月30日 木曜日 午後8時38分
Page 258 of 392
Automatic air conditioning with
Fahrenheit scale (if so equipped)
7-8 Comfort controls
7
N00736900094
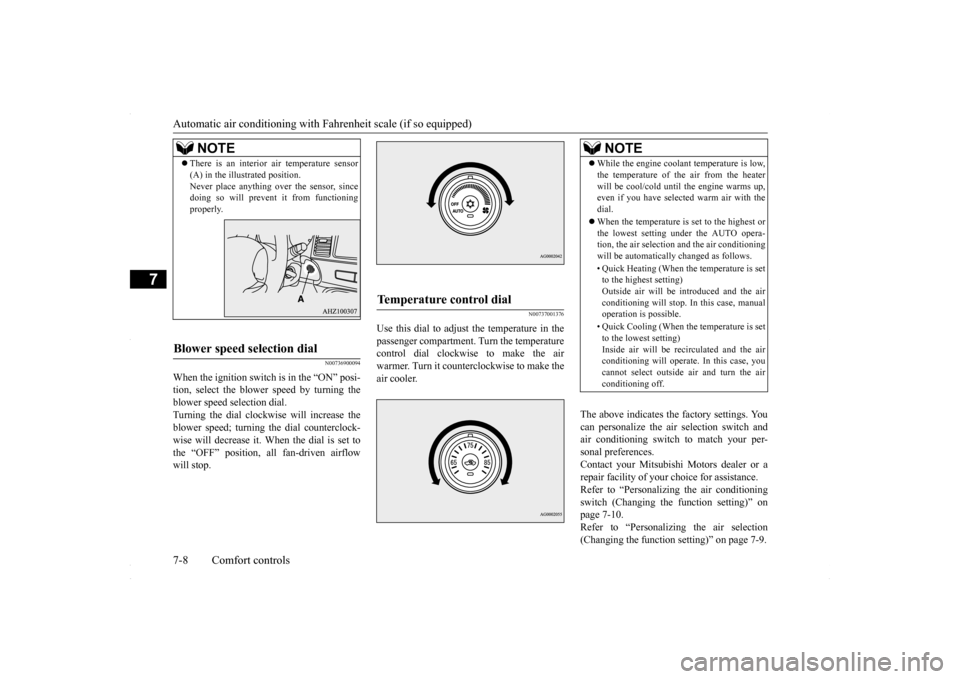
When the ignition switch is in the “ON” posi- tion, select the blower speed by turning the blower speed selection dial. Turning the dial clockwise will increase theblower speed; turning the dial counterclock- wise will decrease it. When the dial is set to the “OFF” position, all fan-driven airflowwill stop.
N00737001376
Use this dial to adjust the temperature in thepassenger compartment. Turn the temperaturecontrol dial clockwise to make the air warmer. Turn it counterclockwise to make the air cooler.
The above indicates the factory settings. You can personalize the air selection switch and air conditioning switch to match your per-sonal preferences. Contact your Mitsubishi Motors dealer or a repair facility of your choice for assistance.Refer to “Personalizing the air conditioning switch (Changing the function setting)” on page 7-10.Refer to “Personalizing the air selection (Changing the function setting)” on page 7-9.
NOTE
There is an interior air temperature sensor (A) in the illustrated position. Never place anything over the sensor, since doing so will prevent it from functioning properly.
Blower speed selection dial
Temperature control dial
NOTE
While the engine coolant temperature is low, the temperature of the air from the heater will be cool/cold until the engine warms up, even if you have selected warm air with the dial. When the temperature is set to the highest or the lowest setting under the AUTO opera-tion, the air selection and the air conditioning will be automatically changed as follows. • Quick Heating (When the temperature is set to the highest setting) Outside air will be introduced and the airconditioning will stop. In this case, manual operation is possible. • Quick Cooling (When the temperature is set to the lowest setting) Inside air will be recirculated and the airconditioning will operate. In this case, you cannot select outside air and turn the air conditioning off.
BK0230300US.bo
ok 8 ページ 2015年7月30日 木曜日 午後8時38分
Page 261 of 392
Automatic air conditioning with
Fahrenheit scale (if so equipped)
Comfort controls 7-11
7
When the mode selection dial or blower speed selection dial has been set to the “AUTO” position or when the tempera- ture control dial has been set to the mini-mum temperature, the air conditioning switch is automatically controlled. Disable automatic air conditioning con- trol:The air conditioning switch is not auto- matically controlled, unless the air condi- tioning switch is used. Changing the settings: Press the air conditioning switch for about10 seconds or longer. When the setting has changed, the system will beep and the indicator light will flash.• When the setting has changed from enabled to disabled, the system will beep three times and theindicator will flash three times. • When the setting has changed from dis- abled to enabled,the system will beep two times and the indicator light will flash three times.
N00731701414
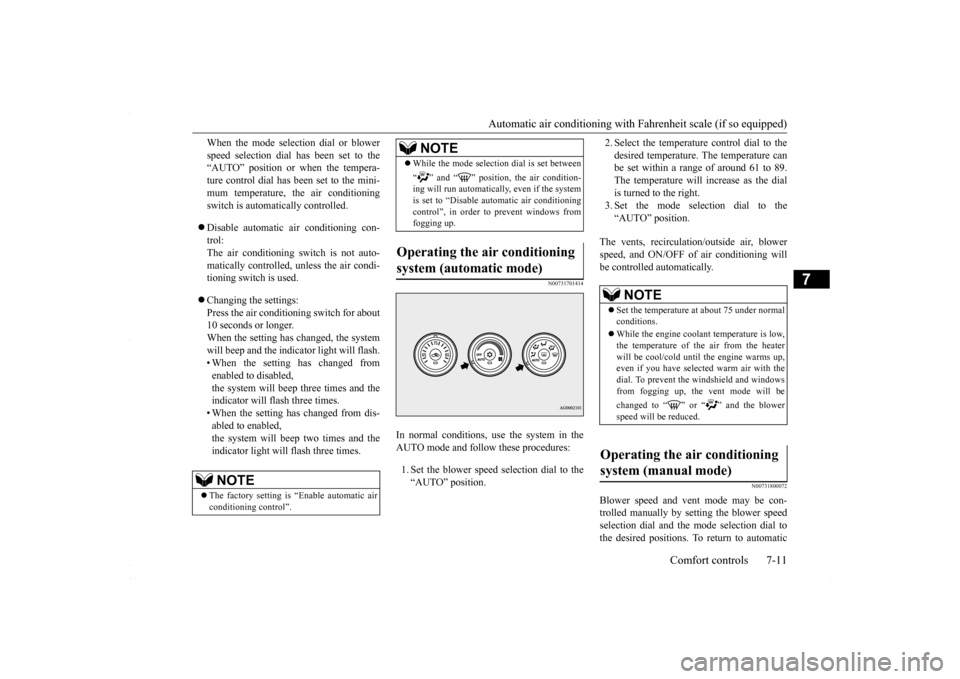
In normal conditions, use the system in the AUTO mode and follow these procedures: 1. Set the blower speed selection dial to the “AUTO” position.
2. Select the temperature control dial to the desired temperature. The temperature can be set within a range of around 61 to 89. The temperature will increase as the dialis turned to the right. 3. Set the mode selection dial to the “AUTO” position.
The vents, recirculation/outside air, blower speed, and ON/OFF of air conditioning will be controlled automatically.
N00731800072
Blower speed and vent mode may be con-trolled manually by setting the blower speed selection dial and the mode selection dial tothe desired positions. To return to automatic
NOTE
The factory setting is “Enable automatic air conditioning control”.
While the mode selection dial is set between “ ” and “ ” position, the air condition- ing will run automatically, even if the system is set to “Disable automatic air conditioningcontrol”, in order to prevent windows from fogging up.
Operating the air conditioning system (automatic mode)
NOTE
NOTE
Set the temperature at about 75 under normal conditions. While the engine coolant temperature is low, the temperature of the air from the heater will be cool/cold until the engine warms up, even if you have selected warm air with thedial. To prevent the windshield and windows from fogging up, the vent mode will be changed to “ ” or “ ” and the blower speed will be reduced.
Operating the air conditioning system (manual mode)
BK0230300US.bo
ok 11 ページ 2015年7月30日 木曜日 午後8時38分
Page 262 of 392
Automatic air conditioning with
Celsius scale (if so equipped)
7-12 Comfort controls
7
operation, set the dials to the “AUTO” posi- tion.
N00732400280
To remove frost or mist from the windshield and door windows, use
the mode selection
dial (“ ” or “ ”). Use this setting to keep the windshield and door windows clear of mist, and to keep the leg area heated (when driving in rain or snow).
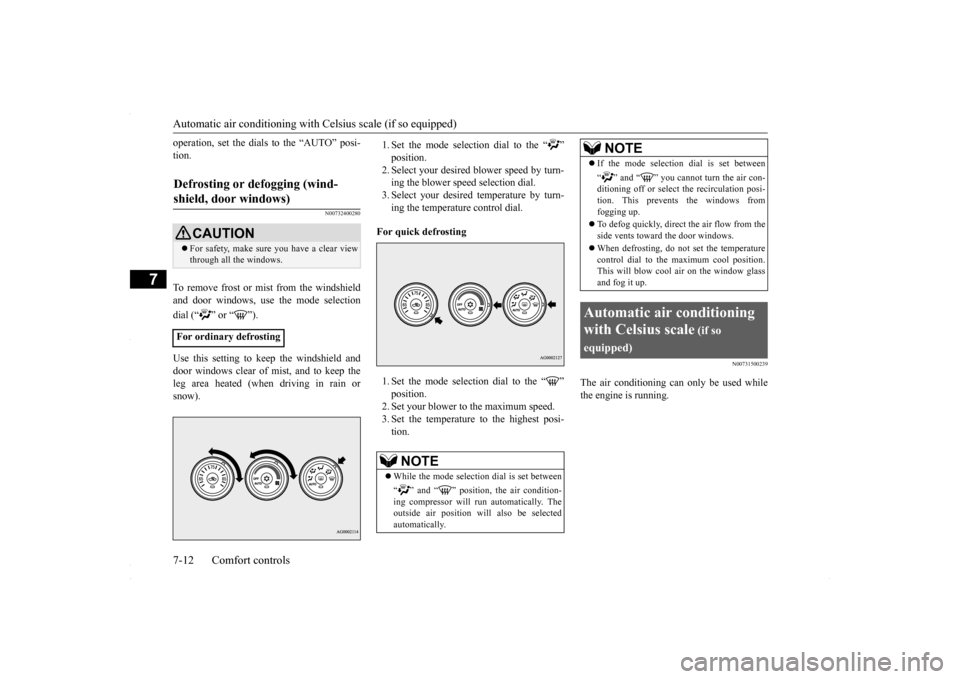
1. Set the mode selection dial to the “ ”2. Select your desired
blower speed by turn-
ing the blower speed selection dial. 3. Select your desired temperature by turn-ing the temperature control dial.
For quick defrosting 1. Set the mode selection dial to the “ ” 2. Set your blower to the maximum speed. 3. Set the temperature to the highest posi-tion.
N00731500239
The air conditioning can only be used whilethe engine is running.
Defrosting or defogging (wind- shield, door windows)
CAUTION For safety, make sure you have a clear view through all the windows.
For ordinary defrosting
NOTE
While the mode selection dial is set between “ ” and “ ” position, the air condition- ing compressor will run automatically. The outside air position will also be selected automatically.
If the mode selection dial is set between “ ” and “ ” you cannot turn the air con- ditioning off or select the recirculation posi- tion. This prevents the windows fromfogging up. To defog quickly, direct
the air flow from the
side vents toward the door windows. When defrosting, do not set the temperature control dial to the maximum cool position. This will blow cool air on the window glass and fog it up.
Automatic air conditioning with Celsius scale
(if so
equipped)
NOTE
BK0230300US.bo
ok 12 ページ 2015年7月30日 木曜日 午後8時38分