key MITSUBISHI LANCER 2016 8.G Repair Manual
[x] Cancel search | Manufacturer: MITSUBISHI, Model Year: 2016, Model line: LANCER, Model: MITSUBISHI LANCER 2016 8.GPages: 392, PDF Size: 13.12 MB
Page 190 of 392
![MITSUBISHI LANCER 2016 8.G Repair Manual Combination headlights and dimmer switch 5-128 Features and controls
5
[When the engine is not running, or when the engine is started before the parking brake is released]
Rotate the switch to operat MITSUBISHI LANCER 2016 8.G Repair Manual Combination headlights and dimmer switch 5-128 Features and controls
5
[When the engine is not running, or when the engine is started before the parking brake is released]
Rotate the switch to operat](/img/19/7463/w960_7463-189.png)
Combination headlights and dimmer switch 5-128 Features and controls
5
[When the engine is not running, or when the engine is started before the parking brake is released]
Rotate the switch to operate the lights.
If your vehicle is equipped with daytime run- ning lights, the combinations of switch opera- tions and illuminated lights differ in accordance with the following conditions. [When the engine is started after the parking brake is released]
The daytime running lights illumi- nated Parking (vehicles with daytime run-ning lights on the headlights), tail, front and rear side-marker lights, license plate and instrument panel lights on Headlights and other lights onNOTE
Once the daytime running light come on, they do not go out until the key is turned to the “LOCK” or “ACC” position.
OFF All lights off
Parking, tail, front and rear side- marker lights, license plate and instrument panel lights on Headlights and other lights onNOTE
Even if the daytime running lights are not on, they will come on once the vehicle starts moving.
Once the daytime running light come on, they do not go out until the key is turned to the “LOCK” or “ACC” position.
Ty p e 2 OFF All lights off AUTO
Headlights and other lights turn on and off automatically in accor- dance with outside light level. Parking, tail, front and rear side- marker lights, license plate and instrument panel lights on Headlights and other lights on
NOTE
OFF
The daytime running lights illumi- nated
AUTO
The daytime running lights illumi- nated (when it is light outside the vehicle) Headlights and other lights turn on and off automatically in accor- dance with outside light level. The daytime running lights illumi- natedParking (vehicles with daytime running lights on the headlights), tail, front and rear side-marker lights, license plate and instrument panel lights on Headlights and other lights on
NOTE
Once the daytime running light come on, they do not go out until the key is turned to the “LOCK” or “ACC” position.
BK0230300US.book
128 ページ 2015年7月30日 木曜日 午後8時38分
Page 191 of 392
![MITSUBISHI LANCER 2016 8.G Repair Manual Combination headlights and dimmer switch
Features and controls 5-129
5
[When the engine is not running, or when the engine is started before the parking brake is released]
N00532601607
If the ign MITSUBISHI LANCER 2016 8.G Repair Manual Combination headlights and dimmer switch
Features and controls 5-129
5
[When the engine is not running, or when the engine is started before the parking brake is released]
N00532601607
If the ign](/img/19/7463/w960_7463-190.png)
Combination headlights and dimmer switch
Features and controls 5-129
5
[When the engine is not running, or when the engine is started before the parking brake is released]
N00532601607
If the ignition key is turned to “LOCK” or “ACC” position or removed from the ignition switch and the driver’s door is opened with the combination headlights and dimmer switch in the “ ” or “ ” [When using a key to start the engine]
• If the driver’s door is opened after the key is removed from the ignition switch, a high-pitched constant tone will sound to remind you to turn off the lights.• If the driver’s door is opened with the key in the ignition switch, a low-pitched tone will sound to remind you to removethe key. [When using the F.A.S.T.-key to start the engine] • If the ignition switch is turned to the“LOCK” position and the driver’s dooris opened, a high-pitched constant buzzer will sound to remind you to turn off the lights.• If the ignition switch is turned to any position other than “LOCK” and the driver’s door is opened, a low-pitchedconstant buzzer will sound to remind you to return the ignition switch.
If the ignition switch is turned to “LOCK” or “ACC” position with the driver’s doorclosed and the combination headlights and dimmer switch in the “ ” or “ ” minutes and then turn off automatically.
OFF All lights off AUTO
Headlights and other lights turn on and off automatically in accor- dance with outside light level. Parking, tail, front and rear side- marker lights, license plate and instrument panel lights on Headlights and other lights on
NOTE
Even if the daytime running lights are not on, they will come on once the vehicle starts moving. Once the daytime running light come on, they do not go out until the key is turned tothe “LOCK” or “ACC” position. The sensitivity of the automatic on/off con- trol can be adjusted. For further information, please contact your authorized Mitsubishi Motors dealer or arepair facility of your choice.
Do not cover the sensor (A) for the automatic on/off control by affixing a sticker or label to the windshield. If the lights do not turn on or off with the switch in the “AUTO” position, manually operate the switch and we recommend you to have your vehicle checked.
Light auto-cutout function (headlights and other lights)
NOTE
BK0230300US.book
129 ページ 2015年7月30日 木曜日 午後8時38分
Page 192 of 392
Combination headlights and dimmer switch 5-130 Features and controls
5
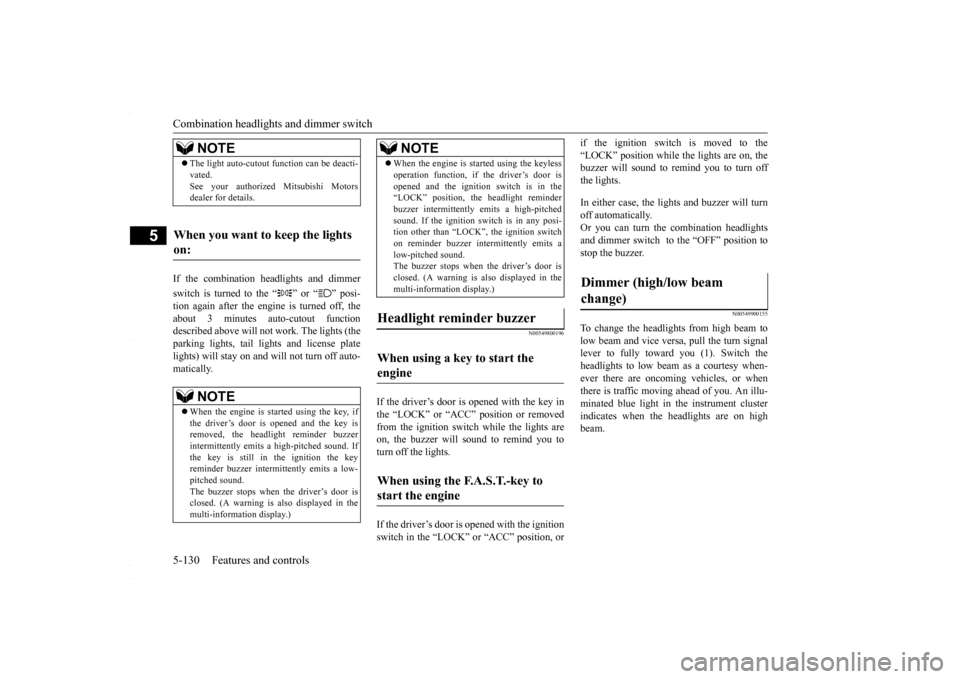
If the combination headlights and dimmer switch is turned to the “ ” or “ ” posi- tion again after the engine is turned off, the about 3 minutes auto-cutout function described above will not work. The lights (theparking lights, tail lights and license plate lights) will stay on and will not turn off auto- matically.
N00549800196
If the driver’s door is opened with the key inthe “LOCK” or “ACC” position or removed from the ignition switch while the lights are on, the buzzer will sound to remind you toturn off the lights. If the driver’s door is opened with the ignition switch in the “LOCK” or “ACC” position, or
if the ignition switch is moved to the “LOCK” position while the lights are on, the buzzer will sound to remind you to turn off the lights. In either case, the li
ghts and buzzer will turn
off automatically. Or you can turn the combination headlights and dimmer switch to the “OFF” position tostop the buzzer.
N00549900155
To change the headlights from high beam tolow beam and vice versa, pull the turn signal lever to fully toward you (1). Switch the headlights to low beam as a courtesy when-ever there are oncoming vehicles, or when there is traffic moving ahead of you. An illu- minated blue light in the instrument clusterindicates when the headlights are on high beam.
NOTE
The light auto-cutout function can be deacti- vated. See your authorized Mitsubishi Motors dealer for details.
When you want to keep the lights on:
NOTE
When the engine is started using the key, if the driver’s door is opened and the key is removed, the headlight reminder buzzer intermittently emits a high-pitched sound. If the key is still in the ignition the keyreminder buzzer intermittently emits a low- pitched sound. The buzzer stops when the driver’s door isclosed. (A warning is also displayed in the multi-information display.)
operation function, if the driver’s door is opened and the ignition switch is in the “LOCK” position, the headlight reminder buzzer intermittently emits a high-pitchedsound. If the ignition sw
itch is in any posi-
tion other than “LOCK”, the ignition switch on reminder buzzer intermittently emits alow-pitched sound. The buzzer stops when the driver’s door is closed. (A warning is also displayed in themulti-information display.)
When using a key to start the engine When using the F.A.S.T.-key to start the engine
NOTE
Dimmer (high/low beam change)
BK0230300US.book
130 ページ 2015年7月30日 木曜日 午後8時38分
Page 194 of 392
Headlight leveling switch (if so equipped) 5-132 Features and controls
5
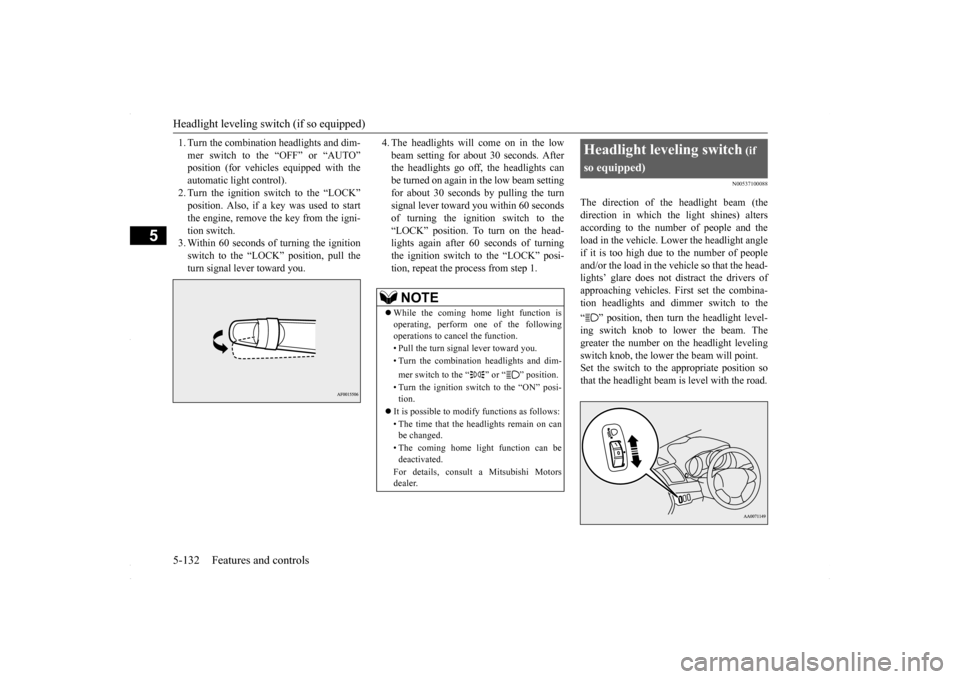
1. Turn the combination headlights and dim- mer switch to the “OFF” or “AUTO” automatic light control).2. Turn the ignition switch to the “LOCK” position. Also, if a key was used to start the engine, remove the key from the igni-tion switch. 3. Within 60 seconds of turning the ignition switch to the “LOCK” position, pull theturn signal lever toward you.
4. The headlights will come on in the low beam setting for about 30 seconds. After the headlights go off, the headlights can be turned on again in the low beam settingfor about 30 seconds by pulling the turn signal lever toward you within 60 seconds of turning the ignition switch to the“LOCK” position. To turn on the head- lights again after 60 seconds of turning the ignition switch to the “LOCK” posi-tion, repeat the process from step 1.
N00537100088
The direction of the headlight beam (thedirection in which the light shines) alters according to the number of people and the load in the vehicle. Lower the headlight angleif it is too high due to the number of people and/or the load in the vehicle so that the head- lights’ glare does not distract the drivers ofapproaching vehicles. First set the combina-tion headlights and dimmer switch to the “ ” position, then turn the headlight level- ing switch knob to lower the beam. The greater the number on the headlight levelingswitch knob, the lower the beam will point. Set the switch to the appropriate position so that the headlight beam is level with the road.
NOTE
While the coming home light function is operating, perform one of the following operations to cancel the function. • Pull the turn signal lever toward you. • Turn the combination headlights and dim- mer switch to the “ ” or “ ” position. • Turn the ignition switch to the “ON” posi- tion.
It is possible to modify functions as follows: • The time that the headlights remain on can be changed. • The coming home light function can be deactivated. For details, consult a Mitsubishi Motors dealer.
Headlight leveling switch
(if
so equipped)
BK0230300US.book
132 ページ 2015年7月30日 木曜日 午後8時38分
Page 195 of 392
Turn signal lever
Features and controls 5-133
5
N00522601545
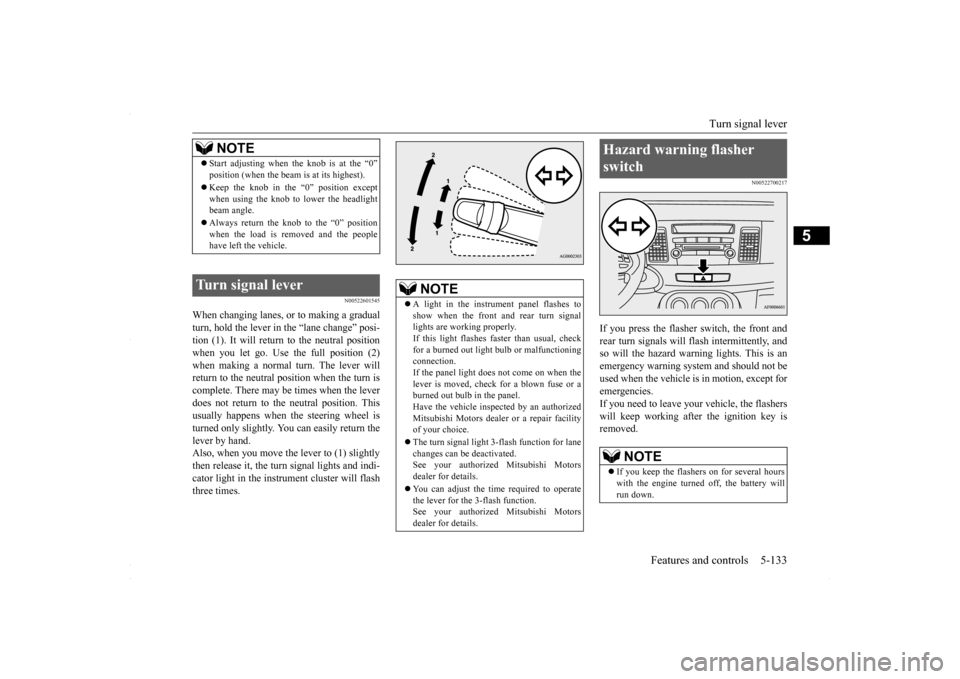
When changing lanes, or to making a gradual turn, hold the lever in
the “lane change” posi-
tion (1). It will return to the neutral positionwhen you let go. Use the full position (2) when making a normal turn. The lever will return to the neutral position when the turn iscomplete. There may be times when the lever does not return to the neutral position. This usually happens when the steering wheel isturned only slightly. You can easily return the lever by hand. Also, when you move the lever to (1) slightlythen release it, the turn signal lights and indi- cator light in the instrument cluster will flash three times.
N00522700217
If you press the flasher switch, the front andrear turn signals will flash intermittently, and so will the hazard warning lights. This is an emergency warning system and should not beused when the vehicle is in motion, except foremergencies. If you need to leave your vehicle, the flashers will keep working afte
r the ignition key is
removed.
NOTE
Start adjusting when the knob is at the “0” position (when the beam is at its highest). Keep the knob in the “0” position except when using the knob to lower the headlightbeam angle. Always return the knob to the “0” position when the load is removed and the people have left the vehicle.
Turn signal lever
NOTE
A light in the instrument panel flashes to show when the front and rear turn signal lights are working properly.If this light flashes faster than usual, check for a burned out light bulb or malfunctioning connection.If the panel light does not come on when the lever is moved, check for a blown fuse or a burned out bulb in the panel.Have the vehicle inspected by an authorized Mitsubishi Motors dealer or a repair facility of your choice. The turn signal light 3-flash function for lane changes can be deactivated.See your authorized Mitsubishi Motors dealer for details. You can adjust the time required to operate the lever for the 3-flash function. See your authorized Mitsubishi Motorsdealer for details.
Hazard warning flasher switch
NOTE
If you keep the flashers on for several hours with the engine turned off, the battery will run down.
BK0230300US.book
133 ページ 2015年7月30日 木曜日 午後8時38分
Page 209 of 392
Bluetooth® 2.0 interface (if so equipped)
Features and controls 5-147
5
1. Stop your vehicle in a safe area, put the shift lever (manual transaxle) in the “N” (Neutral) position, or the selector lever {continuously variable transmission(CVT)} in the “P” (PARK) position, and then pull the parking brake lever. 2. Press the SPEECH button (except for vehicles with Mitsubishi Multi-Commu- nication System) or PICK-UP button (for vehicles with Mitsubishi Multi-Commu-nication System). 3. Say “Setup.” 4. Say “Pairing Options.”5. The voice guide will say “Select one ofthe following: pair, edit, delete, or list.” Say “Pair.”
digit pairing code.” Say a 4-digit number. When the confirmation function is on, thesystem will confirm whether the number said is acceptable. Answer “Yes.” Answer “No” to return to pairing codeselection.
7. The voice guide will say “Start pairing procedure on the device. See the device manual for instructions.” Enter in the Bluetooth
® device the 4-digit number you
have registered in Step 6.
Pairing procedure- Type 1
(if so
equipped)NOTE
You cannot pair any Bluetooth
® device with
the Bluetooth
® 2.0 interface unless the vehi-
cle is parked. Before pairing a Bluetooth
®
device with the Bluetooth
® 2.0 interface,
confirm that the vehicle is parked in a safelocation.
NOTE
If 7 devices have already been paired, the voice guide will say “Maximum devices paired” and then the system will end the pairing process. To register a new device, delete one device and then repeat the pairingprocess. (Refer to “Deleting a device” on page 5-150.)NOTE
Some Bluetooth
® devices require a specific
pairing code. Please refer to the device man-ual for pairing code requirements.
The pairing code entered here is only used for the Bluetooth
® connection certification.
It is any 4-digit number the user would like to select. Remember the pairing code as it needs to be keyed into the Bluetooth
® device later in the
pairing process. Depending on the connection settings of the Bluetooth
® device, this code may have to be
entered each time you connect the Blue- tooth
® device to the Bluetooth
® 2.0 inter-
face. For the default connection settings, refer to the instructions for the device.NOTE
Depending on the Bluetooth
® device, it may
take a few minutes to pair it with the Blue- tooth
® 2.0 interface.
If the Bluetooth
® 2.0 interface cannot recog-
nize the Bluetooth
® device, the voice guide
will say “Pairing has timed out” and the pair-ing process will be cancelled. Confirm that the device you are pairing sup- ports Bluetooth
®, and try pairing it again.
NOTE
BK0230300US.book
147 ページ 2015年7月30日 木曜日 午後8時38分
Page 230 of 392
Interior lights 5-168 Features and controls
5
N00553800067
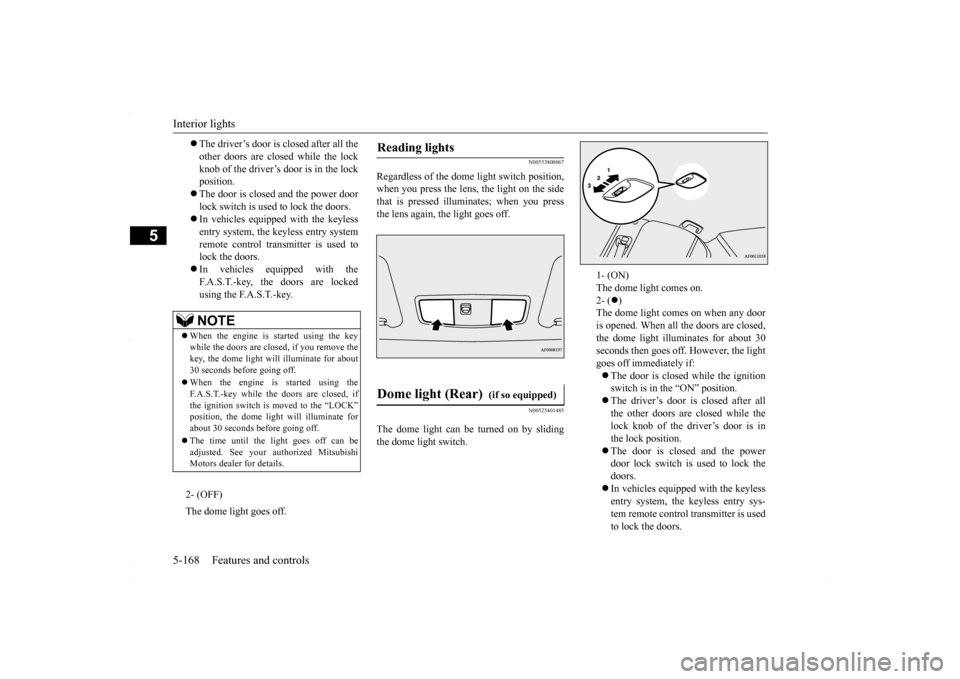
Regardless of the dome
light switch position,
when you press the lens, the light on the sidethat is pressed illuminates; when you press the lens again, the light goes off.
N00525401485
The dome light can be turned on by sliding the dome light switch.
The driver’s door is closed after all the other doors are closed while the lockknob of the driver’s door is in the lock position. The door is closed and the power door lock switch is used
to lock the doors.
In vehicles equipped with the keyless entry system, the keyless entry systemremote control transmitter is used to lock the doors. In vehicles equipped with the F.A.S.T.-key, the doors are lockedusing the F.A.S.T.-key.NOTE
When the engine is started using the key while the doors are closed, if you remove the key, the dome light will illuminate for about 30 seconds before going off. When the engine is started using the F.A.S.T.-key while the doors are closed, ifthe ignition switch is moved to the “LOCK” position, the dome light will illuminate for about 30 seconds before going off. The time until the light goes off can be adjusted. See your au
thorized Mitsubishi
Motors dealer for details.2- (OFF) The dome light goes off.
Reading lights
Dome light (Rear)
(if so equipped)
1- (ON) The dome light comes on. 2- (
)
The dome light comes on when any dooris opened. When all the doors are closed, the dome light illuminates for about 30 seconds then goes off. However, the lightgoes off immediately if: The door is closed while the ignition switch is in the “ON” position. The driver’s door is closed after all the other doors are closed while the lock knob of the driver’s door is in the lock position. The door is closed and the power door lock switch is used to lock the doors. In vehicles equipped with the keyless entry system, the keyless entry sys- tem remote control transmitter is usedto lock the doors.
BK0230300US.book
168 ページ 2015年7月30日 木曜日 午後8時38分
Page 231 of 392
Storage spaces
Features and controls 5-169
5
N00526301465
If any of the interior lights are left on with the ignition switch in the “LOCK” position, the lights go off automatically after about 30 minutes.
The lights come on again if the ignition switch is turned to the “ON” or “ACC” posi- tion, any door or the tru
nk lid is opened and
closed, or the keyless entry system orF.A.S.T.-key is operated.
N00526401570
N00551501302
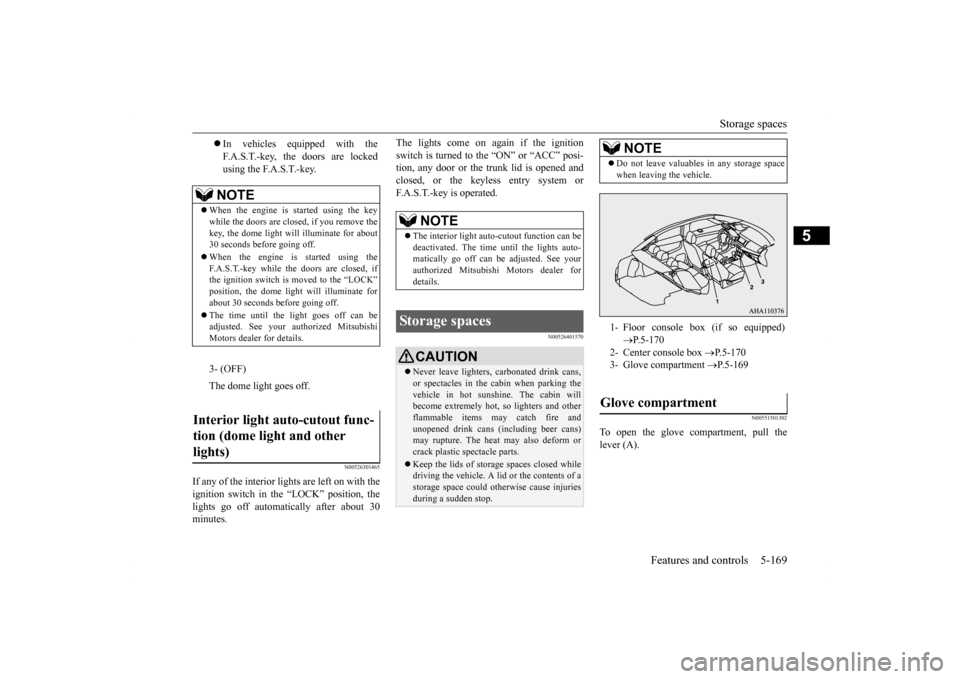
To open the glove compartment, pull the lever (A).
In vehicles equipped with the F.A.S.T.-key, the doors are lockedusing the F.A.S.T.-key.NOTE
When the engine is started using the key while the doors are closed, if you remove the key, the dome light will illuminate for about30 seconds before going off. When the engine is started using the F.A.S.T.-key while the doors are closed, if the ignition switch is moved to the “LOCK” position, the dome light will illuminate forabout 30 seconds before going off. The time until the light goes off can be adjusted. See your authorized Mitsubishi Motors dealer for details.3- (OFF) The dome light goes off.
Interior light auto-cutout func- tion (dome light and other lights)
NOTE
The interior light auto-cutout function can be deactivated. The time until the lights auto- matically go off can be adjusted. See yourauthorized Mitsubishi Motors dealer for details.
Storage spaces
CAUTION Never leave lighters, carbonated drink cans, or spectacles in the cabin when parking the vehicle in hot sunshine. The cabin will become extremely hot, so lighters and otherflammable items may catch fire and unopened drink cans (including beer cans) may rupture. The heat may also deform or crack plastic spectacle parts. Keep the lids of stor
age spaces closed while
driving the vehicle. A lid or the contents of a storage space could otherwise cause injuriesduring a sudden stop.
NOTE
Do not leave valuables in any storage space when leaving the vehicle.1- Floor console box (if so equipped)
P.5-170
2- Center console box
P.5-170
3- Glove compartment
P.5-169
Glove compartment
BK0230300US.book
169 ページ 2015年7月30日 木曜日 午後8時38分
Page 242 of 392
Loading information 6-6 Driving safety
6
Your front bumper can be damaged if you scrape it over curbs or parking stop blocks.Be careful when traveling up or down steep slopes where your bumper can scrape the road. When leaving the vehicle unattended, always carry the key and lock all doors.Always try to park your vehicle in a well lit area.
N00629900349
It is very important to know how much weight your vehicle can carry. This weight iscalled the vehicle capacity weight and includes the weight of all occupants, cargo and non-factory-installed options. The tireand loading information placard located on the driver’s door sill of your vehicle will show how much weight it may properly carry. It is important to familiarize yourself with the following terms before loading your vehicle: Vehicle maximum load on the tire: load on an individual tire that is determined by distributing to each axle its share of the maximum loaded vehicle weight anddividing by two. Vehicle normal load on the tire: load on an individual tire that is determined by dis-tributing to each axle its share of the curb weight, accessory weight, and normal occupant weight and dividing by two.
Maximum loaded vehicle weight: the sum of - (a) Curb weight; (b) Accessory weight;(c) Vehicle capacity weight; and (d) Production options weight. Curb weight: the weight of a motor vehi- cle with standard equipment including the maximum capacity of fuel, oil, and cool- ant. Accessory weight: the combined weight (in excess of those standard items which may be replaced) of automatic transmis- sion, power steering, power brakes, powerwindows, power seats, radio, and heater, to the extent that these items are available as factory- installed equipment (whetherinstalled or not). Vehicle capacity weight: the rated cargo and luggage load plus 150 lbs (68 kg)
*
times the vehicle’s designated seating capacity. Production options weight: the combined weight of those installed regular produc- tion options weighing over 5 lbs (2.3 kg) in excess of those standard items whichthey replace, not previously considered in curb weight or accessory weight, includ- ing heavy duty brakes, ride levelers, roofrack, heavy duty battery, and special trim.
WA R N I N G Leaving the engine running risks injury or death from accidentally moving the gear- shift lever (manual transaxle or the selec- tor lever (CVT) or from the accumulation of toxic exhaust fumes in the passengercompartment.
Where you park
WA R N I N G Do not park your vehicle in areas where combustible materials such as dry grass or leaves can come in contact with a hotexhaust, since a fire could occur.
When leaving the vehicle
Loading information
WA R N I N G Never overload your vehicle. Overloading can damage your vehicle, adversely affectvehicle performance, including handling and braking, cause tire failure, and result in an accident.
BK0230300US.bo
ok 6 ページ 2015年7月30日 木曜日 午後8時38分
Page 251 of 392
7
Comfort controlsVents .........................................
.......................................................7-2
Heater without air conditioning function (if so equipped) ...............7-4 Automatic air conditioning
with Fahrenheit scale
(if so equipped) .
.................................................
..........................7-7
Automatic air conditioning with Cels
ius scale (if so equipped) .....7-12
Important air conditioning op
erating tips ......................................7-18
Air purifier ......................
...............................................................7-18
AM/FM radio/CD player (if so equipped) .....................................7-19 Handling of Discs .
.................................................
........................7-22
Audio Files (MP3/WMA/
AAC) ....................................................7-24
Important Points on Safety fo
r the Customer ................................7-28
Operation Keys ...............
...............................................................7-28
Listen to Radio ......
.................................................
........................7-32
Listen to Satellite Radio (if so equipped) .......................................7-33 Listen to CDs ..................
...............................................................7-35
Listen to MP3s ......
.................................................
........................7-36
Listen to an iPod ...
.................................................
........................7-37
Listen to Audio Files on
a USB Device .........................................7-39
To play iPod/USB memory device tracks via voice operation (vehicles with Bluetooth 2.0
interface) ......................................7-42
Listen to Bluetooth Audio (i
f so equipped) ....................................7-45
Display Indicator ..
.................................................
........................7-47
Audio Quality and Volume Balance Adjustment ...........................7-48System Settings .....
.................................................
........................7-49
Troubleshooting ..............
...............................................................7-53
Antenna .....................................
.....................................................7-55
Clock (if so equipped)
............................................
........................7-56
General information about
your radio ...........................................7-57
BK0230300US.bo
ok 1 ページ 2015年7月30日 木曜日 午後8時38分