key MITSUBISHI LANCER EVOLUTION 2015 10.G MMCS Manual
[x] Cancel search | Manufacturer: MITSUBISHI, Model Year: 2015, Model line: LANCER EVOLUTION, Model: MITSUBISHI LANCER EVOLUTION 2015 10.GPages: 229, PDF Size: 58.35 MB
Page 58 of 229
58 Route Checking
Route Checking and Changing
Route Checking
If a route has been set, you can check it.
Check the Next Junction to
Tur n
When the route you are traveling has a
junction ahead where you must turn left or
right, you can have audio guidance and
junction guidance map display provided ahead
of time.
ADVICE
• You must be traveling a route.
• For some maps, only audio guidance is
provided.
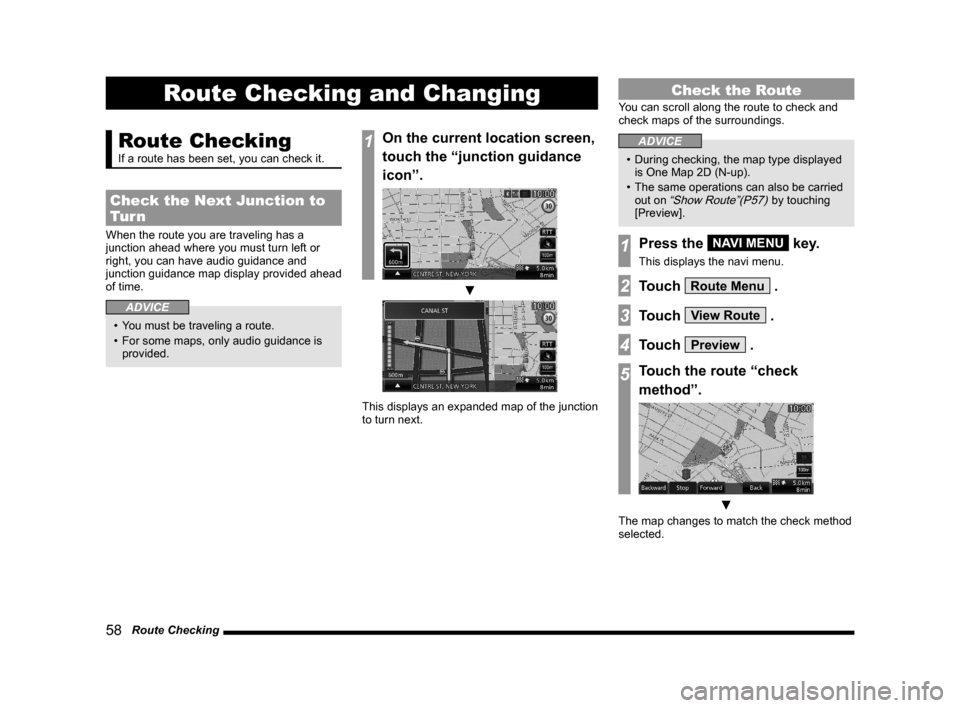
1On the current location screen,
touch the “junction guidance
icon”.
▼
This displays an expanded map of the junction
to turn next.
Check the Route
You can scroll along the route to check and
check maps of the surroundings.
ADVICE
• During checking, the map type displayed
is One Map 2D (N-up).
• The same operations can also be carried
out on
“Show Route”(P57) by touching
[Preview].
1Press the NAVI MENU key.
This displays the navi menu.
2Touch Route Menu .
3Touch View Route .
4Touch Preview .
5Touch the route “check
method”.
▼
The map changes to match the check method
selected.
Page 59 of 229
Route Checking
59
NAVI Route Checking and Changing
Types of Check Methods
Backward
Scrolls from the destination
toward the start location.
Stop
Stops scrolling for going
backward or forward.
Forward
Scrolls from the start location
toward the destination.
Back
Ends scrolling.
Check the Entire Route
This displays the map at a scale that allows
you to check the route from the start location
to the destination.
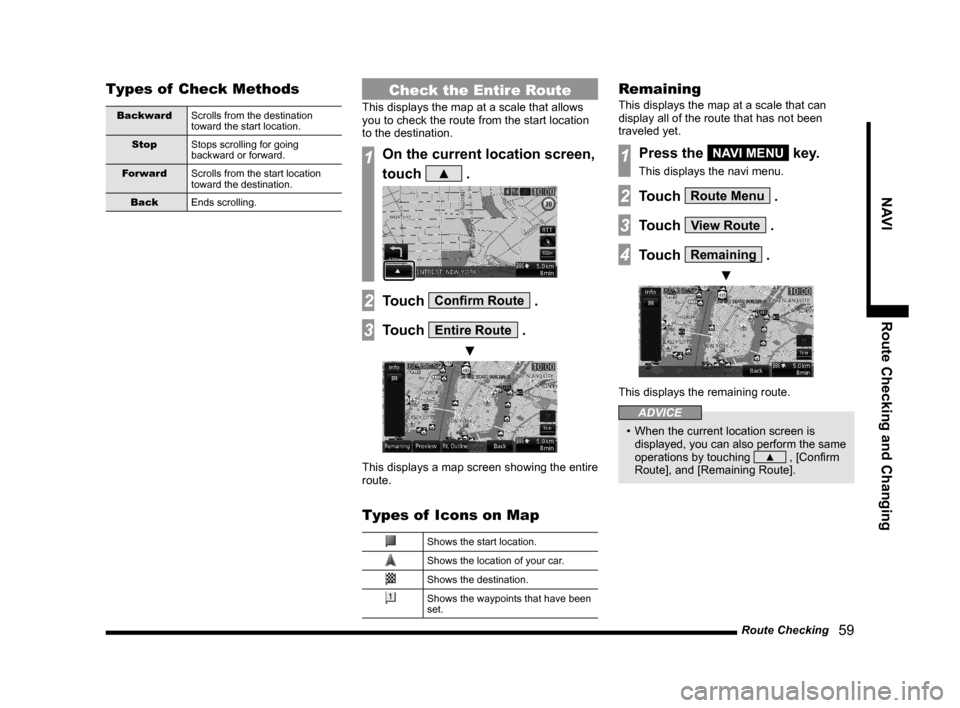
1On the current location screen,
touch
▲ .
2Touch Confi rm Route .
3Touch Entire Route .
▼
This displays a map screen showing the entire
route.
Types of Icons on Map
Shows the start location.
Shows the location of your car.
Shows the destination.
Shows the waypoints that have been
set.
Remaining
This displays the map at a scale that can
display all of the route that has not been
traveled yet.
1Press the NAVI MENU key.
This displays the navi menu.
2Touch Route Menu .
3Touch View Route .
4Touch Remaining .
▼
This displays the remaining route.
ADVICE
• When the current location screen is
displayed, you can also perform the same
operations by touching
▲ , [Confi rm
Route], and [Remaining Route].
Page 60 of 229
60 Route Checking
Route Outline
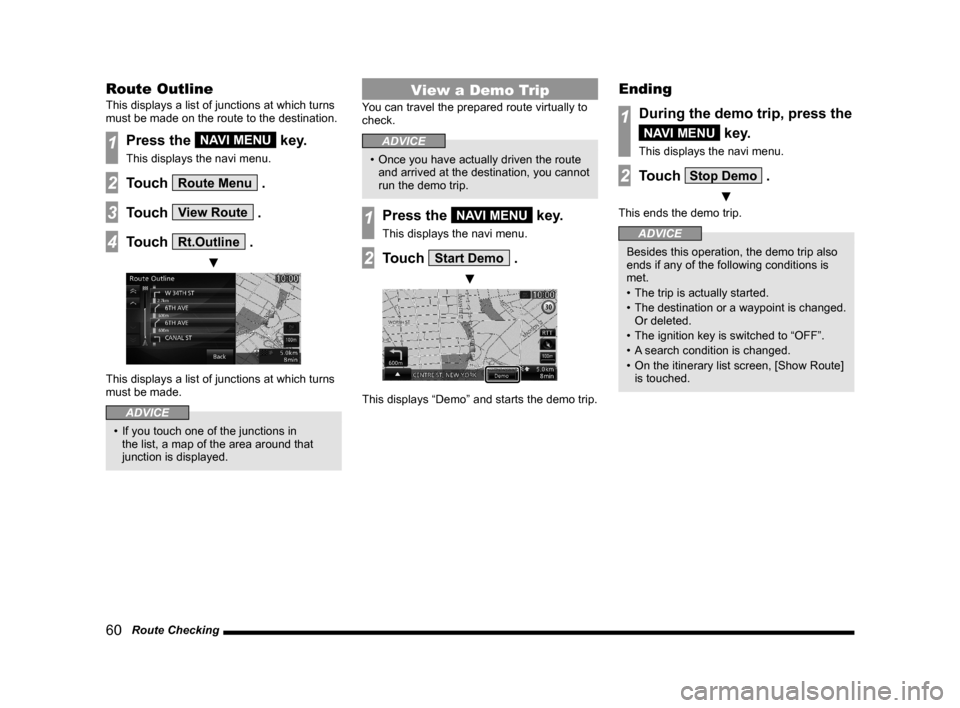
This displays a list of junctions at which turns
must be made on the route to the destination.
1Press the NAVI MENU key.
This displays the navi menu.
2Touch Route Menu .
3Touch View Route .
4Touch Rt.Outline .
▼
This displays a list of junctions at which turns
must be made.
ADVICE
• If you touch one of the junctions in
the list, a map of the area around that
junction is displayed.
View a Demo Trip
You can travel the prepared route virtually to
check.
ADVICE
• Once you have actually driven the route
and arrived at the destination, you cannot
run the demo trip.
1Press the NAVI MENU key.
This displays the navi menu.
2Touch Start Demo .
▼
This displays “Demo” and starts the demo trip.
Ending
1During the demo trip, press the
NAVI MENU key.
This displays the navi menu.
2Touch Stop Demo .
▼
This ends the demo trip.
ADVICE
Besides this operation, the demo trip also
ends if any of the following conditions is
met.
• The trip is actually started.
• The destination or a waypoint is changed.
Or deleted.
• The ignition key is switched to “OFF”.
• A search condition is changed.
• On the itinerary list screen, [Show Route]
is touched.
Page 61 of 229
Change the Route
61
NAVI Route Checking and Changing
Change the Route
A detour route or a different route can be
set for the route currently set. The route
search method can also be changed.
1Press the NAVI MENU key.
This displays the navi menu.
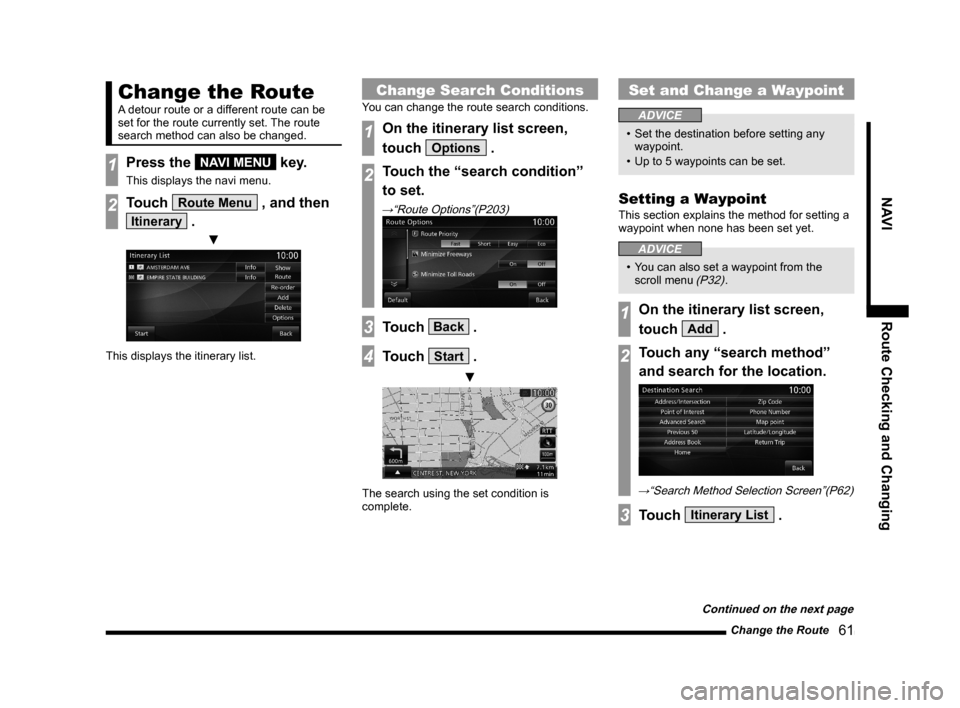
2Touch Route Menu , and then
Itinerary .
▼
This displays the itinerary list.
Change Search Conditions
You can change the route search conditions.
1On the itinerary list screen,
touch
Options .
2Touch the “search condition”
to set.
→“Route Options”(P203)
3Touch Back .
4Touch Start .
▼
The search using the set condition is
complete.
Set and Change a Waypoint
ADVICE
• Set the destination before setting any
waypoint.
• Up to 5 waypoints can be set.
Setting a Waypoint
This section explains the method for setting a
waypoint when none has been set yet.
ADVICE
• You can also set a waypoint from the
scroll menu (P32).
1On the itinerary list screen,
touch
Add .
2Touch any “search method”
and search for the location.
→“Search Method Selection Screen”(P62)
3Touch Itinerary List .
Continued on the next page
Page 64 of 229
64 Change the Route
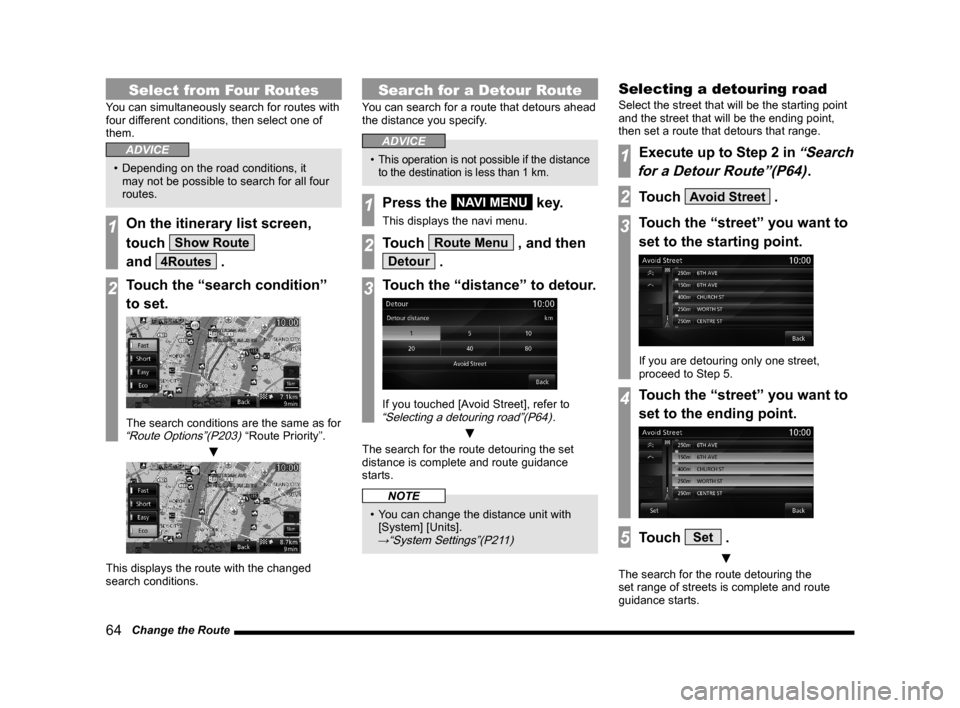
Select from Four Routes
You can simultaneously search for routes with
four different conditions, then select one of
them.
ADVICE
• Depending on the road conditions, it
may not be possible to search for all four
routes.
1On the itinerary list screen,
touch
Show Route
and
4Routes .
2Touch the “search condition”
to set.
The search conditions are the same as for “Route Options”(P203) “Route Priority”.
▼
This displays the route with the changed
search conditions.
Search for a Detour Route
You can search for a route that detours ahead
the distance you specify.
ADVICE
• This operation is not possible if the distance
to the destination is less than 1 km.
1Press the NAVI MENU key.
This displays the navi menu.
2Touch Route Menu , and then
Detour .
3Touch the “distance” to detour.
If you touched [Avoid Street], refer to “Selecting a detouring road”(P64).
▼
The search for the route detouring the set
distance is complete and route guidance
starts.
NOTE
• You can change the distance unit with
[System] [Units].
→“System Settings”(P211)
Selecting a detouring road
Select the street that will be the starting point
and the street that will be the ending point,
then set a route that detours that range.
1Execute up to Step 2 in “Search
for a Detour Route”(P64)
.
2Touch Avoid Street .
3Touch the “street” you want to
set to the starting point.
If you are detouring only one street,
proceed to Step 5.
4Touch the “street” you want to
set to the ending point.
5Touch Set .
▼
The search for the route detouring the
set range of streets is complete and route
guidance starts.
Page 65 of 229
Change the Route
65
NAVI Route Checking and Changing
Searching for a Different
Route
This repeats the searches for the route.
1On the current location screen,
touch
▲ .
2Touch Change Route .
3Touch Alternative Route .
▼
The search for a different route is complete
and route guidance starts.
Pause Route Guidance
This pauses route guidance.
1On the current location screen,
touch
▲ .
2Touch Stop Guidance .
▼
This pauses route guidance.
ADVICE
• While the route guidance is paused, you
can change the destination, waypoints,
and search conditions. If you change
anything, the search is repeated, then the
route guidance starts.
Restarting Guidance
This restarts paused route guidance (P65).
1On the current location screen,
touch
▲ .
2Touch Start Guidance .
▼
The route is searched for again and route
guidance starts.
Delete a Route
This deletes the input destination and
waypoint and deletes the route.
1Press the NAVI MENU key.
This displays the navi menu.
2Touch Route Menu , and then
Delete Route .
3Touch Ye s .
▼
The deletion of the route is complete and the
current location screen (P30) is displayed.
ADVICE
• You can also delete the route by touching
the [DEST] key, and then [Delete Route].
The [DEST] key may change to the
key depending on the model.
Operating from a Sub-menu
1On the current location screen,
touch
▲ .
2Touch Change Route .
3Touch Delete Route .
▼
The deletion of the route is complete.
Page 66 of 229
66 Change the Route
Select the DRG route
When the RTT message is detected, a route
based on the detected information is searched
and DRG (Dynamic Route Guidance) route
can be selected.
ADVICE
• It is necessary to set the [RTT Options]
“Dynamic Route Guidance” to [On].→
“Navi Settings” (P196)
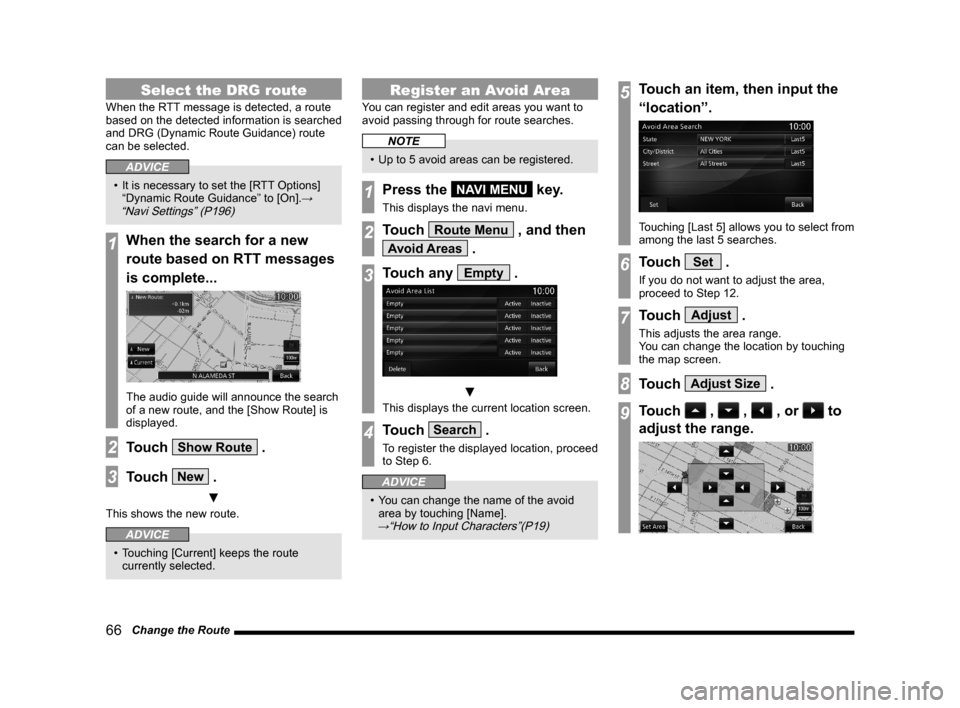
1When the search for a new
route based on RTT messages
is complete...
The audio guide will announce the search
of a new route, and the [Show Route] is
displayed.
2Touch Show Route .
3Touch New .
▼
This shows the new route.
ADVICE
• Touching [Current] keeps the route
currently selected.
Register an Avoid Area
You can register and edit areas you want to
avoid passing through for route searches.
NOTE
• Up to 5 avoid areas can be registered.
1Press the NAVI MENU key.
This displays the navi menu.
2Touch Route Menu , and then
Avoid Areas .
3Touch any Empty .
▼
This displays the current location screen.
4Touch Search .
To register the displayed location, proceed
to Step 6.
ADVICE
• You can change the name of the avoid
area by touching [Name].
→“How to Input Characters”(P19)
5Touch an item, then input the
“location”.
Touching [Last 5] allows you to select from
among the last 5 searches.
6Touch Set .
If you do not want to adjust the area,
proceed to Step 12.
7Touch Adjust .
This adjusts the area range.
You can change the location by touching
the map screen.
8Touch Adjust Size .
9Touch , , , or to
adjust the range.
Page 68 of 229
68 Register a Home Location
Set an Address in the Address Book
Register a Home
Location
If you register your home, it is simple to set
a route going home from the location you
have gone out to.
The
DEST key may change to the
key depending on the model.
ADVICE
• For information on how to set a route
returning to your home, refer to “Set Your
Home as the Destination”(P47).
• For information on how to delete the
registration of your home, refer to
“Erase
Your Home Registration”(P69).
• You can only register one home.
1Press the DEST key.
This displays the destination menu.
2Touch Go Home .
3Touch Ye s .
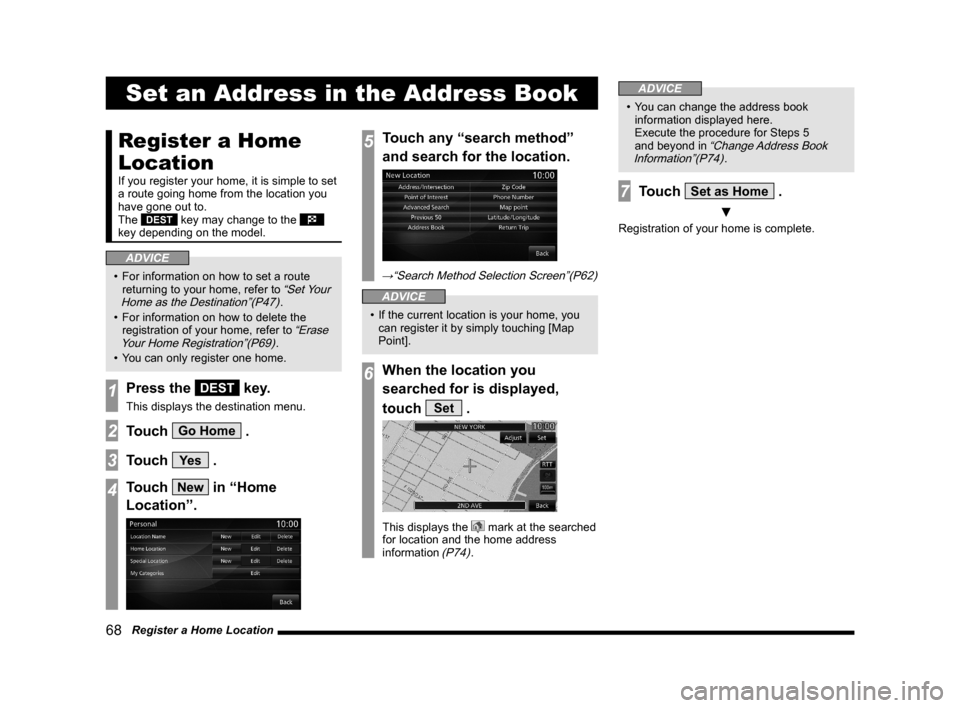
4Touch New in “Home
Location”.
5Touch any “search method”
and search for the location.
→“Search Method Selection Screen”(P62)
ADVICE
• If the current location is your home, you
can register it by simply touching [Map
Point].
6When the location you
searched for is displayed,
touch
Set .
This displays the mark at the searched
for location and the home address
information
(P74).
ADVICE
• You can change the address book
information displayed here.
Execute the procedure for Steps 5
and beyond in
“Change Address Book
Information”(P74).
7Touch Set as Home .
▼
Registration of your home is complete.
Page 69 of 229
Register a Home Location
69
NAVI Set an Address in the Address Book
Change the Home Location
You can edit your home information.
1Press the NAVI MENU key.
This displays the navi menu.
2Touch Personal .
3Touch Edit in “Home
Location”.
▼
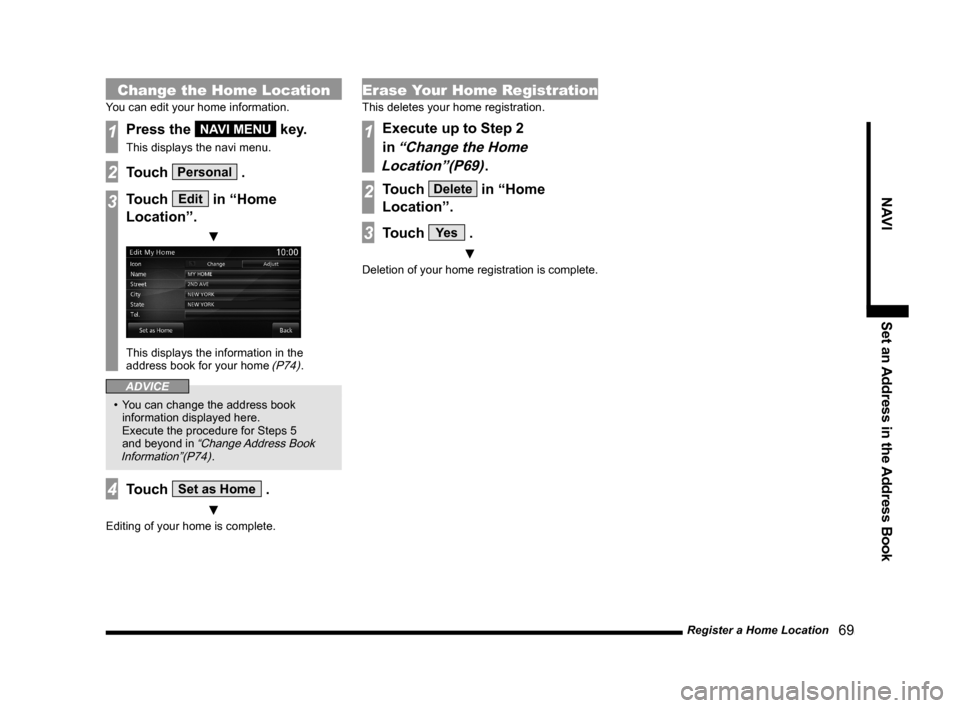
This displays the information in the
address book for your home (P74).
ADVICE
• You can change the address book
information displayed here.
Execute the procedure for Steps 5
and beyond in
“Change Address Book
Information”(P74).
4Touch Set as Home .
▼
Editing of your home is complete.
Erase Your Home Registration
This deletes your home registration.
1Execute up to Step 2
in
“Change the Home
Location”(P69)
.
2Touch Delete in “Home
Location”.
3Touch Ye s .
▼
Deletion of your home registration is complete.
Page 70 of 229
70 Set a Frequently Used Location in the Address Book
Set a Frequently
Used Location in
the Address Book
You can register locations frequently used
as a destination or waypoint.
The
DEST key may change to the
key depending on the model.
ADVICE
• Up to 5 frequently used locations.
1Press the DEST key.
This displays the destination menu.
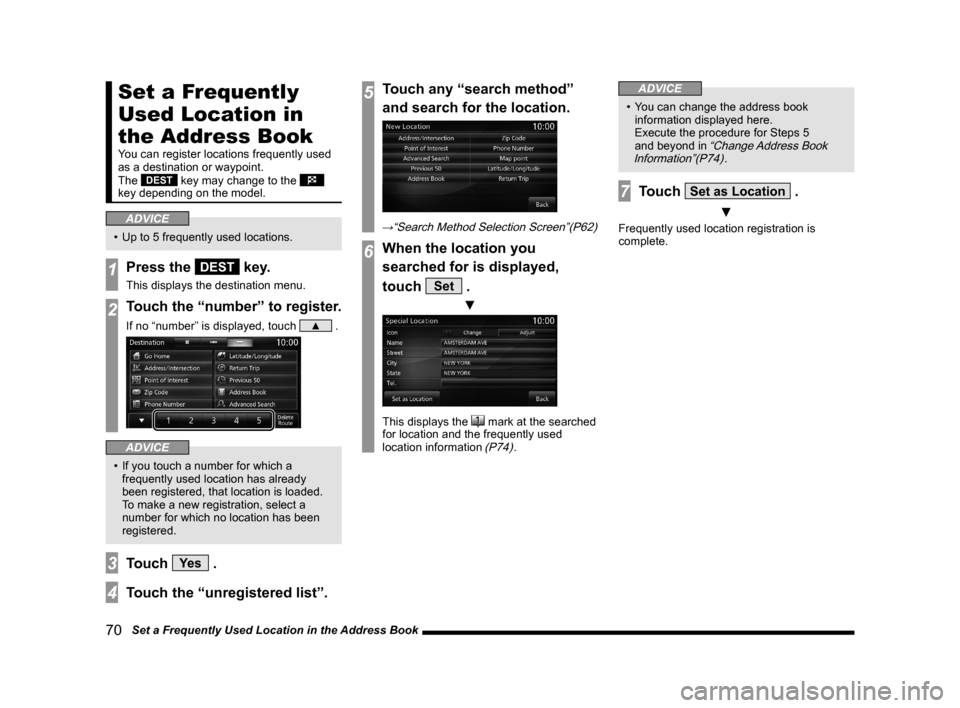
2Touch the “number” to register.
If no “number” is displayed, touch ▲ .
ADVICE
• If you touch a number for which a
frequently used location has already
been registered, that location is loaded.
To make a new registration, select a
number for which no location has been
registered.
3Touch Ye s .
4Touch the “unregistered list”.
5Touch any “search method”
and search for the location.
→“Search Method Selection Screen”(P62)
6When the location you
searched for is displayed,
touch
Set .
▼
This displays the mark at the searched
for location and the frequently used
location information
(P74).
ADVICE
• You can change the address book
information displayed here.
Execute the procedure for Steps 5
and beyond in
“Change Address Book
Information”(P74).
7Touch Set as Location .
▼
Frequently used location registration is
complete.