bonnet MITSUBISHI LANCER EVOLUTION IX 2005 Workshop Manual
[x] Cancel search | Manufacturer: MITSUBISHI, Model Year: 2005, Model line: LANCER EVOLUTION IX, Model: MITSUBISHI LANCER EVOLUTION IX 2005Pages: 364, PDF Size: 14.38 MB
Page 34 of 364

ENGINE – TIMING BELT, TIMING BELT B, ENGINE ASSY11-28
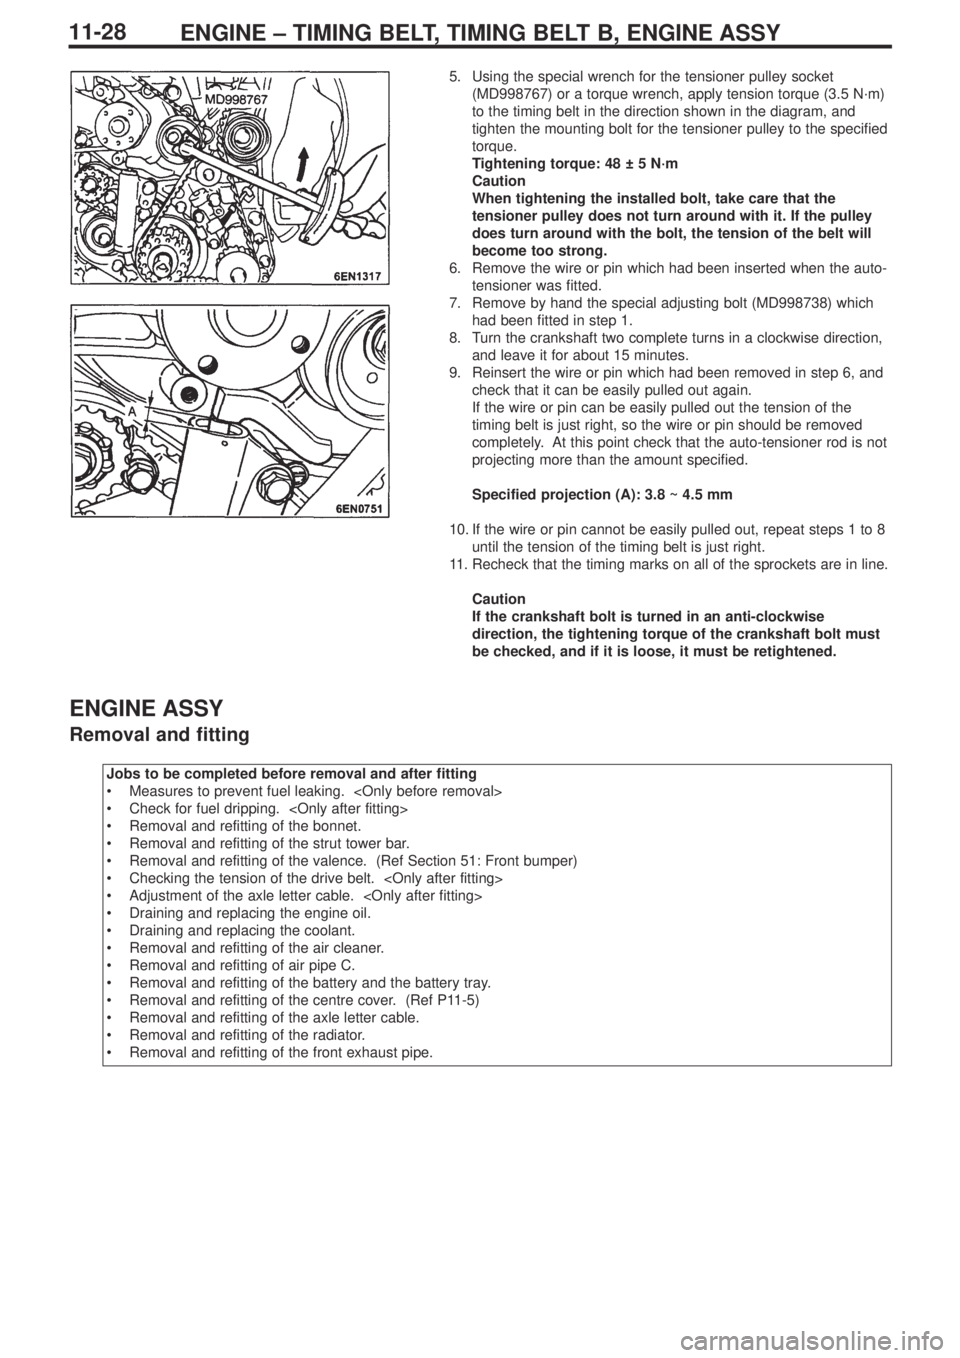
5. Using the special wrench for the tensioner pulley socket
(MD998767) or a torque wrench, apply tension torque (3.5 N·m)
to the timing belt in the direction shown in the diagram, and
tighten the mounting bolt for the tensioner pulley to the specified
torque.
Tightening torque: 48 ± 5 N·m
Caution
When tightening the installed bolt, take care that the
tensioner pulley does not turn around with it. If the pulley
does turn around with the bolt, the tension of the belt will
become too strong.
6. Remove the wire or pin which had been inserted when the auto-
tensioner was fitted.
7. Remove by hand the special adjusting bolt (MD998738) which
had been fitted in step 1.
8. Turn the crankshaft two complete turns in a clockwise direction,
and leave it for about 15 minutes.
9. Reinsert the wire or pin which had been removed in step 6, and
check that it can be easily pulled out again.
If the wire or pin can be easily pulled out the tension of the
timing belt is just right, so the wire or pin should be removed
completely. At this point check that the auto-tensioner rod is not
projecting more than the amount specified.
Specified projection (A): 3.8 ~ 4.5 mm
10. If the wire or pin cannot be easily pulled out, repeat steps 1 to 8
until the tension of the timing belt is just right.
11.Recheck that the timing marks on all of the sprockets are in line.
Caution
If the crankshaft bolt is turned in an anti-clockwise
direction, the tightening torque of the crankshaft bolt must
be checked, and if it is loose, it must be retightened.
ENGINE ASSY
Removal and fitting
Jobs to be completed before removal and after fitting
•Measures to prevent fuel leaking.
•Check for fuel dripping.
•Removal and refitting of the bonnet.
•Removal and refitting of the strut tower bar.
•Removal and refitting of the valence. (Ref Section 51: Front bumper)
•Checking the tension of the drive belt.
•Adjustment of the axle letter cable.
•Draining and replacing the engine oil.
•Draining and replacing the coolant.
•Removal and refitting of the air cleaner.
•Removal and refitting of air pipe C.
•Removal and refitting of the battery and the battery tray.
•Removal and refitting of the centre cover. (Ref P11-5)
•Removal and refitting of the axle letter cable.
•Removal and refitting of the radiator.
•Removal and refitting of the front exhaust pipe.
Page 103 of 364

CHASSIS ELECTRICAL – LICENCE PLATE LAMP
SRS AIRBAG – GENERAL54A-1
52B-1
SECTION 52B
SRS AIRBAG
CONTENTS
General........................................................1
General
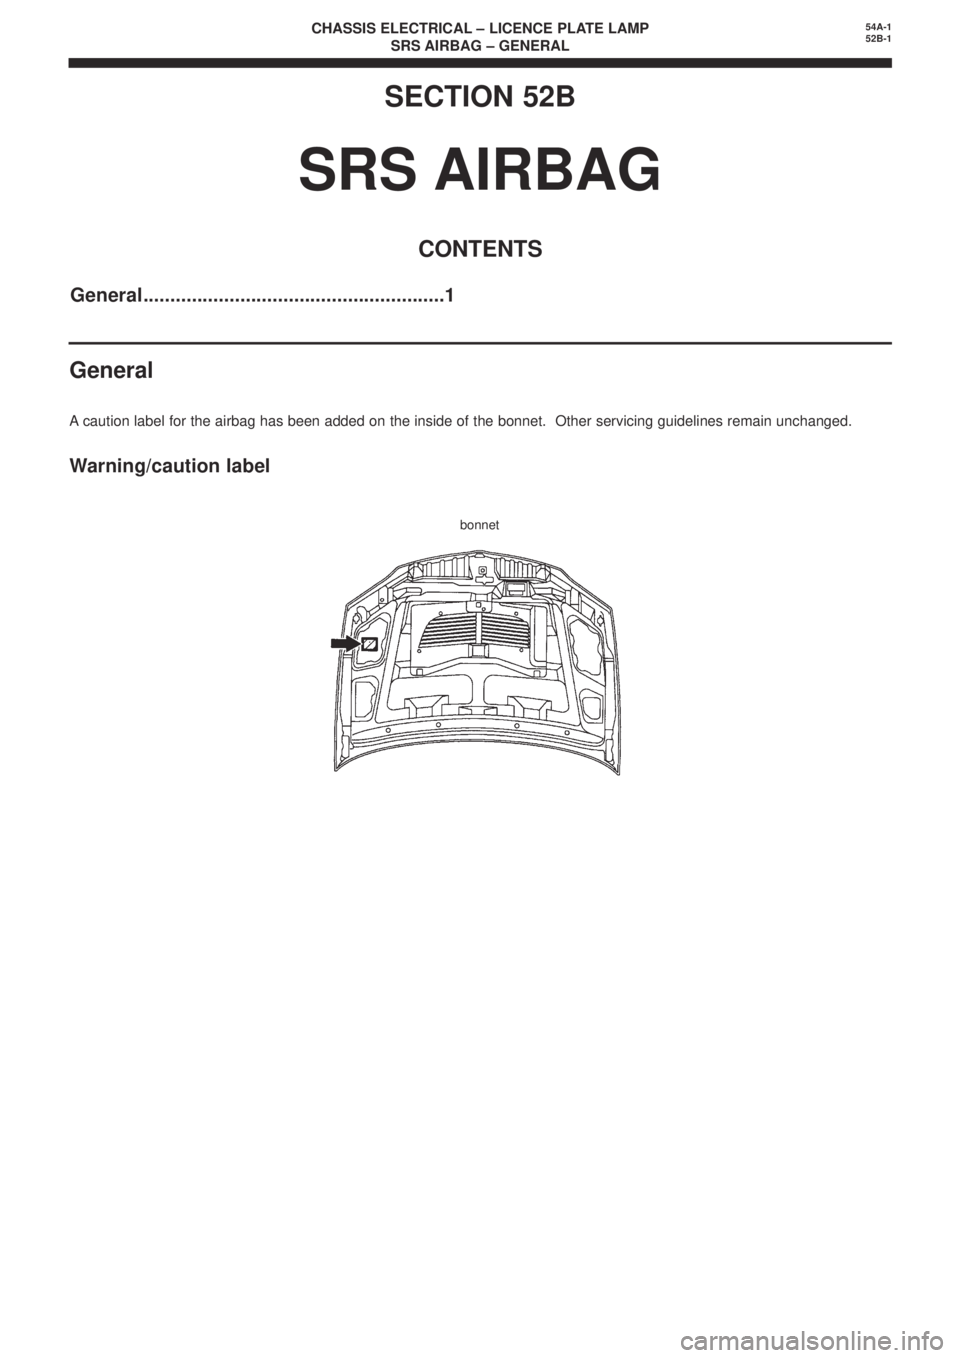
Acaution label for the airbag has been added on the inside of the bonnet. Other servicing guidelines remain unchanged.
Warning/caution label
SECTION 54A
CHASSIS ELECTRICAL
CONTENTS
Number plate lamp ....................................1
bonnet
Number plate lamp
Due to changes made to the licence plate lamp, servicing guidelines have
been changed to be the same as for the ’03 model Lancer.
Other servicing guidelines remain unchanged.
Page 105 of 364

CHASSIS ELECTRICAL – LICENCE PLATE LAMP
SRS AIRBAG – GENERAL54A-1
52B-1
SECTION 52B
SRS AIRBAG
CONTENTS
General........................................................1
General
Acaution label for the airbag has been added on the inside of the bonnet. Other servicing guidelines remain unchanged.
Warning/caution label
SECTION 54A
CHASSIS ELECTRICAL
CONTENTS
Number plate lamp ....................................1
bonnet
Number plate lamp
Due to changes made to the licence plate lamp, servicing guidelines have
been changed to be the same as for the ’03 model Lancer.
Other servicing guidelines remain unchanged.