set clock MITSUBISHI LANCER RALLIART 2014 8.G Display Audio Manual
[x] Cancel search | Manufacturer: MITSUBISHI, Model Year: 2014, Model line: LANCER RALLIART, Model: MITSUBISHI LANCER RALLIART 2014 8.GPages: 88, PDF Size: 11.63 MB
Page 3 of 88

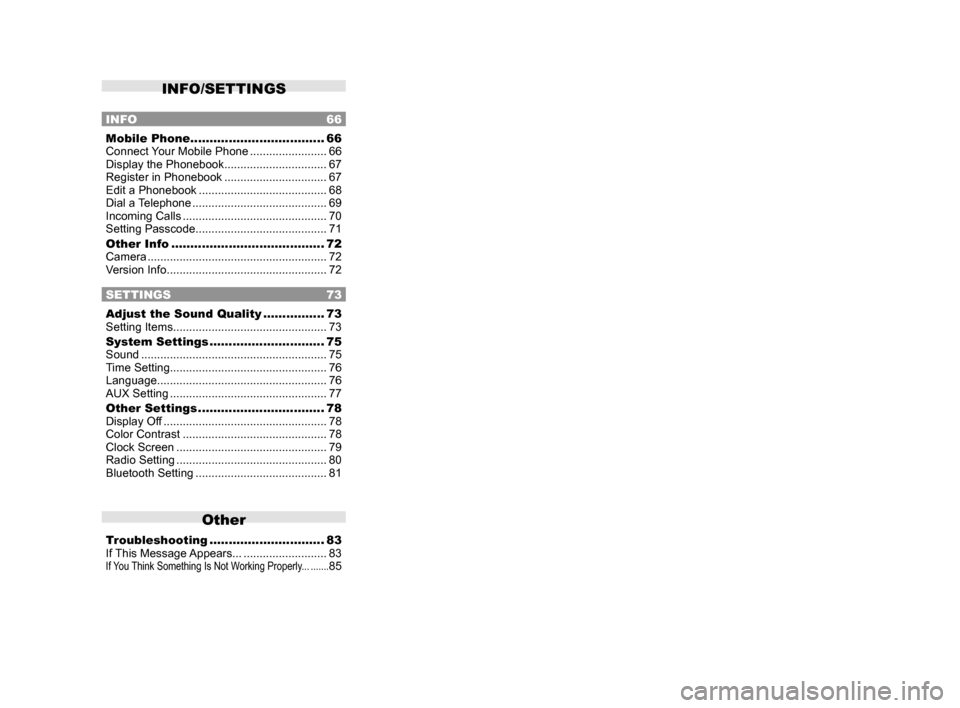
INFO/SETTINGS
INFO 66
Mobile Phone ................................... 66
Connect Your Mobile Phone ........................66
Display the Phonebook ................................ 67
Register in Phonebook ................................ 67
Edit a Phonebook ........................................ 68
Dial a Telephone .......................................... 69
Incoming Calls ............................................. 70
Setting Passcode ......................................... 71
Other Info ........................................ 72
Camera ........................................................ 72
Version Info .................................................. 72
SETTINGS 73
Adjust the Sound Quality ................73
Setting Items ................................................ 73
System Settings .............................. 75
Sound .......................................................... 75
Time Setting ................................................. 76
Language ..................................................... 76
AUX Setting ................................................. 77
Other Settings ................................. 78
Display Off ................................................... 78
Color Contrast ............................................. 78
Clock Screen ............................................... 79
Radio Setting ............................................... 80
Bluetooth Setting ......................................... 81
Other
Troubleshooting ..............................83
If This Message Appears... .......................... 83
If You Think Something Is Not Working Properly... .......85
13MY_AVC(NAS).indb 32013/02/14 10:57:16
Page 12 of 88
![MITSUBISHI LANCER RALLIART 2014 8.G Display Audio Manual 12 Top Menu
Top Menu
By pressing the [MENU] key to display the top menu, then selecting a sou\
rce from that menu,
you can use various functions.
Display Contents
TOP
5)6)7)9)8)
1)2) 3)4)
2nd TOP
1 MITSUBISHI LANCER RALLIART 2014 8.G Display Audio Manual 12 Top Menu
Top Menu
By pressing the [MENU] key to display the top menu, then selecting a sou\
rce from that menu,
you can use various functions.
Display Contents
TOP
5)6)7)9)8)
1)2) 3)4)
2nd TOP
1](/img/19/7487/w960_7487-11.png)
12 Top Menu
Top Menu
By pressing the [MENU] key to display the top menu, then selecting a sou\
rce from that menu,
you can use various functions.
Display Contents
TOP
5)6)7)9)8)
1)2) 3)4)
2nd TOP
10)11)12)13)
1) FM (P25)
Allows you to use the FM radio function.
2)
AM (P25)
Allows you to use the AM radio function.
3)
SIRIUS *7 (P32)
Allows you to use the satellite radio
function.
4) Clock
Displays the current time using 24-hour
time or 12-hour time.
5)
CD
Plays media inserted into this product.
Audio CD
(P41)
Audio files (MP3/WMA/AAC)
(P44)
6) USB/iPod *1
When an iPod is connected to this
product,
iPod is displayed and when you
touch this, the iPod screen is displayed.
(P52)
When a USB device is connected to this
product,
USB is displayed and when you
touch this, the USB screen is displayed.
(P57)
When nothing is connected to this product,
USB/iPod is displayed.
7)
BT Audio *2(P62)
When a Bluetooth-capable audio device
is connected to this product, the Bluetooth
audio function can be used. 8)
Next
Displays the top menu (2nd top).
9)
Voice *3(P17)
Allows you to use the voice control
function.
10)
AUX *1, *4, *5(P65)
When an external input device is connected to this product, the audio from
the external input device is played.
11)
Phone *6(P66)
Allows you to make and receive telephone
calls.
12)
Setting (P73)
Displays the settings screen, on which you
can make various settings for this product.
13)
Back
Displays the top menu (top).
*1) An iPod and external input cable (both available separately) are required.
*2) Requires a separately-purchased Bluetooth-
capable audio device in
Equipment by type (vehicles
with a Bluetooth® 2.0 interface).
*3) Can be used with Equipment by type (vehicles with a
Bluetooth® 2.0 interface).
*4) Equipment by type Even when no external input
cable or AUX device (both available separately)
is connected to this product, [AUX] is displayed,
but touching it does not output any audio.
*5)
Equipment by type Not displayed for vehicles that do
not support AUX devices.
*6) Requires a separately-purchased Bluetooth-
capable mobile phone in
Equipment by type (vehicles
with a Bluetooth® 2.0 interface).
*7) Equipment by type Requires a satellite tuner
connection.
13MY_AVC(NAS).indb 122013/02/14 10:57:23
Page 79 of 88

Other Settings 79
INFO/SETTINGSSETTINGS
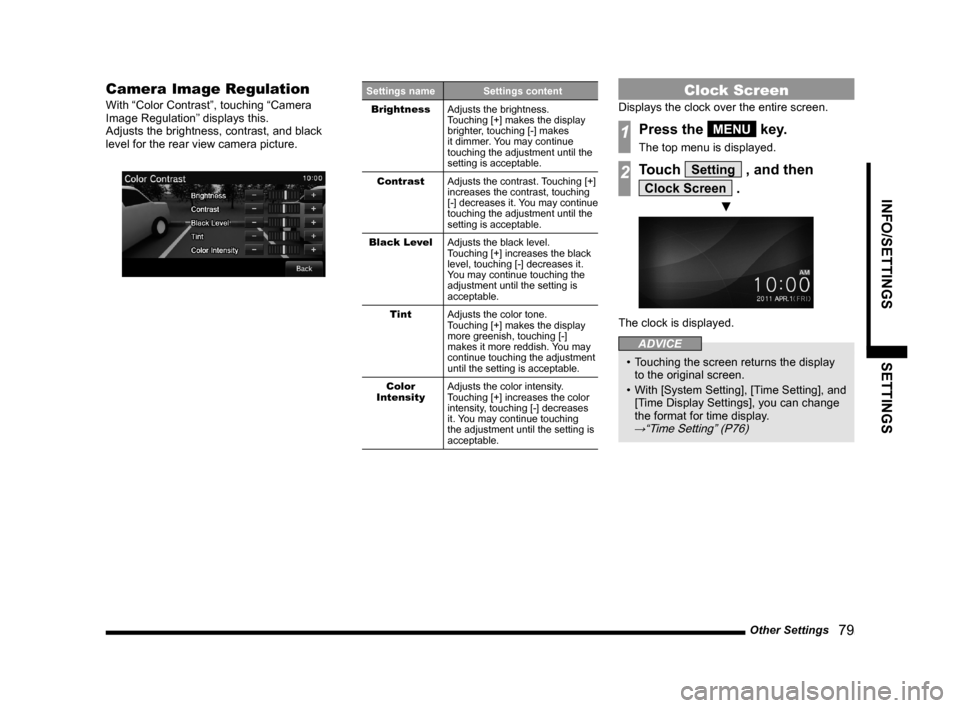
Camera Image Regulation
With “Color Contrast”, touching “Camera
Image Regulation” displays this.
Adjusts the brightness, contrast, and black
level for the rear view camera picture.
Settings name Settings content
Brightness Adjusts the brightness.
Touching [+] makes the display
brighter, touching [-] makes
it dimmer. You may continue
touching the adjustment until the
setting is acceptable.
Contrast Adjusts the contrast. Touching [+]
increases the contrast, touching
[-] decreases it. You may continue
touching the adjustment until the
setting is acceptable.
Black Level Adjusts the black level.
Touching [+] increases the black
level, touching [-] decreases it.
You may continue touching the
adjustment until the setting is
acceptable.
Tint Adjusts the color tone.
Touching [+] makes the display
more greenish, touching [-]
makes it more reddish. You may
continue touching the adjustment
until the setting is acceptable.
Color
Intensity Adjusts the color intensity.
Touching [+] increases the color
intensity, touching [-] decreases
it. You may continue touching
the adjustment until the setting is
acceptable.Clock Screen
Displays the clock over the entire screen.
1Press the MENU key.
The top menu is displayed.
2Touch Setting , and then
Clock Screen .
▼
The clock is displayed.
ADVICE
• Touching the screen returns the display
to the original screen.
• With [System Setting], [Time Setting], and
[Time Display Settings], you can change
the format for time display.
→“Time Setting” (P76)
13MY_AVC(NAS).indb 792013/02/14 10:58:06