stop start MITSUBISHI LANCER RALLIART 2014 8.G Owner's Guide
[x] Cancel search | Manufacturer: MITSUBISHI, Model Year: 2014, Model line: LANCER RALLIART, Model: MITSUBISHI LANCER RALLIART 2014 8.GPages: 434, PDF Size: 57.5 MB
Page 235 of 434

Bluetooth® 2.0 interface (if so equipped) 5-168 Features and controls
5
4. The voice guide will say “This operation must be performed in a quiet environment while the vehicle is stopped. See the owner’s manual for the list of requiredtraining phrases. Press and release the SPEECH button when you are ready to begin. Press the HANG-UP button to can-cel at any time.” Press the SPEECH button to start the speaker enrollment process.
5. The voice guide will prompt for phrase 1. Repeat the corresponding phrase listed in table “Enrollment commands” on page 5-183.The system will register your voice and then move on to the registration of the next command. Continue the process untilall phrases have been registered. 6. When all enrollment commands have been read out, the voice guide will say “Speaker enrollment is complete.” Thesystem will then end the speaker enroll- ment process and return to the main menu.
N00564901065
You can turn a voice model registered with the speaker enrollment function on and off whenever you want.You can also retrain the system. Use the following procedure to perform these actions. 1. Press the SPEECH button (except for vehicles with Mitsubishi Multi-Commu-nication System) or PICK-UP button (for vehicles with Mitsubishi Multi-Commu- nication System).2. Say “Voice training.” 3. If you have completed a speaker enroll- ment process once already, the voiceguide will say either “Enrollment is enabled. Would you like to disable or retrain?” or “Enrollment is disabled.Would you like to enable or retrain?” 4. When enrollment is “enabled,” the voice model is on; when enrollment is “dis-abled,” the voice model is off. Say the command that fits your needs. Say “Retrain” to start the speaker enroll-ment process and recreate a new voice model. (Refer to “Speaker enrollment” on page 5-167.)
NOTE
If you do not start the speaker enrollment process within 3 minutes after pressing the SPEECH button, the speaker enrollment function will time out. The voice guide will say “Speaker enroll- ment has timed out.” The system will then beep and the voice recognition mode will bedeactivated.
NOTE
To repeat the most recent voice training com- mand, press and release the SPEECH button. If you press the HANG-UP button anytime during the process, the system will beep andstop the speaker enrollment process.NOTE
Completing the speaker enrollment process will turn on the voice model automatically. The commands “Help” and “Cancel” will not work in this mode.
Enabling and disabling the voice model and retraining
Page 264 of 434
Vehicle preparation before driving
Driving safety 6-3
6
N00629000337
For a safer and more enjoyable trip, always observe the following: Before starting the vehicle, make certain that you and all passengers are seated and wearing their seat belts properly (with children in the rear seat, in appropriaterestraints), and that all the doors are locked.
Move the driver’s seat as far backward as possible, while still keeping good visibil- ity, and good control of the steering wheel, brakes, accelerator, and controls.Check the instrument panel indicators and multi-information display for any possible problem. Move the front passenger seat as far back as possible. Make sure that infants and small children are properly restrained in accordance withall laws and regulations.
Check these by selecting the defroster mode, and set the blower switch on high. You should be able to feel the air blowing against the windshield. (Refer to “Defrosting or defogging the wind- shield and door windows” on page 7-6, 7-12, 7-17, 7-22, 7-27.) Check all the tires for heavy tread wear or uneven wear patterns. Look for stones, nails,glass, or other objects stuck in the tread. Look for any tread cuts or sidewall cracks. Check the wheel nuts for tightness, and the tires(including spare tire) for proper pressures.
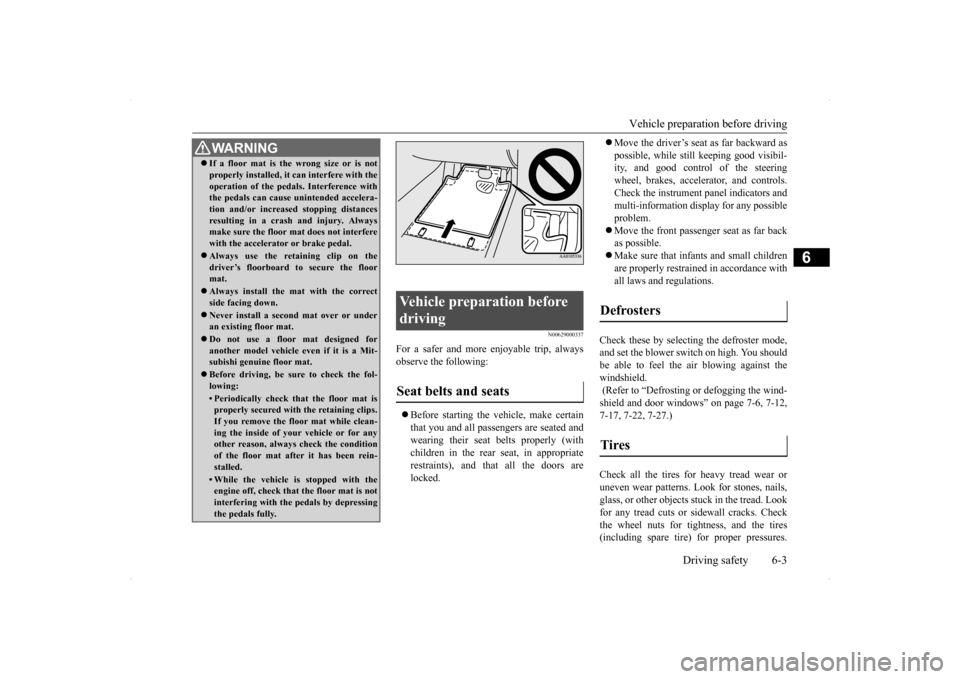
WA R N I N G If a floor mat is the wrong size or is not properly installed, it can interfere with the operation of the pedals. Interference with the pedals can cause unintended accelera- tion and/or increased stopping distancesresulting in a crash and injury. Always make sure the floor mat does not interfere with the accelerator or brake pedal. Always use the retaining clip on the driver’s floorboard to secure the floormat. Always install the mat with the correct side facing down. Never install a second mat over or under an existing floor mat. Do not use a floor mat designed for another model vehicle ev
en if it is a Mit-
subishi genuine floor mat. Before driving, be sure to check the fol- lowing:• Periodically check that the floor mat isproperly secured with the retaining clips. If you remove the floor mat while clean-ing the inside of your vehicle or for any other reason, always check the condition of the floor mat after it has been rein-stalled.• While the vehicle is stopped with the engine off, check that the floor mat is not interfering with the pedals by depressingthe pedals fully.
Vehicle preparation before driving Seat belts and seats
Defrosters Tires
Page 265 of 434
Safe driving techniques 6-4 Driving safety
6
Replace your tires before they are heavily worn out. As your vehicle is equipped with a tire pres- sure monitoring system, there is a risk ofdamage to the tire inflation pressure sensors when the tire is replaced on the rim. Tire replacement should, therefore, be performedonly by an authorized Mitsubishi Motors dealer. Have someone watch while you turn all the exterior lights on and off. Also check the turn signal indicators and high-beam indicators on the instrument panel. Check the ground under the vehicle after parking overnight, for fuel, water, oil, orother leaks. Make sure all the fluid levels are correct. Also, if you can smell fuel, you need to find out why immediately and have itfixed.
N00629200111
Even this vehicle’s safety equipment, andyour safest driving, cannot guarantee that you
can avoid an accident or injury. However, if you give extra attention to the following areas, you can better protect yourself and your passengers: Drive defensively. Be aware of traffic, road and weather conditions. Leave plenty of stopping distance between your vehicle and the vehicle ahead. Before changing lanes, check your mir- rors and use your turn signal light. While driving, watch the behavior of other drivers, bicyclists, and pedestrians. Always obey applicable laws and regula- tions. Be a polite and alert driver. Always leave room for unexpected events, such assudden braking. If you plan to drive in another country, obey their vehicle registration laws andmake sure you will be able to get the right fuel.
N00629400429
Check the battery, including terminals and cables. During extremely cold weather,the battery will not be as strong. Also, the battery power level may drop because more power is used for cold starting anddriving. Before driving the vehicle, check to see if the engine runs at the proper speed and ifthe headlights are as bright as normally.Charge or replace the battery if necessary. During extreme cold weather, it is possi- ble that a very low battery could freeze. Warm the engine sufficiently. After start- ing the engine, allow a short warm-up time to distribute oil
to all cylinders and
turbocharger. Then drive your vehicleslowly.
Lights Fluid leaks Safe driving techniques
Driving during cold weather
WA R N I N G The battery gives off explosive hydrogen gas. Any spark or flame can cause the bat-tery to explode, which could cause serious injury or death. Always wear protective clothes and a facemask when working with your battery, or let a skilled mechanic do it.
Page 314 of 434
Operation Keys
Comfort controls 7-39
7
N00716300021 N00716400022
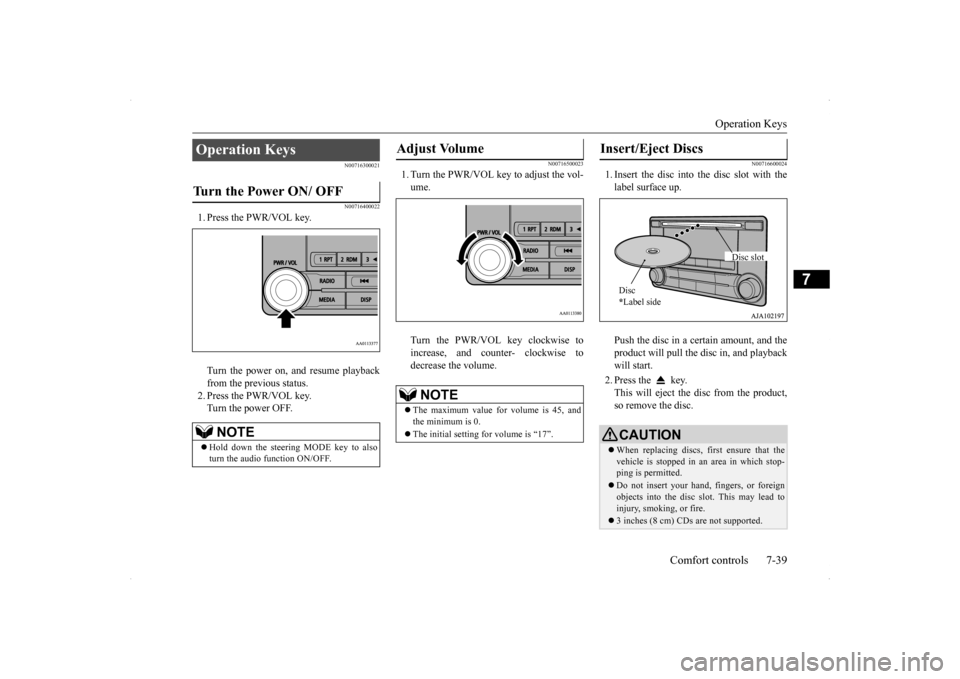
1. Press the PWR/VOL key. Turn the power on, and resume playback from the previous status. 2. Press the PWR/VOL key.Turn the power OFF.
N00716500023
1. Turn the PWR/VOL key to adjust the vol-ume. Turn the PWR/VOL key clockwise to increase, and counter- clockwise todecrease the volume.
N00716600024
1. Insert the disc into the disc slot with thelabel surface up. Push the disc in a certain amount, and the product will pull the disc in, and playbackwill start. 2. Press the key. This will eject the disc from the product, so remove the disc.
Operation Keys Turn the Power ON/ OFF
NOTE
Hold down the steering MODE key to also turn the audio function ON/OFF.
Adjust Volume
NOTE
The maximum value for volume is 45, and the minimum is 0. The initial setting for volume is “17”.
Insert/Eject Discs
CAUTIONWhen replacing discs, first ensure that the vehicle is stopped in an area in which stop-ping is permitted. Do not insert your hand, fingers, or foreign objects into the disc slot. This may lead to injury, smoking, or fire. 3 inches (8 cm) CDs are not supported.Disc * Label side
Disc slot
Page 317 of 434
Listen to Radio 7-42 Comfort controls
7
N00716900027
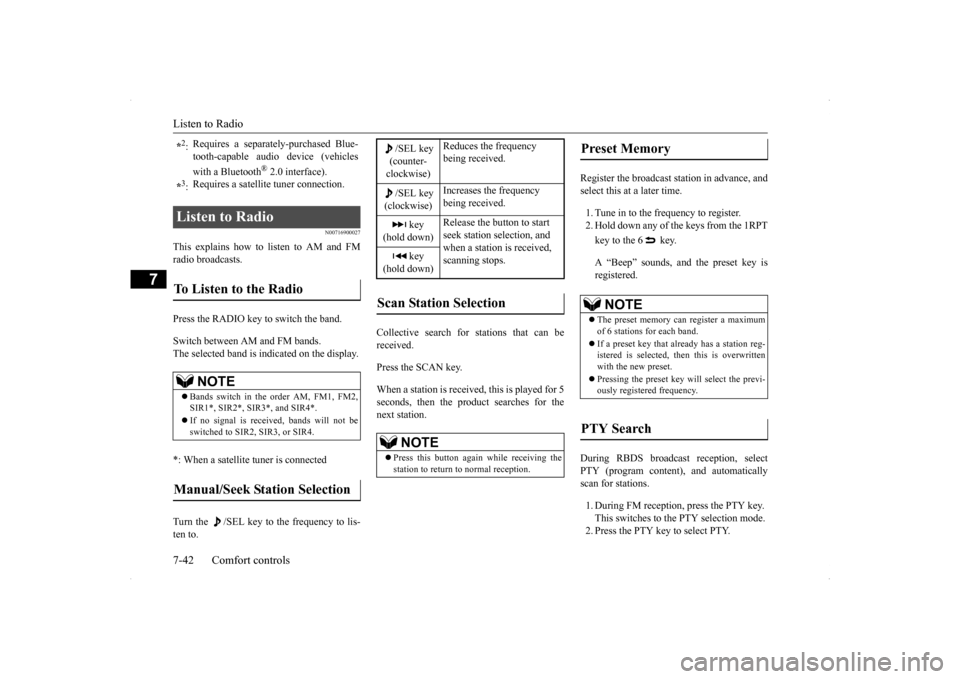
This explains how to listen to AM and FM radio broadcasts. Press the RADIO key to switch the band. Switch between AM and FM bands. The selected band is indicated on the display. *: When a satellite tuner is connected Turn the /SEL key to the frequency to lis- ten to.
Collective search for stations that can be received. Press the SCAN key.When a station is received, this is played for 5 seconds, then the product searches for the next station.
Register the broadcast station in advance, and select this at a later time. 1. Tune in to the frequency to register. 2. Hold down any of the keys from the 1RPT key to the 6 key. A “Beep” sounds, and the preset key is registered.
During RBDS broadcast reception, select PTY (program content), and automatically scan for stations. 1. During FM reception, press the PTY key. This switches to the PTY selection mode. 2. Press the PTY key to select PTY.
*2: Requires a separately-purchased Blue- tooth-capable audio device (vehicles with a Bluetooth
® 2.0 interface).
*3: Requires a satellite tuner connection.
Listen to Radio To Listen to the Radio
NOTE
Bands switch in the order AM, FM1, FM2, SIR1*, SIR2*, SIR3*, and SIR4*. If no signal is received, bands will not be switched to SIR2, SIR3, or SIR4.
Manual/Seek Station Selection
/SEL key (counter- clockwise)
Reduces the frequency being received.
/SEL key (clockwise)
Increases the frequency being received.
key
(hold down)
Release the button to start seek station selection, and when a station is received, scanning stops.
key
(hold down)Scan Station Selection
NOTE
Press this button again while receiving the station to return to normal reception.
Preset Memory
NOTE
The preset memory can register a maximum of 6 stations for each band. If a preset key that already has a station reg- istered is selected, then this is overwritten with the new preset. Pressing the preset key will select the previ- ously registered frequency.
PTY Search
Page 323 of 434

Listen to an iPod 7-48 Comfort controls
7
Press the MEDIA key to set the iPod as the source. The selected source is indicated on the dis- play.
Press the key or key to select the track. This enables selection of the next or previous track. Hold down the 3 key or the 4 key. Fast forward/rewind is possible. Repeat playback and shuffle playback are possible. Press the 1RPT key. Repeat playback of th
e track currently being
played.
NOTE
Depending on the generation, model, or soft- ware version of the iPod/iPhone, playback on this product may not be possible. ( P.7-30) Additionally, playback as
explained in this document may not be possi-ble. Regarding details such as types of iPod/iPhone that can be connected to equip- ment by type (vehicles with a Bluetooth
® 2.0
interface), and types of files that can beplayed back, refer to “Types of connectable devices and supported file specifications” on page 5-185. Regarding how to connect the iPod/iPhone, refer to “How to connect an iPod” on page5-184. When connecting the iPod/iPhone, use a commercially-available iPod connection cable. Set up the device in order that no unsafe actions, such as plugging in the connectioncable are taken while driving. When inserting and removing the iPod/iPhone, for safety’s sake first stop the vehicle. Depending on the status of the iPod/iPhone, it may take some time until the device is rec- ognized, or playback starts. Buttons on the product will not operate while iPod/iPhone is connected. iPod/iPhone specifications and settings may mean that connection is not possible, orresult in differences in operation or display.
Depending on audio data in the iPod/iPhone, track information may not be displayed cor- rectly. Depending on the status of the vehicle and device, the iPod/iPhone may not play back after starting the engine. Data containing copyright information may not play back. It is recommended that the iPod/iPhone equalizer settings be set to flat. Operate the iPod/iPhone while connected to this product. If the iPod/iPhone is connected via Bluetooth as a Bluetooth-capable audio device, then do not connect the iPod/iPhone using an iPodcable. Connection using both methods will result in erroneous operation. If an iPod/iPhone does not operate correctly, then remove the iPod/iPhone from the prod- uct, reset, then reconnect.
Play iPod
NOTE
Select the Track (File) Fast Forward or Rewind Switch Playback Mode Repeat Playback (RPT)
NOTE
Pressing again will cancel.
Page 325 of 434

Listen to Audio Files on a USB Device 7-50 Comfort controls
7
Press the MEDIA key to set USB as the source. The selected source is indicated on the dis- play.
Press the key or key to select the track. This enables selection of the next or previous track. Hold down the 3 key or the 4 key. Fast forward/rewind is possible. Repeat playback, random playback, and scan playback are possible. Press the 1RPT key. Repeat playback of th
e track currently being
played.
NOTE
Regarding details such as types of USB devices that can be connected, and USB input ports, refer to “Device types” on page 5-185. Regarding details of types of files that can be played back in equipment by type (vehicles with a Bluetooth
® 2.0 interface), refer to
“File specifications” on page 5-186. Regarding how to connect USB devices, refer to “How to connect a USB memory device” on page 5-184. When connecting a USB device, use a con- nection cable. Failure to use a connection cable when connecting may place undue loadon, or damage the USB connector. Set up the device in order that no unsafe actions, such as plugging in the connection cable are taken while driving. When inserting and removing the USB device, for safety’s sake first stop the vehi-cle. Do not insert other than audio devices into the USB port. Damage to the device or equipment may result. Depending on the status of the USB device, it may take some time until the device is rec- ognized, or playback starts. Depending on USB devices, buttons on the product will not operate while the USBdevice is connected. USB device specifications and settings may mean that connection is not possible, or result in differences in operation or display.
Depending on audio data in the USB device, track information may not be displayed cor- rectly. Depending on the status of the vehicle and device, the iPod/iPhone may not play back after starting the engine. Data containing copyright information may not play back. This product can play back MP3, WMA, and AAC format audio files. Depending on the type of USB device, usage may not be possible, or functions that can be used may be restricted. The recommended file system for USB memory is FAT32. The maximum supported capacity for USB memory is 32GB. Operate the USB device containing recorded audio files while connected to this product.
Play Back of Audio Files on a USB Device
NOTE
Select the Track (File) Fast Forward or Rewind Switch Playback Mode Repeat Playback (RPT)
NOTE
Pressing again will cancel.
Page 328 of 434
Use AUX (if so equipped) Comfort controls 7-53
7
2. Press the 5 key. Bluetooth Audio play- back starts.
Press the key or key to select the track. This enables selection of the next or previous track. Hold down the 3 key or the 4 key. Fast forward/rewind is possible. Repeat playback, random playback, and scan playback are possible.
Press the 1RPT key. Repeat playback of th
e track currently being
played. Press the 2RDM key. Play the tracks in the Bluetooth Audio device in a random order. Press the SCAN key. Play the first 10 seconds of each of the tracks on the whole Bluetooth Audio device inorder.
N00717600034
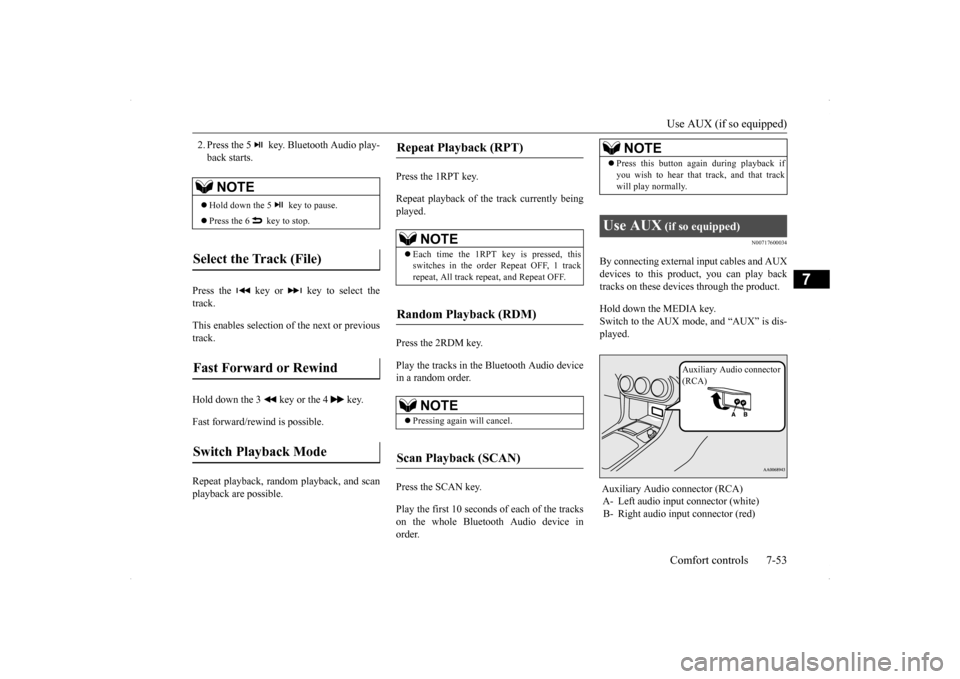
By connecting external input cables and AUXdevices to this product, you can play back tracks on these devices
through the product.
Hold down the MEDIA key. Switch to the AUX mode, and “AUX” is dis-played.
NOTE
Hold down the 5 key to pause. Press the 6 key to stop.
Select the Track (File)
Fast Forward or Rewind
Switch Playback Mode
Repeat Playback (RPT)
NOTE
Each time the 1RPT key is pressed, this switches in the order Repeat OFF, 1 trackrepeat, All track repeat, and Repeat OFF.
Random Playback (RDM)
NOTE
Pressing again will cancel.
Scan Playback (SCAN)
NOTE
Press this button again during playback if you wish to hear that track, and that track will play normally.
Use AUX
(if so equipped)
Auxiliary Audio connector (RCA) A- Left audio input connector (white) B- Right audio input connector (red)
Auxiliary Audio connector (RCA)
Page 343 of 434
If the vehicle breaks down 8-2 For emergencies
8
N00836300161
If your vehicle breaks down on the road, move to the shoulder and turn on the hazardwarning flashers. If there is no shoulder, or the shoulder is not safe, drive in the right lane slowly, with the hazard lights flashing, untilyou come to a safe stopping place. Keep the flashers flashing. If the engine stops, there will be no power assist to the steering and brakes, making these difficult to use. The brake booster will not work, so the brakes will not grip well. The brake pedalwill be harder to press than usual. Since there is no power steering assist, the steering wheel will be hard to turn.
Get help from your passengers, bystanders, etc. to push the vehicl
e and move it to a safe
zone.
N00836400713
If the engine cannot be started because the battery is weak or dead, you can start it withthe battery from another vehicle using jumper cables. 1. Take off any metal jewelry such as watch bands or bracelets that might make an accidental electrical contact.
2. Position the vehicles close enough together so that the jumper cables can reach, but be sure the vehicles aren’t touching each other. 3. You could be injured if the vehicles move. Set the parking brake firmly on each vehi- cle. Put an automatic transaxle, CVT or Twin Clutch SST in “P” (PARK) or amanual transaxle in “N” (Neutral). Turn the ignition key to the “LOCK” position.
If the vehicle breaks down If the engine stops/fails When the engine fails at the intersection
Jump-starting the engine
WA R N I N G When using jumper cables to start a vehi- cle, follow the procedures and be very cau- tious. CAUTION Do not try to start your vehicle by pushing or towing. Vehicles with continuously variable transmission (CVT) or Twin Clutch SST cannot be started this way. Pushing or towinga vehicle that has a manual transaxle may overheat and damage the catalytic converter. Also, there is more ri
sk of an accident when
a vehicle is being pushed or towed.
CAUTION Check the other vehicle. It must have a 12- volt battery. If the other system isn’t 12-volt, both systems can be damaged.WA R N I N G Turn the ignition key to the “LOCK” posi- tion on both vehicles. Make sure that the cables or your clothes cannot be caught by the fan or drive belt. Personal injurycould result. NOTE
Turn off all lights, heater, and other electrical loads. This will avoid sparks and help save both batteries.
Page 345 of 434
Engine overheating 8-4 For emergencies
8
8. Start the engine in the vehicle providing the boost. Let the engine idle a few min- utes, then start the engine in the vehicle with the low battery. 9. After the engine is started, disconnect the cables in the reverse order from the wayyou connected them.
10. For vehicles equipped with turbocharger,
install the battery upper cover and thenthe air duct. (Refer to “Removing and installing the battery upper cover” on page 9-14.)
If you drive your vehicle with a low battery charge, after the engine has been started by using jumper cables, the engine may misfire. This can cause the anti-lock braking systemwarning light to blink on and off. This is only due to the low battery voltage. It is not a problem with the brake system. If this hap-pens, fully charge the battery and ensure the charging system is operating properly.
N00836500323
When the engine has overheated, the infor- mation screen in the multi-information dis-play will be interrupted and the engine coolant temperature warning display will appear. The screen will then change to theengine coolant temperature display screen and “ ” will flash. If this happens: 1. Stop the vehicle in a safe place. Turn on the hazard warning flashers. 2. With the engine still running, carefullyraise the engine hood to vent the engine compartment. 3. Check that the cooling fan is running. Ifthe fan is not turning, stop the engine immediately and contact an authorized Mitsubishi Motors dealer or a repair facil-ity of your choice for assistance. 4. If you see steam or spray coming from under the hood, turn off the engine.
NOTE
If the engine is started with the air duct removed, the noise produced as air is drawn into the engine will be greater than when the duct is installed.WA R N I N G Charging your battery while it is still in your vehicle might cause the battery tocatch fire and explode. If you have to charge it while in the vehicle, disconnect the negative terminal. Keep sparks, cigarettes and flames away from the battery because the battery may explode. Keep your work area well vented when charging or using the battery in an enclosed space.
Remove all the caps before charging the battery. Electrolyte (battery acid) is corrosive diluted sulphuric acid. If electrolyte comesin contact with your hands, eyes, clothes, or the painted surface of your vehicle, thoroughly flush with water. If electrolytegets in your eyes, flush them immediately and thoroughly with water, and get prompt medical attention. Always wear protective clothing and gog- gles when working near the battery. Keep the battery out of the reach of chil- dren.
As your vehicle has anti-lock brakes
WA R N I N G
Engine overheating
WA R N I N G To avoid personal injury, keep hands, hair, jewelry and clothes away from the cooling fan. The cooling fan can start at any time.