bluetooth MITSUBISHI MIRAGE 2017 6.G Owner's Manual
[x] Cancel search | Manufacturer: MITSUBISHI, Model Year: 2017, Model line: MIRAGE, Model: MITSUBISHI MIRAGE 2017 6.GPages: 307, PDF Size: 9.02 MB
Page 165 of 307
Bluetooth® 2.0 interface (if so equipped) 5-104 Features and controls
5
Follow the steps below to transfer to the mobile phonebook the phonebook stored in the cellular phone.
1. Press the SPEECH button. 2. Say “Phonebook.” 3. The voice guide will
say “Select one of
the following: new entry, edit number,edit name, list names, delete, erase all, or import contact.
” Say “Import contact.”
to import a single entr
y or all contacts?”
Say “All contacts.” 5. The voice guide will say “Importing thecontact list from the mobile phonebook. This may take several minutes to com- plete. Would you like to continue?” phonebook the phonebook stored in the cellular phone will start.Answer “No,” the system will return to the main menu.
6. When the transfer is complete, the voice guide will say “Import complete” and then the system will return to the main menu.
N00566301119
Model name: MMC or MDGMY10FCC ID: CB2MDGMY10 orNT8MDGMY10 IC: 279B-MDGMY10 or 3043A-MDGMY10 Your Bluetooth
® 2.0 interface operates on a
radio frequency subject
to Federal Communi-
You cannot change the names and telephone numbers in the phonebook entries registeredin the mobile phonebook. You cannot selectand delete specific
phonebook entries, either.
To change or delete any of the above, change the applicable information in the sourcephonebook of the cellular phone and then transfer the phonebook again.
To import a devices phonebook
NOTE
Transfer should be completed while the vehi- cle is parked. Before transferring, make surethat the vehicle is parked in a safe location. The already stored phonebook in the mobile phonebook is overwritten by the stored phonebook in the cellular phone. All or part of data
may not be transferred,
even when the cellular phone supports Blue- tooth
®, depending on the compatibility of
the device. Only a home, a work, and a mobile number can be imported. The maximum supported telephone number length is 19 digits.
Any telephone number of
20 digits or more will be truncated to the first19 digits.NOTE
If telephone numbers
contain characters
other than 0 to 9,
*, # or +, these characters
are deleted before the transfer. For the connection set
tings on the cellular
phone side, refer to the
instructions for the
cellular phone.NOTE
The transfer may take some time to complete depending on the numb
er of contacts.
NOTE
If the Bluetooth
® 2.0 interface could not be
connected to the Bluetooth
® compatible cel-
lular phone, the voice gui
de will sa
y “Unable
to transfer contact list from phone” and then the system will return to the main menu. If you press the HANG-UP button or press and hold the SPEECH button during the data transfer, the transfer will be cancelled andthe system will return to the main menu. If an error occurs during the data transfer, all transfer will be canc
elled and the voice guide
will say “Unable to complete the phonebook import” and then the system will return tothe main menu. If there are no contacts in the phonebook, the voice guide will say
“There are no contacts
on the connected phone.”
General information
NOTE
BK0236100US.book 104 ページ 2016年2月1日 月曜日 午前10時15分
Page 169 of 307
USB input terminal (if so equipped) 5-108 Features and controls
5
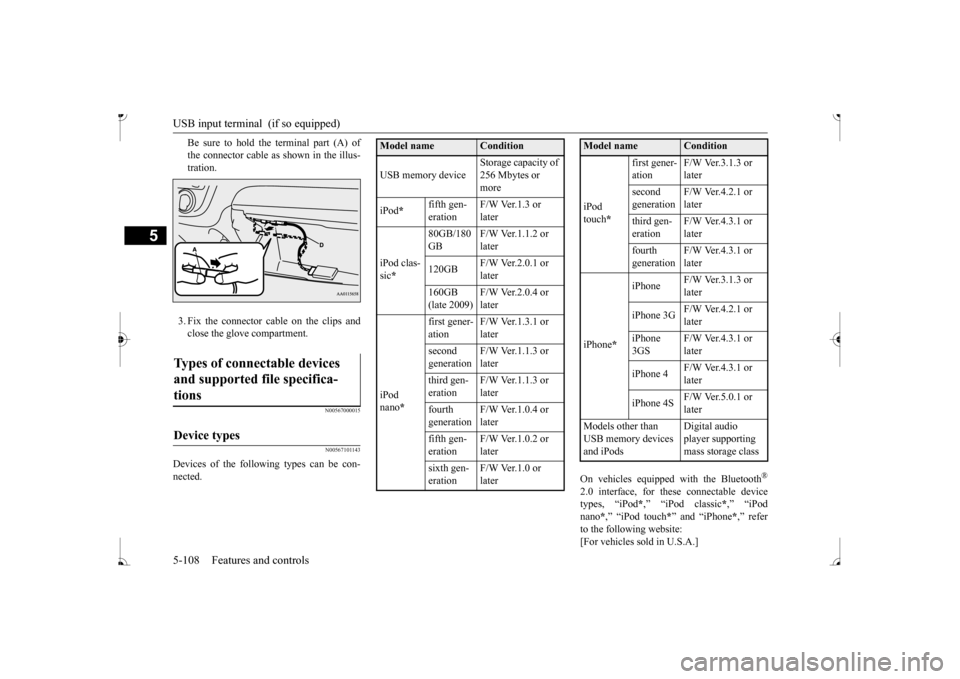
Be sure to hold the terminal part (A) of the connector cable as
shown in the illus-
tration. 3. Fix the connector cable on the clips and close the glove compartment.
N00567000015 N00567101143
Devices of the follow
ing types can be con-
nected.
On vehicles equipped
with the Bluetooth
®
2.0 interface, for th
ese connectable device
types, “iPod
*,” “iPod classic
*,” “iPod
nano
*,” “iPod touch
*” and “iPhone
*,” refer
to the following website:[For vehicles sold in U.S.A.]
Types of connectable devices and supported file specifica- tions
Device types
Model name
Condition
USB memory device
Storage capacity of 256 Mbytes or more
iPod
*
fifth gen- eration
F/W Ver.1.3 or later
iPod clas- sic *
80GB/180 GB
F/W Ver.1.1.2 or later
120GB
F/W Ver.2.0.1 or later
160GB (late 2009)
F/W Ver.2.0.4 or later
iPod nano
*
first gener- ation
F/W Ver.1.3.1 or later
second generation
F/W Ver.1.1.3 or later
third gen- eration
F/W Ver.1.1.3 or later
fourth generation
F/W Ver.1.0.4 or later
fifth gen- eration
F/W Ver.1.0.2 or later
sixth gen- eration
F/W Ver.1.0 or later
iPod touch
*
first gener- ation
F/W Ver.3.1.3 or later
second generation
F/W Ver.4.2.1 or later
third gen- eration
F/W Ver.4.3.1 or later
fourth generation
F/W Ver.4.3.1 or later
iPhone
*
iPhone
F/W Ver.3.1.3 or later
iPhone 3G
F/W Ver.4.2.1 or later
iPhone 3GS
F/W Ver.4.3.1 or later
iPhone 4
F/W Ver.4.3.1 or later
iPhone 4S
F/W Ver.5.0.1 or later
Models other than USB memory devices and iPods
Digital audio player supporting mass storage class
Model name
Condition
BK0236100US.book 108 ページ 2016年2月1日 月曜日 午前10時15分
Page 194 of 307
7
Comfort controlsVents ................................................................................................7-2 Heater without air conditioning functi
on (if so equipped) ...............7-4
Manual air conditioning (if so equipped) .........................................7-7Automatic air conditioning (if so equipped)...................................7-12 Important air conditioning operating tips ..
...........
...........
.........
.....7-18
Air purifier (if so equipped)............................................................7-19AM/FM electronically tune
d radio with CD player
(if so equipped) ..........................................................................7-19 To play tracks from USB device (if so equipped) ..........................7-29 To play tracks from a Bluetooth
® device
(vehicles with Bluetooth
® 2.0 interface) ...................................7-37
Steering wheel audio remote control
switches (if so equipped) .....7-40
Error codes .....................................................................................7-41 Handling of compact discs .............................................................7-42 Antenna ..........................................................................................7-44General information about your radio .....
...........
...........
...........
.....7-44
BK0236100US.book 1 ページ 2016年2月1日 月曜日 午前10時15分
Page 219 of 307
AM/FM electronically tuned radio with CD player (if so equipped) 7-26 Comfort controls
7
N00702701047
1. Press and hold the button and the clock display flashes. 2. Turn the SEL switch to adjust the “hours”digit. 3. When the “hours” digit is adjusted, press the button to flash
the “minutes” digit.
Turn the SEL switch to adjust the “min- utes” digit. 4. When the desired time is displayed, press the button to complete the procedure.
N00702801048
1. Press and hold the /MENU button for 2 seconds or longer. 2. Turn the SEL switch or press the
/MENU button several times to select
“Gracenote DB” and then press the SEL switch. 3. Turn the SEL switch to select “DB Ver-sion” and then press the SEL switch to determine the Gracenote DB version.
To adjust the clock
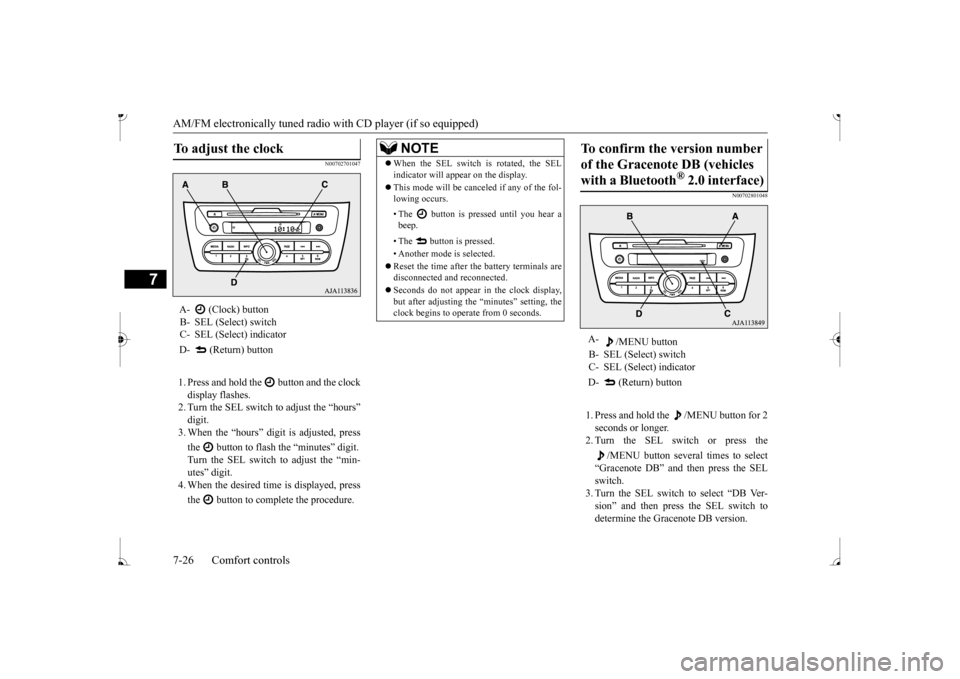
A- (Clock) buttonB- SEL (Select) switch C- SEL (Select) indicator D- (Return) button
NOTE
When the SEL switch is rotated, the SEL indicator will appear on the display. This mode will be canceled if any of the fol- lowing occurs. • The button is pressed until you hear a beep. • The button is pressed. • Another mode is selected. Reset the time after the battery terminals are disconnected an
d reconnected.
Seconds do not appear
in the clock display,
but after adjusting the
“minutes” setting, the
clock begins to operate from 0 seconds.
To confirm the version number of the Gracenote DB (vehicles with a Bluetooth
® 2.0 interface)
A-
/MENU button
B- SEL (Select) switch C- SEL (Select) indicator D- (Return) button
BK0236100US.book 26 ページ 2016年2月1日 月曜日 午前10時15分
Page 220 of 307
AM/FM electronically tuned radio with CD player (if so equipped)
Comfort controls 7-27
7
N00702901049
It is possible to set the language used for voice control.
1. Press and hold the /MENU button for 2 seconds or longer.2. Turn the SEL switch or press the
/MENU button several times to select
“PHONE SET” and then press the SEL switch.3. Turn the SEL switch to select “LAN- GUAGE” and then press the SEL switch. 4. Turn the SEL switch to select “LangChgYES” and then press the SEL switch. 5. Turn the SEL switch to select language and then press the SEL switch. 6. Turn the SEL switch to select “LangSet YES” and then press the SEL switch.
N00755400030
It is possible to cha
nge the position of the
speaker of the output sound during cellular phone voice cut-in. 1. Press and hold the /MENU button for 2 seconds or longer.
NOTE
When the SEL switch is rotated, the SEL indicator will appear on the display. This mode will be canceled if any of the fol- lowing occurs. • The button is pressed. • Any operation is not
performed for more
than 10 seconds. • The “EXIT ”MENU” ” is selected.
To change the language (vehi- cles with Bluetooth
® 2.0 inter-
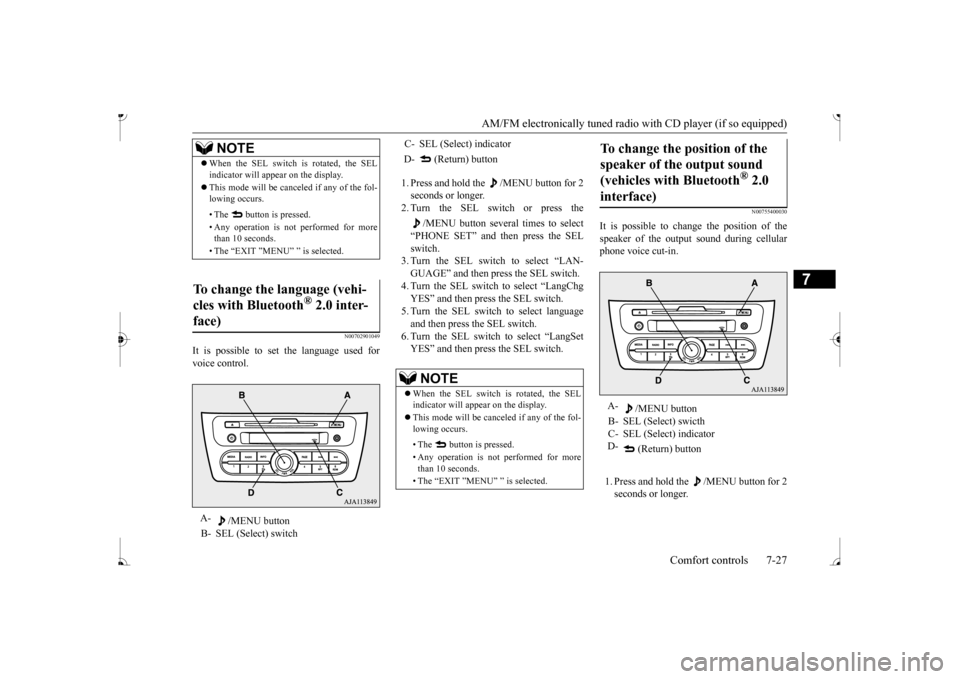
face)A-
/MENU button
B- SEL (Select) switch
C- SEL (Select) indicator D- (Return) button
NOTE
When the SEL switch is rotated, the SEL indicator will appear on the display. This mode will be canceled if any of the fol- lowing occurs. • The button is pressed. • Any operation is not performed for more than 10 seconds. • The “EXIT ”MENU” ” is selected.
To change the position of the speaker of the output sound (vehicles with Bluetooth
® 2.0
interface)
A-
/MENU button
B- SEL (Select) swicth C- SEL (Select) indicator D-
(Return) button
BK0236100US.book 27 ページ 2016年2月1日 月曜日 午前10時15分
Page 222 of 307
To play tracks from USB device (if so equipped)
Comfort controls 7-29
7
N00762200056
You can connect your
iPod or USB memory
device to the USB input terminal and play music files stored in the iPod or USB mem- ory device.See the following section for the types of connectable devices
and supported files.
Refer to “Types of c
onnectable devices and
supported file specific
ations” on page 5-108.
See the following sections for the connecting methods, “How to connect an iPod” on page5-107 and “How to connect a USB memory device” on page 5-106. If your vehicle is equipped with a Bluetooth
®
2.0 interface, you can play music files in your iPod or USB memory de
vice via voice opera-
tion.Refer to “To play iPod tracks via voice opera- tion” on page 7-31 and “To play USB mem- ory device tracks via voice operation” onpage 7-37.
N00762301070
Use the connected a
udio equipment’s own
power source, such as its battery.Noise may be produced from the speakers ifthe connected audio equipment is used while charging it using the accessory socket of the vehicle. Do not activate the
external audio input
mode when no audio equipment is con-nected. Otherwise, noise may be produced from the speakers. Connect audio equipmen
t when the external
audio input mode is de
activated or lower the
vehicle’s speaker volum
e before connecting
it. Noise may be produced from the speakers ifaudio equipment is conne
cted after the exter-
nal audio input m
ode is activated.
Compared to the CD player mode and radio mode, the vehicle’s speaker volume will be lower in the external audio input mode.Therefore, be careful when switching from the external audio input mode to the CD player mode or radio mode since the speakervolume will be higher. Do not use excessive
force on the connection
cord. Otherwise, the cord and connectors may be damaged. If the connection cord
alone is left connected
to the auxiliary audi
o connector, noise may
be produced from the speakers.NOTE
For information on how to connect and oper- ate the commercially av
ailable audio equip-
ment, refer to the owner’s manual for thecommercially availabl
e audio equipment.
To play tracks from USB device
(if so equipped)
NOTE
NOTE
A file protected by c
opyright might not be
able to playback. It is recommended to adjust the equalizer of the connected device to 0 db or neutral.
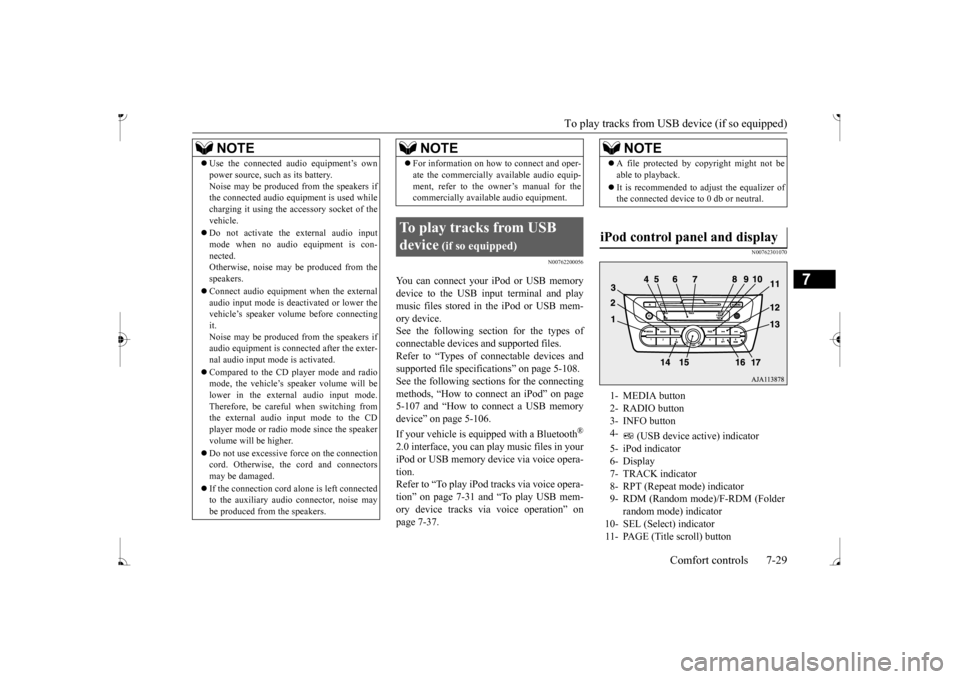
iPod control panel and display
1- MEDIA button 2- RADIO button 3- INFO button 4-
(USB device ac
tive) indicator
5- iPod indicator6- Display 7- TRACK indicator 8- RPT (Repeat mode) indicator9- RDM (Random mode)/F-RDM (Folder
random mode) indicator
10- SEL (Select)
indicator
11- PAGE (Title scroll) button
BK0236100US.book 29 ページ 2016年2月1日 月曜日 午前10時15分
Page 223 of 307
To play tracks from USB device (if so equipped)
7
N00762401101
1. Press the PWR switch to turn on the audio system. The system turns on in the last mode used.2. Connect your iPod to the USB input ter- minal. Refer to “How to connect an iPod” onpage 5-107. 3. Press the MEDIA button several times to switch to the iPod mode. The input modechanges as follows every time the MEDIA button is pressed: CD mode
iPod mode
Bluetooth
® mode (if so
equipped)
AUX mode
CD mode.
The iPod indicator is illuminated and then the iPod mode will be activated.4. Once the device is
selected, playback
starts and indicator appears on the dis- play.
5. To stop the playback, press the RADIO button or MEDIA button to switch to adifferent mode.
N00762501043
To fast-forward/revers
e the current track,
press the button or button. To fast-forward the current track, press and hold the button. To fast-reverse the current track, press and hold the button.
N00762600034
Press the button repeatedly until the desired track number appears on the display. Press the button repeatedly until the desired track number appears on the display.
N00762701090
You can select desired
tracks from the “Playl-
ists”, “Artists”,
“Albums”, “Songs” or
“Genre” (vehicles with Bluetooth
® 2.0 inter-
face) menus on your iPod. Operate the SEL switch to select desired tracks.The selected menu or category or track is shown in the display.
12-
(Fast-reverse/Track down) button
13-
(Fast-forward/Track up) button
14-
(Return) button
15- PWR (On-Off)/SE
L (Select) switch
16- RPT (Repeat) button17- RDM (Random) buttonTo play from an iPod
NOTE
Depending on the conditi
on of your iPod, it
may take a longer time
before the playback
starts.NOTE
Buttons on the iPod are disabled while the iPod is connected to
the audio system.
To adjust the volume and tone, refer to “To adjust the volume” on page 7-20 and “To adjust the tone” on page 7-20.
To fast-forward/reverse the track
Fast-forward Fast-reverse
To select a desired track
Track upTrack down
NOTE
Pressing the button once during the song will cause the audio system to restart play-back from the beginning of the song.
To find a track from the iPod menu
BK0236100US.book 30 ページ 2016年2月1日 月曜日 午前10時15分
Page 224 of 307
To play tracks from USB device (if so equipped)
Comfort controls 7-31
7
When this mode is activated by pressing the SEL switch, the SEL indicator will be appearon the display.
N00762800023
Press the RPT button during playback toshow “RPT” in the display. To exit this mode, press the button again.
N00762901034
Press the RDM button to show “RDM” in thedisplay. The iPod randomly selects and plays tracksfrom the current category. To exit this mode, press the button again.
N00763001045
Press and hold the RDM button until you heara beep to show “F-RDM” in the display. The iPod randomly select
s and plays tracks in
the album from the current category. To exit this mode, press the button again.
N00763101059
You can display the track titles, artist names,genre and album titles recorded in the iPod. The display changes as follows every timethe INFO button is pressed during playback: Album title
Track name
Artist name
Genre (vehicles with Bluetooth
® 2.0 inter-
face)
Normal display.
N00763200040
Desired tracks can be
selected and played
from your iPod by “Artist”, “Album”, “Playl- ist” and “Genre” us
ing voice commands.
For information concerning the voice recog-nition function or spea
ker registration func-
tion, refer to “Bluetooth
® 2.0 interface” on
page 5-85.The following explains how to prepare for voice operation and play the tracks.
N00763300067
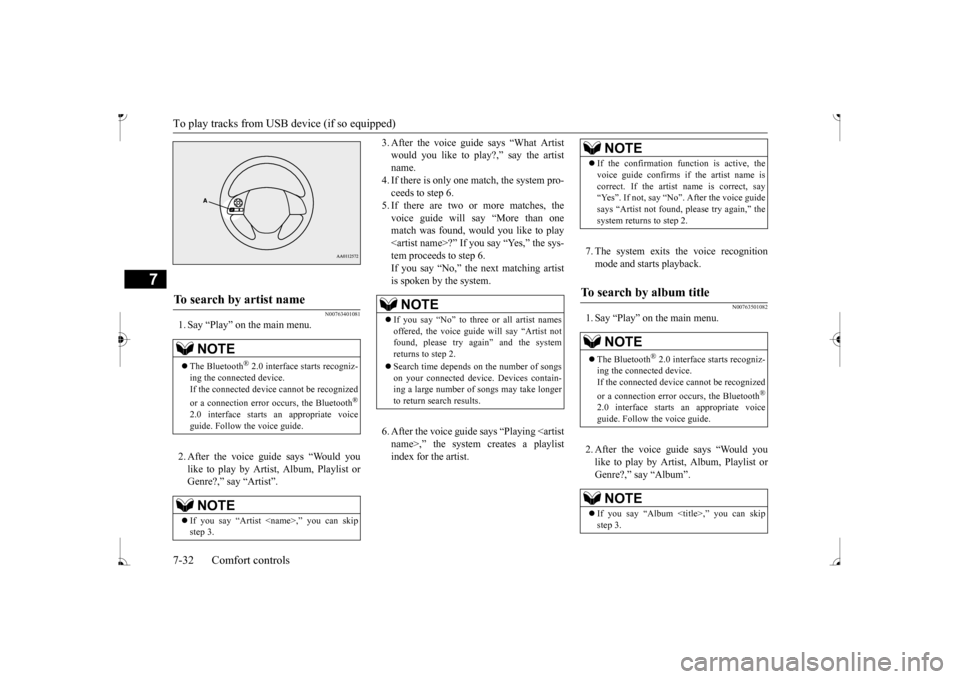
To use the voice operation, press theSPEECH button (A) first.
Press the SEL switch :To start this mode or
to select the menu or category or track.
Turn the SEL switch :To show the menu or
category or track.
NOTE
To cancel the selecti
on, press the button
to return to the previous step. If no operation is performed for 10 seconds or more or another but
ton is operated after
the SEL switch has been
pressed, searching
of the desired tracks is canceled. If no operation is perf
ormed for 5 seconds or
more after the track is displayed, playbackstarts. When the SEL indicator is not shown on the display and the SEL swit
ch is operated, the
volume adjustment
is activated.
To play the same track repeatedly
To play tracks in random order
To play tracks in each album in random order
To switch the display
NOTE
Up to 11 characters are shown in the display at once. If the title is cut off in the middle,press the PAGE button.
The next characters
are displayed every
time this button is
pressed. If no title is stored, “NO TITLE” is shown in the display. Characters that cannot
be displayed are sub-
stituted by “•”.
To play iPod tracks via voice operation (vehicles with Blue-tooth
® 2.0 interface)
Preparation for voice operation
BK0236100US.book 31 ページ 2016年2月1日 月曜日 午前10時15分
Page 225 of 307
To play tracks from USB device (if so equipped)
7
N00763401081
1. Say “Play” on the main menu. 2. After the voice guide says “Would you like to play by Artist, Album, Playlist orGenre?,” say “Artist”.
3. After the voice guide says “What Artist would you like to play?,” say the artistname. 4. If there is only one match, the system pro- ceeds to step 6.5. If there are two or more matches, the voice guide will say “More than one match was found, would you like to play
says “Playing
7. The system exits the voice recognition mode and starts playback.
N00763501082
1. Say “Play” on the main menu. 2. After the voice guide says “Would you like to play by Artist, Album, Playlist or Genre?,” say “Album”.
To search by artist name
NOTE
The Bluetooth
® 2.0 interface starts recogniz-
ing the connected device. If the connected device
cannot be recognized
or a connection error
occurs, the Bluetooth
®
2.0 interface starts
an appropriate voice
guide. Follow the voice guide.NOTE
If you say “Artist
NOTE
If you say “No” to three or all artist names offered, the voice guide
will say “Artist not
found, please try again” and the system returns to step 2. Search time depends on the number of songs on your connected devi
ce. Devices contain-
ing a large number of
songs may take longer
to return search results.
NOTE
If the confirmation function is active, the voice guide confirms if the artist name iscorrect. If the artist name is correct, say“Yes”. If not, say “No”. After the voice guide says “Artist not found, please try again,” the system returns to step 2.
To search by album title
NOTE
The Bluetooth
® 2.0 interface starts recogniz-
ing the connect
ed device.
If the connected device
cannot be recognized
or a connection error occurs, the Bluetooth
®
2.0 interface starts
an appropriate voice
guide. Follow the voice guide.NOTE
If you say “Album