MITSUBISHI MIRAGE G4 2018 Owner's Manual (in English)
Manufacturer: MITSUBISHI, Model Year: 2018, Model line: MIRAGE G4, Model: MITSUBISHI MIRAGE G4 2018Pages: 263, PDF Size: 37.9 MB
Page 141 of 263
Combination headlights and dimmer switch 5-78 Features and controls
5
N00590300021
This light comes on when the washer fluid is running low.If the light comes on, replenish the container with washer fluid. Refe
r to “Washer fluid” on
page 9-9.
N00522501889
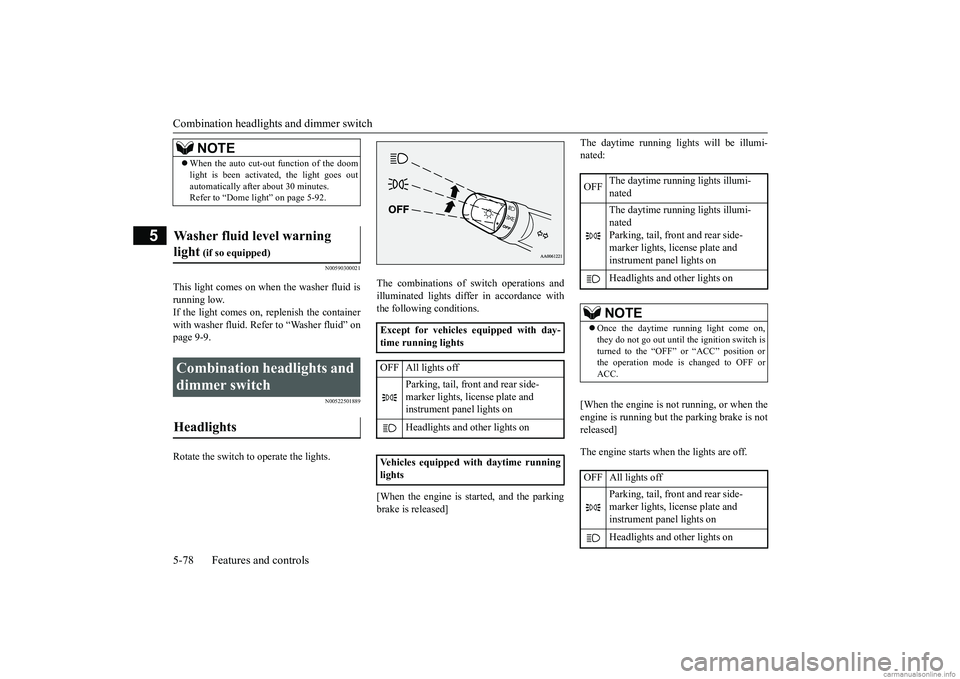
Rotate the switch to operate the lights.
The combinations of switch operations and illuminated lights differ in accordance withthe following conditions. [When the engine is started, and the parking brake is released]
The daytime running lights will be illumi- nated: [When the engine is not running, or when the engine is running but the parking brake is not released] The engine starts when the lights are off.
NOTE
When the auto cut-out function of the doom light is been activated, the light goes outautomatically after
about 30 minutes.
Refer to “Dome light” on page 5-92.
Washer fluid level warning light
(if so equipped)
Combination headlights and dimmer switch Headlights
Except for vehicles equipped with day- time running lights OFF All lights off
Parking, tail, front
and rear side-
marker lights, license plate and instrument panel lights on Headlights and other lights on
Vehicles equipped
with daytime running
lights
OFF
The daytime running lights illumi- nated The daytime running lights illumi- nated Parking, tail, front and rear side-marker lights, license plate and instrument panel lights on Headlights and
other lights on
NOTE
Once the daytime running light come on, they do not go out until the ignition switch isturned to the “OFF” or “ACC” position or the operation mode is changed to OFF or ACC.
OFF All lights off
Parking, tail, front and rear side- marker lights, license plate and instrument panel lights on Headlights and
other lights on
BK0249600US.book 78 ページ 2017年4月20日 木曜日 午後1時36分
Page 142 of 263
Combination headlights and dimmer switch
Features and controls 5-79
5
N00532600570
If the following operation is performed with the combination headlights and dim- mer switch in the “ ” or “ ” position, the lights automatically turn off. [Except for vehicles equipped with the F. A . S . T. - k e y ]The ignition switch is turned to the “OFF” or “ACC” position or
the key is removed
from the ignition switch and the driver’sdoor is opened. [For vehicles equipped with the F.A.S.T.- key]
The operation mode is changed to OFF or ACC and the driver’s door is opened. If the following operation is performed with the combination headlights and dim- mer switch in the “ ” or “ ” position, the lights automatically turn off after about 3 minutes. [Except for vehicles
equipped with the
F. A . S . T. - k e y ] The ignition switch is turned to the “OFF”or “ACC” position or the key is removed from the ignition switch and the driver’s door is not opened. [For vehicles equipped with the F.A.S.T.- key] The operation mode is changed to OFF or ACC and the driver’s door is not opened.
If the combination
headlights and dimmer
switch is turned to the “ ” or “ ” posi- tion again after the engine is turned off, the about 3-minute auto-cutout function described above will not
work. The lights (the
parking lights, tail lig
hts and license plate
lights) will stay on and will not turn off auto-matically.
N00549800226
[When using a key to
start the engine]
If the driver’s door is opened with the key in the “OFF” or “ACC” position or removed from the ignition switch while the lights areon, the tone will sound to remind you to turn off the lights. [When using the F.A.S.T.-key to start the engine]If the driver’s door is opened with the opera- tion mode is put in OFF or ACC, or if the operation mode is changed to OFF while thelights are on, the tone will sound to remind you to turn off the lights. In either case, the lights will turn off automat- ically and so will the tone. Or you can turn
NOTE
Do not leave the head
lights and ot
her lights
on for a long period of time when the engineis not running. The battery will run down. When it rains, or wh
en the vehicle has been
washed, the inside of the lens sometimesbecomes foggy. This is the same as when window glass mists up
on a humid day, and
does not indicate a problem. When the lightis switched on, the heat
will dry out the fog.
However, if water collects inside the light, have it checked by an
authorized Mitsubishi
Motors dealer or a repair facility of your choice.
Light auto-cutout function (headlights and other lights)
NOTE
The light auto-cutout
function can be deacti-
vated. See your authorized Mitsubishi Motorsdealer for details.
When you want to keep the lights on: Headlight reminder buzzer
BK0249600US.book 79 ページ 2017年4月20日 木曜日 午後1時36分
Page 143 of 263
Turn signal lever 5-80 Features and controls
5
the light switch to the “OFF” position to stop the tone.
N00549900142
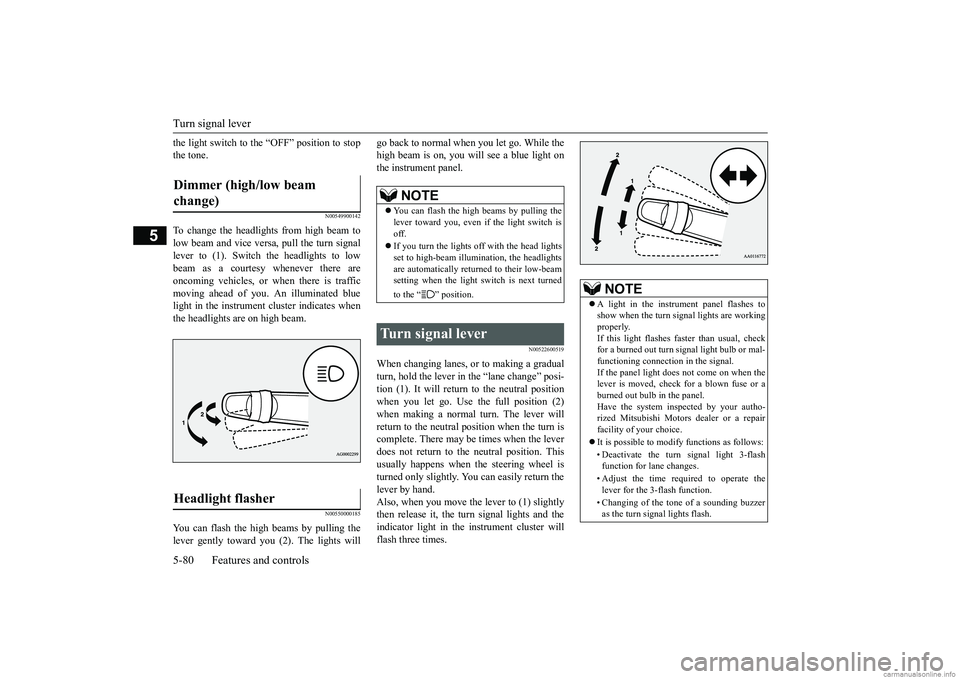
To change the headlights from high beam tolow beam and vice vers
a, pull the turn signal
lever to (1). Switch the headlights to low beam as a courtesy whenever there are oncoming vehicles, or when there is traffic moving ahead of you. An illuminated bluelight in the instrument cluster indicates when the headlights are on high beam.
N00550000185
You can flash the high beams by pulling the lever gently toward you (2). The lights will
go back to normal when you let go. While the high beam is on, you will see a blue light onthe instrument panel.
N00522600519
When changing lanes, or to making a gradual turn, hold the lever in the “lane change” posi- tion (1). It will return to the neutral positionwhen you let go. Use the full position (2) when making a normal turn. The lever will return to the neutral pos
ition when the turn is
complete. There may be times when the lever does not return to th
e neutral position. This
usually happens when the steering wheel isturned only slightly. You
can easily return the
lever by hand. Also, when you move the lever to (1) slightlythen release it, the turn signal lights and the indicator light in the instrument cluster will flash three times.
Dimmer (high/low beam change) Headlight flasher
NOTE
You can flash the high beams by pulling the lever toward you, even if the light switch isoff. If you turn the lights off with the head lights set to high-beam illumi
nation, the headlights
are automatically returned to their low-beam setting when the light
switch is next turned
to the “ ” position.
Turn signal lever
NOTE
A light in the instrument panel flashes to show when the turn signal lights are workingproperly. If this light flashes fast
er than usual, check
for a burned out turn
signal light bulb or mal-
functioning connecti
on in the signal.
If the panel light does not come on when the lever is moved, check
for a blown fuse or a
burned out bulb in the panel. Have the system inspected by your autho- rized Mitsubishi Motors
dealer or a repair
facility of your choice. It is possible to modify functions as follows: • Deactivate the turn signal light 3-flash function for lane changes. • Adjust the time required to operate the lever for the 3-flash function. • Changing of the tone of a sounding buzzer as the turn signal lights flash.
BK0249600US.book 80 ページ 2017年4月20日 木曜日 午後1時36分
Page 144 of 263
Hazard warning flasher switch Features and controls 5-81
5
See your authorized Mitsubishi Motors dealer for details.
N00522700318
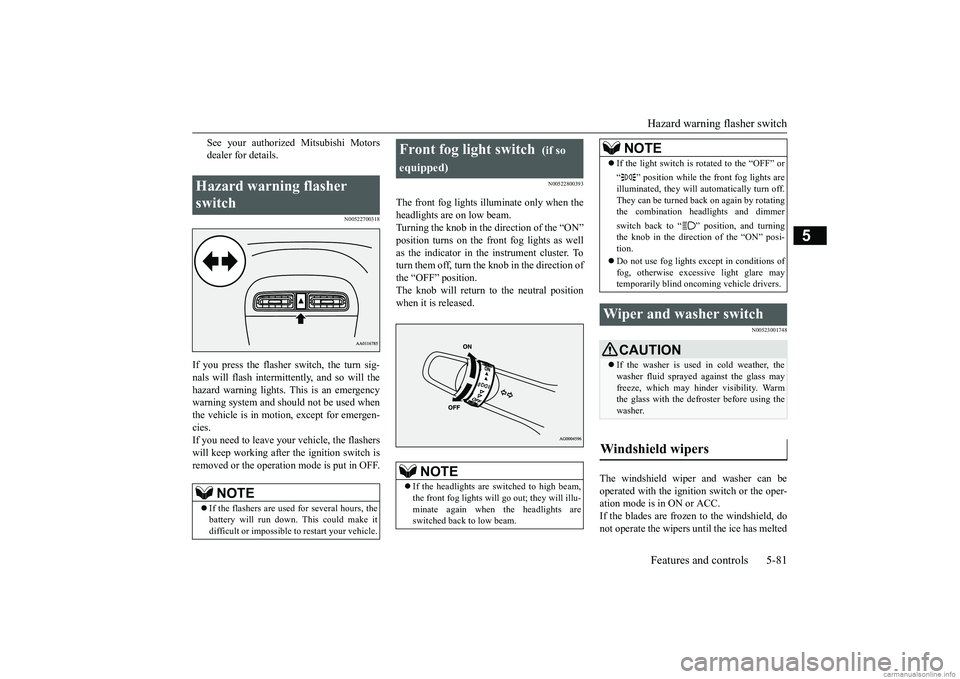
If you press the flasher switch, the turn sig- nals will flash intermittently, and so will the hazard warning lights.
This is an emergency
warning system and should not be used when the vehicle is in motion, except for emergen- cies.If you need to leave your
vehicle, the flashers
will keep working after the ignition switch is removed or the operation mode is put in OFF.
N00522800393
The front fog lights illuminate only when theheadlights are on low beam.Turning the knob in the direction of the “ON” position turns on the front fog lights as well as the indicator in the instrument cluster. Toturn them off, turn the knob in the direction of the “OFF” position. The knob will return to the neutral position when it is released.
N00523001748
The windshield wiper
and washer can be
operated with the ignition switch or the oper- ation mode is in ON or ACC.If the blades are frozen to the windshield, do not operate the wipers
until the ice has melted
Hazard warning flasher switch
NOTE
If the flashers are used for several hours, the battery will run down.
This could make it
difficult or impossible
to restart your vehicle.
Front fog light switch
(if so
equipped)
NOTE
If the headlights are sw
itched to high beam,
the front fog lights will
go out; they will illu-
minate again when the headlights are switched back to low beam.
If the light switch is rotated to the “OFF” or “ ” position while the
front fog lights are
illuminated, they will automatically turn off.They can be turned back on again by rotating the combination headlights and dimmer switch back to “ ” position, and turning the knob in the direction of the “ON” posi-tion. Do not use fog lights ex
cept in conditions of
fog, otherwise excessive light glare may temporarily blind oncom
ing vehicle drivers.
Wiper and washer switch
CAUTIONIf the washer is used in cold weather, the washer fluid sprayed against the glass mayfreeze, which may hinder visibility. Warm the glass with the defr
oster before using the
washer.
Windshield wipers
NOTE
BK0249600US.book 81 ページ 2017年4月20日 木曜日 午後1時36分
Page 145 of 263
Wiper and washer switch 5-82 Features and controls
5
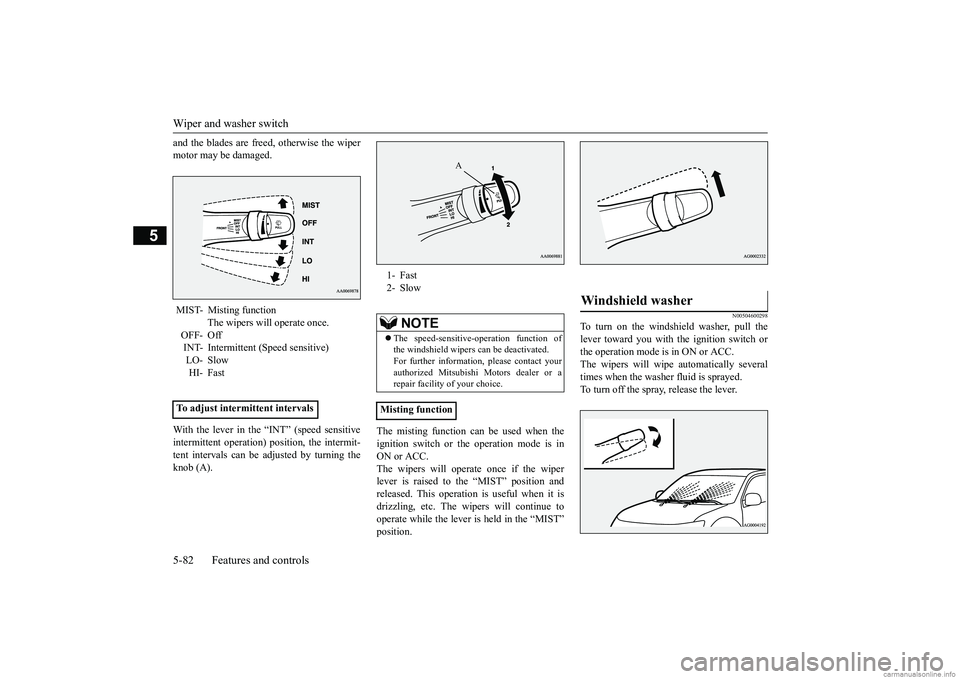
and the blades are freed, otherwise the wiper motor may be damaged. With the lever in the “INT” (speed sensitive intermittent operation) position, the intermit- tent intervals can be adjusted by turning theknob (A).
The misting function can be used when the ignition switch or th
e operation mode is in
ON or ACC. The wipers will operate once if the wiper lever is raised to the “MIST” position andreleased. This operation
is useful when it is
drizzling, etc. The wi
pers will continue to
operate while the lever is held in the “MIST”position.
N00504600298
To turn on the windshield washer, pull thelever toward you with the ignition switch or the operation mode is in ON or ACC. The wipers will wipe automatically severaltimes when the washer fluid is sprayed. To turn off the spray, release the lever.
MIST- Misting function
The wipers will operate once.
OFF- OffINT- Intermittent (Speed sensitive) LO- Slow HI- Fast
To adjust intermittent intervals
1- Fast 2- Slow
NOTE
The speed-sensitive-
operation function of
the windshield wipers
can be de
activated.
For further informati
on, please contact your
authorized Mitsubishi Motors dealer or a repair facility of your choice.
Misting function
A
Windshield washer
BK0249600US.book 82 ページ 2017年4月20日 木曜日 午後1時36分
Page 146 of 263
Electric rear window defogger switch
Features and controls 5-83
5
N00523501349
N00523701484
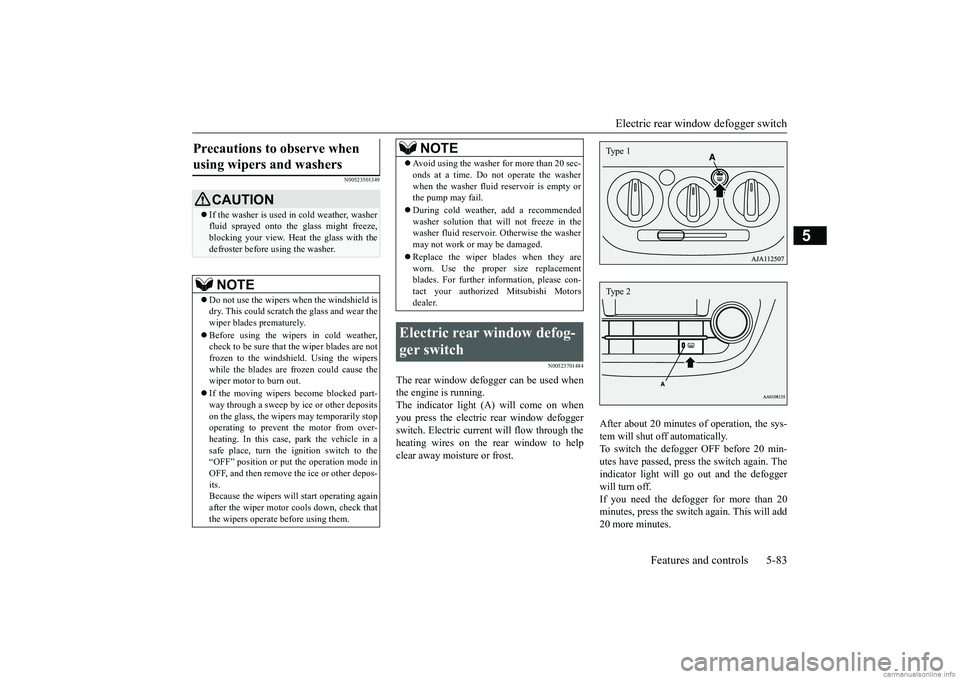
The rear window defogger can be used when the engine is running. The indicator light (A) will come on when you press the electric rear window defoggerswitch. Electric current will flow through the heating wires on the rear window to help clear away moisture or frost.
After about 20 minutes
of operation, the sys-
tem will shut off automatically. To switch the defogge
r OFF before 20 min-
utes have passed, press
the switch again. The
indicator light will go out and the defogger will turn off. If you need the defogger for more than 20 minutes, press the switch
again. This will add
20 more minutes.
Precautions to observe when using wipers and washers
CAUTION If the washer is used in cold weather, washer fluid sprayed onto the glass might freeze, blocking your view. Heat
the glass with the
defroster before using the washer.NOTE
Do not use the wipers when the windshield is dry. This could scratch the glass and wear the wiper blades prematurely. Before using the wipe
rs in cold weather,
check to be sure that the wiper blades are notfrozen to the windshield. Using the wipers while the blades are frozen could cause the wiper motor to burn out. If the moving wipers
become blocked part-
way through a sweep by ice or other depositson the glass, the wipers may temporarily stop operating to prevent the motor from over- heating. In this case,
park the vehicle in a
safe place, turn the ignition switch to the“OFF” position or put
the operation mode in
OFF, and then remove the ice or other depos- its.Because the wipers will
start operating again
after the wiper motor cools down, check that the wipers operate
before using them.
Avoid using the washer for more than 20 sec- onds at a time. Do not operate the washerwhen the washer fluid reservoir is empty orthe pump may fail. During cold weather, add a recommended washer solution that will not freeze in the washer fluid reservoir. Otherwise the washer may not work or may be damaged. Replace the wiper blades when they are worn. Use the proper size replacementblades. For further info
rmation, please con-
tact your authorized
Mitsubishi Motors
dealer.
Electric rear window defog- ger switch
NOTE
Type 1Type 2
BK0249600US.book 83 ページ 2017年4月20日 木曜日 午後1時36分
Page 147 of 263
Horn switch 5-84 Features and controls
5
N00523800185
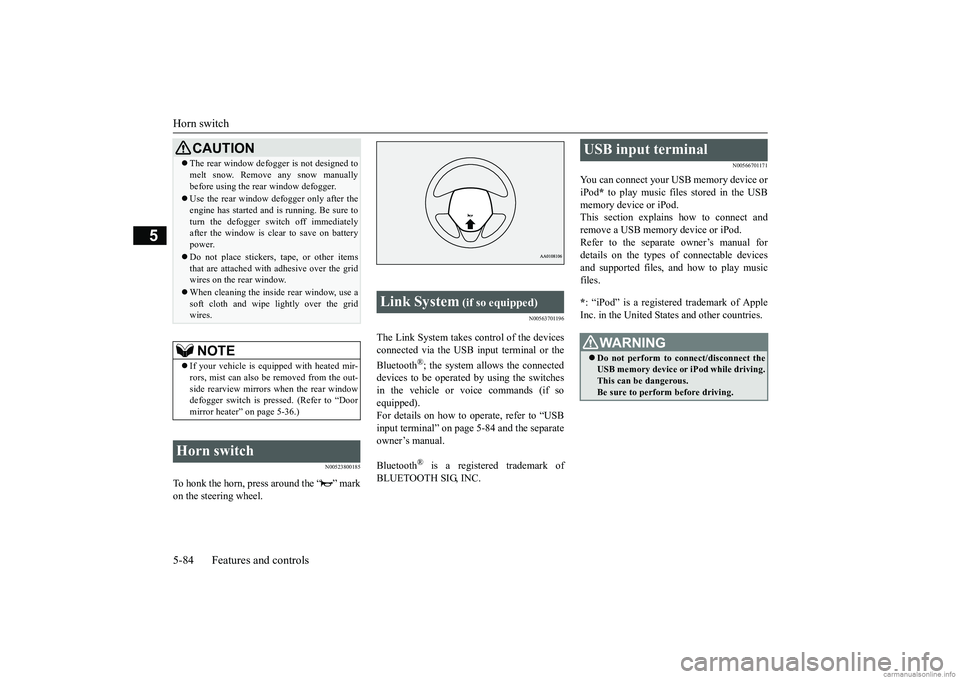
To honk the horn, press around the “ ” mark on the steering wheel.
N00563701196
The Link System takes control of the devicesconnected via the USB i
nput terminal or the
Bluetooth
®; the system allows the connected
devices to be operated by using the switches in the vehicle or voice commands (if so equipped).For details on how to operate, refer to “USB input terminal” on page
5-84 and the separate
owner’s manual. Bluetooth
® is a registered trademark of
BLUETOOTH SIG, INC.
N00566701171
You can connect your USB memory device or iPod
* to play music files stored in the USB
memory device or iPod.This section explains how to connect and remove a USB memory device or iPod. Refer to the separate owner’s manual fordetails on the types of
connectable devices
and supported files, and how to play music files. * : “iPod” is a register
ed trademark of Apple
Inc. in the United Stat
es and other countries.
CAUTIONThe rear window defogge
r is not designed to
melt snow. Remove any snow manuallybefore using the rear window defogger. Use the rear window defogger only after the engine has started and
is running. Be sure to
turn the defogger switch off immediately after the window is clea
r to save on battery
power. Do not place stickers
, tape, or other items
that are attached with adhesive over the gridwires on the rear window. When cleaning the insi
de rear window, use a
soft cloth and wipe
lightly over the grid
wires.NOTE
If your vehicle is equi
pped with heated mir-
rors, mist can also be removed from the out-side rearview mirrors
when the rear window
defogger switch is pre
ssed. (Refer to “Door
mirror heater” on page 5-36.)
Horn switch
Link System
(if so equipped)
USB input terminal
WA R N I N G Do not perform to connect/disconnect the USB memory device or
iPod while driving.
This can be dangerous. Be sure to perform before driving.
BK0249600US.book 84 ページ 2017年4月20日 木曜日 午後1時36分
Page 148 of 263
Sun visors
Features and controls 5-85
5
N00566801172
1. Connect a commercia
lly available USB
connector cable (A) to the USB memory device (B). 2. Open the cover (C) and connect the oppo- site end of the USB connector cable.
3. To disconnect the USB connector cable, perform the installation steps in reverse.
N00566901203
1. Connect the connector cable to the iPod. 2. Open the cover (A) and connect the oppo- site end of the connector cable.
3. To disconnect the
connector cable, per-
form the installation steps in reverse.
N00524600353
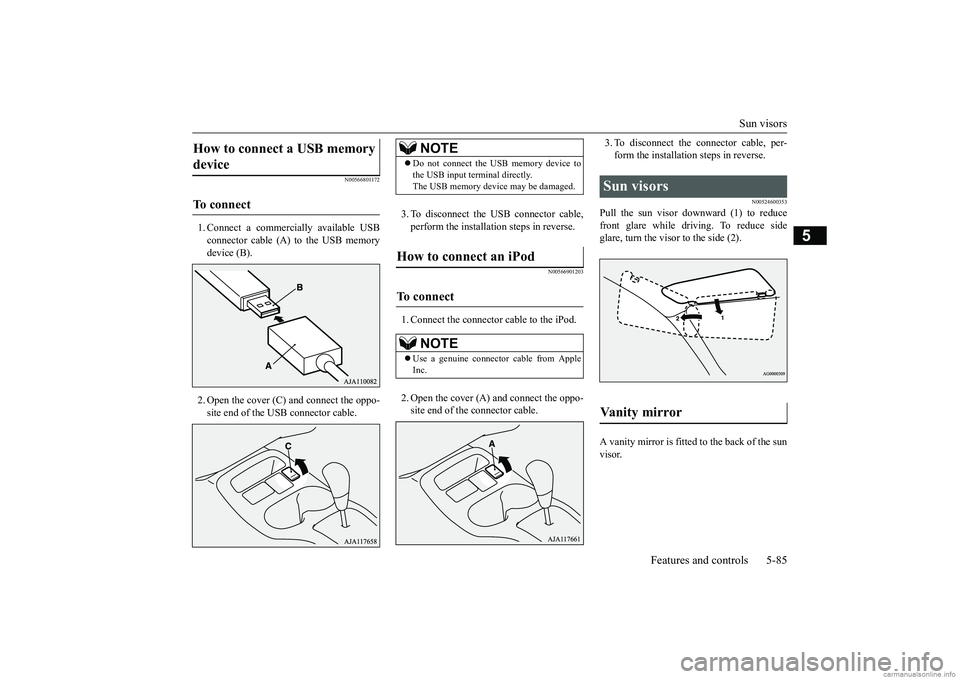
Pull the sun visor downward (1) to reducefront glare while driving. To reduce sideglare, turn the visor to the side (2). A vanity mirror is fitted to the back of the sun visor.
How to connect a USB memory device To connect
NOTE
Do not connect the USB memory device to the USB input term
inal directly.
The USB memory devi
ce may be damaged.
How to connect an iPod To connect
NOTE
Use a genuine connector cable from Apple Inc.
Sun visors Vanity mirror
BK0249600US.book 85 ページ 2017年4月20日 木曜日 午後1時36分
Page 149 of 263
12 V power outlets 5-86 Features and controls
5
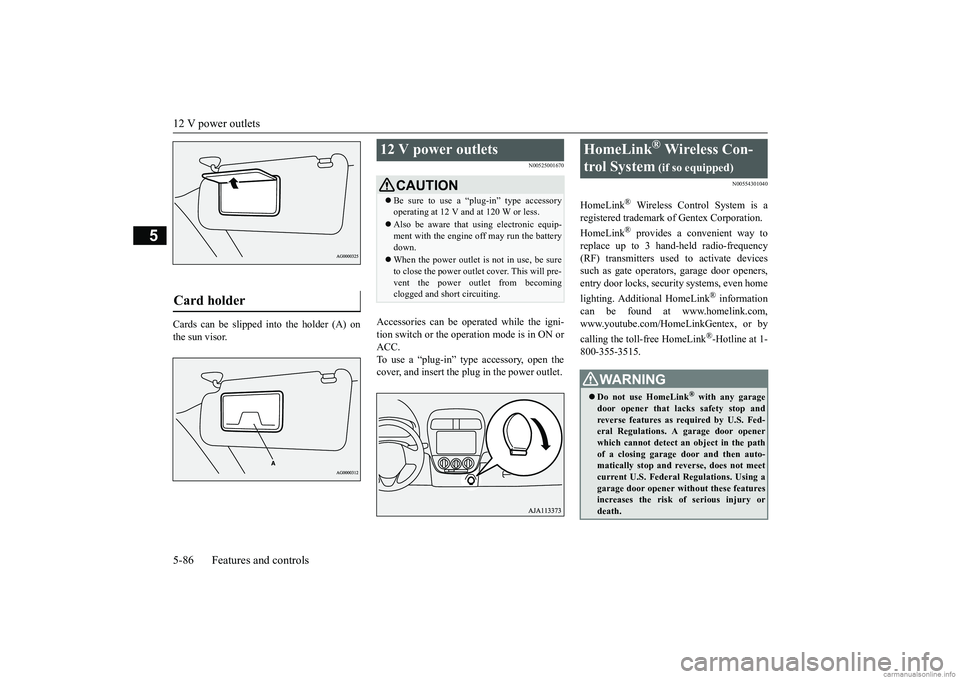
Cards can be slipped
into the holder (A) on
the sun visor.
N00525001670
Accessories can be operated while the igni-tion switch or the operation mode is in ON or ACC. To use a “plug-in” type accessory, open thecover, and insert the plug in the power outlet.
N00554301040
HomeLink
® Wireless Contro
l System is a
registered trademark of Gentex Corporation. HomeLink
® provides a convenient way to
replace up to 3 hand-held radio-frequency (RF) transmitters used to activate devicessuch as gate operators
, garage door openers,
entry door locks, security systems, even home lighting. Additional HomeLink
® information
can be found at www.homelink.com, www.youtube.com/HomeLinkGentex, or by calling the toll-free HomeLink
®-Hotline at 1-
800-355-3515.
Card holder
12 V power outlets
CAUTION Be sure to use a “plug-in” type accessory operating at 12 V and at 120 W or less. Also be aware that using electronic equip- ment with the engine
off may run the battery
down. When the power outlet is not in use, be sure to close the power outlet cover. This will pre- vent the power outlet from becoming clogged and short circuiting.
HomeLink
® Wireless Con-
trol System
(if so equipped)
WA R N I N G Do not use HomeLink
® with any garage
door opener that lacks safety stop and reverse features as required by U.S. Fed- eral Regulations.
A garage door opener
which cannot detect an object in the path of a closing garage d
oor and then auto-
matically stop and reverse, does not meetcurrent U.S. Federal Regulations. Using a garage door opener wi
thout these features
increases the risk of serious injury ordeath.
BK0249600US.book 86 ページ 2017年4月20日 木曜日 午後1時36分
Page 150 of 263
HomeLink® Wireless Control System (if so equipped)
Features and controls 5-87
5
N00584600029
Some garage door openers manufactured after 1995 have “rolling code protection”. To program a garage door openerequipped with “rolli
ng code protection”;
you will need to ac
cess the garage door
opener motor to press the motor’s “Learn”or “Smart” buttons.
For convenience, use
a ladder and another pe
rson to assist you.
It is recommended that a new battery be placed in the hand-held transmitter of the device being programmed to HomeLink
®
for quicker training and accurate trans- mission of the radio-frequency signal.
N00584700020
To program HomeLink
® to operate a garage
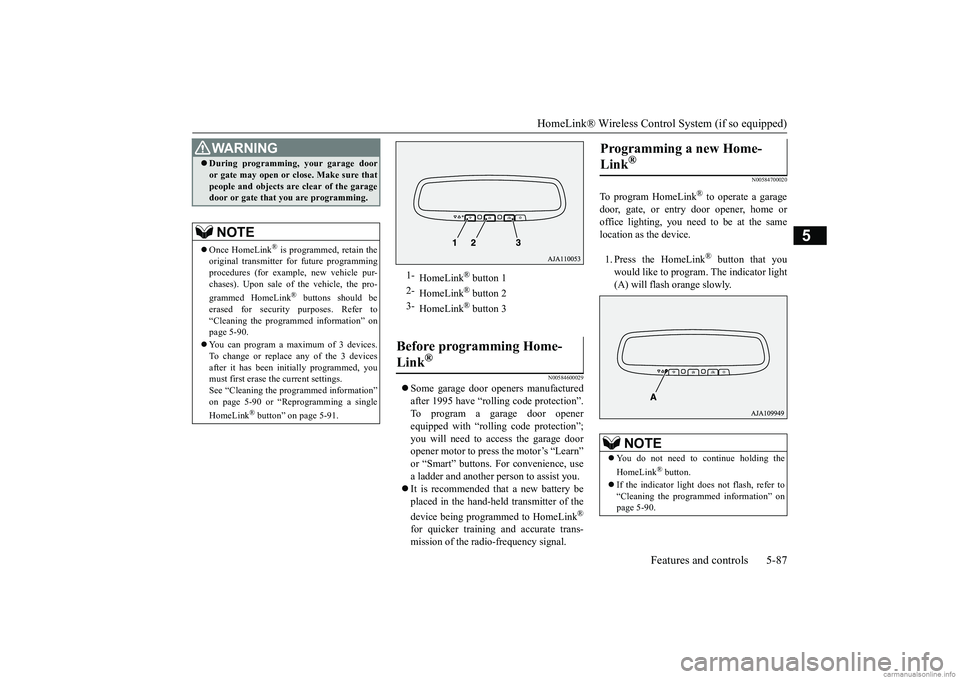
door, gate, or entry door opener, home oroffice lighting, you need to be at the same location as the device. 1. Press the HomeLink
® button that you
would like to program. The indicator light (A) will flash orange slowly.
During programming
, your garage door
or gate may open or close. Make sure thatpeople and objects are clear of the garagedoor or gate that you are programming.NOTE
Once HomeLink
® is programmed, retain the
original transmitter for future programming procedures (for example, new vehicle pur-chases). Upon sale of the vehicle, the pro- grammed HomeLink
® buttons should be
erased for security purposes. Refer to “Cleaning the programmed information” on page 5-90. You can program a ma
ximum of 3 devices.
To change or replace any of the 3 devicesafter it has been in
itially programmed, you
must first erase the current settings. See “Cleaning the programmed information”on page 5-90 or “Reprogramming a single HomeLink
® button” on page 5-91.
WA R N I N G
1-
HomeLink
® button 1
2-
HomeLink
® button 2
3-
HomeLink
® button 3
Before programming Home- Link
®
Programming a new Home- Link
®
NOTE
You do not need to continue holding the HomeLink
® button.
If the indicator light does not flash, refer to “Cleaning the programmed information” on page 5-90.
BK0249600US.book 87 ページ 2017年4月20日 木曜日 午後1時36分