child lock MITSUBISHI MIRAGE G4 2019 (in English) User Guide
[x] Cancel search | Manufacturer: MITSUBISHI, Model Year: 2019, Model line: MIRAGE G4, Model: MITSUBISHI MIRAGE G4 2019Pages: 267, PDF Size: 38.31 MB
Page 90 of 267

Door locks
Features and controls 5-25
5
N00509201599
Turn the key toward the front of the vehicle to lock the door. After checking that the door is locked, turn the key back to the center and remove it.
Move the lock knob to the lock position to lock the door. All doors should be kept locked while driv-ing.
CAUTION When the remote control transmitter case is opened, be careful to keep water, dust, etc.out. Also, do not touch the internal compo-nents.
Door locks
WA R N I N G Make sure all doors are tightly closed and locked while driving.• Locked doors, in co
mbination with the
use of seat belts, can help reduce the risk of ejection in
an accident.
• Locked doors can help keep passengers, especially small children, from openingdoors and falling out
of moving vehicles.
• Locked doors can help
prevent outsiders
from gaining access to your vehicle when you slow or come to a stop.
Lock your vehicle when
ever you leave it.
Children who get into unlocked vehicles may not be able to get out. Childrentrapped inside vehicles can quickly beovercome by heat
and suffer serious
injury or death due to heat stroke. Never leave a ch
ild alone in the vehicle. In
addition to the risk
of heat stroke, chil-
dren can activate switches and controls,resulting in an injury
or fatal accident.
When closing a door,
make sure that the
door is fully closed and the door-ajarwarning display goes out on the informa-tion screen on the multi-information dis- play. If the door is aj
ar it could
open while
driving and caus
e an accident.
To lock and unlock with the key (driver’s door) (except for vehi- cles equipped with the F.A.S.T.-key) 1- Lock 2- UnlockWA R N I N G
NOTE
When locking or unlocking with the key, only the driver’s door will be locked orunlocked.To lock or unlock all doors, use the power door lock switches, the keyless entry system or the F.A.S.T-key operation. (if soequipped) Refer to “Power door locks” on page 5-26, “Keyless entry system” on pages 5-6 and5-22, and “To operate using the F.A.S.T.- key” on page 5-12. In vehicles equipped wi
th the F.A.S.T.-key,
the passenger’s door can be locked and unlocked using the emergency key.Refer to “Emergency key” on page 5-20.
To lock or unlock the door from the inside
BK0267800US.book 25 ページ 2018年5月30日 水曜日 午後4時24分
Page 92 of 267

Child safety locks for rear door Features and controls 5-27
5
All of the doors can be locked or unlocked by pressing the power door lock switch on the driver’s or the front passenger door.
N00563401207
All doors will unlock when the selector leveris moved to the “P” (PARK) position with the ignition switch or the operation mode in ON.
N00509401315
Child safety locks help prevent rear passen-gers, especially children, from opening therear door using the inside door handle. A lock lever for the child safety lock is pro- vided on each rear door.When the lever is in the lock position (1), the rear door cannot be opened using the inside door handle.To open the rear door when the child safety lock lever is in the lock position, pull the out- side door handle.When the lever is in the release position (2), the child safety lock is released and the rear
To lock and unlock the doors Using the power door lock switch
(if so equipped)1- Lock 2- Unlock
To unlock the doors You can select the functions to unlock thedoors either using the ignition switch or theengine switch, or usi
ng the selector lever
position {continuously variable transmis- sion (CVT)}.These functions are not
activated when the
vehicle is shipped from the factory. To acti- vate or deactivate
these functions, please
contact your authorized Mitsubishi Motors dealer.Using the selector lever position {continuously variable transmis-sion (CVT)}
Child safety locks for rear door 1- To lock 2- To release
BK0267800US.book 27 ページ 2018年5月30日 水曜日 午後4時24分
Page 93 of 267

Trunk lid 5-28 Features and controls
5
door can be opened using the inside door han- dle.
N00509501215
Insert the key and turn it clockwise. The trunk lid will pop up
slightly. Lift it to
open the trunk.
Press the trunk button (Vehicles with F.A.S.T.-key). (See “Free-hand Advanced Security Transmitter (F.A.S.T.-key)” on page 5-9.) The trunk lid will pop up to slightly. Lift it to open the trunk. Pull the trunk lid release lever, located to the left of the driver’s seat, up to open the trunk.
WA R N I N G Always keep the door
s tightly closed and
locked when driving. An unlocked door may be accidentally
opened by a passen-
ger, especially by
a child who could fall
out. Also, if the doors are not locked, there is a greater risk of someone being thrown from the vehicle
in an accident.
Trunk lid
WA R N I N GIt is dangerous to drive with the trunk lid open since carbon mo
noxide (CO) gas can
enter the cabin. CO is an invisible, odor- less gas that can cause unconsciousnessand even death. Do not allow children
to have access to the
trunk by climbing into the trunk from outside of the vehicl
e. Always close the
trunk lid when your vehicle is unattended.If trapped in the trunk, it is possible toescape from the trunk by using the inside emergency trunk re
lease lever. (See
“Inside emergency trunk lid release” onpage 5-29.)
CAUTION Do not stand behind the exhaust pipe when loading and unloading
luggage. Heat from
the exhaust could lead to burns.
To open Operation from outside the vehicle Using the key (Vehicles with key cylin- der)
Using the remote control transmitter (Vehicles with F.A.S.T.-key)Operation from inside the vehicle
CAUTION Do not use the trunk lid release lever while the vehicle is moving. If the trunk lid is opened, objects in th
e trunk could fall onto
the road and cause an accident.
BK0267800US.book 28 ページ 2018年5月30日 水曜日 午後4時24分
Page 94 of 267

Inside emergency trunk lid release
Features and controls 5-29
5
Pull the trunk lid downward as illustrated. Gently slam the trunk
lid from the outside so
that it is completely closed. Always ensurethe trunk lid is securely closed.
N00509801188
The emergency trunk lid
release is designed
to provide a way to open the trunk lid from inside the trunk. It was developed to help pre-vent death and serious injuries to children who might become locked inside a vehicle trunk. The emergency trunk lid release lever (see illustration) is mounted on the trunk lid. The lever glows in the dark after exposure to sunlight. You and your family should familiarize your- selves with the location and operation of theemergency trunk lid re
lease lever. Children
should be taught not to play in or around vehicles.
To open the trunk from the inside, move the lever (A) in the direction of the arrow on thelever. Push up on the trunk lid to open the trunk and climb out.
NOTE
The trunk area light comes on when the trunk lid is opened, and goes out
when it is closed.
To close
CAUTIONBe careful to prevent catching anyone’s fin- gers when closing the trunk lid. Before starting the vehi
cle, be sure to con-
firm that the trunk lid is closed. If the trunk lid opens while driving the vehicle, objects stored in the trunk could fall out onto theroad.
Inside emergency trunk lid release
WA R N I N G Children should never be left unsuper- vised in or ar
ound vehicles.
Unsupervised children could lock them- selves in an open vehicle or trunk. People trapped inside
a vehicle or trunk,
even if only for a short period of time, can quickly die from su
ffocation or heat
stroke, especially on hot days. Interior temperatures in vehicles can rise in min- utes. Keep your vehicle d
oors locked and the
trunk lid closed when not in use. Keepyour vehicle keys aw
ay from children.
BK0267800US.book 29 ページ 2018年5月30日 水曜日 午後4時24分
Page 97 of 267

Power window control 5-32 Features and controls
5
N00528801161
If a hand or head is trapped, for safety the door window is automati
cally lowered a little.
After the door window is lowered, clear the obstruction, then pull up the switch again toclose the door window.
N00551400043
Wind buffeting can be de
scribed as the per-
ception of pressure on the ears or a booming or rumbling sound. Your
vehicle may exhibit
wind buffeting when driving with one or bothrear door windows down or partially opened. This is a normal occurrence that can be mini- mized. If the buffeting
occurs with the rear
door windows open, open the front door win- dows as well as the rear door windows to minimize the condition.
WA R N I N G Before driving with a child in the vehicle, be sure to lock the window switch to makeit inoperative. Children tampering withthe switch could easily trap their hands or heads in the window.
Safety mechanism (Driver’s door window of Type 1 only)
WA R N I N G If the battery terminals are disconnected or the fuse for electric window is replaced, the safety mechanism will be cancelled. If a hand or head got
trapped, a serious
injury could result.CAUTION The safety mechanism is deactivated just before the door window closes. This allows the door window to close completely. There- fore be especially careful that fingers are nottrapped in the door window opening.
The safety mechanism is deactivated while the switch is pulled up.
Therefore be espe-
cially careful that fi
ngers are not trapped in
the door window opening. Do not deliberately tr
ap your hands or head
in order to activate the safety mechanism. Your hand or head coul
d be trapped and per-
sonal injury could result.NOTE
The safety mechanism can be activated if the driving conditions or
other circumstances
cause the door window to be subjected to a physical shock similar to that caused by trapped hand or head. If the safety mechanism is activated 5 or more times in a row, the safety mechanismwill be cancelled a
nd the door window will
not close correctly. In such a case, the following procedureshould be implemented to rectify this situa- tion. If the window is open,
repeatedly raise the
driver’s door window sw
itch until that win-
dow has been fully cl
osed. Following this,
release the switch, raise the switch once again and hold it in this condition for atleast1 second, then release it. You should now be able to operate
in the normal fashion.
CAUTION
If the battery terminals are disconnected or the fuse for electric
window is replaced, the
safety mechanism will
be cancelled and the
door window will not automatically open/close completely. If the window is open,
repeatedly raise the
driver’s door window switch until the win- dow has been fully cl
osed. Following this,
release the switch, raise the switch onceagain and hold it in this
condition for at least
1 second, then release it. You should now be able to operate the driver’s door window inthe normal fashion.
What to do if you hear wind buffeting when driving
NOTE
BK0267800US.book 32 ページ 2018年5月30日 水曜日 午後4時24分
Page 164 of 267
Vehicle preparatio
n before driving
Driving safety 6-3
6
N00629001770
For a safer and more enjoyable trip, always check for the following:
Before starting the ve
hicle, make certain
that you and all passengers are seated and wearing their seat belts properly (with children in the rear seat, in appropriaterestraints), and that all the doors are locked. Move the driver’s seat as far backward as possible, while keeping good visibility, and good control of the steering wheel, brakes, accelerator, and controls. Check the instrument panel indicators and multi- information display for any possible prob-lem. Similarly, the front
passenger seat should
also be moved as fa
r back as possible.
Make sure that infants and small children are properly restrained in accordance with all laws and regulations.
Check these by selectin
g the defroster mode,
and set the blower switch on high. You shouldbe able to feel the air blowing against the windshield. Refer to “Defrosti
ng or defogging (wind-
shield, door windows)” on page 7-6, 7-10, 7-17.
NOTE
The shape of the mat and the number of retaining clips may
vary depending on the
vehicle model.WA R N I N G If a floor mat is the
wrong size or is not
properly installed, it can interfere with the operation of the pedals. Interference with the pedals can cause unintended accelera-tion and/or increase
d stopping distances
resulting in a cras
h and injury. Always
make sure the floor mat does not interferewith the accelerator or brake pedal. Always use the retaining clip on the driver’s floorboard to secure the floor mat. Always install the mat with the correct side facing down. Never install a second mat over or under an existing floor mat. Do not use a floor mat designed for another model vehicle even if it is a Mitsubishi Motors Genuine floor mat. Before driving, be sure to check the fol- lowing:• Periodically check that the floor mat is properly secured with the retaining clips. If you remove the fl
oor mat while clean-
ing the inside of you
r vehicle or for any
other reason, always
check the condition
of the floor mat afte
r it has been rein-
stalled.
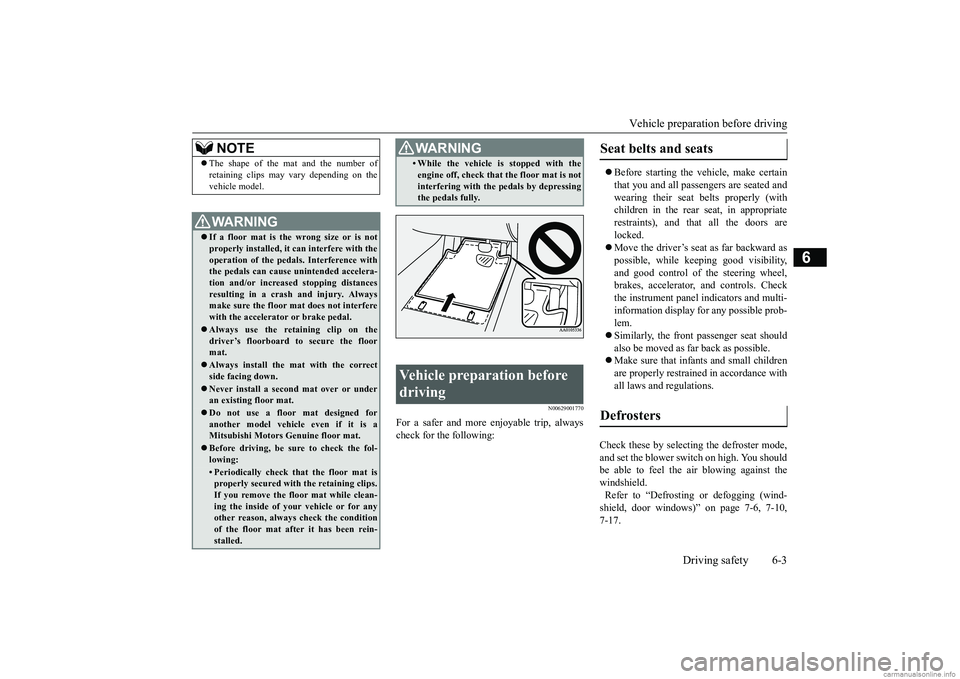
• While the vehicle is stopped with theengine off, check that the floor mat is notinterfering with the pedals by depressingthe pedals fully.
Vehicle preparation before driving
WA R N I N G
Seat belts and seats Defrosters
BK0267800US.book 3 ページ 2018年5月30日 水曜日 午後4時24分
Page 260 of 267

Alphabetical index
12-1
12
A
Accessory (installation)
.........................
3-5
Active stability control (ASC)
..............
5-52
Air cleaner filter
...................................
9-8
Air conditioning
Automatic air conditioning
..............
7-12
Important air condi
tioning operating tips
..
7-18Manual air conditioning
....................
7-7
Air purifier
.........................................
7-19
Airbag
...............................................
4-22
Aluminum wheels
...............................
9-35
Antenna
.............................................
7-19
Anti-lock braking system
.....................
5-50
Arm rest
........................................
4-4
, 4-5
Assist grips
........................................
5-96
Automatic air conditioning
..................
7-12
B
Back-up light
Bulb capacity
.................................
9-27
Replacement
..................................
9-31
Ball joint, steering li
nkage seals and drive
shaft boots
........................................
9-21
Battery
...............................................
9-11
Charging system warning light
.........
5-78
Checking battery el
ectrolyte level
.....
9-11
Disconnection and connection
.........
9-11
During cold weather
.......................
9-11
Specification
..................................
11-5
Bottle holders
.....................................
5-95
Brake
Fluid
.............................................
11-6
Brake assist system
.............................
5-49
Braking
...............................................
6-5
Anti-lock braking system
................
5-50
Hose
.............................................
9-21
Pad wear alarm
..............................
5-48
Parking brake
.................................
5-33
Pedal
.............................................
5-47
Pedal free play
...............................
9-19
Power brakes
.................................
5-47
Service brake
.................................
5-47
Warning lights
...............................
5-76
Break-in recommendations
....................
5-2
Bulb capacity
.....................................
9-27
Bulb location
.....................................
9-27
C
California Perchl
orate Materials
Requirements
.....................................
3-7
Capacity
............................................
11-6
Card holder
........................................
5-87
Cargo loads
........................................
6-10
Cargo room light
Bulb capacity
.................................
9-28
Catalytic converter
................................
9-3
Certification label
...............................
11-3
Charging system warning light
.............
5-78
Child restraint systems
........................
4-14
Child safety locks for rear door
............
5-27
Cleaning
Inside of your vehicle
......................
9-32
Outside of your vehicle
...................
9-33
Clutch
Pedal free play
................................
9-18
Consumer information
.........................
10-2
Continuously variable transmission (CVT)
...
5-42Fluid
.......................................
9-9
, 11-6
Selector lever operation
...................
5-42
Selector lever positions
....................
5-44
Convenience hook
...............................
5-95
Coolant (engine)
..........................
9-7
, 11-6
Cruise control
.....................................
5-55
Cup holders
........................................
5-94
D
Daytime running lights
Bulb capacity
.................................
9-27
Replacement
...................................
9-29
Defogger (rear window)
......................
5-84
Defrosting or defogging
(windshield, door
windows)
.........................
7-6
, 7-10
, 7-17
BK0267800US.book 1 ページ 2018年5月30日 水曜日 午後4時24分