change time MITSUBISHI MIRAGE G4 2020 (in English) User Guide
[x] Cancel search | Manufacturer: MITSUBISHI, Model Year: 2020, Model line: MIRAGE G4, Model: MITSUBISHI MIRAGE G4 2020Pages: 253, PDF Size: 36.39 MB
Page 137 of 253
![MITSUBISHI MIRAGE G4 2020 (in English) User Guide Multi-information display 5-72 Features and controls
5
[Except for vehicles
equipped with the
F. A . S . T. - k e y ]Turn the ignition switch to the “ON” posi- tion from the “ACC” or “OFF MITSUBISHI MIRAGE G4 2020 (in English) User Guide Multi-information display 5-72 Features and controls
5
[Except for vehicles
equipped with the
F. A . S . T. - k e y ]Turn the ignition switch to the “ON” posi- tion from the “ACC” or “OFF](/img/19/34857/w960_34857-136.png)
Multi-information display 5-72 Features and controls
5
[Except for vehicles
equipped with the
F. A . S . T. - k e y ]Turn the ignition switch to the “ON” posi- tion from the “ACC” or “OFF” position. [For vehicles equipped
with the F.A.S.T.-
key]Change the operation mode to ON from ACC or OFF. When the average fuel consumption is being displayed, if you hold down the multi-information display switch, these calculations will
be reset to zero.
When the engine switch or the operation mode is in the following conditions, the average fuel consumption display willautomatically reset. [Except for vehicles
equipped with the
F. A . S . T. - k e y ] The ignition switch has been set to the“ACC” or “OFF” position for about 4 hours or more. [For vehicles equipped
with the F.A.S.T.-
key]The operation mode has been set to ACC or OFF for about 4 hours or more.
N00557100156
The fuel consumption display unit can bechanged. The distance
and amount units are
also switched to match the selected fuel con-sumption unit. 1. When you lightly press the multi-informa- tion display switch a few times, the infor- mation display switches to the averagefuel consumption display. Refer to “Information display” on page 5-66.2. Press and hold the mu
lti-information dis-
play switch for about 5 seconds or more until buzzer sound is heard twice.
3. Press and hold the multi-information dis- play switch to switch in sequence from“km/L”
“L/100 km”
“mpg”
“km/L”.
The distance units is al
so changed in the fol-
lowing combinations to match the selected fuel consumption unit.
Auto reset mode
NOTE
The average fuel cons
umption display can be
reset separately for the auto reset mode andfor the manual reset mode. Disconnecting th
e battery cable will erase
from memory the manual reset mode or autoreset mode setting for the average fuel con- sumption display. The initial (default) setting is “Auto reset mode”.
Changing the fuel consumption display unit
NOTE
The display units for the driving range, the average fuel consumption are changed, but the units for the indicating needle (speedom- eter), the odometer, the trip odometer and theservice reminder will
remain unchanged.
If the battery is disconnected, the memory of the unit setting is erased and it returns auto- matically to factory setting.
BK0284300US.book 72 ページ 2019年5月23日 木曜日 午後12時22分
Page 143 of 253

Combination headlights and dimmer switch 5-78 Features and controls
5
N00522501977
Rotate the switch to operate the lights. The combinations of
switch operations and
illuminated lights differ in accordance with the following conditions.
N00532600570
If the following operation is performed with the combination headlights and dim- mer switch in the “ ” or “ ” position, the lights automatically turn off. [Except for vehicles equipped with the F. A . S . T. - k e y ]
The ignition switch is turned to the “OFF” or “ACC” position or the key is removedfrom the ignition switch and the driver’s door is opened. [For vehicles equipped
with the F.A.S.T.-
key]The operation mode is changed to OFF or ACC and the driver’s door is opened. If the following operation is performed with the combination headlights and dim- mer switch in the “ ” or “ ” position, the lights automatically turn off after about 3 minutes. [Except for vehicles
equipped with the
F. A . S . T. - k e y ] The ignition switch is turned to the “OFF” or “ACC” position or the key is removedfrom the ignition switch and the driver’s door is not opened. [For vehicles equipped
with the F.A.S.T.-
key]The operation mode is changed to OFF or ACC and the driver’s door is not opened.
NOTE
When the auto cut-out function of the doom light is been activated, the light goes outautomatically after
about 30 minutes.
Refer to “Dome light” on page 5-86.
Combination headlights and dimmer switch Headlights OFF All lights off
Parking, tail, front
and rear side-
marker lights, license plate and instrument panel lights on Headlights and other lights onNOTE
Do not leave the head
lights and ot
her lights
on for a long period of time when the engine is not running. The battery will run down. When it rains, or wh
en the vehicle has been
washed, the inside of the lens sometimesbecomes foggy. This is the same as when window glass mists up
on a humid day, and
does not indicate a problem. When the lightis switched on, the heat
will dry out the fog.
However, if water collects inside the light, have it checked by an authorized MitsubishiMotors dealer or a repair facility of your choice.
Light auto-cutout function (headlights and other lights)
NOTE
The light auto-cutout
function can be deacti-
vated.See your authorized Mitsubishi Motors dealer for details.
BK0284300US.book 78 ページ 2019年5月23日 木曜日 午後12時22分
Page 144 of 253
Turn signal lever
Features and controls 5-79
5
If the combination
headlights and dimmer
switch is turned to the “ ” or “ ” posi- tion again after the engine is turned off, the about 3-minute auto
-cutout function
described above will not
work. The lights (the
parking lights, tail lig
hts and license plate
lights) will stay on and will not turn off auto-matically.
N00549800226
[When using a key to start the engine]If the driver’s door is opened with the key in the “OFF” or “ACC” position or removed from the ignition switch while the lights areon, the tone will sound to remind you to turn off the lights. [When using the F.A.S.T.-key to start the engine]If the driver’s door is opened with the opera- tion mode is put in OFF or ACC, or if the operation mode is changed to OFF while thelights are on, the tone will sound to remind you to turn off the lights. In either case, the lights will turn off automat- ically and so will the tone. Or you can turn
the light switch to the “OFF” position to stop the tone.
N00549900142
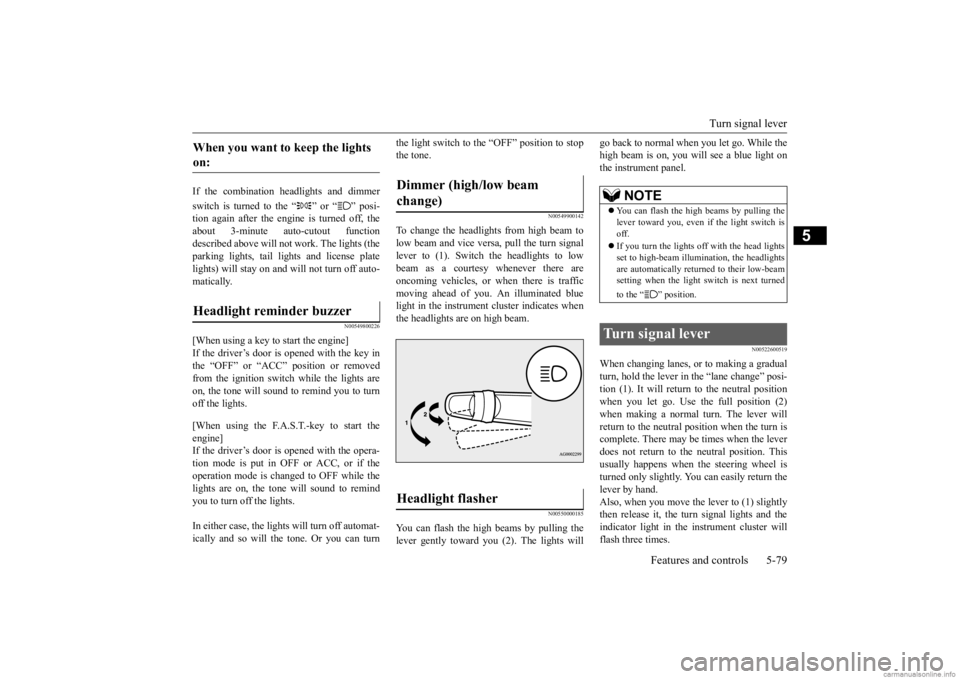
To change the headlights from high beam tolow beam and vice vers
a, pull the turn signal
lever to (1). Switch the headlights to low beam as a courtesy whenever there are oncoming vehicles, or when there is traffic moving ahead of you. An illuminated bluelight in the instrument
cluster indicates when
the headlights are on high beam.
N00550000185
You can flash the high beams by pulling the lever gently toward you (2). The lights will
go back to normal when you let go. While the high beam is on, you will see a blue light onthe instrument panel.
N00522600519
When changing lanes, or to making a gradual turn, hold the lever in the “lane change” posi- tion (1). It will return to the neutral positionwhen you let go. Use the full position (2) when making a normal turn. The lever will return to the neutral position when the turn iscomplete. There may be times when the lever does not return to th
e neutral position. This
usually happens when
the steering wheel is
turned only slightly. You can easily return the lever by hand. Also, when you move the lever to (1) slightlythen release it, the turn signal lights and the indicator light in the instrument cluster will flash three times.
When you want to keep the lights on: Headlight reminder buzzer
Dimmer (high/low beam change) Headlight flasher
NOTE
You can flash the high beams by pulling the lever toward you, even if the light switch isoff. If you turn the lights off with the head lights set to high-beam illumi
nation, the headlights
are automatically returned to their low-beam setting when the light
switch is next turned
to the “ ” position.
Turn signal lever
BK0284300US.book 79 ページ 2019年5月23日 木曜日 午後12時22分
Page 145 of 253
Hazard warning flasher switch 5-80 Features and controls
5
See your authorized Mitsubishi Motors dealer for details.
N00522700318
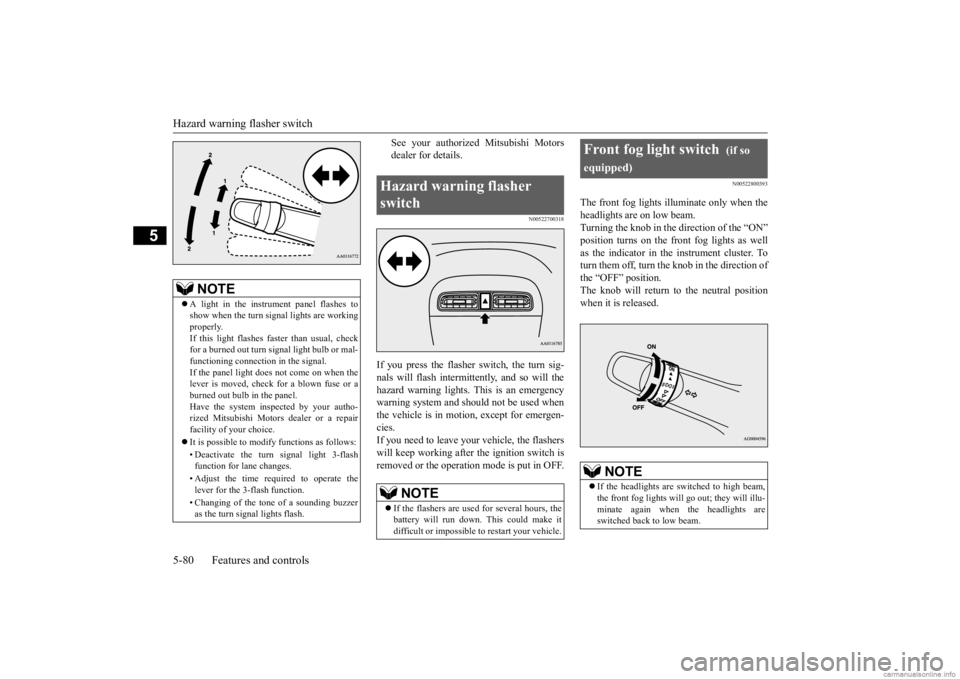
If you press the flasher switch, the turn sig- nals will flash intermittently, and so will the hazard warning lights.
This is an emergency
warning system and should not be used when the vehicle is in motion, except for emergen- cies.If you need to leave your
vehicle, the flashers
will keep working after the ignition switch is removed or the operation mode is put in OFF.
N00522800393
The front fog lights illuminate only when theheadlights are on low beam.Turning the knob in the direction of the “ON” position turns on the front fog lights as well as the indicator in the instrument cluster. Toturn them off, turn the knob in the direction of the “OFF” position. The knob will return to the neutral position when it is released.
NOTE
A light in the instrument panel flashes to show when the turn signal lights are workingproperly. If this light flashes fast
er than usual, check
for a burned out turn
signal light bulb or mal-
functioning connecti
on in the signal.
If the panel light does not come on when the lever is moved, check for a blown fuse or aburned out bulb in the panel. Have the system inspected by your autho- rized Mitsubishi Motors
dealer or a repair
facility of your choice. It is possible to modify functions as follows: • Deactivate the turn signal light 3-flash function for lane changes. • Adjust the time required to operate the lever for the 3-flash function. • Changing of the tone of a sounding buzzer as the turn signal lights flash.
Hazard warning flasher switch
NOTE
If the flashers are used for several hours, the battery will run down.
This could make it
difficult or impossible
to restart your vehicle.
Front fog light switch
(if so
equipped)
NOTE
If the headlights are switched to high beam, the front fog lights will
go out; they will illu-
minate again when the headlights are switched back to low beam.
BK0284300US.book 80 ページ 2019年5月23日 木曜日 午後12時22分
Page 173 of 253

Automatic air conditioning 7-6 Comfort controls
7
The above indicates the
factory settings. You
can personalize the air
selection switch and
air conditioning switch to match your per-sonal preferences. Contact your Mitsubishi
Motors dealer or a
repair facility of your choice for assistance.Refer to “Personalizi
ng the air conditioning
switch (Changing the function setting)” on
page7-8. Refer to “Personalizing the air selection(Changing the function setting)” on page7-7.
N00737101247
To change air flow direction, press theMODE switch. Each time the MODE switch is pressed, the mode ch
anges to the next one
in the following sequence: “ ”
“”
“”
“”
“ ”. The selected mode
is shown in the displa
y (A). Refer to “Chang-
ing the mode selection” on page 7-3.
N00703400015
When this switch is pressed, the mode changes to the “ ” mode. The indicator light (A) will come on.
The selected mode is
shown in the display (B). Refer to “Changing the mode selection” on page 7-3.
N00737200368
Normally, use the outside air position to keepthe windshield and side windows clear and toquickly remove fog or frost from the wind- shield. To change the air selection, simply press the air selection switch.
While the engine coolant temperature is low, the temperature of the air from the heaterwill be cool/cold until
the engine warms up,
even if you have selected warm air with the switch. To prevent the windshield and windows fromfogging up, the vent mode
will be changed to
“ ” and the blower sp
eed will be reduced.
When the temperature is set to the highest or the lowest setting under the AUTO opera- tion, the air selection
and the air conditioning
will be automatically changed as follows. • Quick Heating (When th
e temperature is set
to the highest setting) Outside air will be introduced and the air conditioning will stop.If the air selection
and the air conditioning
are operated ma
nually after an automatic
changeover, manual
operation will be
selected. • Quick Cooling (When th
e temperature is set
to the lowest setting) Inside air will be recirculated and the air conditioning wi
ll operate.
NOTE
MODE switch Defogger switch
NOTE
When the defogger switch is pressed, the air conditioning system au
tomatically operates
and outside air (as oppos
ed to recirculated
air) is selected. Refer to “Defrosting or defogging (wind- shield, door windows)” on page 7-9.
Air selection switch
BK0284300US.book 6 ページ 2019年5月23日 木曜日 午後12時22分
Page 174 of 253
Automatic air conditioning Comfort controls 7-7
7
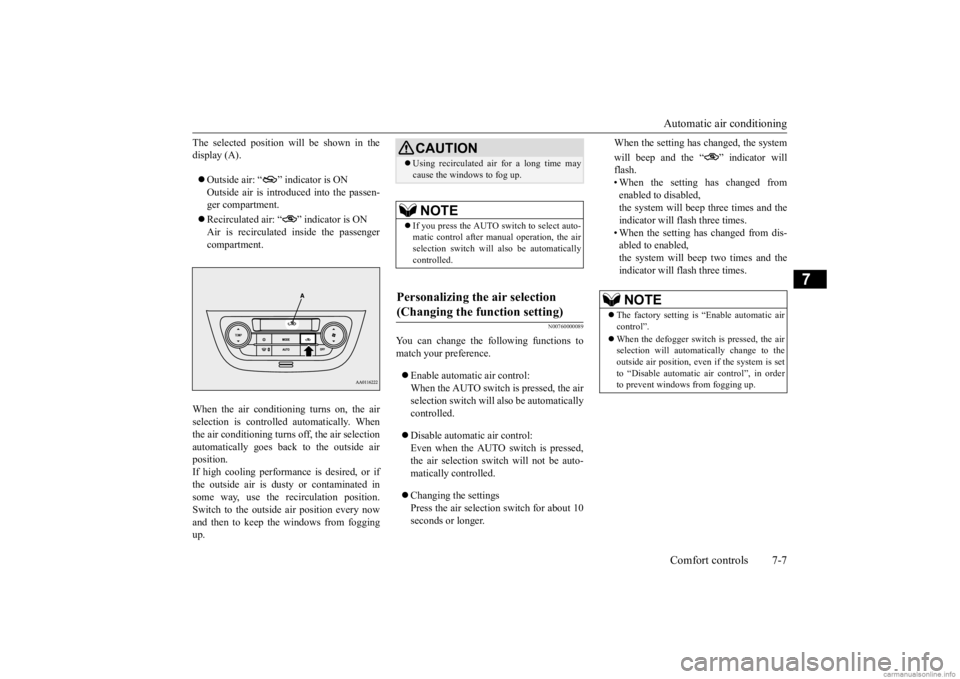
The selected position will be shown in the display (A). Outside air: “ ” indicator is ON Outside air is introduced into the passen-ger compartment. Recirculated air: “ ” indicator is ON Air is recirculated
inside the passenger
compartment.
When the air conditioning turns on, the air selection is controlled automatically. When the air conditioning turns off, the air selection automatically goes back to the outside airposition. If high cooling performan
ce is desired, or if
the outside air is dusty or contaminated insome way, use the recirculation position. Switch to the outside
air position every now
and then to keep the windows from foggingup.
N00760000089
You can change the following functions tomatch your preference. Enable automatic air control: When the AUTO switch is pressed, the air selection switch will also be automatically controlled. Disable automatic air control: Even when the AUTO switch is pressed, the air selection switch will not be auto- matically controlled. Changing the settings Press the air selection switch for about 10 seconds or longer.
When the setting has changed, the system will beep and the “ ” indicator will flash.• When the setting has changed from enabled to disabled, the system will beep three times and theindicator will flash three times. • When the setting has changed from dis- abled to enabled, the system will beep two times and the indicator will flash three times.
CAUTION Using recirculated air for a long time may cause the windows to fog up.NOTE
If you press the AUTO switch to select auto- matic control after ma
nual operation, the air
selection switch will also be automatically controlled.
Personalizing the air selection (Changing the function setting)
NOTE
The factory setting is
“Enable automatic air
control”. When the defogger switch
is pressed, the air
selection will automatically change to the outside air position, even if the system is setto “Disable automatic air control”, in order to prevent windows from fogging up.
BK0284300US.book 7 ページ 2019年5月23日 木曜日 午後12時22分
Page 175 of 253
Automatic air conditioning 7-8 Comfort controls
7
N00737301409
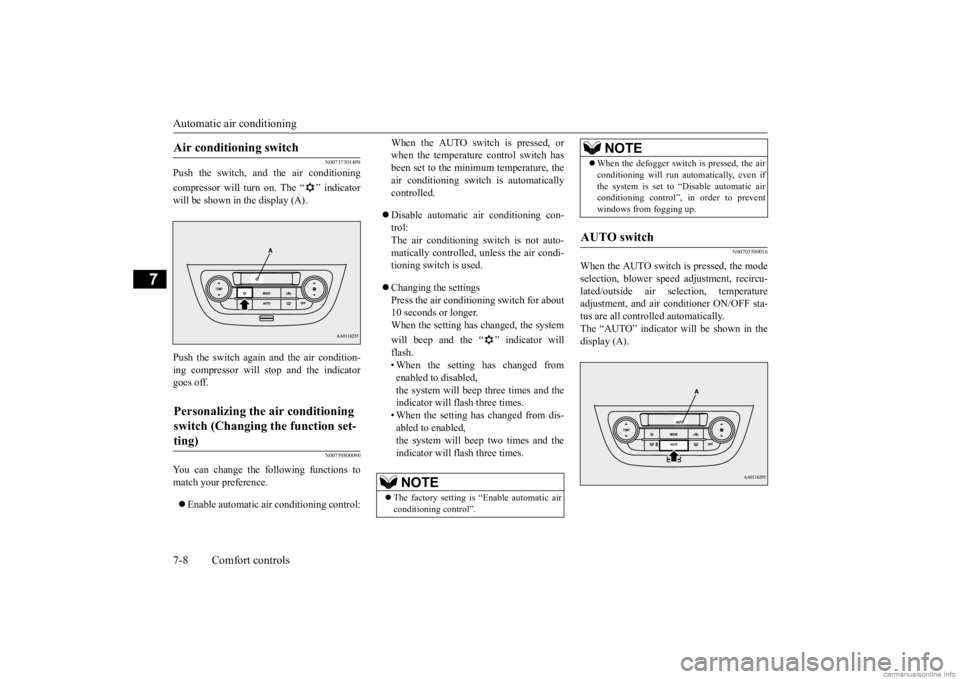
Push the switch, and the air conditioning compressor will turn on. The “ ” indicator will be shown in the display (A). Push the switch again and the air condition- ing compressor will stop and the indicator goes off.
N00759800090
You can change the following functions tomatch your preference. Enable automatic air conditioning control:
When the AUTO switch is pressed, or when the temperature control switch hasbeen set to the minimum temperature, the air conditioning switch
is automatically
controlled. Disable automatic air conditioning con- trol: The air conditioning switch is not auto- matically controlled, unless the air condi-tioning switch is used. Changing the settings Press the air conditi
oning switch for about
10 seconds or longer. When the setting has changed, the system will beep and the “ ” indicator will flash.• When the setting has changed from enabled to disabled, the system will beep three times and theindicator will flash three times. • When the setting has changed from dis- abled to enabled,the system will beep two times and the indicator will flash three times.
N00703500016
When the AUTO switch is pressed, the modeselection, blower spee
d adjustment, recircu-
lated/outside air sele
ction, temperature
adjustment, and air conditioner ON/OFF sta- tus are all controlled automatically. The “AUTO” indicator
will be shown in the
display (A).
Air conditioning switch Personalizing the air conditioning switch (Changing the function set- ting)
NOTE
The factory setting is
“Enable automatic air
conditioning control”.
When the defogger switch is pressed, the air conditioning will run au
tomatically, even if
the system is set to “Disable automatic airconditioning control”, in order to prevent windows from fogging up.
AUTO switch
NOTE
BK0284300US.book 8 ページ 2019年5月23日 木曜日 午後12時22分
Page 177 of 253
Important air condit
ioning operating tips
7-10 Comfort controls
7
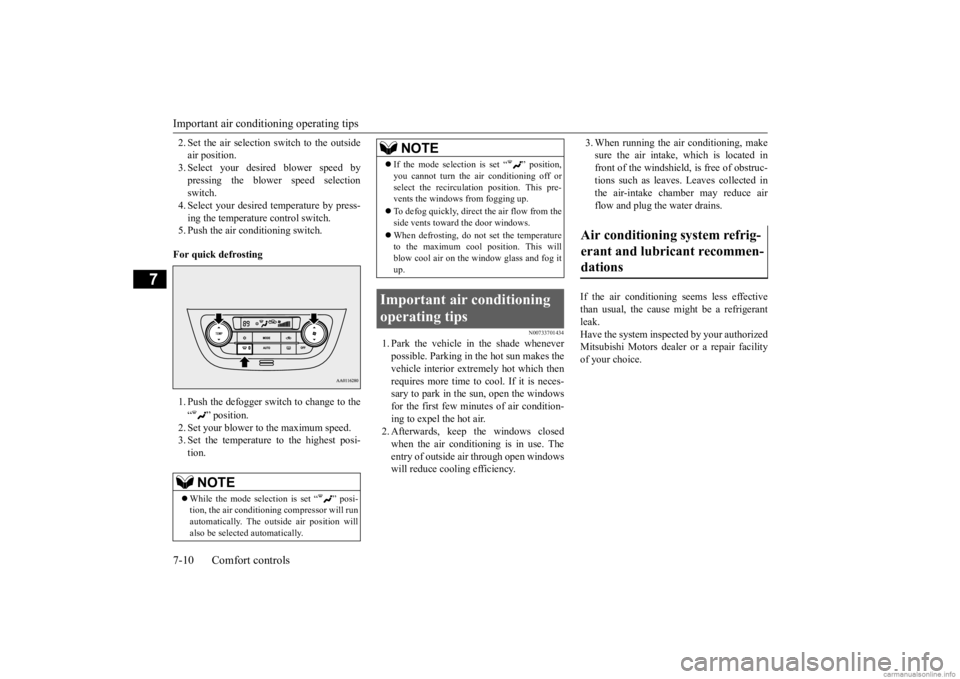
2. Set the air selection switch to the outside air position.3. Select your desired blower speed by pressing the blower speed selection switch.4. Select your desired temperature by press- ing the temperature control switch. 5. Push the air conditioning switch. For quick defrosting 1. Push the defogger switch to change to the “ ” position. 2. Set your blower to the maximum speed.3. Set the temperature to the highest posi- tion.
N00733701434
1. Park the vehicle in the shade whenever possible. Parking in the hot sun makes the vehicle interior extremely hot which then requires more time to cool. If it is neces-sary to park in the sun, open the windows for the first few minutes of air condition- ing to expel the hot air.2. Afterwards, keep the windows closed when the air conditioning is in use. The entry of outside air through open windowswill reduce cooling efficiency.
3. When running the air conditioning, make sure the air intake, which is located infront of the windshield, is free of obstruc- tions such as leaves. Leaves collected in the air-intake chamber may reduce airflow and plug the water drains.
If the air conditioning seems less effective than usual, the cause might be a refrigerant leak. Have the system inspected by your authorizedMitsubishi Motors dealer
or a repair facility
of your choice.
NOTE
While the mode selection is set “ ” posi- tion, the air conditioning
compressor will run
automatically. The out
side air position will
also be selected automatically.
If the mode selection is set “ ” position, you cannot turn the air conditioning off orselect the recirculati
on position. This pre-
vents the windows from fogging up. To defog quickly, direct the air flow from the side vents toward the door windows. When defrosting, do not set the temperature to the maximum cool position. This will blow cool air on the window glass and fog it up.
Important air conditioning operating tips
NOTE
Air conditioning system refrig- erant and lubricant recommen- dations
BK0284300US.book 10 ページ 2019年5月23日 木曜日 午後12時22分
Page 179 of 253
General information about your radio 7-12 Comfort controls
7
N00733901582
Your vehicle’s radio receives both AM and FM stations. The quality of your reception is affected bydistance, obstacles, an
d signal interference.
This radio complies with Part 15 of Federal Communications Comm
ission (FCC) Rules.
Operation is subject
to the following condi-
tions: The device may not cause harmful inter- ference. This device must ac
cept any interference
recieved, including interference that may cause undesirable operation.
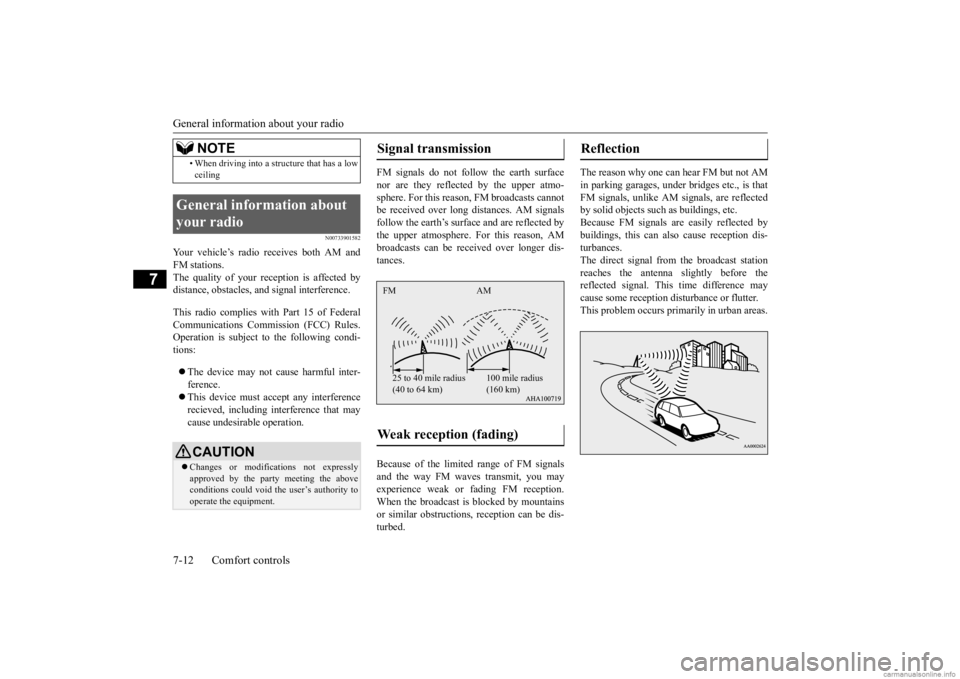
FM signals do not follow the earth surface nor are they reflected by the upper atmo- sphere. For this reason,
FM broadcasts cannot
be received over long distances. AM signalsfollow the earth’s surface and are reflected by the upper atmosphere. For this reason, AM broadcasts can be received over longer dis-tances. Because of the limited
range of FM signals
and the way FM waves transmit, you may experience weak or fading FM reception.When the broadcast is blocked by mountains or similar obstructions,
reception can be dis-
turbed.
The reason why one can hear FM but not AM in parking garages, unde
r bridges etc., is that
FM signals, unlike AM
signals, are reflected
by solid objects such
as buildings, etc.
Because FM signals are easily reflected by buildings, this can also
cause reception dis-
turbances.The direct signal from
the broadcast station
reaches the antenna slightly before the reflected signal. This
time difference may
cause some reception di
sturbance or flutter.
This problem occurs primarily in urban areas.
• When driving into a structure that has a low ceiling
General information about your radio
CAUTION Changes or modifica
tions not expressly
approved by the party meeting the above conditions could void the user’s authority tooperate the equipment.NOTE
Signal transmission Weak reception (fading) FM AM 25 to 40 mile radius (40 to 64 km)
100 mile radius (160 km)
Reflection
BK0284300US.book 12 ページ 2019年5月23日 木曜日 午後12時22分
Page 188 of 253
How to change a tire
For emergencies 8-7
8
6. Get the jack, bar and wheel nut wrench ready. (Refer to “Jack and t
ools” on page 8-5.)
N00849600344
The compact spare tire is stowed beneath the floor board of the cargo area. It is designed to save space in the cargo area. Its lighter weightmakes it easier to use if a flat tire occurs.
N00849701371
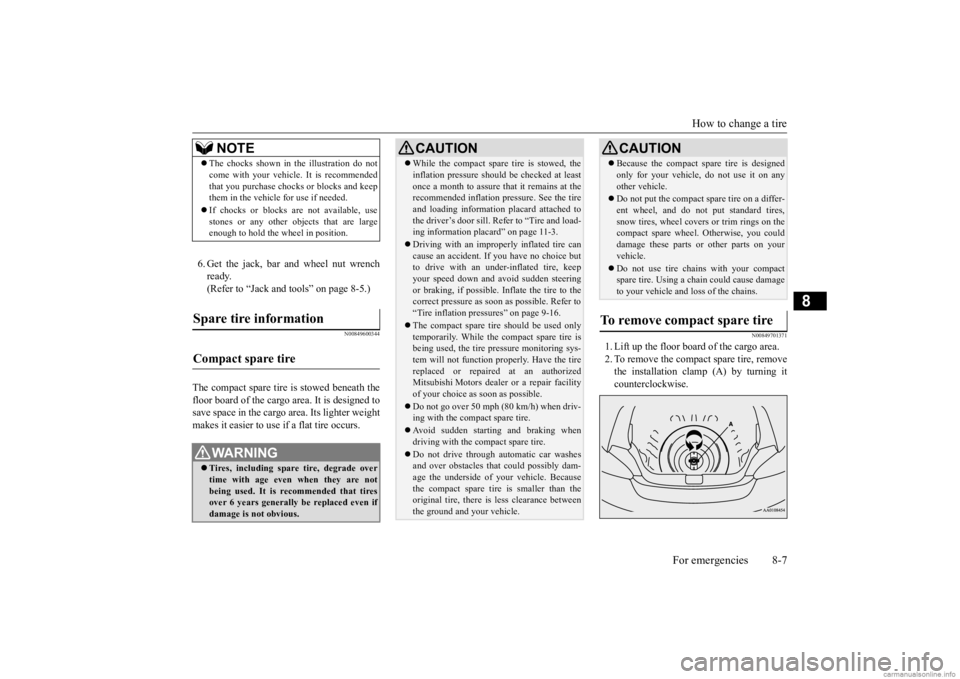
1. Lift up the floor board of the cargo area. 2. To remove the compact spare tire, remove the installation clamp (A) by turning itcounterclockwise.
NOTE
The chocks shown in the illustration do not come with your vehicl
e. It is recommended
that you purchase chocks or blocks and keepthem in the vehicle for use if needed. If chocks or blocks
are not available, use
stones or any other obj
ects that are large
enough to hold the wheel in position.
Spare tire information Compact spare tire
WA R N I N G Tires, including spar
e tire, degrade over
time with age even when they are notbeing used. It is recommended that tires over 6 years generally
be replaced even if
damage is not obvious.
CAUTION While the compact spare tire is stowed, the inflation pressure shoul
d be checked at least
once a month to assure that it remains at therecommended inflation pressure. See the tire and loading informati
on placard attached to
the driver’s door sill. Refer to “Tire and load-ing information placard” on page 11-3. Driving with an imprope
rly inflated tire can
cause an accident. If
you have no choice but
to drive with an under-inflated tire, keep your speed down and av
oid sudden steering
or braking, if possible. Inflate the tire to the correct pressure as soon as possible. Refer to “Tire inflation pressures” on page 9-16. The compact spare tire should be used only temporarily. While th
e compact spare tire is
being used, the tire pr
essure monitoring sys-
tem will not function
properly. Have the tire
replaced or repaired at an authorizedMitsubishi Motors dealer
or a repair facility
of your choice as soon as possible. Do not go over 50 mph (80 km/h) when driv- ing with the compact spare tire. Avoid sudden starting and braking when driving with the compact spare tire. Do not drive through automatic car washes and over obstacles that
could possibly dam-
age the underside of your vehicle. Becausethe compact spare tire is smaller than the original tire, there is less clearance between the ground and your vehicle.
Because the compact spare tire is designed only for your vehicle, do not use it on anyother vehicle. Do not put the compact spare tire on a differ- ent wheel, and do not put standard tires,snow tires, wheel covers
or trim rings on the
compact spare wheel. Otherwise, you could damage these parts or other parts on yourvehicle. Do not use tire chains with your compact spare tire. Using a chain could cause damage to your vehicle and loss of the chains.
To remove compact spare tire
CAUTION
BK0284300US.book 7 ページ 2019年5月23日 木曜日 午後12時22分