change time MITSUBISHI MIRAGE G4 2020 Owner's Manual (in English)
[x] Cancel search | Manufacturer: MITSUBISHI, Model Year: 2020, Model line: MIRAGE G4, Model: MITSUBISHI MIRAGE G4 2020Pages: 253, PDF Size: 36.39 MB
Page 2 of 253
N09200102446
Thank you for buying a MITSUBISHI MIRAGE G4. We are confident you will enjoy your
vehicle. It has
been engineered
for optimum performance, durability and comfort. By thoroughly reading this Owner’s Manual, you w
ill gain an understanding of the
many features that are included in the MIRAGE G4. The Owner’s Manual contains descripti
ons and illustrations that will assist in the
operation and maintenance of your vehicle. Your Authorized Mitsubishi Motors
Dealer will be
happy to assist you
with any further questions you ma
y have regarding the operation of
your vehicle.Please note that this manual applies to all MIRAGE G4 models and explains all features in
cluding options. Some feat
ures explained in this
manual may not be inst
alled on your vehicle.
Please leave this Owner’s Manual in the vehicle at the time of resale. The next owner will appreciate ha
ving access to the information con-
tained here. This manual includes instructions fo
r standard and optional equipment
available at the time of printing. Mitsubishi Motors Corporationreserves the right to make changes
in design and specifications and to
make additions or improvements in
its product without assuming any
obligation to install these on pr
eviously manufac
tured products.
Introduction
This vehicle is manufactured by Mitsubishi
Motors (Thailand) Co.,Ltd. in Thailand under
license from Mitsubishi Motors Corporation.Throughout this manual the words
WARNING
and
CAUTION
appear.These are reminders to be especially careful. Failure to follow the instructions could result in persona
l injury or damage to your vehi-
cle. Indicates a strong possibility of se
vere personal injury or death if
instructions are not followed. Points out hazards or unsafe pr
actices that could cause minor
personal injury
or damage to your vehicle.
You will see another important symbol: NOTE Gives helpful information.©2019 Mitsubishi Motors Corpor
ation Printed in Thailand
BK0284300US.book 1 ページ 2019年5月23日 木曜日 午後12時22分
Page 71 of 253
Keyless entry system (if so equipped) 5-6 Features and controls
5
N00509002057
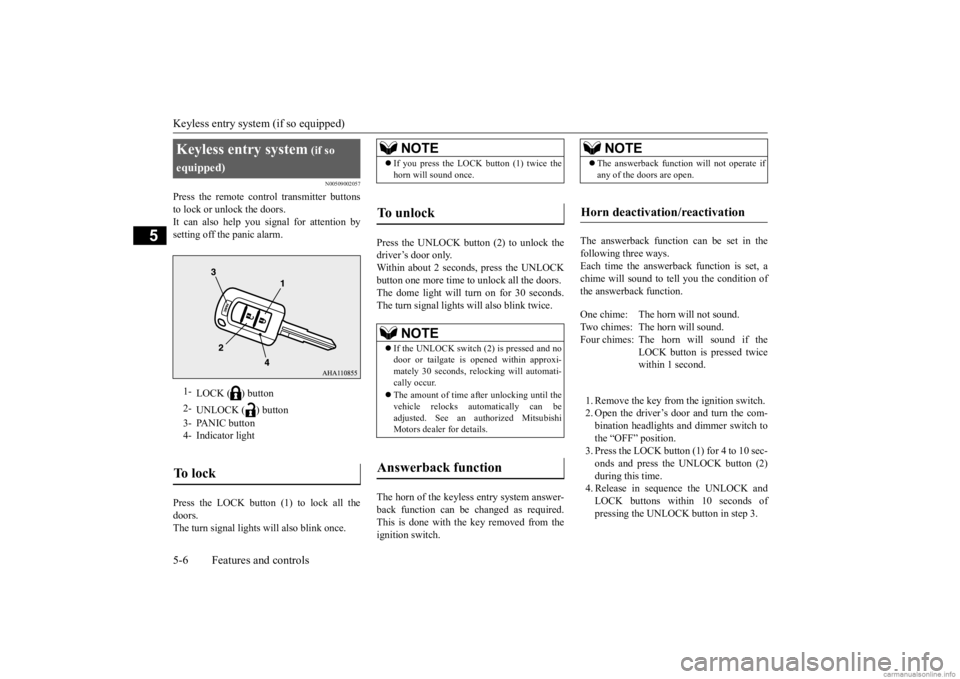
Press the remote control transmitter buttons to lock or unlock the doors. It can also help you
signal for attention by
setting off the panic alarm. Press the LOCK button (1) to lock all the doors.The turn signal lights will also blink once.
Press the UNLOCK button (2) to unlock the driver’s door only.Within about 2 seconds, press the UNLOCK button one more time to
unlock all the doors.
The dome light will turn on for 30 seconds.The turn signal lights will also blink twice. The horn of the keyless entry system answer- back function can be
changed as required.
This is done with the key removed from the ignition switch.
The answerback function can be set in the following three ways.Each time the answerback function is set, a chime will sound to
tell you the condition of
the answerback function. 1. Remove the key from
the ignition switch.
2. Open the driver’s door and turn the com- bination headlights a
nd dimmer switch to
the “OFF” position.3. Press the LOCK button (1) for 4 to 10 sec- onds and press the UNLOCK button (2) during this time.4. Release in sequence the UNLOCK and LOCK buttons within 10 seconds of pressing the UNLOCK button in step 3.
Keyless entry system
(if so
equipped)1-
LOCK ( ) button
2-
UNLOCK ( ) button
3- PANIC button 4- Indicator lightTo l o c k
NOTE
If you press the LOCK button (1) twice the horn will sound once.
To unlock
NOTE
If the UNLOCK switch
(2) is pressed and no
door or tailgate is
opened within approxi-
mately 30 seconds, relocking will automati- cally occur. The amount of time af
ter unlocking until the
vehicle relocks automatically can beadjusted. See an authorized Mitsubishi Motors dealer for details.
Answerback function
NOTE
The answerback functi
on will not operate if
any of the doors are open.
Horn deactivation/reactivation
One chime: The horn will not sound. Two chimes: The horn will sound.Four chimes: The hor
n will sound if the
LOCK button is pressed twice within 1 second.
BK0284300US.book 6 ページ 2019年5月23日 木曜日 午後12時22分
Page 77 of 253
Free-hand Advanced
Security Transmitter (F.A.S
.T.-key) (if so equipped)
5-12 Features and controls
5
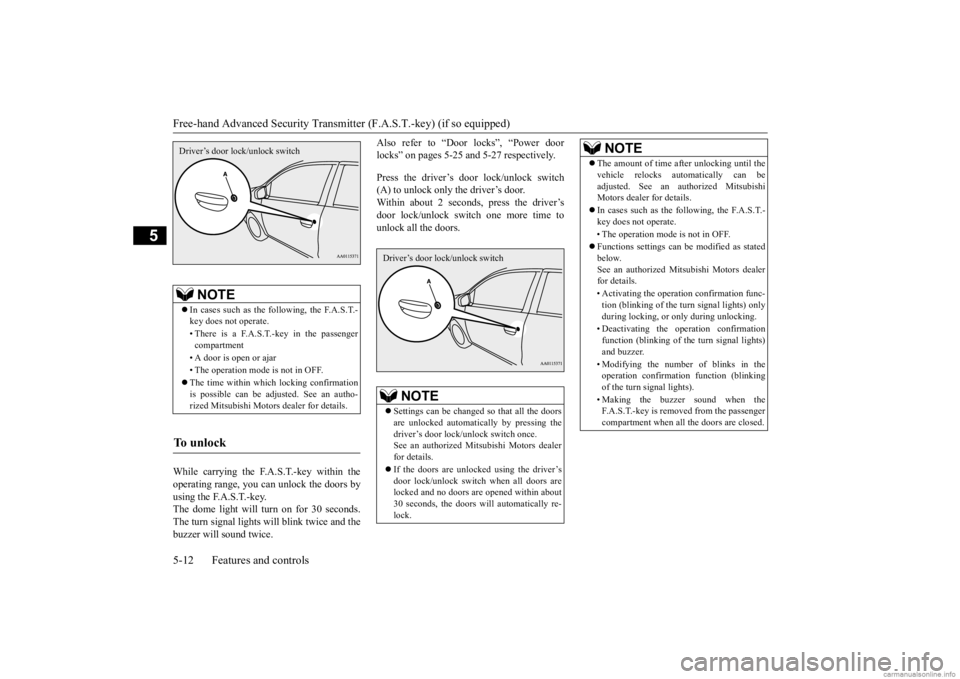
While carrying the F.A.S.T.-key within the operating range, you can unlock the doors by using the F.A.S.T.-key.The dome light will turn on for 30 seconds. The turn signal lights will blink twice and the buzzer will
sound twice.
Also refer to “Door locks”, “Power door locks” on pages 5-25 and 5-27 respectively. Press the driver’s door lock/unlock switch (A) to unlock only the driver’s door. Within about 2 seconds, press the driver’s door lock/unlock switch one more time tounlock all the doors.
NOTE
In cases such as the following, the F.A.S.T.- key does not operate. • There is a F.A.S.T.-key in the passenger compartment • A door is open or ajar • The operation mode
is not in OFF.
The time within which locking confirmation is possible can be adjusted. See an autho-rized Mitsubishi Motors
dealer for details.
To unlock
Driver’s door lock/unlock switch
NOTE
Settings can be changed
so that all the doors
are unlocked automati
cally by pressing the
driver’s door lock/unlock switch once. See an authorized Mitsubishi Motors dealerfor details. If the doors are unlocked using the driver’s door lock/unlock switch when all doors are locked and no doors are opened within about 30 seconds, the doors will
automatically re-
lock.Driver’s door lock/unlock switch
The amount of time after unlocking until the vehicle relocks automatically can beadjusted. See an authorized MitsubishiMotors dealer for details. In cases such as the following, the F.A.S.T.- key does not operate. • The operation mode
is not in OFF.
Functions settings can
be modified as stated
below.See an authorized Mi
tsubishi Motors dealer
for details. • Activating the operati
on confirmation func-
tion (blinking of the turn signal lights) only during locking, or only during unlocking. • Deactivating the ope
ration confirmation
function (blinking of
the turn signal lights)
and buzzer. • Modifying the number of blinks in the operation confirmati
on function (blinking
of the turn signal lights). • Making the buzzer sound when the F.A.S.T.-key is removed from the passenger compartment when all the doors are closed.NOTE
BK0284300US.book 12 ページ 2019年5月23日 木曜日 午後12時22分
Page 79 of 253
Free-hand Advanced
Security Transmitter (F.A.S
.T.-key) (if so equipped)
5-14 Features and controls
5
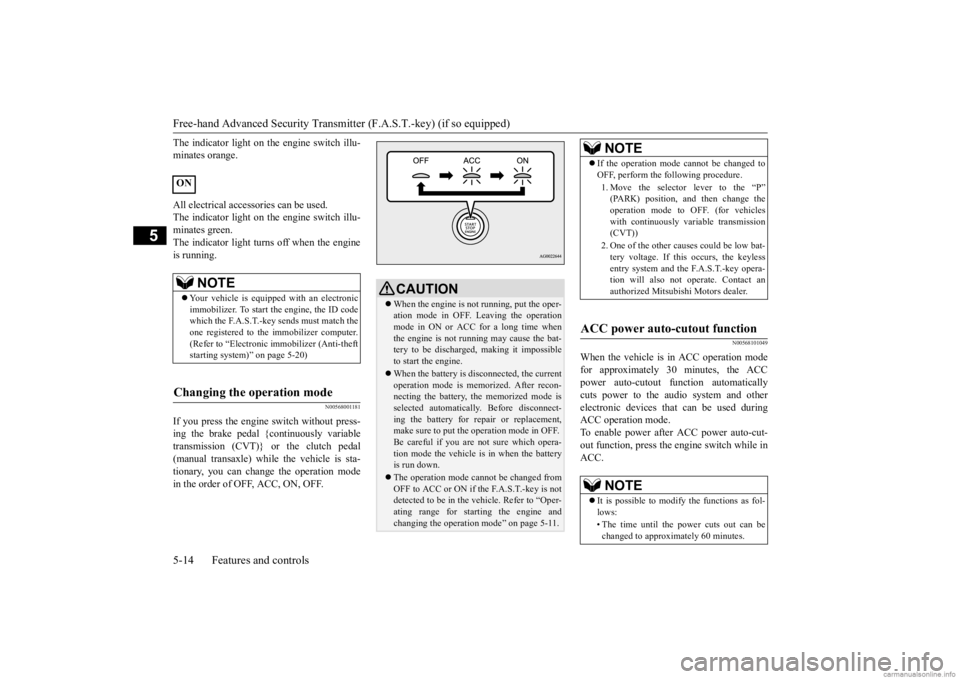
The indicator light on the engine switch illu- minates orange. All electrical accessories can be used. The indicator light on the engine switch illu- minates green. The indicator light turns off when the engineis running.
N00568001181
If you press the engine
switch without press-
ing the brake pedal {continuously variable transmission (CVT)} or the clutch pedal (manual transaxle) while the vehicle is sta-tionary, you can change the operation mode in the order of OFF, ACC, ON, OFF.
N00568101049
When the vehicle is
in ACC operation mode
for approximately 30 minutes, the ACCpower auto-cutout fu
nction automatically
cuts power to the audio system and other electronic devices that
can be used during
ACC operation mode. To enable power after ACC power auto-cut- out function, press the
engine switch while in
ACC.
ON
NOTE
Your vehicle is equippe
d with an electronic
immobilizer. To start
the engine, the ID code
which the F.A.S.T.-key sends must match the one registered to the immobilizer computer. (Refer to “Electronic
immobilizer (Anti-theft
starting system)” on page 5-20)
Changing the operation mode
CAUTION When the engine is not running, put the oper- ation mode in OFF. Leaving the operationmode in ON or ACC for a long time when the engine is not running may cause the bat- tery to be discharged, making it impossibleto start the engine. When the battery is disconnected, the current operation mode is memo
rized. After recon-
necting the battery, the memorized mode is selected automaticall
y. Before disconnect-
ing the battery for re
pair or replacement,
make sure to put the operation mode in OFF. Be careful if you are not sure which opera-tion mode the vehicle is in when the battery is run down. The operation mode cannot be changed from OFF to ACC or ON if the F.A.S.T.-key is not detected to be in the
vehicle. Refer to “Oper-
ating range for star
ting the engine and
changing the operation mode” on page 5-11.
NOTE
If the operation mode cannot be changed to OFF, perform the following procedure. 1. Move the selector lever to the “P” (PARK) position, and then change the operation mode to OFF. (for vehicleswith continuously variable transmission (CVT)) 2. One of the other causes could be low bat- tery voltage. If this
occurs, the keyless
entry system and the F.A.S.T.-key opera-tion will also not
operate. Contact an
authorized Mitsubishi Motors dealer.
ACC power auto-cutout function
NOTE
It is possible to modify the functions as fol- lows: • The time until the power cuts out can be changed to approximately 60 minutes.
BK0284300US.book 14 ページ 2019年5月23日 木曜日 午後12時22分
Page 87 of 253
Free-hand Advanced
Security Transmitter (F.A.S
.T.-key) (if so equipped)
5-22 Features and controls
5
Press the LOCK button (1) to lock all the doors.The turn signal lights will also blink once.
Press the UNLOCK button (2) to unlock the driver’s door only. Within about 2 seconds, press the UNLOCK button one more time to
unlock all the doors.
The dome light will turn on for 30 seconds. The turn signal lights will also blink twice.
N00544401035
Press the trunk button (3) twice within about 5 seconds and the tru
nk lid will be opened.
The trunk lid must be closed manually after it has been opened.
N00544501108
The horn of the keyless entry system answer-back function can be
changed as required.
This is done with the operation mode in OFF.
The answerback function can be set in the following three ways. 1. Put the operation mode in OFF. 2. Open the driver’s door and turn the com- bination headlights a
nd dimmer switch to
the “OFF” position. 3. Press the LOCK button (1) for 4 to 10 sec- onds and press the UNLOCK button (2)during this time. 4. Release in sequence the UNLOCK and LOCK buttons within 10 seconds ofpressing the UNLOCK button in step 3.
The turn signal lights answerback function can be changes.If you want to change the answerback func- tion, please contact an
authorized Mitsubishi
Motors dealer.
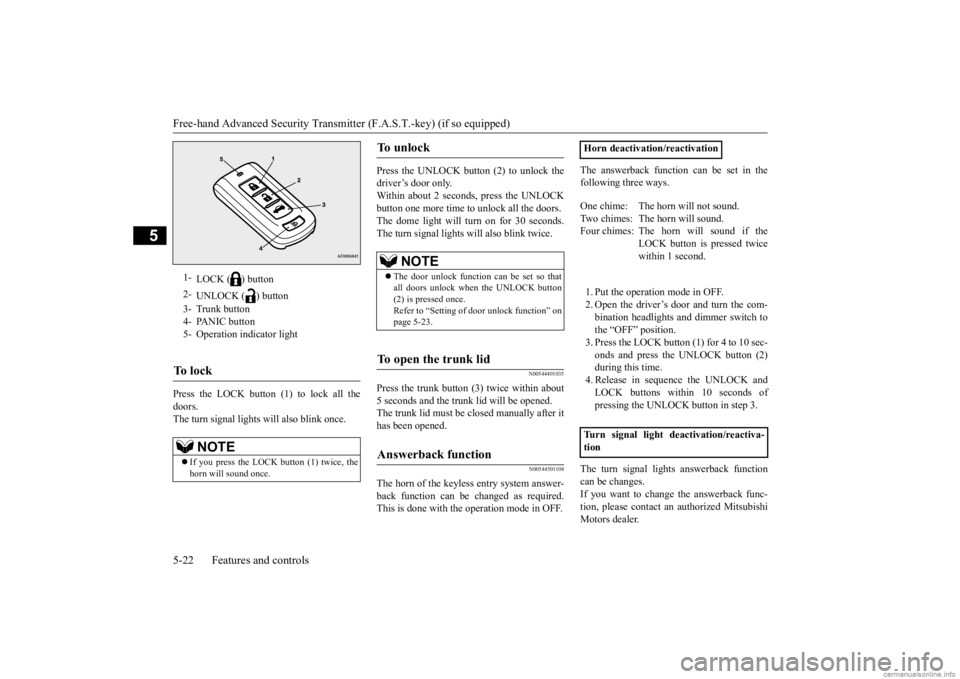
1-
LOCK ( ) button
2-
UNLOCK ( ) button
3- Trunk button 4- PANIC button 5- Operation indicator lightTo l o c k
NOTE
If you press the LOCK button (1) twice, the horn will sound once.
To u n l o c k
NOTE
The door unlock function
can be set so that
all doors unlock when the UNLOCK button (2) is pressed once.Refer to “Setting of
door unlock function” on
page 5-23.
To open the trunk lid
Answerback function
Horn deactivation/reactivation One chime: The horn will not sound. Two chimes: The horn will sound.Four chimes: The hor
n will sound if the
LOCK button is pressed twice within 1 second.
Turn signal light
deactivation/reactiva-
tion
BK0284300US.book 22 ページ 2019年5月23日 木曜日 午後12時22分
Page 88 of 253
Free-hand Advanced Securi
ty Transmitter (F.A.S.T.-key) (if so equipped)
Features and controls 5-23
5
The buzzer answerback function can be turned ON or OFF as required.
N00544601138
The door unlock function can be set to thefollowing two conditions.Each time the door unlock function is set, a chime will sound to tell you the condition of the door unlock function. 1. Put the operation mode in OFF. 2. Open the driver’s door and turn the com-bination headlights and dimmer switch to the “OFF” position. 3. Press the LOCK button (1) for 4 to 10 sec-onds and press the UNLOCK button (2) during this time. 4. Release in sequence the LOCK andUNLOCK buttons within 10 seconds of pressing the LOCK button in step 3.
N00544701171
If you are near your vehicle and feel threat-ened, you can activate the alarm to call atten- tion as follows: 1. Press the PANIC button (4) for more than 1 second. 2. The headlights will blink on and off and the horn will sound intermittently forabout 3 minutes. 3. To turn off the alarm, press any button on the remote control transmitter.
N00562001118
Your F.A.S.T.-key operates on a radio fre-quency subject to
Federal Communications
Commission (FCC) Rules. This device com- plies with Part 15 of FCC Rules.Operation is subject to the following two con- ditions. This device may not
cause harmful inter-
ference. This device must ac
cept any interference
received, including interference that may cause undesired operation of this device.
Buzzer deactivation/reactivationSetting of door unlock function
Number of chimes
Condition
One chime All doors unlock Two chimes Driver’s door unlock only
Using the panic alarm
NOTE
The indicator light (5) comes on each time a button is pressed. The F.A.S.T.-key can be used from about 40 feet (12 m) away. However, this distance may change if your vehicle is near a TV transmitting tower, a power station, or aradio station. If the following conditi
ons are observed after
pressing the LOCK (1) or UNLOCK (2) but- ton on the remote control transmitter, the buttery in the F.A.S.T.-key may need to bereplaced. • The doors cannot be locked or unlocked.• The panic alarm cannot be operated. • The indicator light
(5) is dim or does not
come on.
If you lose your F.A.S.T.-key, please contact an authorized Mitsubishi Motors dealer for areplacement. If you wish to obtain an additional F.A.S.T.- key, please contact an
authorized Mitsubishi
Motors dealer. A maximum of four F.A.S.T.- key can be programme
d for your vehicle.
To use the new remote control transmitters, it is necessary to register the key with the elec- tronic immobilizer and
keyless entry system.
Refer to “Electronic immobilizer (Anti-theft starting system): Customer F.A.S.T.-key pro- gramming” on page 5-20.
General information
NOTE
BK0284300US.book 23 ページ 2019年5月23日 木曜日 午後12時22分
Page 106 of 253
Continuously variable transmission (CVT) (if so equipped)
Features and controls 5-41
5
N00512900131
For the best fuel ec
onomy and performance in
using your manual transaxl
e, upshift as listed
below. At low altitude locations, shift at the vehicle speeds listed. Upshifting earlier during cruise conditions (relativel
y steady speeds) will
improve your fuel economy. At high altitude locati
ons, upshift as listed
below.
N00513000096
It is recommended that you downshift to a lower gear when needed to maintain the desired speed, according to the table. Avoid downshifting at too high a speed. Theengine may suffer damage. To maintain a safe speed and prolong brake life, shift down to 2nd or 1st when descend-ing a steep hill. Downshifting is also important to avoid “lug- ging” the engine at t
oo low a speed, such as
when turning a corner or when driving up a steep hill.
N00513100244
Do not use the gearshift lever as a han- drest. This can result
in premature wear of
the transaxle shift forks. The table above shows the maximum rec- ommended driving speed for in each gear. Do not drive near or at these speeds forprolonged periods of time.
N00560200050
The CVT will automatically and continuously change its gear ratio depending on road and
Upshifting
Shift point
Upshift speeds
Acceleration
Cruise
1st gear to 2nd gear
15 mph (24 km/h)
15 mph (24 km/h)
2nd gear to 3rd gear
28 mph (45 km/h)
19 mph (31 km/h)
3rd gear to 4th gear
36 mph (58 km/h)
33 mph (53 km/h)
4th gear to 5th gear
45 mph (72 km/h)
45 mph (72 km/h)
Shift point
Upshift speeds
1st gear to 2nd gear 15 mph (24 km/h)2nd gear to 3rd gear 25 mph (40 km/h)3rd gear to 4th gear 40 mph (64 km/h)
4th gear to 5th gear 45 mph (72 km/h)Downshifting
Recommended downshifting speed
Downshifting speed
Shift point
Under 20 mph (32 km/h)
Shift down from cur- rent gear to 2nd gear.
20 to 30 mph (32 to
48 km/h)
Shift down from cur- rent gear to 3rd gear.
Shift point
Upshift speeds
Driving precautions
Maximum possible driving speed
Shift points
Maximum possible driving
speed
1st gear 28 mph (45 km/h)2nd gear 53 mph (85 km/h)3rd gear 78 mph (125 km/h)4th gear 105 mph (170 km/h)Continuously variable transmission (CVT)
(if so
equipped)
BK0284300US.book 41 ページ 2019年5月23日 木曜日 午後12時22分
Page 132 of 253
Multi-information display
Features and controls 5-67
5
N00574900016
The odometer indicates the total distance the vehicle has traveled.
N00575000014
The trip odometer indicates the distance trav-eled between two points. To return the display to 0, hold down the multi-information display switch for about 1 second or more. Only the currently displayed value will be reset. Example
If trip odometer is
displayed, only trip
odometer wi
ll be reset.
N00575101025
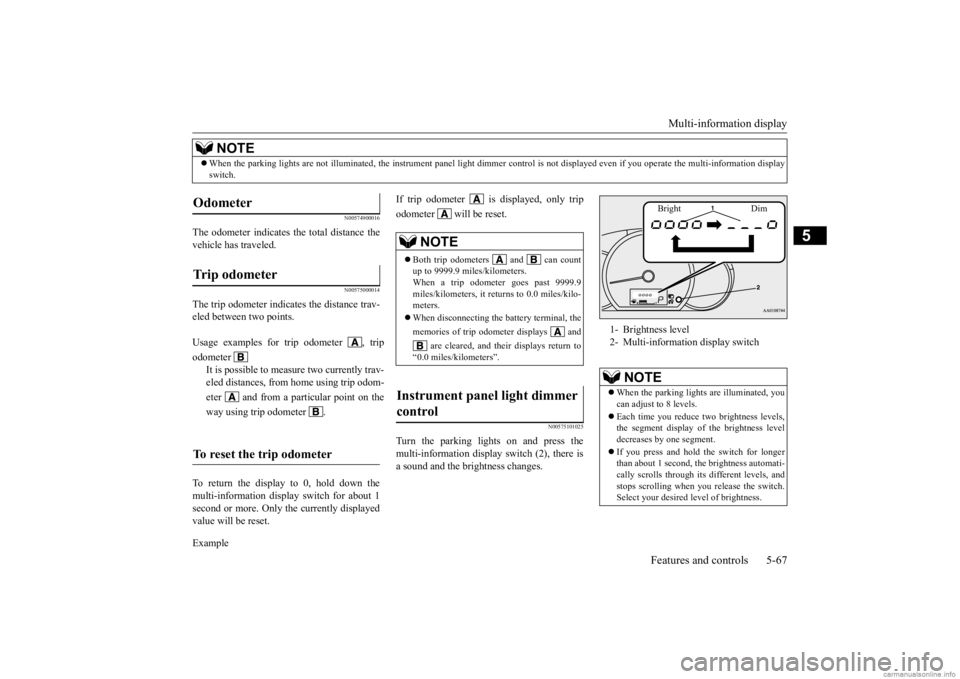
Turn the parking lights on and press the multi-information display switch (2), there is a sound and the brightness changes.
When the parking lights are not il
luminated, the instrument pane
l light dimmer control is not di
splayed even if you operate the
multi-information display
switch.NOTE
Odometer Trip odometer Usage examples for trip odometer , trip odometer
It is possible to measure two currently trav- eled distances, from home using trip odom- eter and from a particular point on theway using trip odometer .
To reset the trip odometer
NOTE
Both trip odometers and can count up to 9999.9 miles/kilometers. When a trip odometer goes past 9999.9miles/kilometers, it returns to 0.0 miles/kilo- meters. When disconnecting the battery terminal, the memories of trip odometer displays and
are cleared, and their displays return to
“0.0 miles/kilometers”.
Instrument panel light dimmer control
1- Brightness level 2- Multi-information display switch
NOTE
When the parking light
s are illuminated, you
can adjust to 8 levels. Each time you reduce tw
o brightness levels,
the segment display of
the brightness level
decreases by one segment. If you press and hold the switch for longer than about 1 second, th
e brightness automati-
cally scrolls through its different levels, and stops scrolling when
you release the switch.
Select your desired
level of brightness.
Bright Dim
BK0284300US.book 67 ページ 2019年5月23日 木曜日 午後12時22分
Page 135 of 253
Multi-information display 5-70 Features and controls
5
N00556701312
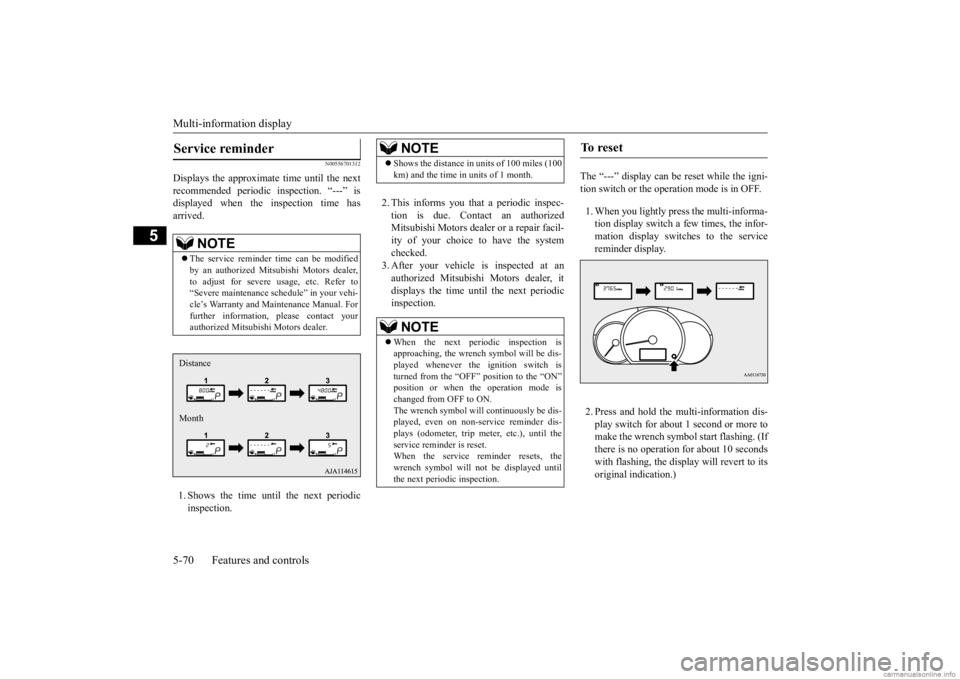
Displays the approximate time until the next recommended periodic
inspection. “---” is
displayed when the inspection time hasarrived. 1. Shows the time until the next periodic inspection.
2. This informs you that a periodic inspec- tion is due. Contact an authorized Mitsubishi Motors dealer
or a repair facil-
ity of your choice to have the system checked. 3. After your vehicle
is inspected at an
authorized Mitsubishi Motors dealer, it displays the time unt
il the next periodic
inspection.
The “---” display can be
reset while the igni-
tion switch or the opera
tion mode is in OFF.
1. When you lightly press the multi-informa- tion display switch a few times, the infor-mation display switches to the service reminder display. 2. Press and hold the multi-information dis- play switch for about 1 second or more tomake the wrench symbol start flashing. (If there is no operation for about 10 seconds with flashing, the displa
y will revert to its
original indication.)
Service reminder
NOTE
The service reminder time can be modified by an authorized Mitsubishi Motors dealer,to adjust for severe usage, etc. Refer to “Severe maintenance sc
hedule” in your vehi-
cle’s Warranty and Ma
intenance Manual. For
further information, please contact your authorized Mitsubishi Motors dealer.Distance Month
NOTE
Shows the distance in
units of 100 miles (100
km) and the time in units of 1 month.NOTE
When the next periodic inspection is approaching, the wrench symbol will be dis-played whenever the ignition switch is turned from the “OFF” position to the “ON” position or when the operation mode ischanged from OFF to ON. The wrench symbol will continuously be dis- played, even on non-service reminder dis-plays (odometer, trip meter, etc.), until the service reminder is reset. When the service reminder resets, thewrench symbol will not be displayed untilthe next periodic inspection.
To r e s e t
BK0284300US.book 70 ページ 2019年5月23日 木曜日 午後12時22分
Page 136 of 253
Multi-information display
Features and controls 5-71
5
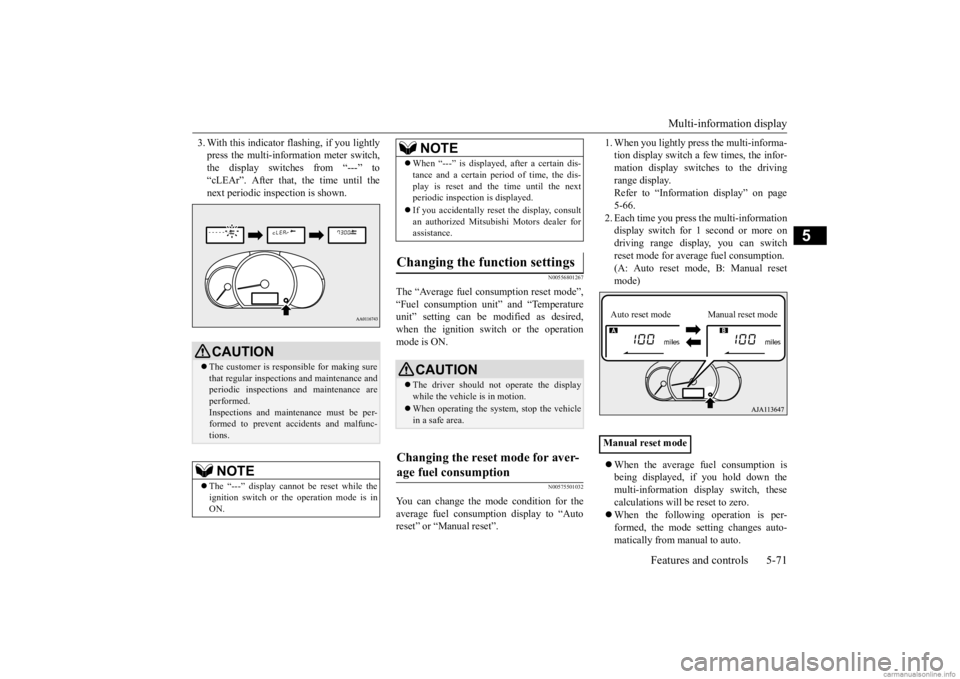
3. With this indicator
flashing, if you lightly
press the multi-information meter switch,the display switches from “---” to “cLEAr”. After that, the time until the next periodic inspection is shown.
N00556801267
The “Average fuel c
onsumption reset mode”,
“Fuel consumption uni
t” and “Temperature
unit” setting can be m
odified as desired,
when the ignition switch or the operation mode is ON.
N00575501032
You can change the mode condition for theaverage fuel consumpt
ion display to “Auto
reset” or “Manual reset”.
1. When you lightly press the multi-informa- tion display switch a few times, the infor-mation display switches to the driving range display. Refer to “Information display” on page5-66. 2. Each time you press th
e multi-information
display switch for 1 second or more ondriving range disp
lay, you can switch
reset mode for average fuel consumption. (A: Auto reset mode, B: Manual reset mode) When the average fuel consumption is being displayed, if you hold down themulti-information display switch, these calculations will be reset to zero. When the following operation is per- formed, the mode setting changes auto- matically from manual to auto.
CAUTION The customer is responsible for making sure that regular inspections and maintenance and periodic inspections
and maintenance are
performed.Inspections and mainte
nance must be per-
formed to prevent accidents and malfunc- tions.NOTE
The “---” display cannot
be reset while the
ignition switch or the operation mode is inON.
When “---” is displayed, after a certain dis- tance and a certain pe
riod of time, the dis-
play is reset and th
e time until the next
periodic inspection is displayed. If you accidentally reset
the display, consult
an authorized Mitsubishi Motors dealer for assistance.
Changing the function settings
CAUTION The driver should not operate the display while the vehicle is in motion. When operating the system, stop the vehicle in a safe area.
Changing the reset mode for aver- age fuel consumption
NOTE
Manual reset modeAuto reset mode Manual reset mode
BK0284300US.book 71 ページ 2019年5月23日 木曜日 午後12時22分