ESP MITSUBISHI MONTERO 1989 1.G Workshop Manual
[x] Cancel search | Manufacturer: MITSUBISHI, Model Year: 1989, Model line: MONTERO, Model: MITSUBISHI MONTERO 1989 1.GPages: 30, PDF Size: 1.61 MB
Page 2 of 30

~~~~ -~-L -.._i._--
--em._. -
2
~!
INTRODUCTION AND MASTER TROUBLESHOOTING - How To Use This Manual
E-m+
HOW TO USE THIS MANUAL
gg$I!
NWS&Wl g-
LIMIT g&i-
s : CONTENTS
Shows the standard for judging the quality of a part
or assembly on inspection and means the maxi- g ’
mum or minimum value within which the part or
ar-=
assembly must be-kept functionally or in strength. s
m.
It is a value established outside the range of
E-
standard value. z The preceding page contains the GROUP INDEX
which lists the group title and group number.
PAGE NUMBERS
All page numbers consist of two sets of digits
separated by a dash. The digits preceding the dash
identify the number of the group. The digits follow-
ing the dash represent the consecutive page
number within the group. The page numbers can
be found on the top left or right of each page.
TEXT
Unless otherwise specified, each service procedure
covers all models. Procedures covering specific
models are identified by the model codes, or similar
designation (engine type, transmission type, etc.).
A description of these designations is covered in
this unit under “VEHICLE IDENTIFICATION”.
TROUBLESHOOTING
Troubleshootings are classified into master trouble-
shooting and group troubleshooting and located as
follows:
The master troubleshooting is prepared when the
trouble symptom relates to two or more groups and
given in MASTER TROUBLESHOOTING.
The group troubleshooting guide is prepared for
causes of problems related to that individual group
only; a troubleshooting guide is prepared for each
appropriate group.
SERVICE PROCEDURES
The sewice steps are arranged in numerical order
and attentions to be paid in performing vehicle ser-
vice are described in detail in SERVICE POINTS.
DEFINITION OF TERMS
STANDARD VALUE
indicates the value used as the standard for judging
the quality of a part or assembly on inspection or the
value to which the part or assembly is corrected and
adjusted. It is given by tolerance.
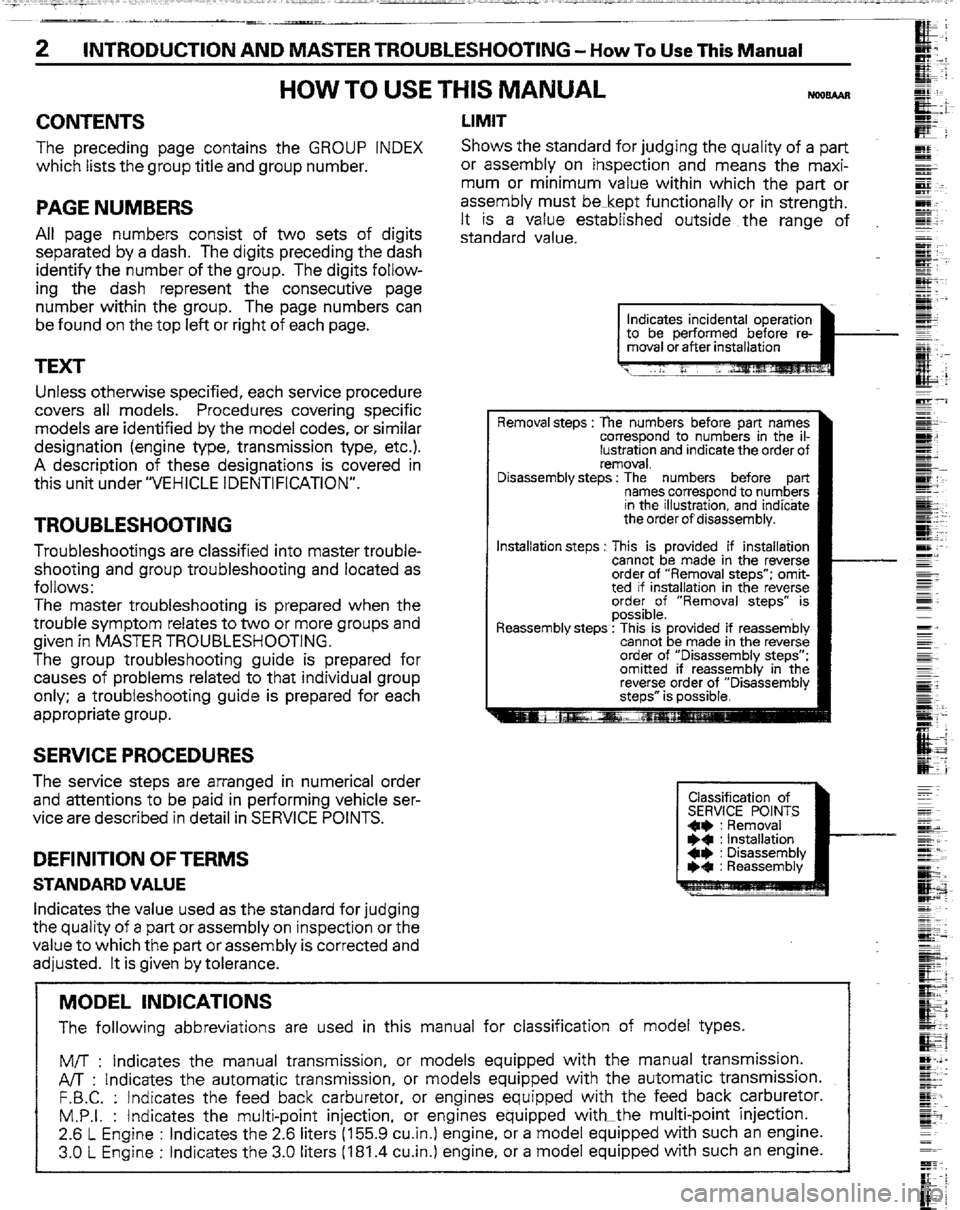
incidental operation
rformed before re-
Removal steps : The numbers before part names b
correspond to numbers in the il-
lustration and indicate the order of
removal.
Disassemblv steos : The numbers before oat-t
I ---I-- names co&pond to num6&
in the illustration, and indicate
the order of’disassembly.
Installation steps : This is provided if installation
cannot be made in the reverse
order of “Removal steps”; omit-
ted if installation in the reverse
order of “Removal steps” is
possible.
Reassembly steps : This is provided if reassembly
cannot be made in the reverse
order of “Disassembly steps”:
omitted if reassembly in the
reverse order
The following abbreviations are used in this manual for classification of model types.
M/T : Indicates the manual transmission, or models equipped with the manual transmission.
A/T : Indicates the automatic transmission, or models equipped with the automatic transmission.
F.B.C. : Indicates the feed back carburetor, or engines equipped with the feed back carburetor.
M.P.I. : Indicates the multi-point injection, or engines equipped witkthe multi-point injection.
2.6 L Engine : Indicates the 2.6 liters (155.9 cuin.) engine, or a model equipped with such an engine.
3.0 L Engine : Indicates the 3.0 liters (181.4 cu.in.) engine, or a model equipped with such an engine.
Page 3 of 30

INTRODUCTION AND MASTER TROUBLESHOOTING - How To Use This Manual
3
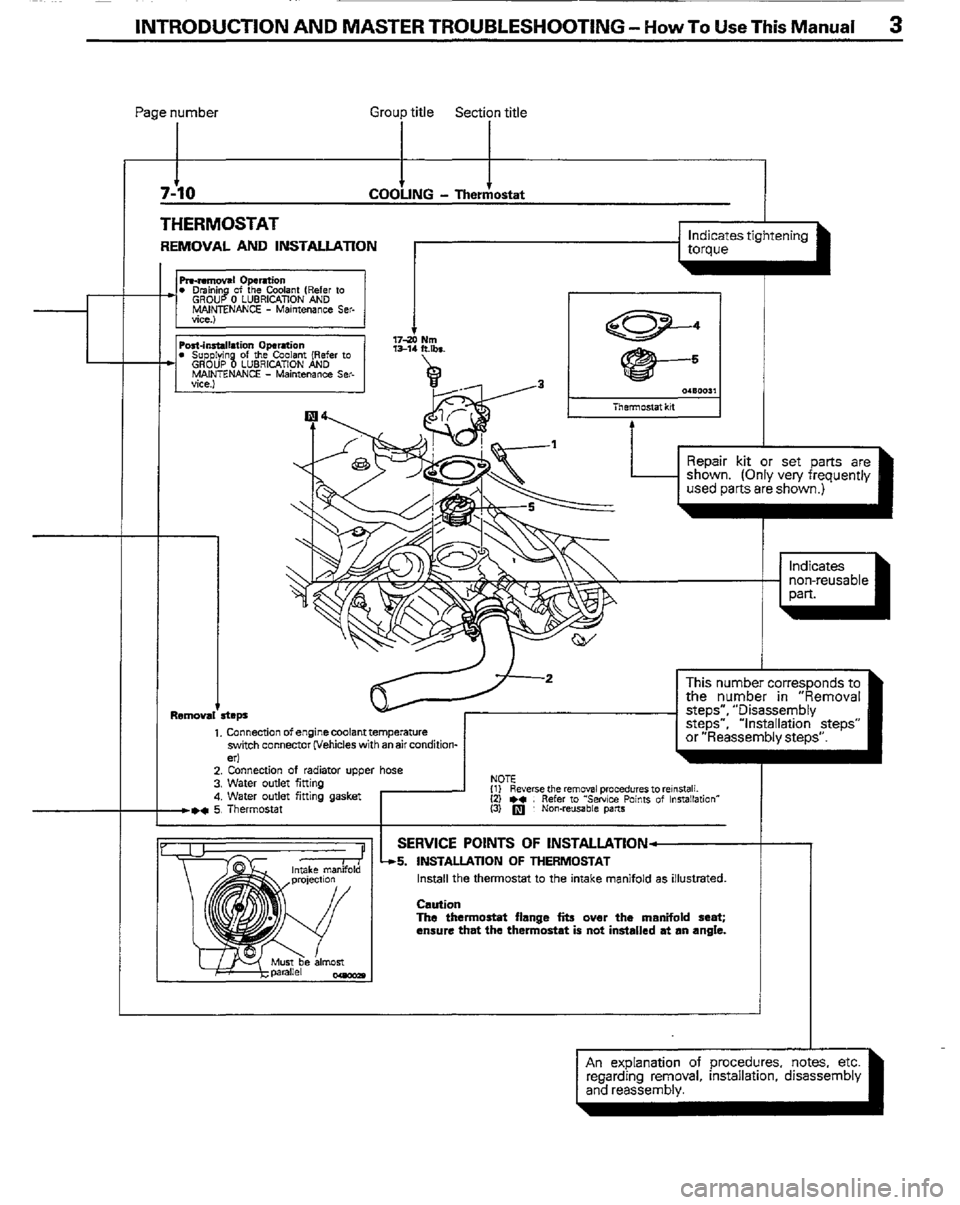
Page number
Group title Section title
7-io t COOLING - Thedostat
vrra-r I
THERML . -.
REMOVAL AND INSTALLATlON
I Indicates tightening
torque
Repair kit or set parts are
shown. fOnlv verv freouentlv
-
1. Connection of enginecoolant temperature
syitch connector (Vehicles with an air condition-
3. Water outlet fitting
4. Water outlet fitting gasket
+ee 5 Thermostat
I This number corresponds to
the number in “Removal
steps”, “Disassembly
steps”, “Installation steps”
or “Reassembly steps”.
L
SERVICE POINTS OF INSTALLATION-
S. INSTALIATION OF THERMOSTAT
Install the thermostat to the intake manifold as illustrated.
caution
The thermostat Range tits over
the manifold seat;
ensure that the thermostat is not installed at an angle.
An explanation of procedures, notes, etc.
regarding removal, installation. disassembly
and reassembly.
Page 17 of 30

INTRODUCTION AND MASTER TROUBLESHOOTING - Towing and Hoisting 17
TOWING AND HOISTING
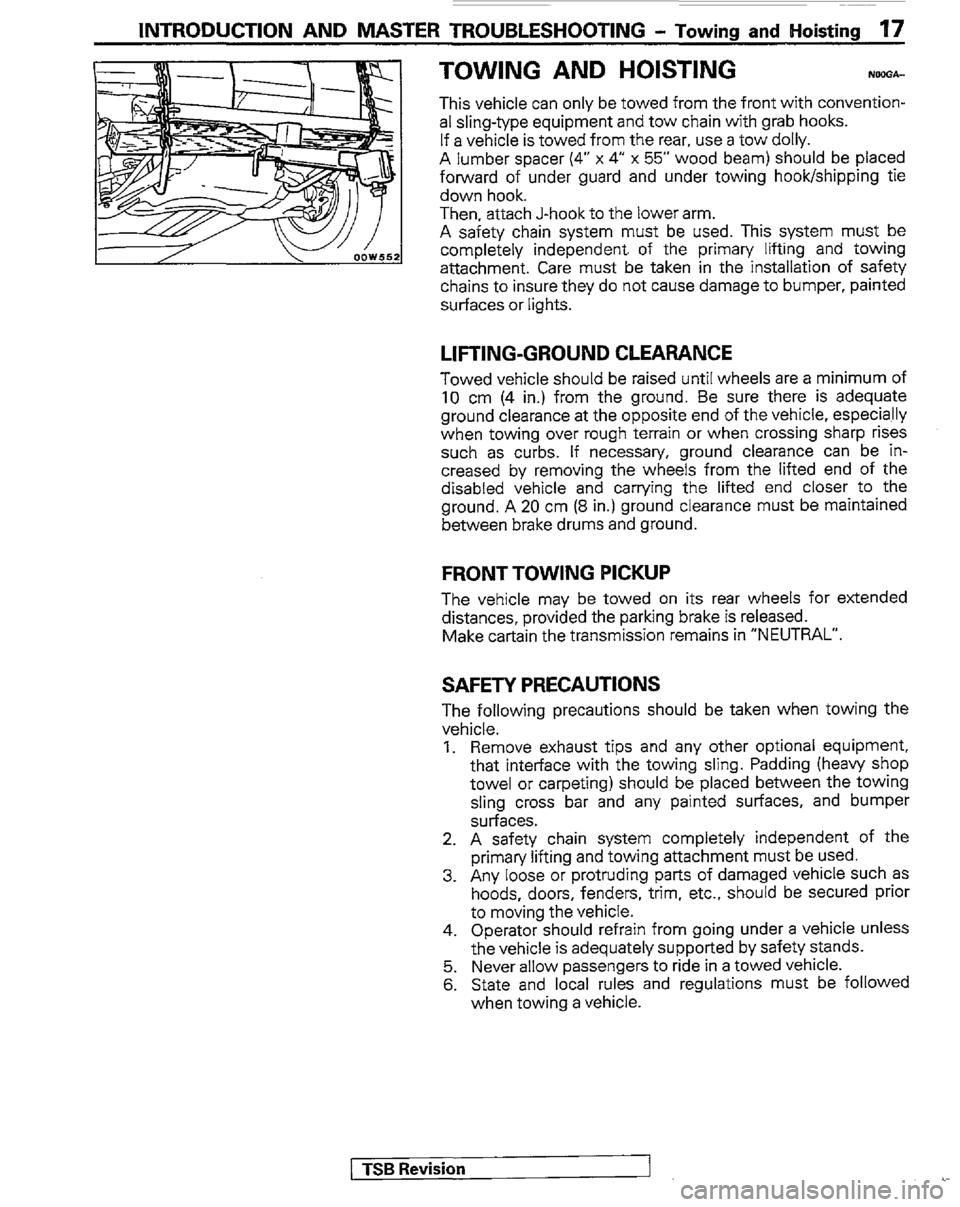
This vehicle can only be towed from the front with convention-
al sling-type equipment and tow chain with grab hooks.
If a vehicle is towed from the rear, use a tow dolly.
A lumber spacer (4” x 4” x 55” wood beam) should be placed
forward of under guard and under towing hook/shipping tie
down hook.
Then, attach J-hook to the lower arm.
A safety chain system must be used. This system must be
completely independent. of the primary lifting and towing
attachment. Care must be taken in the installation of safety
chains to insure they do not cause damage to bumper, painted
surfaces or lights.
LIFTING-GROUND CLEARANCE
Towed vehicle should be raised until wheels are a minimum of
10 cm (4 in.) from the ground. Be sure there is adequate
ground clearance at the opposite end of the vehicle, especially
when towing over rough terrain or when crossing sharp rises
such as curbs. If necessary, ground clearance can be in-
creased by removing the wheels from the lifted end of the
disabled vehicle and carrying the lifted end closer to the
ground. A 20 cm (8 in.) ground clearance must be maintained
between brake drums and ground.
FRONT TOWING PICKUP
The vehicle may be towed on its rear wheels for extended
distances, provided the parking brake is released.
Make cartain the transmission remains in “NEUTRAL”.
SAFETY PRECAUTIONS
The following precautions should be taken when towing the
vehicle.
1. Remove exhaust tips and any other optional equipment,
that interface with the towing sling. Padding (heavy shop
towel or carpeting) should be placed between the towing
sling cross bar and any painted surfaces, and bumper
surfaces.
2. A safety chain system completely independent of the
primary lifting and towing attachment must be used.
3. Any loose or protruding parts of damaged vehicle such as
hoods, doors, fenders, trim, etc., should be secured prior
to moving the vehicle.
4. Operator should refrain from going under a vehicle unless
the vehicle is adequately supported by safety stands.
5.
Never allow passengers to ride in a towed vehicle.
6. State and local rules and regulations must be followed
when towing a vehicle.
1 TSB Revision