lights MITSUBISHI OUTLANDER 2016 3.G Owner's Manual
[x] Cancel search | Manufacturer: MITSUBISHI, Model Year: 2016, Model line: OUTLANDER, Model: MITSUBISHI OUTLANDER 2016 3.GPages: 464, PDF Size: 60.77 MB
Page 106 of 464
Free-hand Advanced
Security Transmitter (F.A.S
.T.-key) (if so equipped)
5-30 Features and controls
5
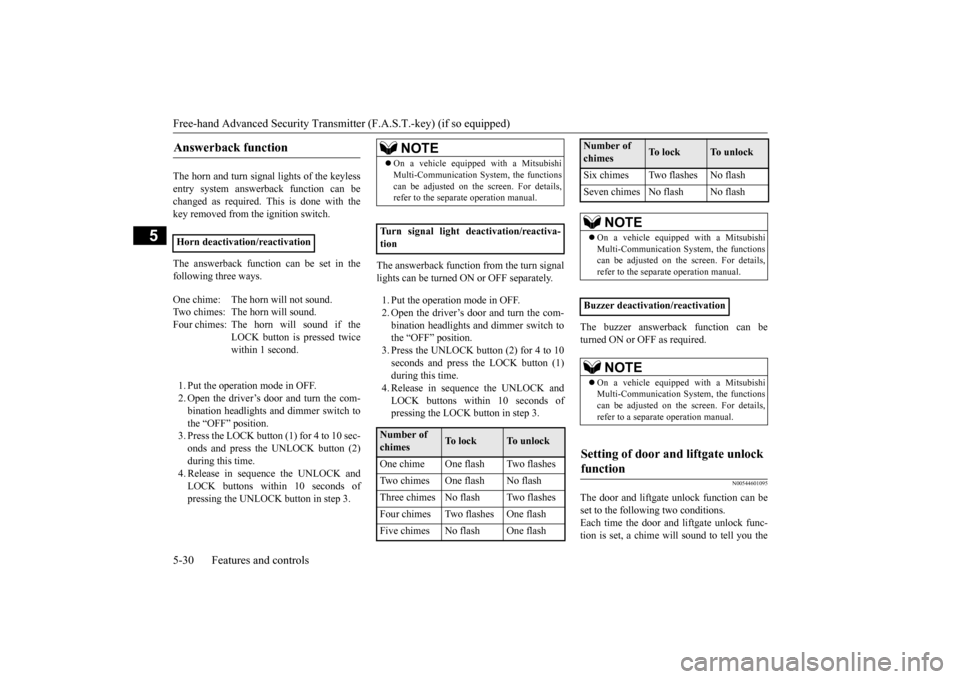
The horn and turn signal lights of the keyless entry system answerback function can be changed as required. This is done with thekey removed from the ignition switch. The answerback function can be set in the following three ways. 1. Put the operation mode in OFF. 2. Open the driver’s door and turn the com- bination headlights and dimmer switch to the “OFF” position.3. Press the LOCK button (1) for 4 to 10 sec- onds and press the UNLOCK button (2) during this time.4. Release in sequence the UNLOCK and LOCK buttons within 10 seconds of pressing the UNLOCK button in step 3.
The answerback function from the turn signal lights can be turned ON or OFF separately. 1. Put the operation mode in OFF. 2. Open the driver’s door and turn the com- bination headlights and dimmer switch tothe “OFF” position. 3. Press the UNLOCK button (2) for 4 to 10 seconds and press the LOCK button (1)during this time. 4. Release in sequence the UNLOCK and LOCK buttons within 10 seconds ofpressing the LOCK button in step 3.
The buzzer answerback function can be turned ON or OFF as required.
N00544601095
The door and liftgate
unlock function can be
set to the following two conditions. Each time the door and
liftgate unlock func-
tion is set, a chime wi
ll sound to tell you the
Answerback function
Horn deactivation/reactivation One chime: The horn will not sound. Two chimes: The horn will sound.Four chimes: The hor
n will sound if the
LOCK button is pressed twice within 1 second.
NOTE
On a vehicle equippe
d with a Mitsubishi
Multi-Communication System, the functionscan be adjusted on the screen. For details,refer to the separa
te operation manual.
Turn signal light deactivation/reactiva- tionNumber of chimes
To l o c k
To u n l o c k
One chime One flash Two flashes Two chimes One flash No flash Three chimes No flash Two flashes Four chimes Two flashes One flash Five chimes No flash One flash
Six chimes Two flashes No flashSeven chimes No flash No flash
NOTE
On a vehicle equippe
d with a Mitsubishi
Multi-Communication System, the functions can be adjusted on the screen. For details, refer to the separate operation manual.
Buzzer deactivation/reactivation
NOTE
On a vehicle equippe
d with a Mitsubishi
Multi-Communication System, the functionscan be adjusted on the screen. For details, refer to a separa
te operation manual.
Setting of door and liftgate unlock function
Number of chimes
To l o c k
To unlock
BK0223400US.book 30 ページ 2015年2月13日 金曜日 午後12時15分
Page 107 of 464

Free-hand Advanced Securi
ty Transmitter (F.A.S.T.-key) (if so equipped)
Features and controls 5-31
5
condition of the door and liftgate unlock function. 1. Put the operation mode in OFF. 2. Open the driver’s door and turn the com- bination headlights and dimmer switch tothe “OFF” position. 3. Press the LOCK button (1) for 4 to 10 sec- onds and press the UNLOCK button (2)during this time. 4. Release in sequence the LOCK and UNLOCK buttons within 10 seconds ofpressing the LOCK button in step 3.
N00579500020
After unlocking the doors and the liftgate, the power liftgate can be operated by pressing the power liftgate button (3).Refer to “Power lift
gate” on page 5-38.
N00544701067
If you are near your vehicle and feel threat- ened, you can activate the alarm to call atten- tion as follows: 1. Press the PANIC button (4) for more than 1 second. 2. The headlights will blink on and off and the horn will sound intermittently forabout 3 minutes. 3. To turn off the alarm, press any button on the remote control transmitter.
Number of chimes
Condition
One chime
All doors and the liftgate unlock
Tw o chimes
Driver’s door unlock only
NOTE
On a vehicle equippe
d with a Mitsubishi
Multi-Communication System, the functions can be adjusted on the screen. For details, refer to the separa
te operation manual.
Operating the power liftgate
Using the panic alarm
NOTE
The indicator light (5) comes on each time a button is pressed. The F.A.S.T.-key can be used from about 40 feet (12 m) away. However, this distance may change if your vehicle is near a TVtransmitting tower, a power station, or a radio station.
If the UNLOCK button (2) is pressed when all doors and the liftgate are locked and nodoors or the liftgate
are opened within about
30 seconds, the doors and the liftgate will automatically re-lock. On a vehicle equipped with a MitsubishiMulti-Communication System, the functions can be adjusted on the screen. For details, refer to the separa
te operation manual.
If the following conditions are observed after pressing the LOCK (1) or UNLOCK (2) but-ton on the remote control transmitter, the battery in the F.A.S.T.-key may need to be replaced. • The doors and the liftgate cannot be locked or unlocked. • The panic alarm
cannot be operated.
• The indicator light
(5) is dim or does not
come on.
If you lose your F.A.S.T.-key, please contact an authorized Mitsubishi Motors dealer for a replacement. If you wish to obtain an additional F.A.S.T.- key, please contact an
authorized Mitsubishi
Motors dealer. A maximum of four F.A.S.T.- key can be programme
d for your vehicle.
To use the new remote control transmitters, it is necessary to register
the key with both the
electronic immobilizer
and keyless entry sys-
tem. Also refer to “Electronic immobilizer (Anti- theft starting system): Customer F.A.S.T.-key programming” on page 5-28.NOTE
BK0223400US.book 31 ページ 2015年2月13日 金曜日 午後12時15分
Page 122 of 464
Theft-alarm system 5-46 Features and controls
5
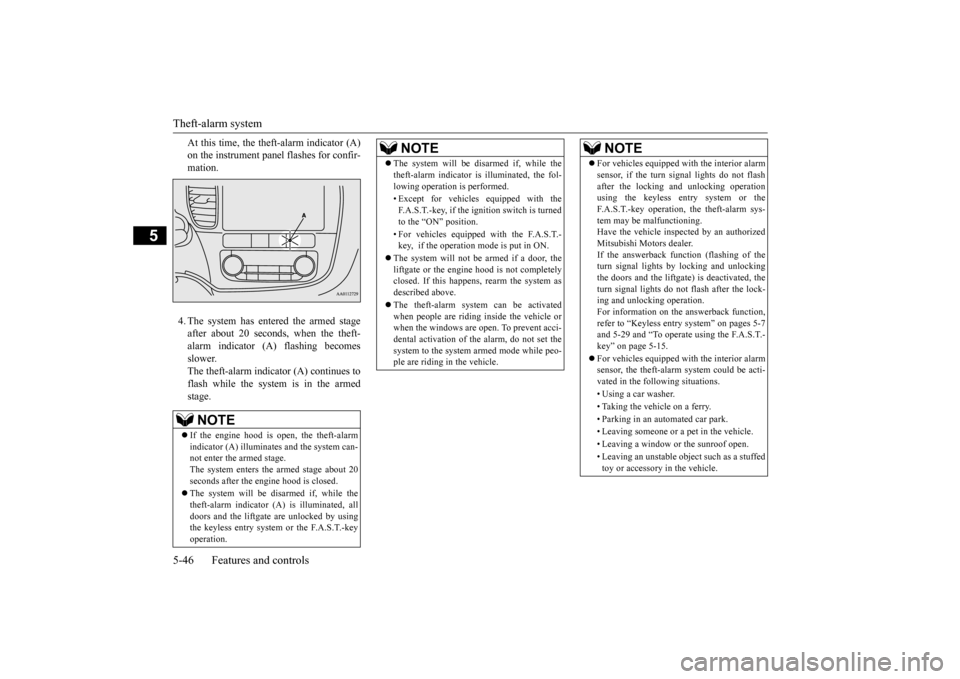
At this time, the theft-alarm indicator (A) on the instrument pane
l flashes for confir-
mation. 4. The system has entered the armed stage after about 20 seconds, when the theft-alarm indicator (A) flashing becomes slower. The theft-alarm indicator (A) continues toflash while the system is in the armed stage.NOTE
If the engine hood is open, the theft-alarm indicator (A) illuminates and the system can- not enter the armed stage. The system enters the armed stage about 20seconds after the engine hood is closed. The system will be disarmed if, while the theft-alarm indicator (A) is illuminated, all doors and the liftgate are unlocked by using the keyless entry system or the F.A.S.T.-keyoperation.
The system will be disarmed if, while the theft-alarm indicator is illuminated, the fol-lowing operation is performed. • Except for vehicles equipped with the F.A.S.T.-key, if the ignition switch is turnedto the “ON” position. • For vehicles equippe
d with the F.A.S.T.-
key, if the operation mode is put in ON.
The system will not be armed if a door, the liftgate or the engine
hood is not completely
closed. If this happens, rearm the system as described above. The theft-alarm system can be activated when people are riding inside the vehicle orwhen the windows are open. To prevent acci- dental activati
on of the alarm, do not set the
system to the system armed mode while peo-ple are riding in the vehicle.NOTE
For vehicles equipped wi
th the interior alarm
sensor, if the turn signal lights do not flashafter the locking a
nd unlocking operation
using the keyless entry system or the F.A.S.T.-key operation, the theft-alarm sys- tem may be ma
lfunctioning.
Have the vehicle inspected by an authorized Mitsubishi Motors dealer. If the answerback function (flashing of theturn signal lights by locking and unlocking the doors and the liftgate) is deactivated, the turn signal lights do not flash after the lock-ing and unlocking operation. For information on the answerback function, refer to “Keyless entry system” on pages 5-7and 5-29 and “To operate using the F.A.S.T.- key” on page 5-15. For vehicles equipped wi
th the interior alarm
sensor, the theft-alarm
system could be acti-
vated in the following situations. • Using a car washer. • Taking the vehicle on a ferry. • Parking in an automated car park.• Leaving someone or a pet in the vehicle. • Leaving a window or the sunroof open. • Leaving an unstable objec
t such as a stuffed
toy or accessory in the vehicle.NOTE
BK0223400US.book 46 ページ 2015年2月13日 金曜日 午後12時15分
Page 123 of 464
Theft-alarm system
Features and controls 5-47
5
N00510401214
The alarm will be activated if any of the fol- lowing occur while the ve
hicle is parked and
the system is armed. One of the doors and the liftgate is opened without using the keyless entry system orthe F.A.S.T.-key operation. The engine hood is opened.
Also, for vehicles equipped with the interior alarm sensor, the alarm will be activated ifany of the following occur.
Attempt an unauthorized moving of the vehicle. (the vehicle
inclination detection
function) Detect a motion in the vehicle. (the inte- rior intrusion de
tection function)
Disconnect the battery terminal.
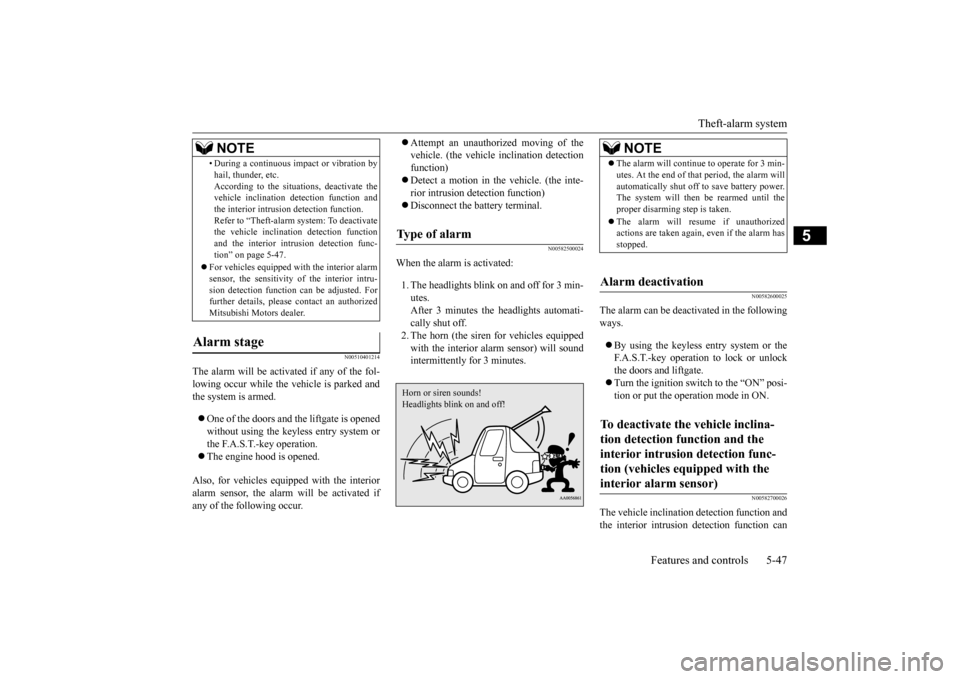
N00582500024
When the alarm is activated: 1. The headlights blink on and off for 3 min- utes. After 3 minutes the headlights automati-cally shut off. 2. The horn (the siren for vehicles equipped with the interior alarm sensor) will soundintermittently for 3 minutes.
N00582600025
The alarm can be deacti
vated in the following
ways. By using the keyless entry system or the F.A.S.T.-key operation to lock or unlockthe doors and liftgate. Turn the ignition switch to the “ON” posi- tion or put the operation mode in ON.
N00582700026
The vehicle inclination detection function and the interior intrusion
detection function can
• During a continuous im
pact or vibration by
hail, thunder, etc.According to the situations, deactivate thevehicle inclination de
tection function and
the interior intrusi
on detection function.
Refer to “Theft-alarm system: To deactivatethe vehicle inclinati
on detection function
and the interior intr
usion detection func-
tion” on page 5-47.
For vehicles equipped wi
th the interior alarm
sensor, the sensitivity of the interior intru-sion detection function can be adjusted. For further details, please
contact an authorized
Mitsubishi Motors dealer.
Alarm stage
NOTE
Type of alarm Horn or siren sounds!Headlights blink on and off!
NOTE
The alarm will continue to operate for 3 min- utes. At the end of that
period, the alarm will
automatically shut off
to save battery power.
The system will then
be rearmed until the
proper disarming step is taken. The alarm will resu
me if unauthorized
actions are taken again, even if the alarm has stopped.
Alarm deactivation To deactivate the vehicle inclina- tion detection function and the interior intrusion detection func-tion (vehicles equipped with the interior alarm sensor)
BK0223400US.book 47 ページ 2015年2月13日 金曜日 午後12時15分
Page 125 of 464
Power window control
Features and controls 5-49
5
N00510601144
Use the following procedure to test the sys- tem: 1. Lower the driver’s window. 2. Arm the system as explained in “Armedstage”. 3. Make sure that the theft-alarm indicator comes on and flashe
s for approximately
20 seconds. 4. Wait a few seconds and then unlock thedriver’s side door by using the inside door lock knob. Open the door. 5. Make sure that the horn (the siren forvehicles equipped with the interior alarm sensor) sounds interm
ittently and the
headlights blink when a door is opened.6. Disarm the system by unlocking all doors and the liftgate by using the keyless entry system or the F.A.S.T.-key operation.
N00510800383
Testing the theft-alarm system
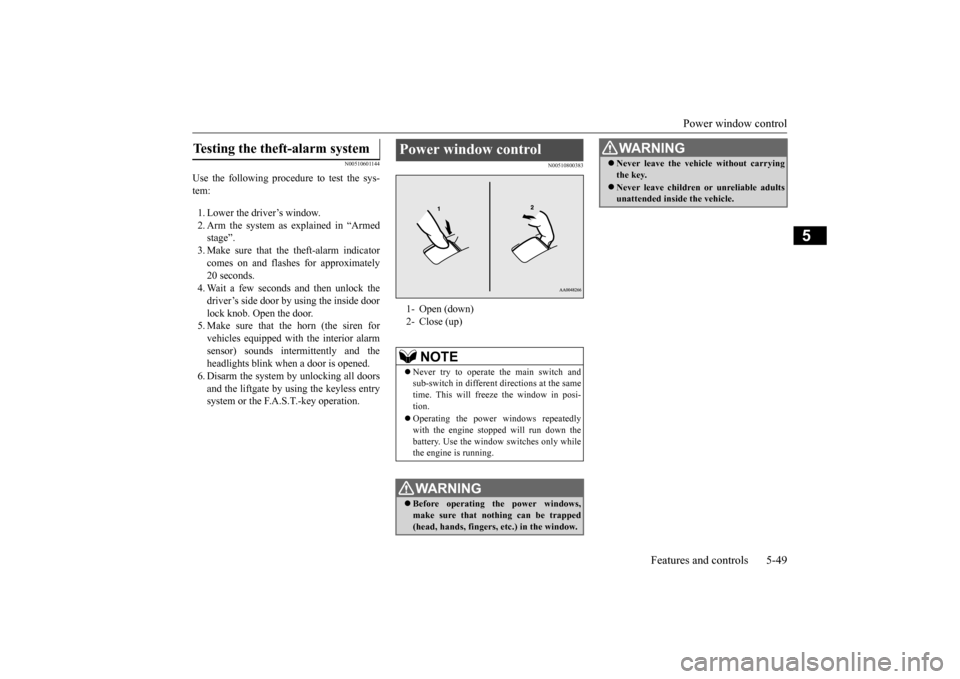
Power window control 1- Open (down)2- Close (up)
NOTE
Never try to operate the main switch and sub-switch in different
directions at the same
time. This will free
ze the window in posi-
tion. Operating the power windows repeatedly with the engine stoppe
d will run down the
battery. Use the window
switches only while
the engine is running.WA R N I N G Before operating the power windows, make sure that nothing can be trapped (head, hands, fingers, etc.) in the window.
Never leave the vehicle without carrying the key. Never leave children
or unreliable adults
unattended inside the vehicle.WA R N I N G
BK0223400US.book 49 ページ 2015年2月13日 金曜日 午後12時15分
Page 132 of 464
Inside rearview mirror 5-56 Features and controls
5
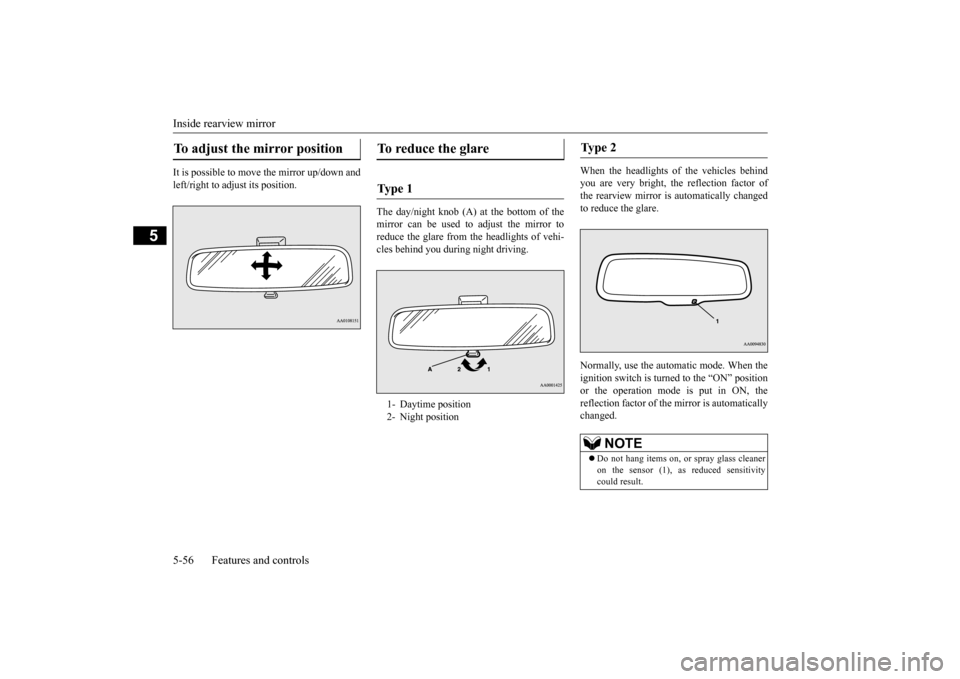
It is possible to move the mirror up/down and left/right to adjust its position.
The day/night knob (A) at
the bottom of the
mirror can be used to adjust the mirror to reduce the glare from the headlights of vehi- cles behind you during night driving.
When the headlights of the vehicles behind you are very bright, the reflection factor of the rearview mirror is automatically changed to reduce the glare. Normally, use the automatic mode. When the ignition switch is turned to the “ON” positionor the operation mode is put in ON, the reflection factor of the mirror is automatically changed.
To adjust the mirror position
To reduce the glare Ty p e 1 1- Daytime position 2- Night position
Ty p e 2
NOTE
Do not hang items on, or
spray glass cleaner
on the sensor (1), as reduced sensitivity could result.
BK0223400US.book 56 ページ 2015年2月13日 金曜日 午後12時15分
Page 133 of 464
Outside rearview mirrors
Features and controls 5-57
5
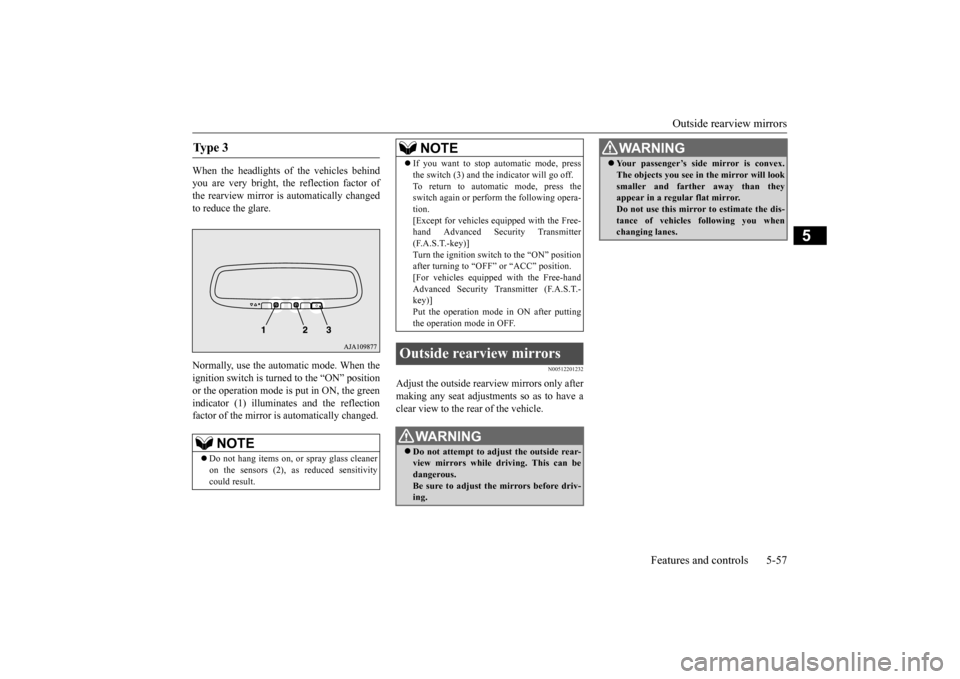
When the headlights of the vehicles behind you are very bright, the reflection factor of the rearview mirror is automatically changed to reduce the glare. Normally, use the automatic mode. When the ignition switch is turn
ed to the “ON” position
or the operation mode is put in ON, the green indicator (1) illuminat
es and the reflection
factor of the mirror is
automatically changed.
N00512201232
Adjust the outside rearview mirrors only after making any seat adjustme
nts so as to have a
clear view to the rear of the vehicle.
Ty p e 3
NOTE
Do not hang items on,
or spray glass cleaner
on the sensors (2), as
reduced sensitivity
could result.
If you want to stop automatic mode, press the switch (3) and the
indicator will go off.
To return to automatic mode, press theswitch again or perfor
m the following opera-
tion. [Except for vehicles e
quipped with the Free-
hand Advanced Security Transmitter (F.A.S.T.-key)] Turn the ignition switch to the “ON” positionafter turning to “OFF” or “ACC” position. [For vehicles equippe
d with the Free-hand
Advanced Security Transmitter (F.A.S.T.-key)] Put the operation mode
in ON after putting
the operation mode in OFF.
Outside rearview mirrors
WA R N I N G Do not attempt to adjust the outside rear- view mirrors while driving. This can be dangerous.Be sure to adjust the mirrors before driv- ing.NOTE
Your passenger’s side mirror is convex. The objects you see in the mirror will looksmaller and farthe
r away than they
appear in a regular flat mirror. Do not use this mirror to estimate the dis- tance of vehicles following you whenchanging lanes.WA R N I N G
BK0223400US.book 57 ページ 2015年2月13日 金曜日 午後12時15分
Page 139 of 464
Starting the engine
Features and controls 5-63
5
This model is equipped with an electronically controlled fuel injection system. This is a sys-tem that automatically controls fuel injection. There is usually no need to depress the accel- erator pedal when starting the engine.The starter should not be run for more than 15 seconds at a time. To prevent battery drai
n, wait a few seconds
between attempts to restart the engine. 1. Make sure all occupants are properly seated with seat belts fastened.
2. Insert the ignition key. 3. Press and hold the brake pedal down withyour right foot. 4. Make sure the selector
lever is in the “P”
(PARK) position.5. Turn the ignition switch to the “ON” posi- tion and make certain that all warning lights are functioning properly beforestarting the engine. 6. Turn the ignition switch to the “START” position without pre
ssing the accelerator
pedal. Release the
ignition switch when
the engine starts.
After several attempts
, you may experience
that the engine still does not start. 1. Make sure that all electric devices, such as lights, air conditi
oning blower and rear
window defogger, are turned off.
2. While depressing the brake pedal, press the accelerator peda
l halfway and hold it
there, then crank the engine. Release the accelerator pedal, immediately after the engine starts.3. If the engine still wi
ll not start, the engine
could be flooded with too much gasoline. While depressing the brake pedal, pushthe accelerator pedal all the way down and hold it there, then crank the engine for 5 to 6 seconds. Return the ignition switch to the “OFF” or “LOCK” position and release the accelerator pedal. Wait a fewseconds, and then crank the engine again for 5 to 6 seconds while depressing the brake pedal, but do
not push the accelera-
tor pedal. Release the ignition key if the engine starts. If the e
ngine fails to start,
repeat these procedures
. If the engine still
will not start, contact your local Mitsubi- shi Motors dealer or a repair facility of your choice for assistance.
When the ambient temperature is -22 °F (-30 °C) or lower, it may not be possible to startfrom a standstill even with the selector lever
WA R N I N G Never run the engine in
a closed or poorly
ventilated area any lo
nger than is needed
to move your vehicle out of the area. Car-bon monoxide gas, whic
h is odorless and
extremely poisonous, could build up and cause serious injury or death.CAUTION Do not push-start the vehicle.Do not run the engine at high rpms or drive at high speeds until th
e engine has had a
chance to warm up. Release the ignition sw
itch as soon as the
engine starts. Otherwise, the starter motor will be damaged
Starting the engine
NOTE
Minor noises may be he
ard on engine start-
up. These will disappear
as the engine warms
up.
When the engine is hard to start
Startability of automatic transaxle vehicle and CVT vehicle with ambient temperature of -22 °F (-30 °C) or lower
BK0223400US.book 63 ページ 2015年2月13日 金曜日 午後12時15分
Page 147 of 464
Continuously variable transmission (CVT) (if so equipped)
Features and controls 5-71
5
For short waiting periods, such as at traffic lights, the vehicle can be
left in gear and held
stationary with the service brake.For longer waiting periods with the engine running, place th
e selector lever in the “N”
(NEUTRAL) position and apply the parkingbrake, while holding th
e vehicle stationary
with the service brake. Prior to moving off after having stopped the vehicle, make sure that the selector lever is in “D” (DRIVE) position or Sports mode posi-tion. To park the vehicle, fi
rst bring it to a com-
plete stop, fully engage the parking brake,
and then move the selector lever to the “P” (PARK) position. If the transaxle does not change gears while driving, or your vehicle does not pick up enough speed when starting on an uphillslope, it may be that there is something unusual happening in the transaxle, causing a safety device to acti
vate. Have your vehicle
checked at an authoriz
ed Mitsubishi Motors
dealer or a repair facility of your choice assoon as possible.
N00560201060
The CVT will automatically and continuouslychange its gear ratio depending on road anddriving conditions. This helps achieve smooth driving and excellent fuel efficiency. If your vehicle is equipped with the spor- tronic steering wheel paddle shifter, you can manually shift up and shift down the trans-mission. Refer to “Sports mode” on page 5-76. The transmission prevents unnecessary upshifts even when the accelerator pedal is released and ensures smooth driving. According to the conditions, the transmission will automatically shift to a lower gear ratioto achieve stronger engine braking. This may help reduce your need
to use the service
brake.
Waiting
CAUTION To avoid transaxle overheating, never try to keep your vehicle stationary on a hill by using the accelerator
pedal. Always apply
the parking brake and/or service brake. Do not rev the engine unnecessarily while the vehicle is stationary. Unexpected acceler-ation may occur if the se
lector lever is in a
position other than “P” (PARK) or “N” (NEUTRAL).
Parking
When the automatic transaxle makes no gear change
NOTE
When the warning display and “SLOW DOWN” or the wa
rning display and
“SERVICE REQUIRED” appear on the information screen in the multi-information display, there could be
a malfunction in the
automatic transaxle. Refer to “Automatic transaxle: Warning di
splay” on page 5-66.
Continuously variable transmission (CVT)
(if so
equipped)DRIVING UPHILL
DRIVING DOWNHILL
BK0223400US.book 71 ページ 2015年2月13日 金曜日 午後12時15分
Page 154 of 464
Continuously variable transmission (CVT) (if so equipped) 5-78 Features and controls
5
To gain extra acceleration in “D” (DRIVE) position (when passing an
other vehicle) push
the accelerator to the floor. The CVT willautomatically downshift.
For short waiting periods, such as at traffic lights, the vehicle can be
left in selector lever
position and held stationary with the servicebrake. For longer waiting periods with the engine running, place th
e selector lever in the “N”
(NEUTRAL) position and apply the parking brake, while holding the vehicle stationary with the service brake.Prior to moving off after having stopped the vehicle, make sure that the selector lever is in “D” (DRIVE) position or Sports mode posi-tion.
To park the vehicle, first bring it to a com- plete stop, fully engage the parking brake, and then move the selector lever to the “P”(PARK) position. If the CVT does not shift while driving, or your vehicle does not pick up enough speed when starting on an uphill slope, it may be that there is something unusual happening inthe transmission, causi
ng a safety device to
activate. Have your ve
hicle checked at an
authorized Mitsubishi Motors dealer or arepair facility of your choice as soon as possi- ble.
Operating the accelerator pedal while the other foot is resting
on the brake pedal will
affect braking efficien
cy and may cause pre-
mature wear of brake pads. Use the selector lever in the correct shift position in accordance
with driving condi-
tions. Never coast downhill backward in the driv-ing shift position {“D” (DRIVE), “DS” (DOWN SHIFT & SPORTY DRVING), “L” (LOW) position or sports mode} or coastforward in the “R” (REVERSE) position. Engine stopping and in
creased brake pedal
and steering effort could
lead to an accident.
Do not rev the engine
with the brake pedal
pressed when the vehi
cle is stationary.
This can damage the CVT. Also, when you depress
the accelera
tor pedal
while holding down the brake pedal with theselector lever in the “D” (DRIVE) position, the engine revolutions
may not rise as high
as when performing the same operation withthe selector lever in the “N” (NEUTRAL) position.
Passing acceleration
CAUTION
NOTE
In sports mode, downshi
fts do not take place
when the accelerator is depressed all the wayto the floor.
Wa i t in g
CAUTION To avoid transmission overheating, never try to keep your vehicle stationary on a hill byusing the accelerator
pedal. Always apply
the parking brake and/or service brake. Do not rev the engine unnecessarily while the vehicle is stationary. Unexpected acceler- ation may occur if the se
lector lever is in a
position other than “P” (PARK) or “N” (NEUTRAL).
Parking
When the CVT makes no speed change
BK0223400US.book 78 ページ 2015年2月13日 金曜日 午後12時15分