seat adjustment MITSUBISHI OUTLANDER 2018 Owner's Manual (in English)
[x] Cancel search | Manufacturer: MITSUBISHI, Model Year: 2018, Model line: OUTLANDER, Model: MITSUBISHI OUTLANDER 2018Pages: 441, PDF Size: 13.71 MB
Page 3 of 441
Instruments and controls1-1
1
Overview
N00100202788
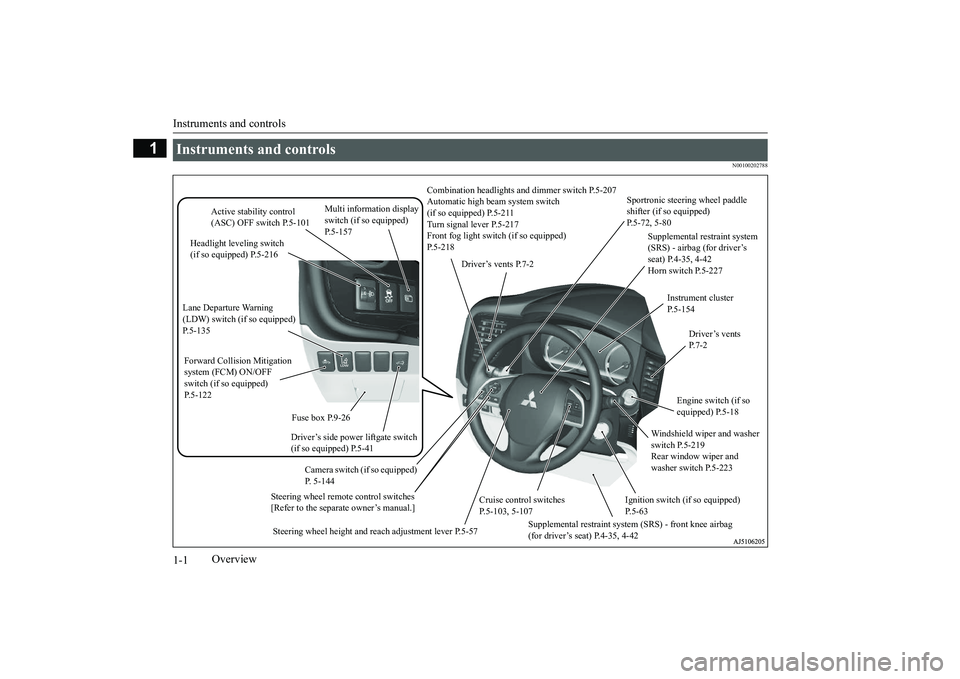
Instruments and controls
Combination headlights an
d dimmer switch P.5-207
Automatic high beam system switch (if so equipped) P.5-211Turn signal lever P.5-217 Front fog light switc
h (if so equipped)
P.5-218
Steering wheel remote control switches[Refer to the separate owner’s manual.]
Active stability control (ASC) OFF switch P.5-101
Supplemental restraint system (SRS) - airbag (for driver’s seat) P.4-35, 4-42Horn switch P.5-227
Instrument clusterP.5-154
Windshield wiper and washer switch P.5-219Rear window wiper and washer switch P.5-223
Cruise control switches P.5-103, 5-107
Steering wheel height and reach adjustment lever P.5-57
Engine switch (if so equipped) P.5-18
Driver’s ventsP. 7 - 2
Sportronic steering wheel paddle shifter (if so equipped) P.5-72, 5-80
Driver’s vents P.7-2
Multi information display switch (if so equipped)
Headlight leveling switch (if so equipped) P.5-216
Driver’s side power liftgate switch (if so equipped) P.5-41Fuse box P.9-26
Lane Departure Warning (LDW) switch (if so equipped)Forward Collision Mitigation system (FCM) ON/OFF switch (if so equipped)P.5-122
Supplemental restraint system (SRS) - front knee airbag (for driver’s seat) P.4-35, 4-42
Ignition switch (if so equipped) P.5-63
Camera switch (if so equipped) P. 5-144
BK0249100US.book 1 ページ 2017年5月10日 水曜日 午前8時49分
Page 33 of 441
Seats and restraint systems4-4 Seat and restraint systems
4
N00401601251
Your vehicle has seat
belts and other safety
features that help protect you and your pas-sengers in an accident.Seat belts are the most important safetydevice. When worn properly, seat belts canreduce the chance of serious injury or deathin various types of crashes. For added protec-tion during a severe fr
ontal collision, your
vehicle has a Supplemental Restraint System(SRS) with airbags for the driver and passen-gers. The seats, head restraints, and doorlocks also are safety equipment, which mustbe used correctly.Always check the following before you drive:That everyone in your vehicle is properlywearing their seat belt.That infants and small children are prop-erly secured in an appropriate childrestraint system in the rear seat.That all doors are fully closed and locked.That seatbacks are upright, with headrestraints properly adjusted.
Safety equipment cannot prevent injury ordeath in all motor ve
hicle accidents. How-
ever, you can help reduce the risk of injury ordeath, by following the instructions in thismanual.
N00401801426
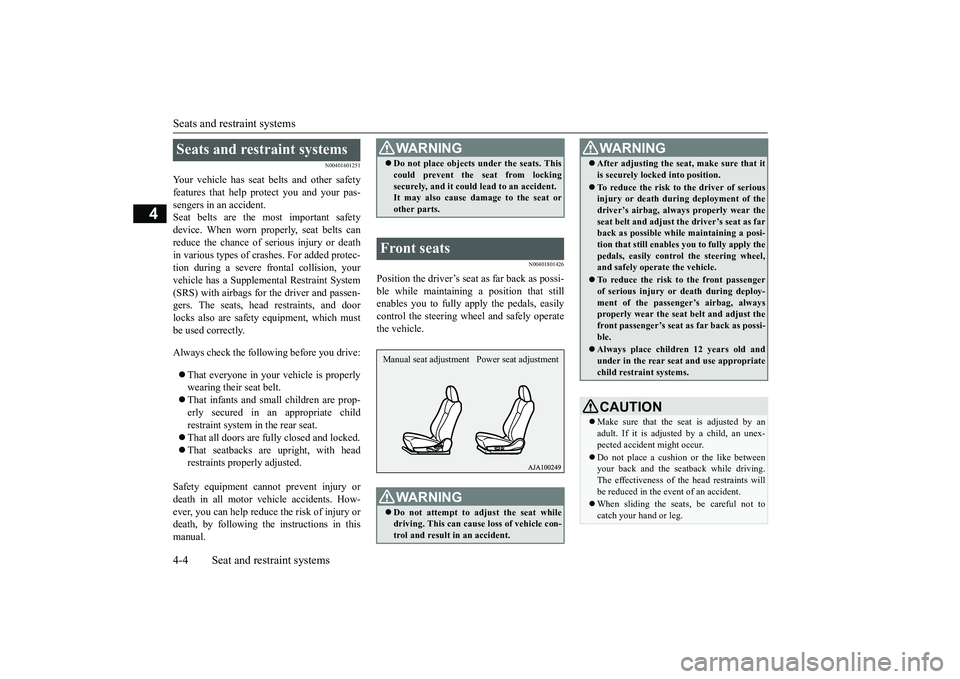
Position the driver’s seat
as far back as possi-
ble while maintaining a position that stillenables you to fully apply the pedals, easilycontrol the steering wh
eel and safely operate
the vehicle.
Seats and restraint systems
WA R N I N GDo not place objects under the seats. Thiscould prevent the seat from lockingsecurely, and it could
lead to an accident.
It may also cause damage to the seat orother parts.
Front seats
WA R N I N GDo not attempt to adjust the seat whiledriving. This can cause loss of vehicle con-trol and result
in an accident.
Manual seat adjustment Power seat adjustment
After adjusting the seat, make sure that itis securely locked into position.To reduce the risk to the driver of seriousinjury or death duri
ng deployment of the
driver’s airbag, always
properly wear the
seat belt and adjust th
e driver’s seat as far
back as possible while maintaining a posi-tion that still enables
you to fully apply the
pedals, easily control the steering wheel,and safely operate the vehicle.To reduce the risk to the front passengerof serious injury or
death during deploy-
ment of the passeng
er’s airbag, always
properly wear the seat
belt and adjust the
front passenger’s seat as far back as possi-ble.Always place childr
en 12 years old and
under in the rear seat
and use appropriate
child restraint systems.CAUTIONMake sure that the seat is adjusted by anadult. If it is adjusted by a child, an unex-pected accident might occur.Do not place a cushion
or the like between
your back and the seatback while driving.The effectiveness of the head restraints willbe reduced in the event of an accident.When sliding the seat
s, be careful not to
catch your hand or leg.WA R N I N G
BK0249100US.book 4 ページ 2017年5月10日 水曜日 午前8時49分
Page 34 of 441
Front seats
Seat and restraint systems 4-5
4
N00401901326
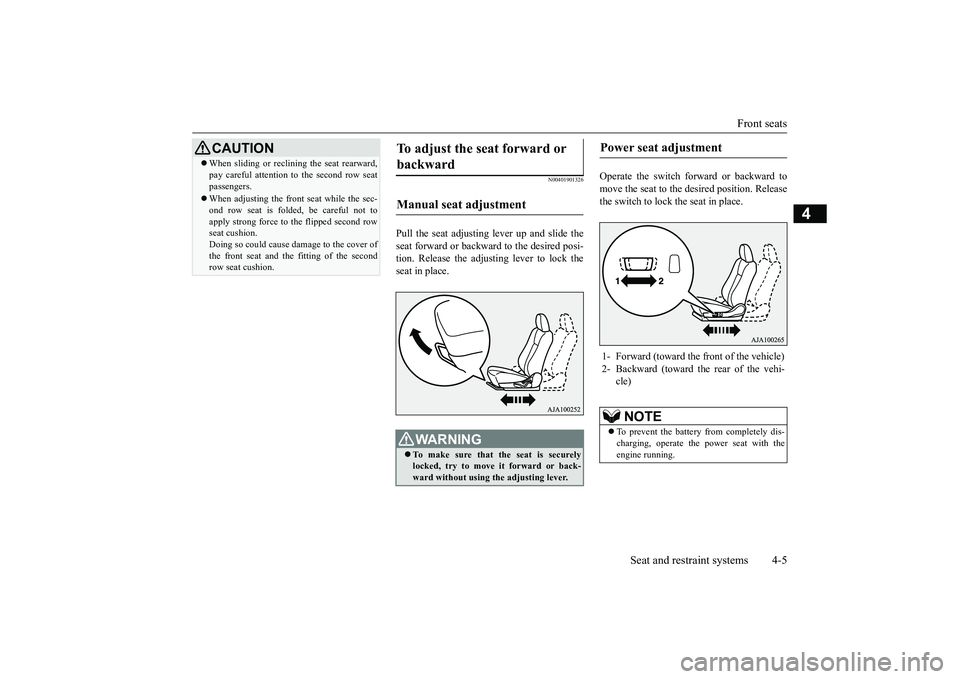
Pull the seat adjusting lever up and slide theseat forward or backward to the desired posi-tion. Release the adjusting lever to lock theseat in place.
Operate the switch forward or backward tomove the seat to the de
sired position. Release
the switch to lock the seat in place.
When sliding or reclin
ing the seat rearward,
pay careful attention
to the second row seat
passengers.When adjusting the front seat while the sec-ond row seat is folded, be careful not toapply strong force to the flipped second rowseat cushion.Doing so could cause da
mage to the cover of
the front seat and the
fitting of the second
row seat cushion.CAUTION
To adjust the seat forward or backward Manual seat adjustment
WA R N I N GTo make sure that the seat is securelylocked, try to move
it forward or back-
ward without using
the adjusting lever.
Power seat adjustment 1- Forward (toward the front of the vehicle)2- Backward (toward the rear of the vehi-
cle)NOTE
To prevent the battery from completely dis-charging, operate the
power seat with the
engine running.
BK0249100US.book 5 ページ 2017年5月10日 水曜日 午前8時49分
Page 35 of 441
Front seats4-6 Seat and restraint systems
4
N00402001379
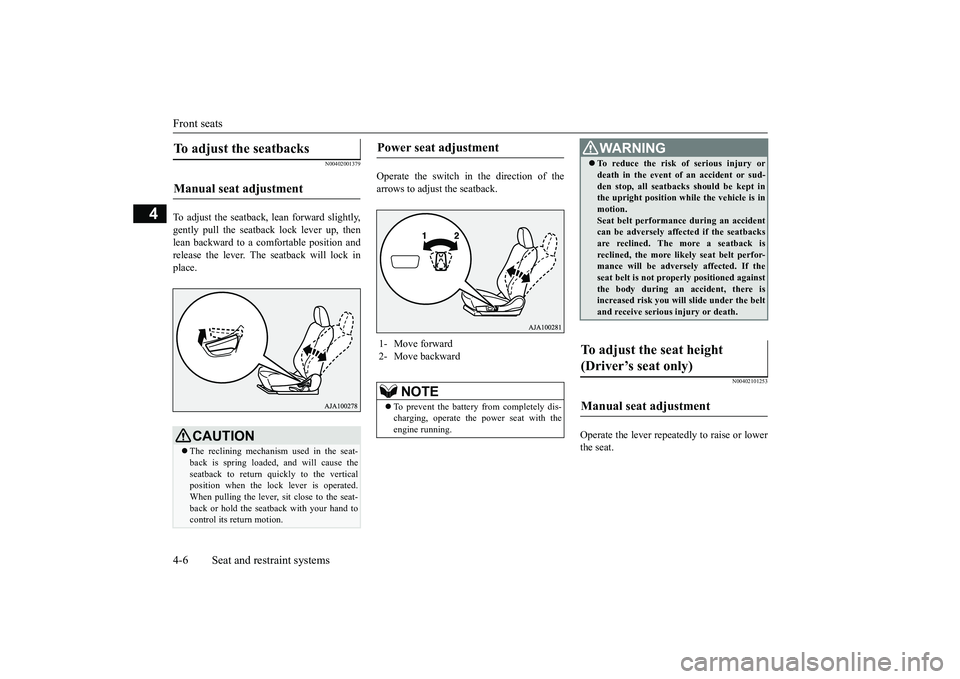
To adjust the seatback, lean forward slightly,gently pull the seatback lock lever up, thenlean backward to a comfortable position andrelease the lever. The seatback will lock inplace.
Operate the switch in the direction of thearrows to adjust the seatback.
N00402101253
Operate the lever repeatedly to raise or lowerthe seat.
To adjust the seatbacks Manual seat adjustment
CAUTIONThe reclining mechanism used in the seat-back is spring loaded, and will cause theseatback to return quickly to the verticalposition when the lock lever is operated.When pulling the lever, sit close to the seat-back or hold the seatback with your hand tocontrol its return motion.
Power seat adjustment 1- Move forward2- Move backward
NOTE
To prevent the battery from completely dis-charging, operate the
power seat with the
engine running.
WA R N I N GTo reduce the risk of serious injury ordeath in the event of
an accident or sud-
den stop, all seatbacks should be kept inthe upright position while the vehicle is inmotion.Seat belt performance during an accidentcan be adversely affect
ed if the seatbacks
are reclined. The more a seatback isreclined, the more likely seat belt perfor-mance will be adversely affected. If theseat belt is not proper
ly positioned against
the body during an accident, there isincreased risk you will slide under the beltand receive serious
injury or death.
To adjust the seat height (Driver’s seat only) Manual seat adjustment
BK0249100US.book 6 ページ 2017年5月10日 水曜日 午前8時49分
Page 36 of 441
Front seats
Seat and restraint systems 4-7
4
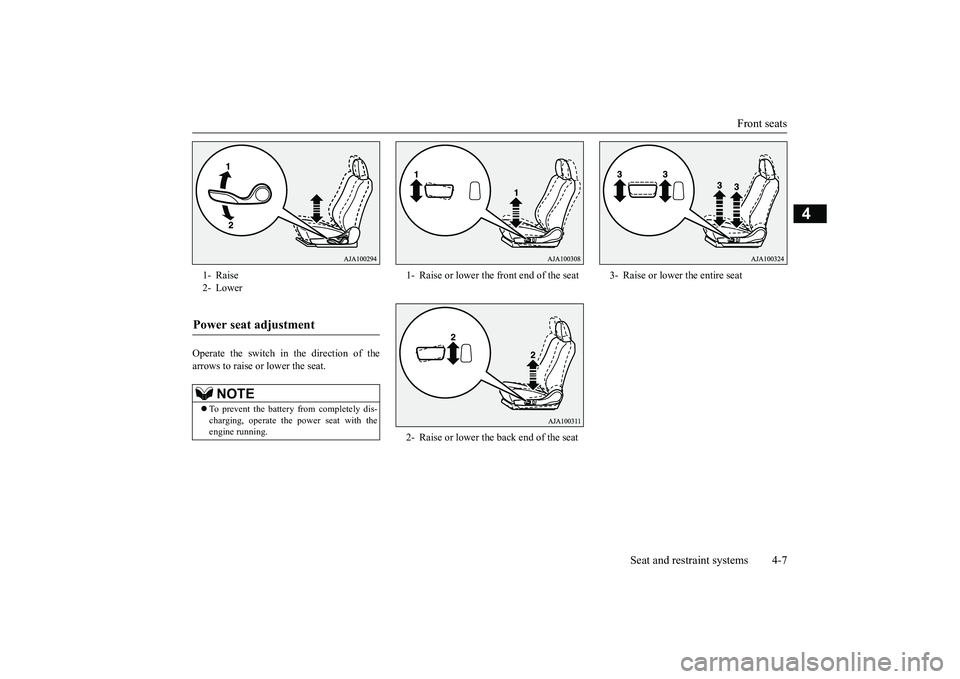
Operate the switch in the direction of thearrows to raise or
lower the seat.
1- Raise2- LowerPower seat adjustment
NOTE
To prevent the battery from completely dis-charging, operate the
power seat with the
engine running.
1- Raise or lower the
front end of the seat
2- Raise or lower the back end of the seat
3- Raise or lower the entire seat
BK0249100US.book 7 ページ 2017年5月10日 水曜日 午前8時49分
Page 40 of 441
Head restraints
Seat and restraint systems 4-11
4
N00404301594
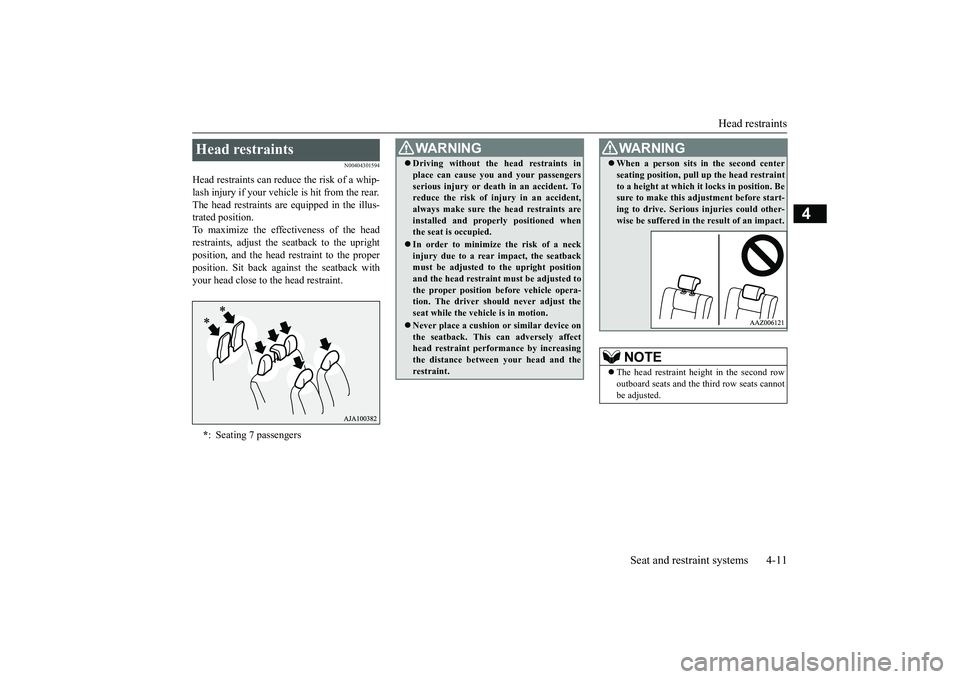
Head restraints can reduce the risk of a whip-lash injury if your vehicle is hit from the rear.The head restraints are equipped in the illus-trated position.To maximize the effectiveness of the headrestraints, adjust the seatback to the uprightposition, and the head
restraint to the proper
position. Sit back against the seatback withyour head close to the head restraint.Head restraints *: Seating 7 passengers
WA R N I N GDriving without the
head restraints in
place can cause you and your passengersserious injury or deat
h in an accident. To
reduce the risk of in
jury in an accident,
always make sure the head restraints areinstalled and proper
ly positioned when
the seat is occupied.In order to minimize
the risk of a neck
injury due to a rear impact, the seatbackmust be adjusted to the upright positionand the head restraint
must be adjusted to
the proper position
before vehicle opera-
tion. The driver shou
ld never adjust the
seat while the vehicle is in motion.Never place a cushion
or similar device on
the seatback. This can adversely affecthead restraint performance by increasingthe distance betwee
n your head and the
restraint.
When a person sits in the second centerseating position, pull up
the head restraint
to a height at which it locks in position. Besure to make this adjustment before start-ing to drive. Serious injuries could other-wise be suffered in the result of an impact.NOTE
The head restraint height in the second rowoutboard seats and the third row seats cannotbe adjusted.WA R N I N G
BK0249100US.book 11 ページ 2017年5月10日 水曜日 午前8時49分
Page 41 of 441
Head restraints4-12 Seat and restraint systems
4
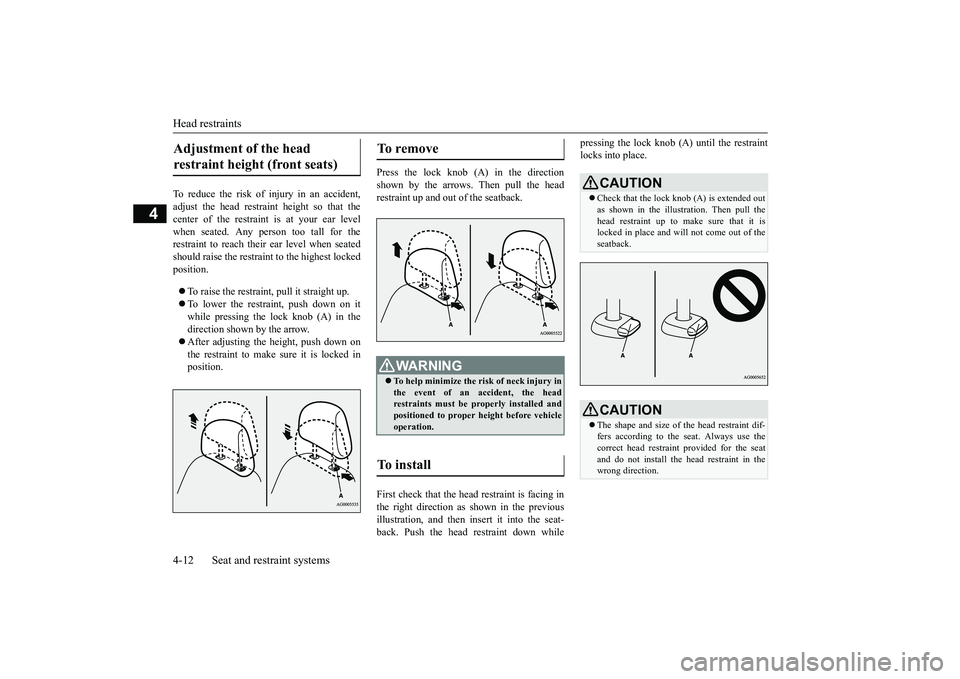
To reduce the risk of injury in an accident,adjust the head restraint height so that thecenter of the restrain
t is at your ear level
when seated. Any person too tall for therestraint to reach their ear level when seatedshould raise the restraint to the highest lockedposition.To raise the restraint, pull it straight up.To lower the restraint, push down on itwhile pressing the lock knob (A) in thedirection shown by the arrow.After adjusting the height, push down onthe restraint to make sure it is locked inposition.
Press the lock knob (A) in the directionshown by the arrows. Then pull the headrestraint up and out of the seatback.First check that the head restraint is facing inthe right direction as shown in the previousillustration, and then insert it into the seat-back. Push the head restraint down while
pressing the lock knob (A) until the restraintlocks into place.
Adjustment of the head restraint height (front seats)
To remove
WA R N I N GTo help minimize the risk of neck injury inthe event of an accident, the headrestraints must be properly installed andpositioned to proper height before vehicleoperation.
To install
CAUTIONCheck that the lock knob (A) is extended outas shown in the illustration. Then pull thehead restraint up to make sure that it islocked in place and will
not come out of the
seatback.CAUTIONThe shape and size of the head restraint dif-fers according to the seat. Always use thecorrect head restraint provided for the seatand do not install the he
ad restraint in the
wrong direction.
BK0249100US.book 12 ページ 2017年5月10日 水曜日 午前8時49分
Page 42 of 441
Making a cargo area
Seat and restraint systems 4-13
4
N00405501115
N00405701146
The second row seat can be folded to createan additional cargo area.
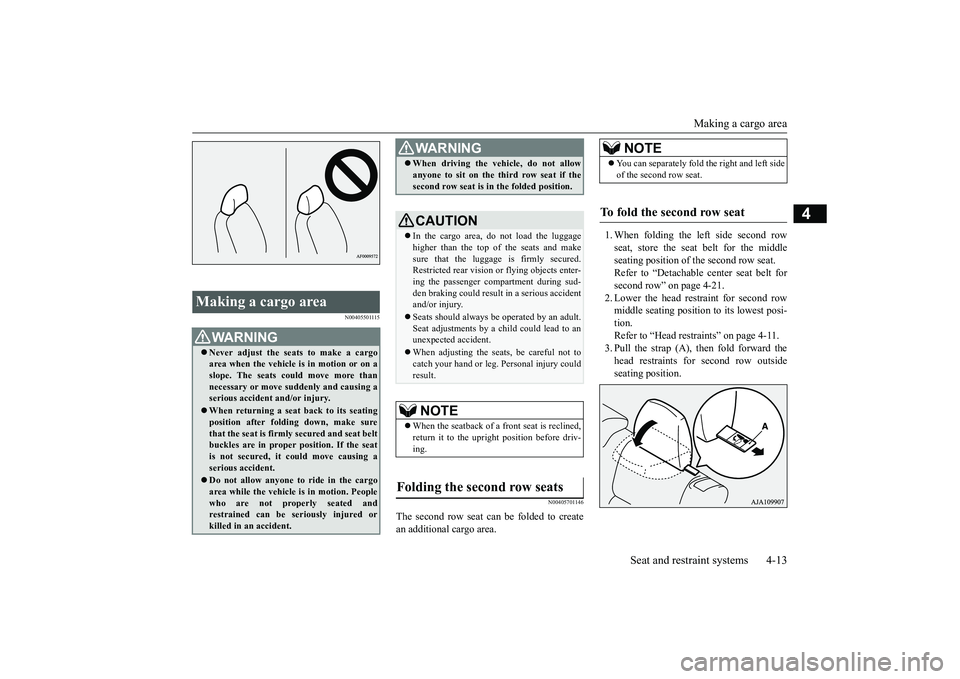
1. When folding the left side second rowseat, store the seat belt for the middleseating position of the second row seat.Refer to “Detachable
center seat belt for
second row” on page 4-21.2. Lower the head restraint for second rowmiddle seating position to its lowest posi-tion.Refer to “Head restraints” on page 4-11.3. Pull the strap (A), then fold forward thehead restraints for second row outsideseating position.
Making a cargo area
WA R N I N GNever adjust the seats to make a cargoarea when the vehicle is in motion or on aslope. The seats co
uld move more than
necessary or move su
ddenly and causing a
serious accident
and/or injury.
When returning a seat back to its seatingposition after fold
ing down, make sure
that the seat is firmly secured and seat beltbuckles are in proper position. If the seatis not secured, it could move causing aserious accident.Do not allow anyone to ride in the cargoarea while the vehicle
is in motion. People
who are not properly seated andrestrained can be seriously injured orkilled in an accident.
When driving the vehicle, do not allowanyone to sit on the third row seat if thesecond row seat is in the folded position.CAUTIONIn the cargo area, do not load the luggagehigher than the top of the seats and makesure that the luggage is firmly secured.Restricted rear vision or
flying objects enter-
ing the passenger compartment during sud-den braking could result
in a serious accident
and/or injury.Seats should always be
operated by an adult.
Seat adjustments by a child could lead to anunexpected accident.When adjusting the seats, be careful not tocatch your hand or leg.
Personal injury could
result.NOTE
When the seatback of a front seat is reclined,return it to the upright
position before driv-
ing.
Folding the second row seats
WA R N I N G
NOTE
You can separately fold
the right and left side
of the second row seat.
To fold the second row seat
BK0249100US.book 13 ページ 2017年5月10日 水曜日 午前8時49分
Page 138 of 441
Steering wheel height
and reach adjustment
Features and controls 5-57
5
Warning light (yellow)Warning displayIf there is a malfunction in the system, thewarning light will come on. In addition, thewarning display appears on the informationscreen in the multi information display.
Under normal conditions, the warning lightonly comes on when the operation mode isput in ON and goes off a few seconds later.
N00511501241
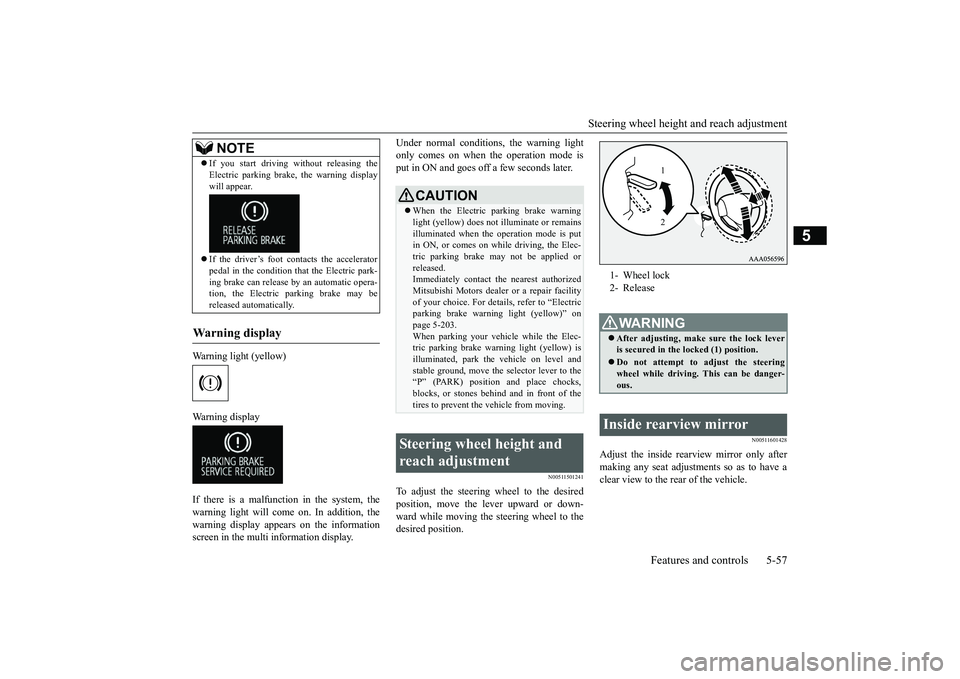
To adjust the steering wheel to the desiredposition, move the lever upward or down-ward while moving the steering wheel to thedesired position.
N00511601428
Adjust the inside rearview mirror only aftermaking any seat adjustme
nts so as to have a
clear view to the rear of the vehicle.
If you start driving wi
thout releasing the
Electric parking brake, the warning displaywill appear.If the driver’s foot contacts the acceleratorpedal in the condition th
at the Electric park-
ing brake can release by an automatic opera-tion, the Electric parking brake may bereleased automatically.
Wa r n i n g d is p la y
NOTE
CAUTIONWhen the Electric parking brake warninglight (yellow) does not
illuminate or remains
illuminated when the operation mode is putin ON, or comes on while driving, the Elec-tric parking brake may not be applied orreleased.Immediately contact the nearest authorizedMitsubishi Motors dealer
or a repair facility
of your choice. For detail
s, refer to “Electric
parking brake warni
ng light (yellow)” on
page 5-203.When parking your vehi
cle while the Elec-
tric parking brake warning light (yellow) isilluminated, park th
e vehicle on level and
stable ground, move the
selector lever to the
“P” (PARK) position and place chocks,blocks, or stones behind and in front of thetires to prevent the vehicle from moving.
Steering wheel height and reach adjustment
1- Wheel lock2- ReleaseWA R N I N GAfter adjusting, make sure the lock leveris secured in the locked (1) position.Do not attempt to adjust the steeringwheel while driving. This can be danger-ous.
Inside rearview mirror
12
BK0249100US.book 57 ページ 2017年5月17日 水曜日 午後2時31分
Page 320 of 441
Storage spaces
Features and controls 5-239
5
The lights come on again if the ignitionswitch or the engine switch is operated, ifany door or liftgate is opened or closed, orif the keyless entry or F.A.S.T.-key isoperated.
N00526401567
N00551501298
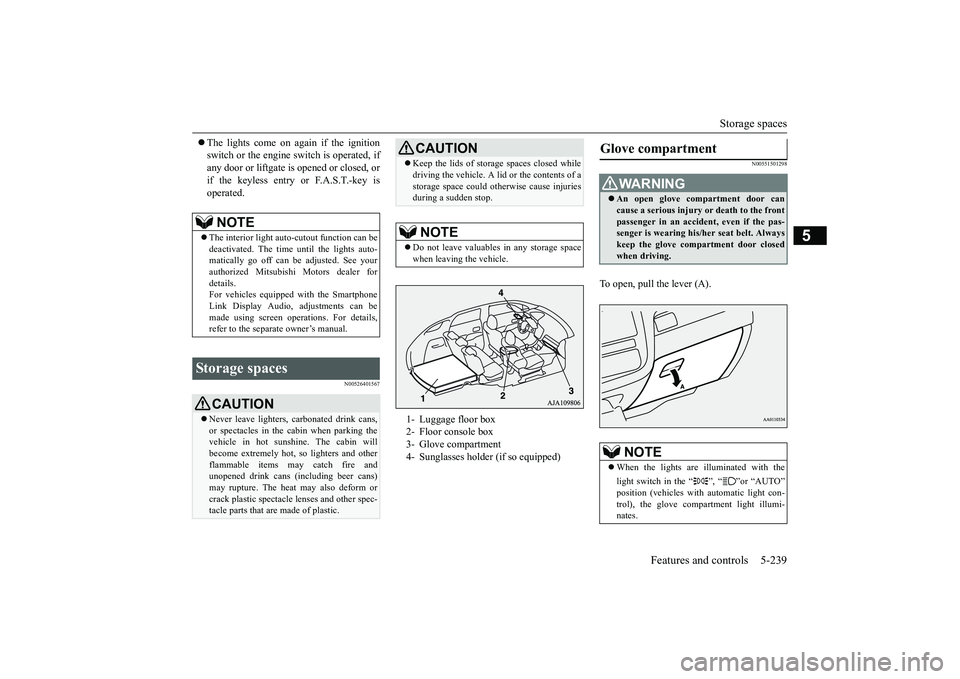
To open, pull the lever (A).
NOTE
The interior light auto-cutout function can bedeactivated. The time until the lights auto-matically go off can
be adjusted. See your
authorized Mitsubishi Motors dealer fordetails.For vehicles equipped with the SmartphoneLink Display Audio, adjustments can bemade using screen ope
rations. For details,
refer to the separa
te owner’s manual.
Storage spaces
CAUTIONNever leave lighters,
carbonated drink cans,
or spectacles in the cabin when parking thevehicle in hot suns
hine. The cabin will
become extremely hot,
so lighters and other
flammable items may catch fire andunopened drink cans (i
ncluding beer cans)
may rupture. The heat may also deform orcrack plastic spectacle
lenses and other spec-
tacle parts that ar
e made of plastic.
Keep the lids of storage spaces closed whiledriving the vehicle. A lid or the contents of astorage space could ot
herwise cause injuries
during a sudden stop.NOTE
Do not leave valuables in any storage spacewhen leaving the vehicle.1- Luggage floor box2- Floor console box3- Glove compartment4- Sunglasses holder (if so equipped)
Glove compartment
WA R N I N GAn open glove compartment door cancause a serious injury or death to the frontpassenger in an accident, even if the pas-senger is wearing his/
her seat be
lt. Always
keep the glove comp
artment door closed
when driving.NOTE
When the lights are illuminated with thelight switch in the “ ”, “ ”or “AUTO”
automatic light con-
trol), the glove compartment light illumi-nates.
BK0249100US.book 239 ページ 2017年5月10日 水曜日 午前8時49分