ECO mode MITSUBISHI OUTLANDER 2020 (in English) Owner's Guide
[x] Cancel search | Manufacturer: MITSUBISHI, Model Year: 2020, Model line: OUTLANDER, Model: MITSUBISHI OUTLANDER 2020Pages: 443, PDF Size: 60.03 MB
Page 141 of 443
Steering wheel height and reach adjustment 5-60 Features and controls
5
Warning light Warning display If there is a malfunction in the system, the warning light will come
on. In addition, the
warning display appears on the information screen in the multi information display.
Under normal conditions
, the warning light
only comes on when the operation mode isput in ON and goes off a few seconds later.
N00511501241
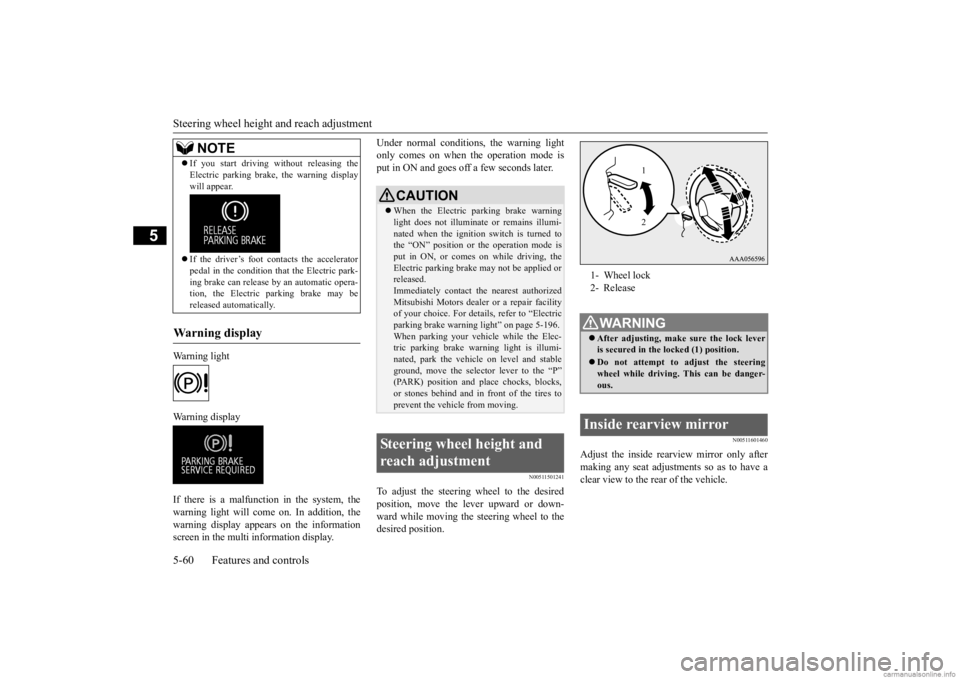
To adjust the steering wheel to the desiredposition, move the lever upward or down- ward while moving the steering wheel to the desired position.
N00511601460
Adjust the inside rearview mirror only after making any seat adjustme
nts so as to have a
clear view to the rear of the vehicle.
If you start driving without releasing the Electric parking brake,
the warning display
will appear. If the driver’s foot contacts the accelerator pedal in the condition th
at the Electric park-
ing brake can release
by an automatic opera-
tion, the Electric parking brake may be released automatically.
Warning display
NOTE
CAUTION When the Electric parking brake warning light does not i
lluminate or remains illumi-
nated when the ignition switch is turned to the “ON” position or
the operation mode is
put in ON, or comes on while driving, theElectric parking brake
may not be applied or
released. Immediately contact the nearest authorizedMitsubishi Motors dealer
or a repair facility
of your choice. For details, refer to “Electric parking brake warni
ng light” on page 5-196.
When parking your vehi
cle while
the Elec-
tric parking brake warning light is illumi- nated, park the vehicl
e on level and stable
ground, move the select
or lever to the “P”
(PARK) position and pl
ace chocks, blocks,
or stones behind and in front of the tires toprevent the vehicle from moving.
Steering wheel height and reach adjustment
1- Wheel lock 2- ReleaseWA R N I N G After adjusting, make
sure the lock lever
is secured in the locked (1) position. Do not attempt to adjust the steering wheel while driving. This can be danger-ous.
Inside rearview mirror
1 2
BK0278200US.book 60 ページ 2019年4月10日 水曜日 午前10時59分
Page 145 of 443

Outside rearview mirrors 5-64 Features and controls
5
N00549201256
The outside mirror can be retracted towards the side window to prevent damage when parking in tight locations. Push the mirror towards the back of the vehi- cle with your hand to retract it in. When extending the mirror, pull it out towards thefront of the vehicle until it clicks to lock in place.
With the ignition switch in the “ON” or “ACC” position or the operation mode in ON or ACC, push the mirror retractor switch to retract the mirrors. Push it again to extend the mirrors to their original positions. After placing the ignition switch in the“LOCK” position or the operation mode in OFF, it is possible to retract and extend the mirrors using the mirror retractor switch forapproximately 30 seconds.
4- Left
NOTE
After adjusting, return the lever to the “•”(OFF) position.
To retract the mirror Except for vehicles equipped with the mirror retractor switch
For vehicles equipped with the mirror retractor switchRetracting and extending the mir- rors using the mirror retractor switch
CAUTION It is possible to retract and extend the mirrors by hand. After retracti
ng a mirror using the
mirror retractor switch, however, you shouldextend it by using the switch again, not by hand. If you extended the mirror by hand after retracting it usi
ng the switch, it would
not properly lock in position. As a result, the mirror could move be
cause of the wind or
vibration while you are driving, and this mayprevent the driver’s rearward visibility.NOTE
Be careful not to get your hands trapped while a mirror is moving. If you move a mirror by hand or it moves after hitting a person or object, you may not be able to return it to its original positionusing the mirror retractor switch. If this hap- pens, push the mirror retractor switch to place the mirror in its retracted position andthen push the switch again to return the mir- ror to its original position. When freezing has occu
rred and mirrors fail
to operate as intended, please refrain from repeated pushing of the retractor switch asthis action can result
in burn-out of the mir-
ror motor circuits.
BK0278200US.book 64 ページ 2019年4月10日 水曜日 午前10時59分
Page 150 of 443
Starting the engine
Features and controls 5-69
5
This model is equipped with an electronically controlled fuel injection system. This is a sys-tem that automatically controls fuel injection. There is usually no need to depress the accel- erator pedal when starting the engine.The starter should not be run for more than 15 seconds at a time. To prevent battery drai
n, wait a few seconds
between attempts to restart the engine. 1. Make sure all occupants are properly seated with seat belts fastened.
2. Insert the ignition key. 3. Press and hold the brake pedal downfirmly with your right foot. 4. Make sure the selector
lever is in the “P”
(PARK) position.5. Turn the ignition switch to the “ON” posi- tion and make certain that all warning lights are functioning properly beforestarting the engine. 6. Turn the ignition switch to the “START” position without pre
ssing the accelerator
pedal. Release the
ignition switch when
the engine starts.
After several attempts
, you may experience
that the engine still does not start. 1. Make sure that all electric devices, such as lights, air conditi
oning blower and rear
window defogger, are turned off.
2. While depressing the brake pedal, press the accelerator peda
l halfway and hold it
there, then crank the engine. Release the accelerator pedal, immediately after the engine starts.3. If the engine still wi
ll not start, the engine
could be flooded with too much gasoline. While depressing the brake pedal, pushthe accelerator pedal all the way down and hold it there, then crank the engine for 5 to 6 seconds. Return the ignition switch to the “OFF” or “LOCK” position and release the accelerator pedal. Wait a fewseconds, and then crank the engine again for 5 to 6 seconds while depressing the brake pedal, but do
not push the accelera-
tor pedal. Release the ignition switch if the engine starts. If the engine fails to start, repeat these procedures. If theengine still will not
start, contact your
local Mitsubishi Motors dealer or a repair facility of your choi
ce for assistance.
When the ambient temperature is -22 °F (-30 °C) or lower, it may not be possible to startfrom a standstill even with the selector lever
WA R N I N G Never run the engine in
a closed or poorly
ventilated area any lo
nger than is needed
to move your vehicle out of the area. Car-bon monoxide gas, whic
h is odorless and
extremely poisonous, could build up and cause serious injury or death.CAUTION Do not push-start the vehicle.Do not run the engine at high rpms or drive at high speeds until th
e engine has had a
chance to warm up. Release the ignition sw
itch as soon as the
engine starts. Otherwise, the starter motor will be damaged
Starting the engine
NOTE
Minor noises may be he
ard on engine start-
up. These will disappear
as the engine warms
up.
When the engine is hard to start
Startability of automatic transaxle vehicle and CVT vehicle with ambient temperature of -22 °F (-30 °C) or lower
BK0278200US.book 69 ページ 2019年4月10日 水曜日 午前10時59分
Page 151 of 443
Automatic transaxle (if so equipped) 5-70 Features and controls
5
in the “D” (DRIVE) or “R” (REVERSE) position.This occurs because the transaxle has not warmed up sufficiently; it does not indicate a problem. If this occurs
, place the selector
lever in the “P” (PARK) position and let the engine idle for at least 10 minutes. The transaxle will wa
rm up, and you will be
able to start normally. Do not leave the vehicle during warm-up operation. The MIVEC engine automatically switches its intake-valve contro
l between a low-speed
mode and a high-speed mode in accordance with driving conditions for maximum engineperformance.
N00513200216
Automatic transaxle will automaticallychange its gear depending on road and driv-ing conditions. This
helps achieve smooth
driving and excellent fuel efficiency. Also you can manually shift up and shiftdown the transaxle. Refer to “Sports mode” on page 5-73. The transaxle prevents unnecessary upshifts even when the accelerator pedal is releasedand ensures smooth driving. According to the conditions, the transaxle will automatically shift to a lower gear to achieve stronger engine
braking. This may
help reduce your need to use the servicebrake.
N00513801424
As an additional safe
ty precaution, models
equipped with an automatic transaxle have a shift-lock device that
holds the selector lever
in the “P” (PARK) position. To move theselector lever from the “P” (PARK) position to another position, follow the steps below. 1. Press and hold the brake pedal down. 2. Move the selector
lever to the desired
position.
The transaxle has 6 forward gears and 1 reverse gear.
Using the MIVEC engine
NOTE
To protect the engine, the high-speed mode may not be selected wh
ile the engine coolant
temperature is low. In such a case, the engine revolutions do not rise to over 5,000 rpmeven if the accelerator pedal is depressed.
Automatic transaxle
(if so
equipped)DRIVING UPHILL
DRIVING DOWNHILL
NOTE
During the break-in pe
riod or immediately
after reconnecting the
battery, your vehicle
may not shift smoothly. This does not indi-cate a problem in the transaxle. Shifting will become smoother once the transaxle has been shifted several
times by the electronic
control system.
Selector lever operation
NOTE
The selector lever ca
nnot be moved from “P”
(PARK) to other posit
ion if the operation
mode is put in OFF or
ACC, or if the brake
pedal is not pressed and held down.
BK0278200US.book 70 ページ 2019年4月10日 水曜日 午前10時59分
Page 152 of 443
Automatic transaxle (if so equipped)
Features and controls 5-71
5
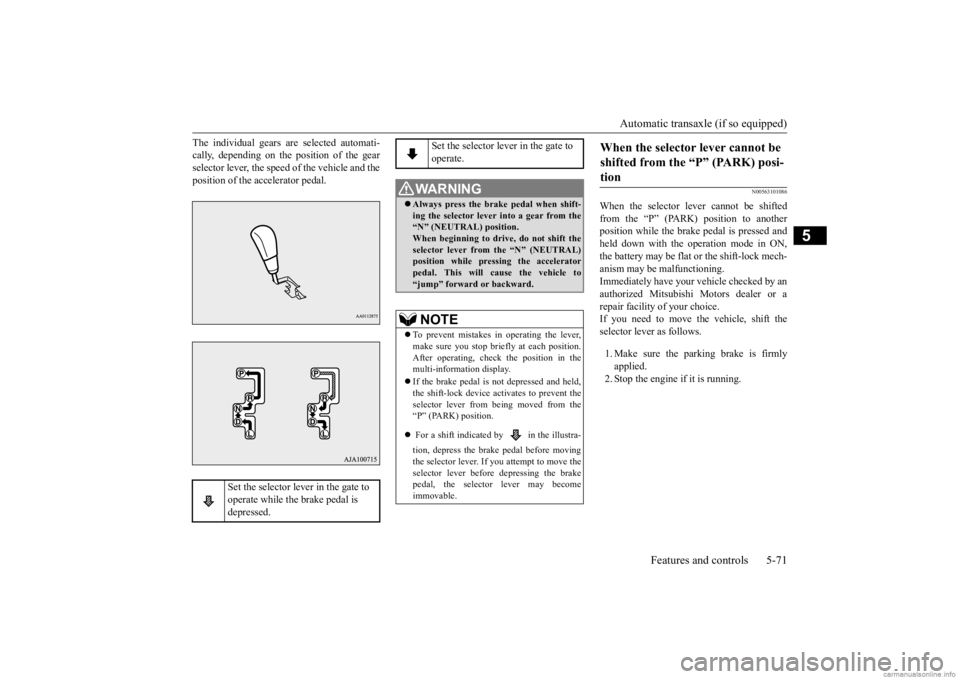
The individual gears are selected automati- cally, depending on the position of the gearselector lever, the speed of the vehicle and the position of the accelerator pedal.
N00563101086
When the selector lever cannot be shifted from the “P” (PARK) position to anotherposition while the brake
pedal is pressed and
held down with the operation mode in ON, the battery may be flat or the shift-lock mech-anism may be malfunctioning. Immediately have your
vehicle checked by an
authorized Mitsubishi Motors dealer or a repair facility
of your choice.
If you need to move the vehicle, shift theselector lever as follows. 1. Make sure the parking brake is firmly applied. 2. Stop the engine if it is running.
Set the selector lever in the gate to operate while the brake pedal is depressed.
Set the selector lever in the gate to operate.
WA R N I N G Always press the brak
e pedal when shift-
ing the selector
lever into a gear from the
“N” (NEUTRAL) position. When beginning to drive, do not shift theselector lever from
the “N” (NEUTRAL)
position while pressing the accelerator pedal. This will cause the vehicle to“jump” forward or backward.NOTE
To prevent mistakes in operating the lever, make sure you stop brie
fly at each position.
After operating, check
the position in the
multi-information display. If the brake pedal is not depressed and held, the shift-lock device activates to prevent theselector lever from being moved from the “P” (PARK) position. For a shift indicated by in the illustra- tion, depress the brake pedal before moving the selector lever. If you attempt to move theselector lever before
depressing the brake
pedal, the selector
lever may become
immovable.
When the selector lever cannot be shifted from the “P” (PARK) posi-tion
BK0278200US.book 71 ページ 2019年4月10日 水曜日 午前10時59分
Page 155 of 443
Automatic transaxle (if so equipped) 5-74 Features and controls
5
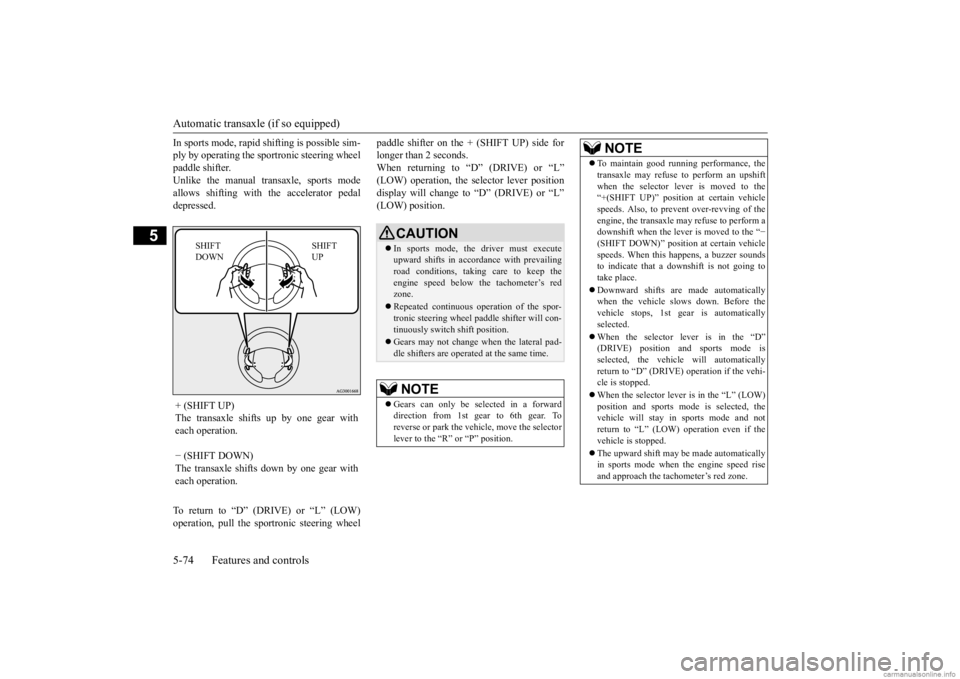
In sports mode, rapid
shifting is possible sim-
ply by operating the sportronic steering wheelpaddle shifter. Unlike the manual transaxle, sports mode allows shifting with the accelerator pedaldepressed. To return to “D” (DRIVE) or “L” (LOW) operation, pull the spor
tronic steering wheel
paddle shifter on the + (SHIFT UP) side for longer than 2 seconds.When returning to “D” (DRIVE) or “L” (LOW) operation, the selector lever position display will change to “D” (DRIVE) or “L”(LOW) position.
+ (SHIFT UP) The transaxle shifts up by one gear with each operation. − (SHIFT DOWN) The transaxle shifts down by one gear with each operation.
SHIFT UP
SHIFT DOWN
CAUTION In sports mode, the driver must execute upward shifts in accordance with prevailingroad conditions, taking care to keep the engine speed below the tachometer’s red zone. Repeated continuous ope
ration of the spor-
tronic steering wheel pa
ddle shifter will con-
tinuously switch shift position. Gears may not change when the lateral pad- dle shifters are operate
d at the same time.
NOTE
Gears can only be selected in a forward direction from 1st gear to 6th gear. To reverse or park the vehi
cle, move the selector
lever to the “R” or “P” position.
To maintain good running performance, the transaxle may refuse to perform an upshiftwhen the selector lever is moved to the“+(SHIFT UP)” positi
on at certain vehicle
speeds. Also, to prevent over-revving of the engine, the transaxle may refuse to perform adownshift when the lever is moved to the “
−
(SHIFT DOWN)” position
at certain vehicle
speeds. When this happens, a buzzer soundsto indicate that a dow
nshift is not going to
take place. Downward shifts are made automatically when the vehicle slows down. Before the vehicle stops, 1st ge
ar is automatically
selected. When the selector lever is in the “D” (DRIVE) position and sports mode is selected, the vehicle will automatically return to “D” (DRIVE)
operation if the vehi-
cle is stopped. When the selector lever is in the “L” (LOW) position and sports mode is selected, the vehicle will stay in
sports mode and not
return to “L” (LOW) operation even if thevehicle is stopped. The upward shift may be
made automatically
in sports mode when the engine speed rise and approach the tac
hometer’s red zone.
NOTE
BK0278200US.book 74 ページ 2019年4月10日 水曜日 午前10時59分
Page 160 of 443
Continuously variable transmission (CVT) (if so equipped)
Features and controls 5-79
5
N00560401134
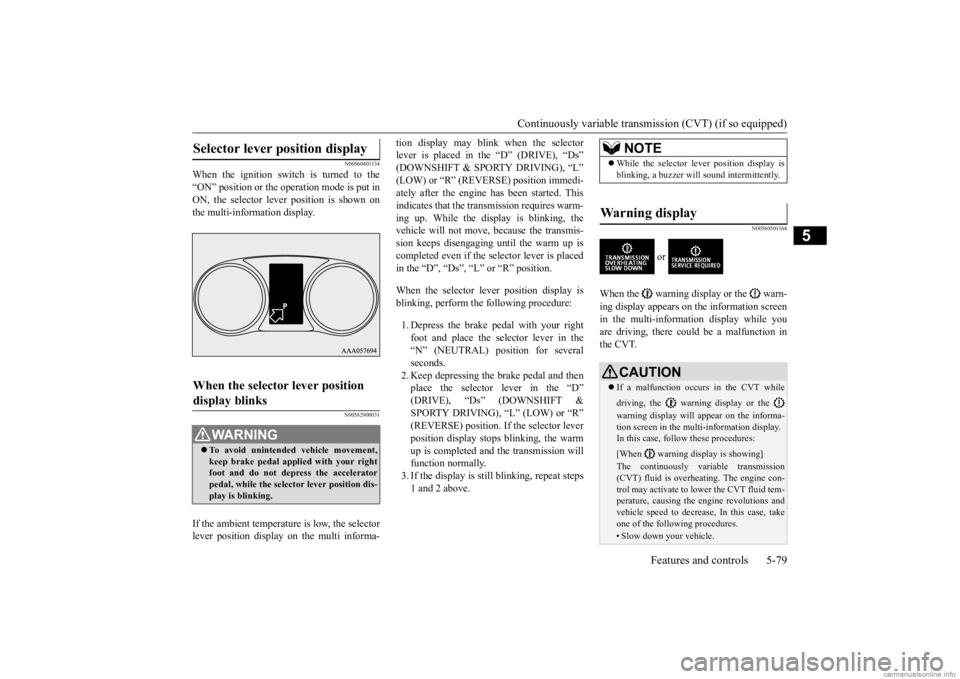
When the ignition switch is turned to the “ON” position or the operation mode is put in ON, the selector lever position is shown onthe multi-information display.
N00582900031
If the ambient temperature is low, the selectorlever position display on the multi informa-
tion display may blink when the selector lever is placed in the “D” (DRIVE), “Ds”(DOWNSHIFT & SPORTY DRIVING), “L” (LOW) or “R” (REVERSE) position immedi- ately after the engine has been started. Thisindicates that the transmission requires warm- ing up. While the display is blinking, the vehicle will not move, because the transmis-sion keeps disengaging until the warm up is completed even if the selector lever is placed in the “D”, “Ds”, “L” or “R” position. When the selector lever position display is blinking, perform the following procedure: 1. Depress the brake pedal with your right foot and place the se
lector lever in the
“N” (NEUTRAL) position for several seconds. 2. Keep depressing the brake pedal and thenplace the selector lever in the “D” (DRIVE), “Ds” (DOWNSHIFT & SPORTY DRIVING), “L” (LOW) or “R”(REVERSE) position. If
the selector lever
position display stops
blinking, the warm
up is completed and the transmission willfunction normally. 3. If the display is still
blinking, repeat steps
1 and 2 above.
N00560501164
or
When the warning display or the warn- ing display appears on
the information screen
in the multi-information display while you are driving, there could be a malfunction inthe CVT.
Selector lever position display
When the selector lever position display blinks
WA R N I N G To avoid unintended
vehicle movement,
keep brake pedal applied with your right foot and do not depress the acceleratorpedal, while the selector lever position dis- play is blinking.
NOTE
While the selector le
ver position display is
blinking, a buzzer will
sound intermittently.
Warning display
CAUTIONIf a malfunction occurs in the CVT while driving, the warning display or the warning display will appear on the informa- tion screen in the multi-information display. In this case, follow
these procedures:
[When warning di
splay is showing]
The continuously variable transmission (CVT) fluid is overhea
ting. The engine con-
trol may activate to
lower the CVT fluid tem-
perature, causing the e
ngine revolutions and
vehicle speed to decrea
se, In this case, take
one of the following procedures.• Slow down your vehicle.
BK0278200US.book 79 ページ 2019年4月10日 水曜日 午前10時59分
Page 165 of 443
Electronically controlled 4W
D system (if so equipped)
5-84 Features and controls
5
4-wheel drive operation requires special driv- ing skills. Carefully read the “4-wheel drive operation” section on page 5-88 and take care to drivesafely.
N00548401062
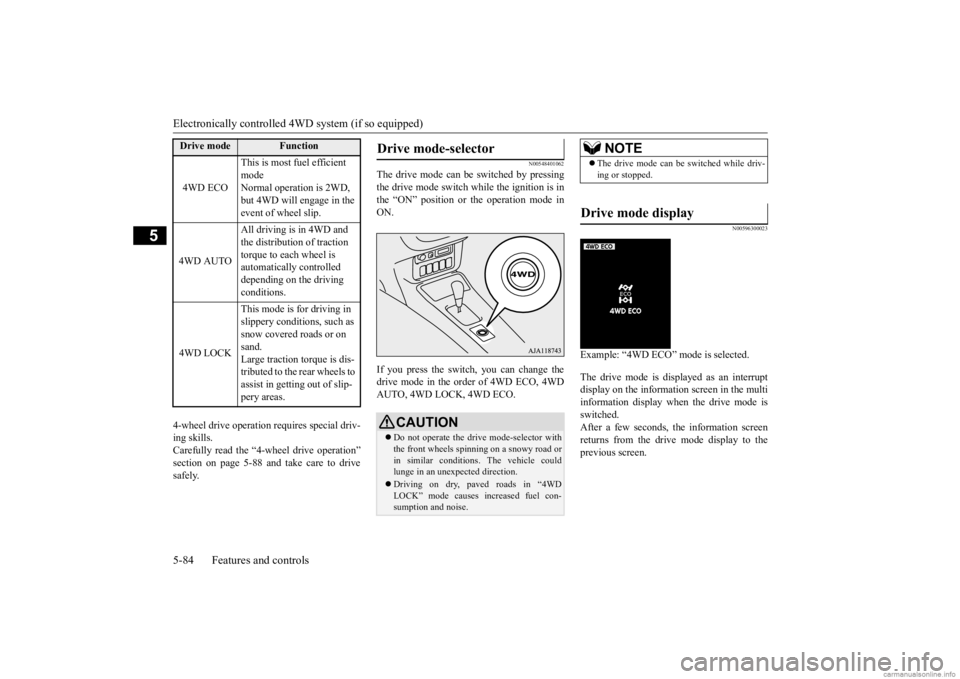
The drive mode can be
switched by pressing
the drive mode switch while the ignition is in the “ON” position or the operation mode inON. If you press the switch, you can change the drive mode in the order of 4WD ECO, 4WD AUTO, 4WD LOCK, 4WD ECO.
N00596300023
Example: “4WD ECO” mode is selected. The drive mode is displayed as an interrupt display on the information screen in the multi information display when the drive mode is switched.After a few seconds, th
e information screen
returns from the drive mode display to the previous screen.
Drive mode
Function
4WD ECO
This is most fuel efficient mode Normal operation is 2WD, but 4WD will e
ngage in the
event of wheel slip.
4WD AUTO
All driving is in 4WD and the distribution of traction torque to each wheel is automatically controlled depending on the driving conditions.
4WD LOCK
This mode is for driving in slippery conditions, such as snow covered roads or on sand. Large traction torque is dis-tributed to the rear wheels to assist in getting out of slip- pery areas.
Drive mode-selector
CAUTION Do not operate the dr
ive mode-selector with
the front wheels spinning on a snowy road orin similar conditions.
The vehicle could
lunge in an unexpe
cted direction.
Driving on dry, paved roads in “4WD LOCK” mode causes increased fuel con- sumption and noise.
NOTE
The drive mode can be
switched while driv-
ing or stopped.
Drive mode display
BK0278200US.book 84 ページ 2019年4月10日 水曜日 午前10時59分
Page 166 of 443
S-AWC (Super-All Wheel Co
ntrol) (if so equipped)
Features and controls 5-85
5
N00576600020
While the drive mode is in the “4WD AUTO” position, if the ECO mode switch is switchedON, the drive mode will be changed to “4WD ECO” mode.
If the ECO mode switch is switched OFF, the drive mode will be returned to “4WD AUTO”mode. Refer to the “ECO
mode switch” on page
5-209.
N00541301105
S-AWC is an integrat
ed vehicle dynamics
control system that helps enhance driving performance, cornering performance, andvehicle stability over a wide range of driving conditions through integrated management of the electronically cont
rolled 4WD, the AYC
(Active Yaw Control), the ABS and the ASC.
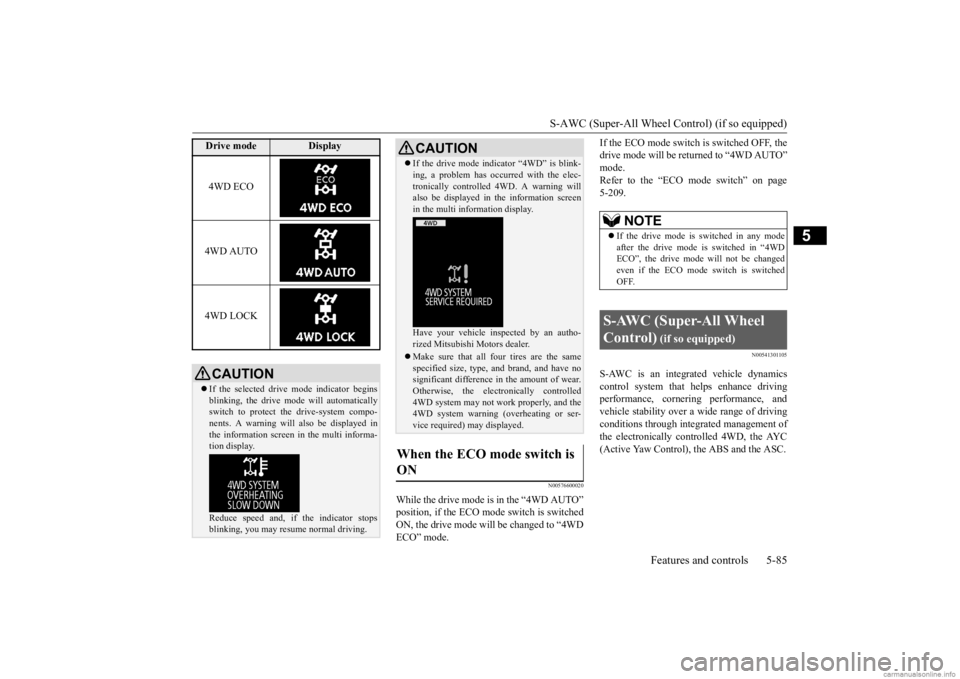
Drive mode
Display
4WD ECO 4WD AUTO 4WD LOCKCAUTION If the selected drive
mode indicator begins
blinking, the drive m
ode will automatically
switch to protect the drive-system compo- nents. A warning will
also be displayed in
the information screen in the multi informa-tion display. Reduce speed and, if
the indicator stops
blinking, you may resume normal driving.
If the drive mode indicator “4WD” is blink- ing, a problem has occurred with the elec-tronically controlled 4WD. A warning willalso be displayed in the information screen in the multi information display. Have your vehicle in
spected by an autho-
rized Mitsubishi Motors dealer. Make sure that all four tires are the same specified size, type, a
nd brand, and have no
significant difference
in the amount of wear.
Otherwise, the electronically controlled 4WD system may not work properly, and the4WD system warning (overheating or ser- vice required) may displayed.
When the ECO mode switch is ON
CAUTION
NOTE
If the drive mode is switched in any mode after the drive mode is switched in “4WD ECO”, the drive mode will not be changed even if the ECO mode switch is switchedOFF.
S-AWC (Super-All Wheel Control)
(if so equipped)
BK0278200US.book 85 ページ 2019年4月10日 水曜日 午前10時59分
Page 168 of 443
S-AWC (Super-All Wheel Co
ntrol) (if so equipped)
Features and controls 5-87
5
N00583000071
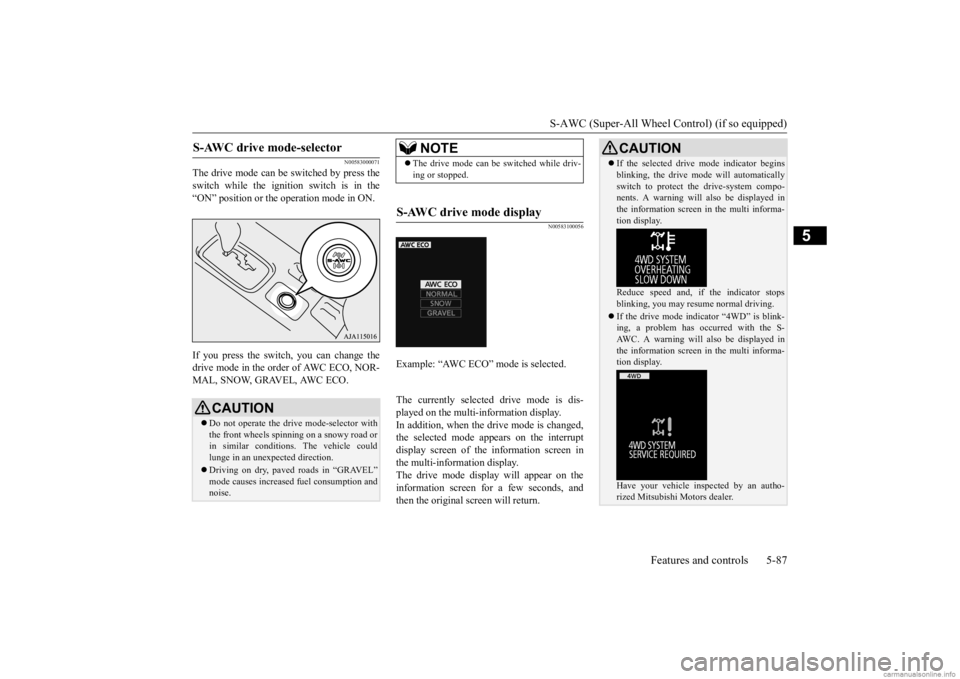
The drive mode can be switched by press the switch while the ignition switch is in the “ON” position or the
operation mode in ON.
If you press the switch, you can change the drive mode in the order of AWC ECO, NOR-MAL, SNOW, GRAVEL, AWC ECO.
N00583100056
The currently selected drive mode is dis- played on the multi-information display. In addition, when the drive mode is changed,the selected mode appears on the interrupt display screen of the information screen in the multi-information display.The drive mode display
will appear on the
information screen for a few seconds, and then the original screen will return.
S-AWC drive mode-selector
CAUTION Do not operate the drive mode-selector with the front wheels spinning on a snowy road or in similar conditions
. The vehicle could
lunge in an unexpe
cted direction.
Driving on dry, paved roads in “GRAVEL” mode causes increased
fuel consumption and
noise.
NOTE
The drive mode can be
switched while driv-
ing or stopped.
S-AWC drive mode display
Example: “AWC ECO” mode is selected.
CAUTION If the selected drive
mode indicator begins
blinking, the drive mode will automaticallyswitch to protect the drive-system compo-nents. A warning will
also be displayed in
the information screen in the multi informa- tion display. Reduce speed and, if the indicator stops blinking, you may resume normal driving. If the drive mode indicator “4WD” is blink- ing, a problem has oc
curred with the S-
AWC. A warning will
also be displayed in
the information screen in the multi informa-tion display. Have your vehicle insp
ected by an autho-
rized Mitsubishi Motors dealer.
BK0278200US.book 87 ページ 2019年4月10日 水曜日 午前10時59分