homelink MITSUBISHI OUTLANDER SPORT 2018 Owner's Manual (in English)
[x] Cancel search | Manufacturer: MITSUBISHI, Model Year: 2018, Model line: OUTLANDER SPORT, Model: MITSUBISHI OUTLANDER SPORT 2018Pages: 22, PDF Size: 0.54 MB
Page 2 of 22

1
Thank you for buying a Mitsubishi Outlander Sport. There’s no doubt you’ve already realized how well your
car drives on the open road. What you may not know is all the great features that help your car perform
the way it does. In the pages ahead we’re going to run through the basics and prepare you for the road.
We hope you will visit the Mitsubishi Owner’s site where we store the latest Mitsubishi news
and special offers. Here you can also keep track of your car’s warranty and servicing needs,
get Roadside Assistance Information and tap into other owner-centric details. Just log on to
WWW.MITSUBISHICARS.COM/OWNERSONLY.
TABLE OF CONTENTS
Driver’s View .............. 2-3
Controls ................. 4-6
Own the Road ............... 7
Safety ................... 8-9
Technology ............. 10-11
HomeLink
® (if equipped) .....12
Audio System . . . . . . . . . . . . . . 13
Display Audio (if equipped) ...14
Smartphone Link Display Audio
(SDA) (if equipped) ......15-16
Bluetooth
® ................ 17
FAQ’s ................. 18-20
Some of the information contained in this booklet may not be correct due to product changes which may have occurred after the time it was
published. Mitsubishi Motors North America, Inc. reserves the right to make changes at any time, without notice, to prices, color, materials,
specification and models.
Page 3 of 22

2
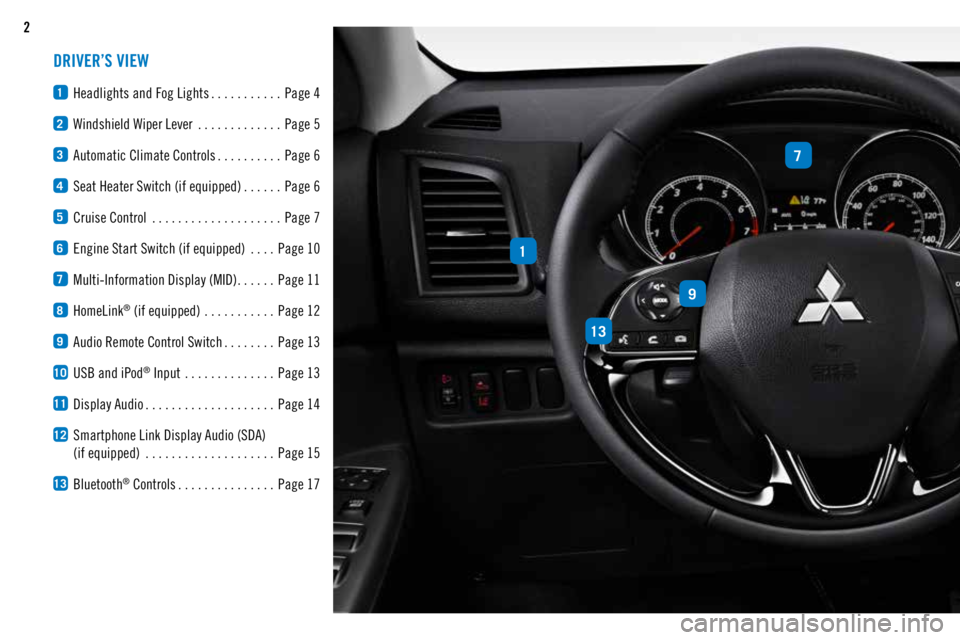
DRIVER’S VIEW
1 Headlights and Fog Lights ...........
Page 4
2 Windshield Wiper Lever
.............Page 5
3 Automatic Climate Controls ..........
Page 6
4 Seat Heater Switch (if equipped) ......
Page 6
5 Cruise Control
.................... Page 7
6 Engine Start Switch (if equipped)
....Page 10
7 Multi-Information Display (MID) ......
Page 11
8 HomeLink® (if equipped)
........... Page 12
9 Audio Remote Control Switch ........
Page 13
10 USB and iPod® Input
.............. Page 13
11 Display Audio ....................
Page 14
12 Smartphone Link Display Audio (SDA)
(if equipped) .................... Page 15
13 Bluetooth® Controls ...............
Page 17
1
7
9
13
Page 13 of 22

12HOMELINK® (IF EQUIPPED)
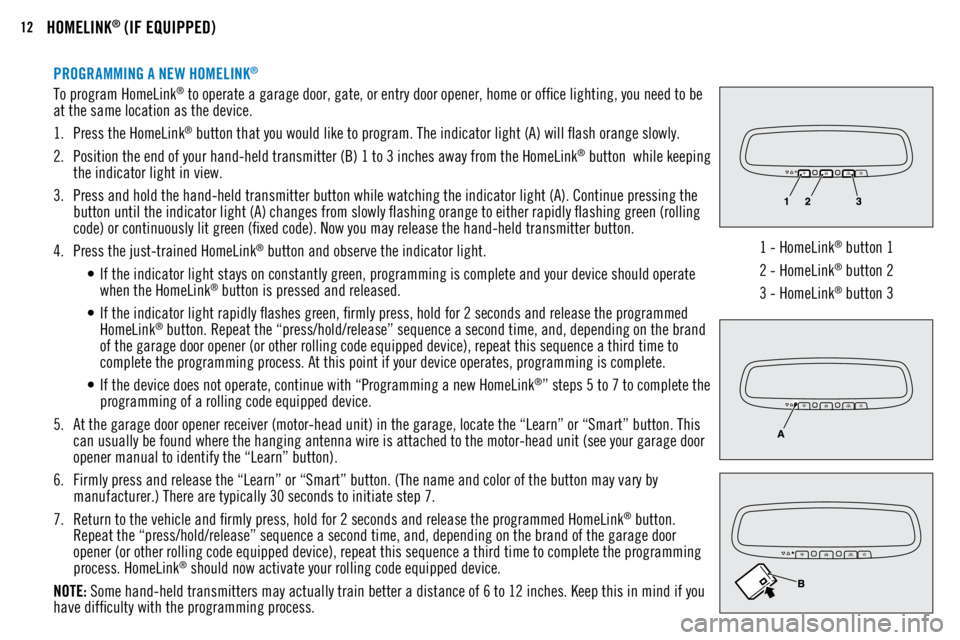
PROGRAMMING A NEW HOMELINK®
To program HomeLink® to operate a garage door, gate, or entry door opener, home or office lighting, you need to be
at the same location as the device.
1. Press the HomeLink
® button that you would like to program. The indicator light (A) will flash orange slowly.
2. Position the end of your hand-held transmitter (B) 1 to 3 inches away from the HomeLink
® button while keeping
the indicator light in view.
3. Press and hold the hand-held transmitter button while watching the indicator light (A). Continue pressing the
button until the indicator light (A) changes from slowly flashing orange to either rapidly flashing green (rolling
code) or continuously lit green (fixed code). Now you may release the hand-held transmitter button.
4. Press the just-trained HomeLink
® button and observe the indicator light.
• If the indicator light stays on constantly green, programming is complete and your device should operate
when the HomeLink
® button is pressed and released.
• If the indicator light rapidly flashes green, firmly press, hold for 2 seconds and release the programmed
HomeLink
® button. Repeat the “press/hold/release” sequence a second time, and, depending on the brand
of the garage door opener (or other rolling code equipped device), repeat this sequence a third time to
complete the programming process. At this point if your device operates, programming is complete.
• If the device does not operate, continue with “Programming a new HomeLink
®” steps 5 to 7 to complete the
programming of a rolling code equipped device.
5. At the garage door opener receiver (motor-head unit) in the garage, locate the “Learn” or “Smart” button. This
can usually be found where the hanging antenna wire is attached to the motor-head unit (see your garage door
opener manual to identify the “Learn” button).
6. Firmly press and release the “Learn” or “Smart” button. (The name and color of the button may vary by
manufacturer.) There are typically 30 seconds to initiate step 7.
7. Return to the vehicle and firmly press, hold for 2 seconds and release the programmed HomeLink
® button.
Repeat the “press/hold/release” sequence a second time, and, depending on the brand of the garage door
opener (or other rolling code equipped device), repeat this sequence a third time to complete the programming
process. HomeLink
® should now activate your rolling code equipped device.
NOTE: Some hand-held transmitters may actually train better a distance of 6 to 12 inches. Keep this in mind if you
have difficulty with the programming process. 1 - HomeLink
® button 1
2 - HomeLink
® button 2
3 - HomeLink
® button 3