lamps MITSUBISHI PAJERO IV 2011 Owner's Manual
[x] Cancel search | Manufacturer: MITSUBISHI, Model Year: 2011, Model line: PAJERO IV, Model: MITSUBISHI PAJERO IV 2011Pages: 377, PDF Size: 29.43 MB
Page 116 of 377
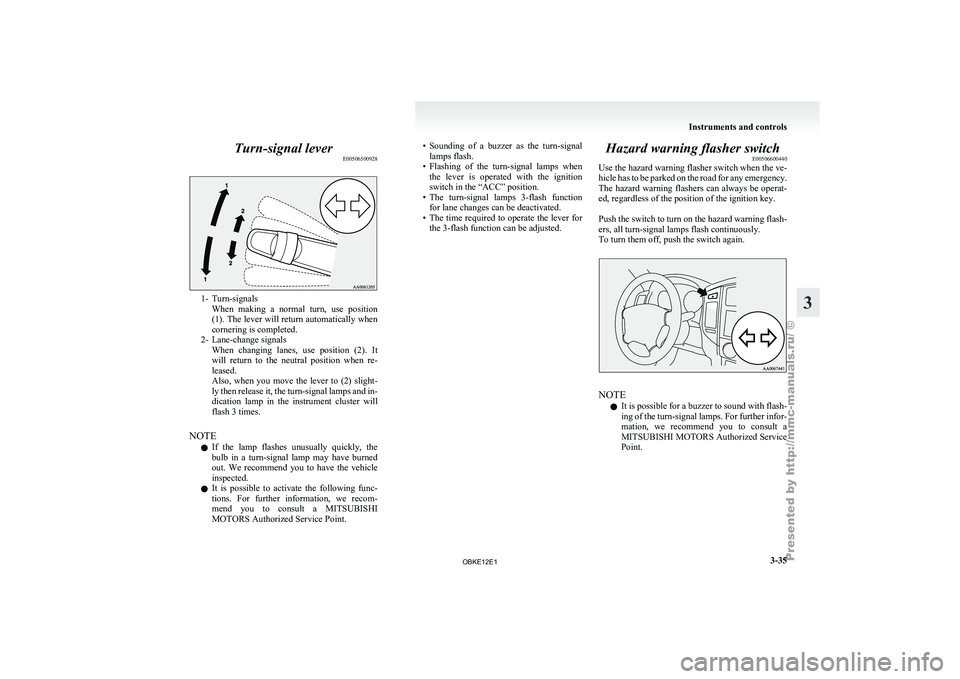
Turn-signal lever
E005065009281- Turn-signals
When making a
normal turn, use position
(1). The lever will return automatically when
cornering is completed.
2- Lane-change signals When changing lanes, use position (2). It
will return to the neutral position when re-
leased.
Also, when you move the lever to (2) slight-
ly then release it, the turn-signal lamps and in-
dication lamp in the instrument cluster will
flash 3 times.
NOTE l If the lamp flashes unusually quickly, the
bulb in a turn-signal lamp may have burned
out. We recommend you to have the vehicle
inspected.
l It is possible to activate the following func-
tions. For further information, we recom-
mend you to consult a MITSUBISHI
MOTORS Authorized Service Point. • Sounding
of a buzzer as the turn-signal
lamps flash.
• Flashing
of the turn-signal lamps when
the lever is operated with the ignition
switch in the “ACC” position.
• The turn-signal lamps 3-flash function for lane changes can be deactivated.
• The time required to operate the lever for the 3-flash function can be adjusted. Hazard warning flasher switch
E00506600440
Use the hazard
warning flasher switch when the ve-
hicle has to be parked on the road for any emergency.
The hazard warning flashers can always be operat-
ed, regardless of the position of the ignition key.
Push the switch to turn on the hazard warning flash-
ers, all turn-signal lamps flash continuously.
To turn them off, push the switch again. NOTE
l It
is possible
for a buzzer to sound with flash-
ing of the turn-signal lamps. For further infor-
mation, we recommend you to consult a
MITSUBISHI MOTORS Authorized Service
Point. Instruments and controls
3-35 3
OBKE12E1
Page 117 of 377
Fog lamp switch
E00506700047
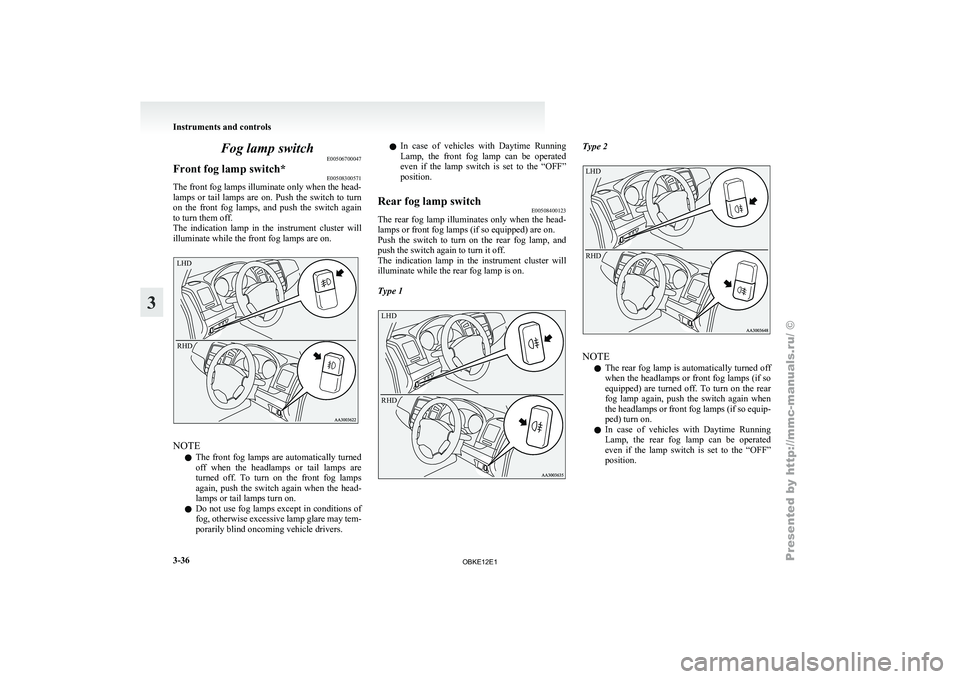
Front fog lamp switch* E00508300571
The front fog lamps illuminate only when the head-
lamps or tail
lamps are on. Push the switch to turn
on the front fog lamps, and push the switch again
to turn them off.
The indication lamp in the instrument cluster will
illuminate while the front fog lamps are on.
LHD
RHD NOTE
l The
front fog
lamps are automatically turned
off when the headlamps or tail lamps are
turned off. To turn on the front fog lamps
again, push the switch again when the head-
lamps or tail lamps turn on.
l Do not use fog lamps except in conditions of
fog, otherwise excessive lamp glare may tem-
porarily blind oncoming vehicle drivers. l
In
case
of
vehicles with Daytime Running
Lamp, the front fog lamp can be operated
even if the lamp switch is set to the “OFF”
position.
Rear fog lamp switch E00508400123
The rear fog lamp illuminates only when the head-
lamps or front fog lamps (if so equipped) are on.
Push the switch
to turn on the rear fog lamp, and
push the switch again to turn it off.
The indication lamp in the instrument cluster will
illuminate while the rear fog lamp is on.
Type 1
LHD
RHD Type 2
LHD
RHD
NOTE
l The
rear fog
lamp is automatically turned off
when the headlamps or front fog lamps (if so
equipped) are turned off. To turn on the rear
fog lamp again, push the switch again when
the headlamps or front fog lamps (if so equip-
ped) turn on.
l In case of vehicles with Daytime Running
Lamp, the rear fog lamp can be operated
even if the lamp switch is set to the “OFF”
position. Instruments and controls
3-36
3
OBKE12E1
Page 121 of 377
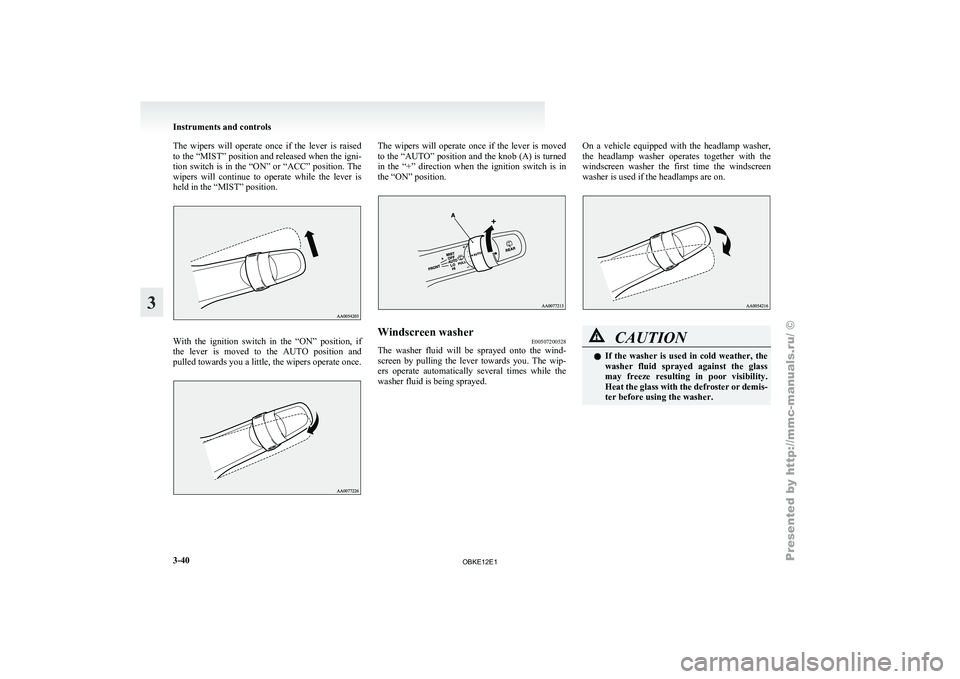
The wipers will operate once if the lever is raised
to the “MIST”
position and released when the igni-
tion switch is in the “ON” or “ACC” position. The
wipers will continue to operate while the lever is
held in the “MIST” position. With the ignition switch in the “ON” position, if
the lever is
moved to the AUTO position and
pulled towards you a little, the wipers operate once. The wipers will operate once if the lever is moved
to the “AUTO”
position and the knob (A) is turned
in the “+” direction when the ignition switch is in
the “ON” position. Windscreen washer
E00507200528
The washer fluid will be sprayed onto the wind-
screen by pulling
the lever towards you. The wip-
ers operate automatically several times while the
washer fluid is being sprayed. On a vehicle equipped with the headlamp washer,
the headlamp washer
operates together with the
windscreen washer the first time the windscreen
washer is used if the headlamps are on. CAUTION
l
If the washer
is used in cold weather, the
washer fluid sprayed against the glass
may freeze resulting in poor visibility.
Heat the glass with the defroster or demis-
ter before using the washer. Instruments and controls
3-40
3
OBKE12E1
Page 122 of 377
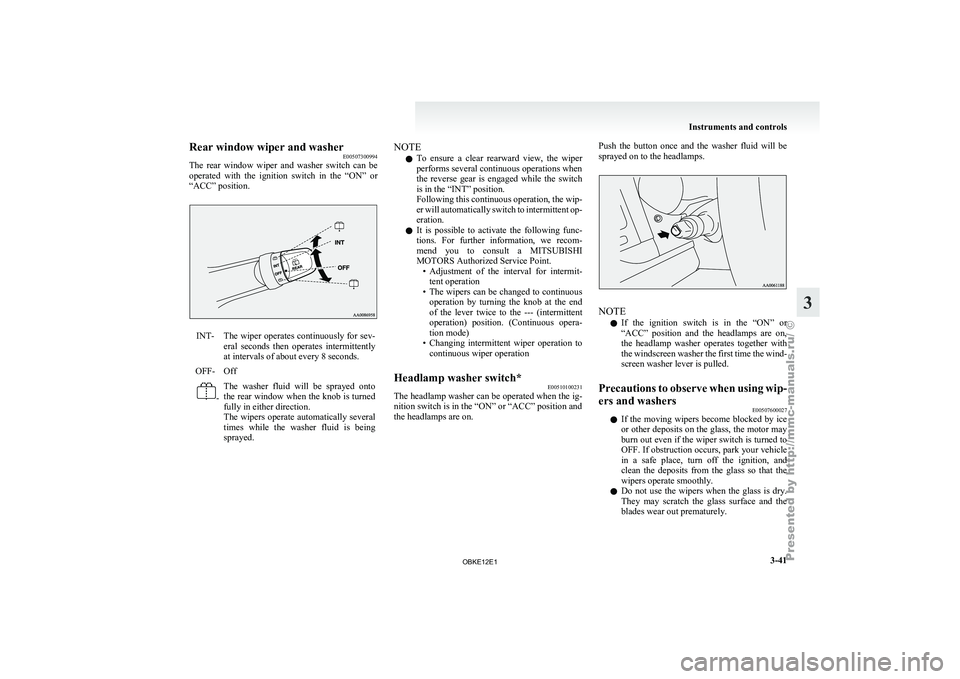
Rear window wiper and washer
E00507300994
The rear window
wiper and washer switch can be
operated with the ignition switch in the “ON” or
“ACC” position. INT- The wiper operates continuously for sev-
eral seconds then
operates intermittently
at intervals of about every 8 seconds.
OFF- Off -
The washer fluid will be sprayed onto
the
rear window
when the knob is turned
fully in either direction.
The wipers operate automatically several
times while the washer fluid is being
sprayed. NOTE
l To
ensure a
clear rearward view, the wiper
performs several continuous operations when
the reverse gear is engaged while the switch
is in the “INT” position.
Following this continuous operation, the wip-
er will automatically switch to intermittent op-
eration.
l It is possible to activate the following func-
tions. For further information, we recom-
mend you to consult a MITSUBISHI
MOTORS Authorized Service Point.
• Adjustment of the interval for intermit-tent operation
• The wipers can be changed to continuous operation by turning the knob at the end
of the lever twice to the --- (intermittent
operation) position. (Continuous opera-
tion mode)
• Changing intermittent wiper operation to continuous wiper operation
Headlamp washer switch* E00510100231
The headlamp washer can be operated when the ig-
nition switch is in the “ON” or “ACC” position and
the headlamps are on. Push the button once and the washer fluid will be
sprayed on to the headlamps.
NOTE
l If
the ignition
switch is in the “ON” or
“ACC” position and the headlamps are on,
the headlamp washer operates together with
the windscreen washer the first time the wind-
screen washer lever is pulled.
Precautions to observe when using wip-
ers and washers E00507600027
l If the
moving
wipers become blocked by ice
or other deposits on the glass, the motor may
burn out even if the wiper switch is turned to
OFF. If obstruction occurs, park your vehicle
in a safe place, turn off the ignition, and
clean the deposits from the glass so that the
wipers operate smoothly.
l Do not use the wipers when the glass is dry.
They may scratch the glass surface and the
blades wear out prematurely. Instruments and controls
3-41 3
OBKE12E1
Page 134 of 377

To reduce the glare
Type 1
The lever
(A)
at the bottom of the mirror can be
used to adjust the mirror to reduce the glare from
the headlamps of vehicles behind you during night
driving. 1- Normal
2- Anti-glare
Type 2
When the headlamps of the vehicles behind you are
very bright, the
reflection factor of the rear-view
mirror is automatically changed to reduce the glare. When the ignition switch is turned to the “ON” po-
sition, the reflection factor of the mirror is automat-
ically changed.
NOTE
l Do
not hang
items on, or spray glass cleaner
on the sensor (1), as reduced sensitivity
could result. Type 3
When the headlamps of the vehicles behind you are
very bright, the
reflection factor of the rear-view
mirror is automatically changed to reduce the glare. When the ignition switch is turned to the “ON” po-
sition, the
green
indicator (1) illuminates and the re-
flection factor of the mirror is automatically
changed.
NOTE
l Do not hang any items on, or spray glass clean-
er on the sensors (2) on the front and back
side, as reduced sensitivity could result.
l If you want to stop automatic mode, press
the switch (3) and the indicator will go off.
To return to automatic mode, press the
switch again or turn the ignition key to the
“ON” position after turning to “LOCK” or
“ACC” position. Starting and driving
4-09 4
OBKE12E1
Page 137 of 377
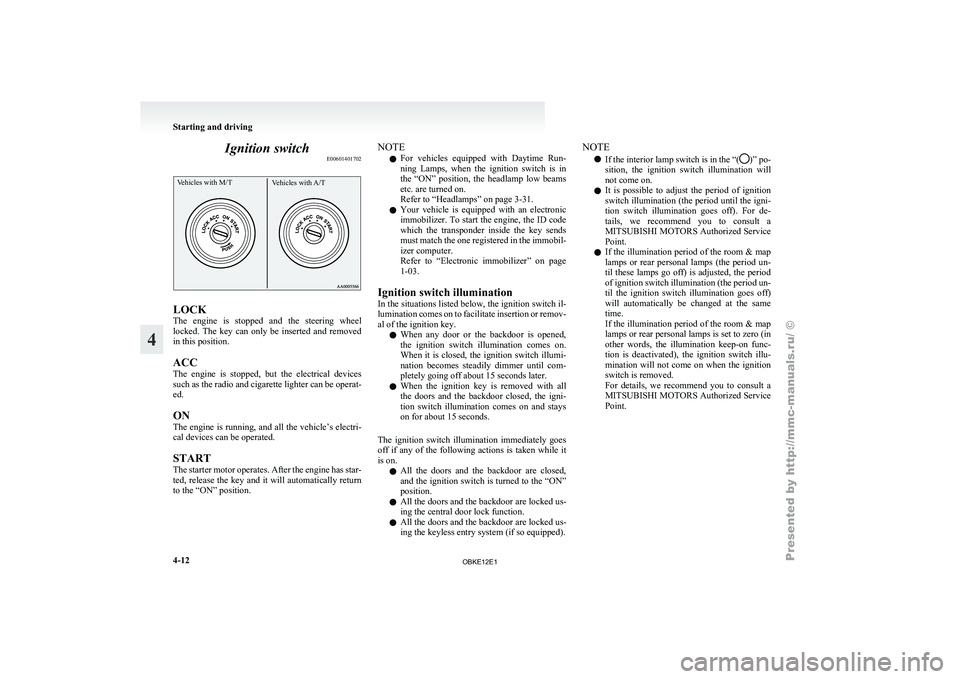
Ignition switch
E00601401702Vehicles with M/T Vehicles with A/TLOCK
The
engine is
stopped and the steering wheel
locked. The key can only be inserted and removed
in this position.
ACC
The engine is stopped, but the electrical devices
such as the radio and cigarette lighter can be operat-
ed.
ON
The engine is running, and all the vehicle’s electri-
cal devices can be operated.
START
The starter motor operates. After the engine has star-
ted, release the key and it will automatically return
to the “ON” position. NOTE
l For
vehicles equipped
with Daytime Run-
ning Lamps, when the ignition switch is in
the “ON” position, the headlamp low beams
etc. are turned on.
Refer to “Headlamps” on page 3-31.
l Your vehicle is equipped with an electronic
immobilizer. To start the engine, the ID code
which the transponder inside the key sends
must match the one registered in the immobil-
izer computer.
Refer to “Electronic immobilizer” on page
1-03.
Ignition switch illumination
In the situations listed below, the ignition switch il-
lumination comes on to facilitate insertion or remov-
al of the ignition key. l When any door or the backdoor is opened,
the ignition switch illumination comes on.
When it is closed, the ignition switch illumi-
nation becomes steadily dimmer until com-
pletely going off about 15 seconds later.
l When the ignition key is removed with all
the doors and the backdoor closed, the igni-
tion switch illumination comes on and stays
on for about 15 seconds.
The ignition switch illumination immediately goes
off if any of the following actions is taken while it
is on. l All the doors and the backdoor are closed,
and the ignition switch is turned to the “ON”
position.
l All the doors and the backdoor are locked us-
ing the central door lock function.
l All the doors and the backdoor are locked us-
ing the keyless entry system (if so equipped). NOTE
l If the interior
lamp switch is in the “( )” po-
sition, the ignition
switch illumination will
not come on.
l It is possible to adjust the period of ignition
switch illumination (the period until the igni-
tion switch illumination goes off). For de-
tails, we recommend you to consult a
MITSUBISHI MOTORS Authorized Service
Point.
l If the illumination period of the room & map
lamps or rear personal lamps (the period un-
til these lamps go off) is adjusted, the period
of ignition switch illumination (the period un-
til the ignition switch illumination goes off)
will automatically be changed at the same
time.
If the illumination period of the room & map
lamps or rear personal lamps is set to zero (in
other words, the illumination keep-on func-
tion is deactivated), the ignition switch illu-
mination will not come on when the ignition
switch is removed.
For details, we recommend you to consult a
MITSUBISHI MOTORS Authorized Service
Point. Starting and driving
4-12
4
OBKE12E1
Page 139 of 377
Starting
E00601600811
Tips for starting l Do not
operate
the starter motor continuous-
ly longer than 10 seconds; doing so could
run down the battery. If the engine does not
start, turn the ignition key back to “LOCK”
position, wait a few seconds, and then try
again. Trying repeatedly with the starter mo-
tor still turning will damage the starter mech-
anism. WARNING
l Never
run
the
engine in a closed or poor-
ly ventilated area any longer than is nee-
ded to move your vehicle in or out of the
area. Carbon monoxide gases are odour-
less and can be fatal. CAUTION
l
Never attempt to
start the engine by push-
ing or pulling the vehicle.
l Do not run the engine at high rpm or
drive the vehicle at high speed until the en-
gine has had a chance to warm up.
l Release the ignition key as soon as the en-
gine starts to avoid damaging the starter
motor.
l If your vehicle is equipped with a turbo-
charger, do not stop the engine immedi-
ately after high-speed or uphill driving.
First allow the engine to idle to give the
turbocharger a chance to cool down. Starting the engine (petrol-powered ve-
hicles)
E00601701994
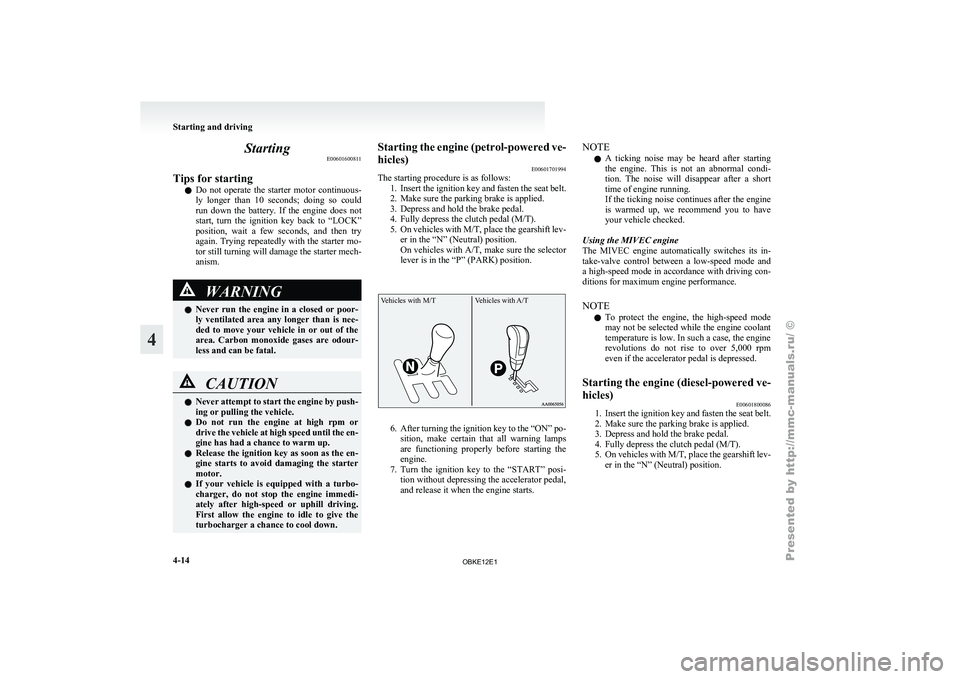
The starting procedure is as follows:
1. Insert the ignition
key and fasten the seat belt.
2. Make sure the parking brake is applied.
3. Depress and hold the brake pedal.
4. Fully depress the clutch pedal (M/T).
5. On vehicles with M/T, place the gearshift lev- er in the “N” (Neutral) position.
On vehicles with A/T, make sure the selector
lever is in the “P” (PARK) position.
Vehicles with M/T Vehicles with A/T 6. After turning the ignition key to the “ON” po-
sition, make
certain that all warning lamps
are functioning properly before starting the
engine.
7. Turn the ignition key to the “START” posi- tion without depressing the accelerator pedal,
and release it when the engine starts. NOTE
l A
ticking noise
may be heard after starting
the engine. This is not an abnormal condi-
tion. The noise will disappear after a short
time of engine running.
If the ticking noise continues after the engine
is warmed up, we recommend you to have
your vehicle checked.
Using the MIVEC engine
The MIVEC engine automatically switches its in-
take-valve control between a low-speed mode and
a high-speed mode in accordance with driving con-
ditions for maximum engine performance.
NOTE l To protect the engine, the high-speed mode
may not be selected while the engine coolant
temperature is low. In such a case, the engine
revolutions do not rise to over 5,000 rpm
even if the accelerator pedal is depressed.
Starting the engine (diesel-powered ve-
hicles) E00601800086
1. Insert the ignition key and fasten the seat belt.
2. Make sure the parking brake is applied.
3.
Depress and hold the brake pedal.
4. Fully depress the clutch pedal (M/T).
5. On vehicles with M/T, place the gearshift lev- er in the “N” (Neutral) position. Starting and driving
4-14
4
OBKE12E1
Page 145 of 377
WARNING
l If the lock button is always pushed to op-
erate the selector lever, the lever may be
accidentally shifted into the “P” (PARK)
or “R” (REVERSE) position. Be sure not
to push the lock button when performing
the operations indicated by in the illus-
tration.
l Always depress
the
brake pedal when
shifting the selector lever into a gear
from the “P” (PARK) or “N” (NEU-
TRAL) position.
Never put your foot on the accelerator ped-
al while shifting the selector lever from
the “P” (PARK) or “N” (NEUTRAL) po-
sition.
NOTE l If
the brake
pedal is not depressed and held,
the shift-lock device activates to prevent the
selector lever from being moved from the
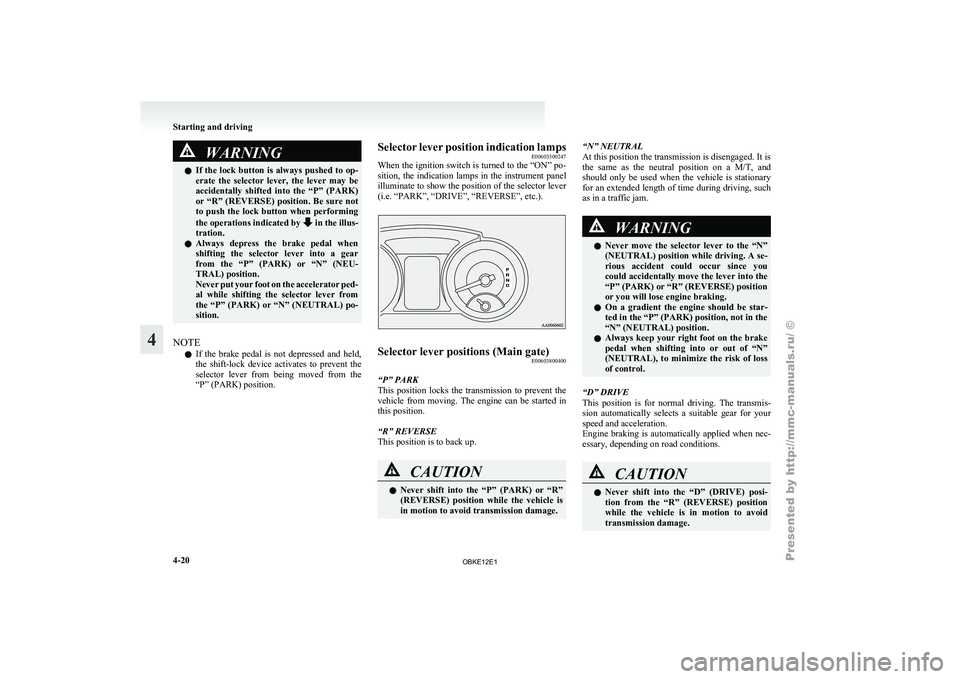
“P” (PARK) position. Selector lever position indication lamps
E00603500247
When the ignition
switch is turned to the “ON” po-
sition, the indication lamps in the instrument panel
illuminate to show the position of the selector lever
(i.e. “PARK”, “DRIVE”, “REVERSE”, etc.). Selector lever positions (Main gate)
E00603800400
“P” PARK
This position locks
the transmission to prevent the
vehicle from moving. The engine can be started in
this position.
“R” REVERSE
This position is to back up. CAUTION
l
Never shift
into
the “P” (PARK) or “R”
(REVERSE) position while the vehicle is
in motion to avoid transmission damage. “N” NEUTRAL
At this position the transmission is disengaged. It is
the
same as
the neutral position on a M/T, and
should only be used when the vehicle is stationary
for an extended length of time during driving, such
as in a traffic jam. WARNING
l Never move
the
selector lever to the “N”
(NEUTRAL) position while driving. A se-
rious accident could occur since you
could accidentally move the lever into the
“P” (PARK) or “R” (REVERSE) position
or you will lose engine braking.
l On a gradient the engine should be star-
ted in the “P” (PARK) position, not in the
“N” (NEUTRAL) position.
l Always keep your right foot on the brake
pedal when shifting into or out of “N”
(NEUTRAL), to minimize the risk of loss
of control.
“D” DRIVE
This position is
for normal driving. The transmis-
sion automatically selects a suitable gear for your
speed and acceleration.
Engine braking is automatically applied when nec-
essary, depending on road conditions. CAUTION
l
Never shift into
the “D” (DRIVE) posi-
tion from the “R” (REVERSE) position
while the vehicle is in motion to avoid
transmission damage. Starting and driving
4-20
4
OBKE12E1
Page 153 of 377
NOTE
l The
2WD/4WD operation
indication lamp
blinks while the selection is in process. Take
the following precautions when the indica-
tion lamp is blinking. • Keep the steering wheel in the straightahead position while making range selec-
tions. If you attempt to drive forward
with the steering wheel turned, gear rat-
tling may occur and the desired range
may not actually be selected.
• If the front wheel and/or centre differen- tial lock lamps continue blinking after a
“2H” ↔ “4H” ↔ “4HLc” selection has
been made with the vehicle moving, hold
the steering wheel in the straight ahead po-
sition and slowly depress the accelerator
pedal several times.
• If, after a “4HLc” ↔ “4LLc” selection has been made, the front and rear wheel
lamps continue blinking and the desired
range is not actually selected, return the
transfer shift lever to its previous posi-
tion. Place the steering wheel in the
straight ahead position, drive the vehicle
forward, and release the accelerator ped-
al. Next, hold down the clutch pedal
(with M/T) or place the selector lever in
the “N” (NEUTRAL) position (with A/T)
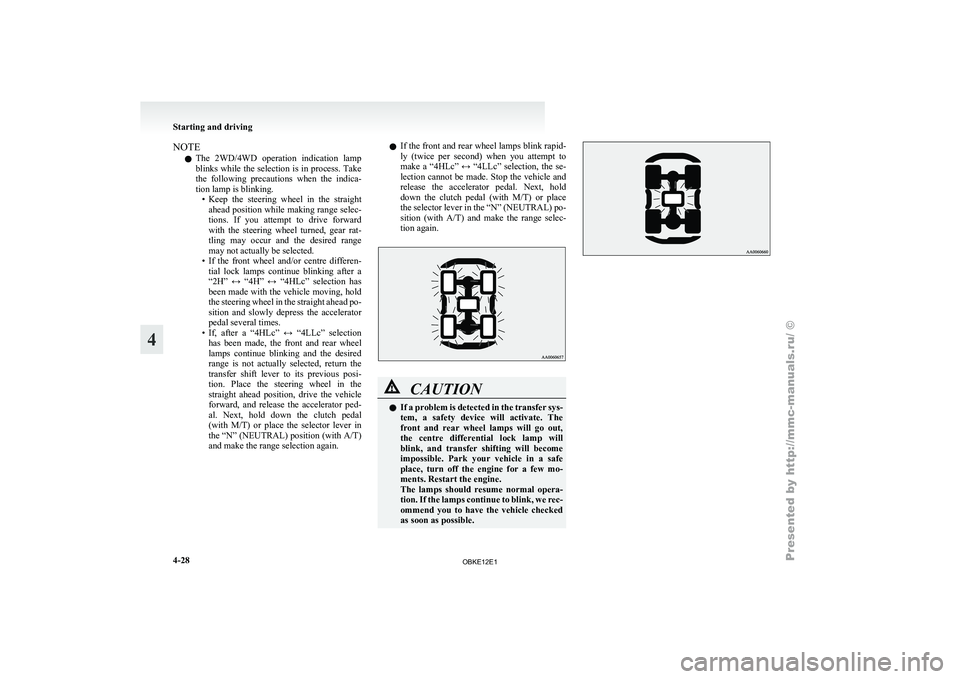
and make the range selection again. l
If
the
front and rear wheel lamps blink rapid-
ly (twice per second) when you attempt to
make a “4HLc” ↔ “4LLc” selection, the se-
lection cannot be made. Stop the vehicle and
release the accelerator pedal. Next, hold
down the clutch pedal (with M/T) or place
the selector lever in the “N” (NEUTRAL) po-
sition (with A/T) and make the range selec-
tion again. CAUTION
l
If a
problem
is detected in the transfer sys-
tem, a safety device will activate. The
front and rear wheel lamps will go out,
the centre differential lock lamp will
blink, and transfer shifting will become
impossible. Park your vehicle in a safe
place, turn off the engine for a few mo-
ments. Restart the engine.
The lamps should resume normal opera-
tion. If the lamps continue to blink, we rec-
ommend you to have the vehicle checked
as soon as possible. Starting and driving
4-28
4
OBKE12E1
Page 155 of 377
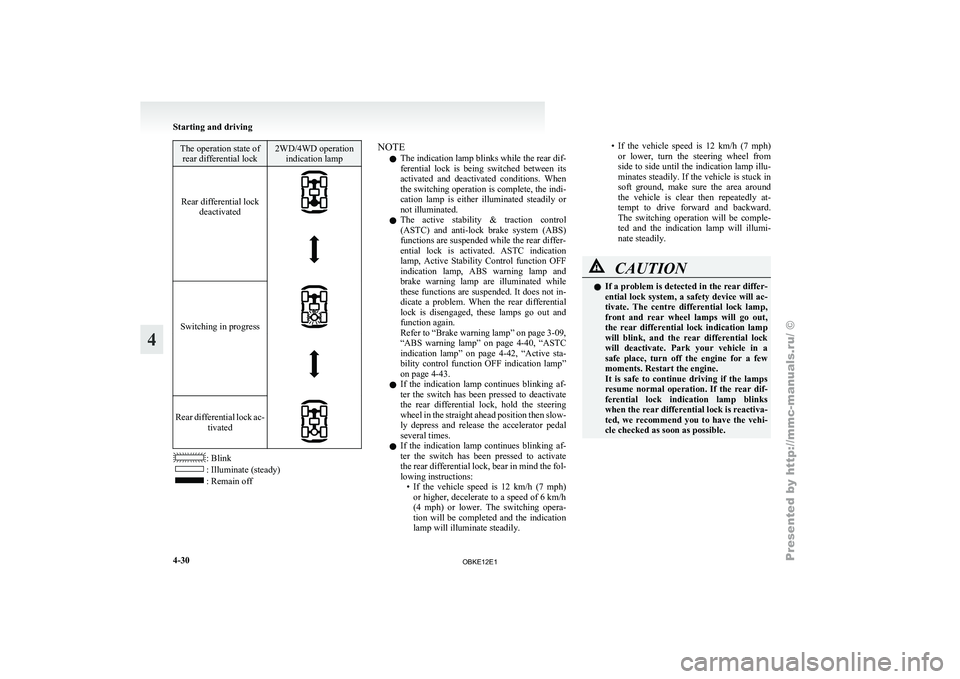
The operation state of
rear differential lock 2WD/4WD operation
indication lamp
Rear differential lock deactivated
Switching in progress
Rear differential lock ac-
tivated : Blink
: Illuminate (steady)
: Remain off NOTE
l The indication lamp blinks while the rear dif-
ferential
lock is
being switched between its
activated and deactivated conditions. When
the switching operation is complete, the indi-
cation lamp is either illuminated steadily or
not illuminated.
l The active stability & traction control
(ASTC) and anti-lock brake system (ABS)
functions are suspended while the rear differ-
ential lock is activated. ASTC indication
lamp, Active Stability Control function OFF
indication lamp, ABS warning lamp and
brake warning lamp are illuminated while
these functions are suspended. It does not in-
dicate a problem. When the rear differential
lock is disengaged, these lamps go out and
function again.
Refer to “Brake warning lamp” on page 3-09,
“ABS warning lamp” on page 4-40, “ASTC
indication lamp” on page 4-42, “Active sta-
bility control function OFF indication lamp”
on page 4-43.
l If the indication lamp continues blinking af-
ter the switch has been pressed to deactivate
the rear differential lock, hold the steering
wheel in the straight ahead position then slow-
ly depress and release the accelerator pedal
several times.
l If the indication lamp continues blinking af-
ter the switch has been pressed to activate
the rear differential lock, bear in mind the fol-
lowing instructions:
• If the vehicle speed is 12 km/h (7 mph)or higher, decelerate to a speed of 6 km/h
(4 mph) or lower. The switching opera-
tion will be completed and the indication
lamp will illuminate steadily. • If the vehicle speed is 12 km/h (7 mph)
or lower,
turn the steering wheel from
side to side until the indication lamp illu-
minates steadily. If the vehicle is stuck in
soft ground, make sure the area around
the vehicle is clear then repeatedly at-
tempt to drive forward and backward.
The switching operation will be comple-
ted and the indication lamp will illumi-
nate steadily. CAUTION
l
If a
problem
is detected in the rear differ-
ential lock system, a safety device will ac-
tivate. The centre differential lock lamp,
front and rear wheel lamps will go out,
the rear differential lock indication lamp
will blink, and the rear differential lock
will deactivate. Park your vehicle in a
safe place, turn off the engine for a few
moments. Restart the engine.
It is safe to continue driving if the lamps
resume normal operation. If the rear dif-
ferential lock indication lamp blinks
when the rear differential lock is reactiva-
ted, we recommend you to have the vehi-
cle checked as soon as possible. Starting and driving
4-30
4
OBKE12E1