clutch MITSUBISHI SHOGUN 2003 Owner's Manual (in English)
[x] Cancel search | Manufacturer: MITSUBISHI, Model Year: 2003, Model line: SHOGUN, Model: MITSUBISHI SHOGUN 2003Pages: 392, PDF Size: 14.34 MB
Page 168 of 392
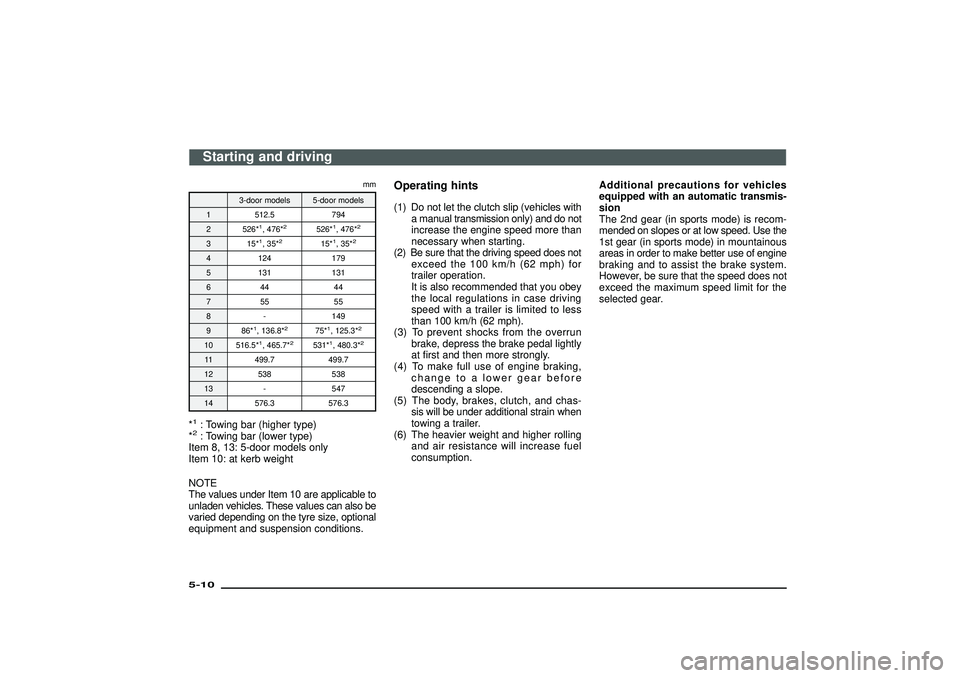
mm
3-door models 5-door models
1 512.5 794
2 526*
1, 476*
2
526*
1, 476*
2
3 15*
1, 35*
2
15*
1, 35*
2
4 124 179
5 131 131
644 44
755 55
8 - 149
9 86*
1, 136.8*
2
75*
1, 125.3*
2
10 516.5*
1, 465.7*
2
531*
1, 480.3*
2
11 499.7 499.7
12 538 538
13 - 547
14 576.3 576.3
*1: Towing bar (higher type)
*2: Towing bar (lower type)
Item 8, 13: 5-door models only
Item 10: at kerb weight
NOTE
The values under Item 10 are applicable to
unladen vehicles. These values can also be
varied depending on the tyre size, optional
equipment and suspension conditions.
Operating hints(1) Do not let the clutch slip (vehicles with
a manual transmission only) and do not
increase the engine speed more than
necessary when starting.
(2) Be sure that the driving speed does not
exceed the 100 km/h (62 mph) for
trailer operation.
It is also recommended that you obey
the local regulations in case driving
speed with a trailer is limited to less
than 100 km/h (62 mph).
(3) To prevent shocks from the overrun
brake, depress the brake pedal lightly
at first and then more strongly.
(4) To make full use of engine braking,
change to a lower gear before
descending a slope.
(5) The body, brakes, clutch, and chas-
sis will be under additional strain when
towing a trailer.
(6) The heavier weight and higher rolling
and air resistance will increase fuel
consumption.Additional precautions for vehicles
equipped with an automatic transmis-
sion
The 2nd gear (in sports mode) is recom-
mended on slopes or at low speed. Use the
1st gear (in sports mode) in mountainous
areas in order to make better use of engine
braking and to assist the brake system.
However, be sure that the speed does not
exceed the maximum speed limit for the
selected gear.
Starting and driving
5-10Div:
Out put date:
Page 172 of 392
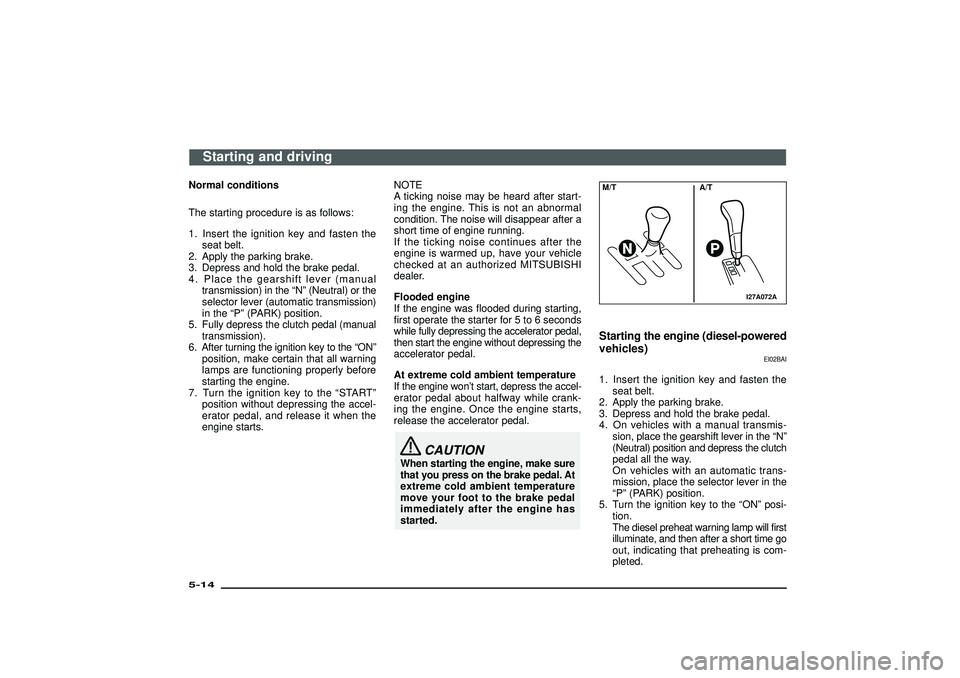
Normal conditions
The starting procedure is as follows:
1. Insert the ignition key and fasten the
seat belt.
2. Apply the parking brake.
3. Depress and hold the brake pedal.
4. Place the gearshift lever (manual
transmission) in the“N”(Neutral) or the
selector lever (automatic transmission)
in the“P”(PARK) position.
5. Fully depress the clutch pedal (manual
transmission).
6. After turning the ignition key to the“ON”
position, make certain that all warning
lamps are functioning properly before
starting the engine.
7. Turn the ignition key to the“START”
position without depressing the accel-
erator pedal, and release it when the
engine starts.NOTE
A ticking noise may be heard after start-
ing the engine. This is not an abnormal
condition. The noise will disappear after a
short time of engine running.
If the ticking noise continues after the
engine is warmed up, have your vehicle
checked at an authorized MITSUBISHI
dealer.
Flooded engine
If the engine was flooded during starting,
first operate the starter for 5 to 6 seconds
while fully depressing the accelerator pedal,
then start the engine without depressing the
accelerator pedal.
At extreme cold ambient temperature
If the engine won’t start, depress the accel-
erator pedal about halfway while crank-
ing the engine. Once the engine starts,
release the accelerator pedal.
CAUTION
When starting the engine, make sure
that you press on the brake pedal. At
extreme cold ambient temperature
move your foot to the brake pedal
immediately after the engine has
started.
I27A072A
M/T A/TStarting the engine (diesel-powered
vehicles)
EI02BAI
1. Insert the ignition key and fasten the
seat belt.
2. Apply the parking brake.
3. Depress and hold the brake pedal.
4. On vehicles with a manual transmis-
sion, place the gearshift lever in the“N”
(Neutral) position and depress the clutch
pedal all the way.
On vehicles with an automatic trans-
mission, place the selector lever in the
“P”(PARK) position.
5. Turn the ignition key to the“ON”posi-
tion.
The diesel preheat warning lamp will first
illuminate, and then after a short time go
out, indicating that preheating is com-
pleted.
Starting and driving
5-14Div:
Out put date:
Page 173 of 392
NOTE
(1) If the engine is cold, the diesel pre-
heat warning lamp is on for a longer
time.
(2) When the engine has not been started
within about 5 seconds after the die-
sel preheat warning lamp went out,
return the ignition key to the“LOCK”
position. Then, turn the key to the“ON”
position to preheat the engine again.
(3) When the engine is warm, the diesel
preheat warning lamp does not come
on even if the ignition key is placed in
the“ON”position.
Start the engine by turning the igni-
tion key right to the“START”position.
6. Operate the accelerator pedal as
described below in accordance with the
atmospheric temperature and/or engine
condition and then start the engine.
(1) When the atmospheric temperature is
moderate or the engine is warm, start
the engine without depressing the
accelerator pedal.
(2) When the atmospheric temperature is
low and the engine is cold, start the
engine following procedures:
2500 models: Without depressing the
accelerator pedal, start the
engine.
3200 models: While depressing the accel-
erator pedal about halfway,
start the engine.
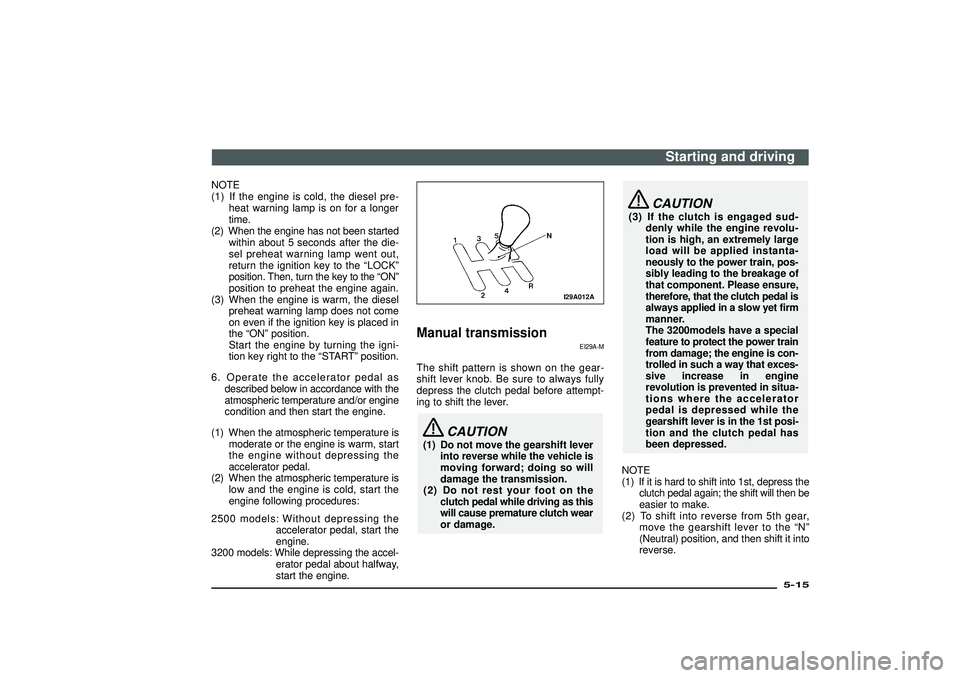
I29A012A
Manual transmission
EI29A-M
The shift pattern is shown on the gear-
shift lever knob. Be sure to always fully
depress the clutch pedal before attempt-
ing to shift the lever.
CAUTION
(1) Do not move the gearshift lever
into reverse while the vehicle is
moving forward; doing so will
damage the transmission.
(2) Do not rest your foot on the
clutch pedal while driving as this
will cause premature clutch wear
or damage.
CAUTION
(3) If the clutch is engaged sud-
denly while the engine revolu-
tion is high, an extremely large
load will be applied instanta-
neously to the power train, pos-
sibly leading to the breakage of
that component. Please ensure,
therefore, that the clutch pedal is
always applied in a slow yet firm
manner.
The 3200models have a special
feature to protect the power train
from damage; the engine is con-
trolled in such a way that exces-
sive increase in engine
revolution is prevented in situa-
tions where the accelerator
pedal is depressed while the
gearshift lever is in the 1st posi-
tion and the clutch pedal has
been depressed.
NOTE
(1) If it is hard to shift into 1st, depress the
clutch pedal again; the shift will then be
easier to make.
(2) To shift into reverse from 5th gear,
move the gearshift lever to the“N”
(Neutral) position, and then shift it into
reverse.
Starting and driving
5-15
Div:
Out put date:
Page 183 of 392

I31D019A
CAUTION
(1) Use 1st gear in the“4L”posi-
tion for very low-speed off-road
driving.
(2) Your vehicle engine should never
be operated with the engine oil
level below the MIN mark on the
dipstick. In rough terrain which
requires four-wheel drive trac-
tion, ensure that the engine oil
level is above the MIN mark on
the dipstick.
Transfer shift lever operation
EI31D-Sb
To shift transfer
case fromTo Procedure
2H 4HThe transfer shift lever can be operated while the vehicle is either moving or sta-
tionary.
In case lever operation is necessary while the vehicle is moving, place the vehicle
in the straight ahead position and depress the clutch pedal to the floor before oper-
ating the lever. 4H 2H
4H 4L
Stop the vehicle, depress the clutch pedal to the floor and operate the transfer shift
lever.
4L 4HNOTE
(1) Shifting of the lever between“2H”↔“4H”should only be made at speeds below 100
km/h (62 mph).
(2) During driving, never attempt to shift from“4H”to“4L”or vice versa.
Starting and driving
5-25
Div:
Out put date:
Page 188 of 392
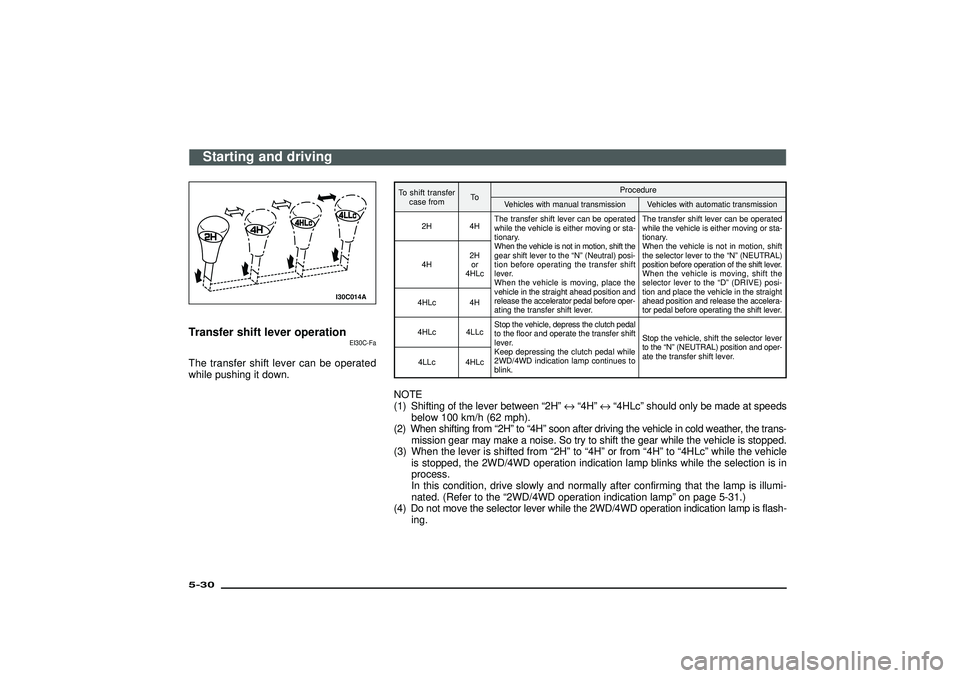
I30C014A
Transfer shift lever operation
EI30C-Fa
The transfer shift lever can be operated
while pushing it down.
To shift transfer
case fromToProcedure
Vehicles with manual transmission Vehicles with automatic transmission
2H 4HThe transfer shift lever can be operated
while the vehicle is either moving or sta-
tionary.
When the vehicle is not in motion, shift the
gear shift lever to the“N”(Neutral) posi-
tion before operating the transfer shift
lever.
When the vehicle is moving, place the
vehicle in the straight ahead position and
release the accelerator pedal before oper-
ating the transfer shift lever.The transfer shift lever can be operated
while the vehicle is either moving or sta-
tionary.
When the vehicle is not in motion, shift
the selector lever to the“N”(NEUTRAL)
position before operation of the shift lever.
When the vehicle is moving, shift the
selector lever to the“D”(DRIVE) posi-
tion and place the vehicle in the straight
ahead position and release the accelera-
tor pedal before operating the shift lever. 4H2H
or
4HLc
4HLc 4H
4HLc 4LLcStop the vehicle, depress the clutch pedal
to the floor and operate the transfer shift
lever.
Keep depressing the clutch pedal while
2WD/4WD indication lamp continues to
blink.Stop the vehicle, shift the selector lever
to the“N”(NEUTRAL) position and oper-
ate the transfer shift lever.
4LLc 4HLcNOTE
(1) Shifting of the lever between“2H”↔“4H”↔“4HLc”should only be made at speeds
below 100 km/h (62 mph).
(2) When shifting from“2H”to“4H”soon after driving the vehicle in cold weather, the trans-
mission gear may make a noise. So try to shift the gear while the vehicle is stopped.
(3) When the lever is shifted from“2H”to“4H”or from“4H”to“4HLc”while the vehicle
is stopped, the 2WD/4WD operation indication lamp blinks while the selection is in
process.
In this condition, drive slowly and normally after confirming that the lamp is illumi-
nated. (Refer to the“2WD/4WD operation indication lamp”on page 5-31.)
(4) Do not move the selector lever while the 2WD/4WD operation indication lamp is flash-
ing.
Starting and driving
5-30Div:
Out put date:
Page 191 of 392
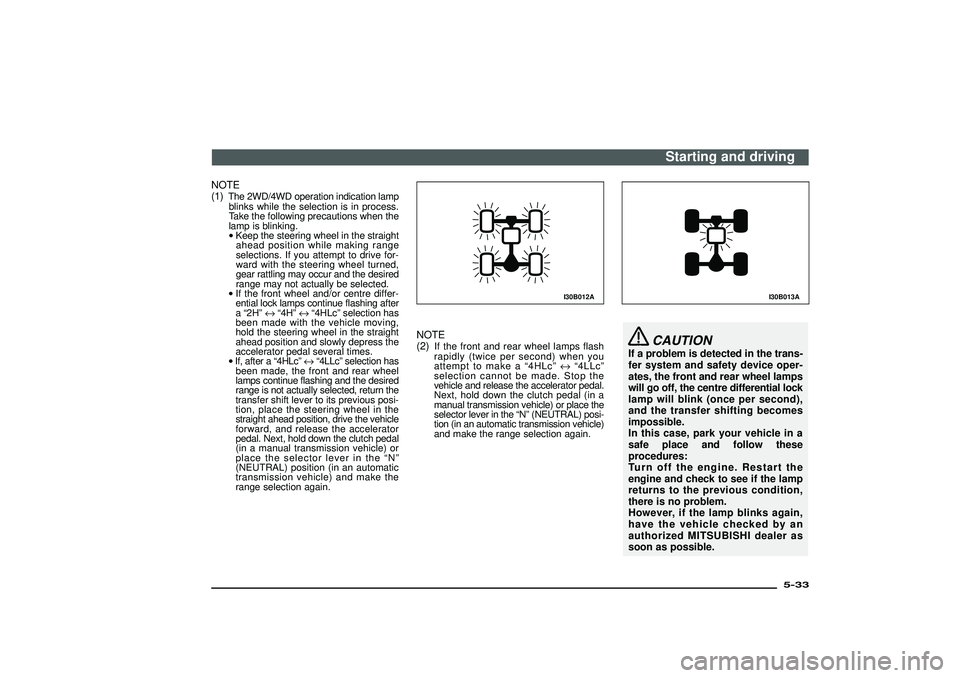
NOTE
(1)
The 2WD/4WD operation indication lamp
blinks while the selection is in process.
Take the following precautions when the
lamp is blinking.
•Keep the steering wheel in the straight
ahead position while making range
selections. If you attempt to drive for-
ward with the steering wheel turned,
gear rattling may occur and the desired
range may not actually be selected.
•If the front wheel and/or centre differ-
ential lock lamps continue flashing after
a“2H”↔“4H”↔“4HLc”selection has
been made with the vehicle moving,
hold the steering wheel in the straight
ahead position and slowly depress the
accelerator pedal several times.
•If, after a“4HLc”↔“4LLc”selection has
been made, the front and rear wheel
lamps continue flashing and the desired
range is not actually selected, return the
transfer shift lever to its previous posi-
tion, place the steering wheel in the
straight ahead position, drive the vehicle
forward, and release the accelerator
pedal. Next, hold down the clutch pedal
(in a manual transmission vehicle) or
place the selector lever in the“N”
(NEUTRAL) position (in an automatic
transmission vehicle) and make the
range selection again.
I30B012A
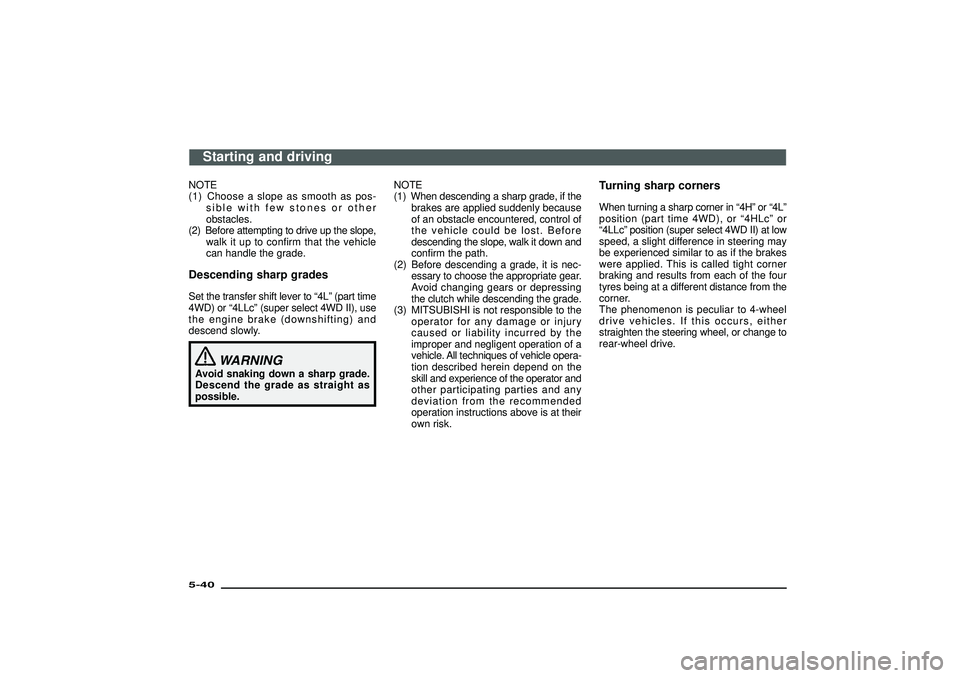
NOTE
(2)
If the front and rear wheel lamps flash
rapidly (twice per second) when you
attempt to make a“4HLc”↔“4LLc”
selection cannot be made. Stop the
vehicle and release the accelerator pedal.
Next, hold down the clutch pedal (in a
manual transmission vehicle) or place the
selector lever in the“N”(NEUTRAL) posi-
tion (in an automatic transmission vehicle)
and make the range selection again.
I30B013A
CAUTION
If a problem is detected in the trans-
fer system and safety device oper-
ates, the front and rear wheel lamps
will go off, the centre differential lock
lamp will blink (once per second),
and the transfer shifting becomes
impossible.
In this case, park your vehicle in a
safe place and follow these
procedures:
Turn off the engine. Restart the
engine and check to see if the lamp
returns to the previous condition,
there is no problem.
However, if the lamp blinks again,
have the vehicle checked by an
authorized MITSUBISHI dealer as
soon as possible.
Starting and driving
5-33
Div:
Out put date:
Page 198 of 392
NOTE
(1) Choose a slope as smooth as pos-
sible with few stones or other
obstacles.
(2) Before attempting to drive up the slope,
walk it up to confirm that the vehicle
can handle the grade.Descending sharp gradesSet the transfer shift lever to“4L”(part time
4WD) or“4LLc”(super select 4WD II), use
the engine brake (downshifting) and
descend slowly.
WARNING
Avoid snaking down a sharp grade.
Descend the grade as straight as
possible.NOTE
(1) When descending a sharp grade, if the
brakes are applied suddenly because
of an obstacle encountered, control of
the vehicle could be lost. Before
descending the slope, walk it down and
confirm the path.
(2) Before descending a grade, it is nec-
essary to choose the appropriate gear.
Avoid changing gears or depressing
the clutch while descending the grade.
(3) MITSUBISHI is not responsible to the
operator for any damage or injury
caused or liability incurred by the
improper and negligent operation of a
vehicle. All techniques of vehicle opera-
tion described herein depend on the
skill and experience of the operator and
other participating parties and any
deviation from the recommended
operation instructions above is at their
own risk.
Turning sharp cornersWhen turning a sharp corner in“4H”or“4L”
position (part time 4WD), or“4HLc”or
“4LLc”position (super select 4WD II) at low
speed, a slight difference in steering may
be experienced similar to as if the brakes
were applied. This is called tight corner
braking and results from each of the four
tyres being at a different distance from the
corner.
The phenomenon is peculiar to 4-wheel
drive vehicles. If this occurs, either
straighten the steering wheel, or change to
rear-wheel drive.
Starting and driving
5-40Div:
Out put date:
Page 200 of 392
Cautions on handling of 4WD
vehicles
EI49A-Xa
Tyre and disc wheelsSince the driving torque can be applied to
the 4 wheels, the performance of the
vehicle when operating in 4WD is greatly
affected by the condition of the tyres.
Pay close attention to the tyres.
•Install specified tyres on all wheels. Refer
to“Tyre and wheels”on page 10-10.
•Be sure to equip the car with all four tyres
and wheels of the same size and type.
When replacement of any of the tyres or
wheels is necessary, replace all of them.
•All tyres should be rotated whenever the
wear difference between front and rear
tyres is recognizable.
Good vehicle performance cannot be
expected if there is a difference in wear
between tyres. Refer to the“Tyre rotation”
on page 9-15.
•Check the tyre inflation pressure regu-
larly.
CAUTION
Always use tyres of the same size,
same type, and same brand, which
have no wear differences.
Using the tyres of differ in size, type,
brand or a different degree of wear
will cause excessive loading, result-
ing in possible damage to the drive
system.Jacking up a 4-wheel drive vehicles
WARNING
Do not crank the engine while jack-
ing up the vehicle.
The tyre on the ground may turn and
the vehicle may roll off the jack.Operate clutch pedal slowly and
positivelyQuick or slight clutch engagement made
while the engine is running at high speed
will cause damage to the clutch and trans-
mission because the tractive force is very
great.
Operate the pedal slowly and positively.
I07A002A
1
Parking brake
EI07AAEd
To park the vehicle, first bring it to a com-
plete stop, fully engage the parking brake,
and then move the gearshift lever to 1st (on
an uphill) or Reverse (on a downhill) posi-
tion, for vehicles with a manual transmis-
sion or set the selector lever to“P”(PARK)
position on automatic transmission
vehicles.To apply1- Pull the lever up without pushing the
button at the end of the hand grip.
Starting and driving
5-42Div:
Out put date:
Page 211 of 392
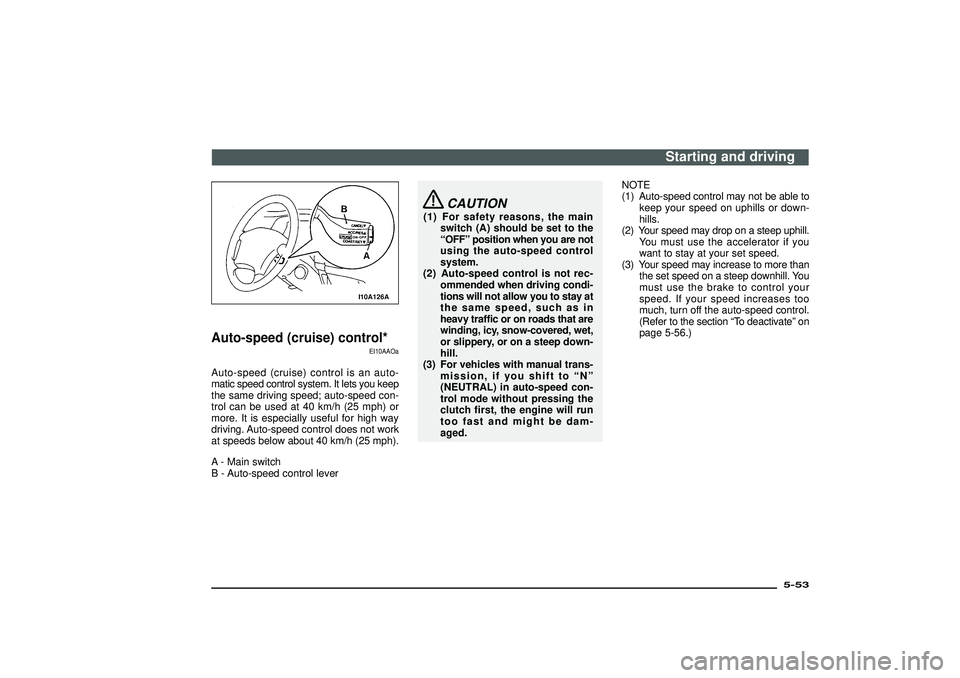
I10A126A
Auto-speed (cruise) control*
EI10AAOa
Auto-speed (cruise) control is an auto-
matic speed control system. It lets you keep
the same driving speed; auto-speed con-
trol can be used at 40 km/h (25 mph) or
more. It is especially useful for high way
driving. Auto-speed control does not work
at speeds below about 40 km/h (25 mph).
A - Main switch
B - Auto-speed control lever
CAUTION
(1) For safety reasons, the main
switch (A) should be set to the
“OFF”position when you are not
using the auto-speed control
system.
(2) Auto-speed control is not rec-
ommended when driving condi-
tions will not allow you to stay at
the same speed, such as in
heavy traffic or on roads that are
winding, icy, snow-covered, wet,
or slippery, or on a steep down-
hill.
(3) For vehicles with manual trans-
mission, if you shift to“N”
(NEUTRAL) in auto-speed con-
trol mode without pressing the
clutch first, the engine will run
too fast and might be dam-
aged.NOTE
(1) Auto-speed control may not be able to
keep your speed on uphills or down-
hills.
(2) Your speed may drop on a steep uphill.
You must use the accelerator if you
want to stay at your set speed.
(3) Your speed may increase to more than
the set speed on a steep downhill. You
must use the brake to control your
speed. If your speed increases too
much, turn off the auto-speed control.
(Refer to the section“To deactivate”on
page 5-56.)
Starting and driving
5-53
Div:
Out put date:
Page 214 of 392
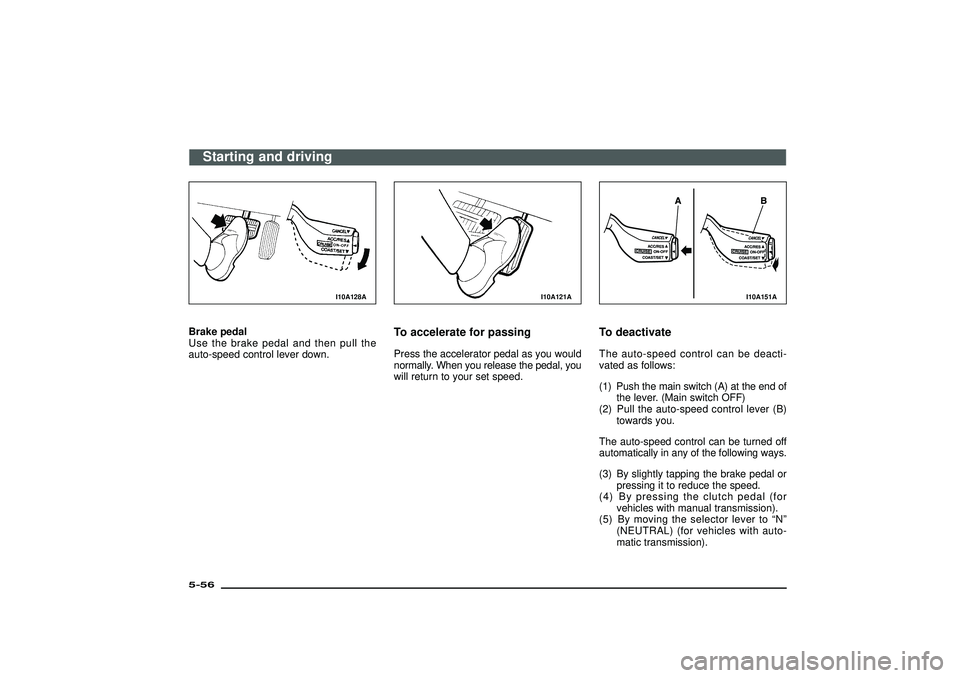
I10A128A
Brake pedal
Use the brake pedal and then pull the
auto-speed control lever down.
I10A121A
To accelerate for passingPress the accelerator pedal as you would
normally. When you release the pedal, you
will return to your set speed.
I10A151A
To deactivateThe auto-speed control can be deacti-
vated as follows:
(1) Push the main switch (A) at the end of
the lever. (Main switch OFF)
(2) Pull the auto-speed control lever (B)
towards you.
The auto-speed control can be turned off
automatically in any of the following ways.
(3) By slightly tapping the brake pedal or
pressing it to reduce the speed.
(4) By pressing the clutch pedal (for
vehicles with manual transmission).
(5) By moving the selector lever to“N”
(NEUTRAL) (for vehicles with auto-
matic transmission).
Starting and driving
5-56Div:
Out put date: