position lamps MITSUBISHI SHOGUN 2003 Owner's Manual (in English)
[x] Cancel search | Manufacturer: MITSUBISHI, Model Year: 2003, Model line: SHOGUN, Model: MITSUBISHI SHOGUN 2003Pages: 392, PDF Size: 14.34 MB
Page 9 of 392
Exterior
EB21DOIb
B21D219T
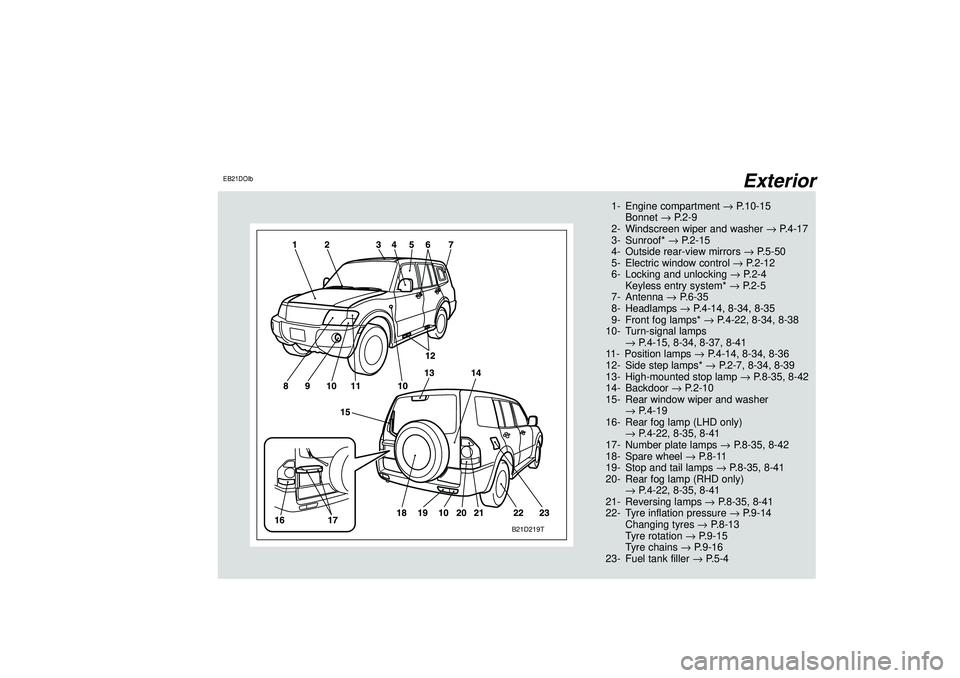
1- Engine compartment→P.10-15
Bonnet→P.2-9
2- Windscreen wiper and washer→P.4-17
3- Sunroof*→P.2-15
4- Outside rear-view mirrors→P.5-50
5- Electric window control→P.2-12
6- Locking and unlocking→P.2-4
Keyless entry system*→P.2-5
7- Antenna→P.6-35
8- Headlamps→P.4-14, 8-34, 8-35
9- Front fog lamps*→P.4-22, 8-34, 8-38
10- Turn-signal lamps
→P.4-15, 8-34, 8-37, 8-41
11- Position lamps→P.4-14, 8-34, 8-36
12- Side step lamps*→P.2-7, 8-34, 8-39
13- High-mounted stop lamp→P.8-35, 8-42
14- Backdoor→P.2-10
15- Rear window wiper and washer
→P.4-19
16- Rear fog lamp (LHD only)
→P.4-22, 8-35, 8-41
17- Number plate lamps→P.8-35, 8-42
18- Spare wheel→P.8-11
19- Stop and tail lamps→P.8-35, 8-41
20- Rear fog lamp (RHD only)
→P.4-22, 8-35, 8-41
21- Reversing lamps→P.8-35, 8-41
22- Tyre inflation pressure→P.9-14
Changing tyres→P.8-13
Tyre rotation→P.9-15
Tyre chains→P.9-16
23- Fuel tank filler→P.5-4
Div:
Out put date:
Page 19 of 392
F12A261A
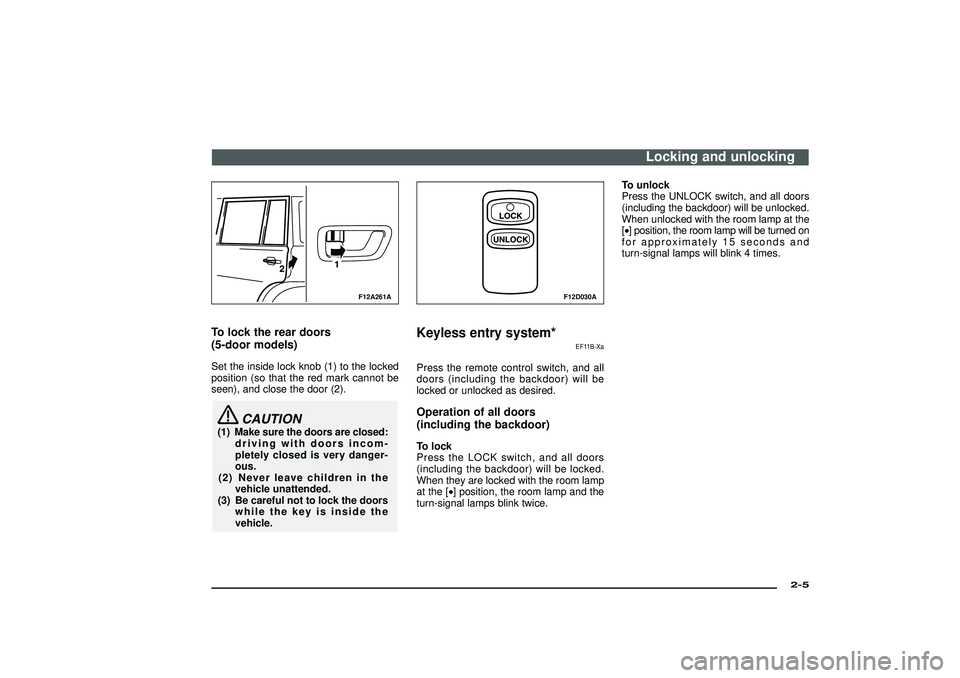
To lock the rear doors
(5-door models)Set the inside lock knob (1) to the locked
position (so that the red mark cannot be
seen), and close the door (2).
CAUTION
(1) Make sure the doors are closed:
driving with doors incom-
pletely closed is very danger-
ous.
(2) Never leave children in the
vehicle unattended.
(3) Be careful not to lock the doors
while the key is inside the
vehicle.
F12D030A
Keyless entry system*
EF11B-Xa
Press the remote control switch, and all
doors (including the backdoor) will be
locked or unlocked as desired.Operation of all doors
(including the backdoor)To lock
Press the LOCK switch, and all doors
(including the backdoor) will be locked.
When they are locked with the room lamp
at the [•] position, the room lamp and the
turn-signal lamps blink twice.To unlock
Press the UNLOCK switch, and all doors
(including the backdoor) will be unlocked.
When unlocked with the room lamp at the
[•] position, the room lamp will be turned on
for approximately 15 seconds and
turn-signal lamps will blink 4 times.
Locking and unlocking
2-5
Div:
Out put date:
Page 20 of 392
NOTE
(1) The confirmation function (this indi-
cates locking or unlocking of the doors
and backdoor with the flash of the turn-
signal lamps) can be deactivated. For
further information, please contact your
authorized MITSUBISHI dealer.
(2) The keyless entry system does not
operate if the key is left in the key cyl-
inder, or any door (including the
backdoor) is open.
(3) If the UNLOCK switch is pressed and
no door is opened within approxi-
mately 30 seconds: relocking will auto-
matically occur.
(4) The remote control switch will oper-
ate within about 4 m from the vehicle.
However, the operating range of the
remote control switch may change if
the vehicle is located near a TV trans-
mitting tower, power station, or radio
broadcasting station.
(5) If the doors cannot be locked or
unlocked after pressing the remote
control switch, the battery inside the
switch may need to be replaced.
Replace the battery at your autho-
rized MITSUBISHI dealer.(6) If your remote control switch is lost,
please contact your authorized MIT-
SUBISHI dealer for a replacement
remote control switch.
(7) If you wish to add a remote control
switch, please contact your autho-
rized MITSUBISHI dealer. A maxi-
mum of 4 remote control switches are
available for your vehicle.
CAUTION
(1) Do not leave the remote con-
trol switch where it may be
exposed to heat caused by the
direct rays of the sun.
(2) The remote control switch is a
precision electronic device.
Therefore, pay attention to the
following:
•Avoid knocking the remote
control switch hard against
other objects or dropping it.
•Keep the remote control switch
dry.
•Do not disassemble the remote
control switch.
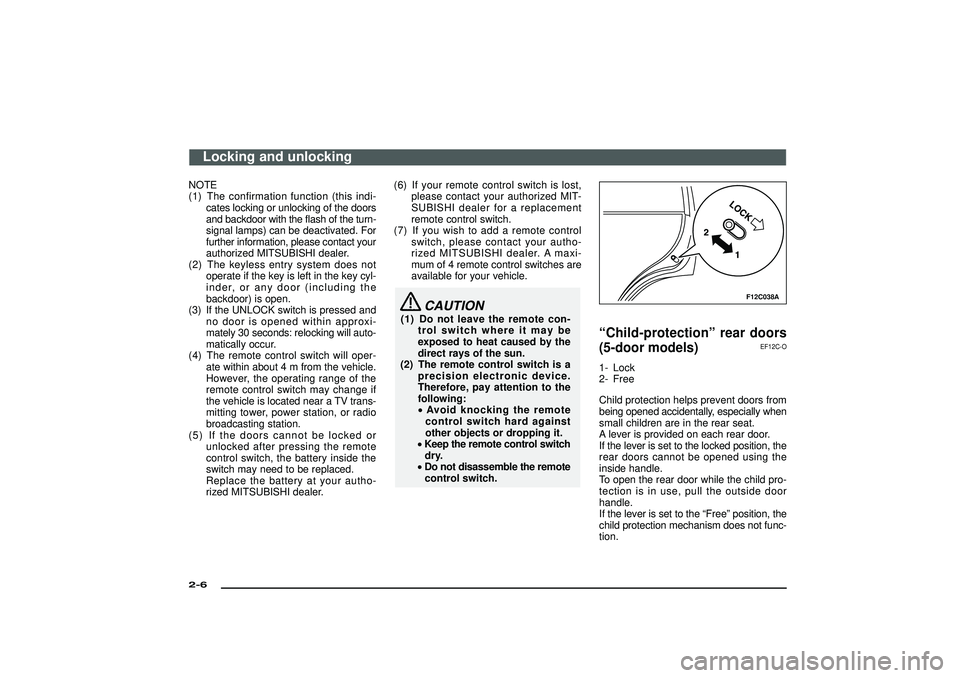
F12C038A
“Child-protection”rear doors
(5-door models)
EF12C-O
1- Lock
2- Free
Child protection helps prevent doors from
being opened accidentally, especially when
small children are in the rear seat.
A lever is provided on each rear door.
If the lever is set to the locked position, the
rear doors cannot be opened using the
inside handle.
To open the rear door while the child pro-
tection is in use, pull the outside door
handle.
If the lever is set to the“Free”position, the
child protection mechanism does not func-
tion.
Locking and unlocking
2-6Div:
Out put date:
Page 21 of 392
CAUTION
When driving with a child in the rear
seat, please use the child protec-
tion to prevent accidental door open-
ing which may cause an accident.
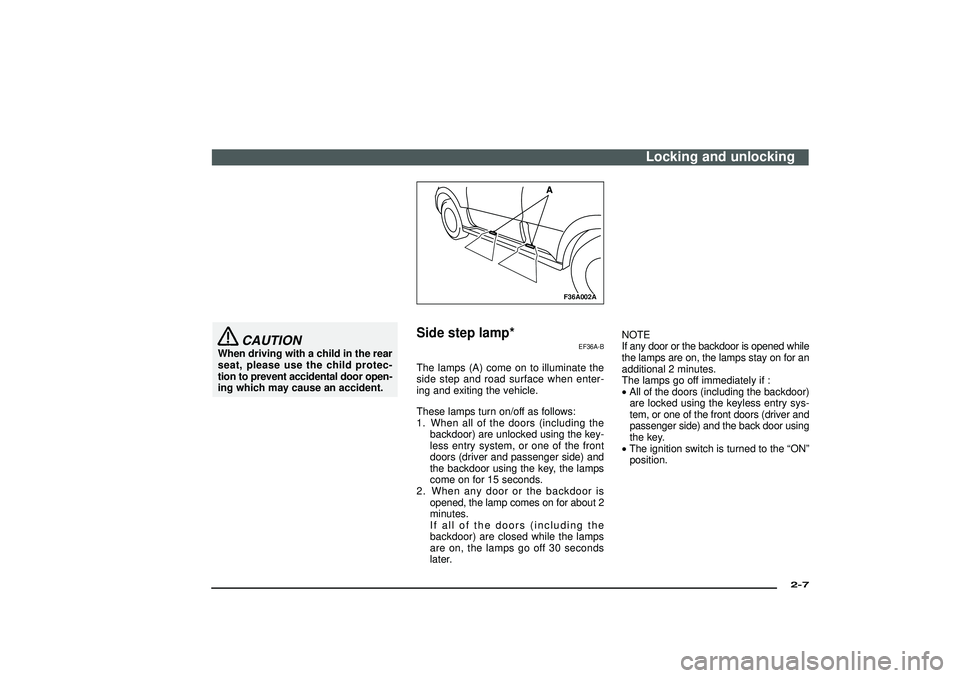
F36A002A
Side step lamp*
EF36A-B
The lamps (A) come on to illuminate the
side step and road surface when enter-
ing and exiting the vehicle.
These lamps turn on/off as follows:
1. When all of the doors (including the
backdoor) are unlocked using the key-
less entry system, or one of the front
doors (driver and passenger side) and
the backdoor using the key, the lamps
come on for 15 seconds.
2. When any door or the backdoor is
opened, the lamp comes on for about 2
minutes.
If all of the doors (including the
backdoor) are closed while the lamps
are on, the lamps go off 30 seconds
later.NOTE
If any door or the backdoor is opened while
the lamps are on, the lamps stay on for an
additional 2 minutes.
The lamps go off immediately if :
•All of the doors (including the backdoor)
are locked using the keyless entry sys-
tem, or one of the front doors (driver and
passenger side) and the back door using
the key.
•The ignition switch is turned to the“ON”
position.
Locking and unlocking
2-7
Div:
Out put date:
Page 101 of 392
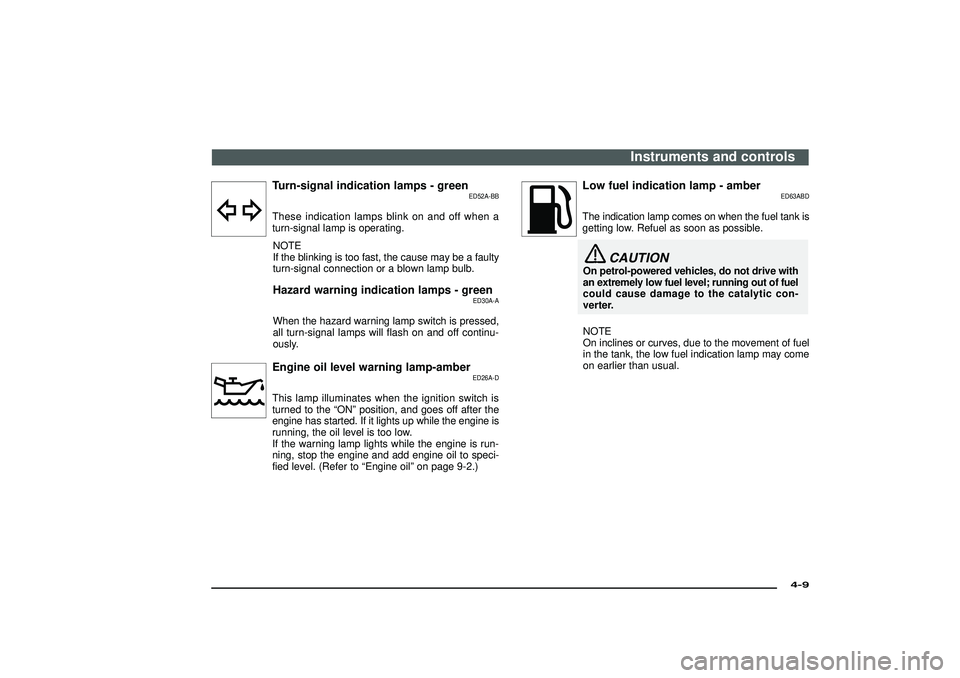
Turn-signal indication lamps - green
ED52A-BB
These indication lamps blink on and off when a
turn-signal lamp is operating.NOTE
If the blinking is too fast, the cause may be a faulty
turn-signal connection or a blown lamp bulb.Hazard warning indication lamps - green
ED30A-A
When the hazard warning lamp switch is pressed,
all turn-signal lamps will flash on and off continu-
ously.Engine oil level warning lamp-amber
ED26A-D
This lamp illuminates when the ignition switch is
turned to the “ON” position, and goes off after theengine has started. If it lights up while the engine is
running, the oil level is too low.
If the warning lamp lights while the engine is run-
ning, stop the engine and add engine oil to speci-
fied level. (Refer to “Engine oil” on page 9-2.)
Low fuel indication lamp - amber
ED63ABD
The indication lamp comes on when the fuel tank is
getting low. Refuel as soon as possible.
CAUTION
On petrol-powered vehicles, do not drive with
an extremely low fuel level; running out of fuel
could cause damage to the catalytic con-
verter.
NOTE
On inclines or curves, due to the movement of fuel
in the tank, the low fuel indication lamp may come
on earlier than usual.
Instruments and controls
4-9
Div:
Out put date:
Page 104 of 392
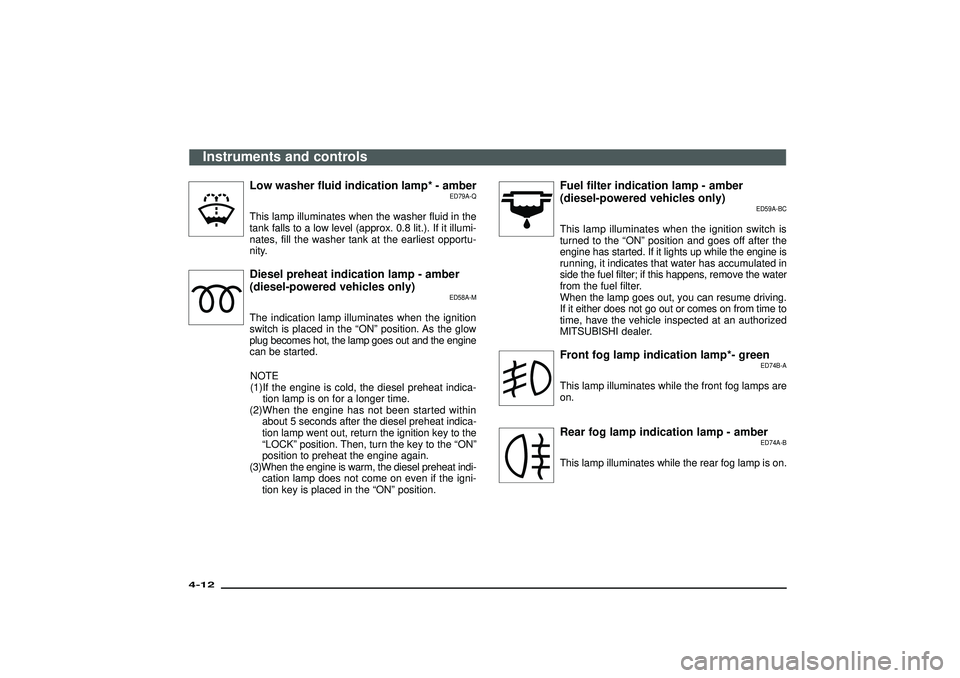
Low washer fluid indication lamp* - amber
ED79A-Q
This lamp illuminates when the washer fluid in the
tank falls to a low level (approx. 0.8 lit.). If it illumi-
nates, fill the washer tank at the earliest opportu-
nity.Diesel preheat indication lamp - amber
(diesel-powered vehicles only)
ED58A-M
The indication lamp illuminates when the ignition
switch is placed in the“ON ”position. As the glow
plug becomes hot, the lamp goes out and the engine
can be started.
NOTE
(1)If the engine is cold, the diesel preheat indica- tion lamp is on for a longer time.
(2)When the engine has not been started within about 5 seconds after the diesel preheat indica-
tion lamp went out, return the ignition key to the
“LOCK” position. Then, turn the key to the “ON”
position to preheat the engine again.
(3)When the engine is warm, the diesel preheat indi- cation lamp does not come on even if the igni-
tion key is placed in the “ON” position.
Fuel filter indication lamp - amber
(diesel-powered vehicles only)
ED59A-BC
This lamp illuminates when the ignition switch is
turned to the “ON ”position and goes off after the
engine has started. If it lights up while the engine is
running, it indicates that water has accumulated in
side the fuel filter; if this happens, remove the water
from the fuel filter.
When the lamp goes out, you can resume driving.
If it either does not go out or comes on from time to
time, have the vehicle inspected at an authorized
MITSUBISHI dealer.Front fog lamp indication lamp*- green
ED74B-A
This lamp illuminates while the front fog lamps are
on.Rear fog lamp indication lamp - amber
ED74A-B
This lamp illuminates while the rear fog lamp is on.
Instruments and controls
4-12Div:
Out put date:
Page 106 of 392
E11A039A
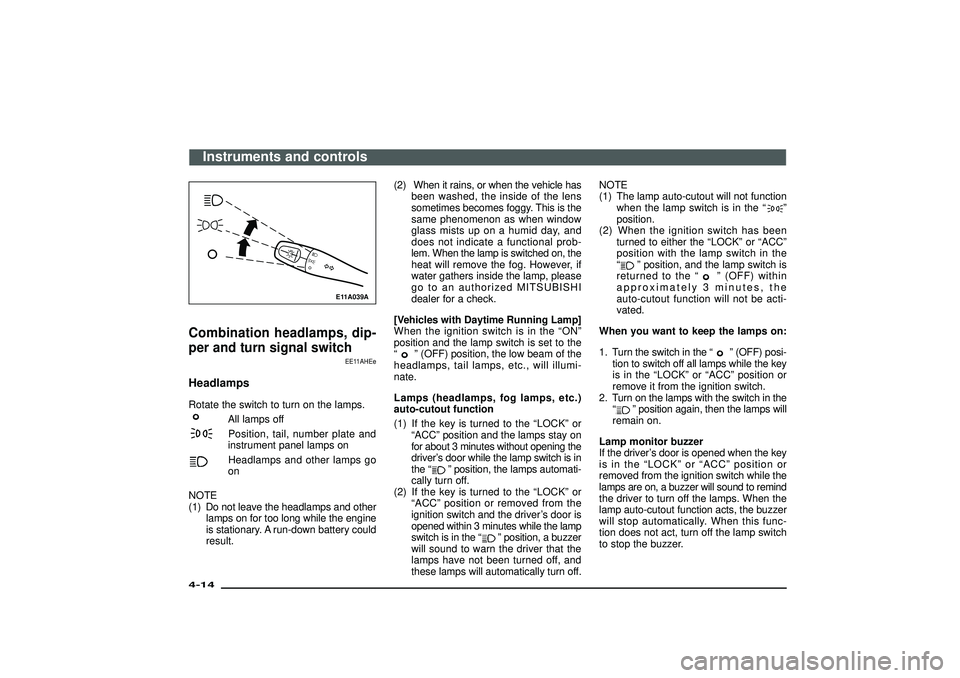
Combination headlamps, dip-
per and turn signal switch
EE11AHEe
HeadlampsRotate the switch to turn on the lamps.
All lamps offPosition, tail, number plate and
instrument panel lamps onHeadlamps and other lamps go
on
NOTE
(1) Do not leave the headlamps and other
lamps on for too long while the engine
is stationary. A run-down battery could
result.(2) When it rains, or when the vehicle has
been washed, the inside of the lens
sometimes becomes foggy. This is the
same phenomenon as when window
glass mists up on a humid day, and
does not indicate a functional prob-
lem. When the lamp is switched on, the
heat will remove the fog. However, if
water gathers inside the lamp, please
go to an authorized MITSUBISHI
dealer for a check.
[Vehicles with Daytime Running Lamp]
When the ignition switch is in the“ON”
position and the lamp switch is set to the
“
”(OFF) position, the low beam of the
headlamps, tail lamps, etc., will illumi-
nate.
Lamps (headlamps, fog lamps, etc.)
auto-cutout function
(1) If the key is turned to the“LOCK”or
“ACC”position and the lamps stay on
for about 3 minutes without opening the
driver’s door while the lamp switch is in
the“
”position, the lamps automati-
cally turn off.
(2) If the key is turned to the“LOCK”or
“ACC”position or removed from the
ignition switch and the driver’s door is
opened within 3 minutes while the lamp
switch is in the“
”position, a buzzer
will sound to warn the driver that the
lamps have not been turned off, and
these lamps will automatically turn off.NOTE
(1) The lamp auto-cutout will not function
when the lamp switch is in the“
”
position.
(2) When the ignition switch has been
turned to either the“LOCK”or“ACC”
position with the lamp switch in the
“
”position, and the lamp switch is
returned to the“
”(OFF) within
approximately 3 minutes, the
auto-cutout function will not be acti-
vated.
When you want to keep the lamps on:
1. Turn the switch in the“
”(OFF) posi-
tion to switch off all lamps while the key
is in the“LOCK”or“ACC”position or
remove it from the ignition switch.
2. Turn on the lamps with the switch in the
“
”position again, then the lamps will
remain on.
Lamp monitor buzzer
If the driver’s door is opened when the key
is in the“LOCK”or“ACC”position or
removed from the ignition switch while the
lamps are on, a buzzer will sound to remind
the driver to turn off the lamps. When the
lamp auto-cutout function acts, the buzzer
will stop automatically. When this func-
tion does not act, turn off the lamp switch
to stop the buzzer.
Instruments and controls
4-14Div:
Out put date:
Page 107 of 392
E11C034A
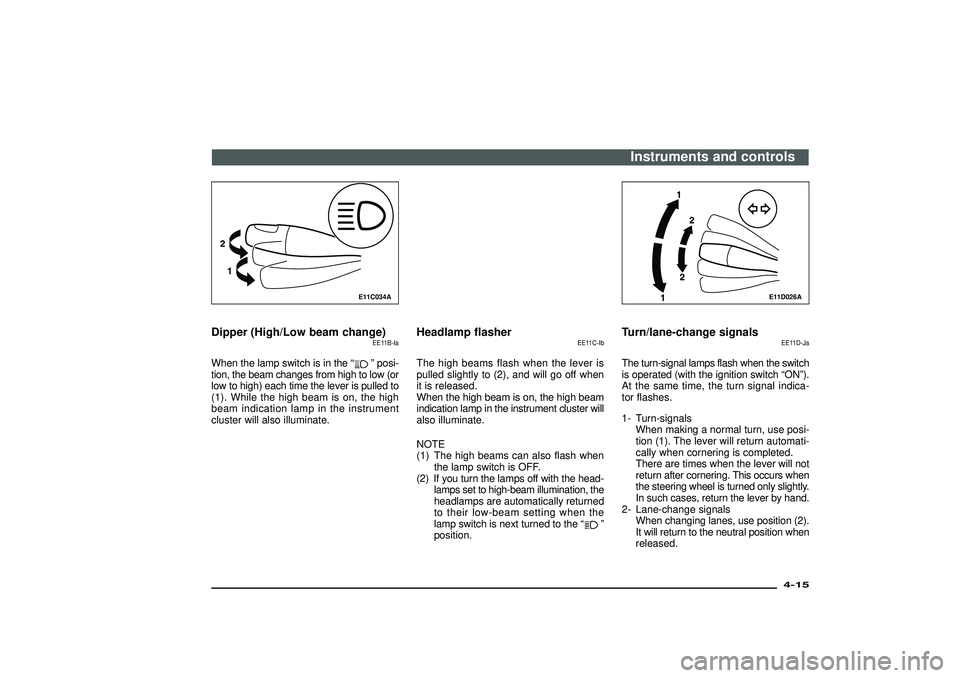
Dipper (High/Low beam change)
EE11B-Ia
When the lamp switch is in the“
”posi-
tion, the beam changes from high to low (or
low to high) each time the lever is pulled to
(1). While the high beam is on, the high
beam indication lamp in the instrument
cluster will also illuminate.
Headlamp flasher
EE11C-Ib
The high beams flash when the lever is
pulled slightly to (2), and will go off when
it is released.
When the high beam is on, the high beam
indication lamp in the instrument cluster will
also illuminate.
NOTE
(1) The high beams can also flash when
the lamp switch is OFF.
(2) If you turn the lamps off with the head-
lamps set to high-beam illumination, the
headlamps are automatically returned
to their low-beam setting when the
lamp switch is next turned to the“
”
position.
E11D026A
Turn/lane-change signals
EE11D-Ja
The turn-signal lamps flash when the switch
is operated (with the ignition switch“ON”).
At the same time, the turn signal indica-
tor flashes.
1- Turn-signals
When making a normal turn, use posi-
tion (1). The lever will return automati-
cally when cornering is completed.
There are times when the lever will not
return after cornering. This occurs when
the steering wheel is turned only slightly.
In such cases, return the lever by hand.
2- Lane-change signals
When changing lanes, use position (2).
It will return to the neutral position when
released.Instruments and controls
4-15
Div:
Out put date:
Page 108 of 392
NOTE
If the lamp flashes unusually quickly, the
bulb in a turn-signal lamp may have burned
out. Have the vehicle inspected by an
authorized MITSUBISHI dealer.
E01G050A
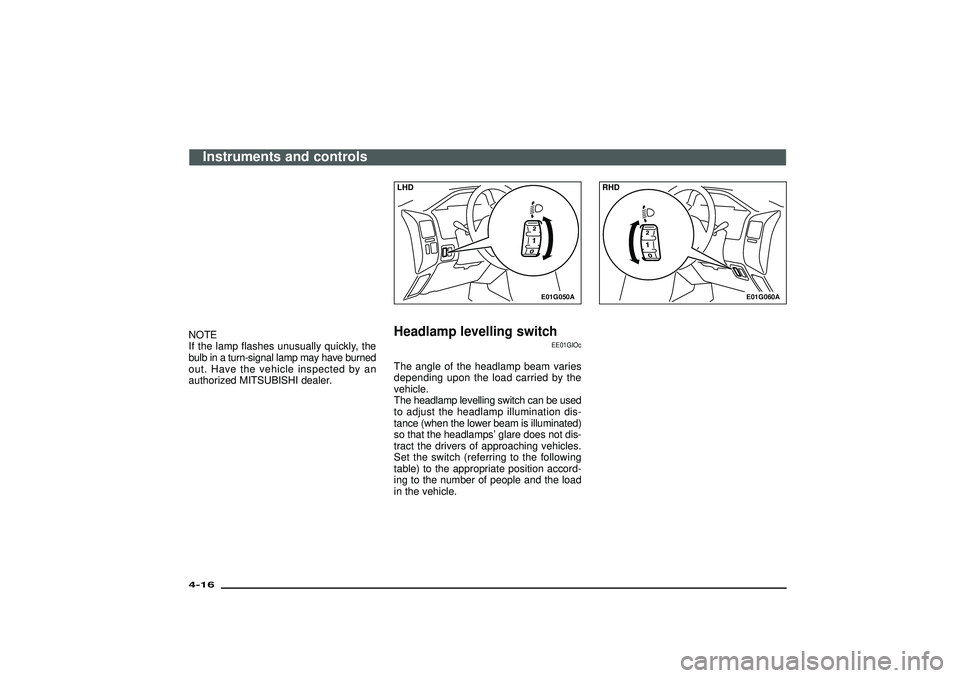
LHDHeadlamp levelling switch
EE01GIOc
The angle of the headlamp beam varies
depending upon the load carried by the
vehicle.
The headlamp levelling switch can be used
to adjust the headlamp illumination dis-
tance (when the lower beam is illuminated)
so that the headlamps’glare does not dis-
tract the drivers of approaching vehicles.
Set the switch (referring to the following
table) to the appropriate position accord-
ing to the number of people and the load
in the vehicle.
E01G060A
RHD
Instruments and controls
4-16Div:
Out put date:
Page 111 of 392
E13B055A
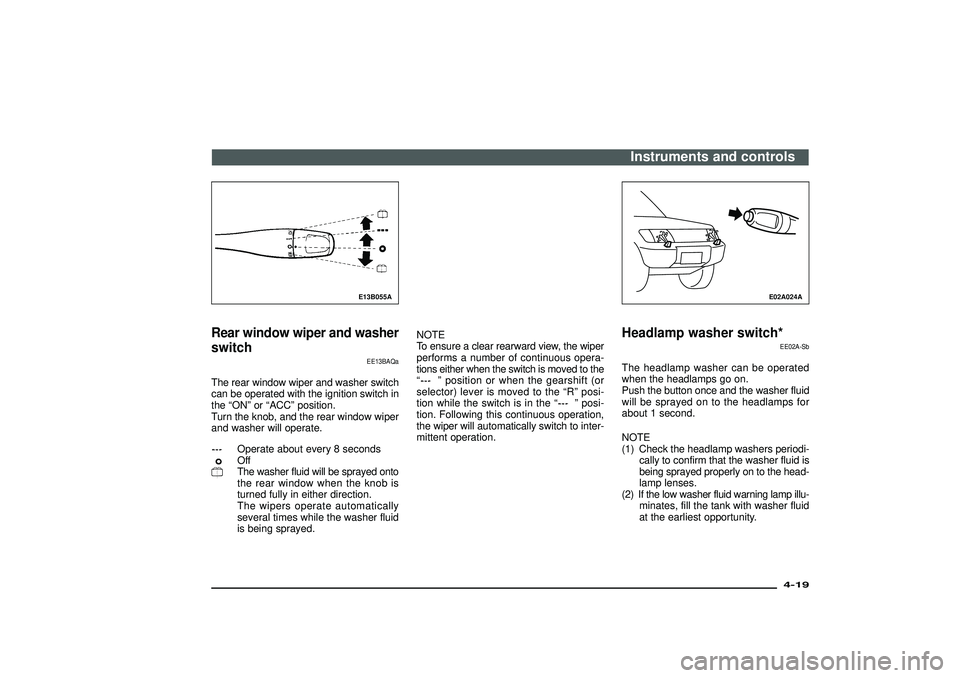
Rear window wiper and washer
switch
EE13BAQa
The rear window wiper and washer switch
can be operated with the ignition switch in
the“ON”or“ACC”position.
Turn the knob, and the rear window wiper
and washer will operate.
Operate about every 8 secondsOffThe washer fluid will be sprayed onto
the rear window when the knob is
turned fully in either direction.
The wipers operate automatically
several times while the washer fluid
is being sprayed.NOTE
To ensure a clear rearward view, the wiper
performs a number of continuous opera-
tions either when the switch is moved to the
“
”position or when the gearshift (or
selector) lever is moved to the“R”posi-
tion while the switch is in the“
”posi-
tion. Following this continuous operation,
the wiper will automatically switch to inter-
mittent operation.
E02A024A
Headlamp washer switch*
EE02A-Sb
The headlamp washer can be operated
when the headlamps go on.
Push the button once and the washer fluid
will be sprayed on to the headlamps for
about 1 second.
NOTE
(1) Check the headlamp washers periodi-
cally to confirm that the washer fluid is
being sprayed properly on to the head-
lamp lenses.
(2) If the low washer fluid warning lamp illu-
minates, fill the tank with washer fluid
at the earliest opportunity.Instruments and controls
4-19
Div:
Out put date: