Light MITSUBISHI SHOGUN 2008 (in English) User Guide
[x] Cancel search | Manufacturer: MITSUBISHI, Model Year: 2008, Model line: SHOGUN, Model: MITSUBISHI SHOGUN 2008Pages: 538, PDF Size: 25.09 MB
Page 62 of 538
2-16 Seat and seat belts
2
Third seat (5
-door models)
*
E00402700149
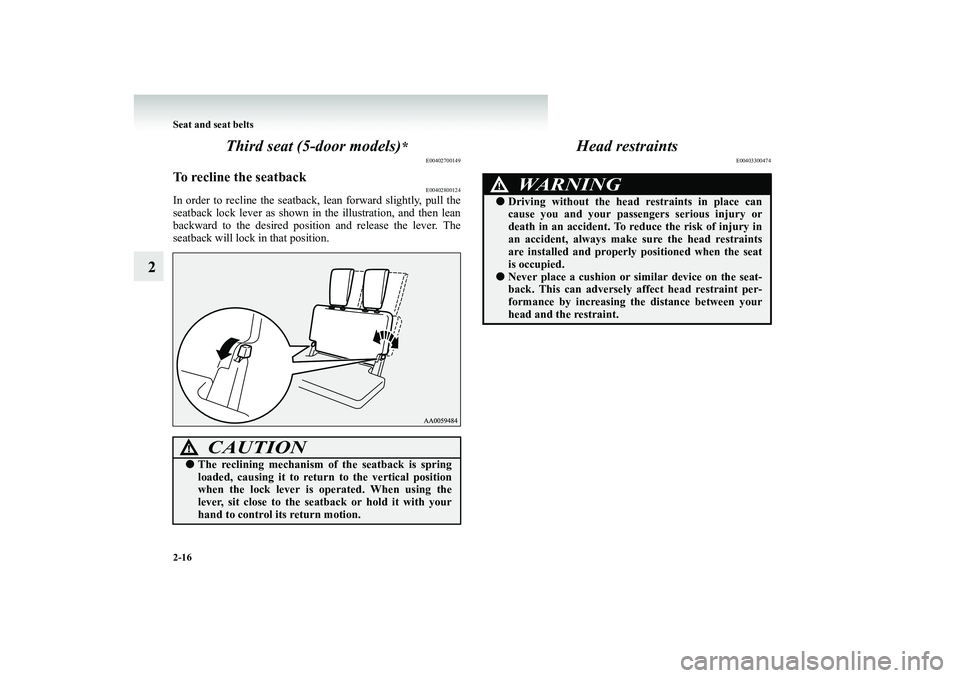
To recline the seatback
E00402800124
In order to recline th
e seatback, lean forw
ard slightly, pull the
seatback lock lever as shown in
the illustration, and then lean
backward to the desired positio
n and release the lever. The
seatback will lock in that position.
Head restraints
E00403300474
CAUTION
!●
The reclining mechanism of
the seatback is spring
loaded, causing it to return
to the vertical position
when the lock lever is
operated. When using the
lever, sit close to the seat
back or hold it with your
hand to control its return motion.
WARNING
!●
Driving without the head
restraints in place can
cause you and your passengers serious injury or death in an accident. To re
duce the risk of injury in
an accident, always make sure the head restraintsare installed and properly
positioned when the seat
is occupied.
●
Never place a cushion or si
milar device on the seat-
back. This can adversely af
fect head restraint per-
formance by increasing
the distance between your
head and the restraint.
BK-BK2008E1ENUK.en-uk-Section5.fm Page
16 Wednesday, January 9, 2008 4:28 PM
Page 67 of 538
Seat and seat belts
2-21
2
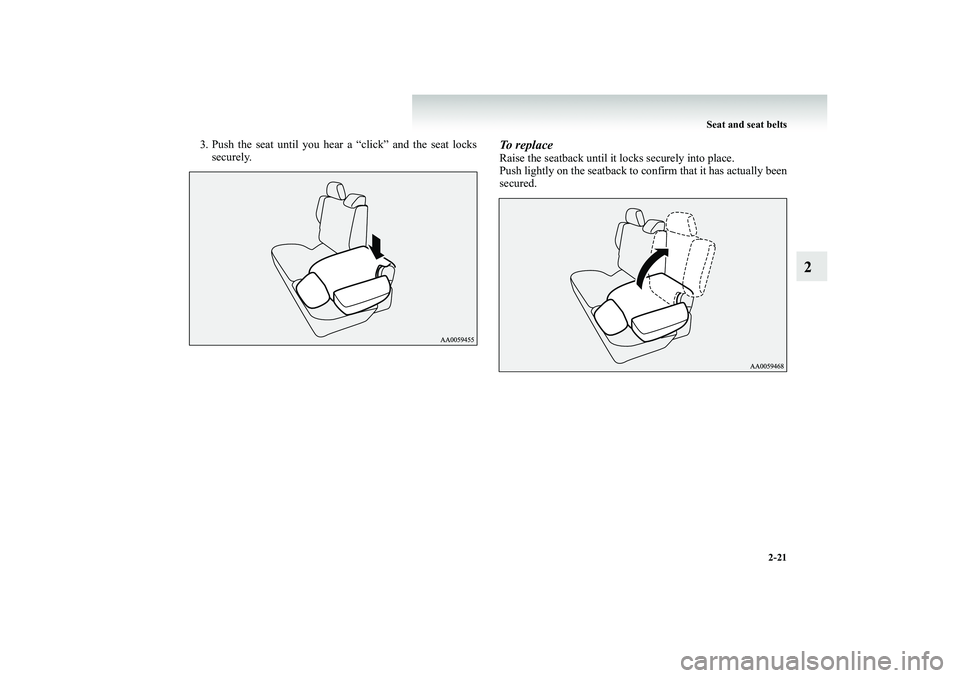
3. Push the seat until you hear
a “click” and the seat locks
securely.
To replaceRaise the seatback until it locks securely into place.Push lightly on the seatback to
confirm that it has actually been
secured.
BK-BK2008E1ENUK.en-uk-Section5.fm Page
21 Wednesday, January 9, 2008 4:28 PM
Page 70 of 538
2-24 Seat and seat belts
2
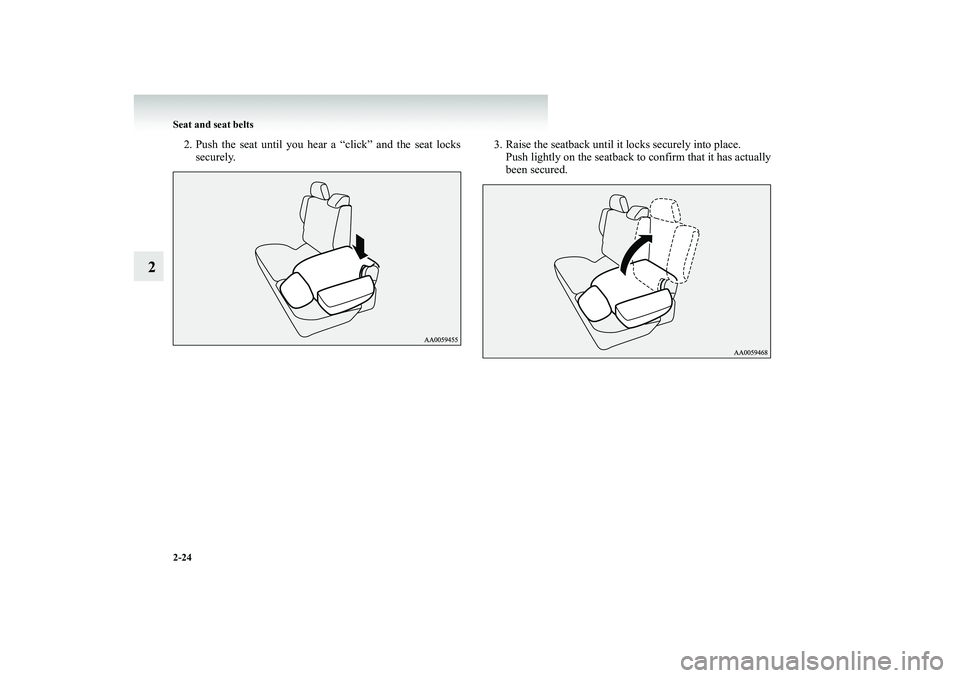
2. Push the seat until you hear a “click” and the seat locks
securely.
3. Raise the seatback until it
locks securely into place.
Push lightly on the seatback to confirm that it has actually been secured.
BK-BK2008E1ENUK.en-uk-Section5.fm Page
24 Wednesday, January 9, 2008 4:28 PM
Page 75 of 538

Seat and seat belts
2-29
2
3. Push knob (A) forward, a
nd raise the seatback until it
locks securely into place. After the operation, push lightly on the seatback to con- firm that it has act
ually been secured.
4. Refit the luggage floor board and head restraints.
Removing the third seat
E00404200122
To create more luggage space, you can remove the third seat.
CAUTION
!●
For safety, do not allow children to remove or refit the seat.
●
Be careful not to trap your hands or feet when removing or refitting the seat. Also, be careful not to drop or trip over the seat. If necessary, have some-one help you remove it.
BK-BK2008E1ENUK.en-uk-Section5.fm Page
29 Wednesday, January 9, 2008 4:28 PM
Page 81 of 538
Seat and seat belts
2-35
2
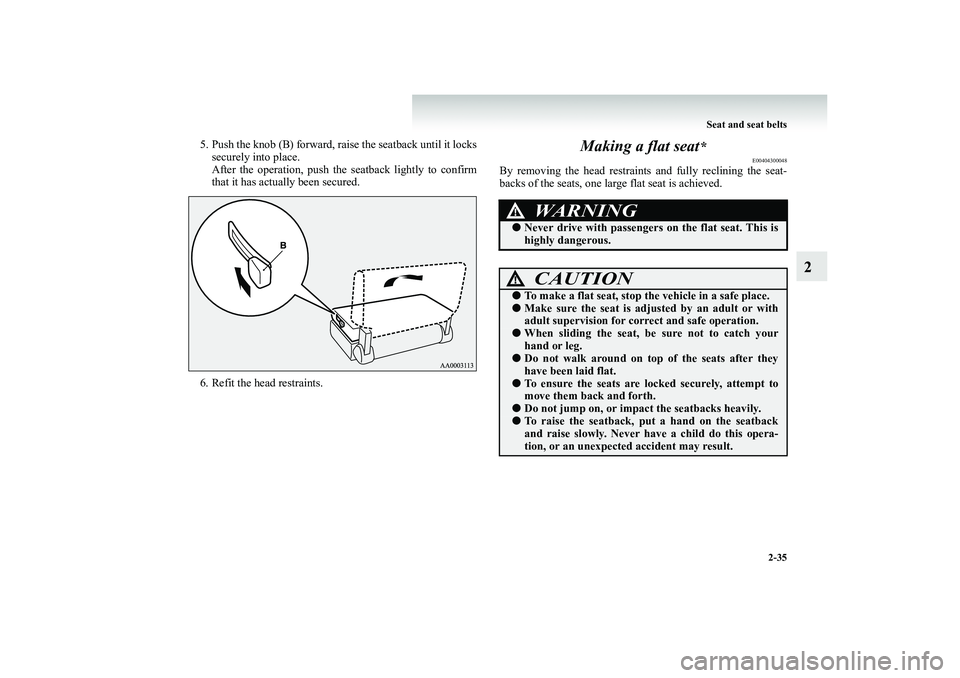
5. Push the knob (B) forward, rais
e the seatback until it locks
securely into place. After the operation, push the
seatback lightly to confirm
that it has actually been secured.
6. Refit the head restraints.
Making a flat seat
*
E00404300048
By removing the head restraints and fully reclining the seat- backs of the seats, one large flat seat is achieved.
WARNING
!●
Never drive with passengers
on the flat seat. This is
highly dangerous.CAUTION
!●
To make a flat seat, stop the vehicle in a safe place.
●
Make sure the seat is adju
sted by an adult or with
adult supervision for corr
ect and safe operation.
●
When sliding the seat, be
sure not to catch your
hand or leg.
●
Do not walk around on top of the seats after they have been laid flat.
●
To ensure the seats are locked securely, attempt to move them back and forth.
●
Do not jump on, or impact the seatbacks heavily.
●
To raise the seatback, pu
t a hand on the seatback
and raise slowly. Never have a child do this opera- tion, or an unexpected
accident may result.
BK-BK2008E1ENUK.en-uk-Section5.fm Page
35 Wednesday, January 9, 2008 4:28 PM
Page 86 of 538
2-40 Seat and seat belts
2
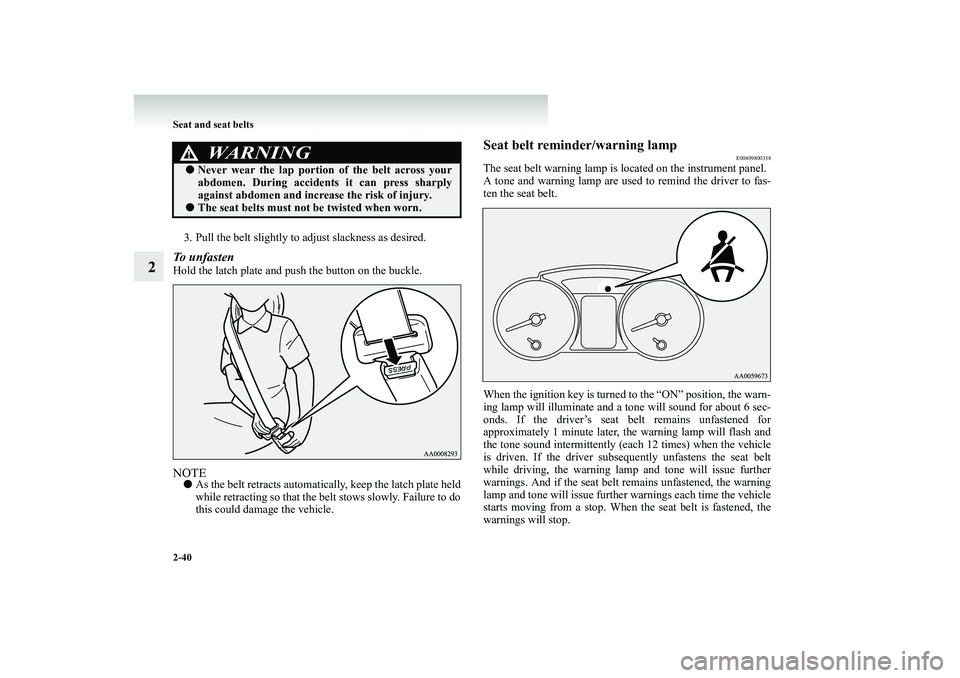
3. Pull the belt slightly to adjust slackness as desired.To unfasten Hold the latch plate and pu
sh the button on the buckle.
NOTE●
As the belt retracts automatically, keep the latch plate held while retracting so that the belt stows slowly. Failure to dothis could damage the vehicle.
Seat belt reminder/warning lamp
E00409800338
The seat belt warning lamp is located on the instrument panel.A tone and warning lamp are used to remind the driver to fas- ten the seat belt. When the ignition key is turned to the “ON” position, the warn- ing lamp will illuminate and a tone will sound for about 6 sec- onds. If the driver’s seat belt remains unfastened for approximately 1 minute later, the warning lamp will flash andthe tone sound intermittently (each 12 times) when the vehicle is driven. If the driver subseq
uently unfastens the seat belt
while driving, the warning lamp and tone will issue furtherwarnings. And if the seat belt remains unfastened, the warning lamp and tone will issue further
warnings each time the vehicle
starts moving from a stop. When
the seat belt is fastened, the
warnings will stop.
WARNING
!●
Never wear the lap portio
n of the belt across your
abdomen. During accident
s it can press sharply
against abdomen and increa
se the risk of injury.
●
The seat belts must not be twisted when worn.
BK-BK2008E1ENUK.en-uk-Section5.fm Page
40 Wednesday, January 9, 2008 4:28 PM
Page 106 of 538
2-60 Seat and seat belts
2
CAUTION
!●
Airbags inflate at an extremely rapid speed. In cer- tain situations, contact wi
th inflating airbags can
result in abrasions, light cuts, bruises, and the like.WARNING
!●
IT IS VERY IMPORTANT TO BE PROPERLY SEATED. A driver or front passenger too close to the steeringwheel or instrument panel during airbag deploy- ment can be killed or seriously injured. Airbags inflate very fast
, and with great force.
If the driver and passengers are not properly seated and restrained, the airbags may not protect you properly, and could cause
serious or fatal injuries
when it inflates.
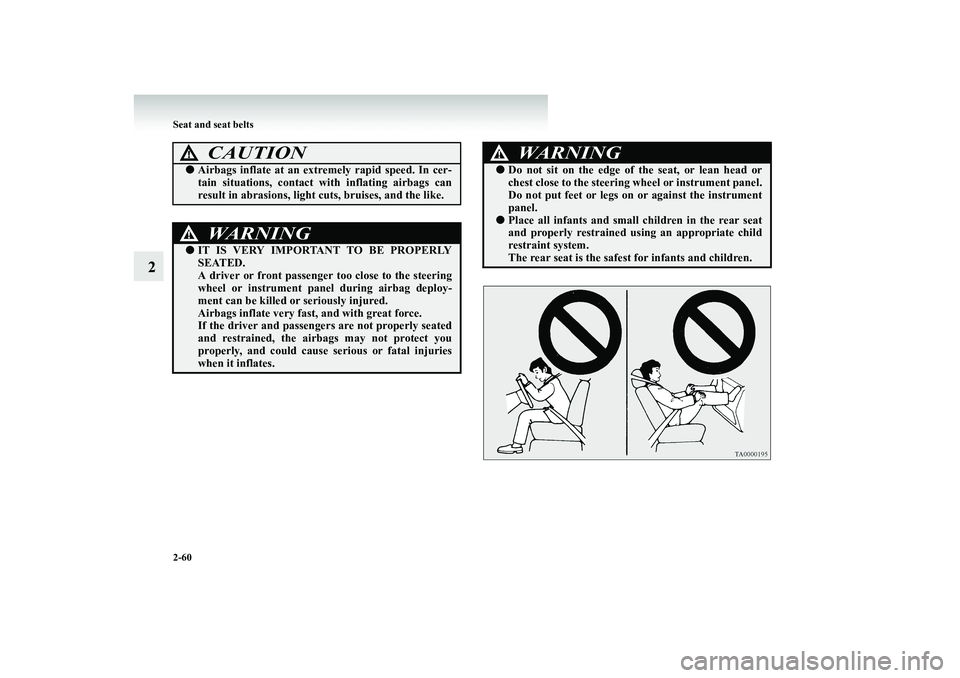
WARNING
!●
Do not sit on the edge of the seat, or lean head or chest close to the steering wheel or instrument panel.Do not put feet or legs on
or against the instrument
panel.
●
Place all infants and small
children in the rear seat
and properly restrained using an appropriate child restraint system. The rear seat is the safest
for infants and children.
BK-BK2008E1ENUK.en-uk-Section5.fm Page
60 Wednesday, January 9, 2008 4:28 PM
Page 137 of 538
Instruments and controls
3-13
3
Fuel filter indication lamp (diesel-powered vehicles)
E00509900040
This indication lamp illuminates when the igni- tion switch is turned to the “ON” position andgoes off after the engine has started. If it lights up while the engine is ru
nning, it indicates that
water has accumulated inside the fuel filter; ifthis happens, remove the
water from the fuel fil-
ter. When the lamp goes out, you can resume driv-ing. If it either does not go out or comes on from time to time, we recommend you to have the vehicle inspected.
Wa r n i n g l a m p s
E00502400017
Brake warning lamp (brake warning buzzer)
E00502501057
This lamp illuminates when the ignition switch is turned to the “ON” position, and goes off after a few seconds.With the ignition switch in the “ON” position, the brake warning lamp illuminates under the following conditions:●
When the parking brake lever has been engaged.
●
When the brake fluid level in the reservoir falls to a low level.
●
When the brake circuit
is not operating cor-
rectly.
Brake warning buzzer When there is a danger of brake performance becoming compromised,
a buzzer will sound to
alert the driver. If this
buzzer should continue to
sound, park your vehicl
e in a safe place and we
recommend you to have it checked.NOTE●
Depressing the brake pe
dal repeatedly may
turn on the brake warning lamp, ABS warn- ing lamp and brake
warning buzzer. It is
normal if the lamp goes out and the buzzer stops sounding after a few seconds.
BK-BK2008E1ENUK.en-uk-Section6.fm Page
13 Wednesday, January 9, 2008 4:32 PM
Page 144 of 538
3-20 Instruments and controls
3
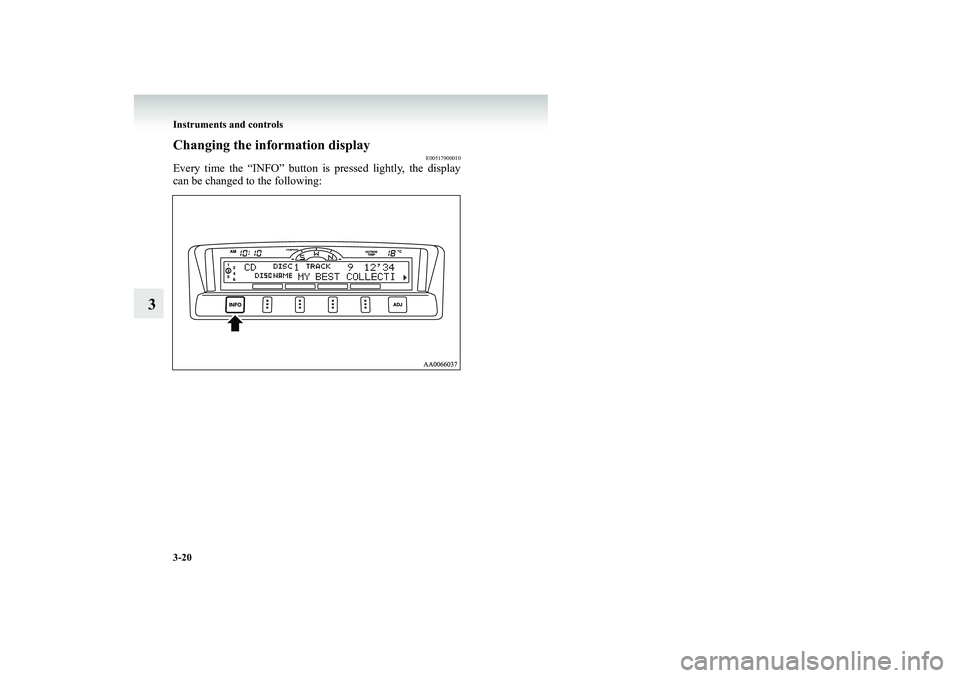
Changing the information display
E00517900010
Every time the “INFO” button is pressed lightly, the display can be changed to the following:BK-BK2008E1ENUK.en-uk-Section6.fm Page
20 Wednesday, January 9, 2008 4:32 PM
Page 152 of 538
3-28 Instruments and controls
3
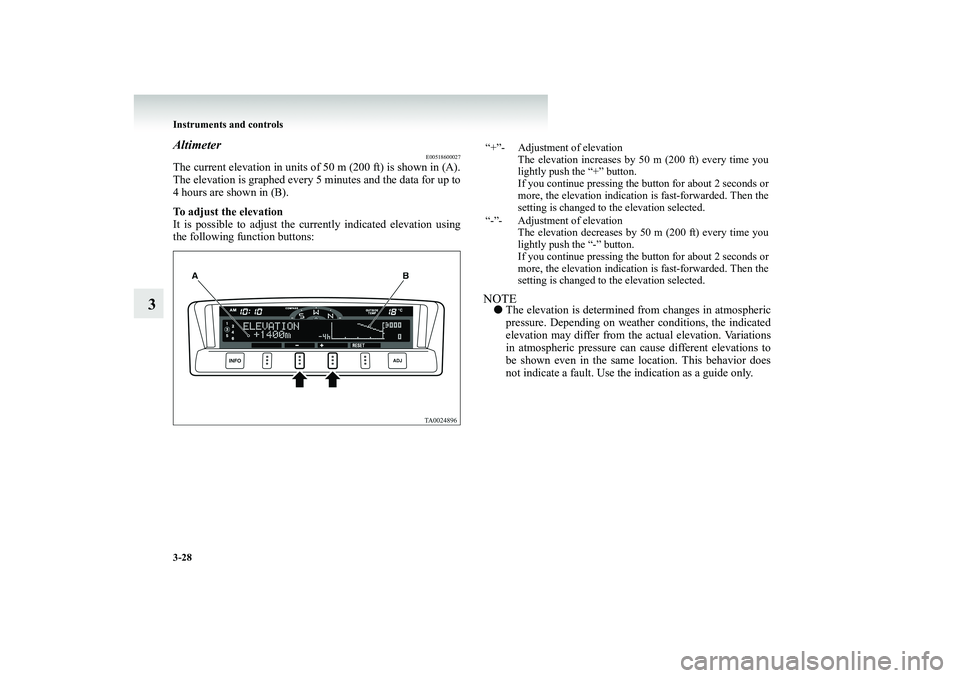
Altimeter
E00518600027
The current elevation in units of 50 m (200 ft) is shown in (A). The elevation is graphed every
5 minutes and the data for up to
4 hours are shown in (B). To adjust the elevation It is possible to adjust the cu
rrently indicated elevation using
the following function buttons:
NOTE●
The elevation is determined
from changes in atmospheric
pressure. Depending on weather conditions, the indicated elevation may differ from th
e actual elevation. Variations
in atmospheric pressure can
cause different elevations to
be shown even in the same location. This behavior does not indicate a fault. Use the
indication as a guide only.
“+”- Adjustment of elevation
The elevation increases by 50 m (200 ft) every time youlightly push the “+” button.If you continue pressing the button for about 2 seconds ormore, the elevation indication is fast-forwarded. Then thesetting is changed to the elevation selected.
“-”- Adjustment of elevation
The elevation decreases by 50 m (200 ft) every time youlightly push the “-” button.If you continue pressing the button for about 2 seconds ormore, the elevation indication is fast-forwarded. Then thesetting is changed to the elevation selected.
BK-BK2008E1ENUK.en-uk-Section6.fm Page
28 Wednesday, January 9, 2008 4:32 PM