stop start MITSUBISHI SHOGUN 2008 (in English) Owner's Guide
[x] Cancel search | Manufacturer: MITSUBISHI, Model Year: 2008, Model line: SHOGUN, Model: MITSUBISHI SHOGUN 2008Pages: 538, PDF Size: 25.09 MB
Page 286 of 538
4-84 Starting and driving
4
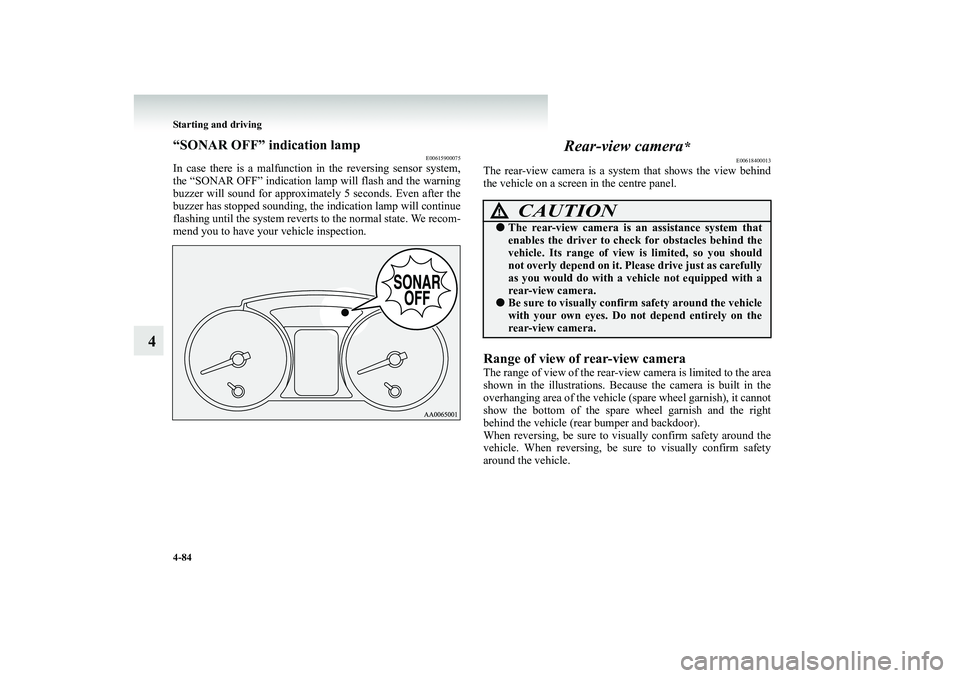
‚ÄúSONAR OFF‚ÄĚ indication lamp
E00615900075
In case there is a malfunction in the reversing sensor system, the ‚ÄúSONAR OFF‚ÄĚ indication lamp will flash and the warning buzzer will sound for
approximately 5 seconds. Even after the
buzzer has stopped sounding, the
indication lamp will continue
flashing until the system reverts
to the normal state. We recom-
mend you to have your vehicle inspection.
Rear-view camera
*
E00618400013
The rear-view camera is a system
that shows the view behind
the vehicle on a screen in the centre panel.Range of view of rear-view cameraThe range of view of the rear-v
iew camera is limited to the area
shown in the illustrations. Becau
se the camera is built in the
overhanging area of the vehicle (spare wheel garnish), it cannot show the bottom of the spare wheel garnish and the rightbehind the vehicle (rear bumper and backdoor). When reversing, be sure to visually confirm safety around the vehicle. When reversing, be sure to visually confirm safetyaround the vehicle.
CAUTION
!‚óŹ
The rear-view camera is
an assistance system that
enables the driver to check
for obstacles behind the
vehicle. Its range of view is limited, so you shouldnot overly depend on it. Plea
se drive just as carefully
as you would do with a vehicle not equipped with a rear-view camera.
‚óŹ
Be sure to visually confirm safety around the vehicle with your own eyes. Do not depend entirely on the rear-view camera.
BK-BK2008E1ENUK.en-uk-Section7.fm Page
84 Wednesday, January 9, 2008 4:36 PM
Page 304 of 538
5-8 For pleasant driving
5
Air conditioning switch
E00703500886
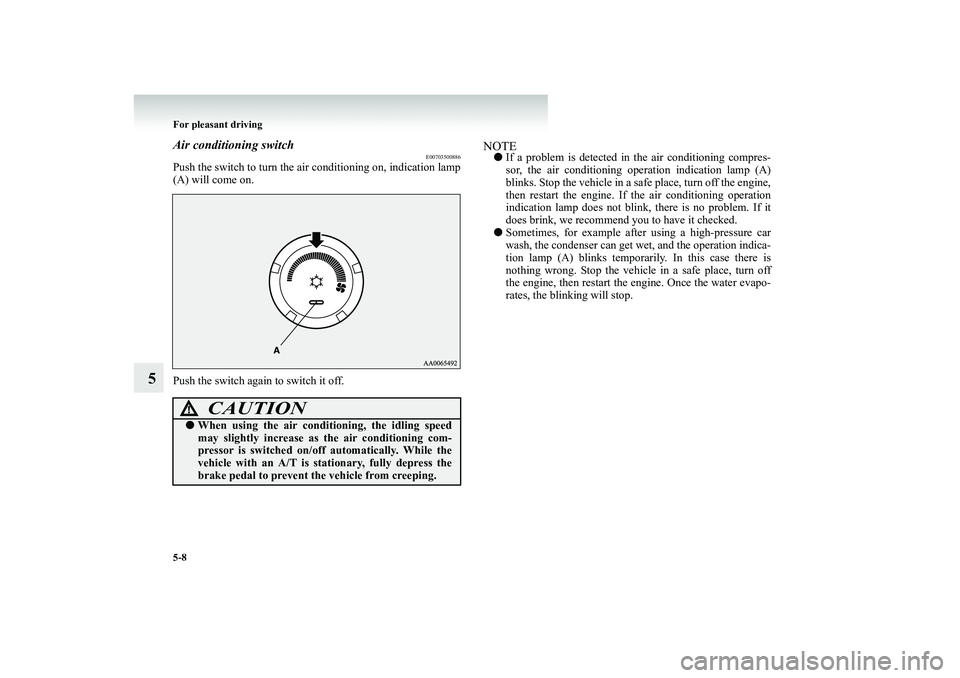
Push the switch to turn the air conditioning on, indication lamp (A) will come on. Push the switch again to switch it off.
NOTE‚óŹ
If a problem is detected in
the air conditioning compres-
sor, the air conditioning operation indication lamp (A) blinks. Stop the vehicle in a sa
fe place, turn off the engine,
then restart the engine. If the air conditioning operationindication lamp does not blink, there is no problem. If it does brink, we recommend you to have it checked.
‚óŹ
Sometimes, for example afte
r using a high-pressure car
wash, the condenser can get we
t, and the operation indica-
tion lamp (A) blinks temporarily. In this case there is nothing wrong. Stop the vehicl
e in a safe place, turn off
the engine, then restart the
engine. Once the water evapo-
rates, the blinking will stop.
CAUTION
!‚óŹ
When using the air condit
ioning, the idling speed
may slightly increase as
the air conditioning com-
pressor is switched on/off
automatically. While the
vehicle with an A/T is st
ationary, fully depress the
brake pedal to prevent th
e vehicle from creeping.
BK-BK2008E1ENUK.en-uk-Section8.fm Page 8 Wednesday, January 9, 2008 4:41 PM
Page 312 of 538
5-16 For pleasant driving
5
Rear fan switch for the front seat
E00705000016
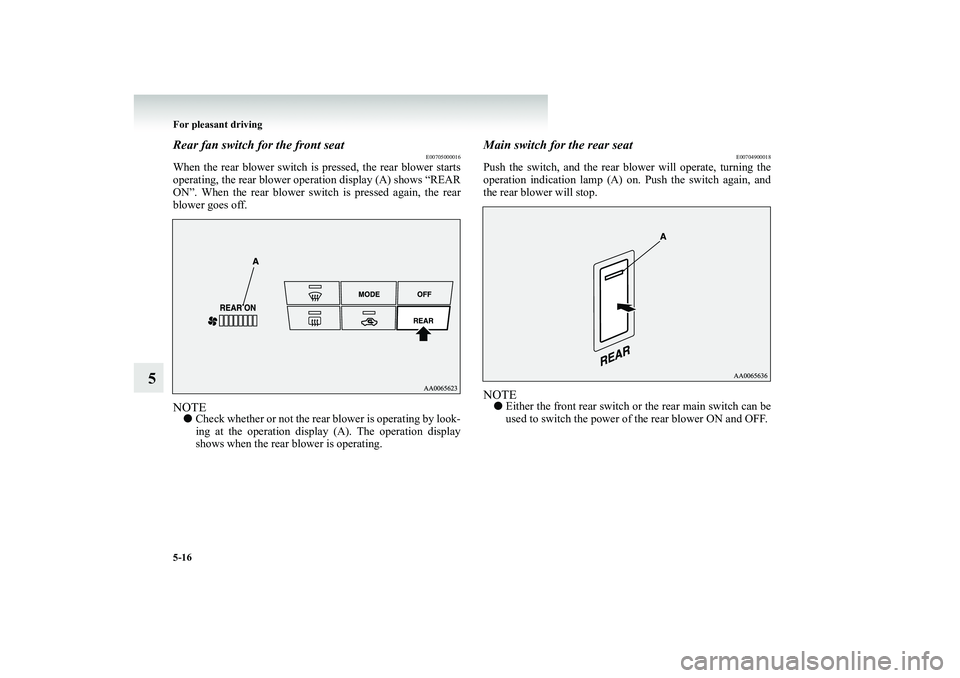
When the rear blower switch is
pressed, the rear blower starts
operating, the rear blower op
eration display (A) shows “REAR
ON‚ÄĚ. When the rear blower swit
ch is pressed again, the rear
blower goes off.NOTE‚óŹ
Check whether or not the rear
blower is operating by look-
ing at the operation display (A). The operation displayshows when the rear
blower is operating.
Main switch for the rear seat
E00704900018
Push the switch, and the rear bl
ower will operat
e, turning the
operation indication lamp (A) on. Push the switch again, and the rear blower will stop.NOTE‚óŹ
Either the front rear switch
or the rear main switch can be
used to switch the power of
the rear blower ON and OFF.
BK-BK2008E1ENUK.en-uk-Section8.fm Page
16 Wednesday, January 9, 2008 4:41 PM
Page 333 of 538
For pleasant driving
5-37
5
To listen to a CD
E00709601062
1. Insert a disc with the label facing up, and the CD player
will begin playing even if the radio is being used. The CD indicator (16), the track number and the playing time will appear on the display. The CD
player will also start play-
back when the CD button (4) is pressed with a disc in the player.
2. To stop the CD, turn off the power by pressing the PWR
button (2) or change over to radio mode by pressing the AM/FM buttons (1), or eject th
e disc by pressing the eject
button (7).
NOTE‚óŹ
To adjust the volume and tone, refer to ‚ÄúTo adjust the vol- ume‚ÄĚ on page 5-21 and ‚ÄúTo adjust the tone‚ÄĚ on page 5-21.
‚óŹ
For information concerning
the handling of compact
discs, refer to ‚ÄúHandling of compact discs‚ÄĚ on page 5-74.
To listen to an MP3 CDThis CD player allows you to play MP3 (MPEG Audio Layer-3) files recorded on CD-ROMs,
CD-Rs (recordable CDs), and
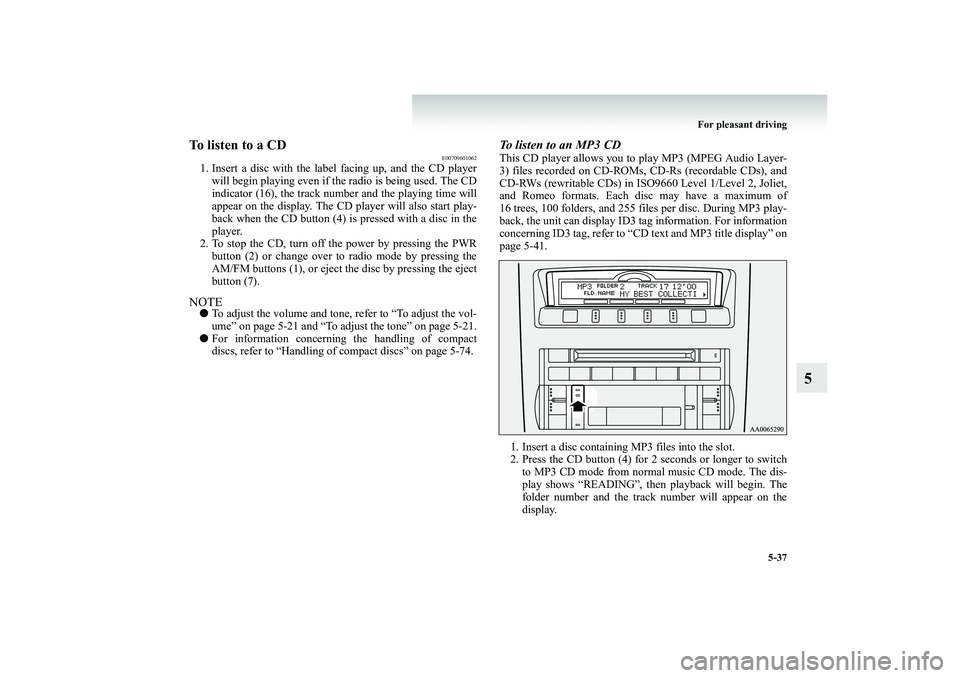
CD-RWs (rewritable CDs) in ISO9660 Level 1/Level 2, Joliet, and Romeo formats. Each disc may have a maximum of16 trees, 100 folders, and 255 files per disc. During MP3 play- back, the unit can display ID3 tag information. For information concerning ID3 tag, refer to ‚ÄúCD text and MP3 title display‚ÄĚ onpage 5-41. 1. Insert a disc containing MP3 files into the slot. 2. Press the CD button (4) for 2 seconds or longer to switch
to MP3 CD mode from normal music CD mode. The dis- play shows ‚ÄúREADING‚ÄĚ, then
playback will begin. The
folder number and
the track number will appear on the
display.
BK-BK2008E1ENUK.en-uk-Section8.fm Page
37 Wednesday, January 9, 2008 4:41 PM
Page 337 of 538
For pleasant driving
5-41
5
To find the start of each track on a disc for playbackPress the SCAN button (14). ‚ÄúSCAN‚ÄĚ will appear on the dis- play and the CD player
will play back th
e first 10 seconds of
each track on the selected disc. The track number will blink while the scan mode is selected.To exit the scan mode, press the SCAN button again.NOTE‚óŹ
Once all tracks on the disc have been scanned, playback of the disc will restart from the beginning of the track thatwas playing when scanning started.
‚óŹ
The scan mode will be canceled when radio or CD opera- tion is selected.
‚óŹ
With a disc that contains both CD-DA and MP3 files, the scan mode causes only files of the same format (CD-DA only or MP3 files only) to be played.
To eject a discWhen the CD eject button (7) is
pressed, the disc automatically
stops and is ejected. The syst
em automatically switches to
radio mode.NOTE‚óŹ
If you do not remove the disc before 15 seconds have elapsed, the CD player will
automatically reload the disc
and stop.
CD text and MP3 title display
E00725000399
This CD player can display CD text and MP3 titles including ID3 tag information. CD text The CD player can display di
sc and track titles for discs
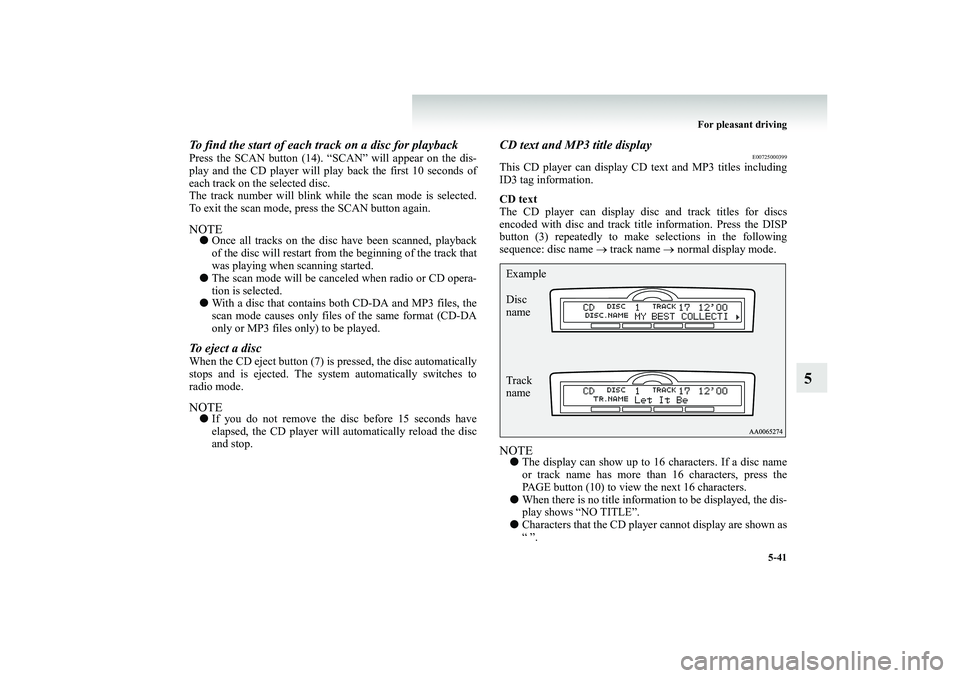
encoded with disc and track title information. Press the DISP button (3) repeatedly to make selections in the followingsequence: disc name
‚Üí track name
‚Üí normal display mode.
NOTE‚óŹ
The display can show up to 16
characters. If a disc name
or track name has more than 16 characters, press thePAGE button (10) to view
the next 16 characters.
‚óŹ
When there is no title information to be displayed, the dis- play shows ‚ÄúNO TITLE‚ÄĚ.
‚óŹ
Characters that the CD player
cannot display are shown as
‚Äú ‚ÄĚ.
Example Disc name Track name
BK-BK2008E1ENUK.en-uk-Section8.fm Page
41 Wednesday, January 9, 2008 4:41 PM
Page 357 of 538
For pleasant driving
5-61
5
To listen to a CD
E00709601075
The CD can be loaded or ejected
by pressing the LOAD button
(15) or the eject button (7) even
if the audio system power is
off. 1. Press the PWR button (2) to turn the audio system on and
off. The system turns on in the last mode used.
2. Press the CD button (4) to enter CD mode. The auto-
changer will start playback if
the CD is already in the
autochanger.
3. To stop the CD, turn off the power by pressing the PWR
button (2) or change over to radio mode by pressing theAM/FM button (1), or eject th
e disc by pressing the eject
button (7).
NOTE‚óŹ
To adjust the volume and tone, refer to ‚ÄúTo adjust the vol- ume‚ÄĚ on page 5-44 and ‚ÄúTo adjust the tone‚ÄĚ on page 5-44.
‚óŹ
As many as 6 CDs can be inserted into the CD auto- changer.
‚óŹ
For information concerning
the handling of the compact
discs, refer to ‚ÄúHandling of compact discs‚ÄĚ on page 5-74.
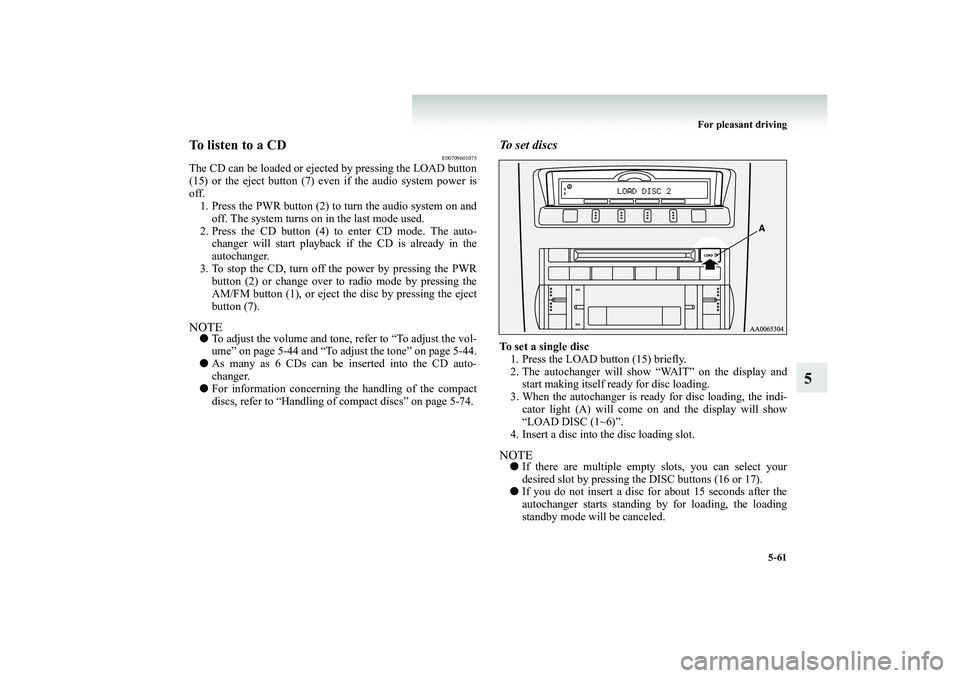
To s e t d i s c sTo set a single disc 1. Press the LOAD button (15) briefly. 2. The autochanger will show ‚ÄúWAIT‚ÄĚ on the display and
start making itself ready for disc loading.
3. When the autochanger is read
y for disc loading, the indi-
cator light (A) will come on and the display will show ‚ÄúLOAD DISC (1~6)‚ÄĚ.
4. Insert a disc into the disc loading slot.NOTE‚óŹ
If there are multiple empty slots, you can select your desired slot by pressing the
DISC buttons (16 or 17).
‚óŹ
If you do not insert a disc for about 15 seconds after the autochanger starts standing
by for loading, the loading
standby mode w
ill be canceled.
BK-BK2008E1ENUK.en-uk-Section8.fm Page
61 Wednesday, January 9, 2008 4:41 PM
Page 372 of 538
5-76 For pleasant driving
5
‚óŹ
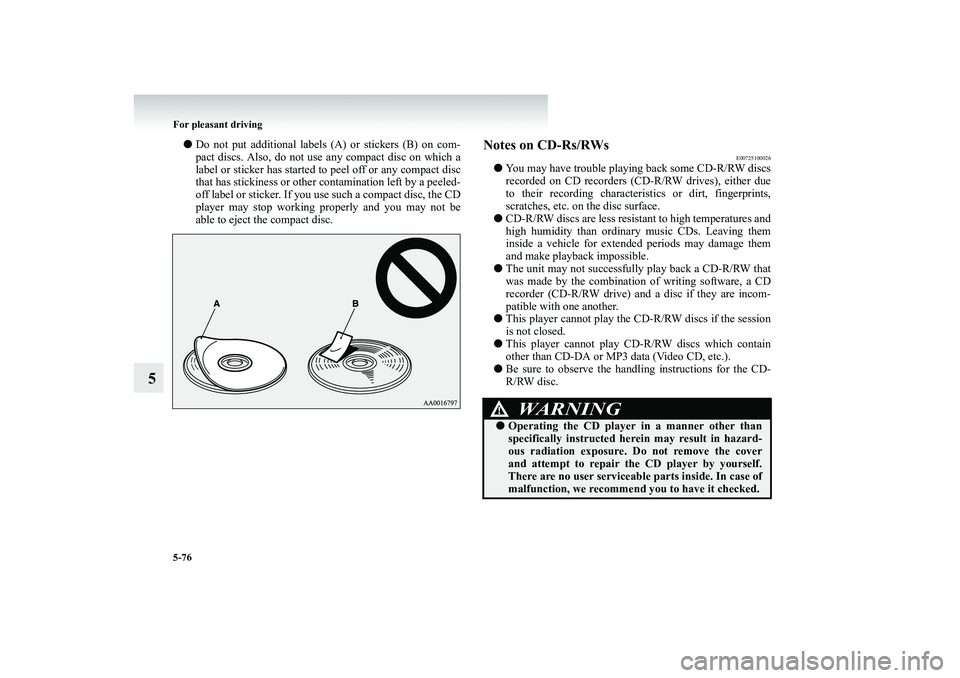
Do not put additional labels (A) or stickers (B) on com- pact discs. Also, do not use any compact disc on which a label or sticker has started to peel off or any compact disc that has stickiness or other contamination left by a peeled-off label or sticker. If you use such a compact disc, the CD player may stop working properly and you may not be able to eject the compact disc.
Notes on CD-Rs/RWs
E00725100026
‚óŹ
You may have trouble playing back some CD-R/RW discs recorded on CD recorders (C
D-R/RW drives), either due
to their recording characteris
tics or dirt, fingerprints,
scratches, etc. on the disc surface.
‚óŹ
CD-R/RW discs are less resistant to high temperatures and high humidity than ordinary music CDs. Leaving them inside a vehicle for extended periods may damage themand make playback impossible.
‚óŹ
The unit may not successfully play back a CD-R/RW that was made by the combination of writing software, a CDrecorder (CD-R/RW drive) an
d a disc if they are incom-
patible with one another.
‚óŹ
This player cannot play the
CD-R/RW discs if the session
is not closed.
‚óŹ
This player cannot play CD-R/RW discs which contain other than CD-DA or MP3 data (Video CD, etc.).
‚óŹ
Be sure to observe the handling instructions for the CD- R/RW disc.
WARNING
!‚óŹ
Operating the CD player
in a manner other than
specifically instructed here
in may result in hazard-
ous radiation exposure. Do not remove the coverand attempt to repair the CD player by yourself. There are no user serviceabl
e parts inside. In case of
malfunction, we recommend
you to have it checked.
BK-BK2008E1ENUK.en-uk-Section8.fm Page
76 Wednesday, January 9, 2008 4:41 PM
Page 406 of 538
6-2 For emergencies
6
If the vehicle breaks down
E00800100505
If the vehicle breaks down on th
e road, move it to the shoulder
and use the hazard warning flashers and/or the warning triangle etc.Refer to “Hazard warning fl
asher switch‚ÄĚ on page 3-66.
If the engine stops/failsVehicle operation and control are
affected if the engine stops.
Before moving the vehicle to a
safe area, be aware of the fol-
lowing:‚óŹ
The brake booster becomes inoperative and the pedal effort will increase. Press down the brake pedal harder than usual.
‚óŹ
Since the power steering pump is no longer operative, the steering wheel feels
heavy when turning it. Turn the wheel
with more effort than usual.
Emergency starting
E00800501287
If the engine cannot be started
because the battery is weak or
dead, the battery from another ve
hicle can be used with jumper
cables to start the engine.
WARNING
!‚óŹ
To start the engine using
jumper cables connected to
another vehicles, perfor
m the correct procedures
according to the instructio
n below. Incorrect proce-
dures could result in a fire or explosion or damage to the vehicles.CAUTION
!‚óŹ
Do not attempt to start the engine by pulling or pushing the vehicle. It could damage your vehicle.
‚óŹ
Always wear protective eye goggles when working near the battery.
‚óŹ
Keep the battery out of the reach of children.
BK-BK2008E1ENUK.en-uk-Section9.fm Page 2 Wednesday, January 9, 2008 4:46 PM
Page 410 of 538
6-6 For emergencies
6
NOTE‚óŹ
If the vehicle is put in motion without fully charging the battery, it might cause the loss of smooth engine operation and the anti-lock brake warning lamp to illuminate. Refer to ‚ÄúAnti-lock brake system (ABS)‚ÄĚ on page 4-58.
Engine overheating
E00800600991
If the water temperature gauge
indication remains in the over-
heating zone for a long time, the engine may be overheating. If this occurs, take the foll
owing corrective measures:
1. Stop the vehicle in a safe place. 2. Check whether steam is comin
g from the engine compart-
ment. [If steam does not come from
the engine compartment]
With the engine still running, raise the bonnet to ventilate the engine compartment. [If steam is coming from
the engine compartment]
Stop the engine, and when the steam stops, raise the bon- net to ventilate the engine
compartment. Restart the
engine.
WARNING
!‚óŹ
Do not open the bonnet wh
ile steam is coming from
the engine compartment. It could cause steam or hot water to spurt out, causin
g burns. Hot water could
spurt out even when there is no steam coming out, and some parts will be very
hot. Be very careful
when opening
the bonnet.
‚óŹ
Be careful of hot steam, which could be blowing off the reserve tank cap.
‚óŹ
Do not attempt to remove the radiator cap while the engine is hot.
BK-BK2008E1ENUK.en-uk-Section9.fm Page 6 Wednesday, January 9, 2008 4:46 PM
Page 428 of 538
6-24 For emergencies
6
5. Move the jack handle up a
nd down to raise the ram until
just before the jack contacts
the jacking point of the vehi-
cle. Ensure that the jack will
properly contact the vehicle
jacking point.
NOTE‚óŹ
This jack is a 3 stage expansion type.
6. Raise the vehicle until the tyre is slightly off the ground.
7. Remove the wheel nuts with the wheel nut wrench, then
take the wheel off.
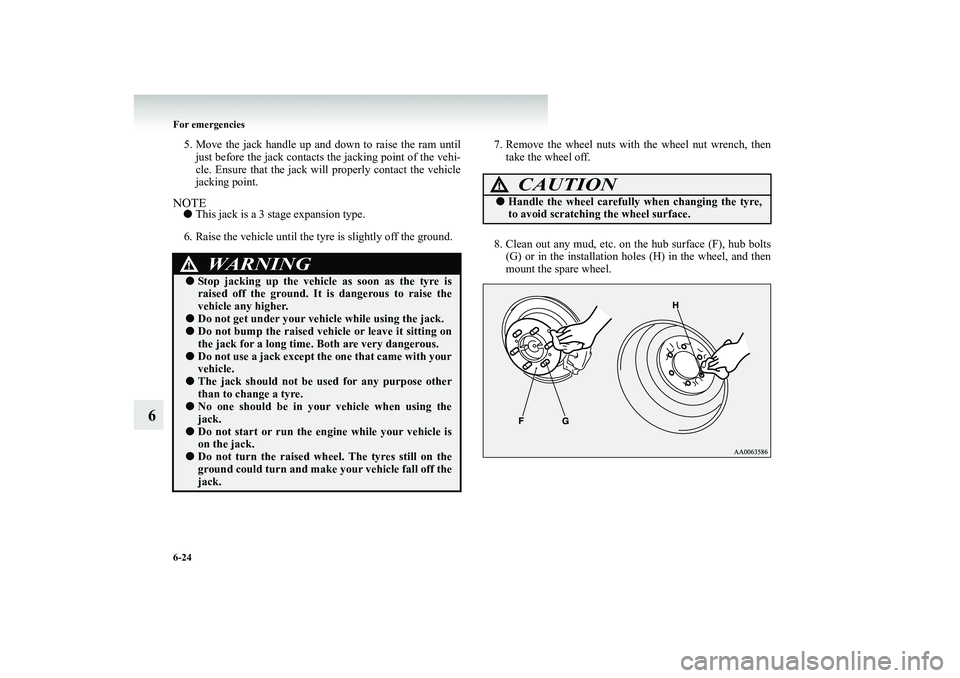
8. Clean out any mud, etc. on
the hub surface
(F), hub bolts
(G) or in the installation holes (H) in the wheel, and thenmount the spare wheel.
WARNING
!‚óŹ
Stop jacking up the vehicle as soon as the tyre is raised off the ground. It
is dangerous to raise the
vehicle any higher.
‚óŹ
Do not get under your vehicle while using the jack.
‚óŹ
Do not bump the raised vehicle or leave it sitting on the jack for a long time.
Both are very dangerous.
‚óŹ
Do not use a jack except th
e one that came with your
vehicle.
‚óŹ
The jack should not be us
ed for any purpose other
than to change a tyre.
‚óŹ
No one should be in your vehicle when using the jack.
‚óŹ
Do not start or run the en
gine while your vehicle is
on the jack.
‚óŹ
Do not turn the raised wheel. The tyres still on the ground could turn and make your vehicle fall off thejack.
CAUTION
!‚óŹ
Handle the wheel carefully
when changing the tyre,
to avoid scratching the wheel surface.
BK-BK2008E1ENUK.en-uk-Section9.fm Page
24 Wednesday, January 9, 2008 4:46 PM