mirror MITSUBISHI SHOGUN 2017 (in English) User Guide
[x] Cancel search | Manufacturer: MITSUBISHI, Model Year: 2017, Model line: SHOGUN, Model: MITSUBISHI SHOGUN 2017Pages: 394, PDF Size: 19 MB
Page 139 of 394
Economical driving............................................................................. 6-02
Driving, alcohol and drugs.................................................................. 6-02
Safe driving techniques....................................................................... 6-03
Running-in recommendations............................................................. 6-04 Parking brake...................................................................................... 6-04
Parking................................................................................................ 6-05
Steering wheel height adjustment....................................................... 6-06
Inside rear-view mirror....................................................................... 6-07 Outside rear-view mirrors................................................................... 6-08
Ignition switch.....................................................................................6-10 Steering wheel lock............................................................................. 6-12
Starting................................................................................................ 6-12 NOx trap catalyst (dieselpowered vehicles)*......................................6-14
Diesel particulate filter (DPF)*........................................................... 6-14 Automatic transmission INVECS-II Sports Mode 5A/T (Intelligent & Innovative Vehicle Electronic Control System II)...6-15
Super select 4WD II (SS4 II).............................................................. 6-21
Rear differential lock*........................................................................ 6-26 4-wheel drive operation...................................................................... 6-30
Inspection and maintenance following rough road operation............. 6-33
Cautions on handling of 4-wheel drive vehicles................................. 6-33
Braking................................................................................................ 6-35
Brake assist system............................................................................. 6-36
Anti-lock brake system (ABS)............................................................ 6-37
Power steering system.........................................................................6-39
Active stability & traction control (ASTC).........................................6-40
Cruise control*.................................................................................... 6-44
Tyre pressure monitoring system (TPMS)*........................................ 6-48 Reversing sensor system*................................................................... 6-52Rear-view camera*............................................................................. 6-56
Cargo loads......................................................................................... 6-59Trailer towing......................................................................................6-60Starting and driving
OVWX17E16
Page 145 of 394

Inside rear-view mirrorE00600801943
Adjust the rear-view mirror only after mak-
ing any seat adjustments so you have a clear
view to the rear of the vehicle.WARNINGl Do not attempt to adjust the rear-view
mirror while driving. This can be danger-
ous.
Always adjust the mirror before driving.
Adjust the rear-view mirror to maximize the
view through the rear window.
To adjust the vertical mirror
position
It is possible to move the mirror up and down
to adjust its position.
To adjust the mirror position
It is possible to move the mirror up/down and left/right to adjust its position.
To reduce the glare
Type 1
The lever (A) at the bottom of the mirror can
be used to adjust the mirror to reduce the
glare from the headlamps of vehicles behind you during night driving.
1- Normal
2- Anti-glare
Inside rear-view mirror
6-07OVWX17E1Starting and driving6Type 2
Type 1
Page 146 of 394

Type 2
When the headlamps of the vehicles behind
you are very bright, the reflection factor of the rear-view mirror is automatically changed
to reduce the glare.
When the ignition switch is turned to the
“ON” position, the reflection factor of the mirror is automatically changed.
NOTEl Do not hang items on, or spray glass cleaner
on the sensor (1), as reduced sensitivitycould result.Outside rear-view mirrors
E00600900484
Compound curved-surface mirror*
On the driver’s side, a compound curved-sur-
face mirror is used, while on the front passen-
ger’s side, a single curved-surface mirror is used.
1- Compound curved-surface mirror
2- Single curved-surface mirror
While the single curved-surface mirror has a fixed curvature, the compound curved-sur- face mirror has different curvatures between
the inner and outer sides of the boundary line
(A).
The inner side of the boundary line provides
the same vision as that available from an or- dinary door mirror.
However, the outer side of the boundary line
provides a wider angle of vision compared to an ordinary door mirror.WARNINGl The sense of distance that you get from an
object you see on the inner side of themirror boundary line differs from the
sense of distance that you get from an ob-
ject you see on the outer side.
An object you see on the outer side of the boundary line of the mirror will look far-
ther away than actually is as compared
with an object you see on the inner side.To adjust the mirror position
E00601000105
The outside rear-view mirrors can be operat-
ed when the ignition switch is in the “ON” or “ACC” position.
WARNINGl Do not attempt to adjust the rear-view
mirrors while driving. This can be dan-
gerous.
Always adjust the mirrors before driving.
Outside rear-view mirrors
6-08OVWX17E1Starting and driving6
Page 147 of 394

WARNINGlYour vehicle is equipped with convex type
mirrors. Please take into consideration,that objects you see in the mirror will looksmaller and farther away compared to a normal flat mirror.
Do not use this mirror to estimate dis- tance of following vehicles when changing
lanes.
1. Place the lever (A) to the same side as
the mirror whose adjustment is desired.
L- Left outside mirror adjustment
R- Right outside mirror adjustment
2. Press the switch (B) to the left, right, up
or down to adjust the mirror position. 1- Up
2- Down
3- Right
4- Left
3. Return the lever (A) back to the middle
position (•).Retracting and extending the
outside mirrors
E00618200011
The outside mirrors can be folded in towards the side window to prevent damage whenparking in narrow areas.
CAUTIONl Do not drive the vehicle with the mirror fol-
ded in. The lack of rearward visibility nor-mally provided the mirror could lead to an
accident.
Retracting and extending the
mirrors using the mirror re- tractor switch
With the ignition switch in the “ON” or
“ACC” position, push the mirror retractor switch to retract the mirrors. Push it again to
extend the mirrors to their original positions.
After placing the ignition switch in the “LOCK” position, it is possible to retract and
extend the mirrors using the mirror retractor switch for about 30 seconds.CAUTIONl It is possible to retract and extend the mir-
rors by hand. After retracting a mirror using
the mirror retractor switch, however, you should extend it by using the switch again,
not by hand. If you extended the mirror by
hand after retracting it using the switch, it would not properly lock in position. As a re-
sult, it could move because of the wind or
vibration while you are driving, taking away your rearward visibility.
Outside rear-view mirrors
6-09OVWX17E1Starting and driving6
Page 148 of 394
NOTElBe careful not to get your hands trapped
while a mirror is moving.
l If you move a mirror by hand or it moves af-
ter hitting a person or object, you may not be
able to return it to its original position using the mirror retractor switch. If this happens,
push the mirror retractor switch to place the mirror in its retracted position and then push
the switch again to return the mirror to its original position.
l If the battery voltage is low and you start the
engine while extending the mirrors, the mir- rors may stop part-way. If this happens, push
the mirror retractor switch to retract the mir- rors and then push the switch again to extend
them.
l When freezing has occurred and mirrors fail
to operate as intended, please refrain from
repeated pushing of the retractor switch as
this action can result in burn-out of the mir- ror motor circuits.
Automatic extension of mirrors
If the engine is stopped and started with the
mirrors retracted, the mirrors automatically
extend for safety when the vehicle speed rea-
ches 30 km/h (19 mph).
Heated mirror*
E00601200312
To demist or defrost the outside rear-view
mirrors, press the rear window demister
switch.
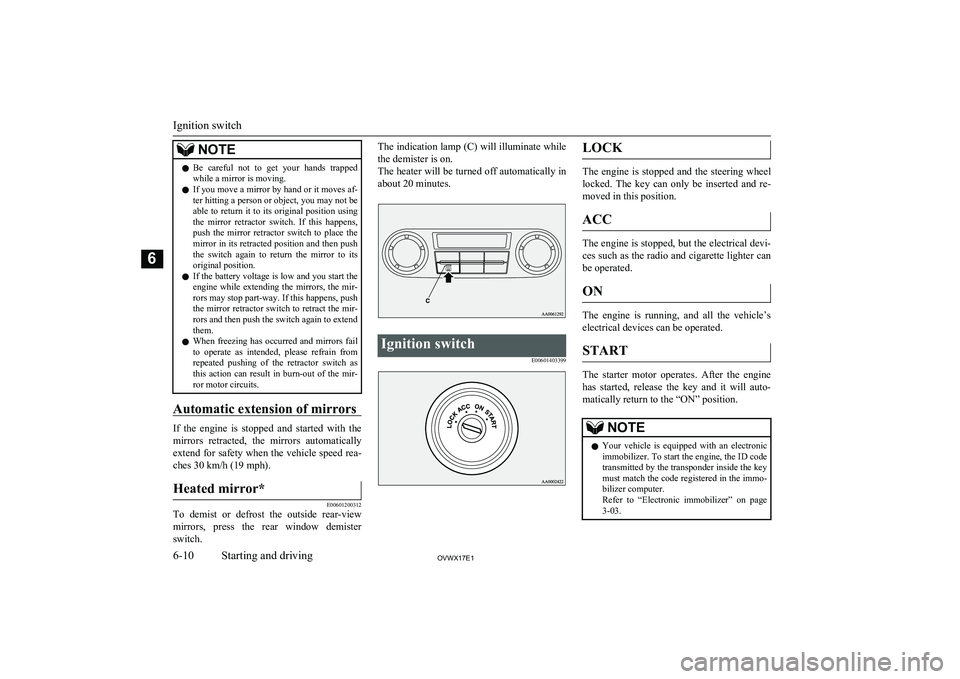
The indication lamp (C) will illuminate while
the demister is on.
The heater will be turned off automatically in about 20 minutes.Ignition switch
E00601403399LOCK
The engine is stopped and the steering wheel
locked. The key can only be inserted and re- moved in this position.
ACC
The engine is stopped, but the electrical devi-
ces such as the radio and cigarette lighter can be operated.
ON
The engine is running, and all the vehicle’s
electrical devices can be operated.
START
The starter motor operates. After the engine has started, release the key and it will auto- matically return to the “ON” position.
NOTEl Your vehicle is equipped with an electronic
immobilizer. To start the engine, the ID codetransmitted by the transponder inside the key must match the code registered in the immo-bilizer computer.
Refer to “Electronic immobilizer” on page
3-03.
Ignition switch
6-10OVWX17E1Starting and driving6
Page 276 of 394

HDMI port*E00771400039
You can connect a commercially available HDMI device such as a video camera and a
smart phone to the HDMI port (A).NOTEl For details, refer to the separate owner’s
manual for Smartphone Link Display Audio.
To connect
1. Park your vehicle in a safe place and
turn the ignition switch to the “LOCK”
position.
2. Open the glove box.
3. Connect a commercially available
HDMI cable to the HDMI device.
4. Connect the HDMI cable to the HDMI
port in the glove box.
CAUTIONl Keep the lid of the glove box closed while
driving the vehicle. A lid or the contents of the glove box could otherwise cause injuries.NOTEl When closing the glove box, be careful not
to trap the HDMI cable.
5. To remove the HDMI cable, turn the ig-
nition switch to the “LOCK” position first and perform the installation steps in
reverse.
Sun visors
E00711200811
1- To eliminate front glare2- To eliminate side glare
Vanity mirror
E00731900191
Type 1
A vanity mirror is fitted to the back of the sun visor.
Type 2
A vanity mirror is fitted to the back of the sun visor.
HDMI port*
7-74OVWX17E1For pleasant driving7
Page 277 of 394

Operating the lid of the vanity mirror will au-tomatically turn on the mirror lamp (A).CAUTIONl If the lid of vanity mirror with lamp is kept
open for prolonged periods of time, the vehi-
cle’s battery will be discharged.Card holder
E00732000203
Cards can be slipped into the holder (A) on
the back of the sun visor.
Slide plate*
E00732100086
To block out the glare of the sunlight from
behind the inside rear-view mirror, swing down the sun visor, and then pull out the
slide plate (B).
To block out a broader range of glare from
your side, swing the sun visor sideways and
pull out the slide plate (B).Ashtray*
E00711400640CAUTIONlPut out matches and cigarettes before they
are placed in the ashtray.
l Don’t put papers and other things that burn
into your ashtrays. If you do, cigarettes or
other smoking materials could set them on fire, causing damage.
l Always close the ashtray. If left open, other
cigarette butts in the ashtray may be rekin-
dled.
Ashtray*
7-75OVWX17E1For pleasant driving7
Page 316 of 394

CAUTION•Maintain a distance of approx. 50 cm
or
more between the vehicle body and the washing nozzle.
• When washing around the door glass,
hold the nozzle at a distance of more than
50 cm and at right angles to the glass sur- face.
l After washing the vehicle, drive the vehicle
slowly while lightly depressing the brake
pedal several times in order to dry out the
brakes.
Leaving the brakes wet could result in re- duced braking performance. Also, there is a
possibility that they could freeze up or be- come inoperative due to rust, rendering the vehicle unable to move.
l When using an automatic car wash, pay at-
tention to the following items, referring to the operation manual or consulting a car
wash operator. If the following procedure is not followed, it could result in damage to
your vehicle.
• The outside mirrors are retracted.
• The wiper arm assembly is taped.
• If your vehicle is equipped with a rear de-
flector or roof rails, consult a car wash operator before using the car wash.
• If your vehicle has a rain sensor, place the
wiper switch lever in the “OFF” position to deactivate the rain sensor.During cold weather
Salt and other chemicals spread on the roads
in some areas in winter can have a harmful effect on the vehicle body. You should there-
fore wash the vehicle as often as possible in accordance with our care-instructions. It is
recommended to have a preservative applied
and the underfloor protection checked before and after the cold weather season.
After washing your vehicle, wipe off all wa- terdrops from the rubber parts around the
doors to prevent the doors from freezing.
NOTEl To prevent freezing of the weatherstripping
on the doors, bonnet, etc., they should be treated with silicone spray.Waxing
E00901000560
Waxing the vehicle will help prevent the ad-
herence of dust and road chemicals to the paintwork. Apply a wax solution after wash- ing the vehicle, or at least once every three
months to assist displacing of water.
Do not wax your vehicle in direct sunlight.
You should wax after the surfaces have
cooled.
CAUTIONl Waxes containing high abrasive compounds
should not be used. Such waxes remove rust and stains effectively from the paintwork but
they are harmful to the lustre on the painted
surface and the plated surface.
Further, they are harmful to glossy surfaces such as grille, garnish, mouldings, etc.
l Do not use petrol or paint thinners to remove
road tar or other contamination to the vehi-
cle surface.
l Do not apply wax on the areas having black
mat coating as it can cause uneven discolou-
ration, patches, blurs, etc. If stained with wax, immediately wipe off with a piece of
soft cloth and warm water.
l On vehicles with a sunroof, be careful when
waxing the area around the sunroof opening, not to put any wax on the weatherstrip
(black rubber). If stained with wax, the weatherstrip cannot maintain a weatherproof
seal with the sunroof.Polishing
E00901100024
The vehicle should only be polished if the
paintwork has become stained or lost its lus- tre. Matt-finish parts and plastic bumpers
must not be polished, polishing these parts will stain them or damage their finish.
Cleaning the exterior of your vehicle
9-04OVWX17E1Vehicle care9
Page 337 of 394

Passenger compartment fuse lo-cation table
E01007901957
NOTEl Spare fuses are contained in the fuse block
lid. Always use a fuse of the same capacity
for replacement.Passenger compartment fuse locationNo.SymbolElectrical
systemCapaci- ty1Ignition coil10 A2Gauge7.5 A3Reversinglamp7.5 A4Daytime run-ning lamps7.5 A5Relay7.5 A6Heated door mirror7.5 A7——30 A8Engine con- trol7.5 A9Cigarettelighter15 A10———11Outside rear-view mirrors7.5 A12Engine con- trol7.5 A13———14Rear windowwiper15 ANo.SymbolElectricalsystemCapaci- ty15Central door locks15 A16Rear fog lamp10 A17———18———19Heater30 A20Rear windowdemister30 A21Sunroof20 A22Anti-lock
brake system10 A23Heated seat20 A24Approach lamps10 A25Transfer con- trol10 A26ENG/
POWER10 A27Starter motor10 A28———29—Spare fuse10 A30—Spare fuse20 A
Fuses
10-19OVWX17E1Maintenance10
Page 338 of 394

No.SymbolElectricalsystemCapaci- ty31—Spare fuse30 A32—Spare fuse25 A
lSome fuses may not be installed on your
vehicle, depending on the vehicle model
or specifications.
l The table above shows the main equip-
ment corresponding to each fuse.
The fuse block does not contain spare
7.5 A and 15 A fuses. If a fuse of one of these capacities blows, replace it tempo-
rarily by borrowing the one that matches
from:
7.5 A: Outside rear-view mirrors
15 A: Cigarette lighter
Replace the borrowed fuse as soon as
possible.
Engine compartment fuse loca-
tion table
E01008001913
Engine compartment fuse location (Type A)
No.SymbolElectrical systemCapaci- ty1Alternator140 A *12Fuse (+B)60 A*13Ignition
switch40 A *1*1
: Fusible link
*2 : Vehicles without discharge headlamps
*3 : Vehicles with discharge headlampsNo.SymbolElectrical
systemCapaci- ty4Electric win-dow control30 A *15Engine con-
trol20 A *16Fuel pump20 A7Rear heater25 A8Accessory
socket25 A9Fuel line heat- er25 A10Condenserfan motor25 A11Rear air con- ditioning20 A
12
Horn (Theft-
alarm system)
15 A
Wiper de-icer13Horn10 A14Automatic
transmission20 A*1 : Fusible link
*2 : Vehicles without discharge headlamps
*3 : Vehicles with discharge headlamps
Fuses
10-20OVWX17E1Maintenance10